Are you already using Midjourney and experiencing mixed results? If your expectations are not being met, it could be because of your prompts ! A prompt is a text instruction that you enter into the input field and on the basis of which Midjourney creates images. These can be simply descriptive or contain parameters and other images to control the result.
The quality of your prompts is crucial as they help Midjourney understand your intentions and create captivating images. Skillful wording of your prompts will lead to significantly improved results.
In this article, I present you with five simple and valuable tips for writing outstanding midjourney prompts that we've learned ourselves in our day-to-day work. We have now created around 5000 images with Midjourney and know exactly how best to enter the prompts so that we can produce even more spectacular and better images without much experimentation.
Tip no. 1: Use the describe command in Midjourney to describe an existing image
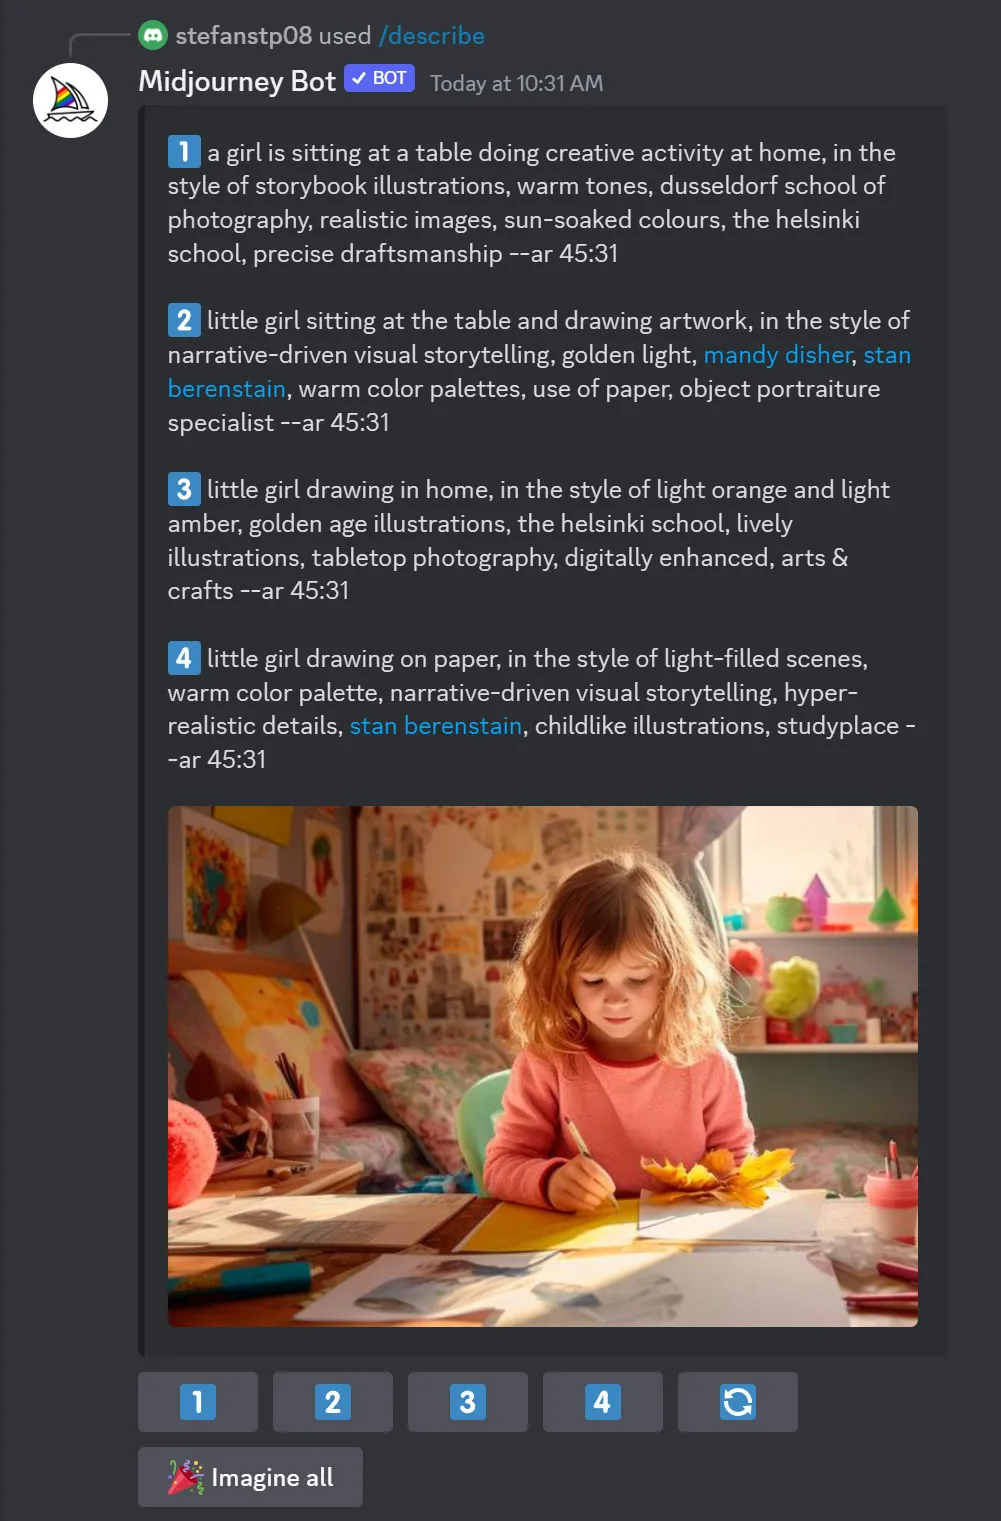
The /describe command works in combination with an image and causes Midjourney to create four prompts for you that match the corresponding image. This allows you to learn fresh terminology for your own prompts and gain inspiration on how to formulate specific aspects.
The whole thing even works from the clipboard. To do this, I usually simply select a photo and right-click on Copy image or, if I only want to copy a section, I press the keyboard shortcut Win + Shift + S in Windows and then select the area and it is automatically copied to the clipboard. Then enter /describe directly in Midjourney and press Enter, now Ctrl + V to paste the image and then Enter again. You will then receive your suggestions and can have them created immediately. If you like them all, you can also press Imagine all directly. Remember, however, that each image also takes away from your booked computing time. So maybe only take 1 - 2 suggestions to start with. It usually fits very well.
Tip no. 2: Short descriptions in Midjourney are often better than much too long ones
The most important thing you should understand about Midjourney's use of language is that it is very different from us humans in this respect. Avoid words like please, and, or.
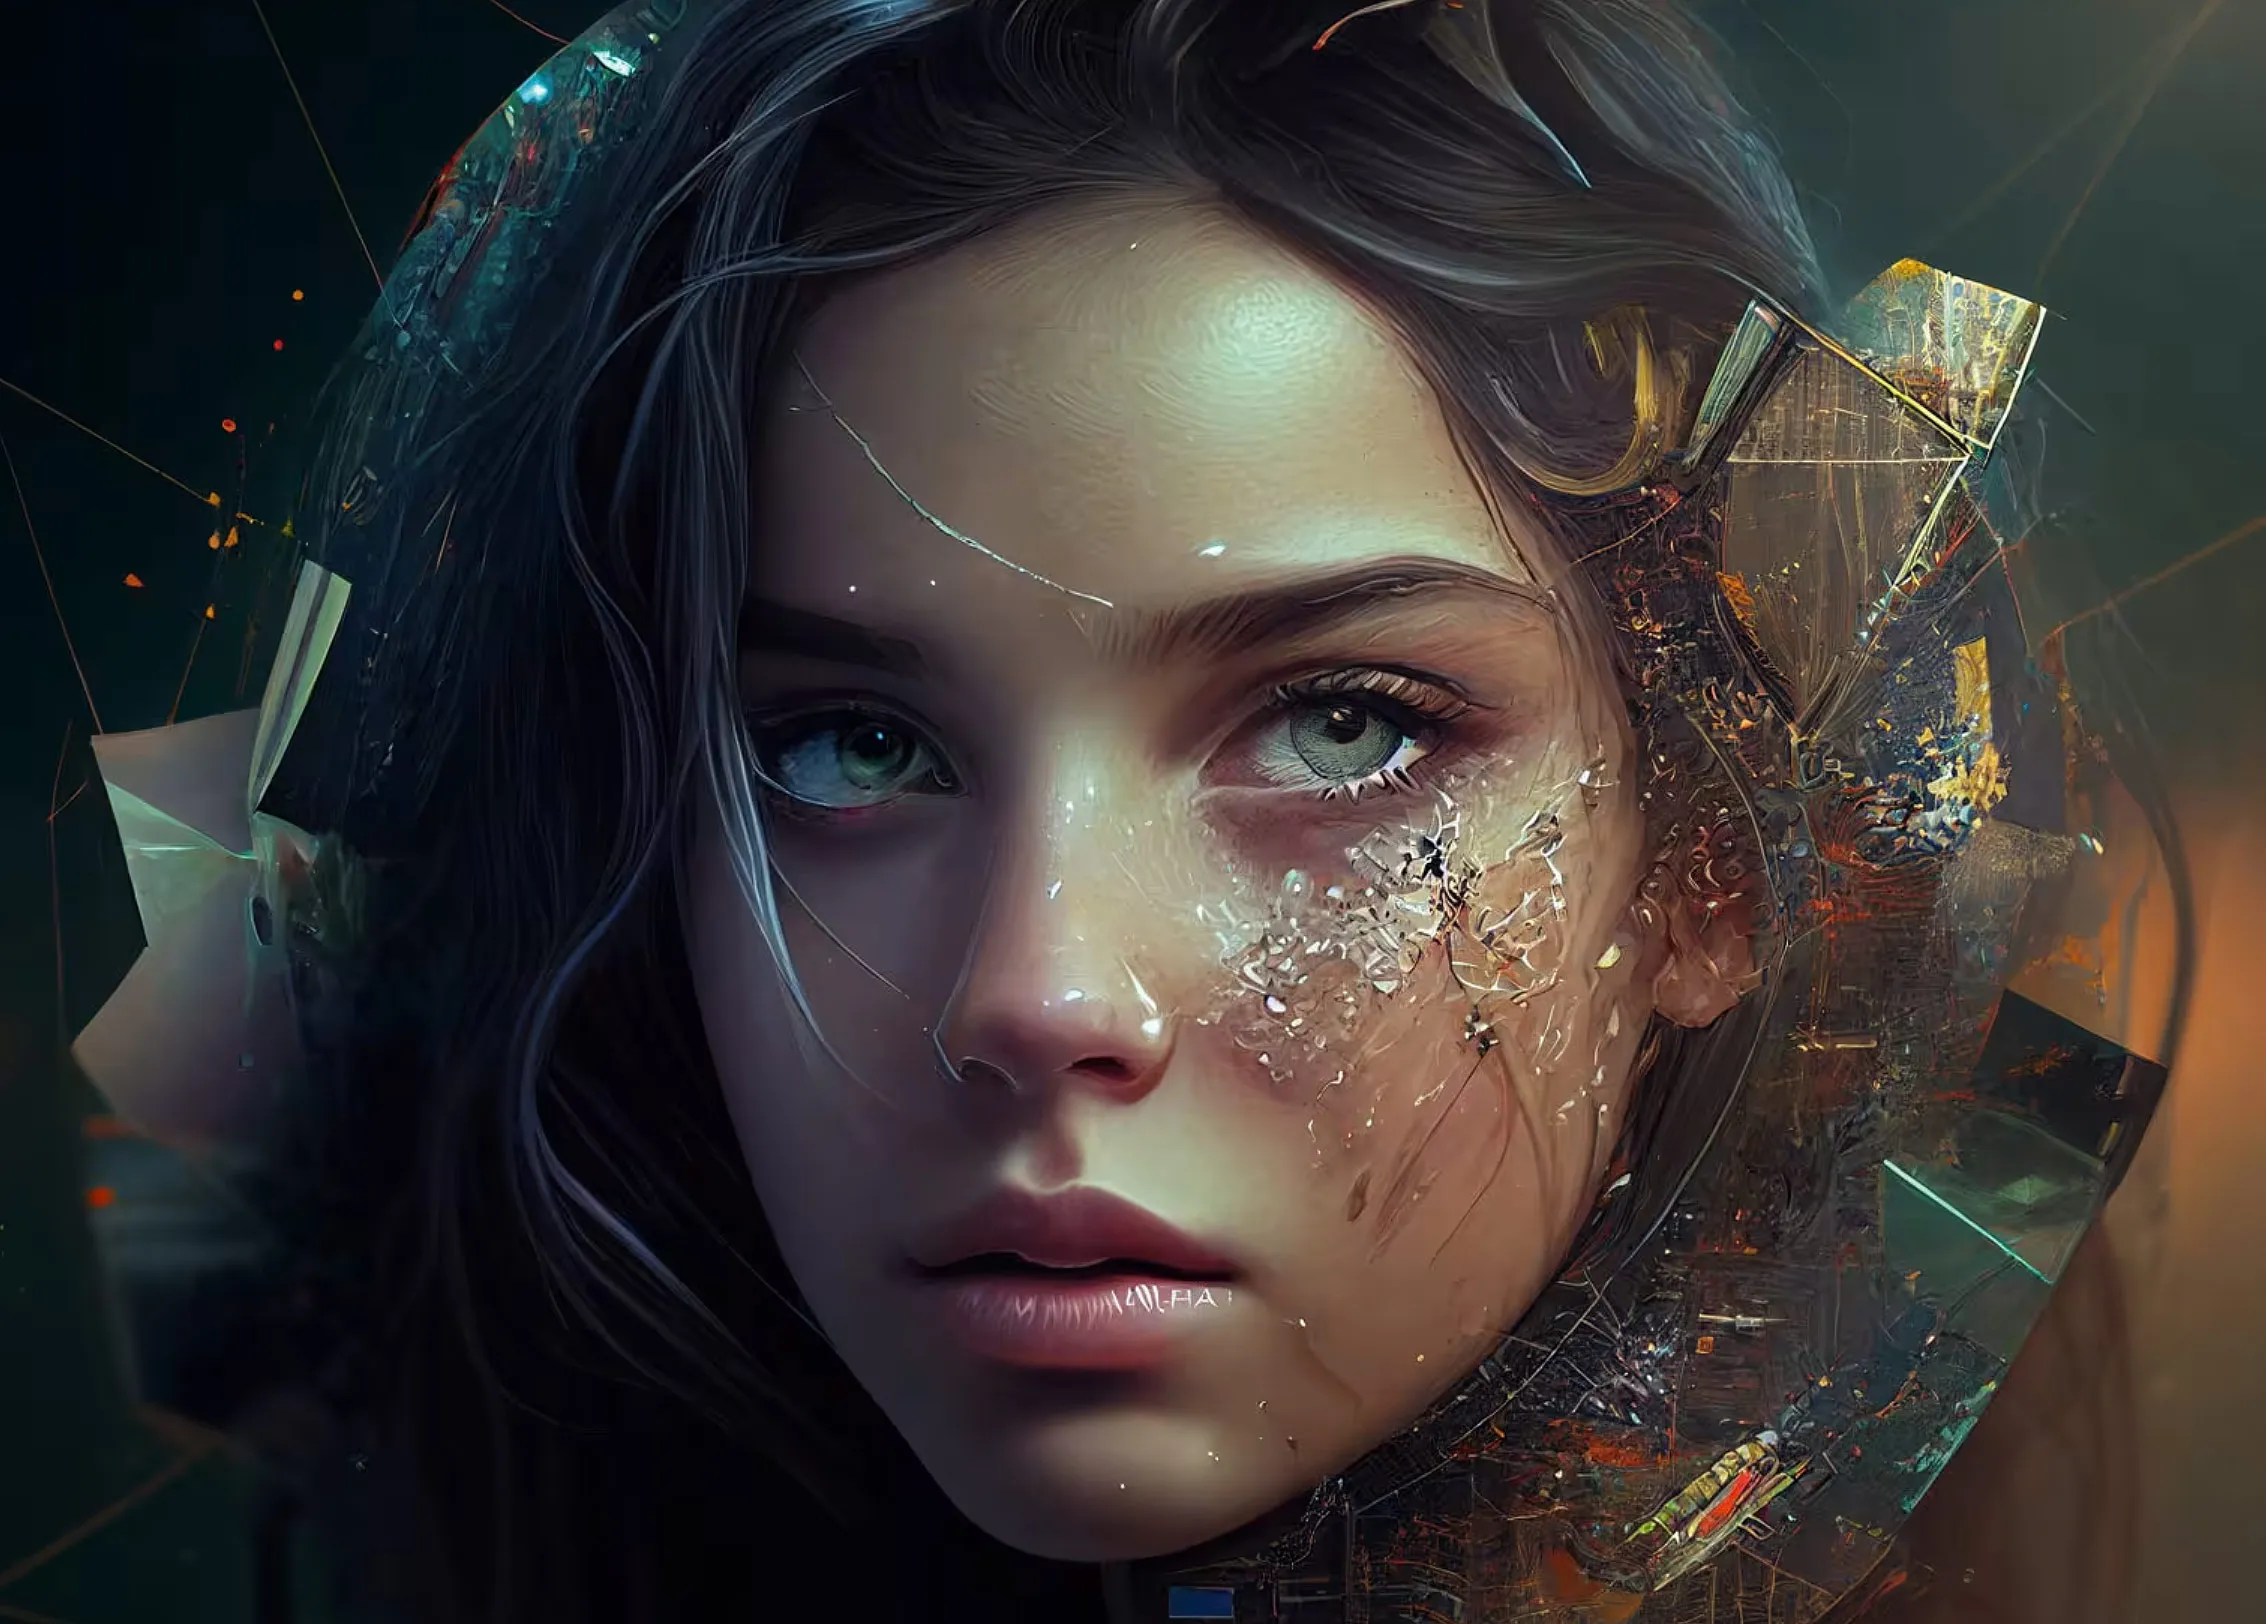
As the number of words in a sentence increases, Midjourney finds it increasingly difficult to give all words equal weight or appropriate consideration. Midjourney doesn't understand grammar and sentence structure in the same way we do and doesn't pay attention to the distinction between capitalization and punctuation. For example, I have achieved this result with just one word (cyberpunk woman):
In shorter prompts, on the other hand, more weight is given to each word. Shortening an extensive prompt can sometimes be a tricky task. After all, the challenge is not to lose any important information during the shortening process. But don't worry! Midjourney offers a handy command that is especially helpful if you tend to write overly verbose prompts that don't deliver the desired result! Using /shorten, you can enter a longer prompt and Midjourney will provide you with several shorter versions that you can try out afterwards:
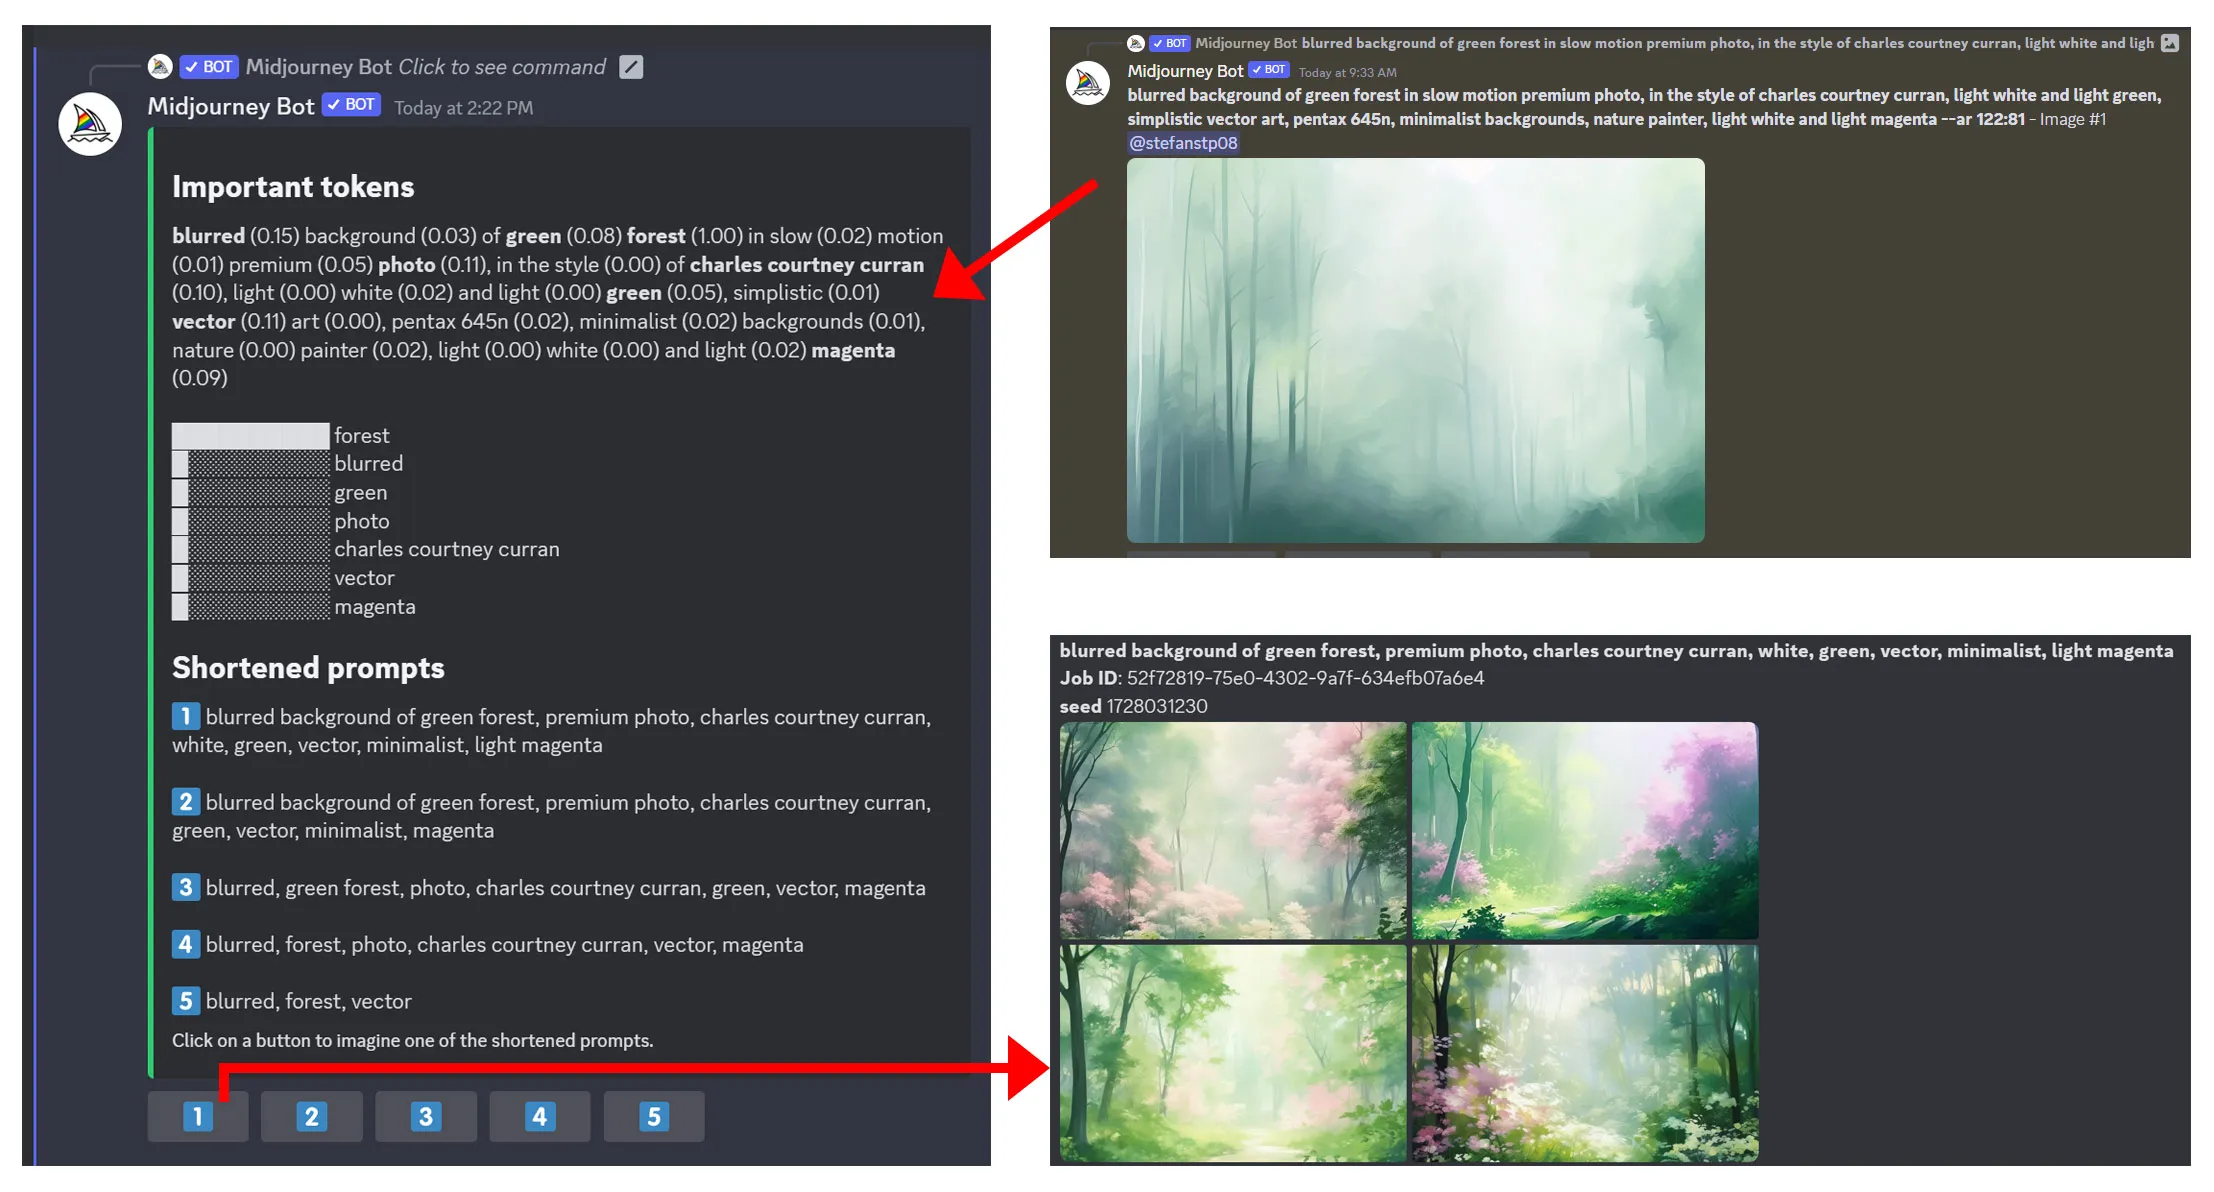
You can see here which words have any weight at all. I have regenerated the 1st suggestion in the example. However, you can see that the result is quite different from the image with lots of words. But perhaps you wanted exactly the image that appears in the shorter version? In any case, I find it very exciting to simply have all the suggestions generated to quickly see what other possibilities there are and often images come out that I like better. As you can see, the /shorten command is not a magic bullet for super-genius prompt commands, but you can still learn a lot about how the AI "reads" the individual words.
Tip no. 3: Sometimes it is perfectly appropriate to exaggerate things
People react differently to exaggerations than to normal images, because exaggerated images often serve to attract attention and arouse interest. Therefore, you can also try this in Midjourney, because the AI can also do something with it and creates exaggerated images accordingly. In my example, I wanted to see an extremely large ice cream being eaten by a girl.
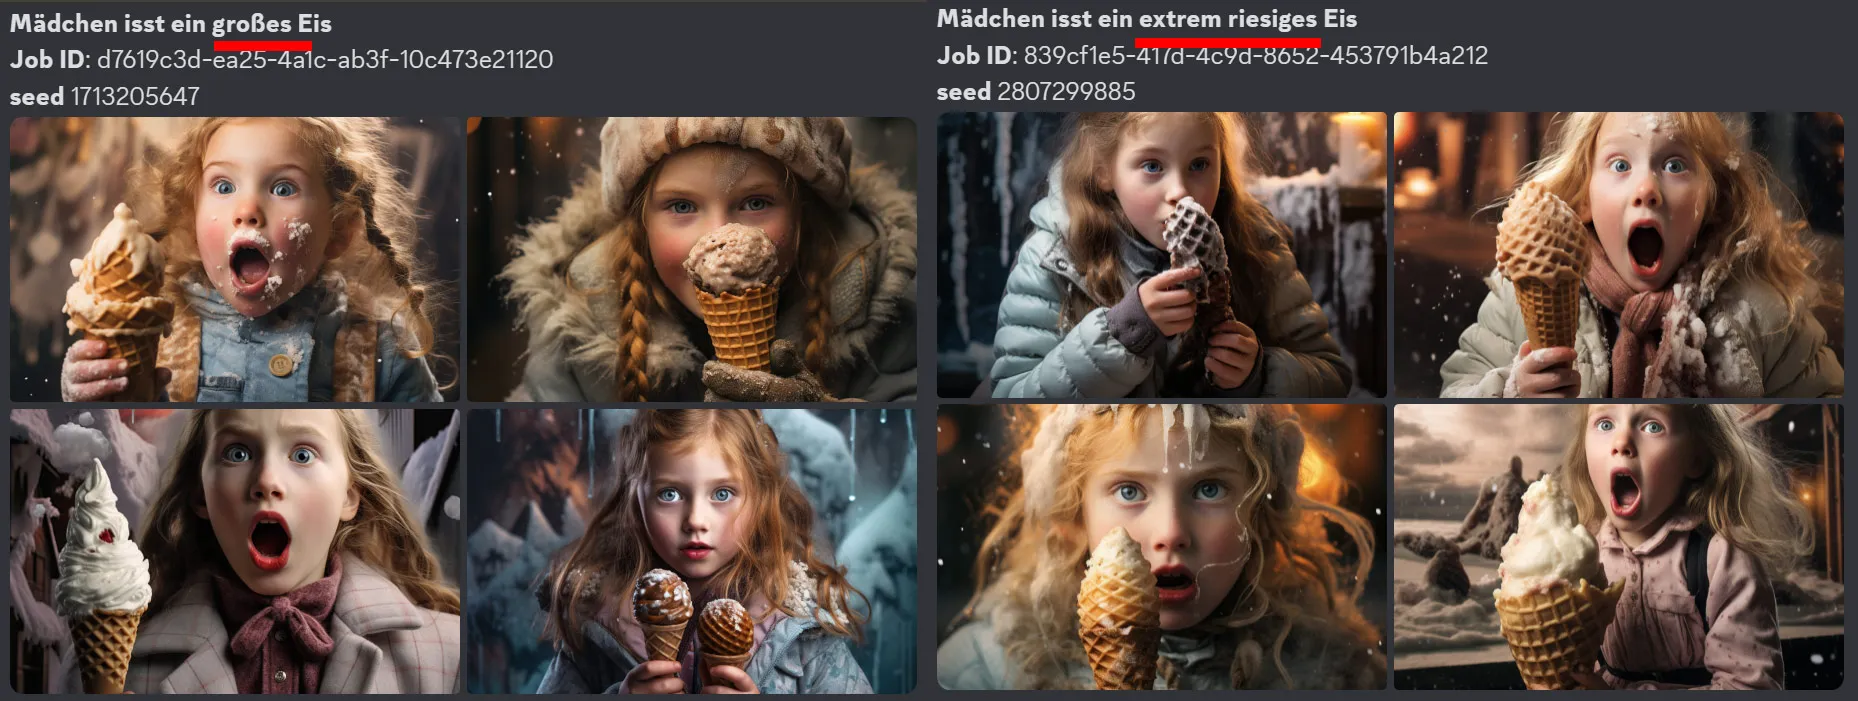
Incidentally, you can of course also use a language AI such as ChatGPT to obtain corresponding synonyms for certain descriptions. For example, ChatGPT suggested that I use extremely huge ice cream instead of large ice cream.
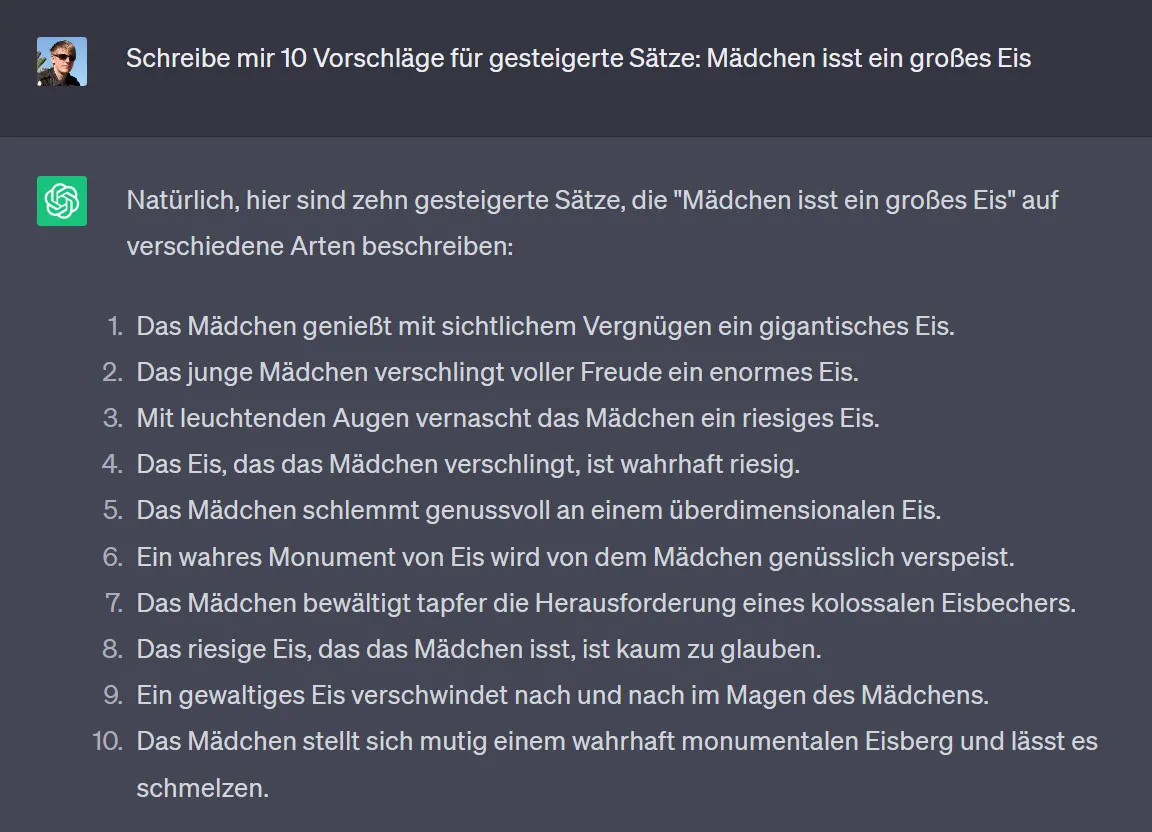
Tip no. 4: Parameters in prompts can have a big impact on creation
| Parameters | Short description |
| --ar --aspect | Image format - square by default: --ar 1:1 Portrait: 4:5 or 4:7 (the higher the number on the right, the taller the image) Landscape format: 3:2 or 7:3 (the higher the number on the left, the wider the image) |
| --h --w | Up to Midjourney version 3, you could use --h 600 --w 1200, for example, to create an image with a height of 600 pixels and a width of 1200 pixels. |
| --c --choas | Chaos command - the higher the number, the more abstract the result. 0 to 100 is possible, for example: --c 50 |
| ::X | X determines the weighting of a word. For example, if you want the bear to have the highest weighting: /imagine bear::4 in the forest::2 hare::1 Negative weightings are also possible: /imagine bear::-1 in forest::2 hare::-5 (they basically correspond to the parameter --no) |
| :: | Use the double colon to separate individual words of terms, for example in hot:: Dog - written like this, the delicious food hot dog becomes a hot dog. |
| --v | Not all commands work in all versions (e.g. --h and --w). If you want to use commands from certain versions, put the version number at the end of the prompt in this form: --v 3 |
| --q --quality | The default is 1. A less detailed version is often sufficient and is faster and cheaper with --q 0.5 or 0.25 because less computing power is required. |
| --s --stylize | The higher the value, the more artistic the image will look and may therefore deviate more from your specification. For example, --s 10 is less artistic than --s 1000. The standard is 100. |
| --no | This allows you to define what should not appear in the image under any circumstances. Example: --no trees |
| --seed | A technical parameter that gives Midjourney an initial value for image creation. It is usually assigned randomly. If you want to achieve similar results for several of your images, you should use the same seed with --seed. Values between 0 and 4294967295 are possible. |
| --video | Saves the creation process of the image as a video |
| /prefer remix | Select the remix mode to change the prompts, parameters, model versions or aspect ratios between the variations. Remix takes the composition of the original image and uses it as part of the new job. |
| {} | You can create several variations at once. For example, 3 images are generated with: portrait of a {3 years, 4 years, 5 years} old girl |
You can find even more commands in the midjourney prompt reference card , which we have included in our midjourney training (which, by the way, we are constantly updating as soon as an update is released).

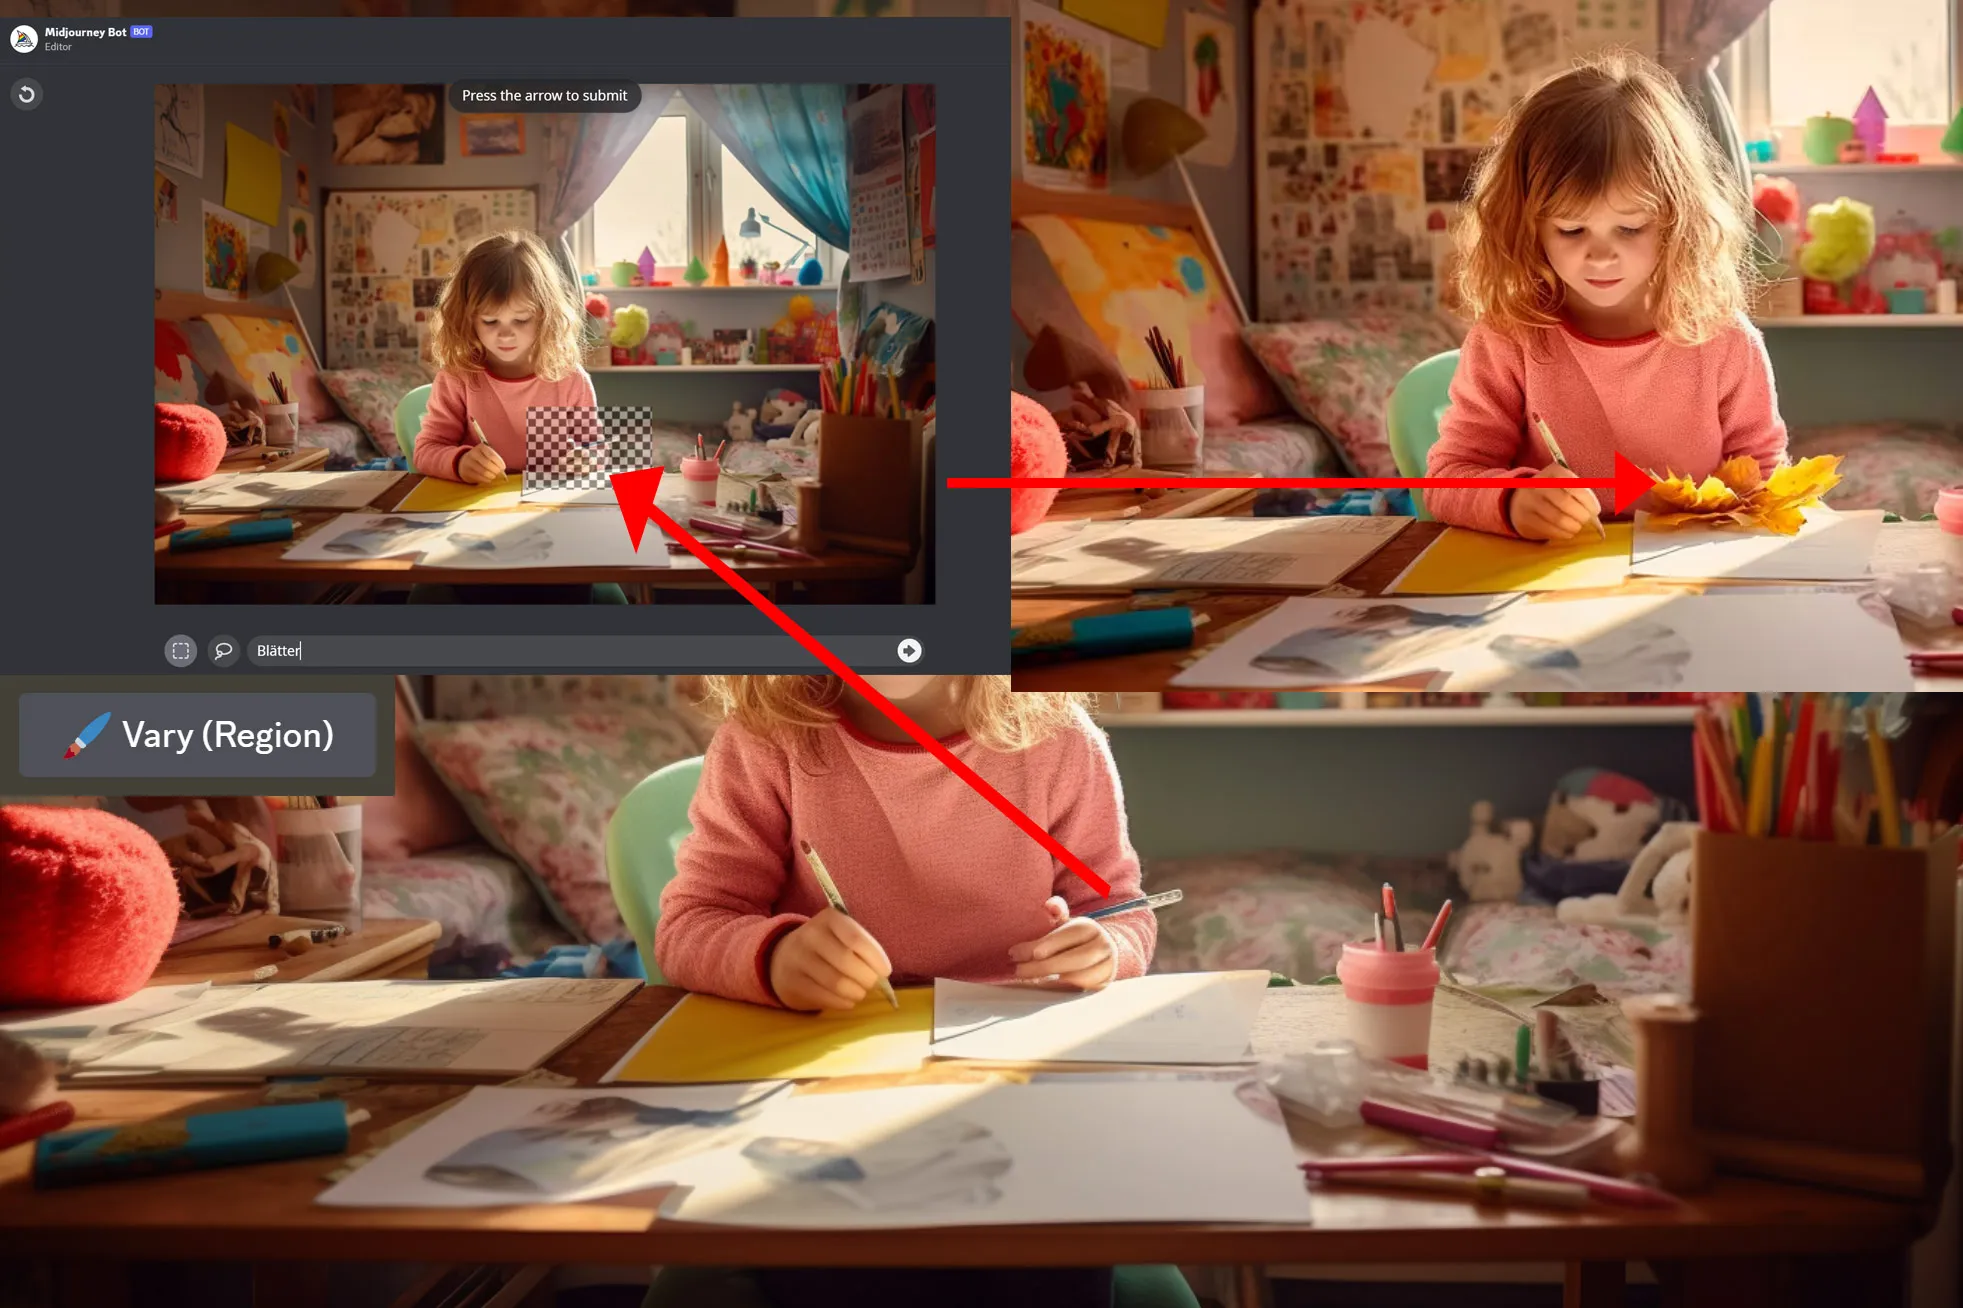
Tip #5: If just one detail is wrong, go with Vary (Region)
Do you know the situation: You have created a picture and you don't like the one hand, for example? In my picture, I actually had this girl created for a blog post, where I didn't like the hand at all, everything else was perfect. So I pressed the Vary (region) button and then entered leaves as the word and lo and behold, I like the result much better. The picture was then really only changed in the selected area, nowhere else!
Do you already like these tips? Then you'll really like my training on Midjourney. Take a look at it now.
