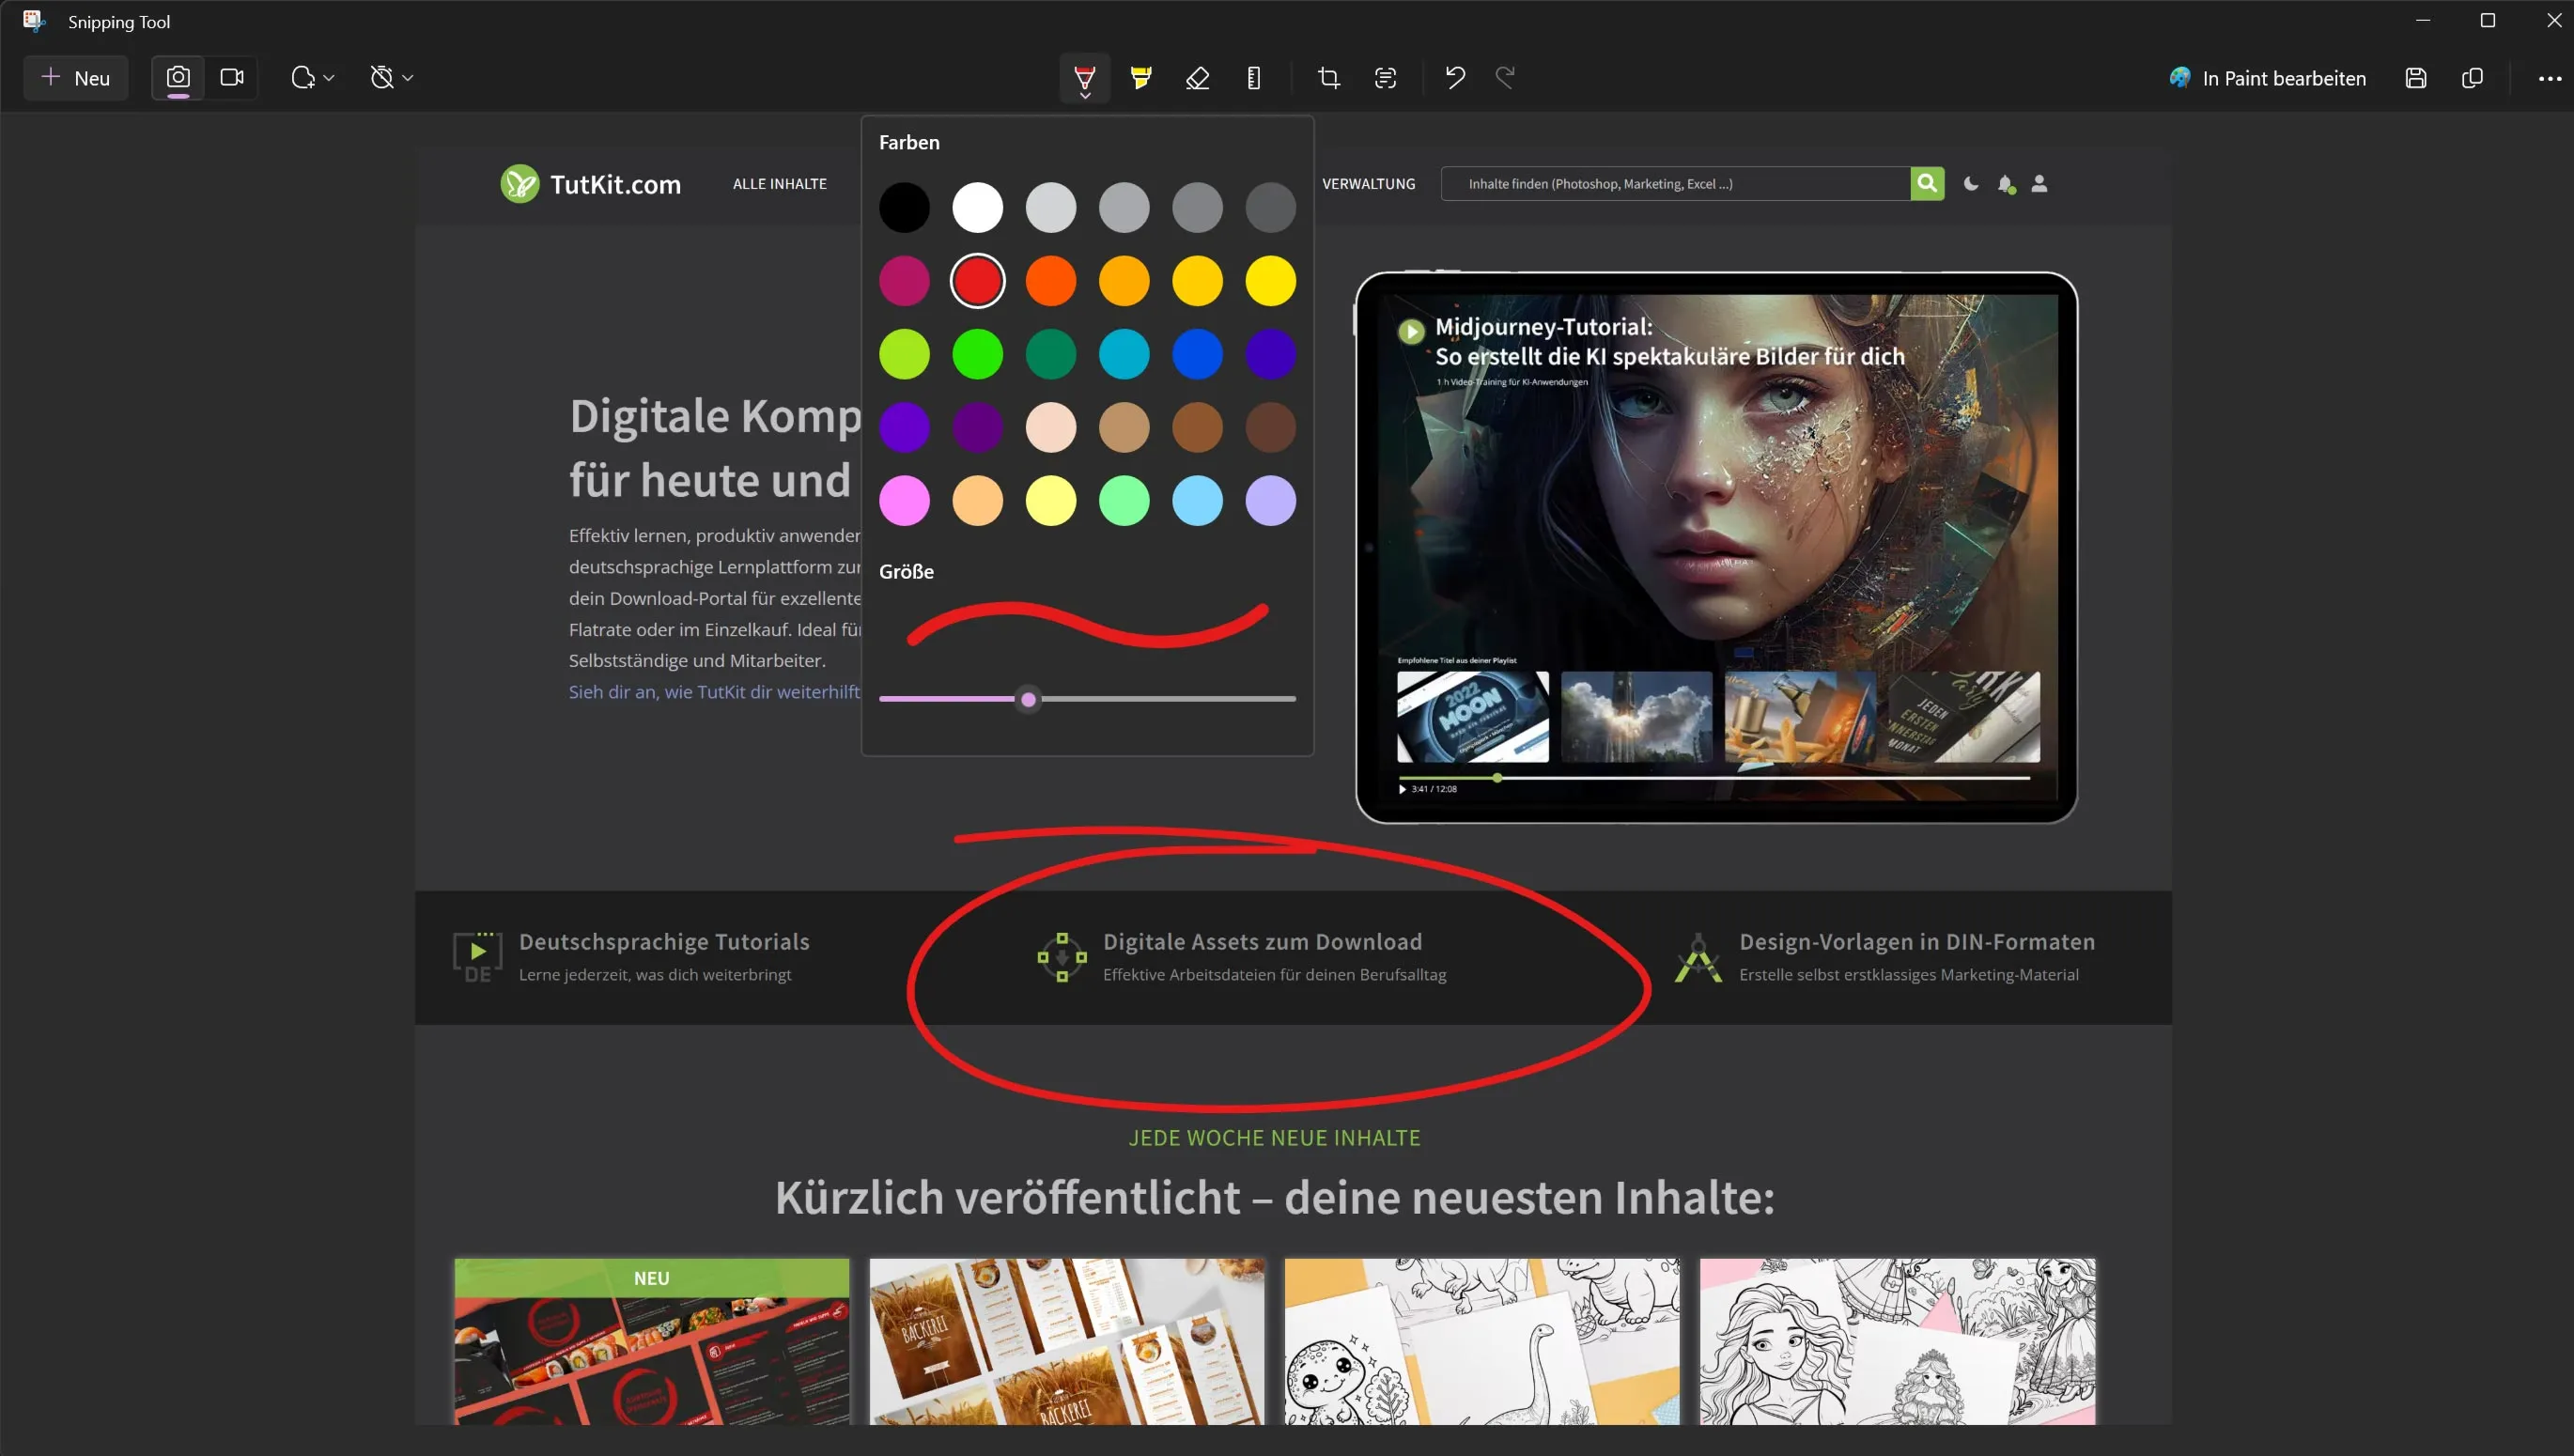
In today's digital world, it's often necessary to share or capture content on our screen for our records. Whether it's a bug we want to show to support, for text tutorials (of which we have many here on TutKit.com), an interesting section of an article (like this one) or simply a funny picture during a video chat session - a screenshot can be useful in many situations. Windows 10 and 11 offer a practical tool for this: the free Snipping Tool. In this blog article, we will show you how to use this tool to take screenshots quickly and efficiently. Whether you are a beginner or an advanced user, the following tips and tricks will help you get the most out of this useful tool.
Table of contents
What is the Snipping Tool?
The Snipping Tool is a built-in application in Windows 10 and Windows 11 that allows users to quickly and easily take screenshots of their screen. These can then be edited, labeled, saved and shared. The application offers different modes for different requirements: from a full-screen screenshot to a window snip to a freely selectable area. We ourselves occasionally receive photos of a screen taken with a camera, but often not everything on the screen can be recognized correctly. So make sure you use the screenshot function of your operating system!
Brief introduction to the tool
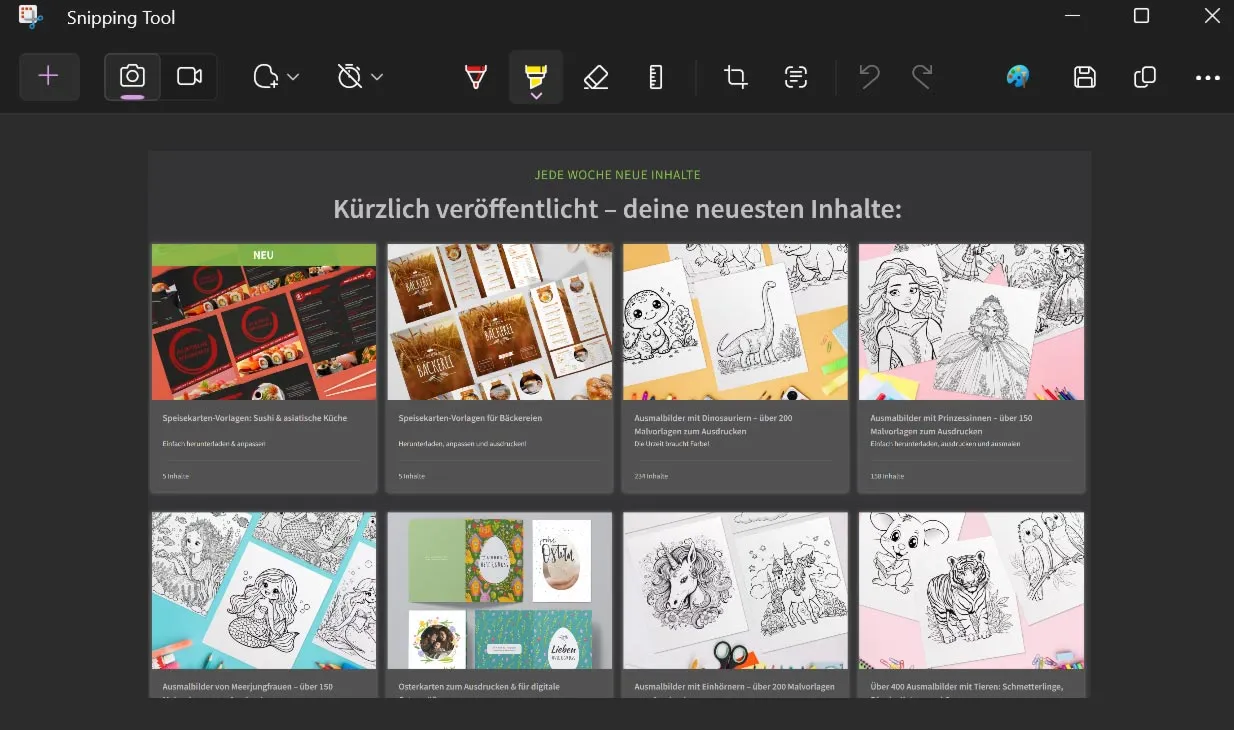
The Snipping Tool offers a user-friendly interface that makes it easy even for beginners to create the desired screenshots. After opening the application, the user can choose from various options to create the perfect screenshot. The tool not only makes it possible to capture a specific area of the screen, but also offers the option to make annotations and simple edits directly in the tool.
Differences between Windows 10 and 11
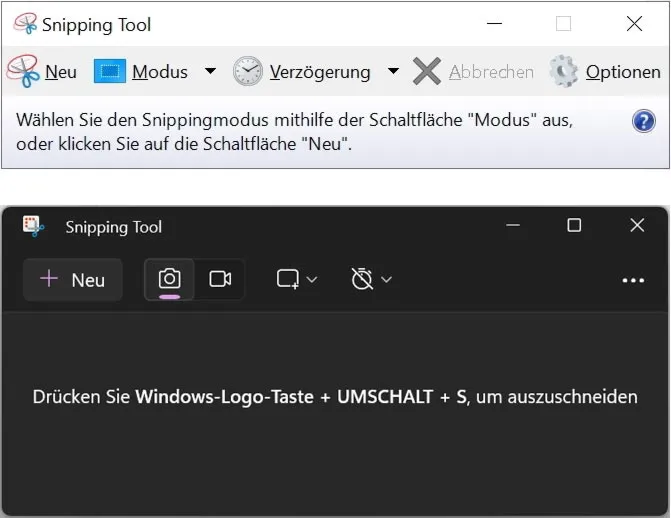
Although the Snipping Tool is available in both operating systems, there are some small differences in the functionality and design available to users depending on the version.
In Windows 10 (the light-colored version in the picture), the Snipping Tool is a well-known feature that has been used for years. It offers basic functions for creating screenshots and editing them.
With Windows 11, Microsoft has further improved the screenshot functionality and equipped the Snipping Tool with new features and a revised design. Windows 11 includes an improved editing function that allows users to customize their screenshots directly after capturing them. Even videos can now be recorded. It can now even read text from screenshots!
Step-by-step guide to using the Snipping Tool
The Snipping Tool is an effective application for taking screenshots in Windows 10 and 11. Here is a simple guide to getting the most out of the tool:
1. open the Snipping Tool:
- Windows 10 & 11: In the search bar next to the Start menu, type "Snipping Tool" or "Screenshot" and click on the app to launch it.
- Tip: Press the key combination Win + Shift + S to open the Snipping Tool directly, then you don't have to constantly enter the words in the search.
2. create a new screenshot / screenshot:
- Click on "New" in the Snipping Tool app or press the key combination Ctrl + N to start the creation of a new snip or screenshot.
3. select the correct mode:
Select one of the following modes depending on which part of the screen you want to capture:
Section: Allows you to select any rectangular area.
Window: Captures the currently selected window.
Full screen: Takes a screenshot of the entire screen.
Freeform: Allows you to draw any shape, which is then captured as a screenshot.
4. editing and labeling screenshots:
Once you have taken the screenshot, the Snipping Tool window will open where you can edit and annotate your screenshot. Use the pen and text tools to make annotations or highlight important information.
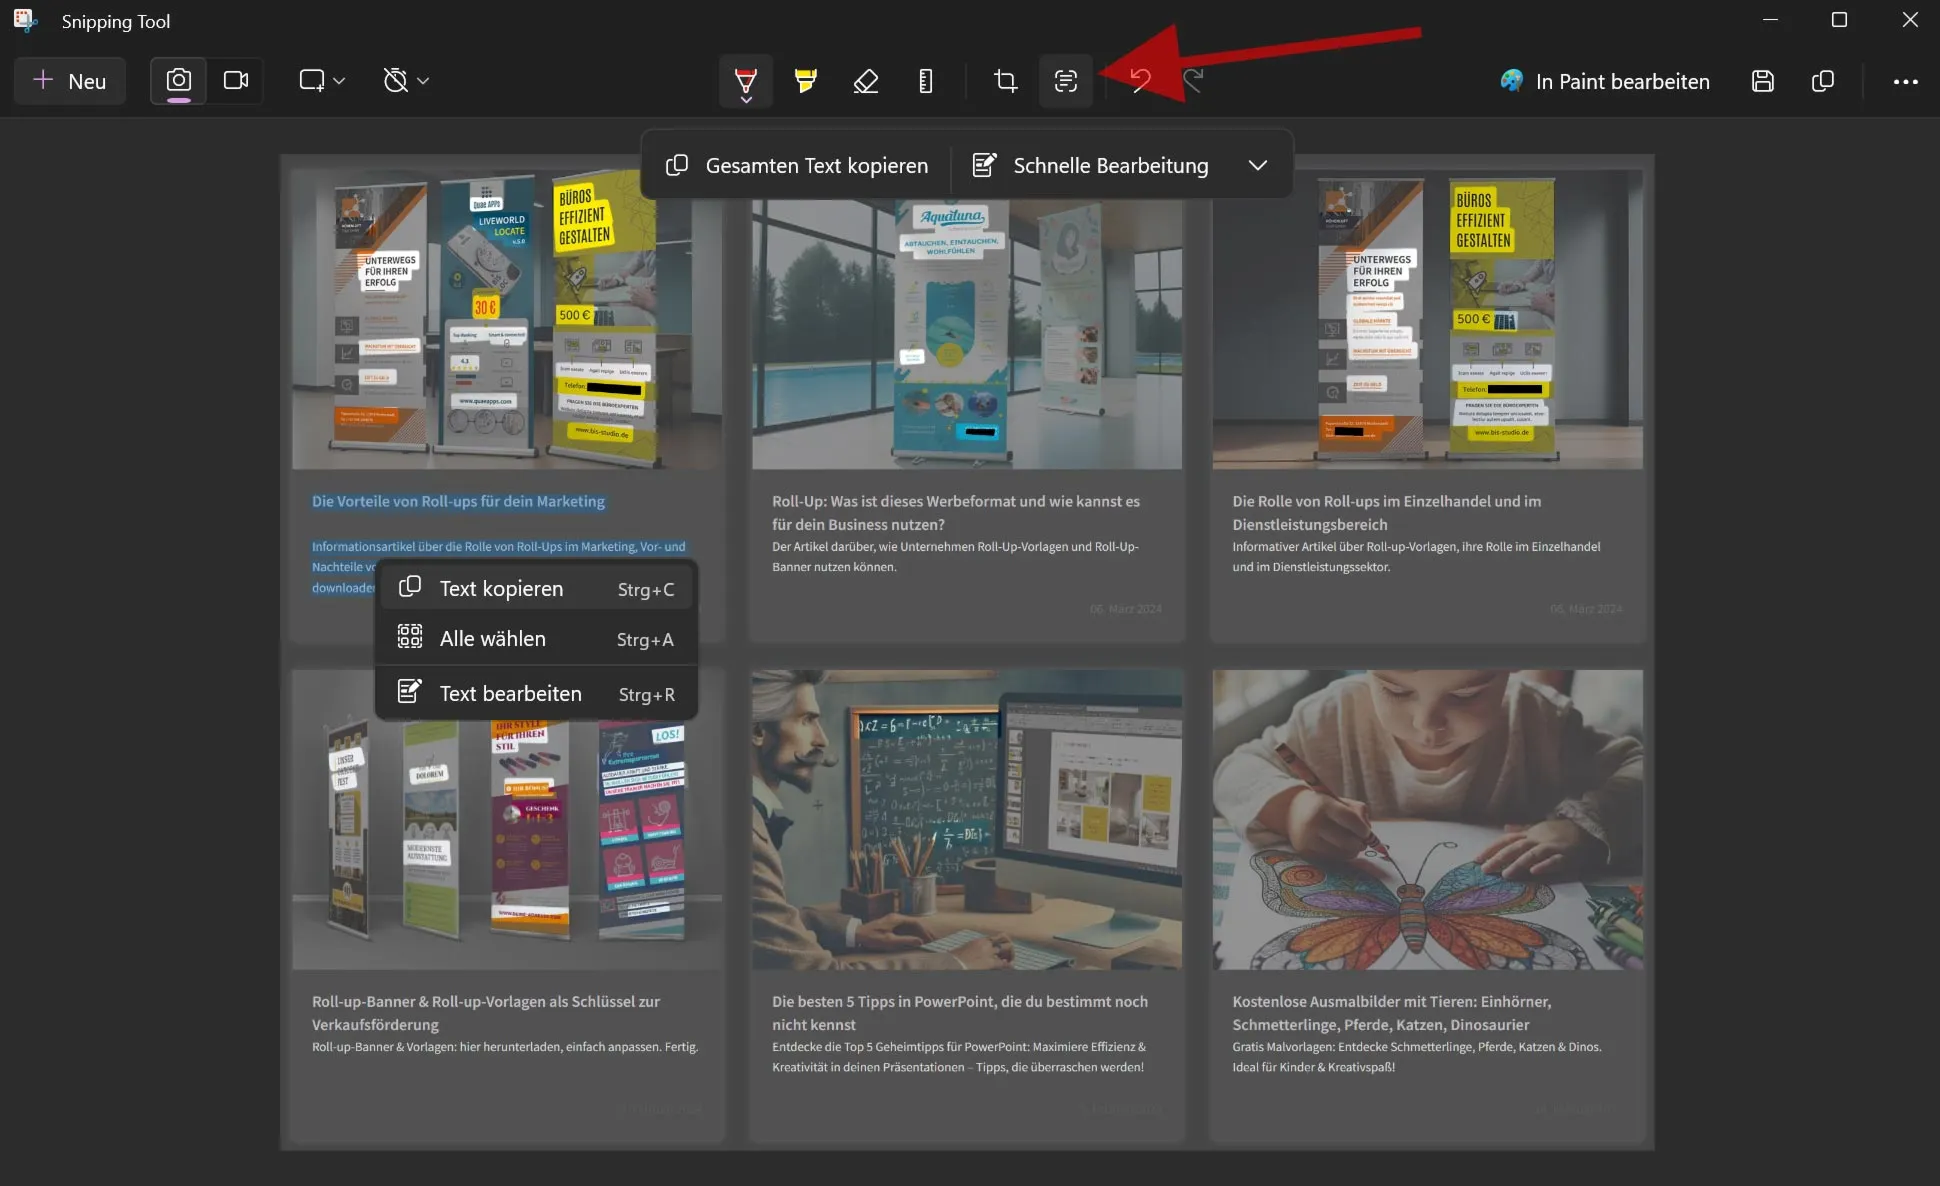
In Windows 11, you can even read and copy text from the screenshot. To do this, simply click on the "Text actions" icon at the top. The text is then analyzed and you have the option of copying the entire text or just certain areas. That's really cool!
5. save and share screenshots:
When you're done editing, you can save the screenshot via the file menu or share it directly with others using the share option.
Keyboard shortcuts for quick screenshots in Windows
In addition to using the Snipping Tool, Windows 10 and 11 offer several keyboard shortcuts to make taking screenshots easier and faster. Here are the most important combinations that every user should know:
1. keyboard shortcuts for the Snipping Tool:
- Win + Shift + S: This is a quick way to activate the Snipping Tool in Windows 10 and 11. After you press this key combination, a small menu will appear at the top of the screen allowing you to select the type of snip you want (crop, window, full screen or freeform).
2. alternative key combinations for screenshots without the snipping tool:
- Print: When you press this button, a screenshot of your entire screen is created and copied to the clipboard. You can then paste it into an image editing program or other application.
- Alt + Print: This combination creates a screenshot of the active window and copies it to the clipboard.
- Win + Print: If you press these keys simultaneously, a screenshot of your entire screen will be taken and automatically saved in the images folder under "Screenshots".
3. using the keyboard shortcuts:
- To use these shortcuts, make sure your keyboard is configured correctly and the keys work. In some cases, laptops need to use the Fn key (function) to access the print functionality.
Tips for using the Snipping Tool effectively
The Snipping Tool in Windows 10 and 11 is a powerful tool for screenshots, but with a few tips and tricks you can make even better use of its capabilities. Here are some tips on how to use the Snipping Tool more effectively:
1. using the delay feature:

The Snipping Tool offers a delay feature that is especially useful when you want to capture menus or other elements that are not permanently displayed on the screen. You can set a delay of up to 5 seconds, which gives you enough time to open the desired element on the screen before the screenshot is taken.
2. integration into the workflow:
Integrate the Snipping Tool into your daily workflow by setting up a shortcut for it if the default methods don't suit your preference. You can also pin the Snipping Tool to the taskbar for quick access. However, I always use the Windows key + S + Shift to launch the tool.
3. use the editing functions:
Use the Snipping Tool's built-in editing features to edit your screenshots right after you take them. You can add text, highlight important information or cut out unwanted parts before saving or sharing the screenshot. Important: Once you have taken a screenshot, the editing function does not appear immediately. Simply click on the image displayed in the notification widget (to the right of the clock).
4. efficient saving and sharing:
Develop a routine for saving and sharing your screenshots. Name your files sensibly so that you can find them more easily later. Use the Snipping Tool's direct sharing options to quickly send your screenshots by email or post them on social networks.
5. master keyboard shortcuts:
Become an expert at using the keyboard shortcuts for the Snipping Tool and other screenshot methods in Windows. This can significantly increase your efficiency, especially if you take screenshots regularly. There is also the option of storing screenshots directly in the cloud (whether in the Windows cloud or Dropbox, for example).
Frequently asked questions (FAQs) about the Snipping Tool
1. can I also record videos with the Snipping Tool?
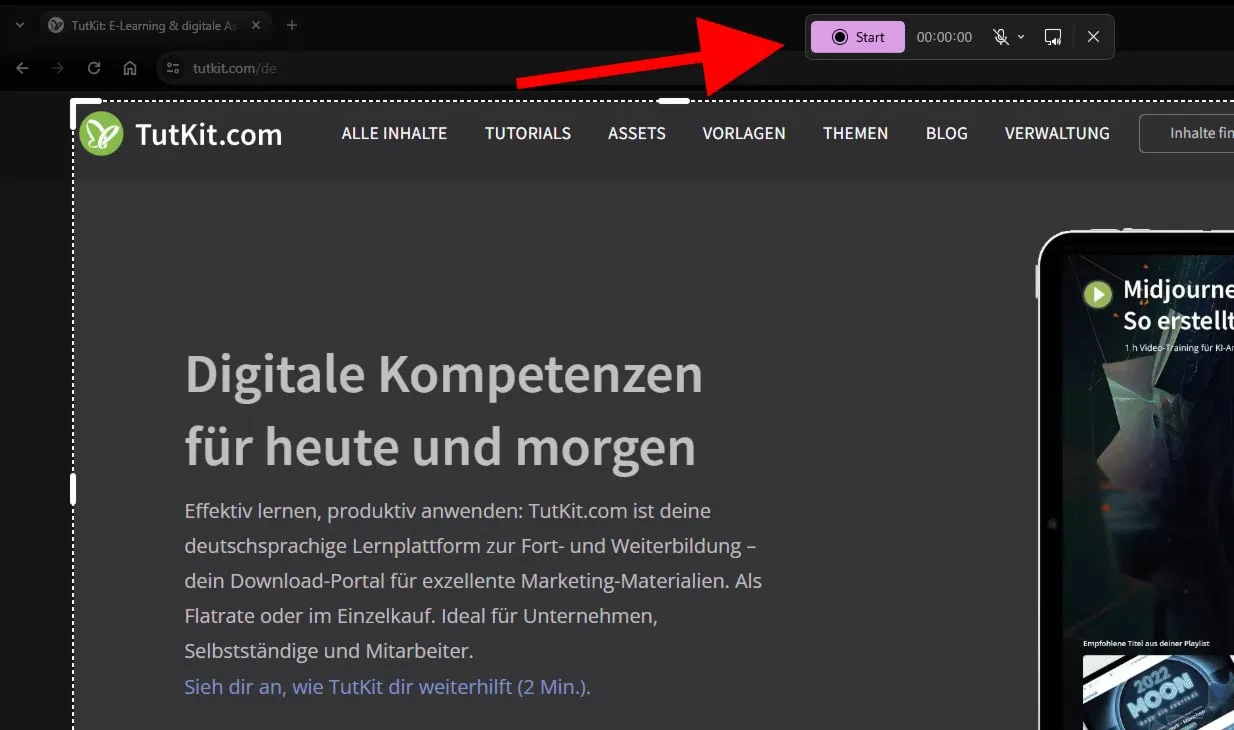
Yes, but only under Windows 11. Under Windows 10, you will unfortunately have to use other programs that can do this (e.g. SnagIt). To do this, simply click on the video icon, then you can define the area where you want to record and whether even the microphone can be recorded. This means you don't have to buy a paid program such as SnagIt or Camtasia (which of course offers many more editing options).
2. how can I change the snipping mode in the Snipping Tool?
Once you have opened the Snipping Tool, you can change the mode in the main window. Choose from the options "Freeform", "Rectangular", "Window" and "Fullscreen" to create the type of screenshot you want.
3. where are the screenshots saved?
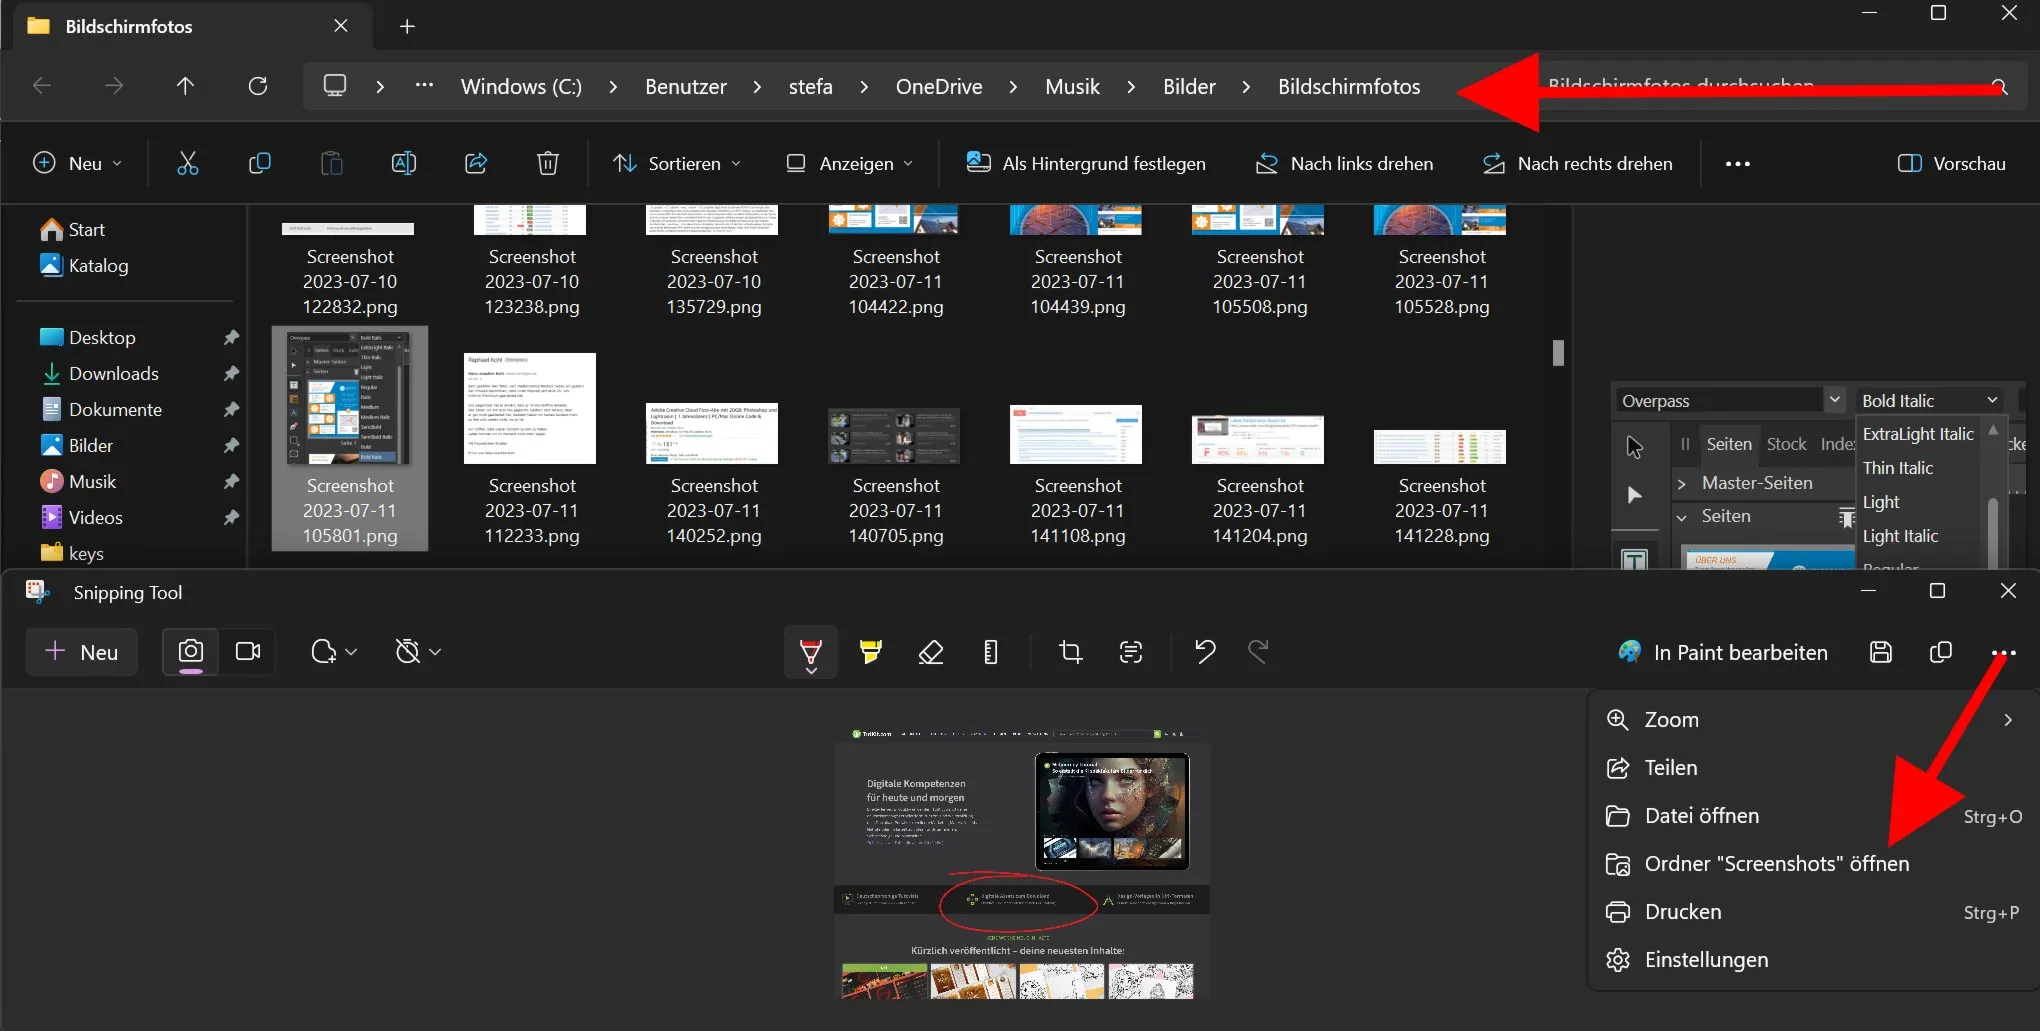
By default, screenshots created with the Snipping Tool are not saved automatically. You have to select the save location manually when you save the screenshot. However, if you use the Win + Print key combination, the screenshots are automatically saved in the "Pictures" folder under "Screenshots". I then realized that I had already saved over 1,300 screenshots there (I deleted them all first ... because I usually don't need them for very long).
4. can I use the snipping tool on a tablet?
Yes, the Snipping Tool can also be used on Windows tablets. The operation is similar to that of a desktop computer, whereby the touch screen can be used to select the screenshot area.
5. is there a way to automate the Snipping Tool or use it via the command line?
The Snipping Tool itself does not offer direct command line support or automation features. For advanced automation tasks, you might consider scripts or third-party tools that can take screenshots based on specific criteria or schedules.
6. how can I take a screenshot of a menu that disappears when I open the snipping tool?

Use the Snipping Tool's delay function to set a countdown before the screenshot is taken. This gives you time to open the menu or other temporary elements on the screen before the screenshot is taken.
