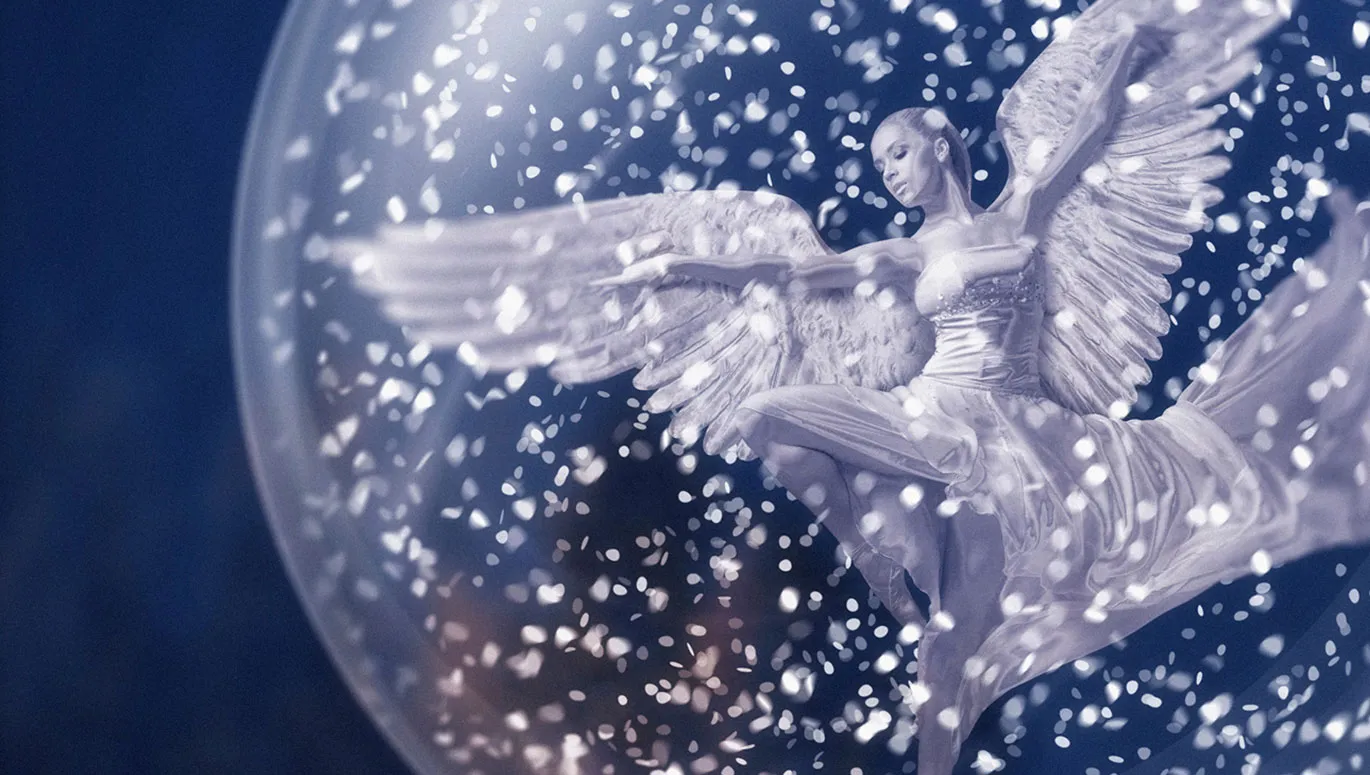
The angel already has it - the wings still need it: a shiny metallic effect. This time you create it in Affinity Photo with an HSL adjustment and gradient conversion. We also need to paint a shadow. All this - in parts 9-10/14 of our Christmas tutorial series.
Part 9: Metal effect for the wings with HSL adjustment and gradient conversion
High time for even more sparkle and effect! The position and alignment of the wings to our Christmas angel are already correct. However, the look doesn't really fit at the moment. So now apply a metallic effect to the wings. This time, use a different method to the angel by first desaturating the wings using an HSL adjustment and then applying a gradient conversion . How? Once again, trainer Marco Kolditz will explain ...
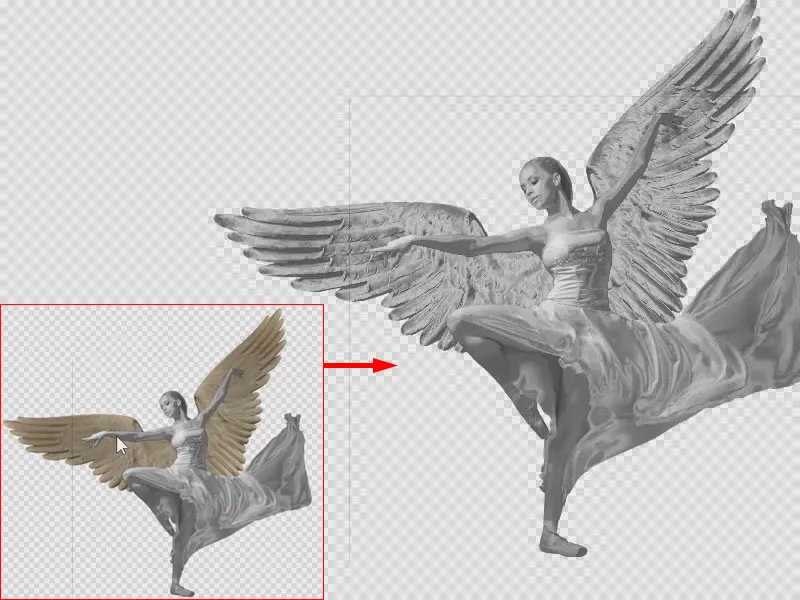
This is what you'll learn in part 9 of the Affinity Photo tutorial
- How to use the HSL adjustment and the gradient conversion
- Use the HSL adjustment to convert motifs to black and white.
- Use the gradient conversion to further enhance the metallic effect.
Desaturate wings with HSL adjustment
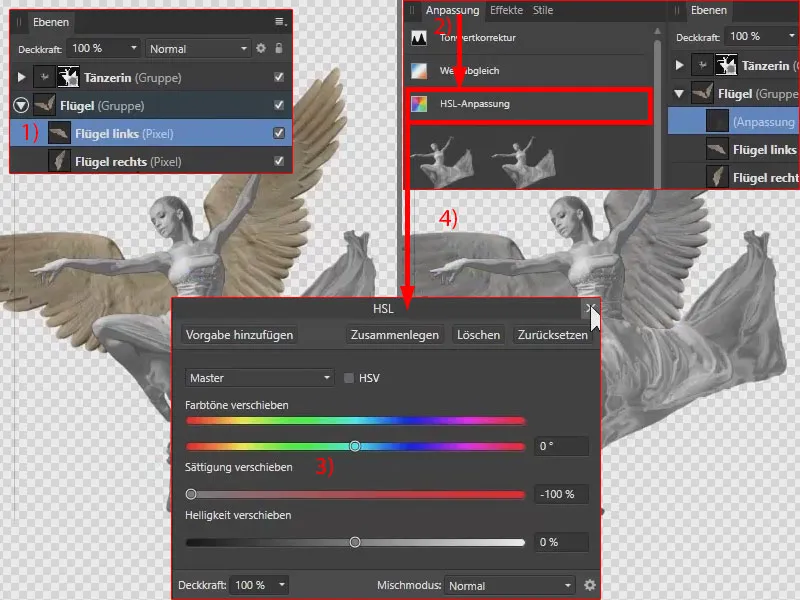
Now the wings should also be given a metallic look . I create a new adjustment layer above the two "Wings" layers: To desaturate the wings, I select "Wings left" (1) and the HSL adjustment (2) under Adjustment. Here we drag the saturation slider completely to the left (3). This makes the wings appear black and white (4).
You could leave it like this. However, I would like to adjust the whole thing to the metallic look of the dancer by using a gradient conversion...
Create gradient conversion
The adjustment layer is active (1). Under Adjustment, I select the gradient conversion (2). This still looks a bit strange. In the dialog box (3), we can set the gradient conversion, i.e. we can colour the individual tonal values of this layer - we can select different shades from the dark to the light areas.
The red tone values are currently the dark areas, the green values are the medium gray areas and the blue values are the very light areas.
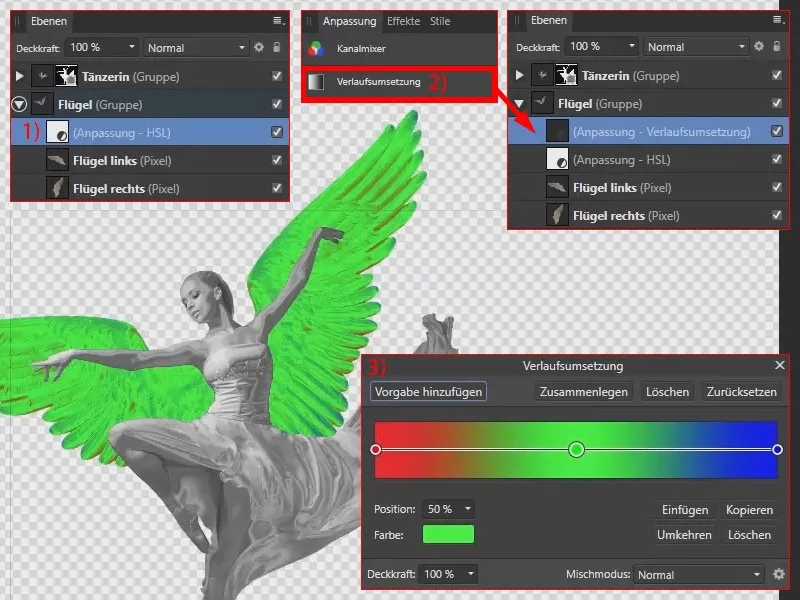
Adjusting the gradient conversion for the metal effect
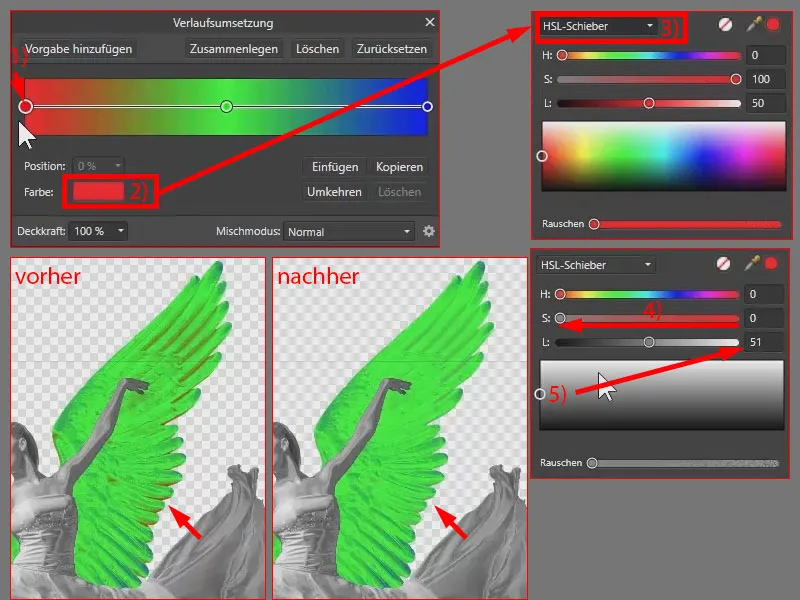
Of course, I don't want colorful wings, but rather metallic ones. That's why we're working with gray values . I select the first anchor point (1), go to Color (2) and select the HSL slider (3).
I set the saturation to 0 (4) so that there are only gray values. The dark areas in the image should be more of a medium gray (5).
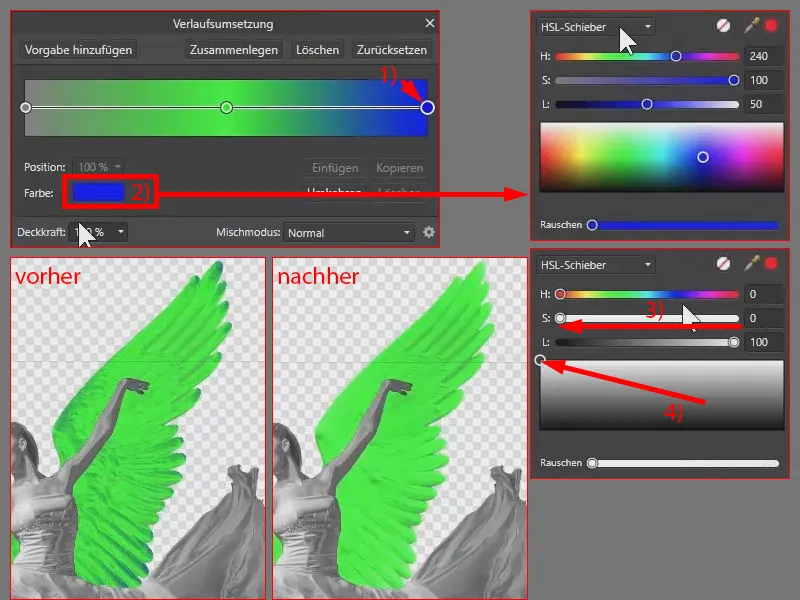
The light areas on the right-hand side should be white. To do this, I select the point (1), go back to Color (2), drag the saturation to 0 (3) and select the white (4).
I also create two more anchor points by clicking on the center line (1). One will be a darker gray (2), the other a white (3) and the last a dark gray again (4). I can move the points on the line (5). I also reduce the opacity to 91 % (5).
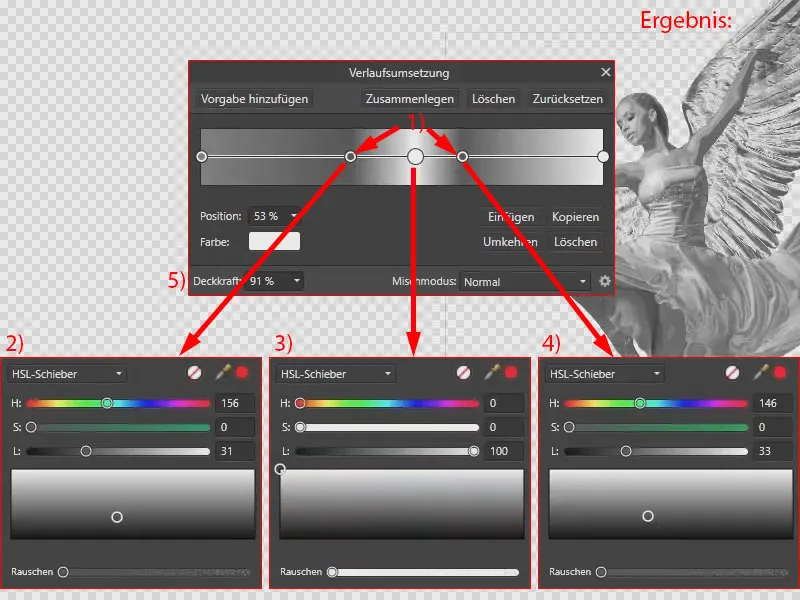
I darken the white of the middle point slightly (1). I move the anchor points until I like the metallic effect (2) . Something like this:
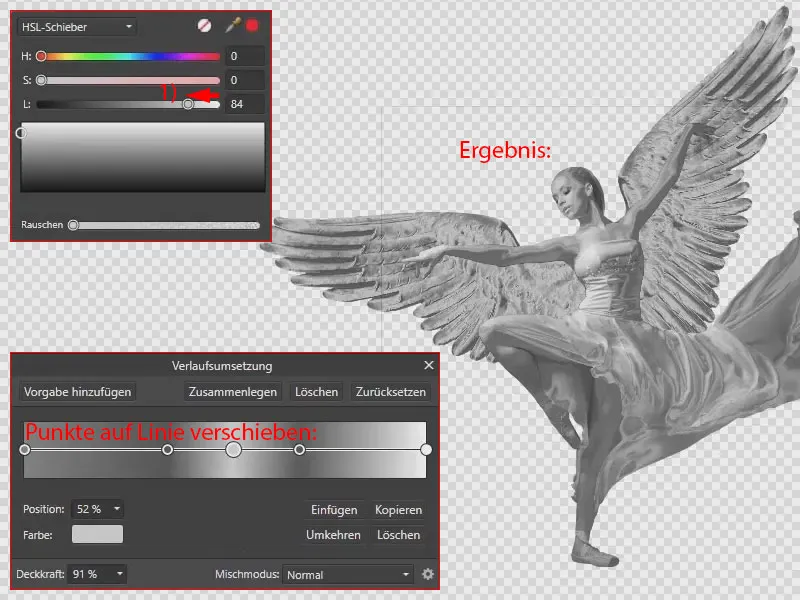
Metal effect with HSL adjustment and gradient conversion - summary part 9
- With the HSL adjustment, you can achieve a black and white conversion by dragging the saturation slider all the way to the left.
- In the gradient conversion, you can add new anchor points, move them and remove them again if necessary.
- Play with the position and color of the anchor points as well as with the opacity until the metallic effect meets your requirements.
Part 10: Painting and blurring the wing shadows
Do you love detail? So does your trainer Marco Kolditz. As explained below using the example of the Christmas angel, you should pay attention to the lighting conditions in all your composings and draw in shadows accordingly . See how easy it is to do this using a new layer, the paint brush and Gaussian blur.
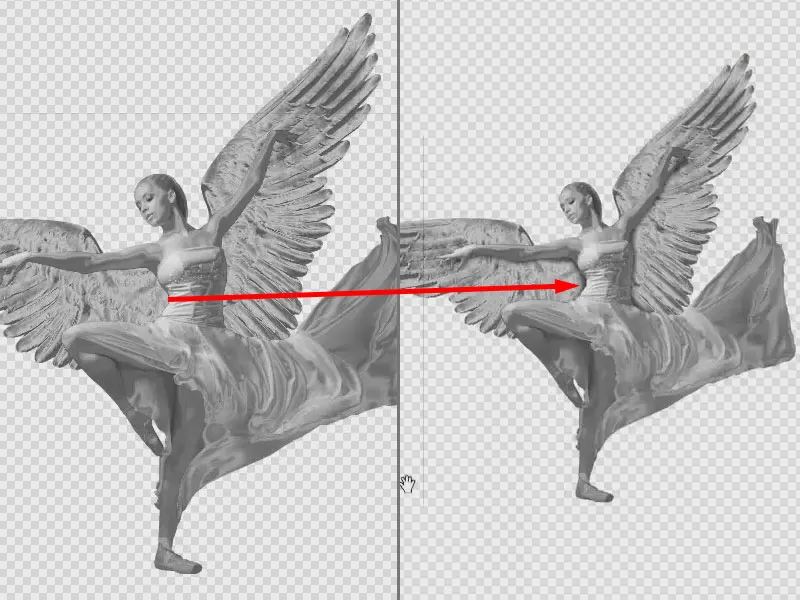
This is what you'll learn in part 10 of the Affinity Photo tutorial
- How to paint and blur shadows with the paint brush
- Shortcut: How to adjust the size and hardness of the brush with the mouse
Importing an image into Affinity Photo
Above the gradient conversion, I create a new empty layer (2) in the layer palette using this icon (1). Let's paint a little shadow on it. To do this, I zoom into the picture so that we can see both the hands and the wing area. Press the B button to switch to the paint brush tool(3). I want to use this to paint the shadow into the picture.
A little tip here: You can adjust both the size and the hardness of a brush using your mouse . To do this, hold down the Alt keyand simultaneously press the left and right mouse buttons. If you drag the mouse to the right or left, you can adjust the size (4). If you drag it up or down, you can adjust the hardness (5). This is quite practical if you are using a mouse.
If you are using a graphics tablet with a pen, you will have a problem at this point, because touching the tablet with the pen is equivalent to a left mouse click. This means that you would actually have to touch the graphics tablet to adjust the size of the brush. Of course, enlarging and reducing the size of the brush tip in this way is a bit tedious, because you sometimes make brushstrokes by mistake. Photoshop has a better solution. All you have to do is press the Alt keyand right mouse button. But perhaps this will be improved in future versions of Affinity Photo or at least be customizable. At the moment (with version 1.6) you can't change this.
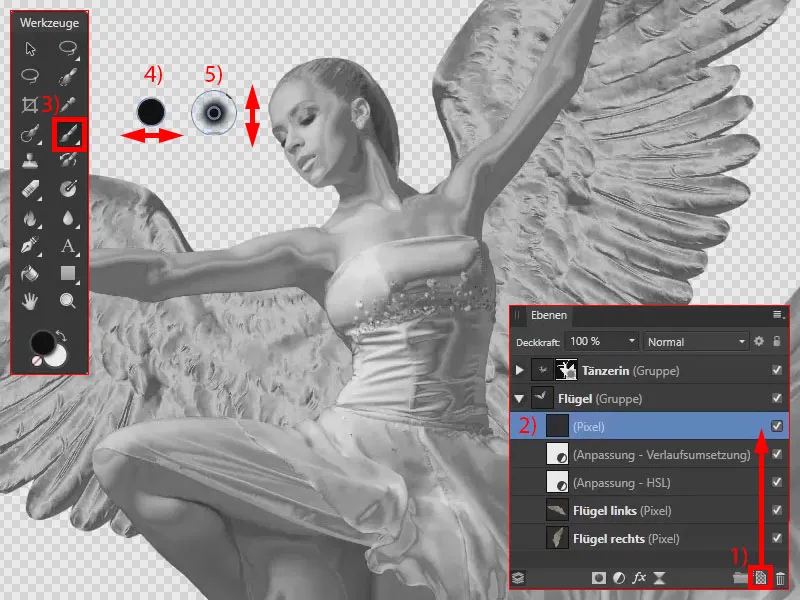
I switch to the pen and activate the pen's pressure sensitivity so that the brush tip becomes wider or smaller depending on how hard I press on the tablet. I now use black to paint the shadow into the picture. We can change the opacity afterwards.
We can see that the light is on the left and the shadow is on the right. This means that the model should cast a shadow on the wing (1). I deliberately only paint with the edge of the brush in this area so that this shadow has a nice soft gradient. As I work with a pen, I change the width of the paintbrush from time to time using the corresponding input field. The arm is slightly angled at the top (2), so I assume that the shadow will continue below the arm.
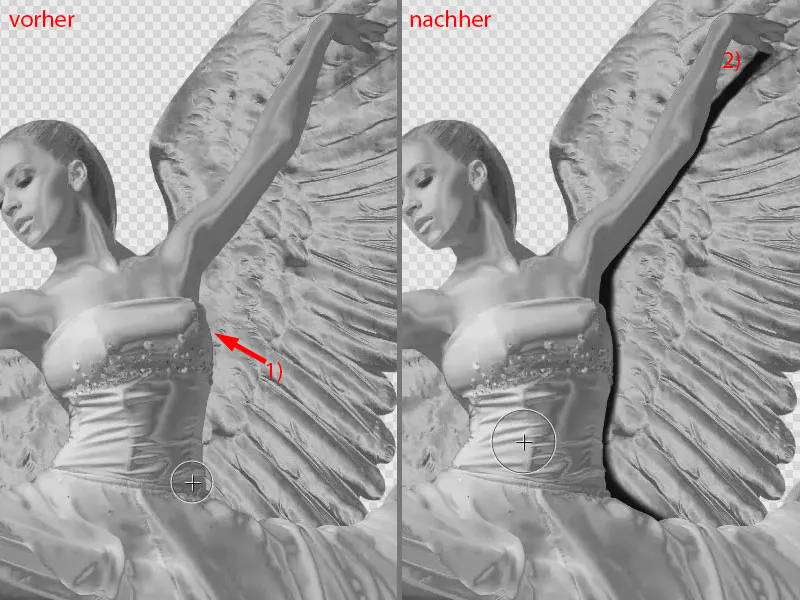
I would also like to have some shadow on the left side, although there is light here. However, the wing should appear slightly bent backwards. It doesn't merge directly into the body, but goes out to the back. The finger also has a shadow.
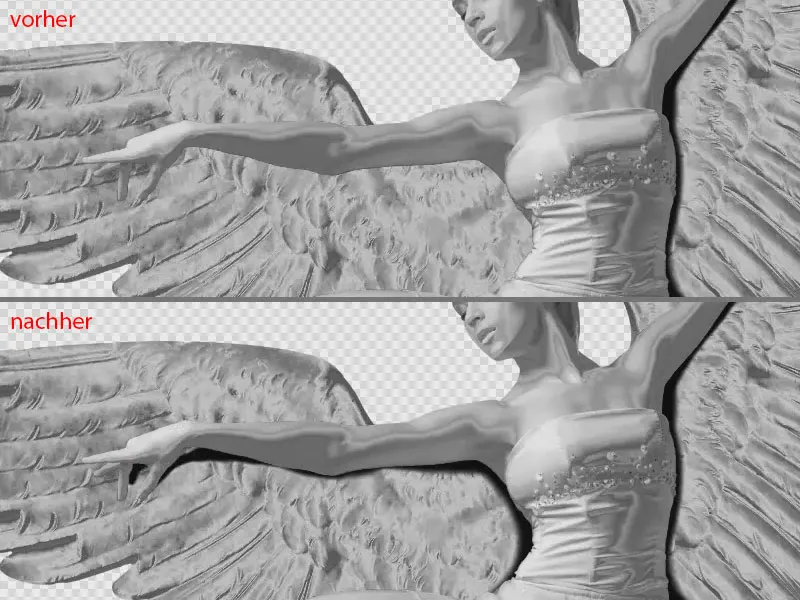
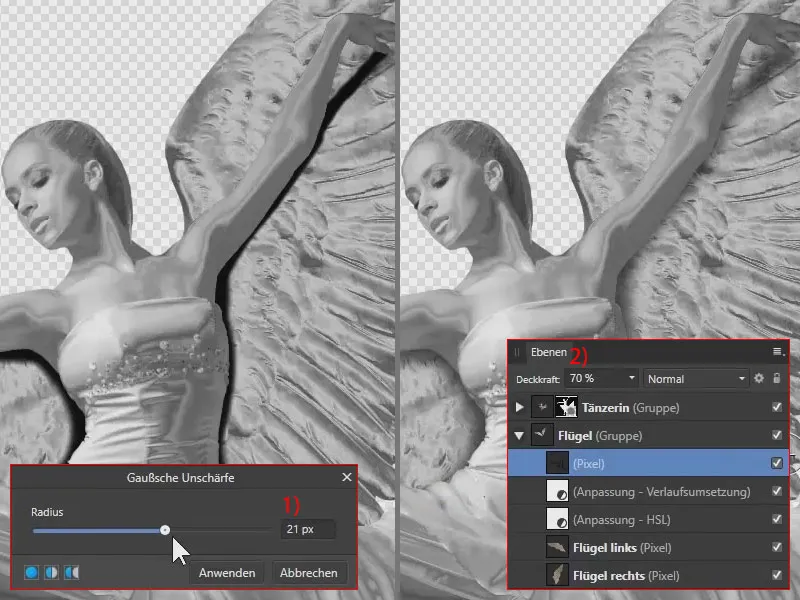
I apply the Gaussian blur to the layer under Filter>Blur. I set this to 21 px so that the shadow becomes softer (1). I also reduce the opacity of the layer to 70 % (2).
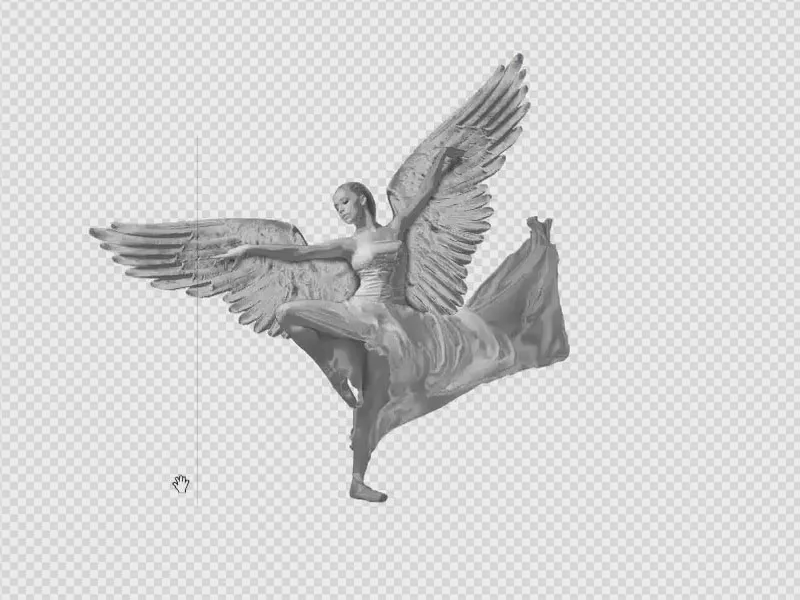
We have now assembled the angel with a uniform metallic effect and a matching shadow .
Painting and blurring shadows - summary part 10
- Create a new layer and paint the shadows on it with a black brush.
- Shortcut: Hold down Alt and both mouse buttons. Adjust the size of the brush by moving the mouse left and right. Adjust the hardness by moving the mouse up and down.
- Use the Gaussian blur and opacity to soften the shadows and make them appear softer.
> To the previous parts 6 to 8 of the tutorial
The content of this article is based on a video tutorial by our trainer Marco Kolditz:
