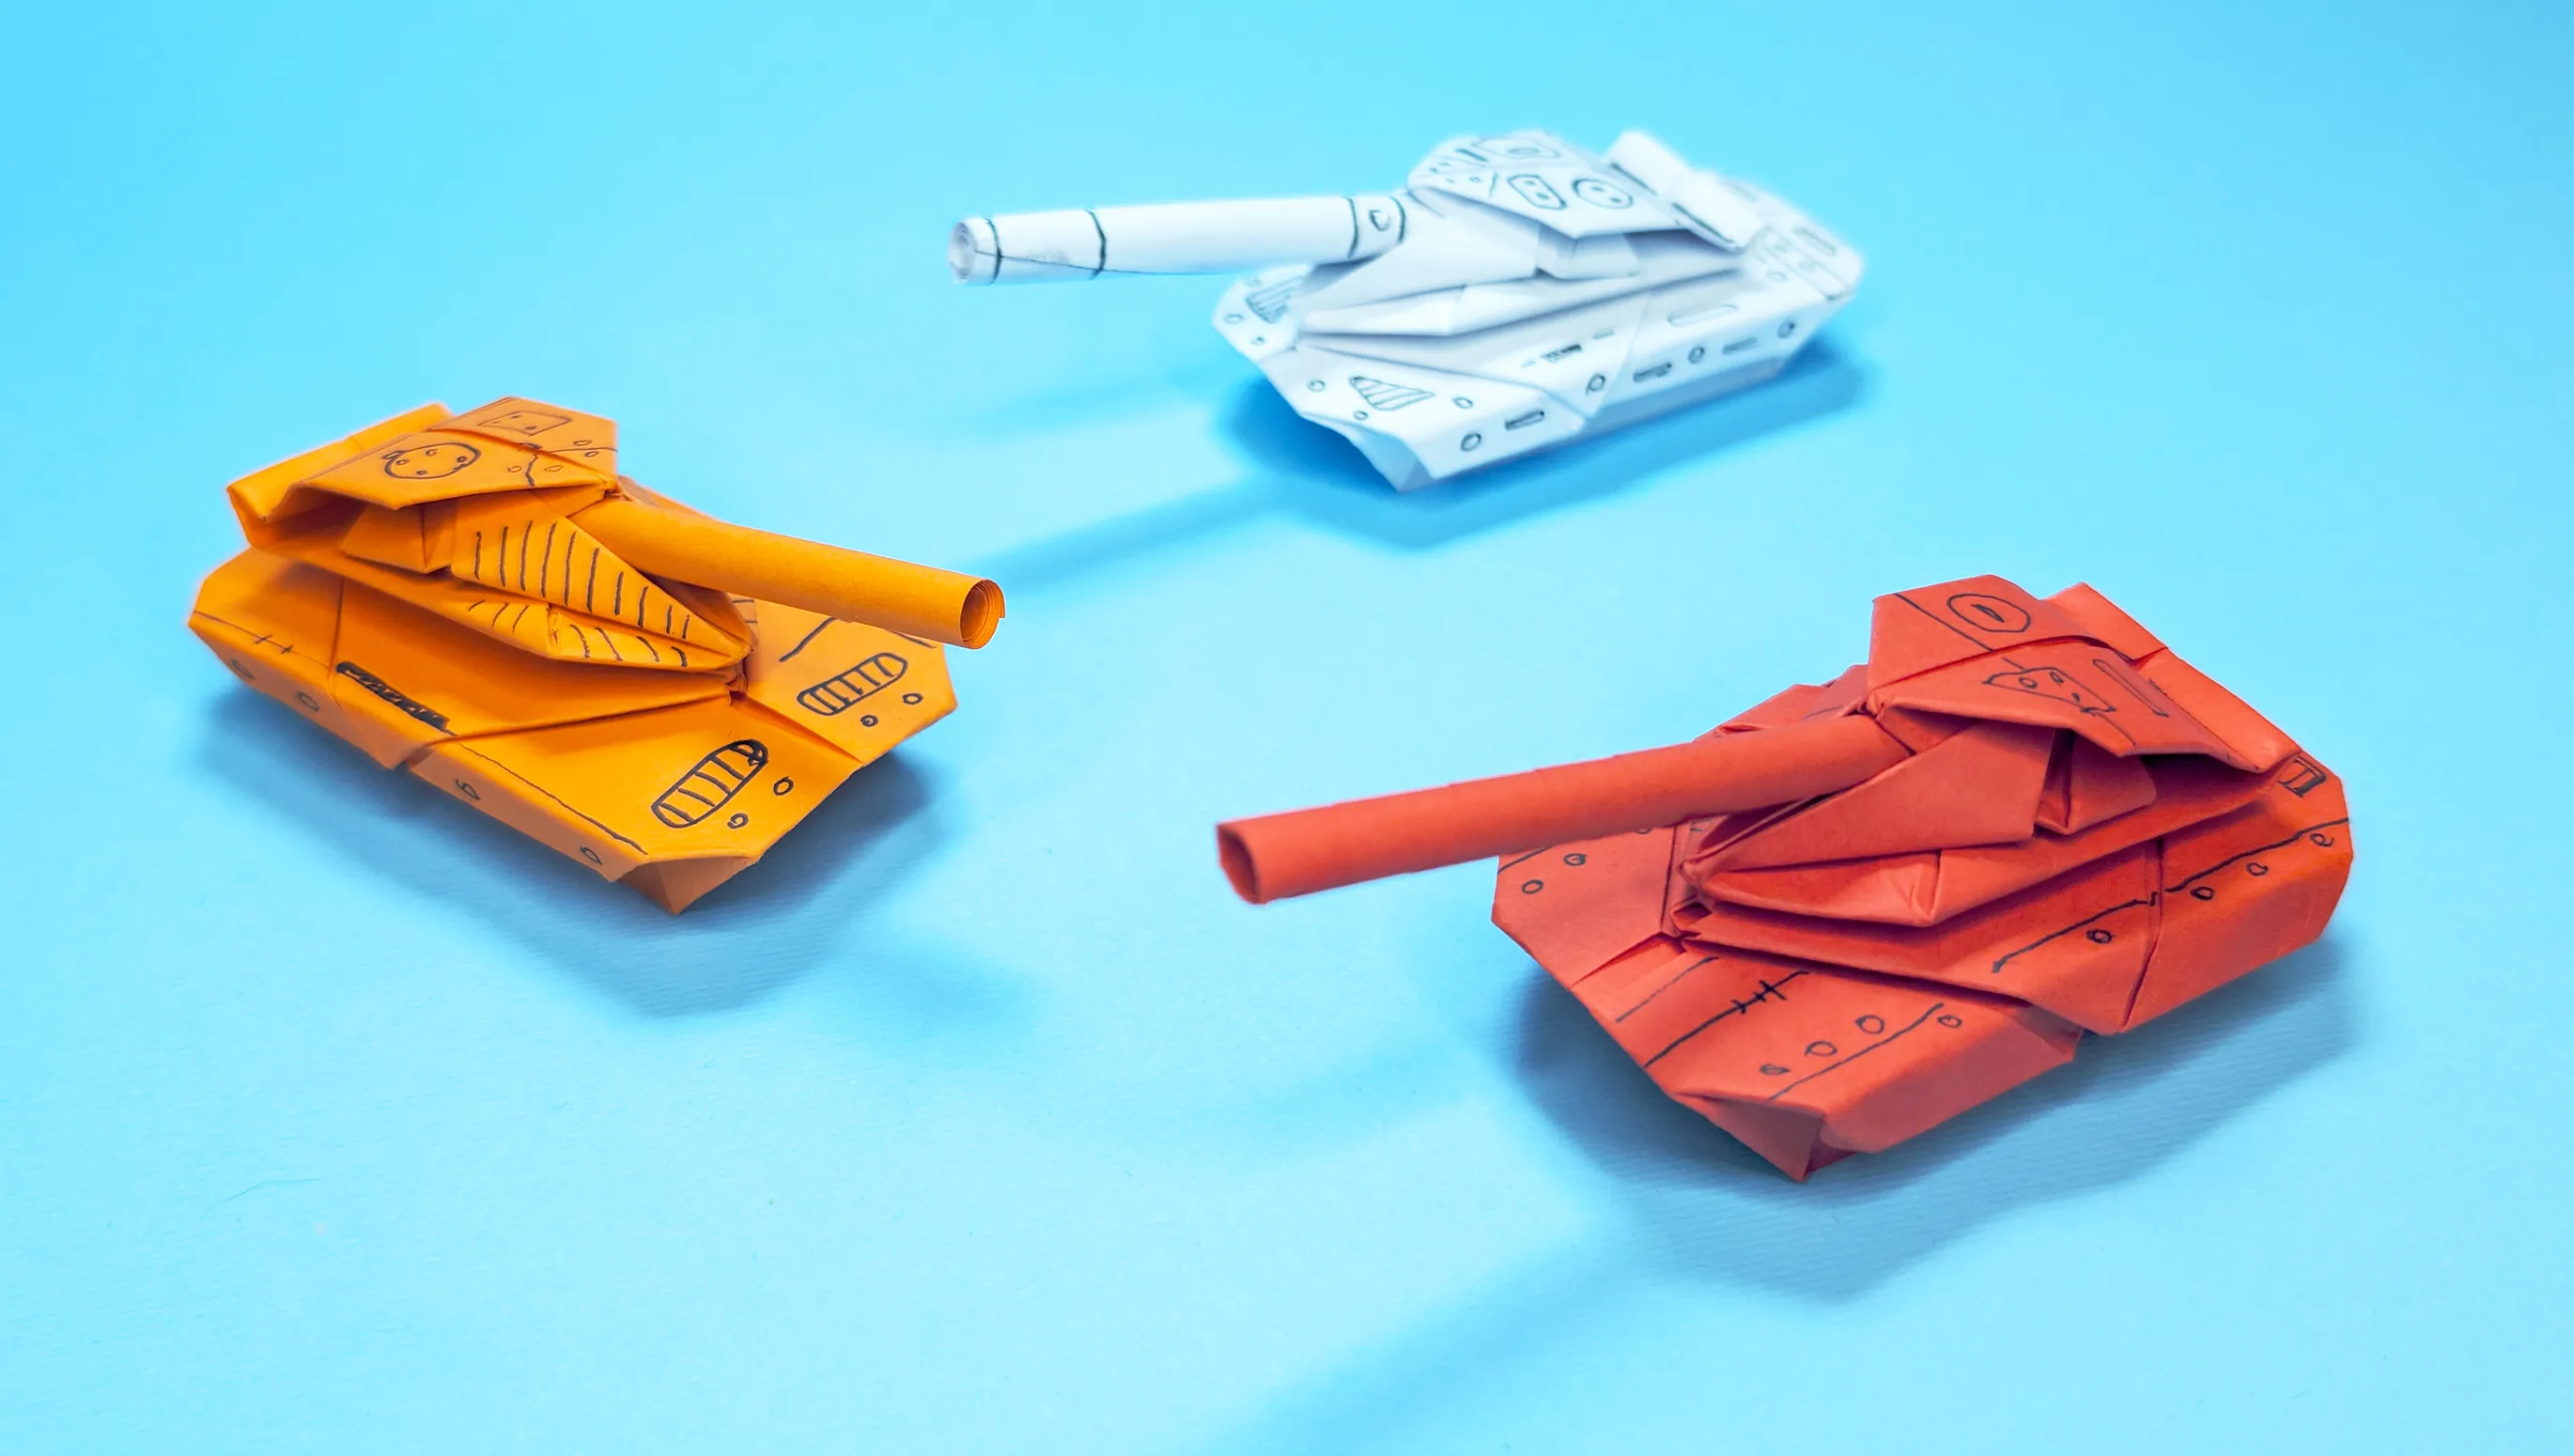
Are you looking for a step-by-step guide on how to fold a cool paper tank? You've come to the right place! With our detailed instructions, images, and video, you can't go wrong. The art of paper folding will be explained to you step by step. This origami tank is a real eye-catcher and not only fun for kids. In just a few minutes, you can turn ordinary paper into a fascinating piece of art. With our comprehensive guide, you are guaranteed to succeed!

Folding a Paper Tank: Step-by-Step Origami Guide with Photos and Description

For this amazing origami tank, you really don't need much:

  • 2 DIN A4 sheets (preferably in your favorite color)
  • Some craft glue
  • Good mood and a bit of patience

What's special about this guide: You don't need expensive specialty paper! Regular paper from your printer or colorful paper from the stationery store is totally sufficient.
Paper Tank: Step-by-step Origami instructions with photos and description. Image 1
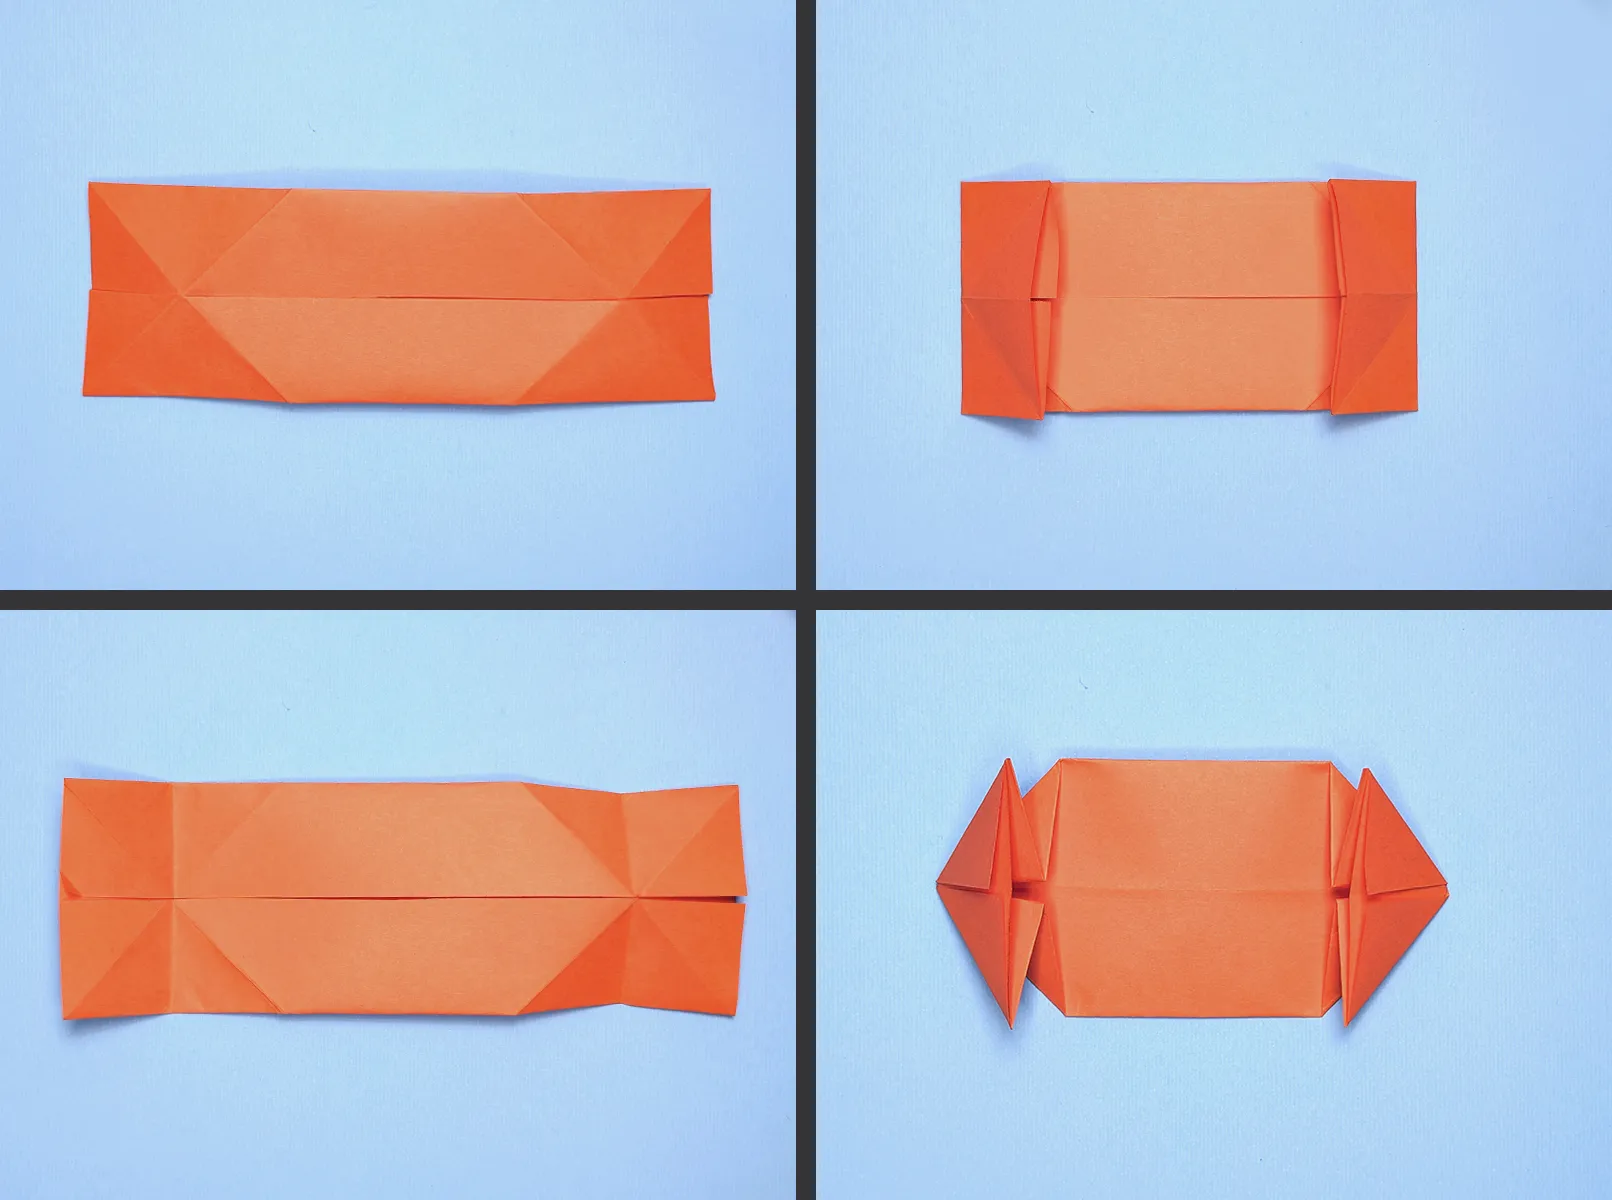
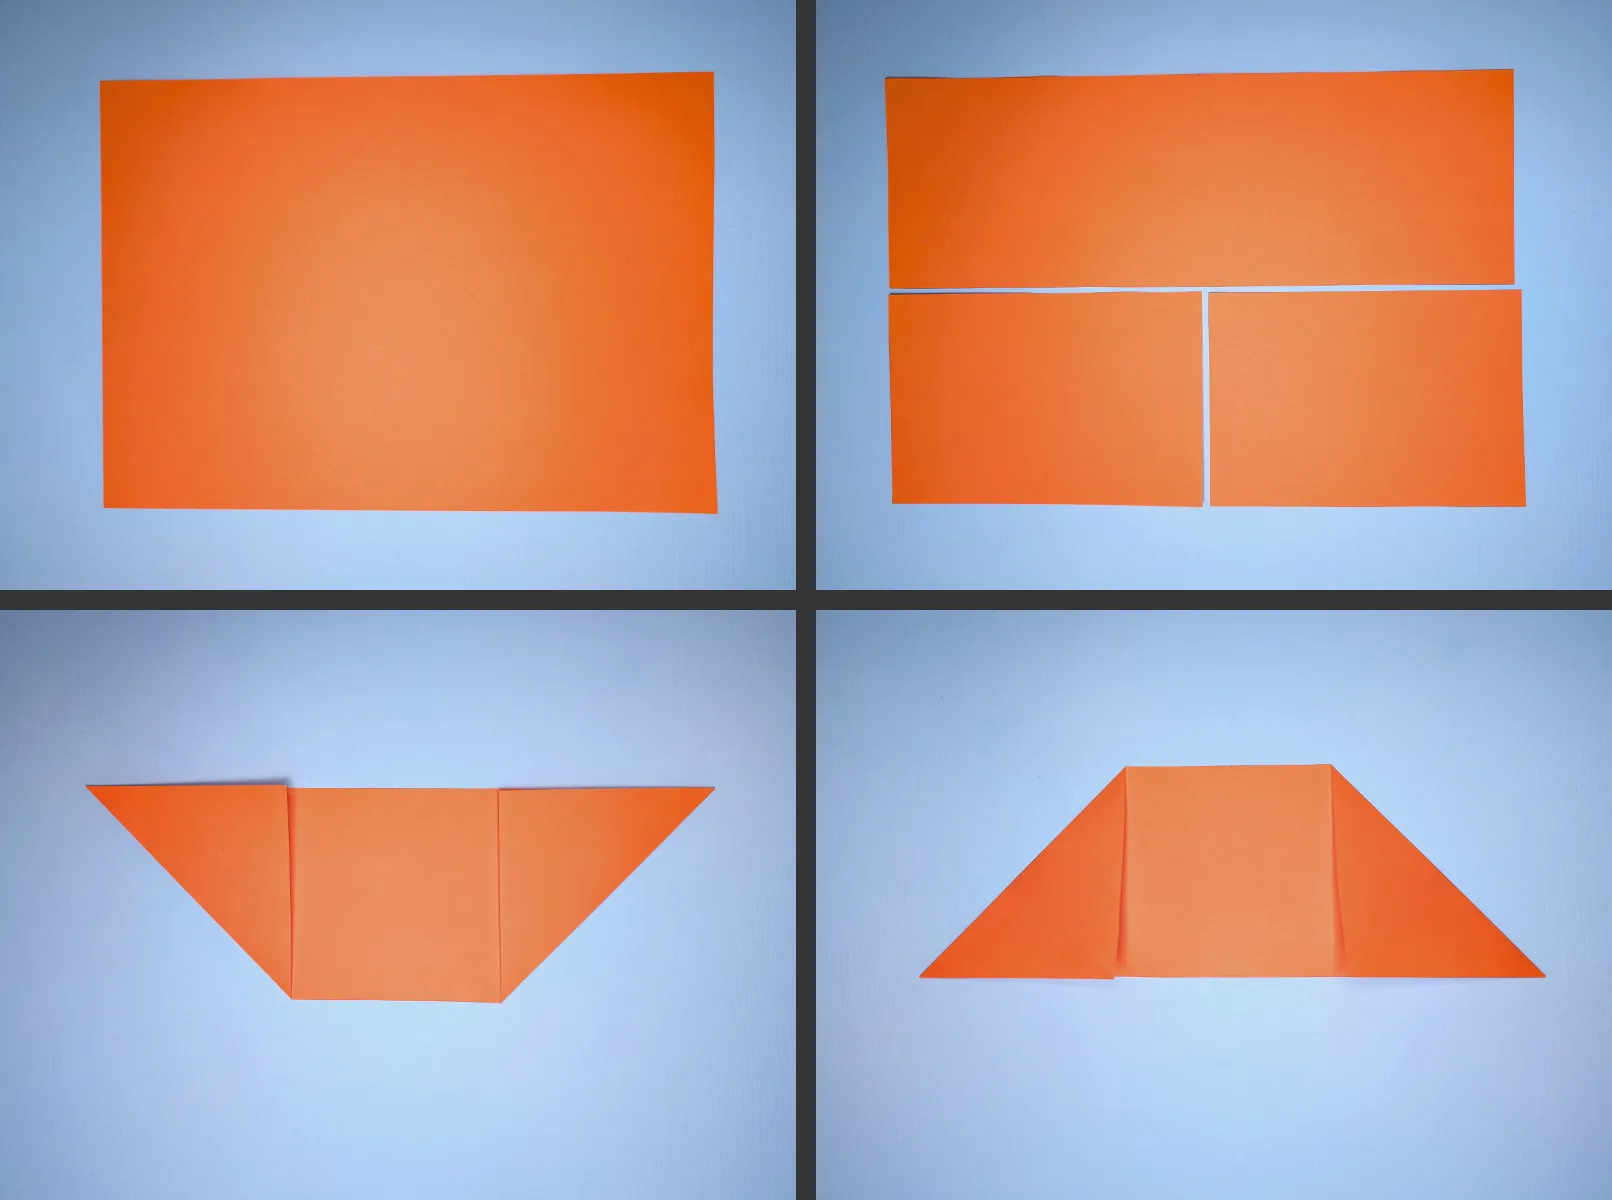
Step 1: First, divide your DIN A4 sheet into three parts. Then take the longest part and fold both sides in two parts one after the other. These fold lines are the basis for our tank.
Paper tank: Step-by-step origami instructions with photos and description. Image 2
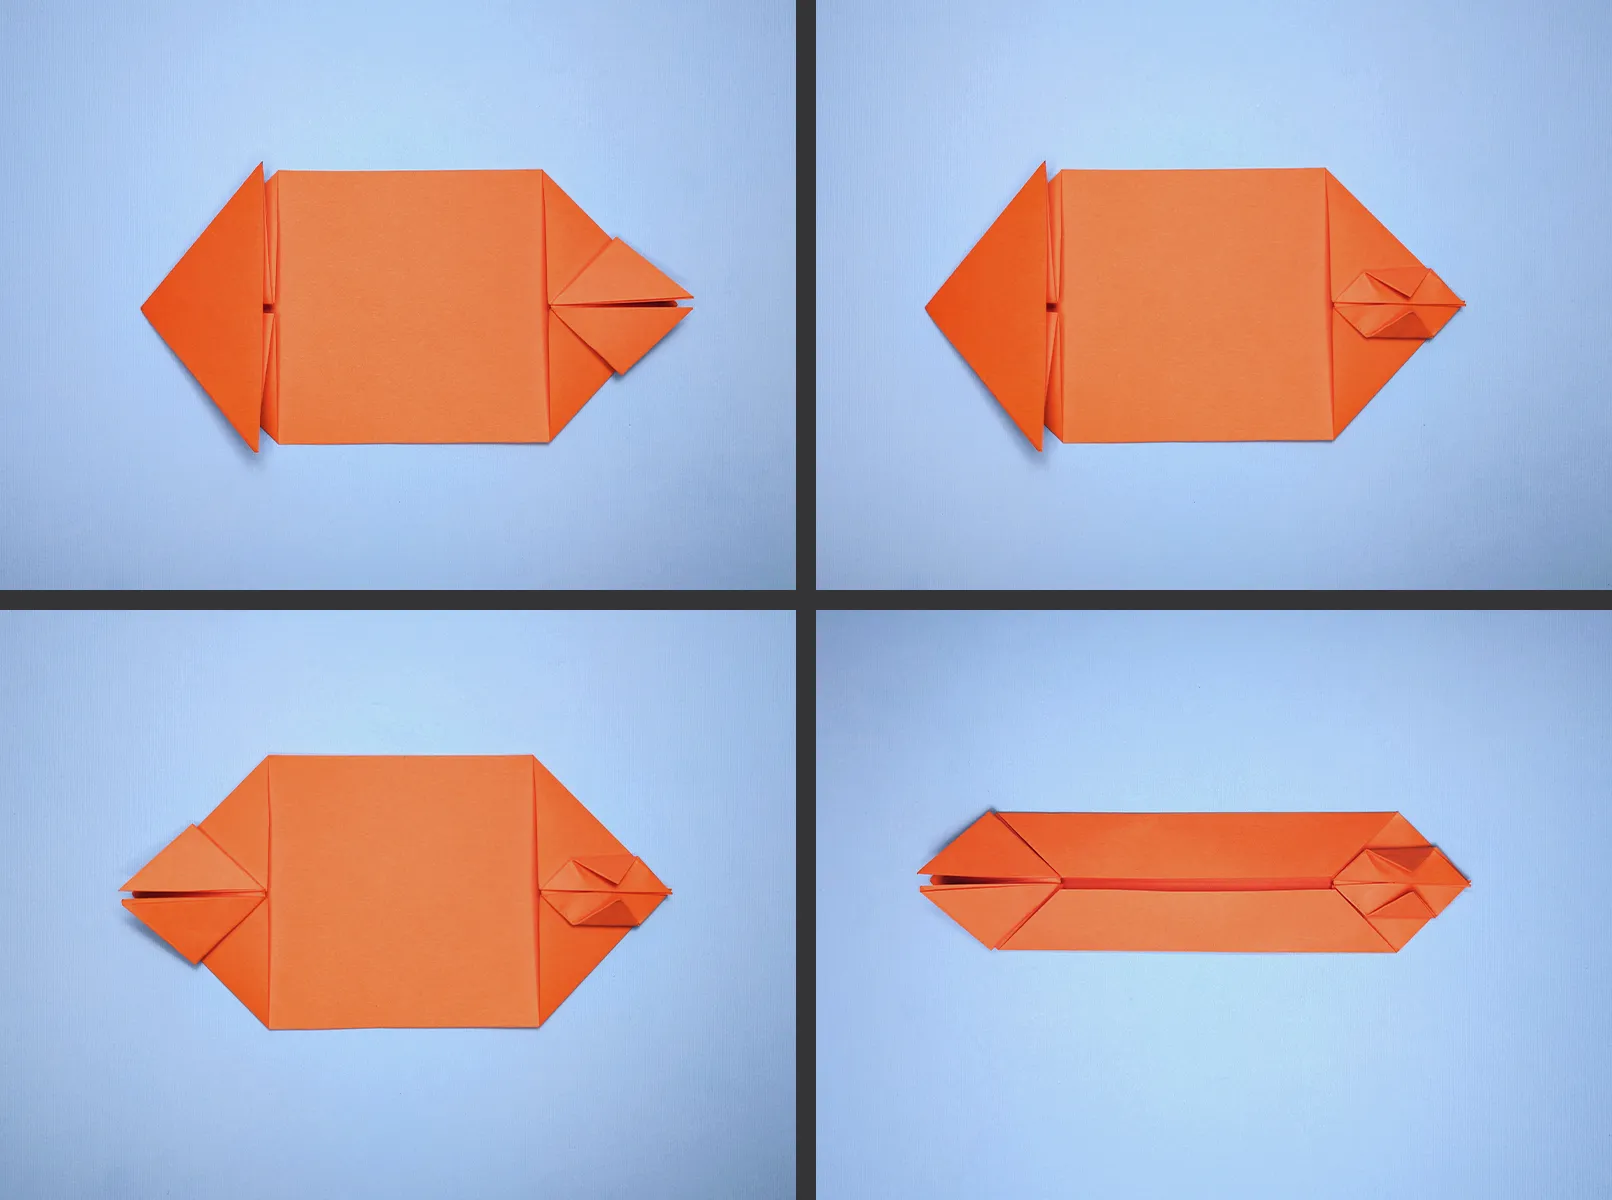
Step 2: Now fold the corners inwards along the existing fold lines. Make sure the folds are clean and precise.
Paper tank: Step-by-step origami tutorial with photos and description. Picture 3
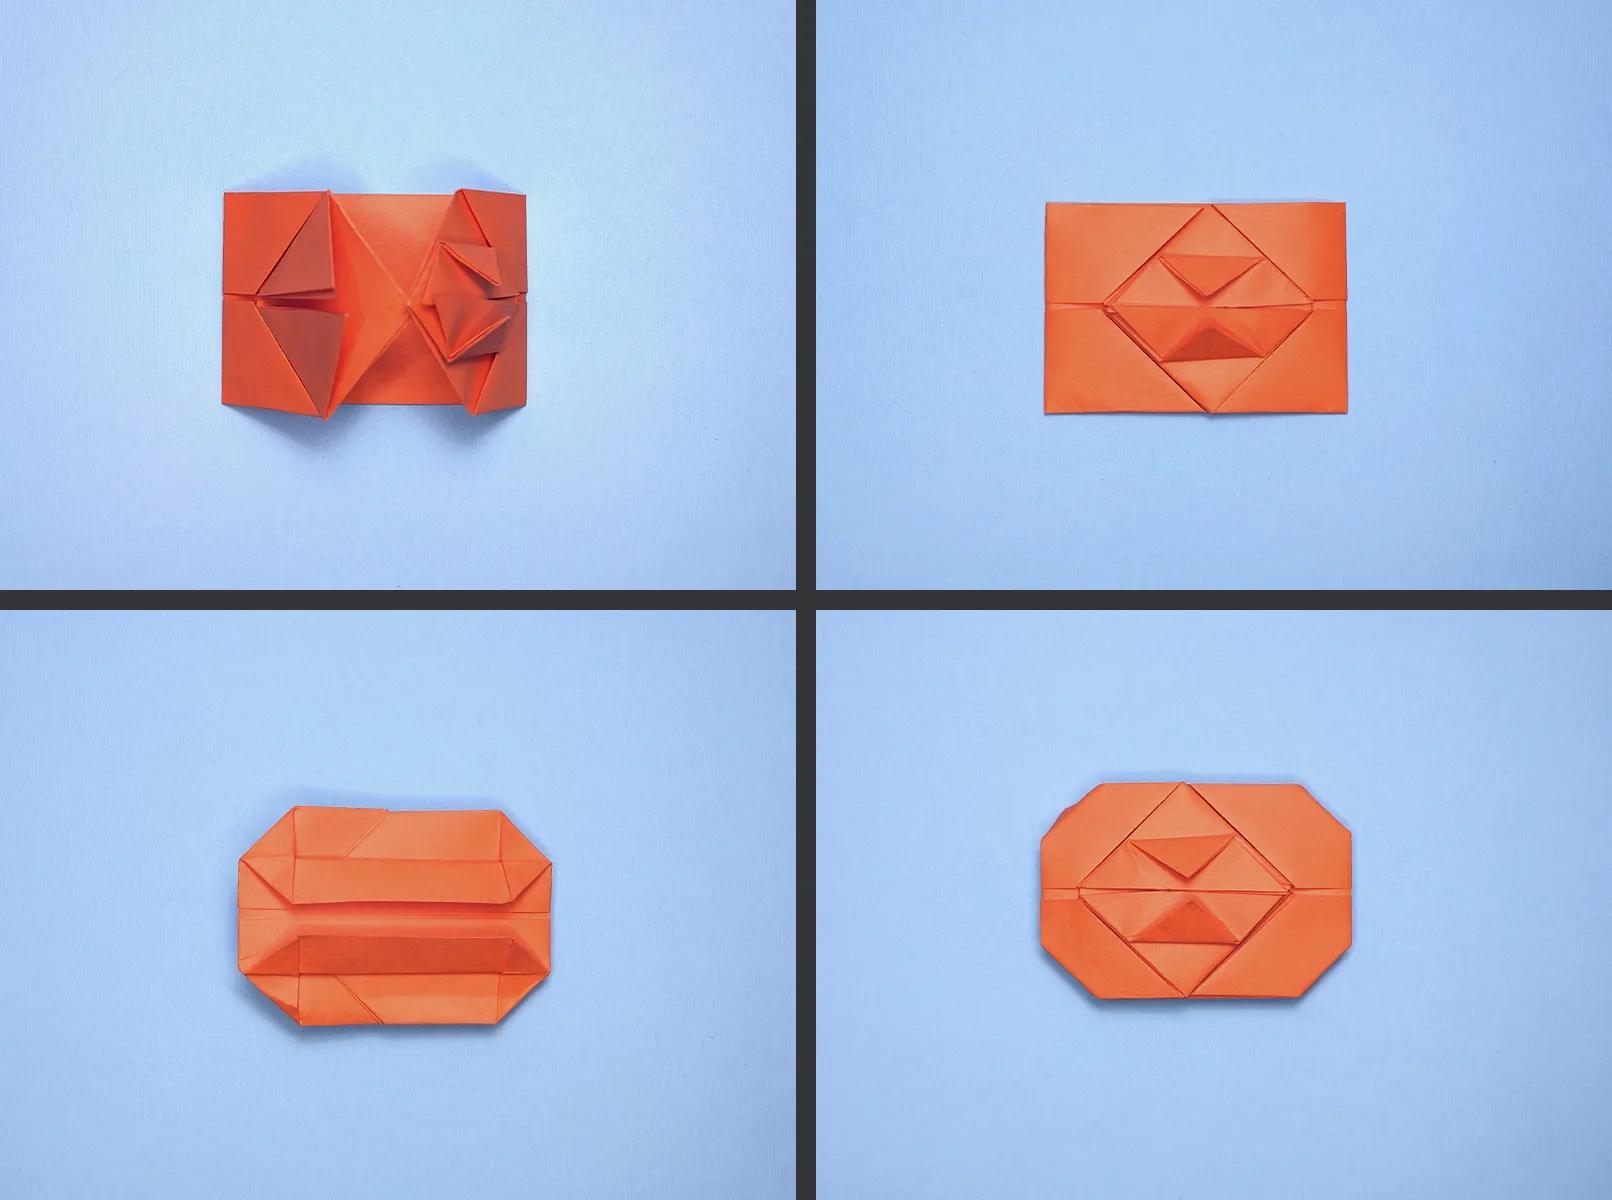
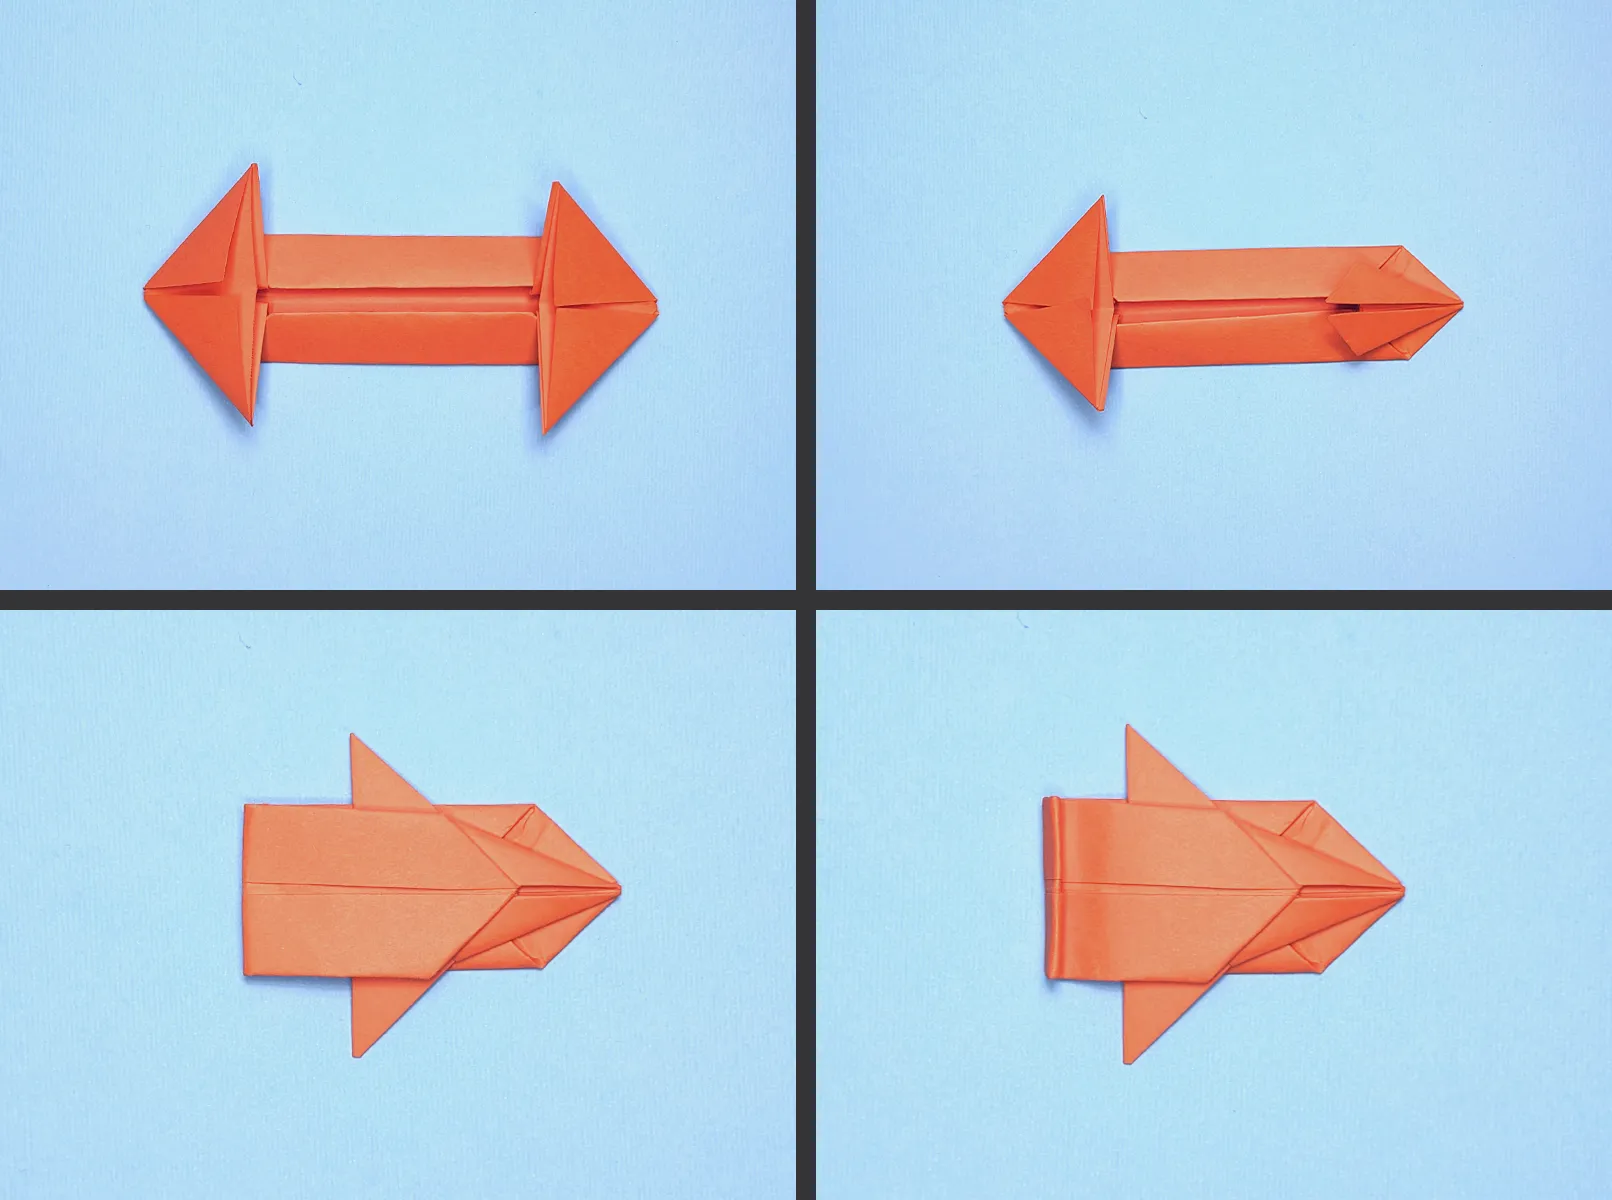
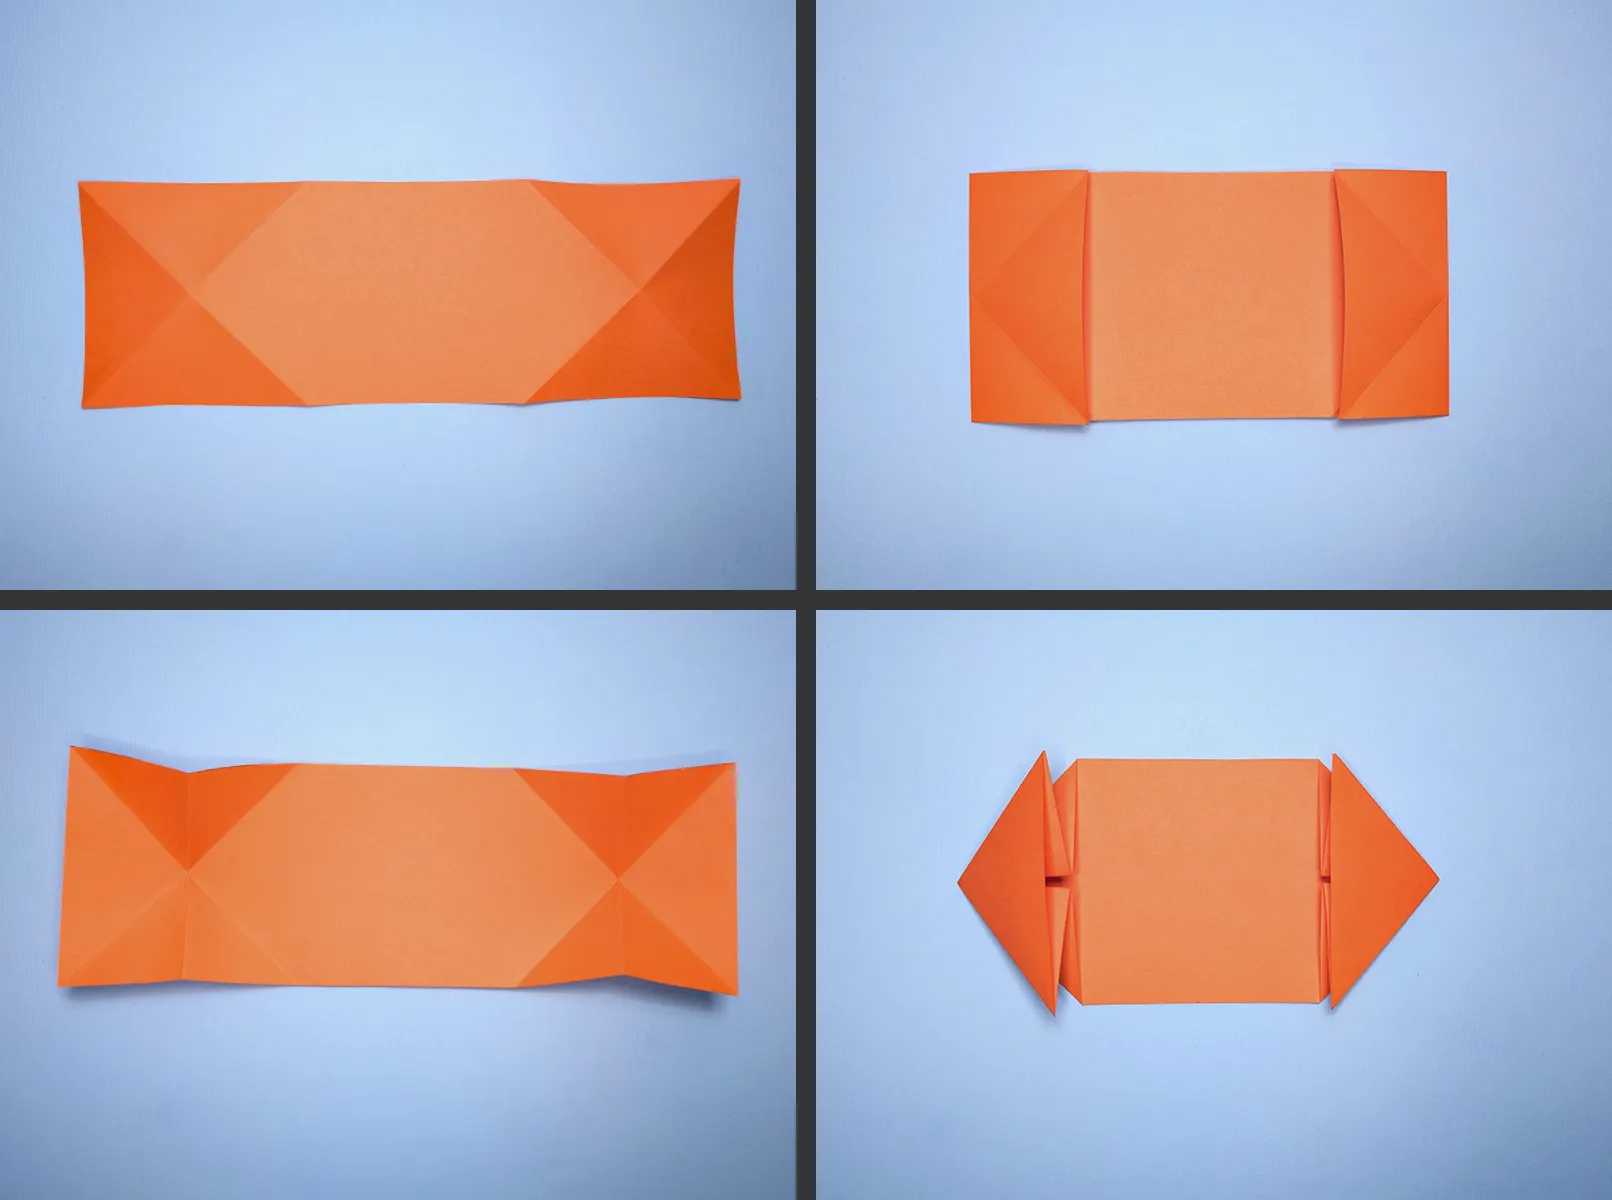
Step 3: Fold up the corners from the left and right sides. On the right side, you need to fold the corners again. Look at the photo for guidance. Then make the side parts a bit narrower.
Paper tank: Step-by-step origami instructions with photos and descriptions. Image 4
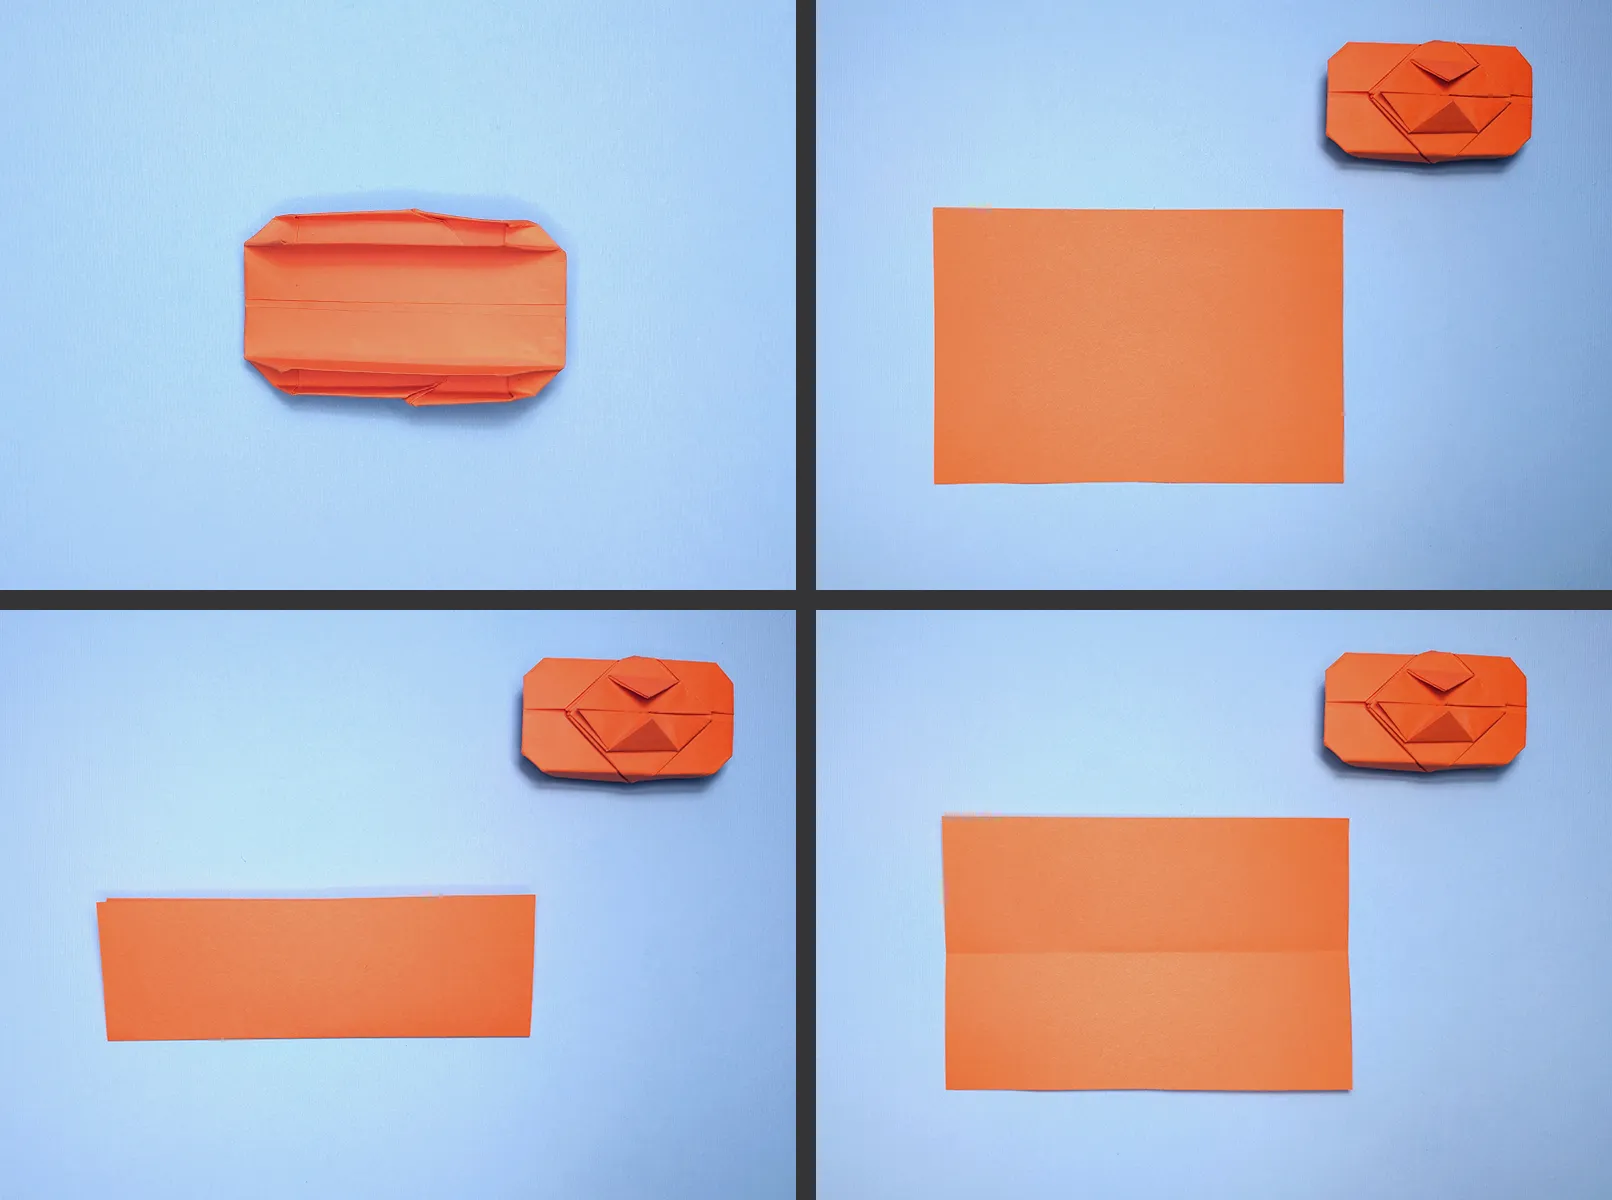
Step 4: Now connect both parts together. Turn the tank around and focus on the tracks.
Paper tank: Step-by-step origami instructions with photos and description. Picture 5
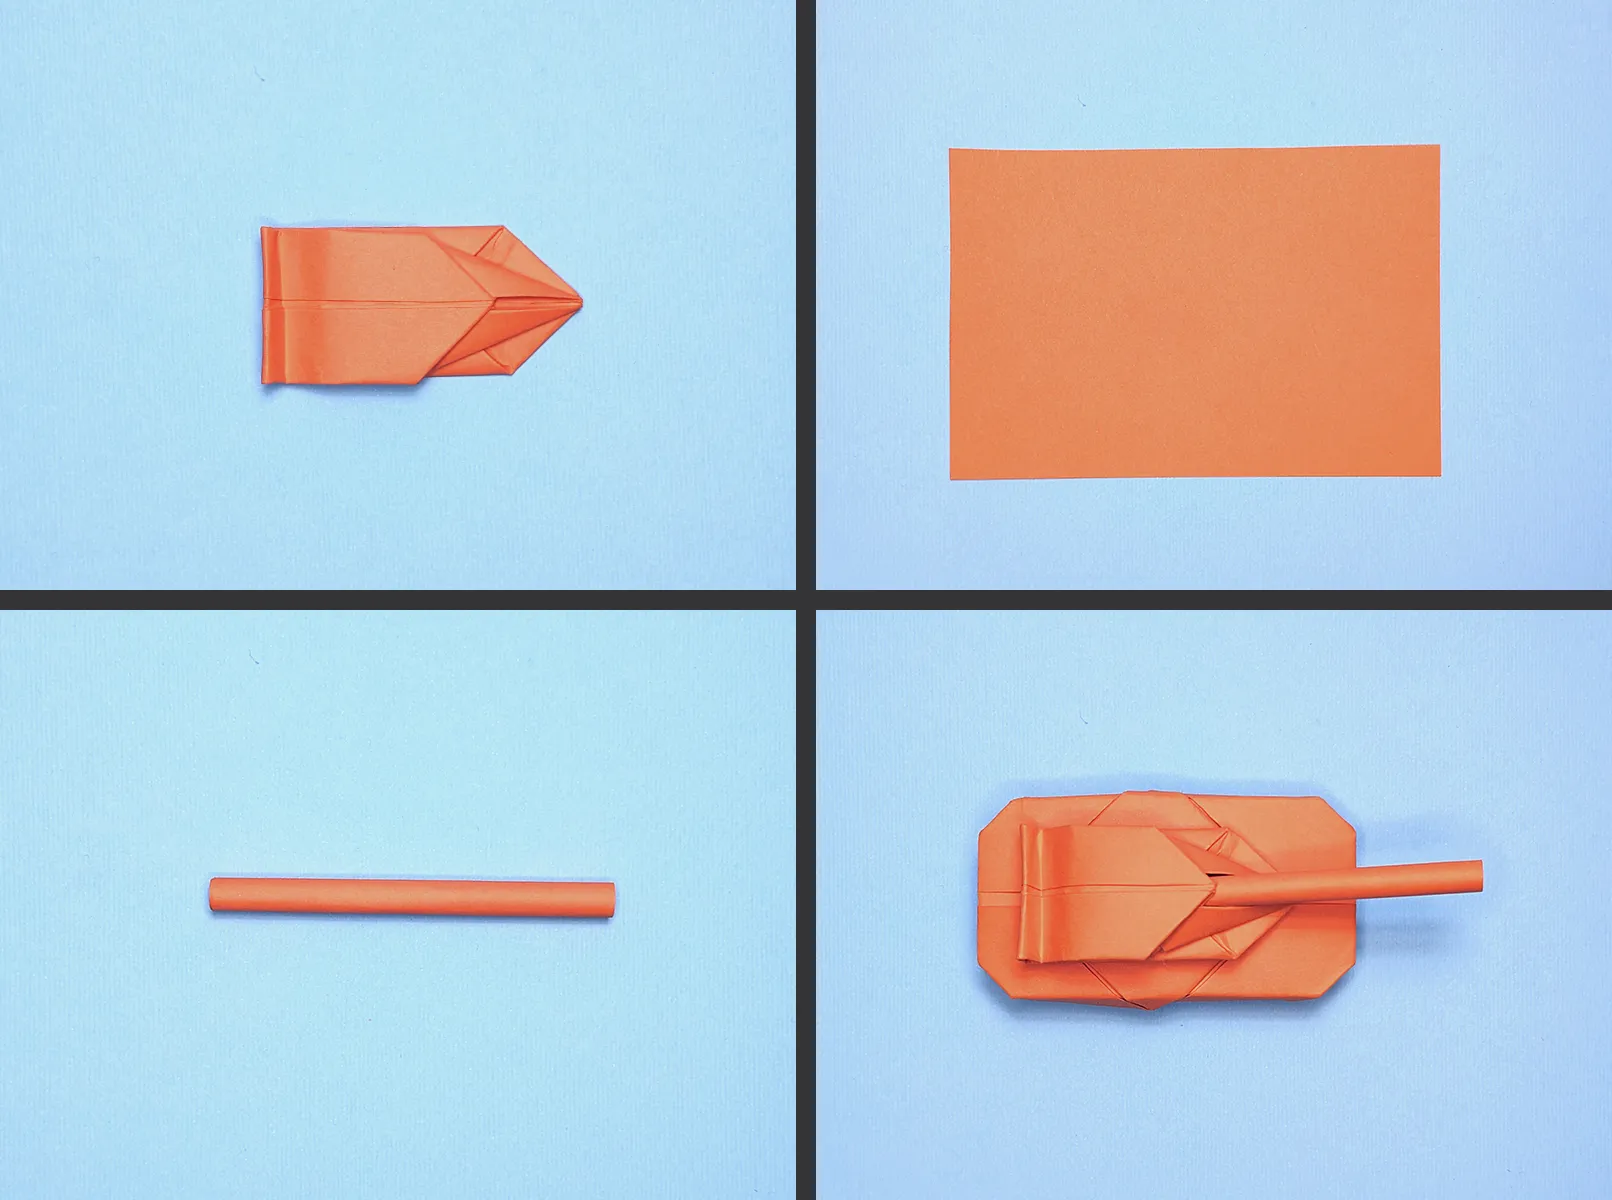
Step 5: Set the tank body aside briefly. Take a quarter of the sheet and fold it in half.
Paper tank: Step-by-step origami instructions with photos and description. Image 6
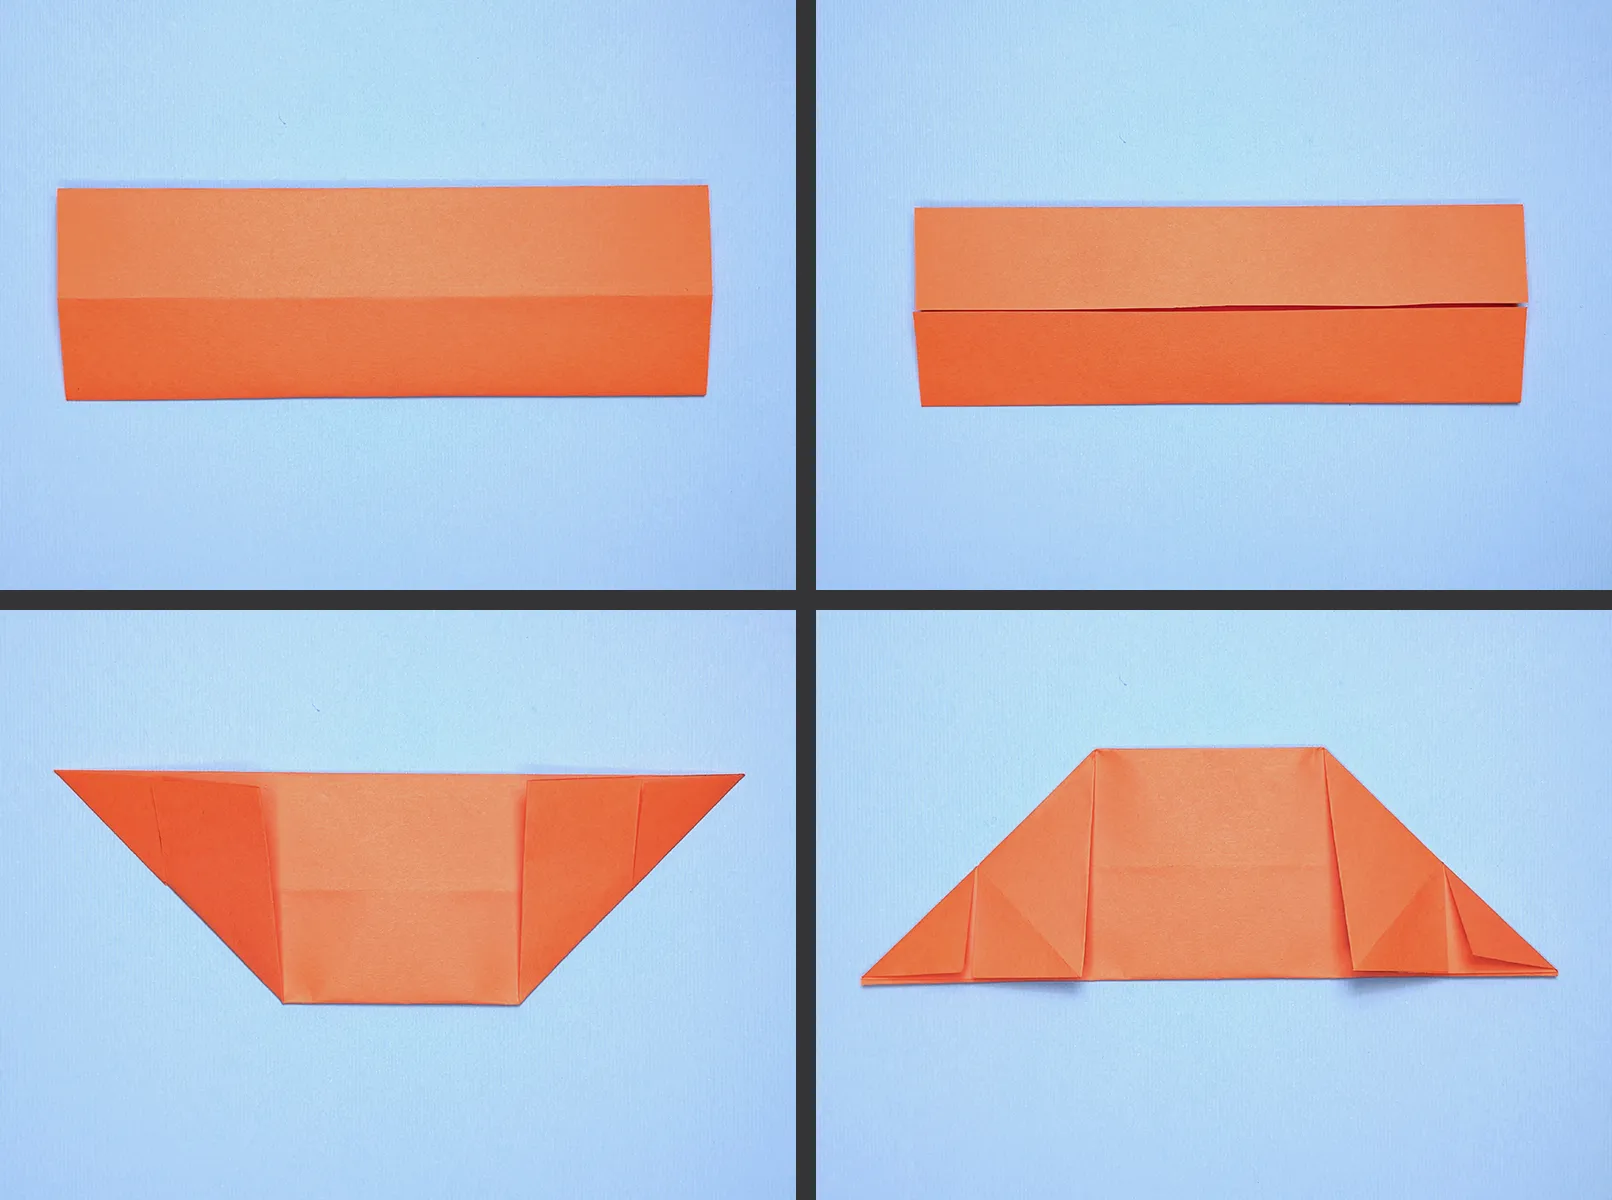
Step 6: Repeat the first steps: Fold the edges first in one direction, then in the other direction.
Paper tank: Step-by-step origami instructions with photos and description. Image 7
Step 7: Fold the side parts inwards - just like we did before.
Paper tank: Step-by-step origami instructions with photos and description. Image 8
Step 8: Now comes a special step: Fold the two edges on the right side backward instead of forward. Then connect the two ends together. This origami figure is called "Car" - we even have a separate video for that!
Tank made of paper: Step-by-step origami guide with photos and description. Image 9
Step 9: Roll the cannon barrel out of the third piece of paper and assemble all parts. You can see exactly how to do this in the video.
Paper tank: Step-by-step origami instructions with photos and description. Picture 10
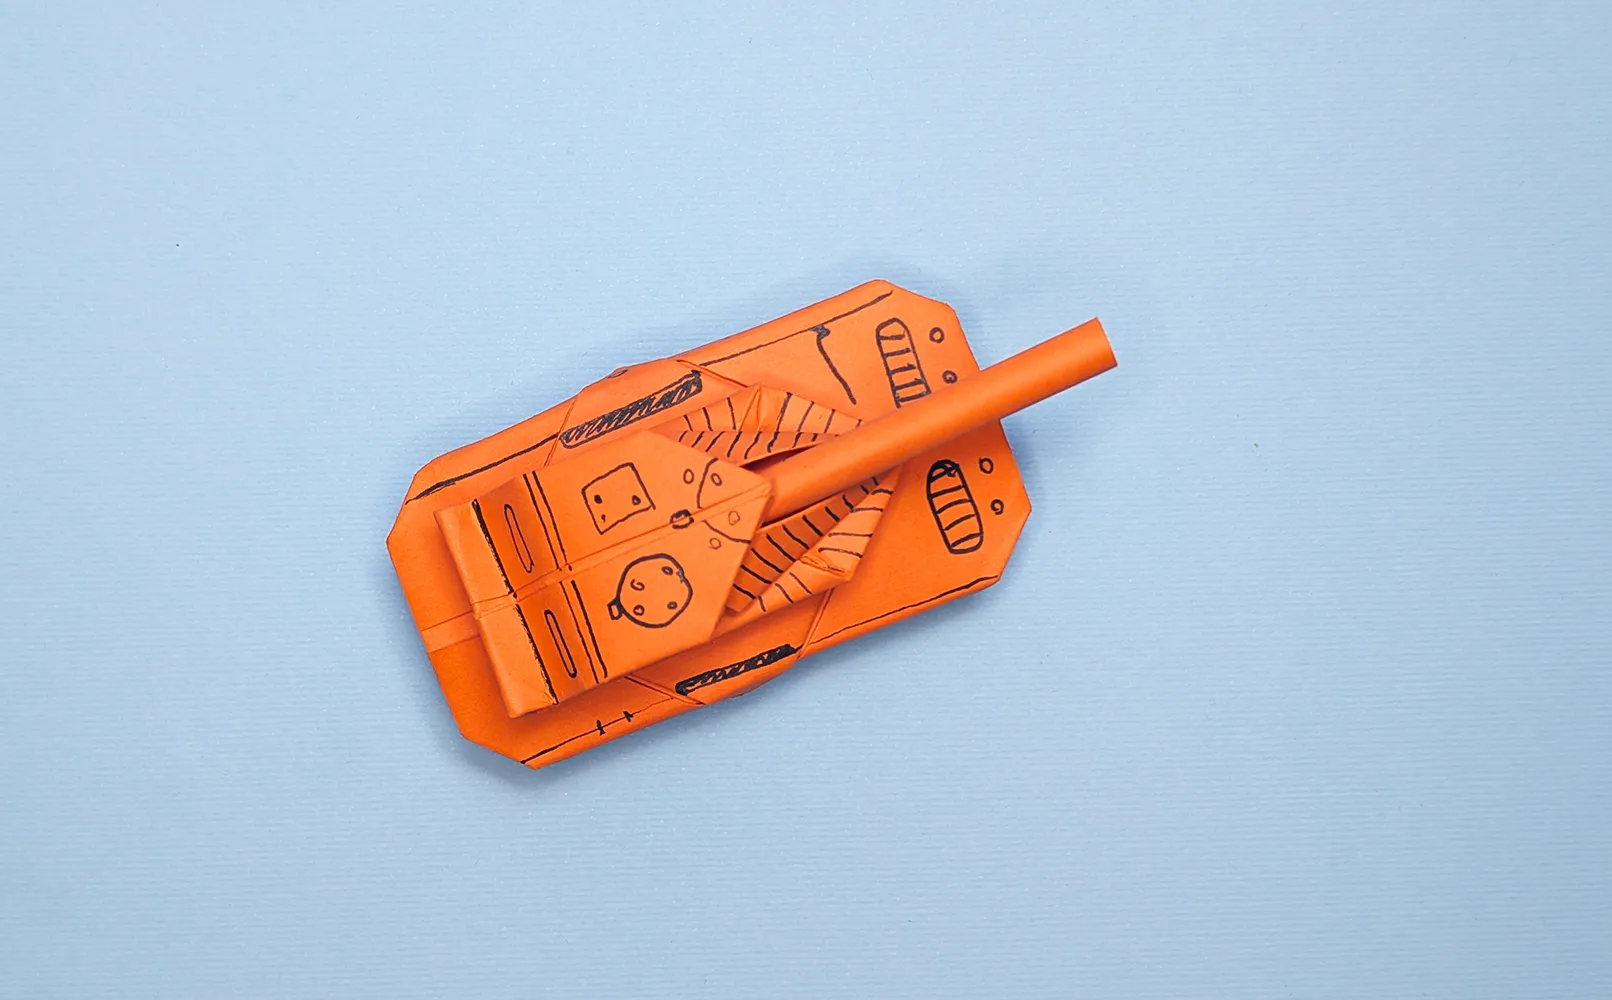
Step 10: Now it's time to get creative! Take your pen and draw cool details on your tank. Look at how awesome it turned out!
Paper tank: Step-by-step origami instructions with photos and description. Image 11
Step 11: A tip at the end: Make several tanks in different colors - it makes the playing even more exciting!

Folding a Paper Tank: Conclusion

As you can see, folding a cool paper tank is not that difficult! The art of paper folding is simply fun, and the result is truly impressive. But that's not all - on our platform, you will find many other exciting origami tutorials. From other amazing origami to creative napkin folding techniques for your dining table, you will find everything there.

h_1146,h_1147,h_1157,h_906,h_987

Fold tank origami from paper: Instructions with photos and video

Published on by Vitalii Shynakov
Published on:
From Vitalii Shynakov
Vitalii Shynakov has been working in the areas of online retail, marketing and customer satisfaction since 2012. Until 2022, he was the head of personnel development and online sales department of four successful stores. He has been part of the TutKit.com team since 2024.