Making paper bags: A simple crafting activity with children for Christmas
Would you like to wrap a gift in a special way? With homemade bags , you can make the packaging not just an addition, but part of the gift. It only takes 5-7 minutes to make and the joy of the result will be remembered for a long time. Crafting with children at Christmas is a wonderful way to increase the anticipation of the festive season. The homemade gift bags not only make children's eyes light up, but also create special memories of the pre-Christmas period together.
Children particularly enjoy this process: they love getting involved in creative tasks, painting, decorating and contributing their own ideas. This craft project is a wonderful way to spend time with the family and create something beautiful and useful in the process. Advent is the perfect time to get creative together and personalize gifts for loved ones.
For celebrations, making bags is an excellent choice for wrapping small items: sweets, jewelry or small toys. The handicraft emphasizes your care and gives each gift a personal touch.
Making bags: Materials and tools
You only need three things to make bags:
- Colored paper in A4 format - the basis of our bag. It's best to choose thicker paper so that the craft project is stable.
- Glue - normal school glue is sufficient.
- Felt-tip pens or colored pencils - to decorate the bag.
You can easily find these materials at home or in the nearest store. If you want to let your imagination run wild, you can also use decorative elements: Ribbons, glitter or stickers.
Safety rules
A glue stick or craft glue is best for making bags. Both are childproof and suitable for paper. The glue stick can be applied cleanly, does not stick to the hands and dries quickly, which makes the process easier. Craft glue should be applied thinly to avoid staining and excess glue can be easily removed with a damp cloth.
To keep the work area clean, cover it with paper or a tablecloth. This prevents soiling and gives the child more creative freedom. A prepared workspace helps with concentration and avoids unnecessary mess.
Step-by-step instructions for making bags
1. start with the top edge
Lay the colored paper horizontally. Fold the bottom edge by 1-1.5 cm and carefully glue the strip in place. Use a glue stick to avoid staining the paper. This reinforces the bottom edge of the bag and gives it stability.
Tip: Use a ruler for a straight folded edge. This helps to achieve a clean result.
2. create the envelope shape
Turn the paper over and fold it into three equal parts. Divide the sheet visually into three strips. First fold one side to the center, then fold the second side so that it overlaps the first. Tape the joints with glue or double-sided tape.
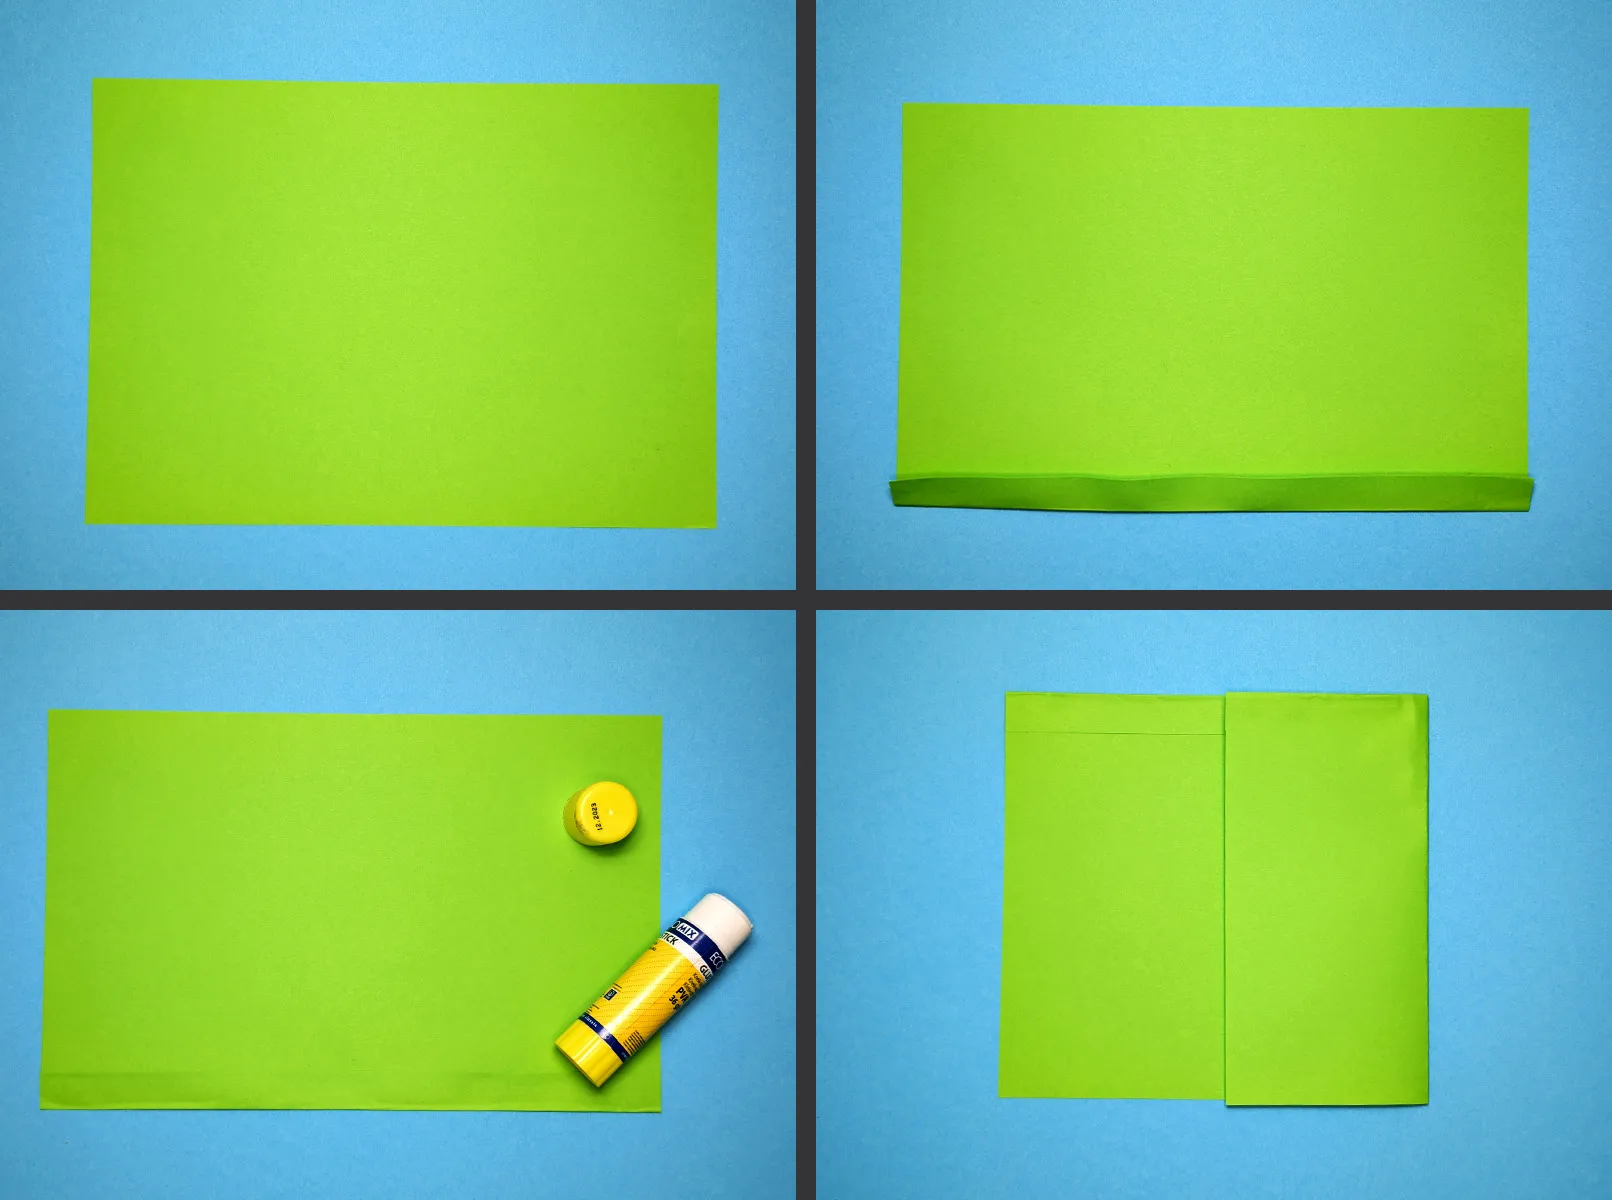
Tip: If it is difficult to divide the sheet evenly, make light pencil marks.
3. preparation of the base
Take the lower part of the resulting envelope and fold it upwards by about 3-4 cm. This prepares the base for the soil to form.
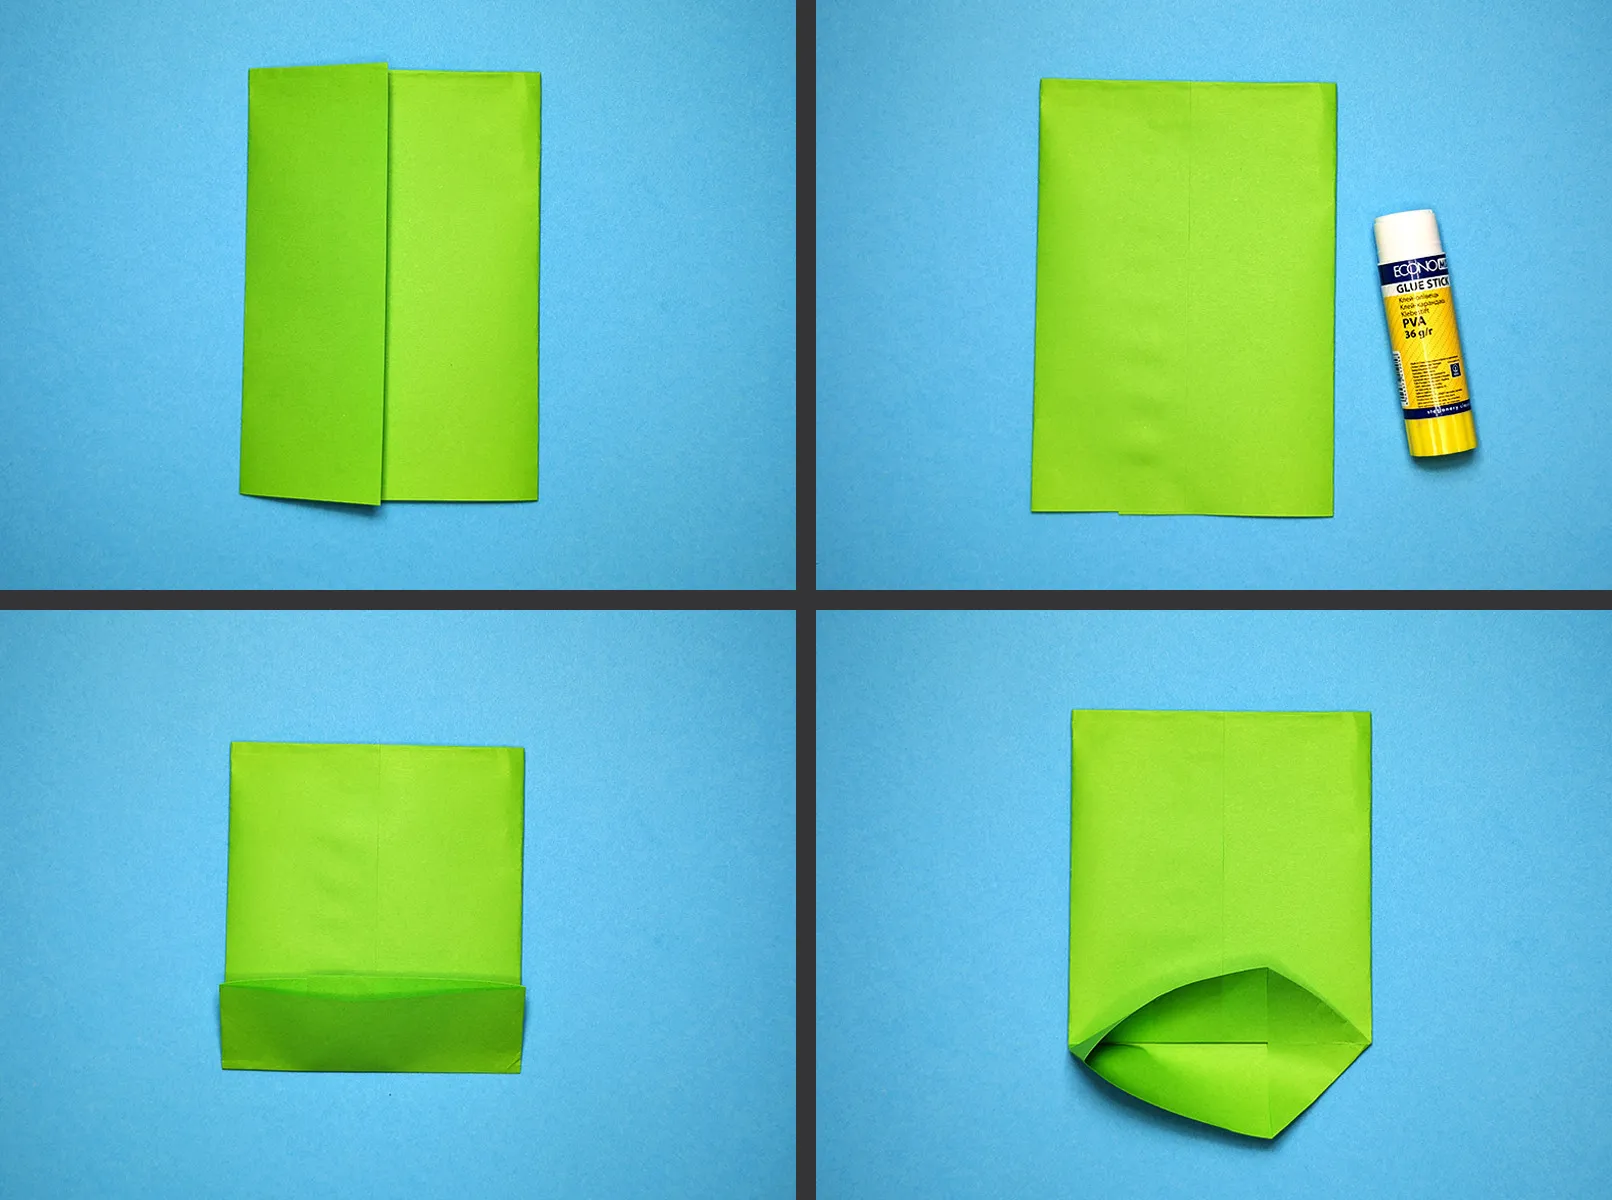
Tip: At this stage, the folds should be straight so that the finished bag looks neat.
4. opening and forming the base
Unfold the folded part and smooth it out on the sides to create a rectangle. You get a kind of open square.
5. glue the bottom together
Fold the opposite corners of the rectangle inwards so that they overlap. Glue the joints together with glue stick or craft glue and press them down lightly until they are completely dry.
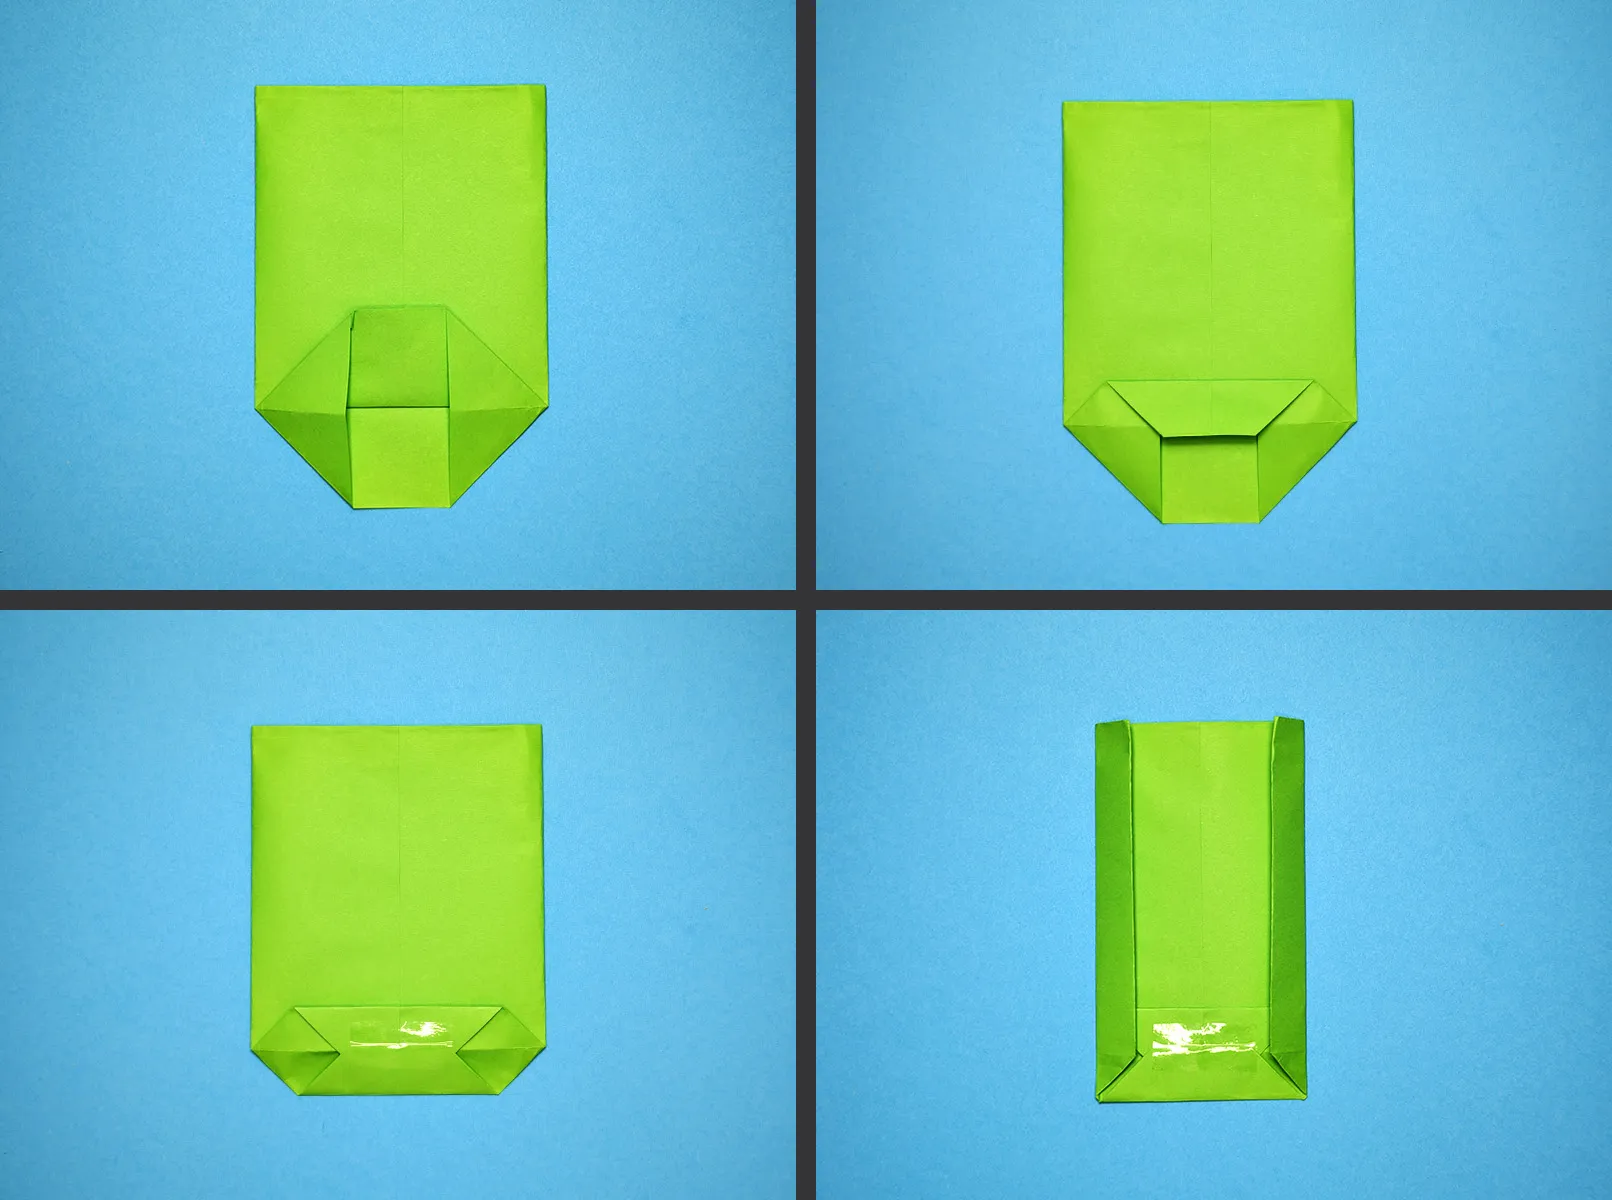
Tip: You can insert a piece of cardboard for a stable base.
6. give the bag volume
Fold the side edges inwards by about 1-1.5 cm to create volume. To do this, fold the edges of the bag to about half its width. This gives the craft project volume and makes it roomier.
Tip: Smooth out the folds with your fingers or a ruler so that the shape holds well.
7. final details for the side edges
Fold out the side edges so that they go inside the bag. Now you can see how the bag takes on volume. This completes the basic shaping.
Tip: If the folds are hard, you can use a soft cloth to smooth out the paper without damaging it.
8. check the shape and align
Align the finished bag to make sure it keeps its shape. If necessary, correct the creases or add some glue in places where the joints may not be tight enough.
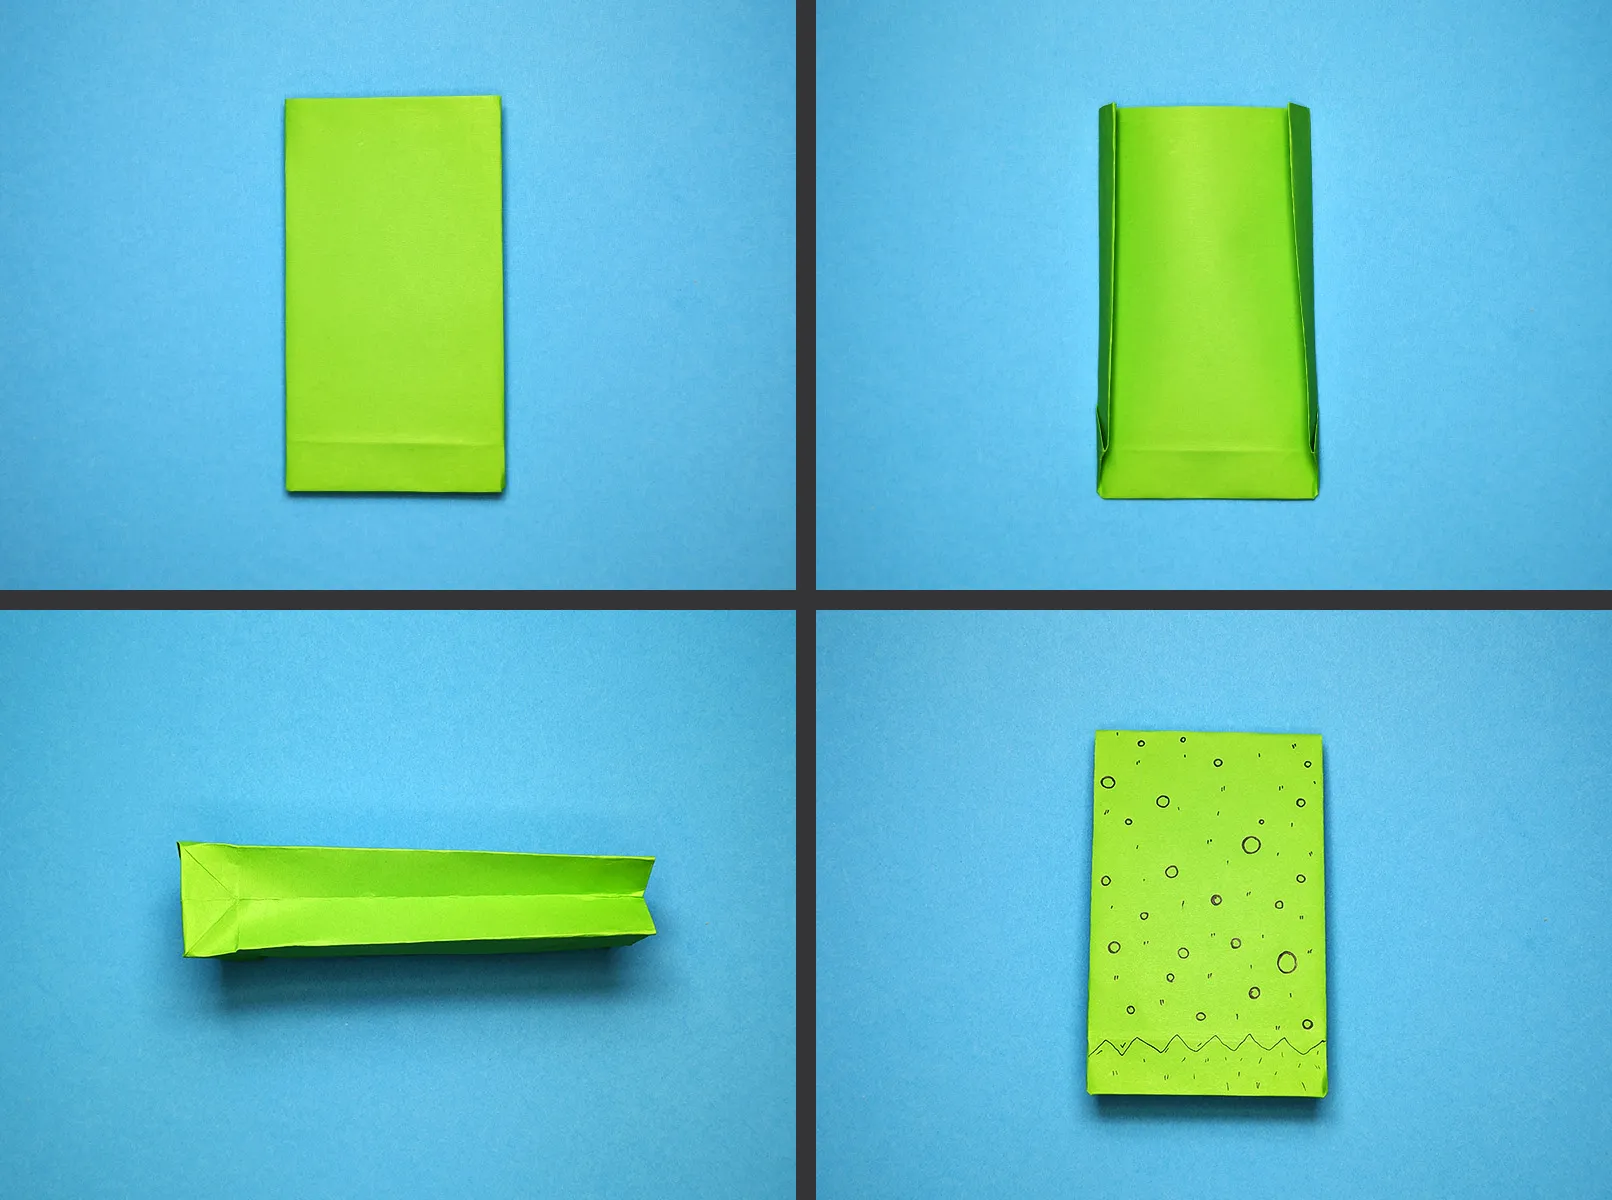
Tip: Let the bag dry a little before decorating so that the glue hardens completely.
9. decorate the bag
Now it's time to get creative! Use felt-tip pens, stickers or crayons to add drawings or patterns. These can be hearts, stars, congratulations or other elements that you like.
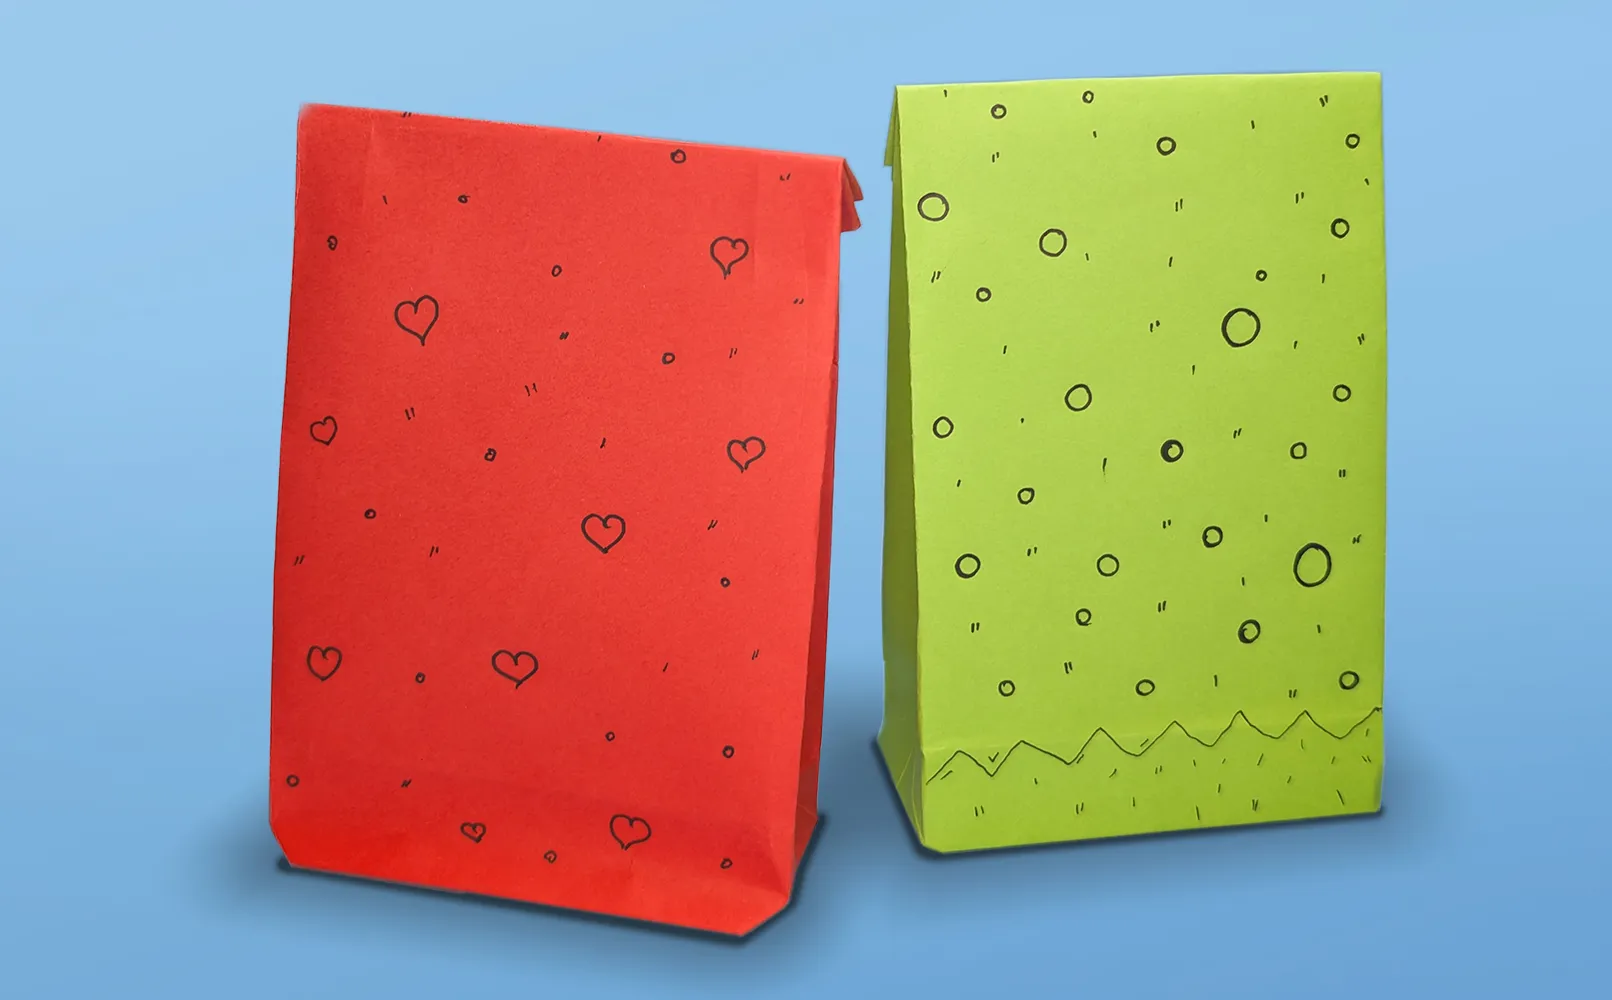
Tip: If you are making the bag for a specific person, add their name or a personal wish. This makes the gift even more heartfelt.
Completion
After all the steps, you will have a nice and neat gift bag. Make sure the glue is completely dry so that the bag retains its shape. Now all you have to do is place the gift inside, fold the top edge carefully so that the bag doesn't open, and you're done!
If you want to add handles, it's very easy. Use scissors to make two small holes on each side, thread ribbons through them and tie them tightly. Now your bag has practical handles and the gift is complete!
Conclusion
Thank you for working together on this great craft project! Together we have not only made a bag, but created a unique package that will embellish any gift. Crafting with children at Christmas is not only fun, but also strengthens the bond within the family and creates precious moments of shared creativity.
At Christmas time, it is especially nice when children learn that not only the gift itself is important, but also the loving packaging. These home-made bags are sure to bring a smile to the faces of everyone who receives them.
You can find even more creative ideas on our portal. Here you will find projects for packaging, handicrafts and gifts that are suitable for various festivals and occasions. We have put together many more inspiring craft ideas, especially for the Advent and Christmas season. Take a look to find inspiration and try something new. Good luck and have fun crafting!
Discover our other crafting instructions
Craft ideas for children: In this category you will find a large selection of tested and photographed craft projects especially for children. Each project comes with detailed step-by-step instructions, our own video recordings and high-quality photos. We have tested all projects with children of different ages to ensure that the instructions are truly child-friendly and achievable.
Origami: Our extensive origami collection offers detailed folding instructions that we have developed and photographed ourselves. From simple basic shapes to sophisticated 3D models, each instruction is accompanied by our own step-by-step videos and detailed photos showing each folding step in detail.
Make paper airplanes: Discover our diverse collection of self-tested paper airplane models. Each model has been folded by us several times and tested for its flight characteristics. With our own videos and close-ups of the folding techniques, you can follow every step exactly and understand what makes the airplane fly particularly well.
Folding banknotes: An exclusive collection of creative folding instructions for banknotes that we have developed ourselves. Each instruction is accompanied by our own high-resolution photos and detailed videos that clearly show each folding step. We've tested each design multiple times to guarantee the best possible results.
Folding napkins: A rich collection of elegant napkin folding techniques that we've photographed and filmed ourselves. From classic to modern, you'll find designs for every occasion, all with our own detailed video tutorials and photo instructions. Each technique has been tested and optimized by us many times over.
From Vitalii Shynakov
