Making a 3D Christmas card: Step by step with your child
Would you like to craft something special with your child for Christmas? Why not try making a 3D Christmas card! This craft project is a great opportunity to unleash imagination, spend time together, and create a beautiful gift yourselves. Your joint effort will not only bring much joy but also be a festive highlight for Christmas.
Crafting the 3D card is ideal for the winter holidays. It promotes fine motor skills, stimulates creative thinking, and is a lot of fun. The result is an original card that will delight your loved ones and add a festive touch to your home.
Materials for the 3D Christmas Card
The required materials are easy to obtain. You can find them in any craft store or may already have them at home. Prepare everything in advance to ensure smooth crafting:
- Colored cardstock
- Colored paper
- Glue
- Scissors
- Ruler
- Styrofoam or sponge
- Felt-tip pens or markers
These materials are affordable, safe for kids, and perfect for creative bonding.
Instructions for the 3D Christmas Card
Here you will find a detailed description of each step to help you easily complete the project. For those who prefer learning through videos, there is an additional visual guide to make the process even simpler and more exciting.
Step 1: Prepare the Card Base
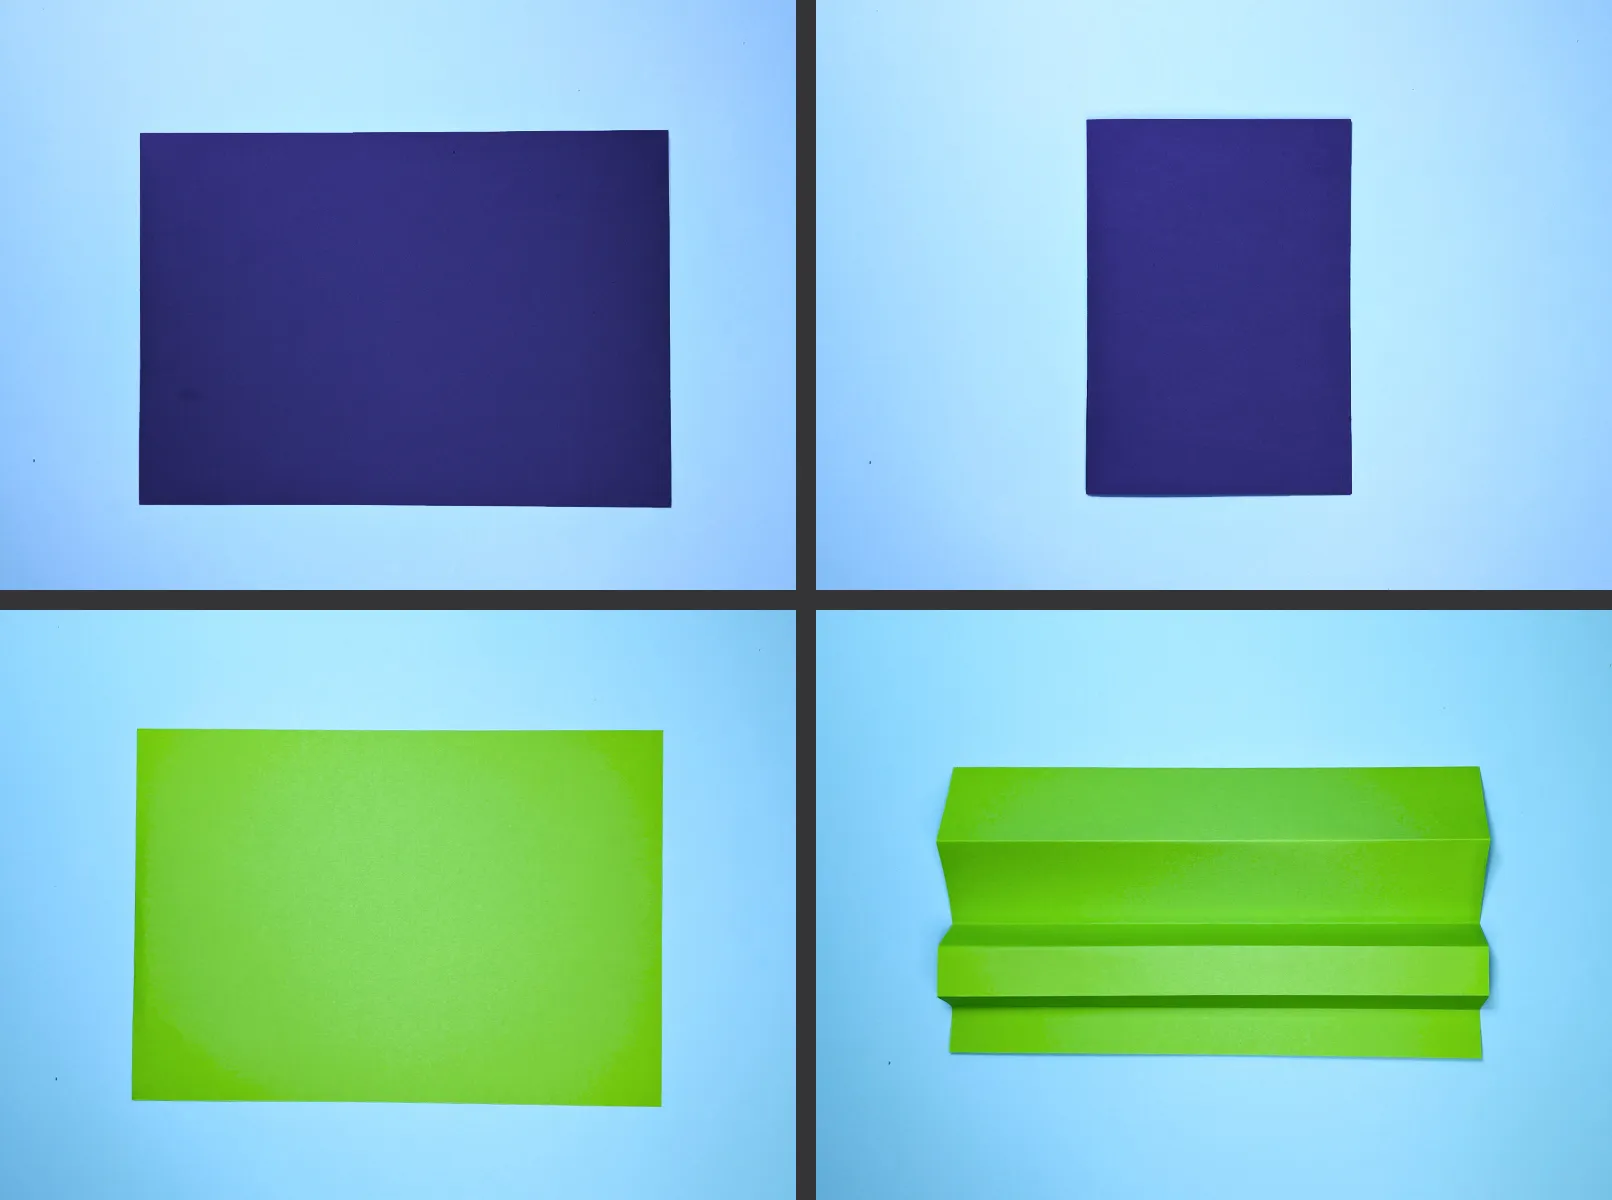
Take a piece of sturdy cardstock and fold it carefully in the middle. This will be the base for your card. Ensure the fold is clear and straight. A ruler can help you draw a clean line.

Tip: The cardstock should not be too thick to fold easily but sturdy enough to hold the shape.
Step 2: Fold the Christmas Tree
Take green paper and fold it in a zigzag pattern. The folds should be around 1.5 to 2 cm wide. A ruler can help make the edges even.
Tip: If your child struggles with making even folds, assist with the first two and let them try the rest on their own. This promotes accuracy.
Step 3: Cut the Christmas Tree Strips
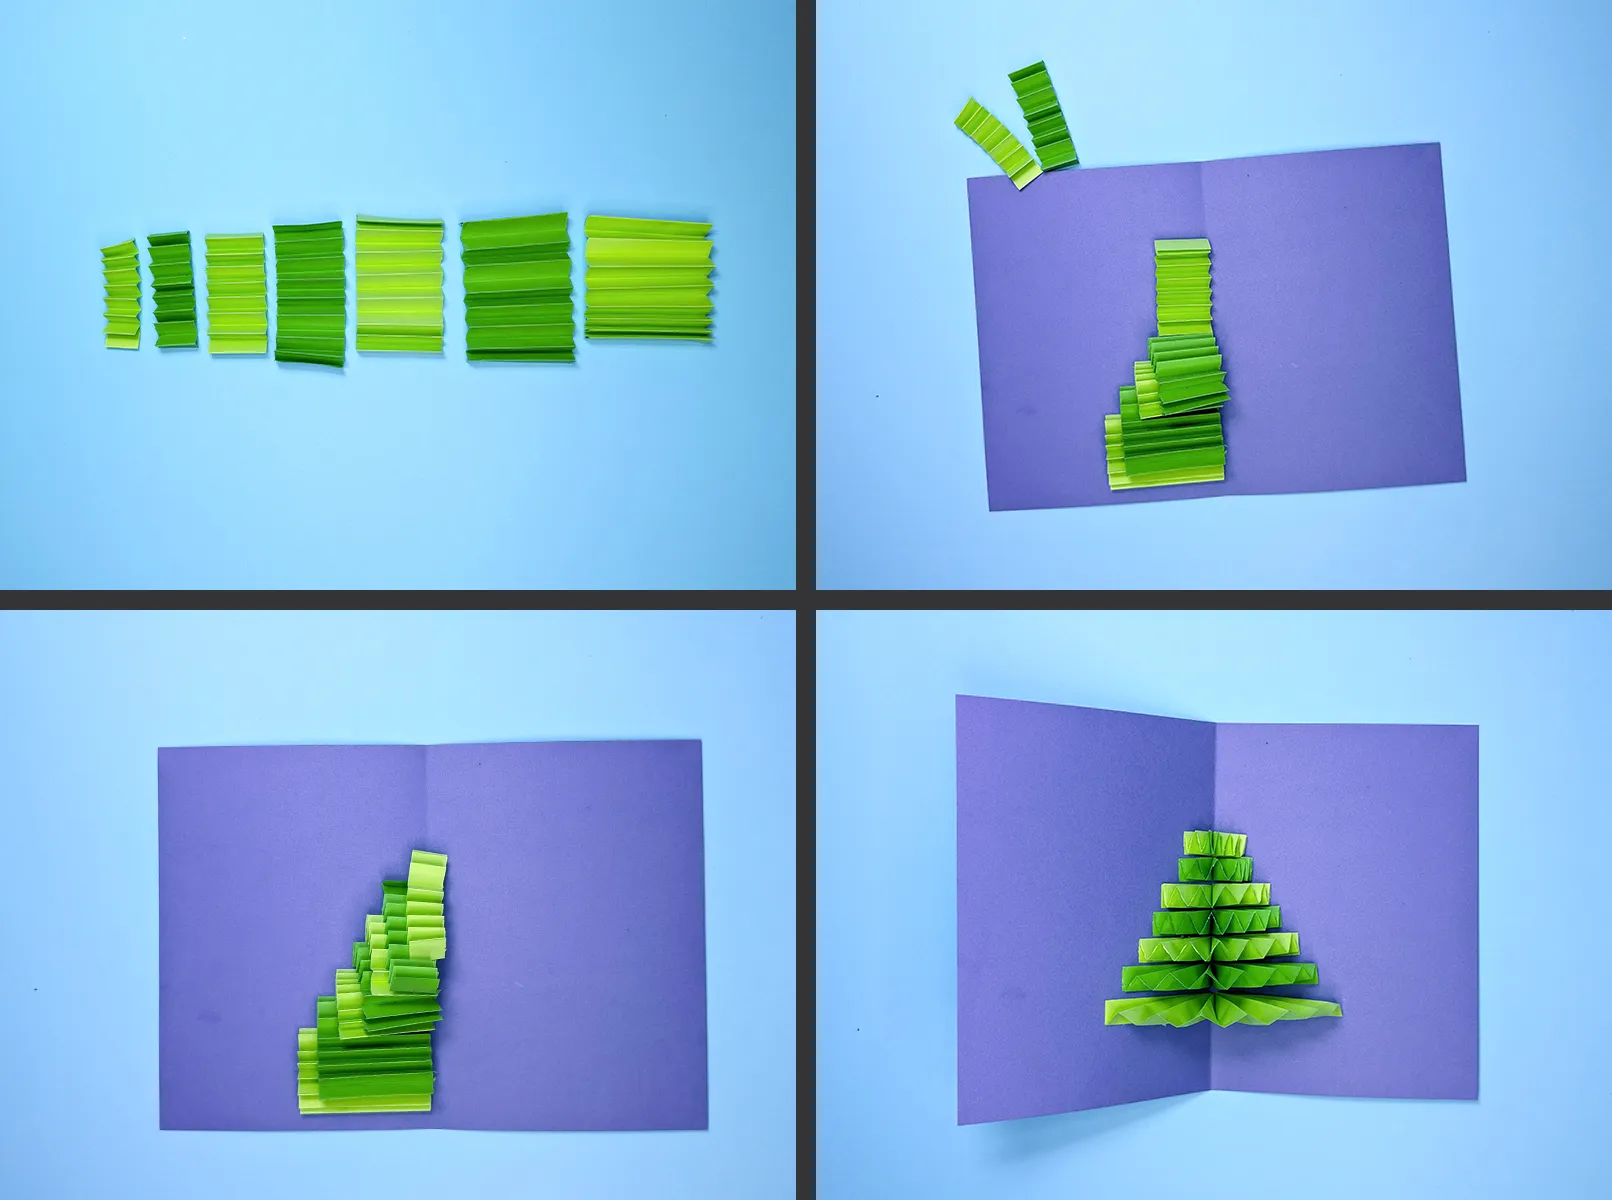
Cut the folded paper into strips of different lengths. Each strip should be slightly shorter than the previous one:
- 7 cm
- 6 cm
- 5 cm
- 4 cm
- 3.5 cm
- 2.5 cm
Arrange the strips in size order in front of you.

Tip: Sketch the lengths first with a pencil and ruler. Use scissors with rounded tips for safer crafting.
Step 4: Glue the Christmas Tree Strips
Open the card base and glue the strips one by one. Start with the shortest strip at the top and work your way down. This creates the three-dimensional tree.
Tip: Apply glue sparingly and precisely to prevent the paper from getting soggy.
Step 5: Decorate the Christmas Tree
Create ornaments for your tree by cutting out small circles, stars, or snowflakes from colored paper. Alternatively, you can draw garlands or balls directly with felt-tip pens.
Tip: Add some glitter or glue small decorative elements to make the tree even more festive.
Step 6: Decorate the Outside of the Card
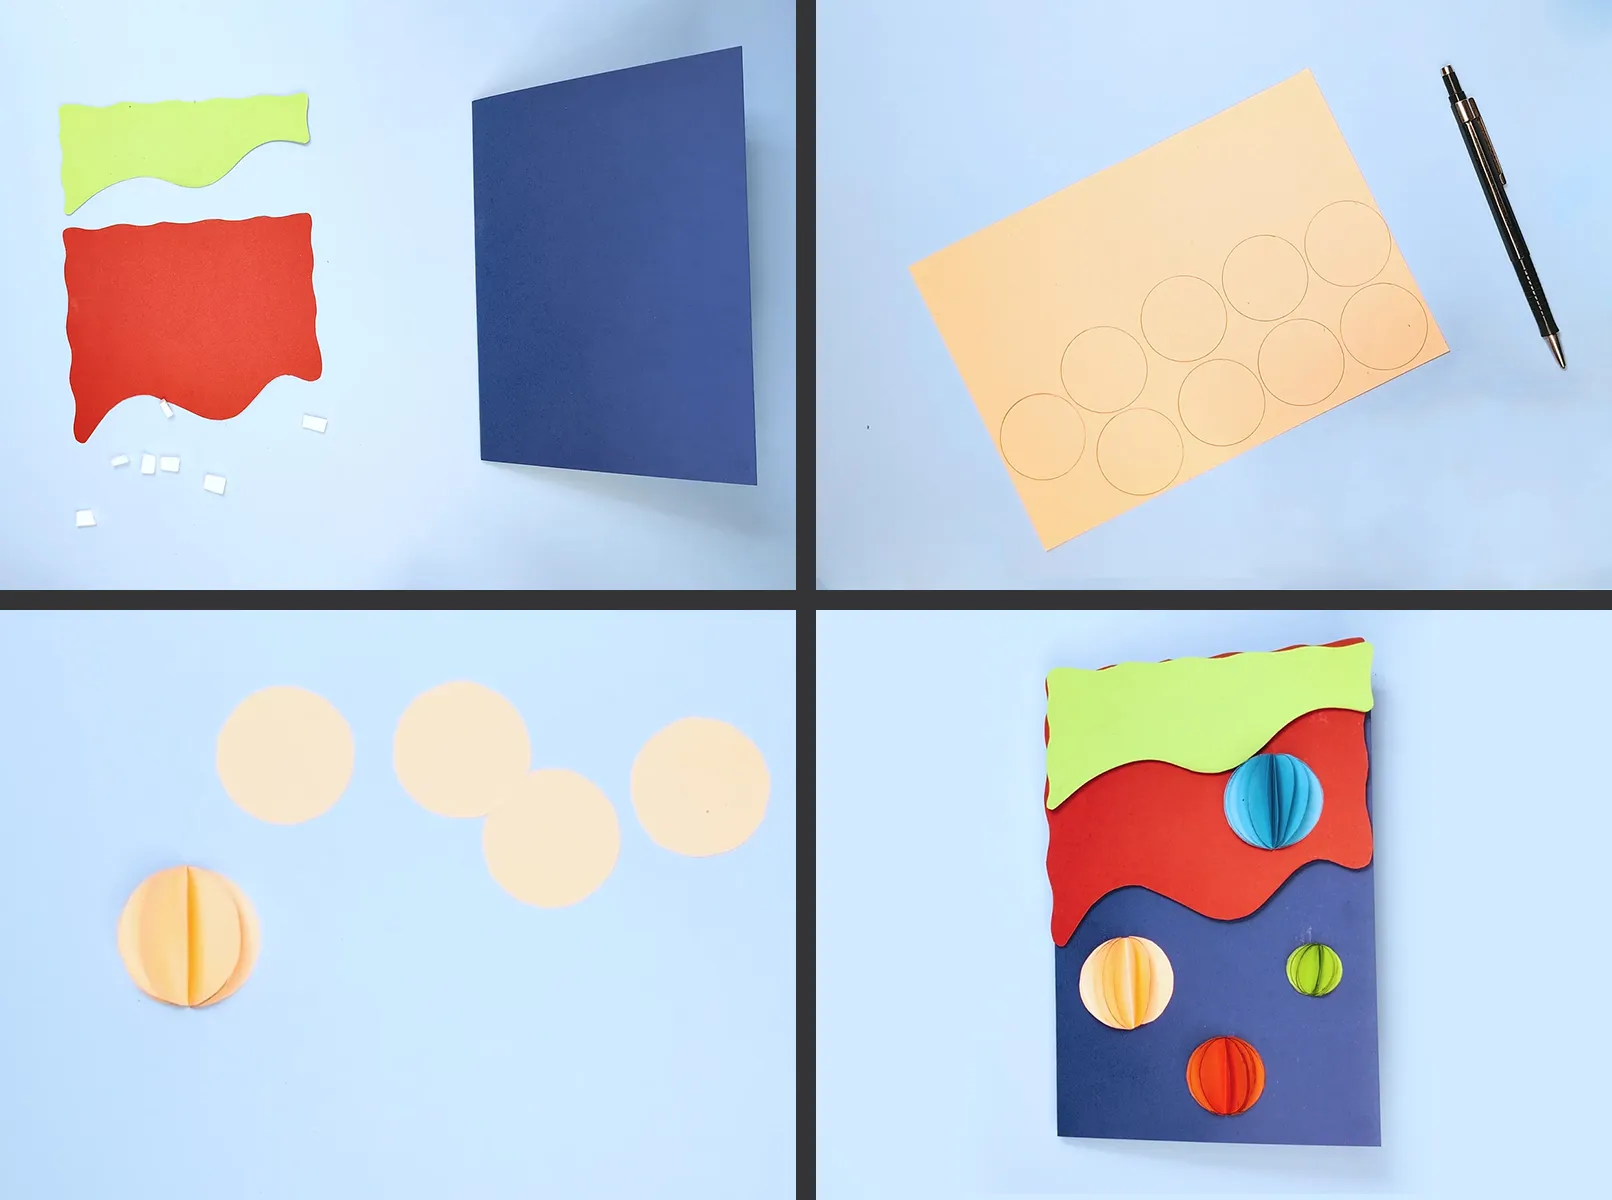
Decorate the front of the card with Christmas motifs like stars, bells, or snowflakes made of styrofoam or cardstock. You can use double-sided tape or small sponge pieces to make the motifs stand out easily.

Tip: Have your child write a greeting or a few words with markers or cut out letters and glue them on.
Step 7: Making 3D balls
As an additional decoration, you can make 3D balls. Draw several circles on colored paper and cut them out. Fold the circles in half and stick the halves together until a round ball is formed.
Tip: Use different colors and types of paper to make the balls more colorful and varied.
Step 8: Adding final details
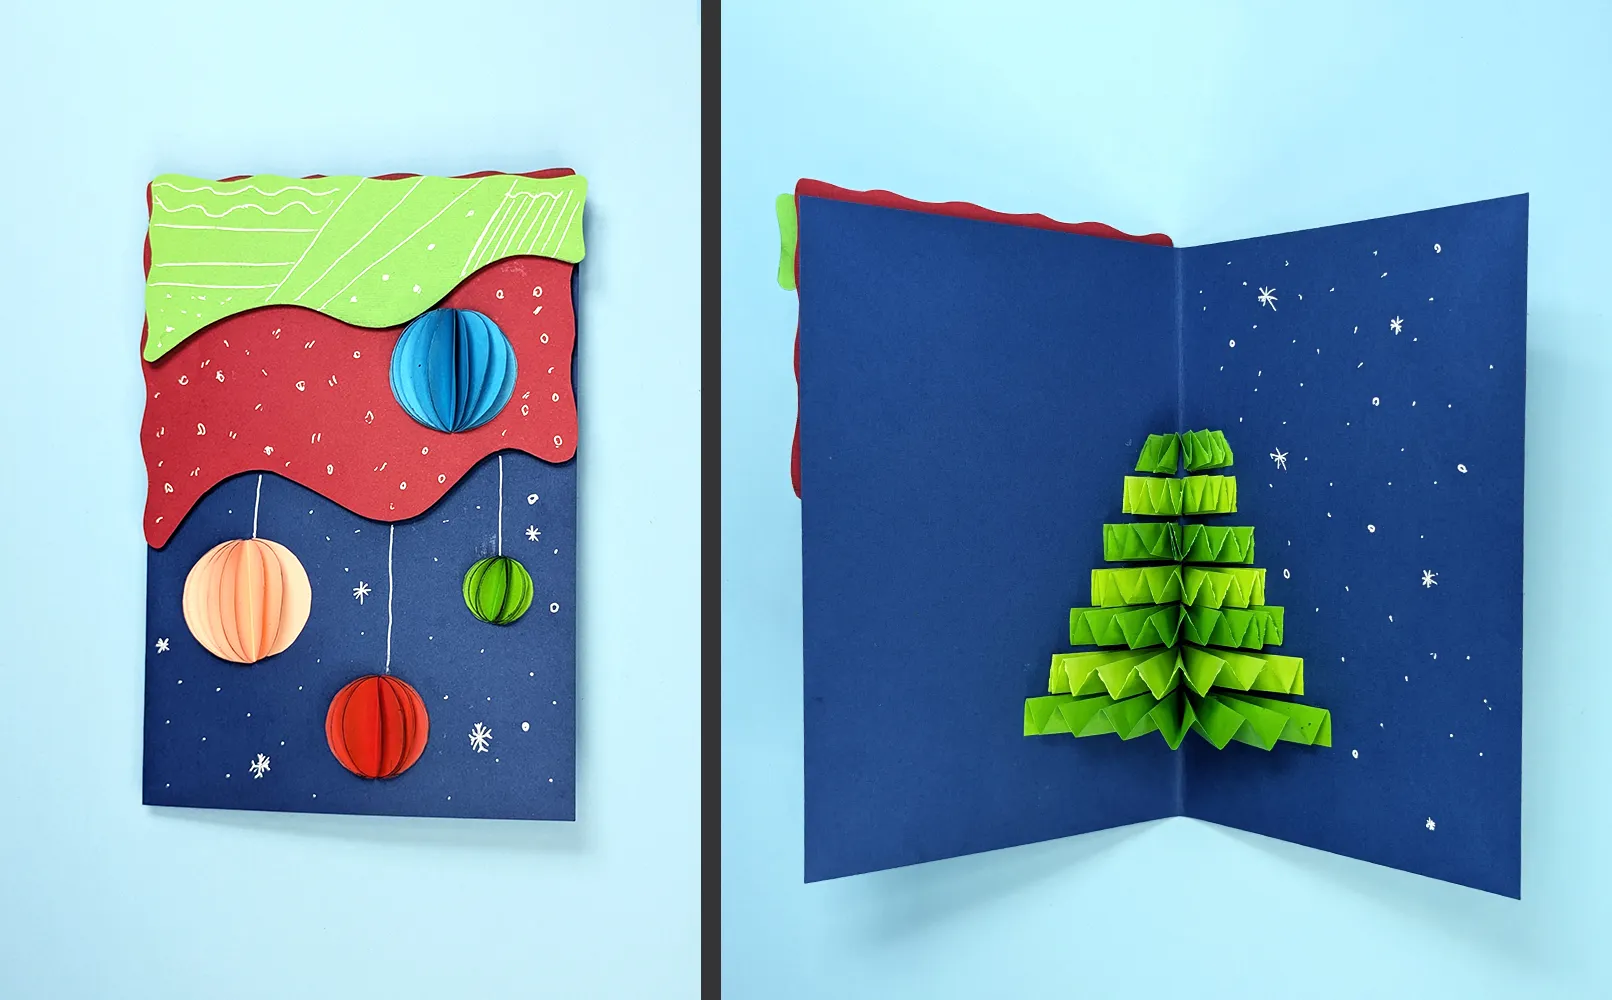
Finally, draw small stars, snowflakes, or a border around the card. If the card is intended as a gift, write a personal greeting together.

Tip: Let your child implement their own ideas. This way, they will feel even more like a part of the project.
Step 9: Completing the card
Allow the card to dry well if glue was used. After that, it is ready to delight your loved ones.
Tip: To protect the card, you can place it in a plastic sleeve or a beautiful packaging.
A beautiful result
If you follow all the steps, you will create an impressive 3D Christmas card that looks like a small festive composition. Handmade gifts like these show how much love and attention you have put into them – a feeling that touches everyone.
In conclusion, thank you for spending this creative time with us! Hopefully, crafting has brought joy and created beautiful shared moments. The 3D card is just the beginning – many more exciting crafting ideas for the winter season await you.
Discover on our website more craft ideas for children, which are explained step by step. From simple origami projects to creative tutorials on napkin folding – like here, for each tutorial, you will find a video, photos for each step, and a detailed description. This makes crafting enjoyable for the whole family.
Happy holidays and have fun crafting! May your creativity bring light and warmth into your home and create unforgettable memories. Until next time!
From Vitalii Shynakov
