Folding banknotes into a tie: Instructions with photos and video
Do you want to give someone money? Folding banknotes into a tie is an elegant gift idea! This creative folding art comes from Japanese Origami and transforms your money gift into a stylish accessory.
A folded tie made of banknotes is a suitable surprise, especially for businessmen or formal occasions. It is perfect as a gift for weddings, Father's Day, or a first job. Folding banknotes into a tie is an art that you can quickly master with our guide.
A money tie looks great on a shirt (which you can also fold from banknotes!) or in an elegant gift box. You can also add it to a new suit or a real tie.
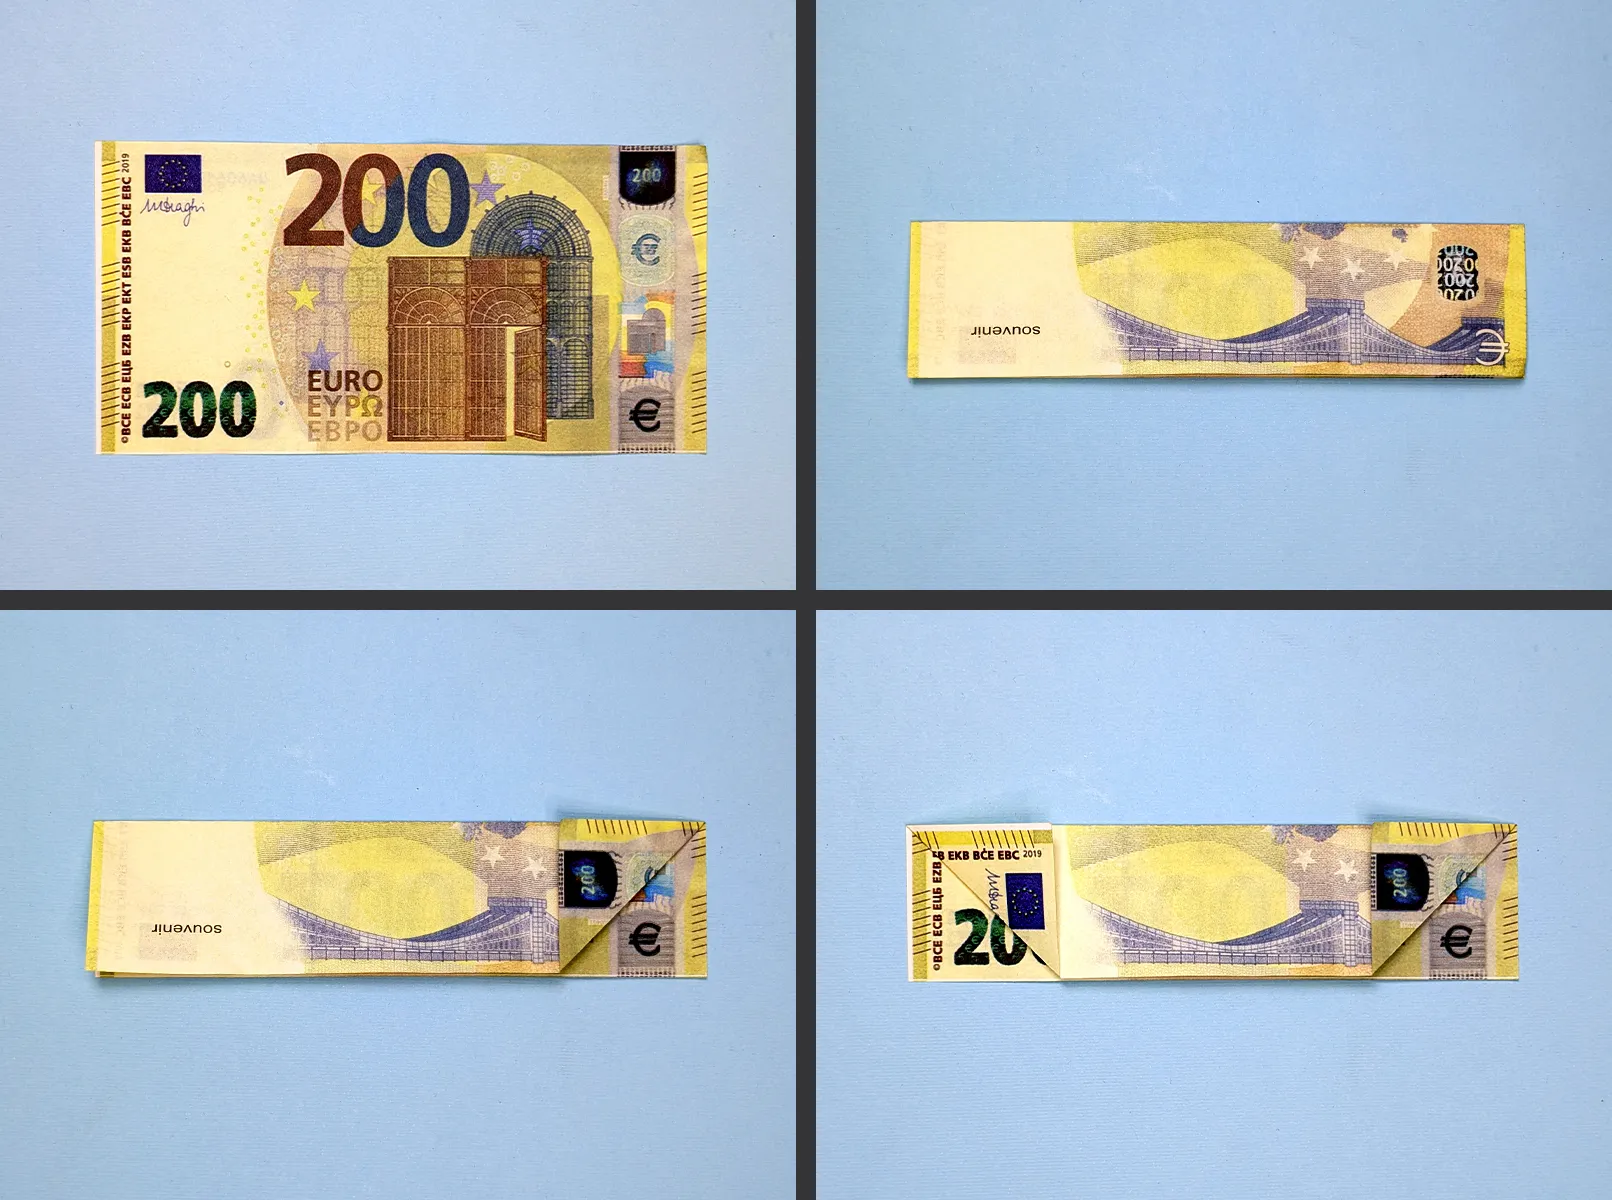
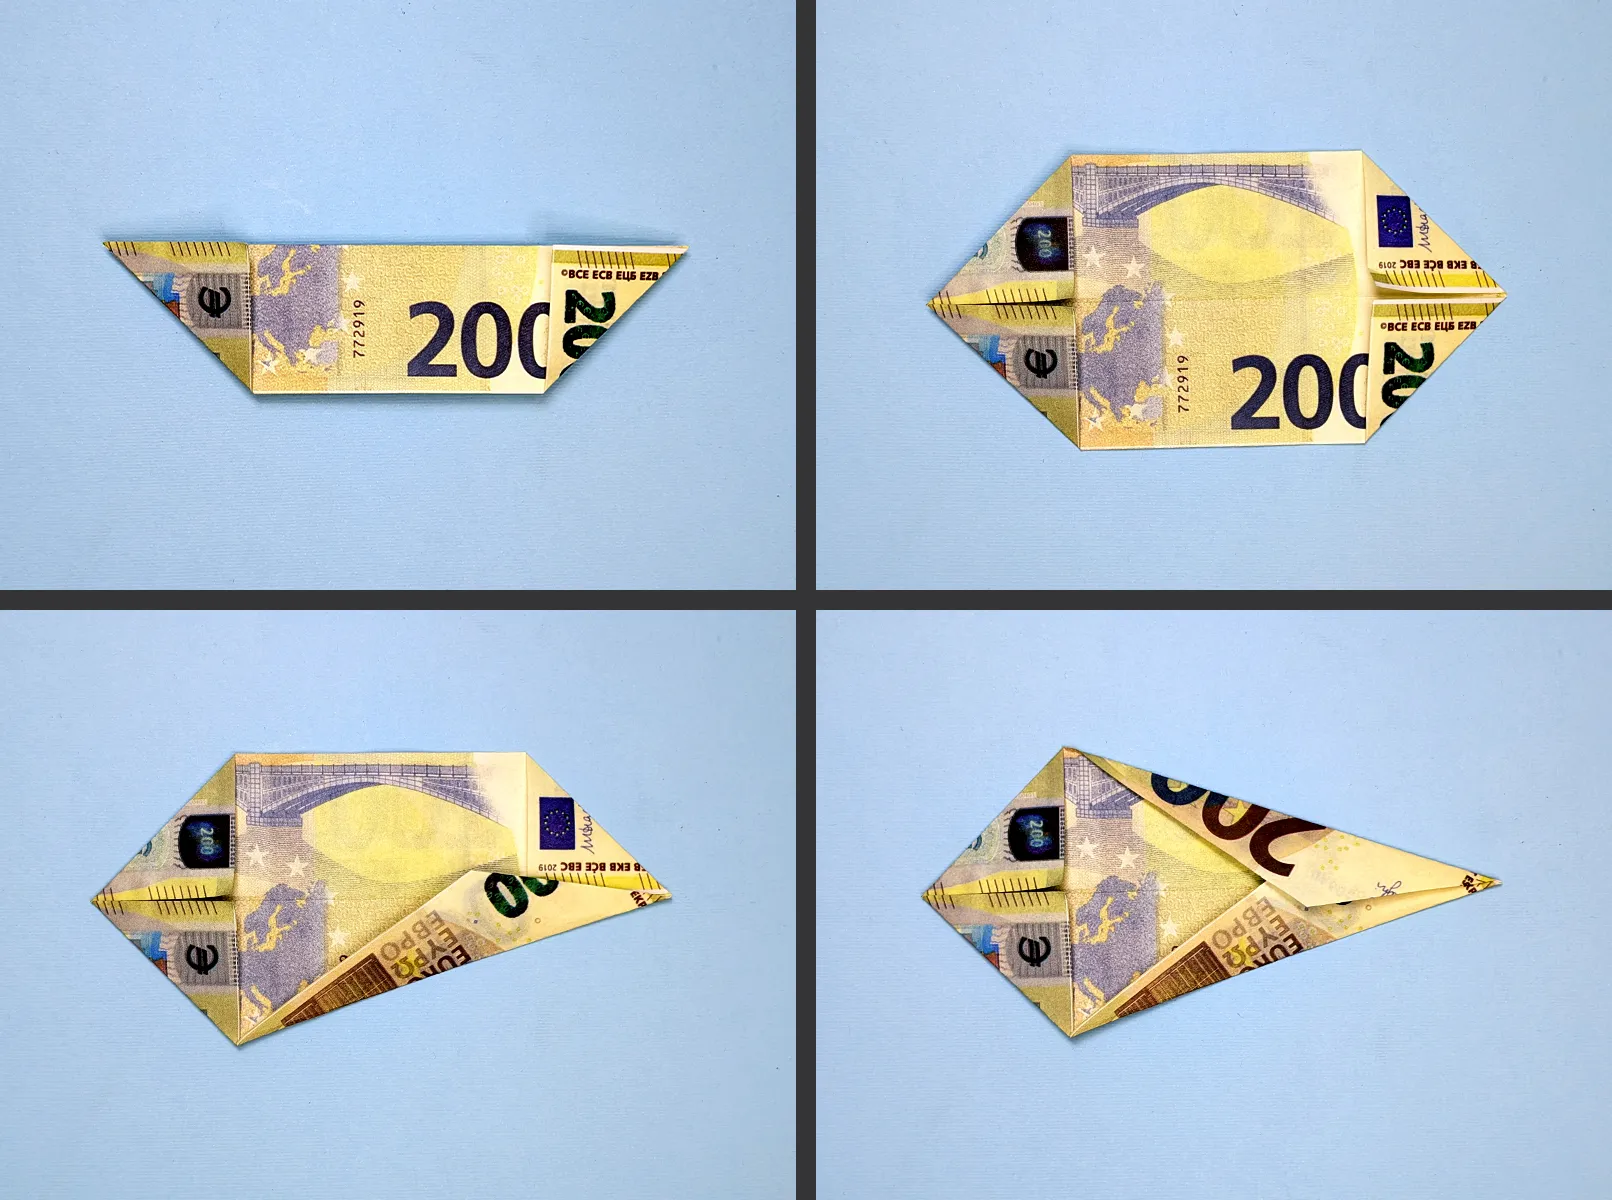
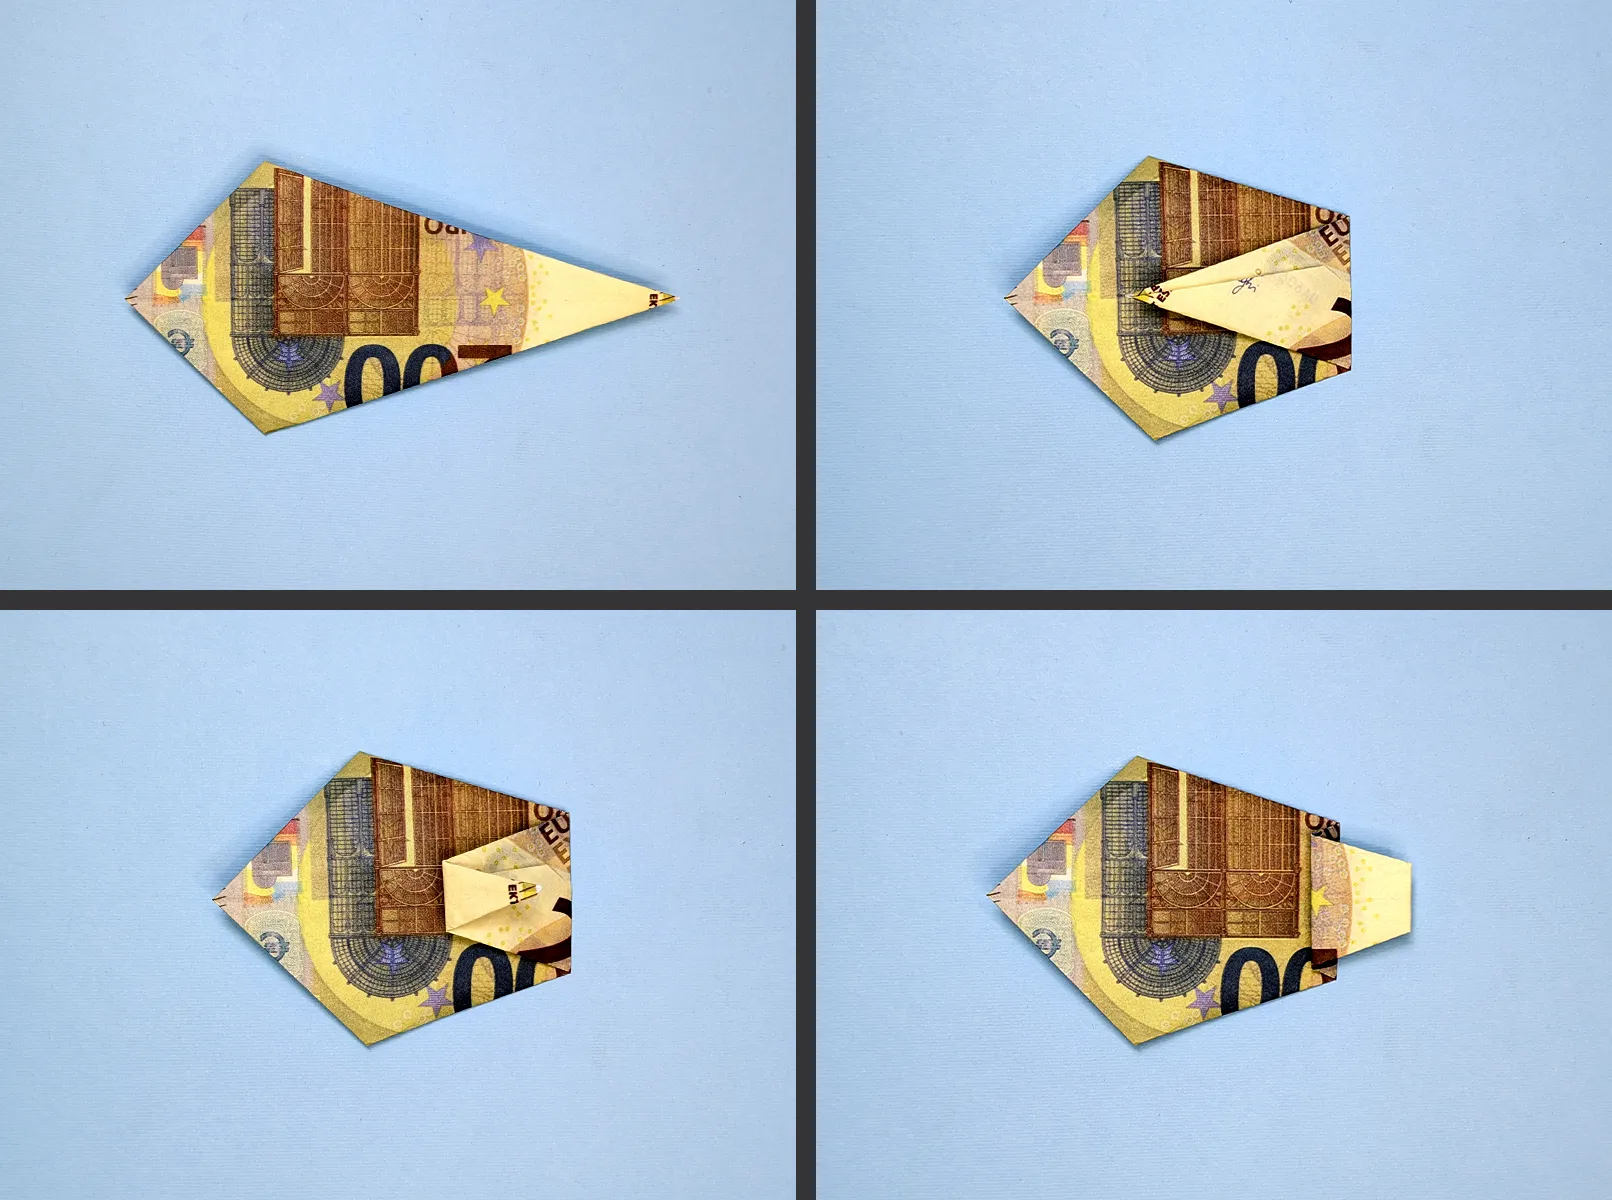
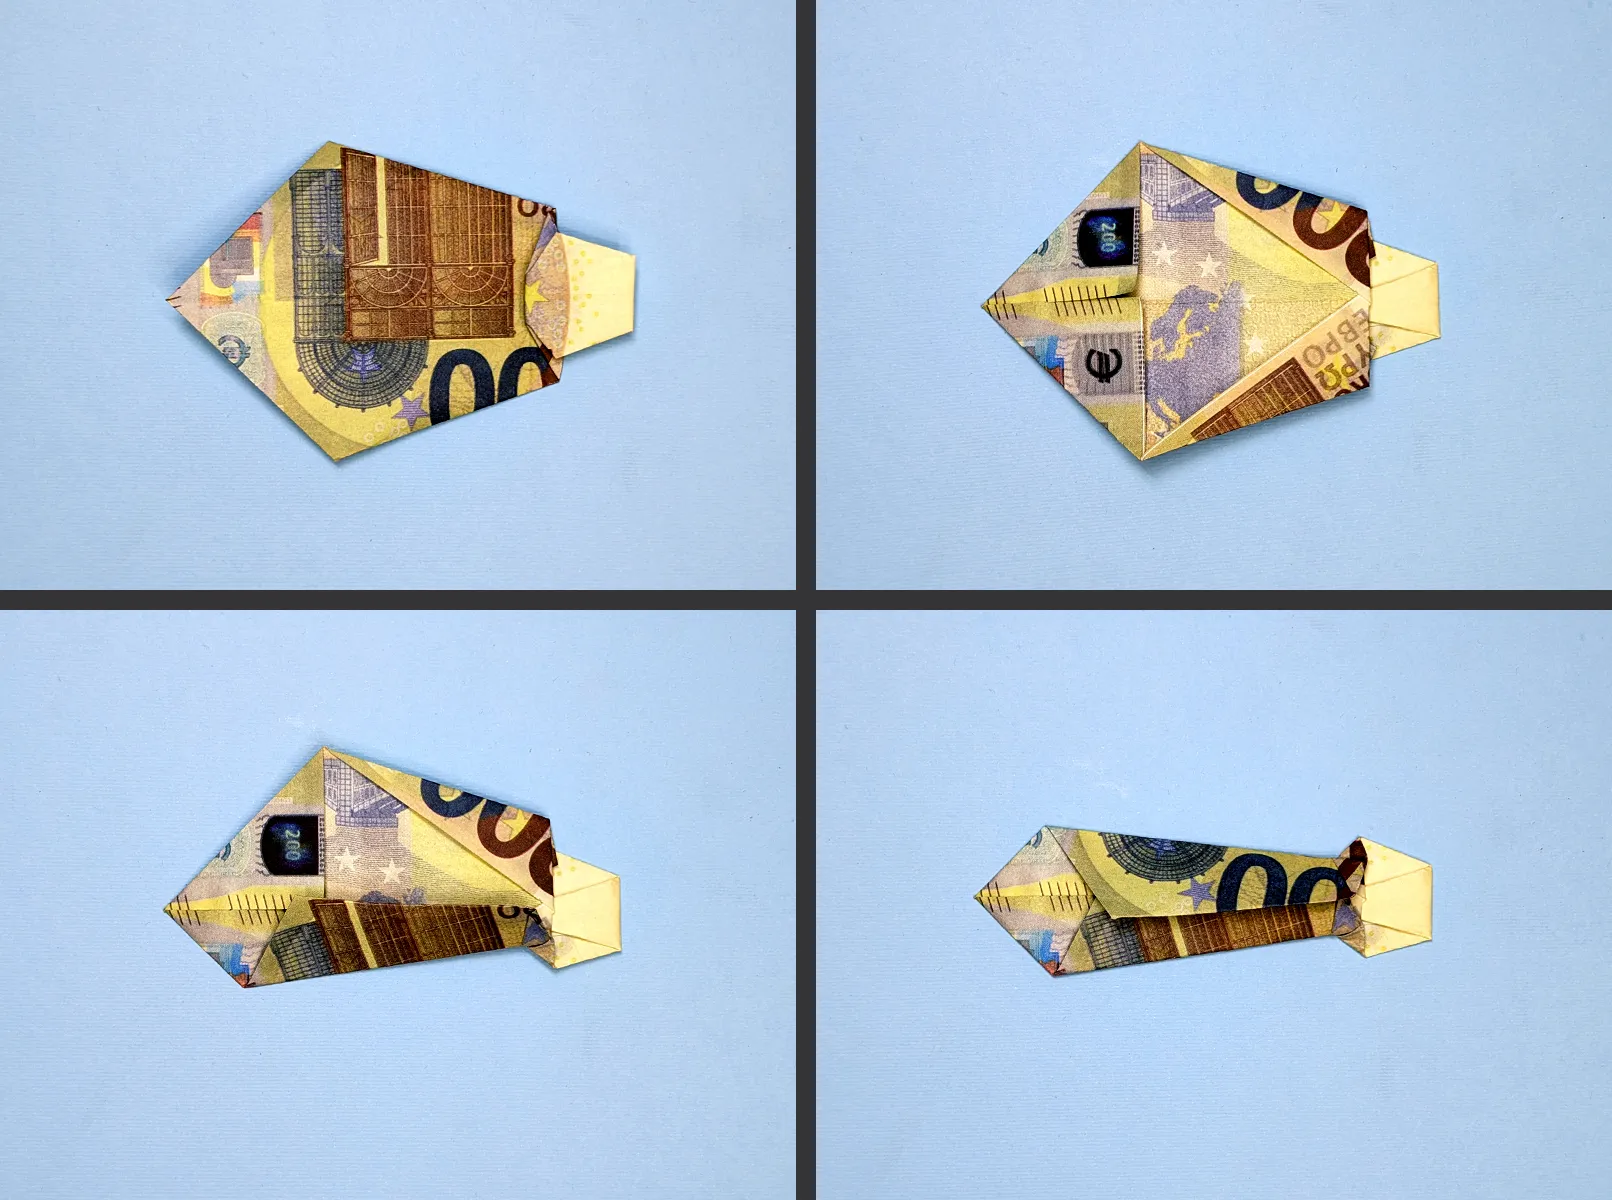
Folding banknotes into a tie: Instructions with photos and text description
To make folding the banknotes easier for you, we have created a detailed illustrated guide. We have photographed every step so that you can easily follow along!
Tip: If you have no experience folding banknotes, practice beforehand. You have two options: Cut paper to the size of the banknotes or buy play money for practice. As with Origami, working slowly and carefully produces the best results.
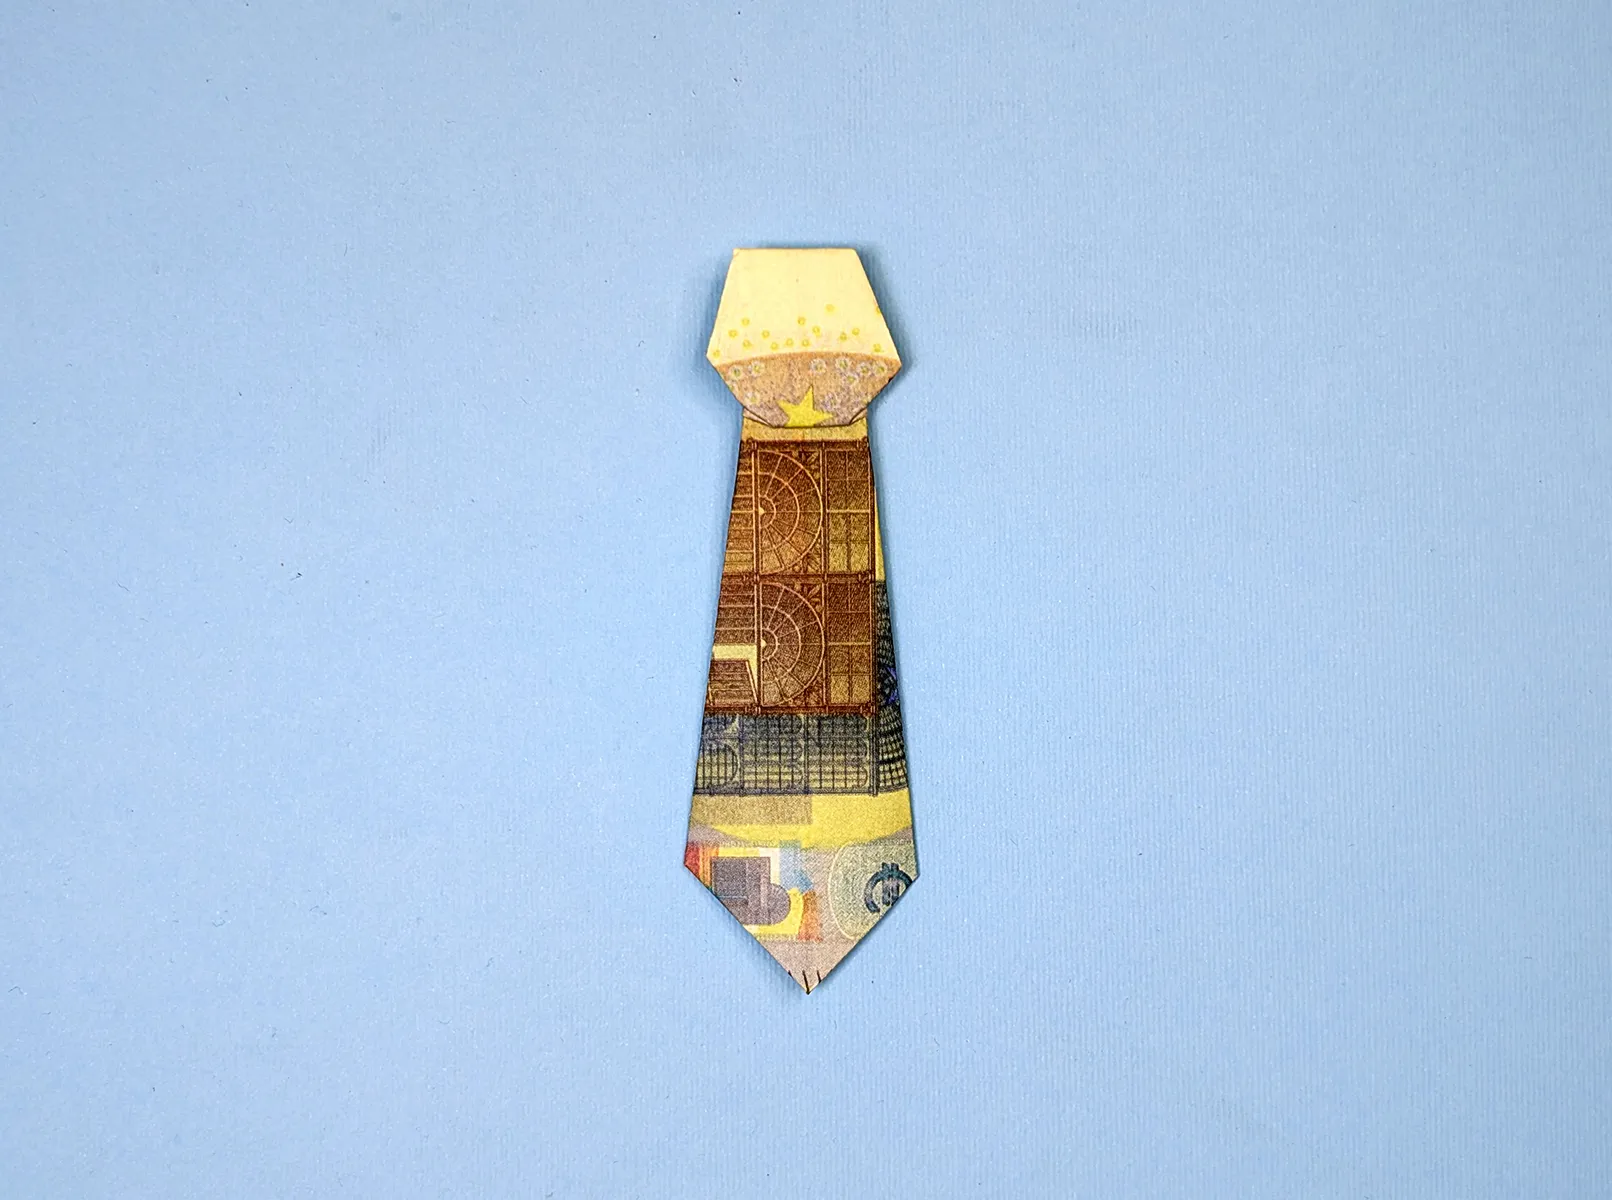
Folding banknotes into a tie: Conclusion
Thank you for taking the time to follow our guide! We are glad if we could assist you in folding the money tie. All our guides come with videos, photos, and detailed text descriptions for each step.
Do you enjoy creative crafting? Then also check out our other categories:
Folding banknotes: Here you will find creative instructions for folding banknotes into hearts, butterflies, shirts, pants, flowers, and many other motifs. Perfect for special money gifts for any occasion.
Craft ideas for kids: Discover great craft ideas using paper, cardboard, natural materials, and everyday items. Many simple projects for kindergarten and elementary school children that are fun and promote creativity.
Origami: Immerse yourself in the Japanese art of paper folding! From simple animals to complex geometric shapes. With our guides, you will learn step by step different Origami techniques.
Enjoy folding!
From Vitalii Shynakov
