DIY surprise box - Origami crafting instructions with video and photos for children
Are you looking for a creative DIY idea for Valentine's Day? We're glad you're stopping by. This magical surprise box is a great gift: when you open it, a cute heart jumps out! The box is easy to make and brings great fun to children aged 7 and above. You can design it in your favorite colors and embellish it with your own drawings.
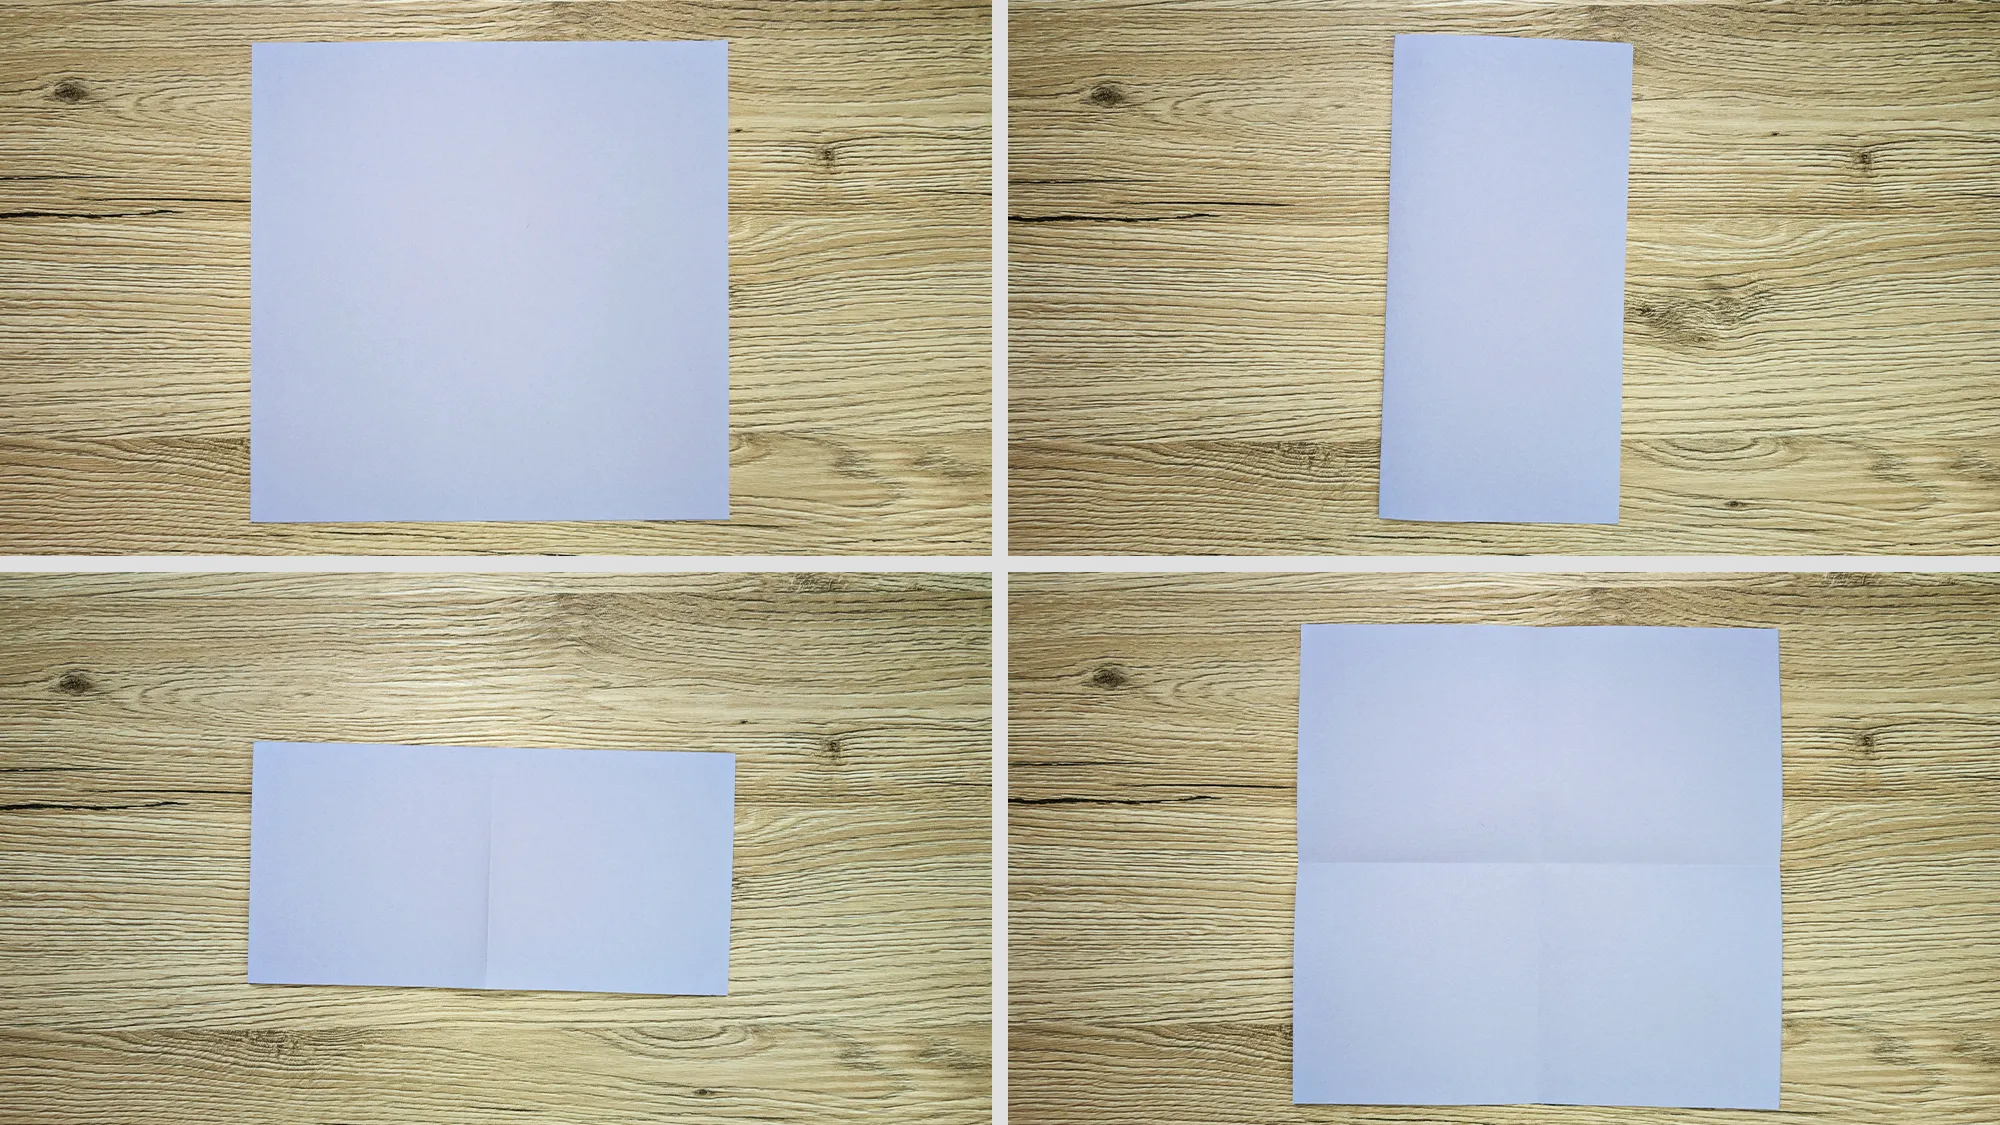
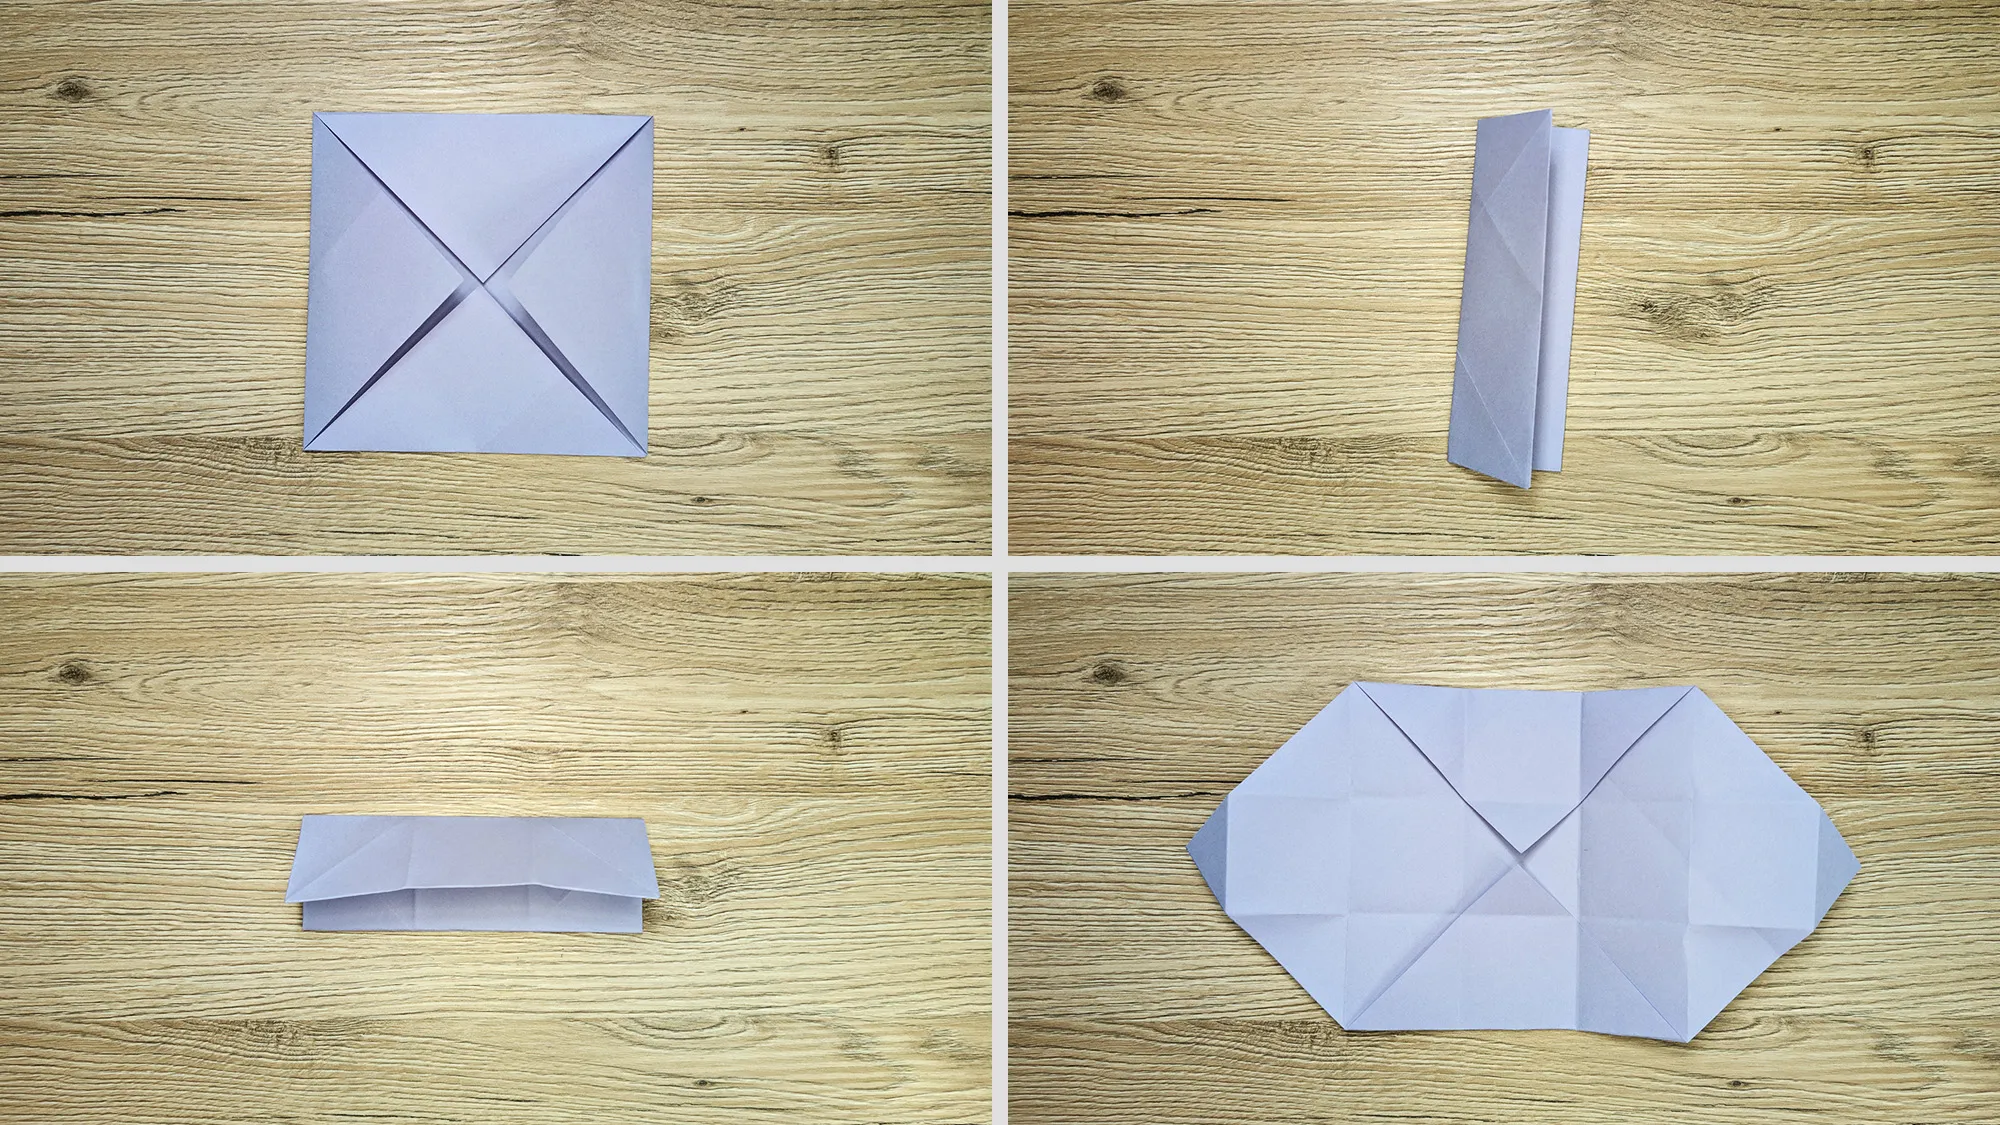
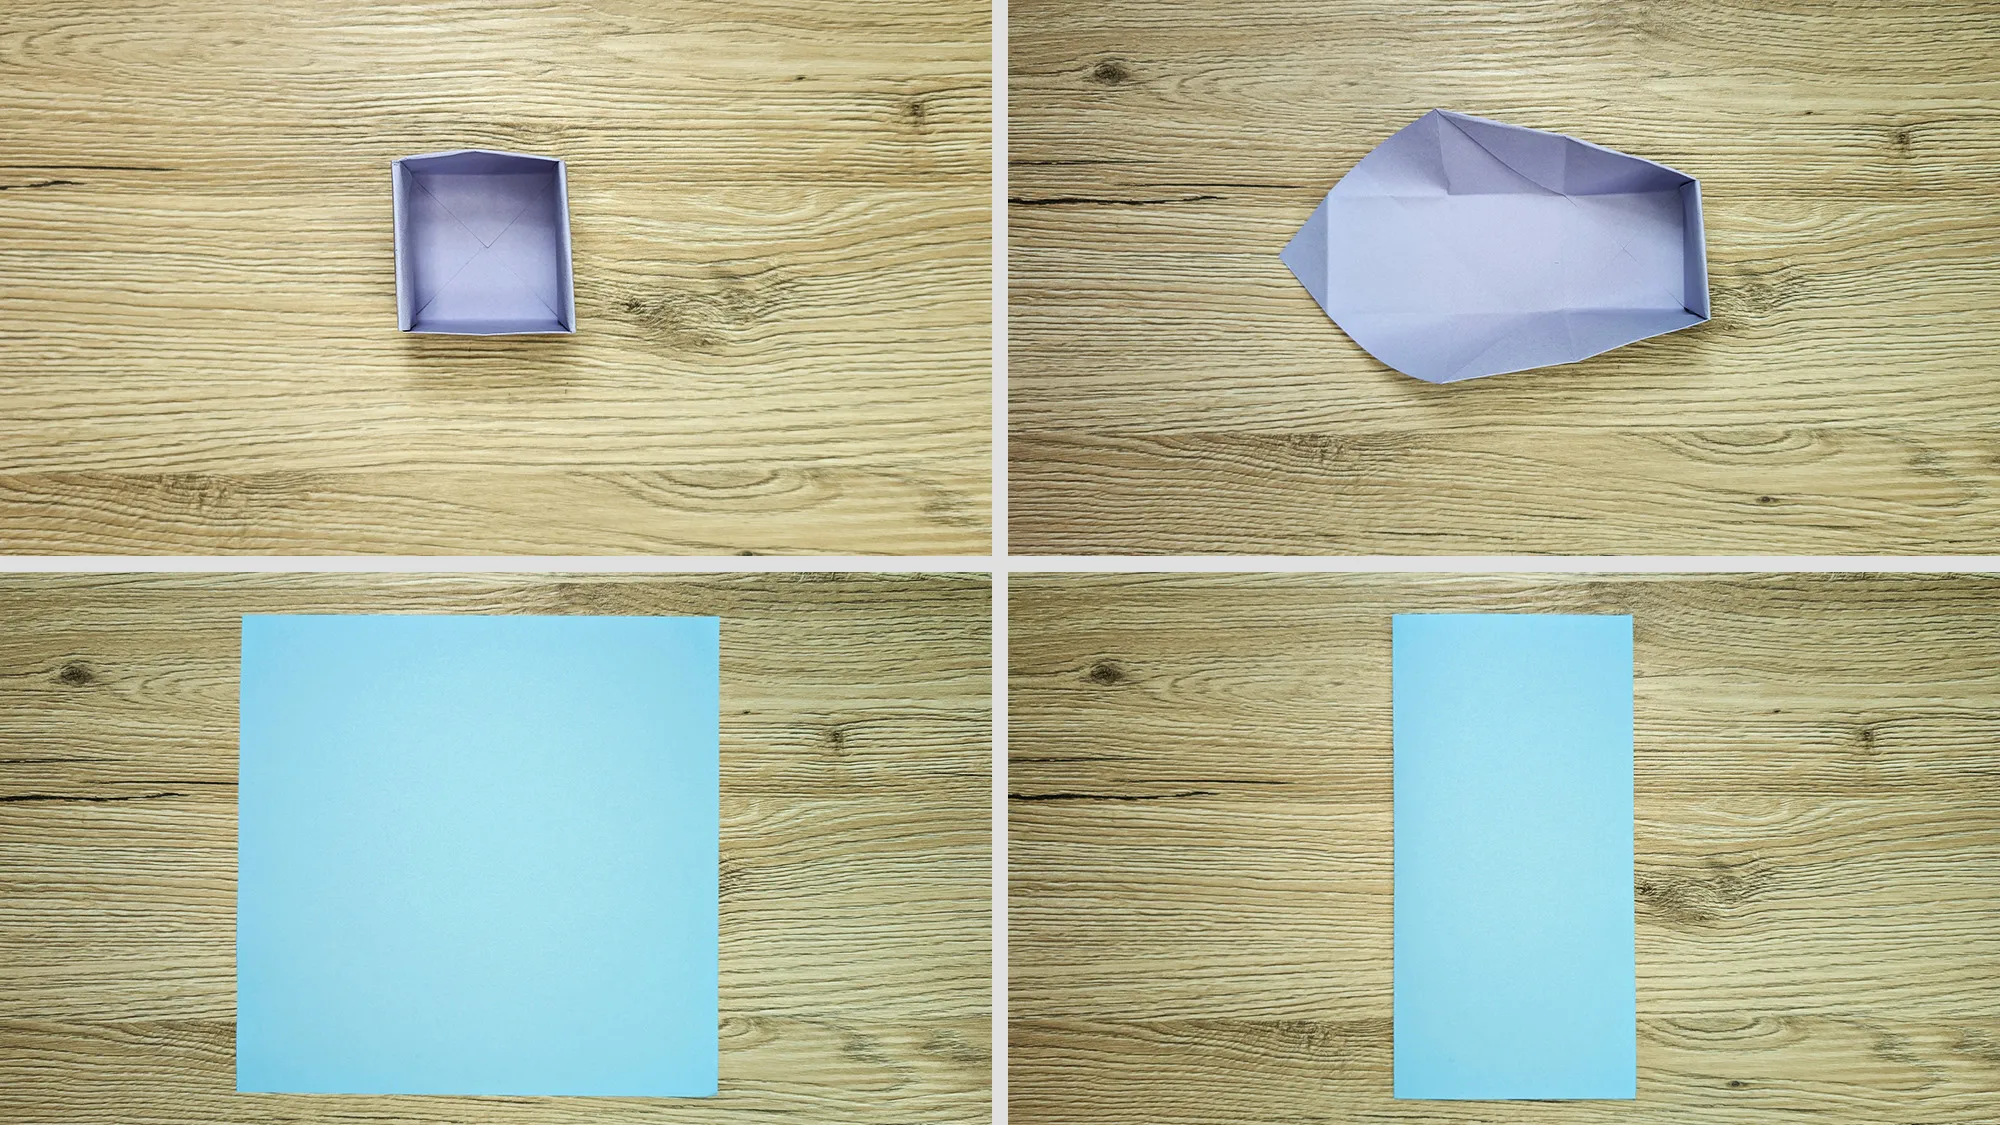
Our tutorials always include a self-recorded video and photos for every crafting step. This way, you can easily follow along at home. The video shows you exactly how to fold the box and make the heart jump. The photos also guide you through each individual step. You can watch everything as many times as you want.
This surprise box is a charming gift! Children love to open the box and discover the jumping heart. They can customize the box to their liking - with colorful paper, fun drawings, and sweet decorations.
DIY Surprise Box: Guide with Photos and Description
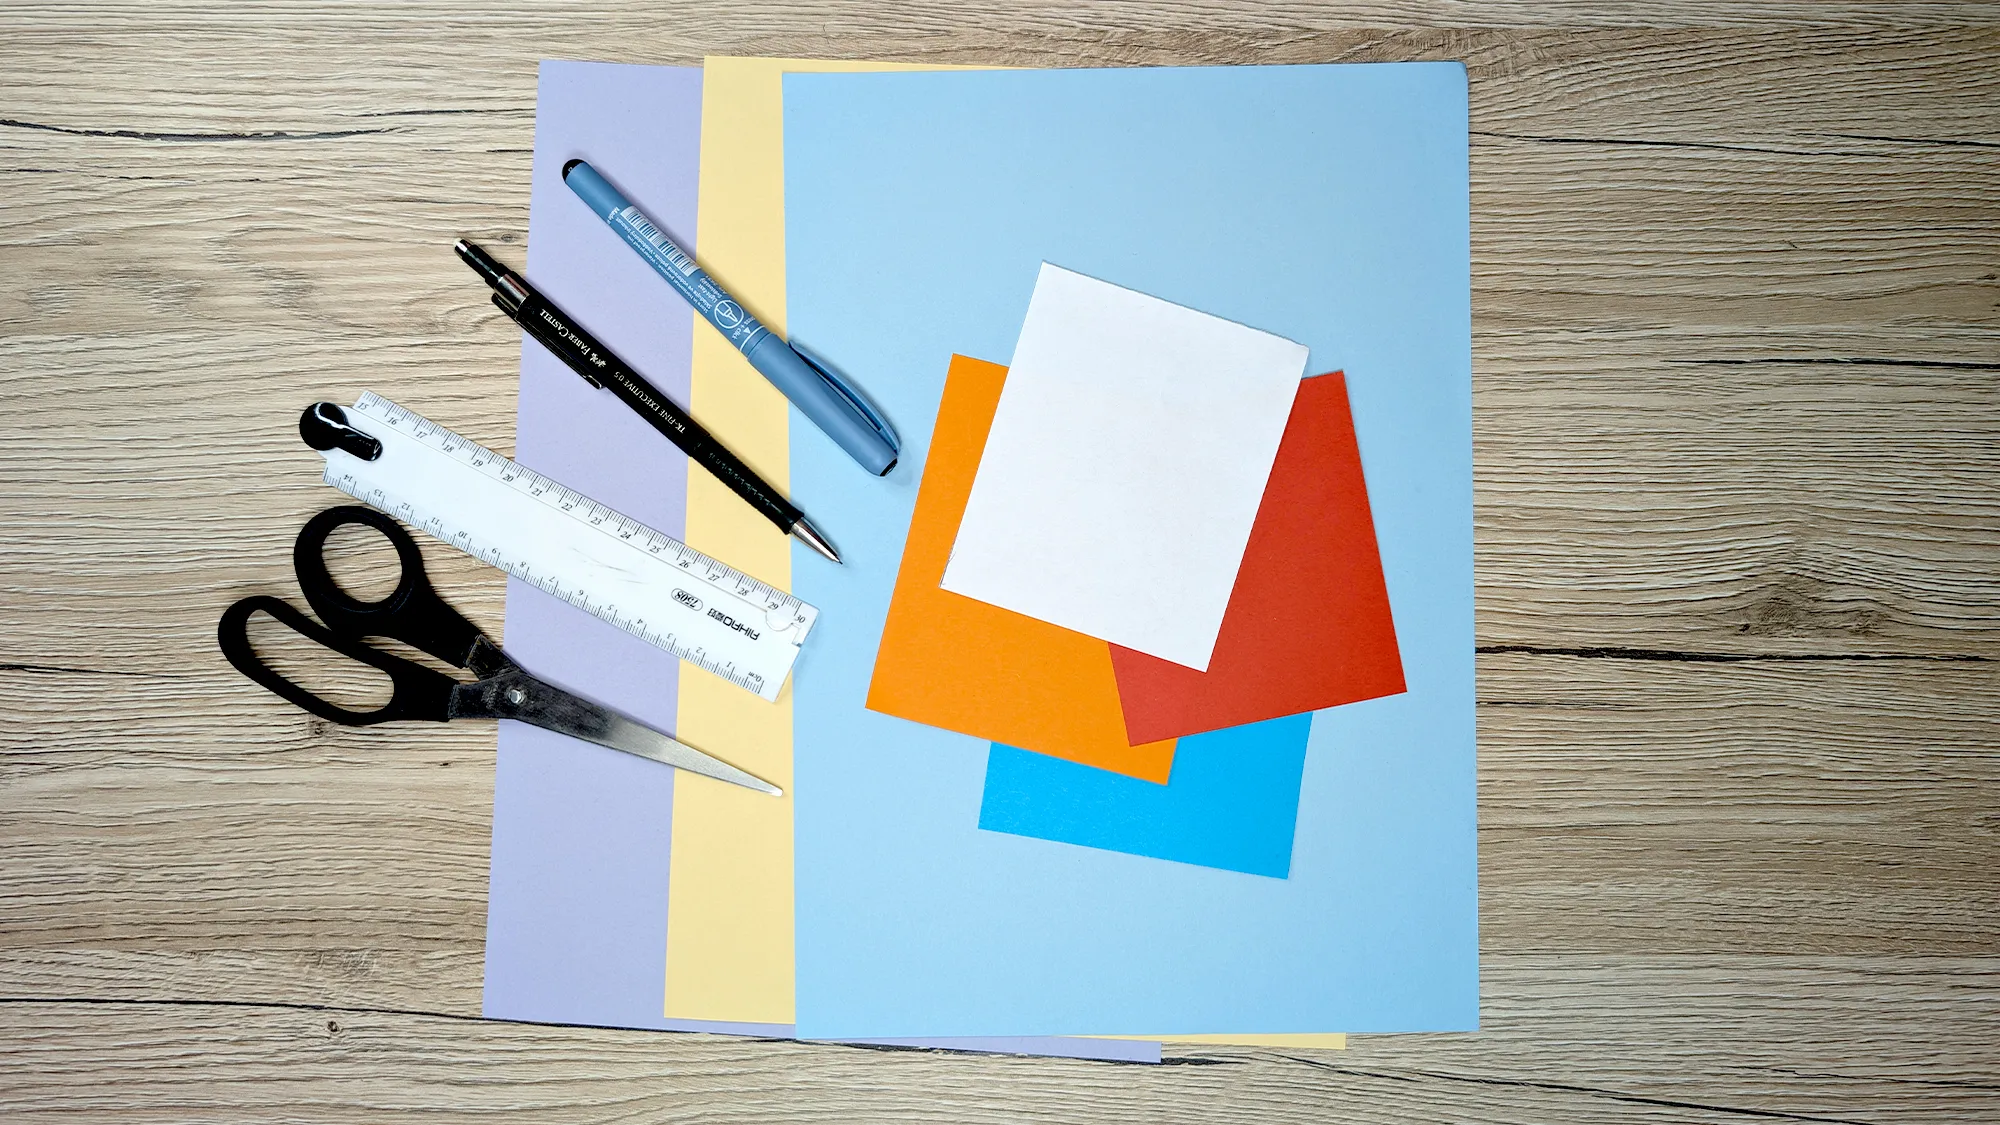
For this crafting project, you will need:
- Colored paper in various colors
- A pen
- A pencil
- Scissors
- Glue
- A ruler
- Creative ideas for decoration
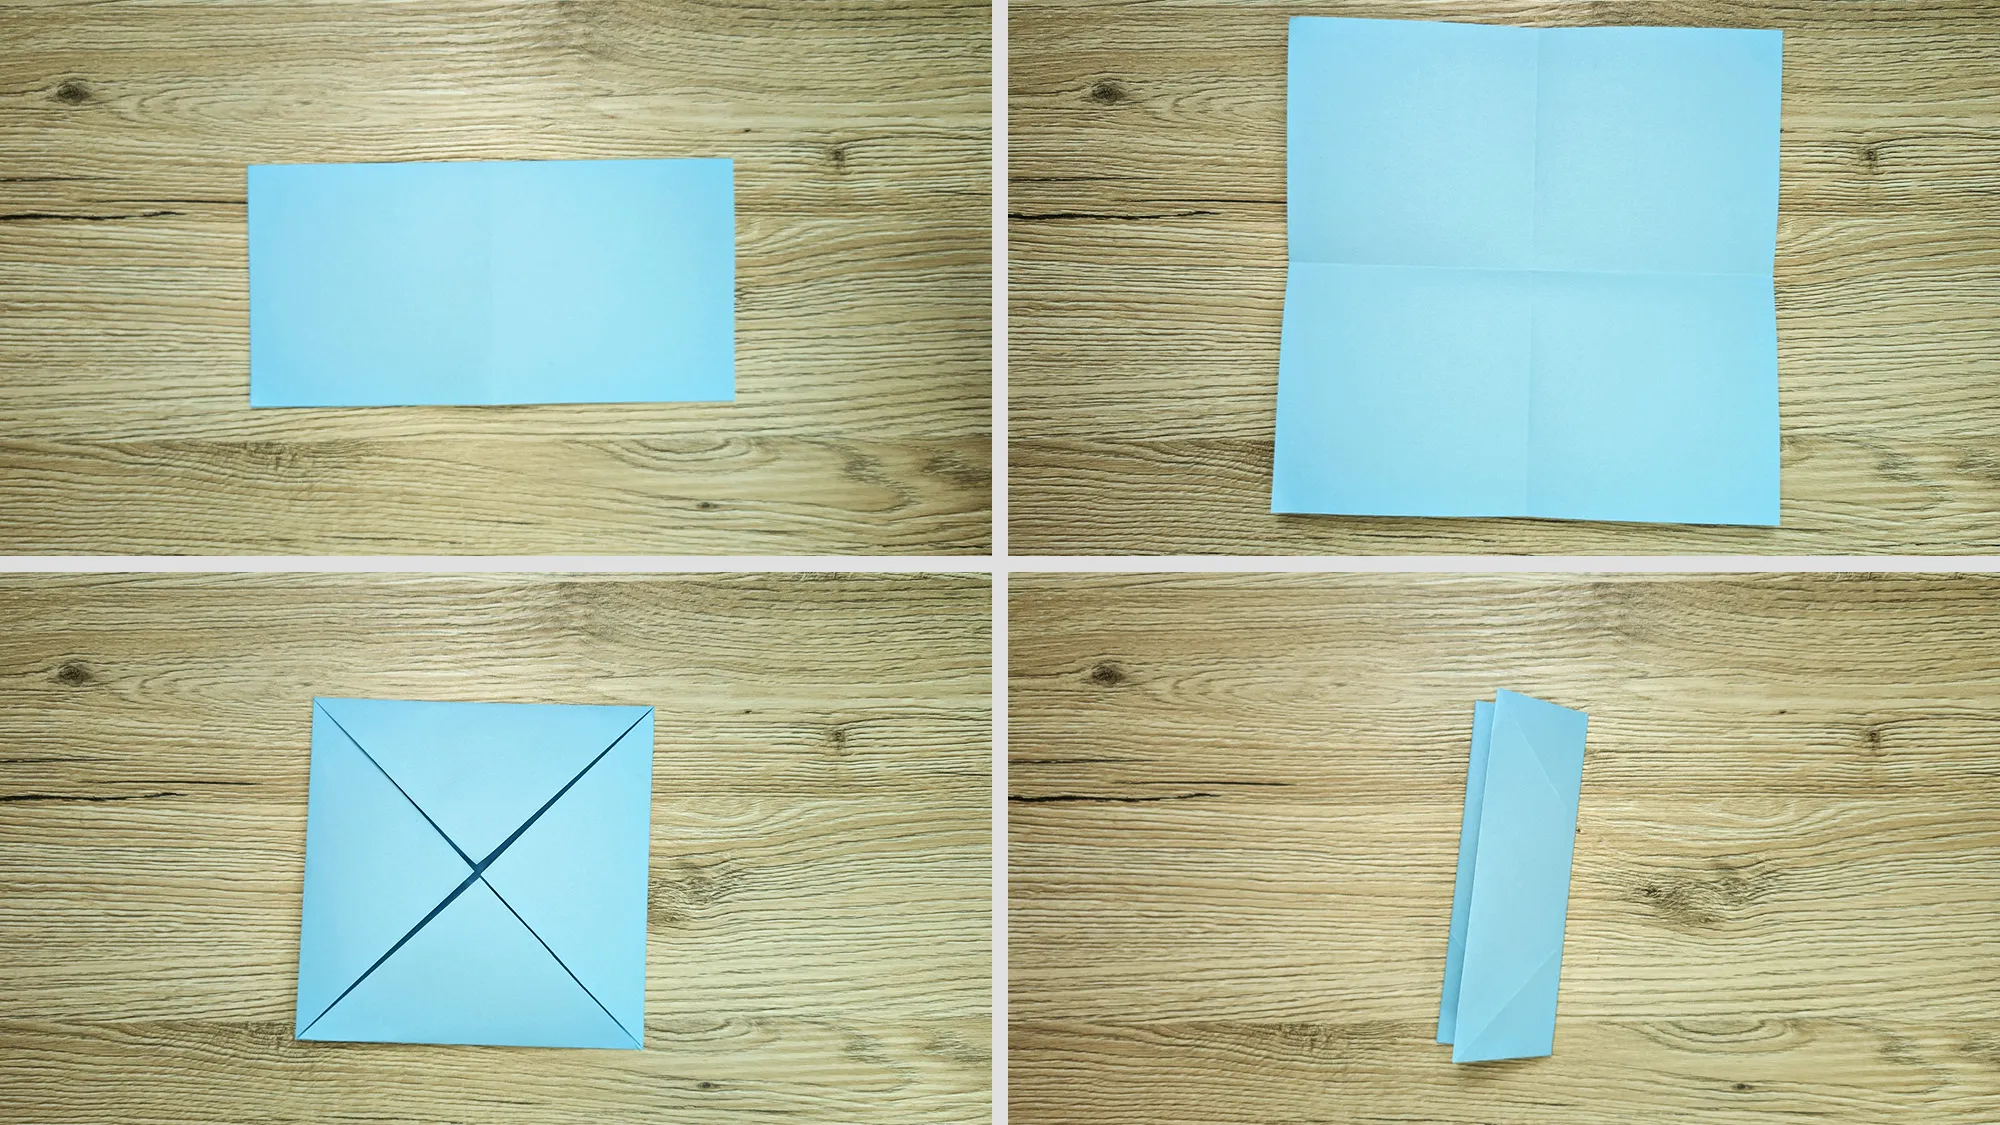
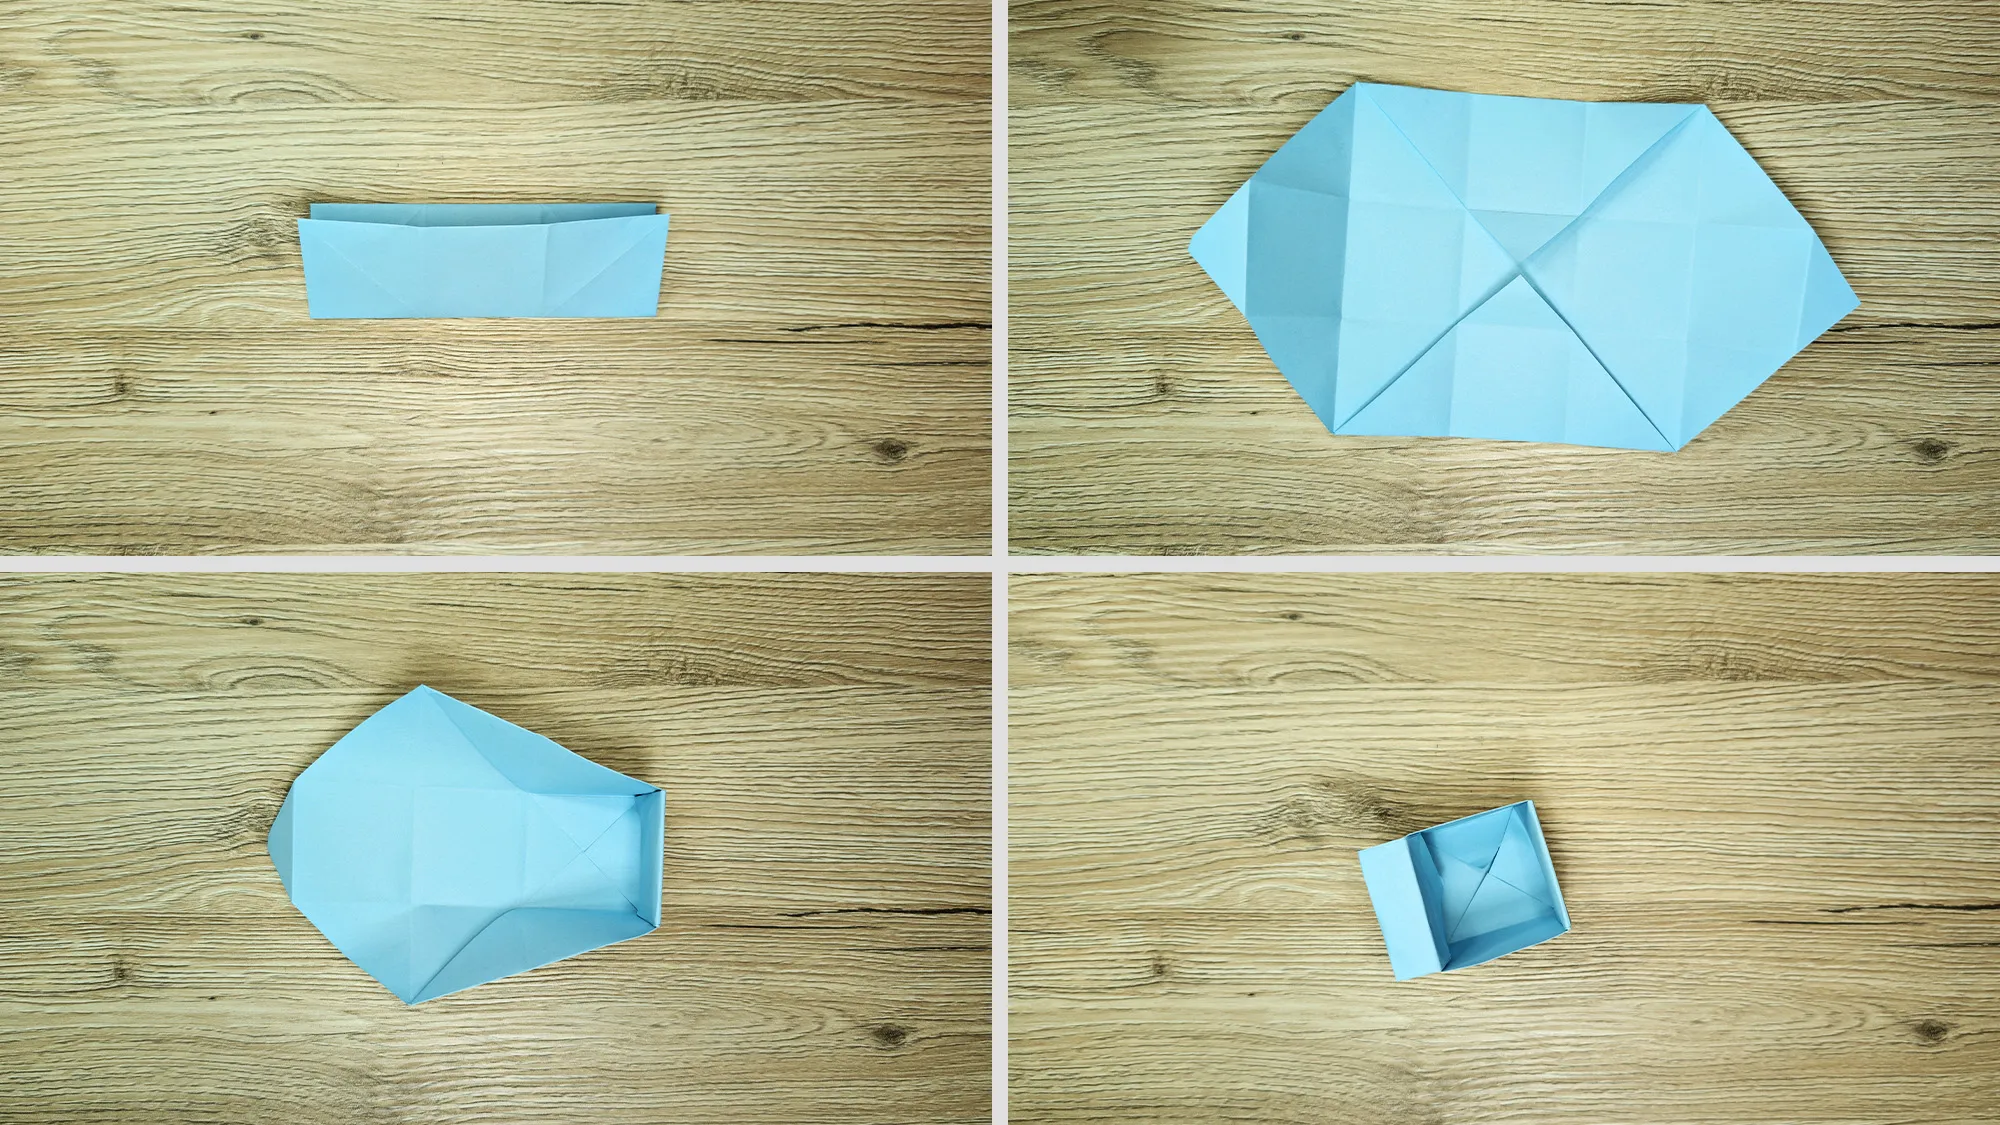
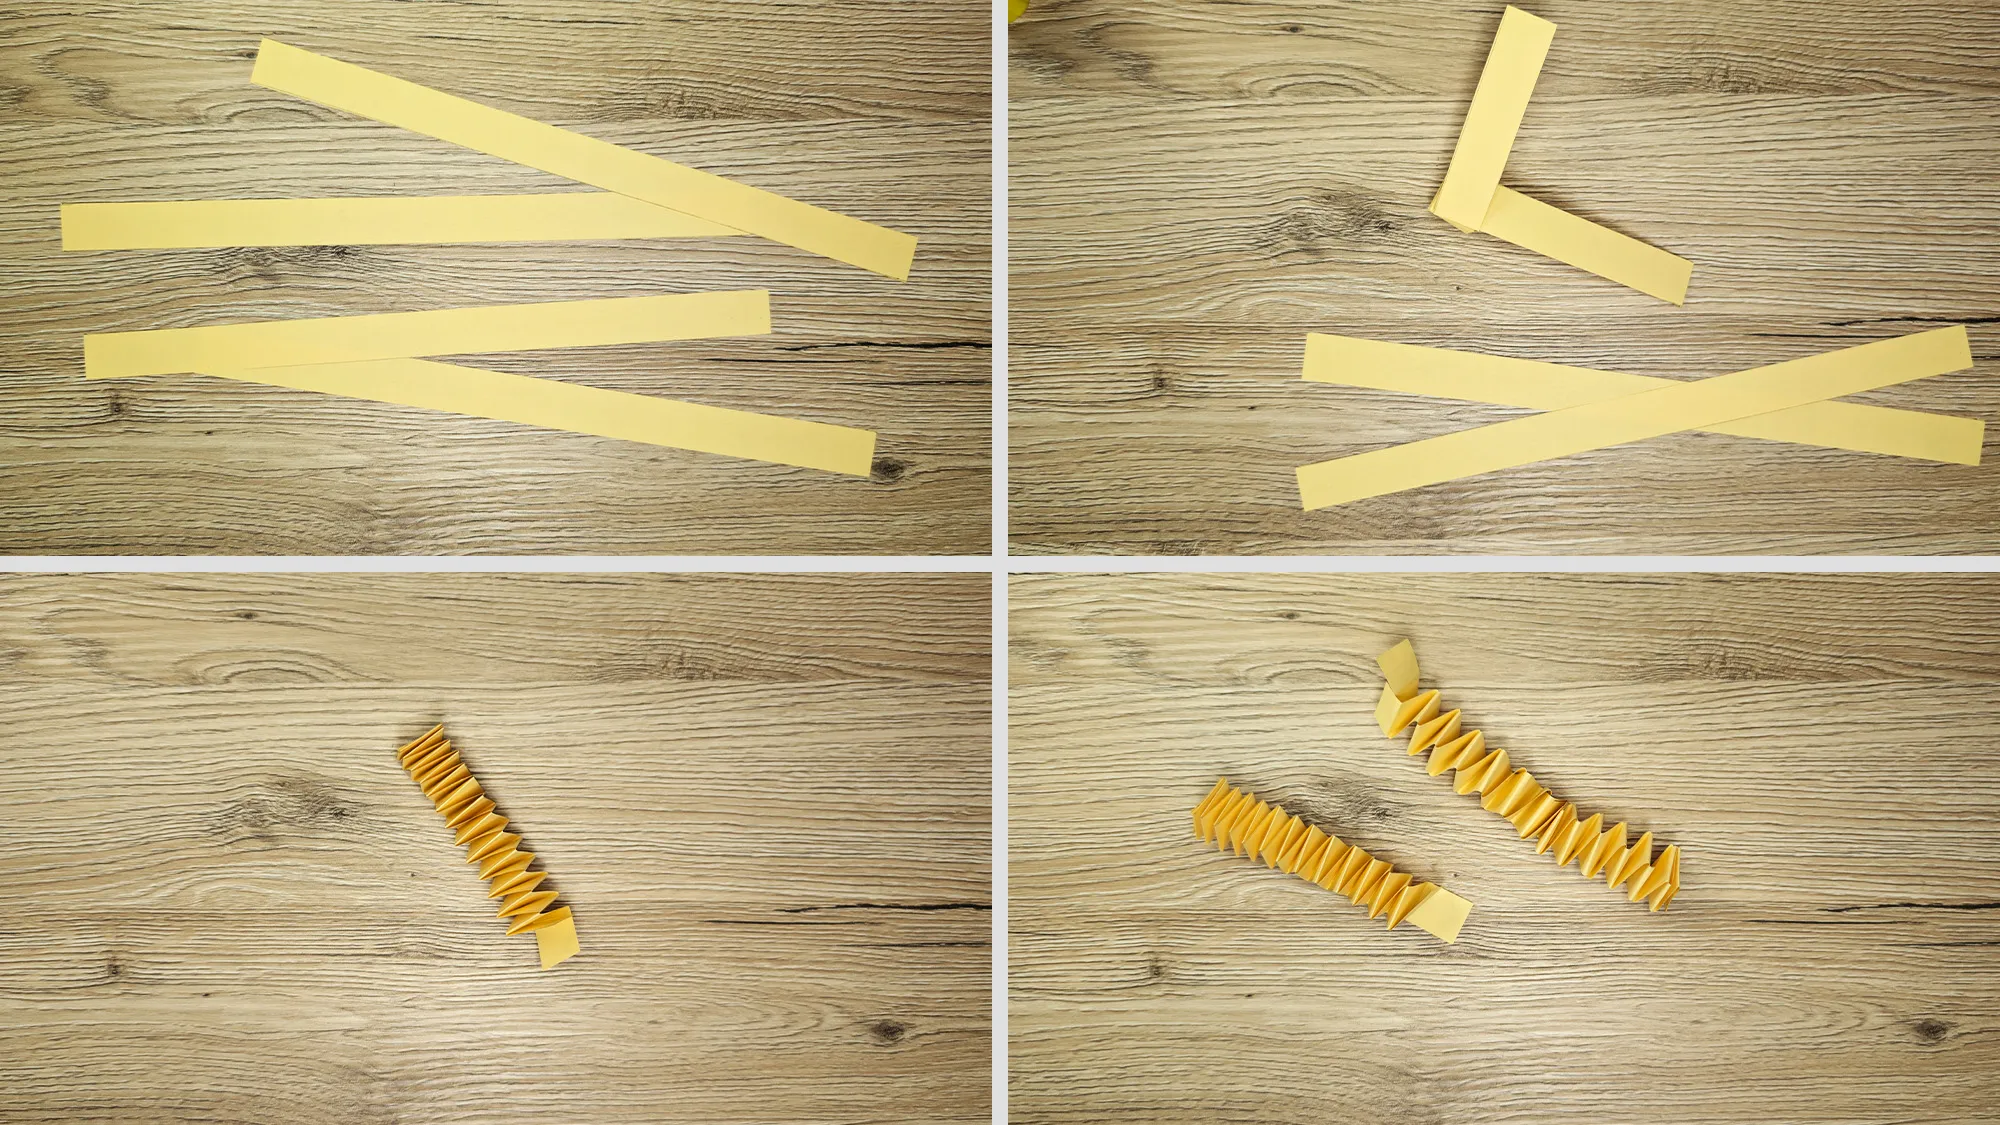
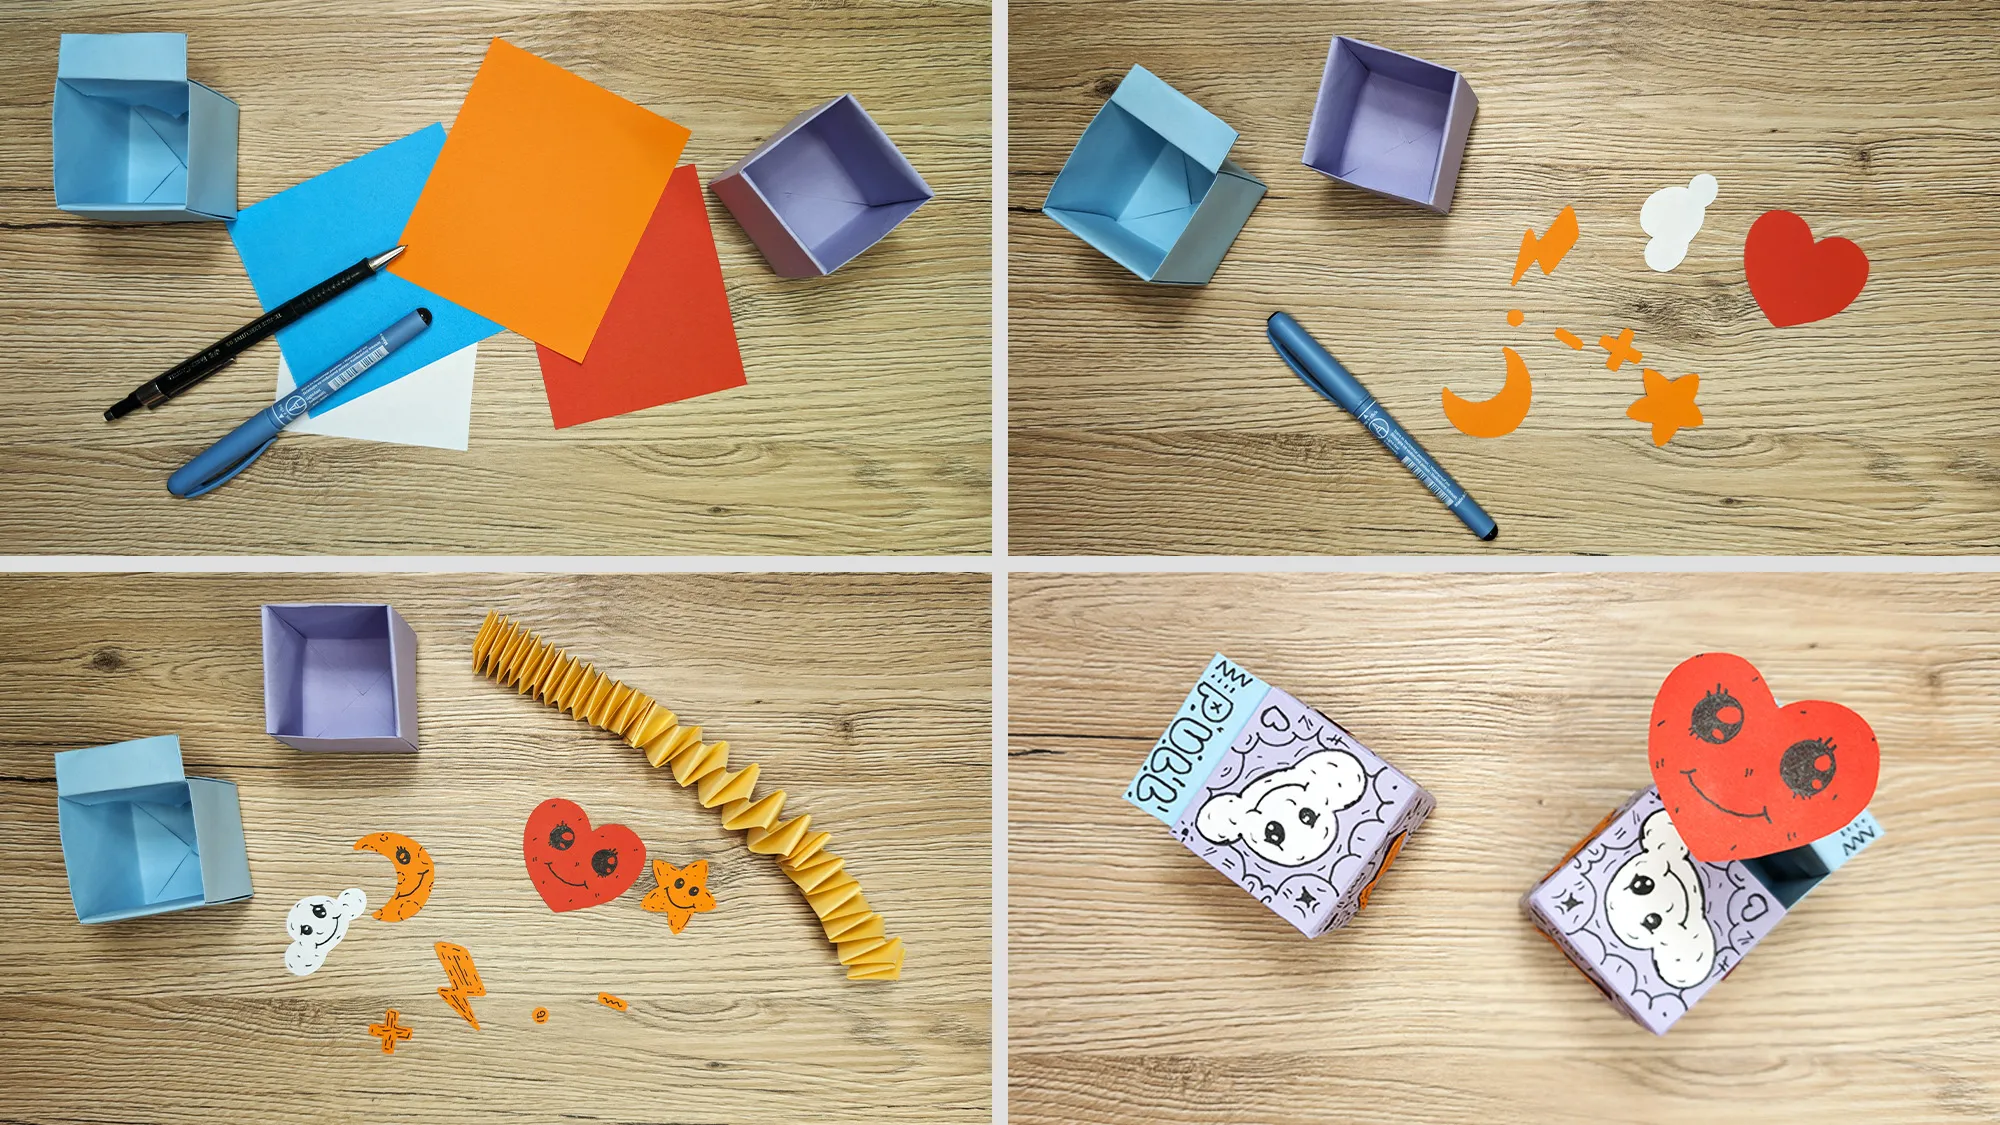
DIY Ideas for Children: Beneficial for Development
Origami and crafting help develop important skills in children! By precise folding and measuring with a ruler, they practice concentration and precision. Working with paper enhances hand fine motor skills. Children also learn to think three-dimensionally and follow complex instructions step by step. This aids them in their school learning later on.
Creative crafting makes children confident and dexterous. They see how something special is created from simple paper. This motivates them to try new things. Children develop their own ideas and learn to patiently work on a task. We regularly showcase new and exciting crafting ideas for home activities.
DIY Ideas for Children: Thank you for participating!
Thank you for taking the time to follow our guide! Check out our other guides in the DIY Ideas for Children category as well.
From Vitalii Shynakov
