DIY Paper revolver - Origami crafting instructions with video and photos
Are you looking for an exciting DIY idea for kids? We are glad you are stopping by with us. This cool paper revolver in Western style is a fascinating crafting project! Although it's not traditional origami, we use similar folding techniques - all parts are folded from paper and then assembled. With some glue, the revolver becomes even more stable. My 11-year-old son was so excited about this crafting idea that he immediately built it!
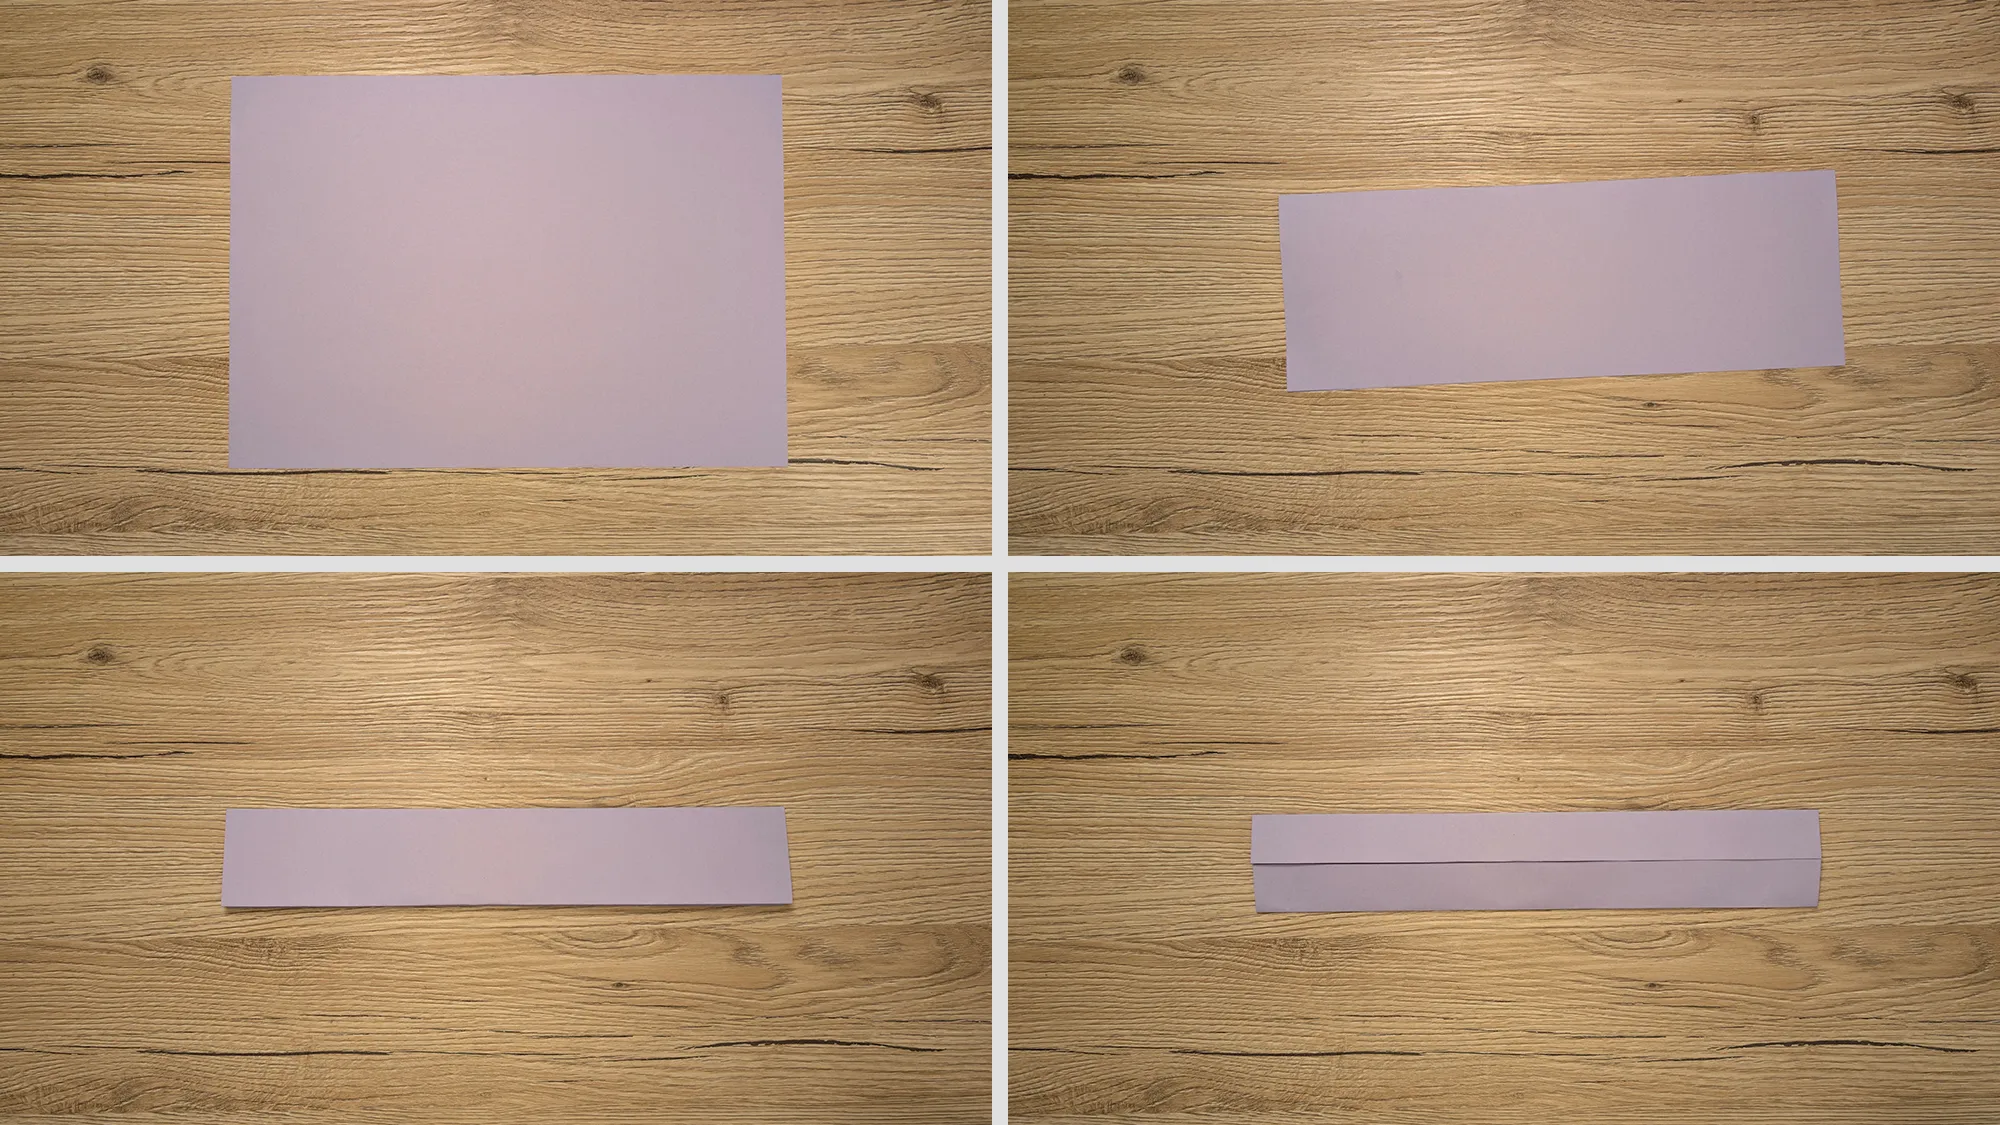
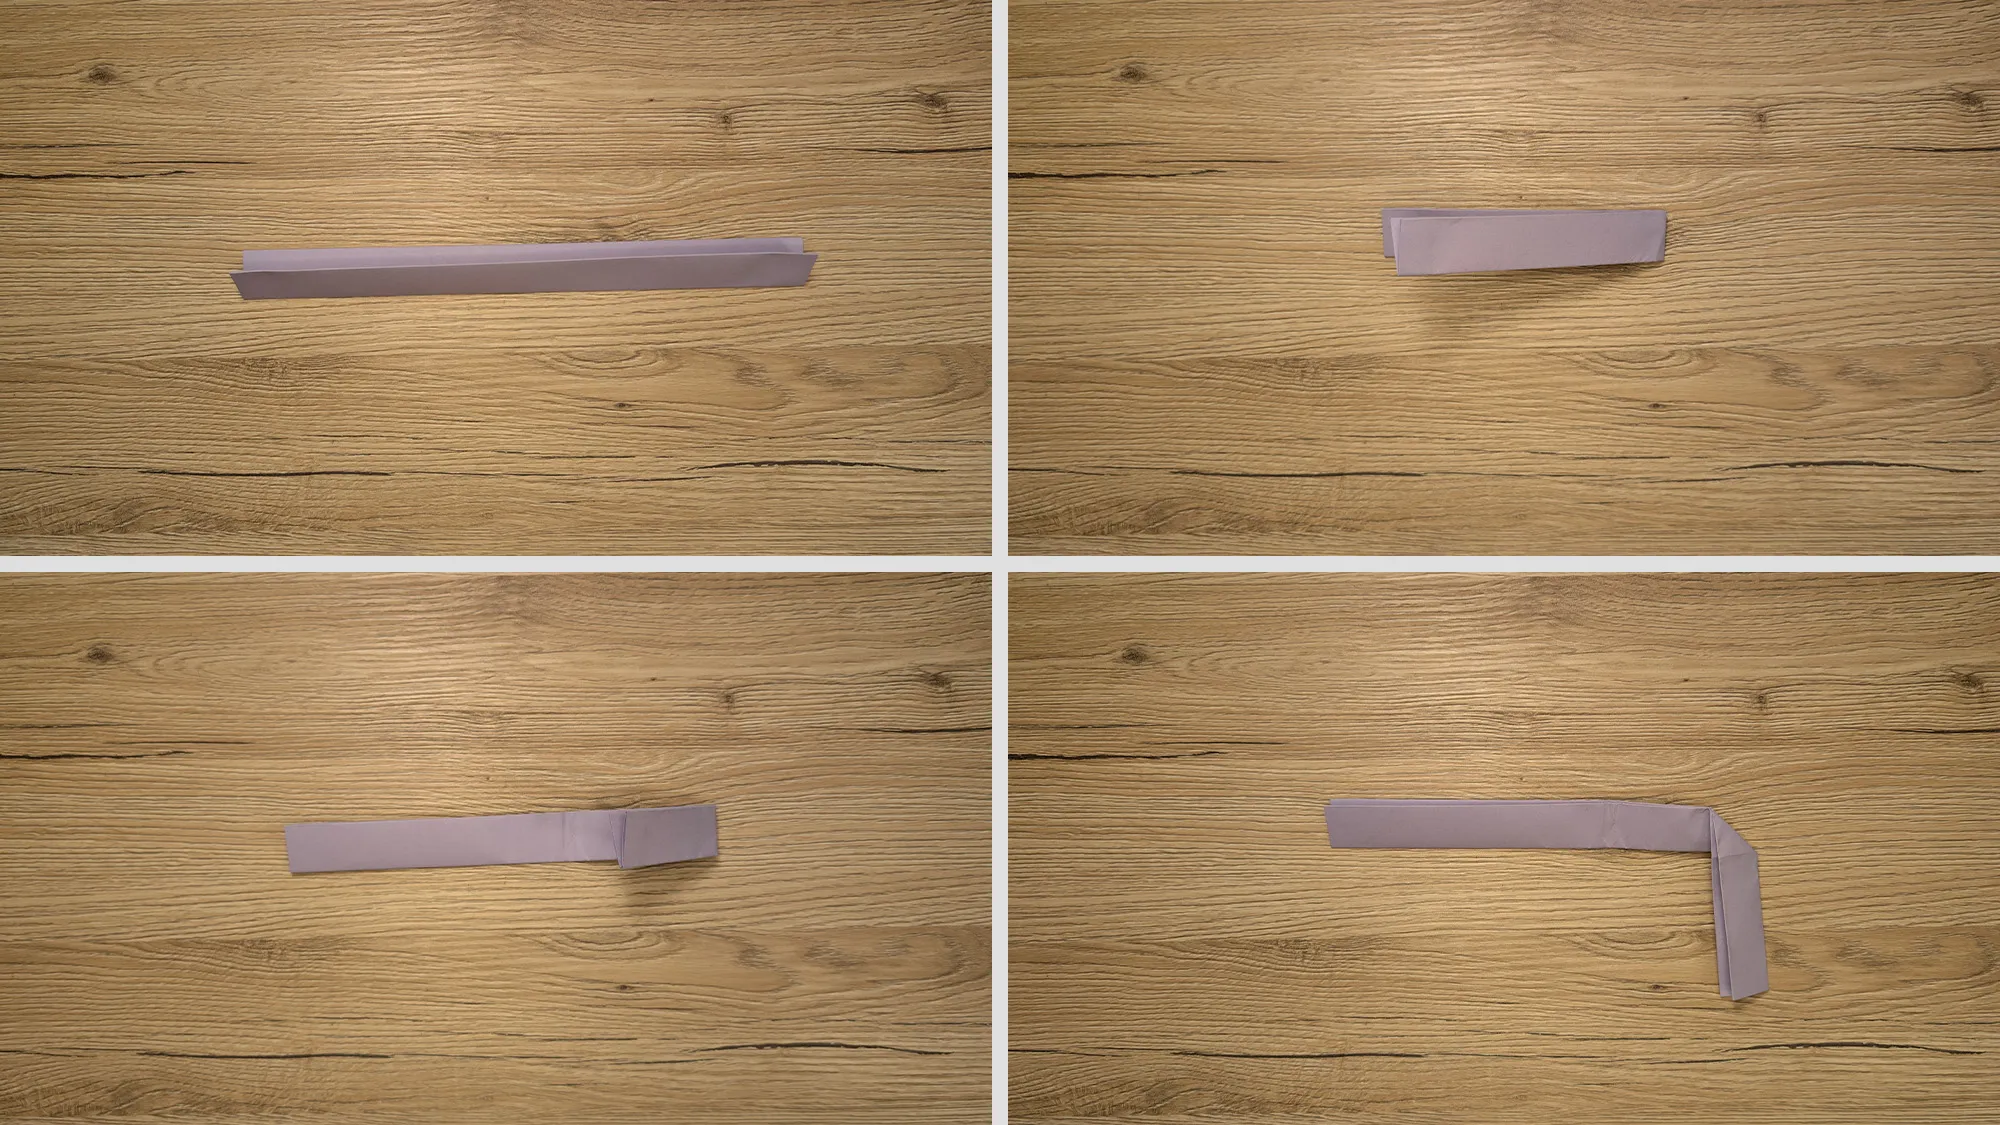
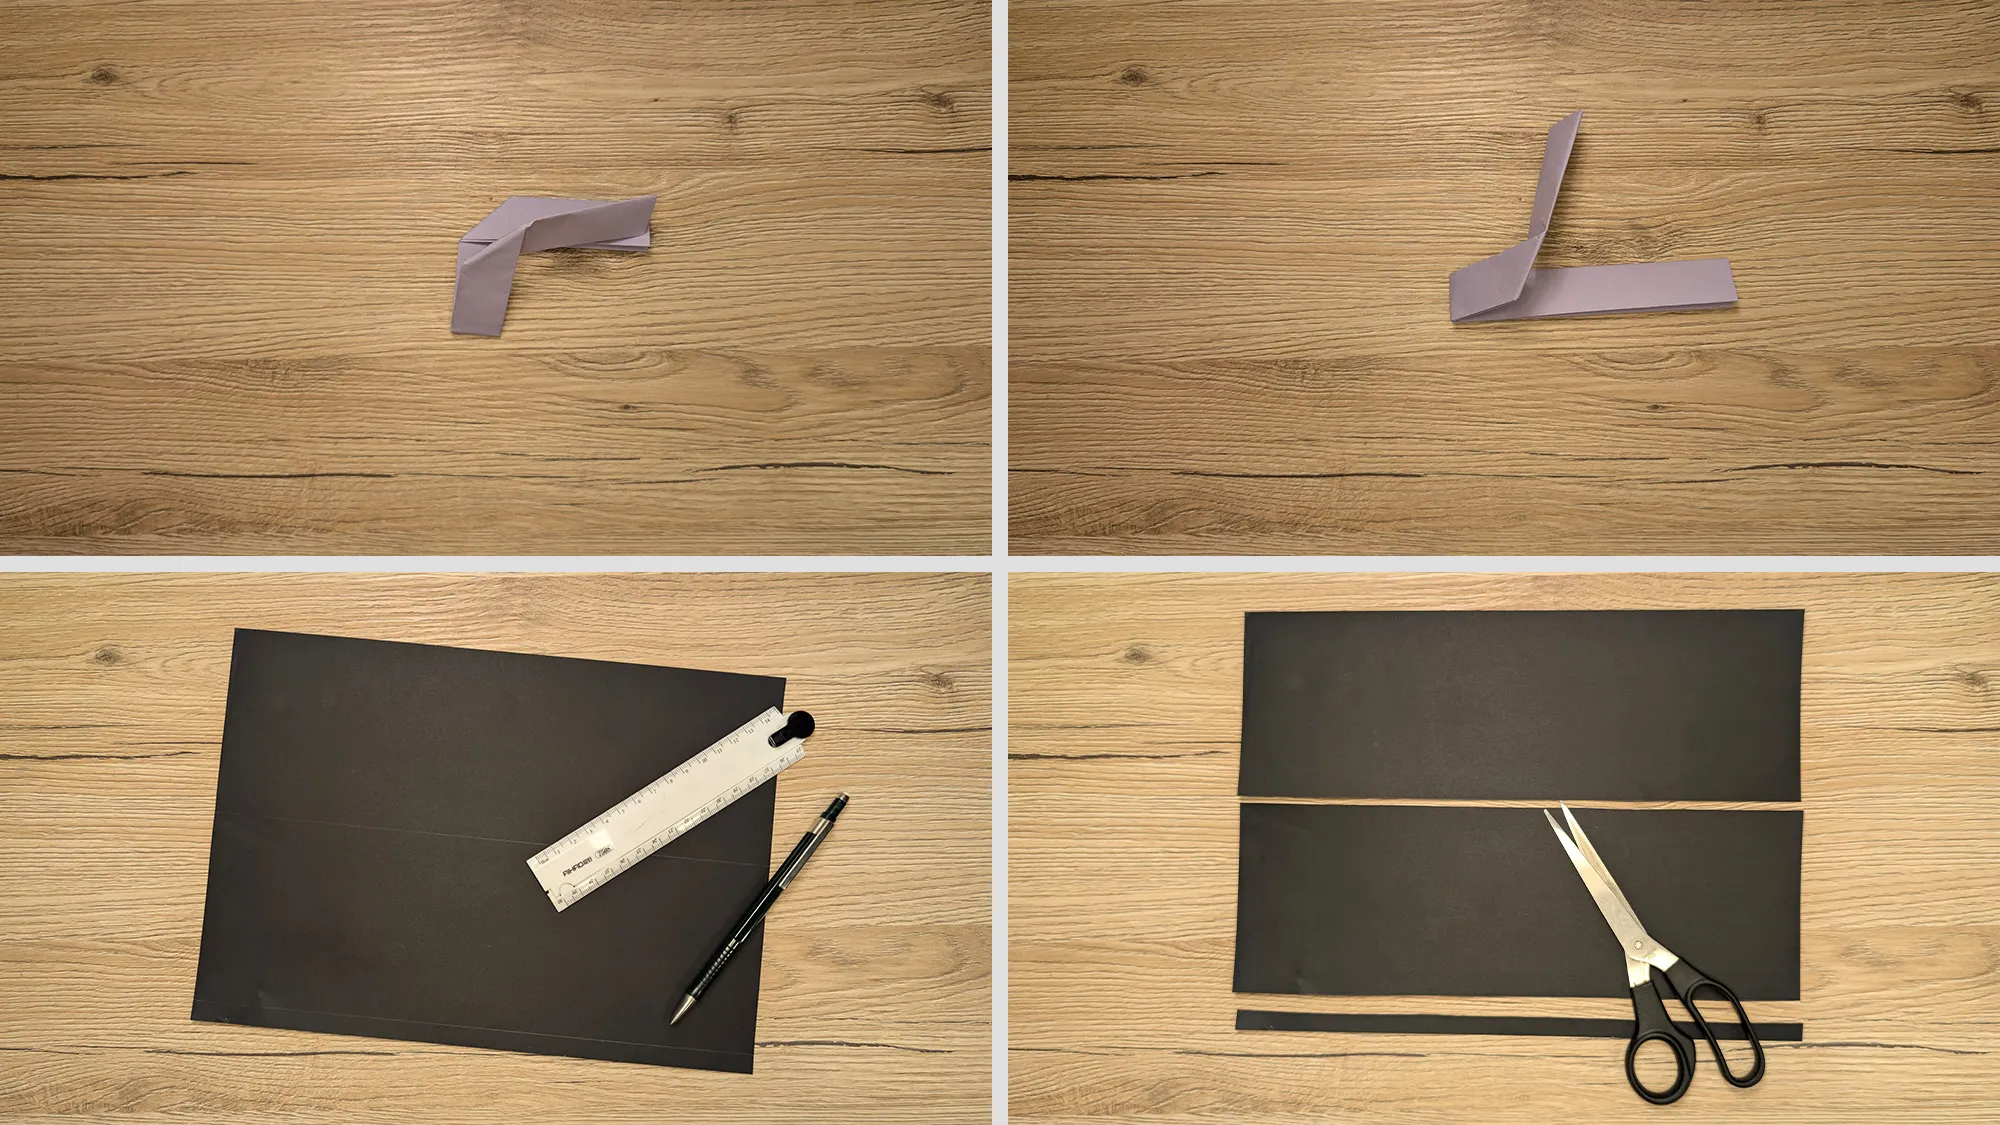
Our tutorials always include a self-made video and photos for each crafting step. This allows you to easily follow along at home. The video shows you exactly how to fold the individual parts and assemble them into the revolver. The photos additionally help you with each step. You can watch everything as many times as you like.
This paper revolver is a real highlight for crafting fans! From simple paper emerges an impressive revolver in Western style. The special thing: Theoretically, you could even build it without any glue, but with a few glue dots, it becomes even more stable.
DIY Paper Revolver: Instructions with Photos and Description
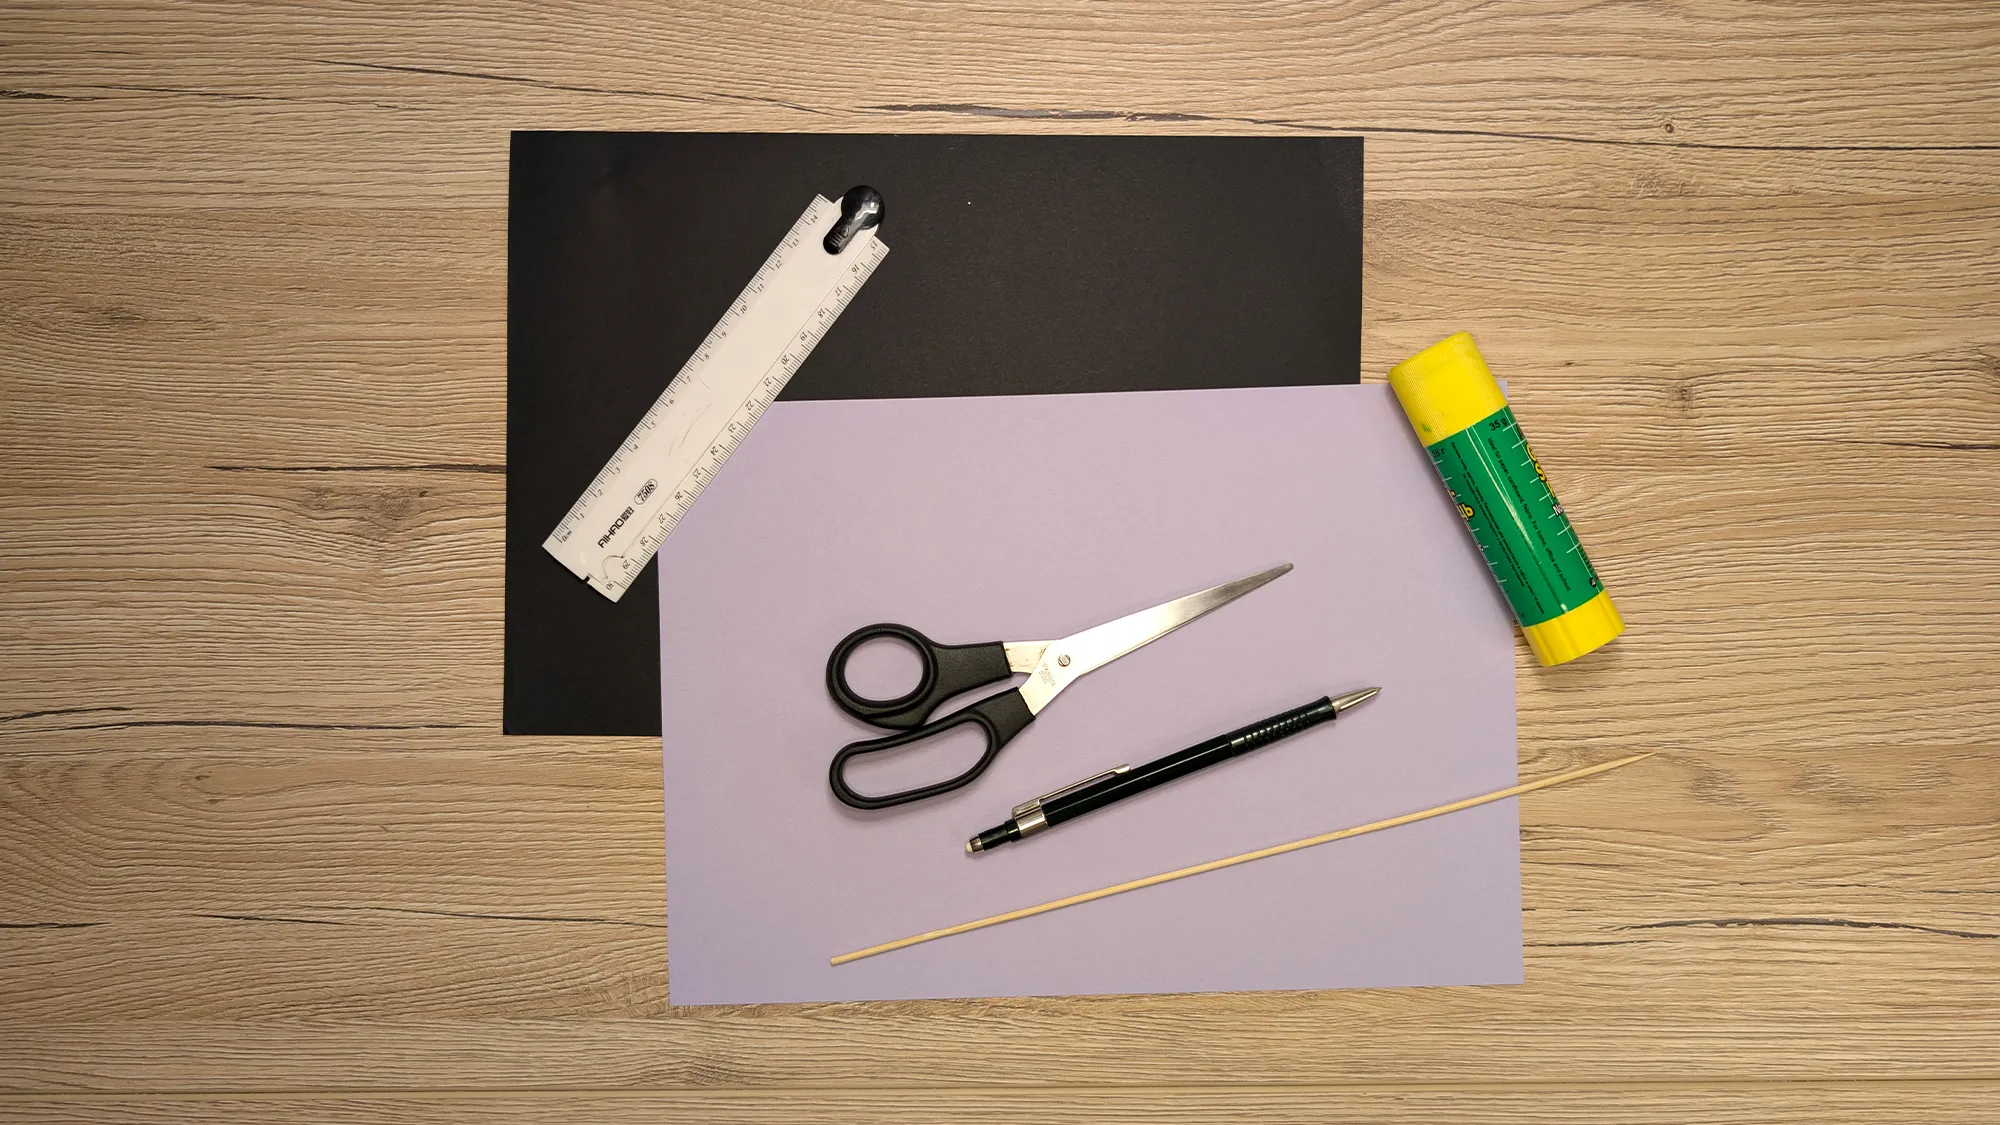
For this crafting project, you will need:
- Colored paper in various colors
- Scissors
- A pen
- Some glue
- Patience for folding
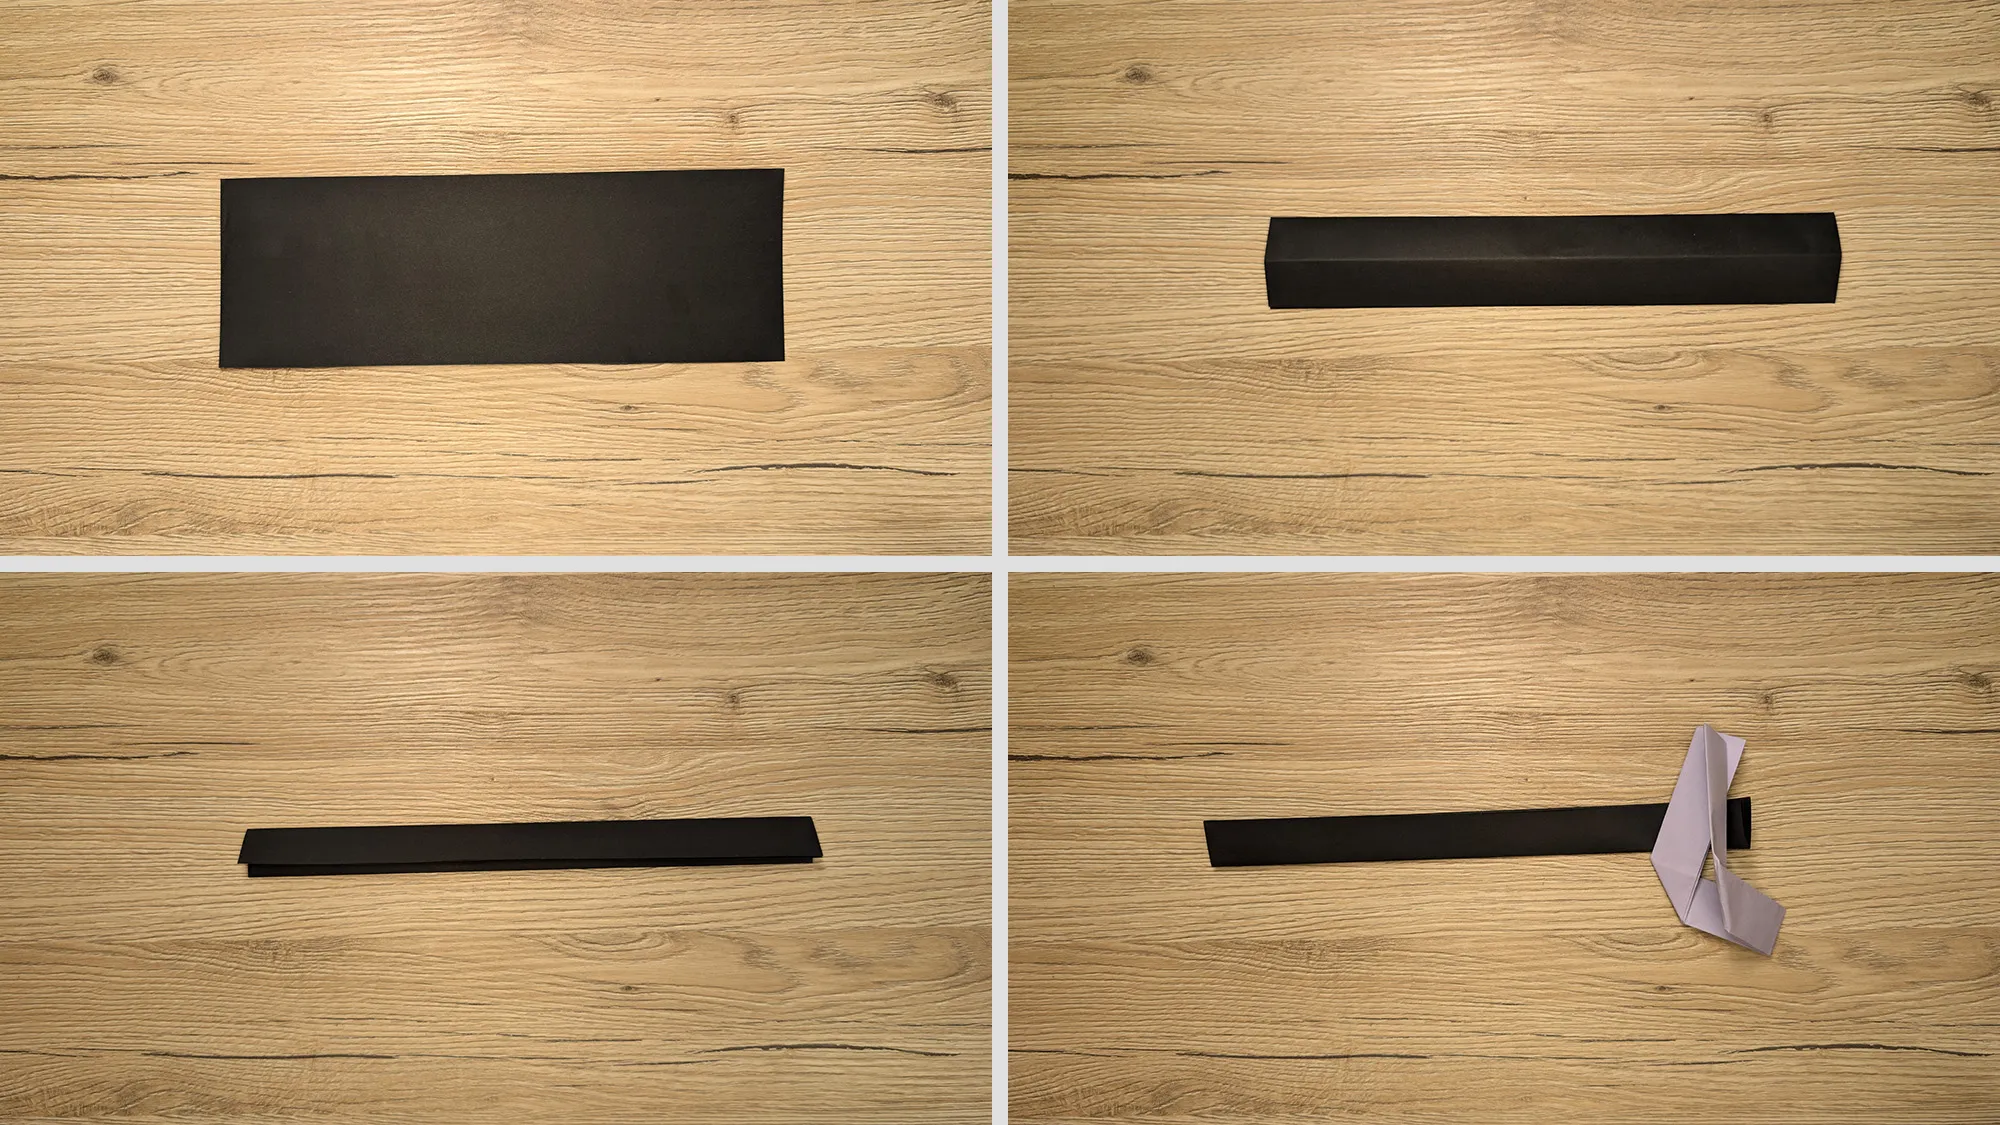
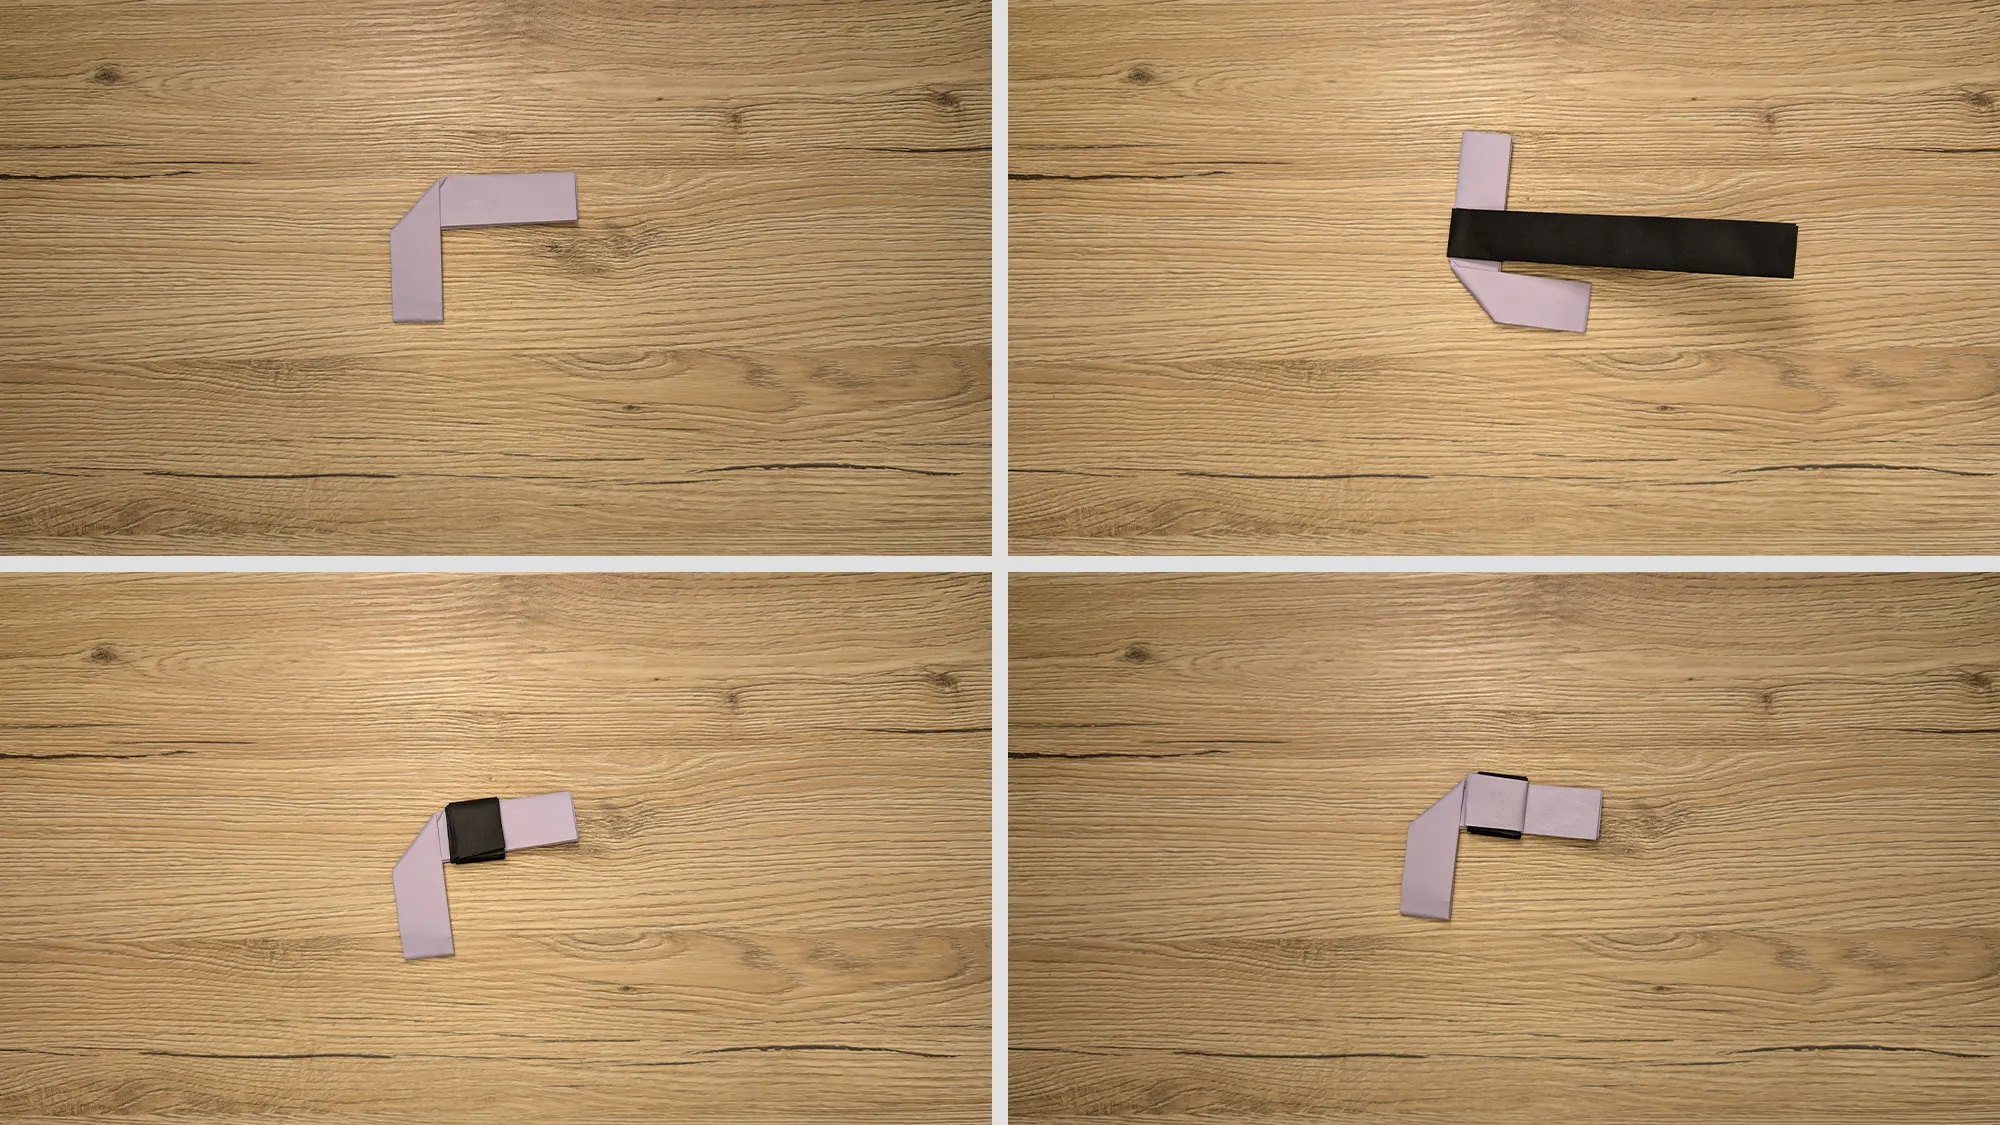
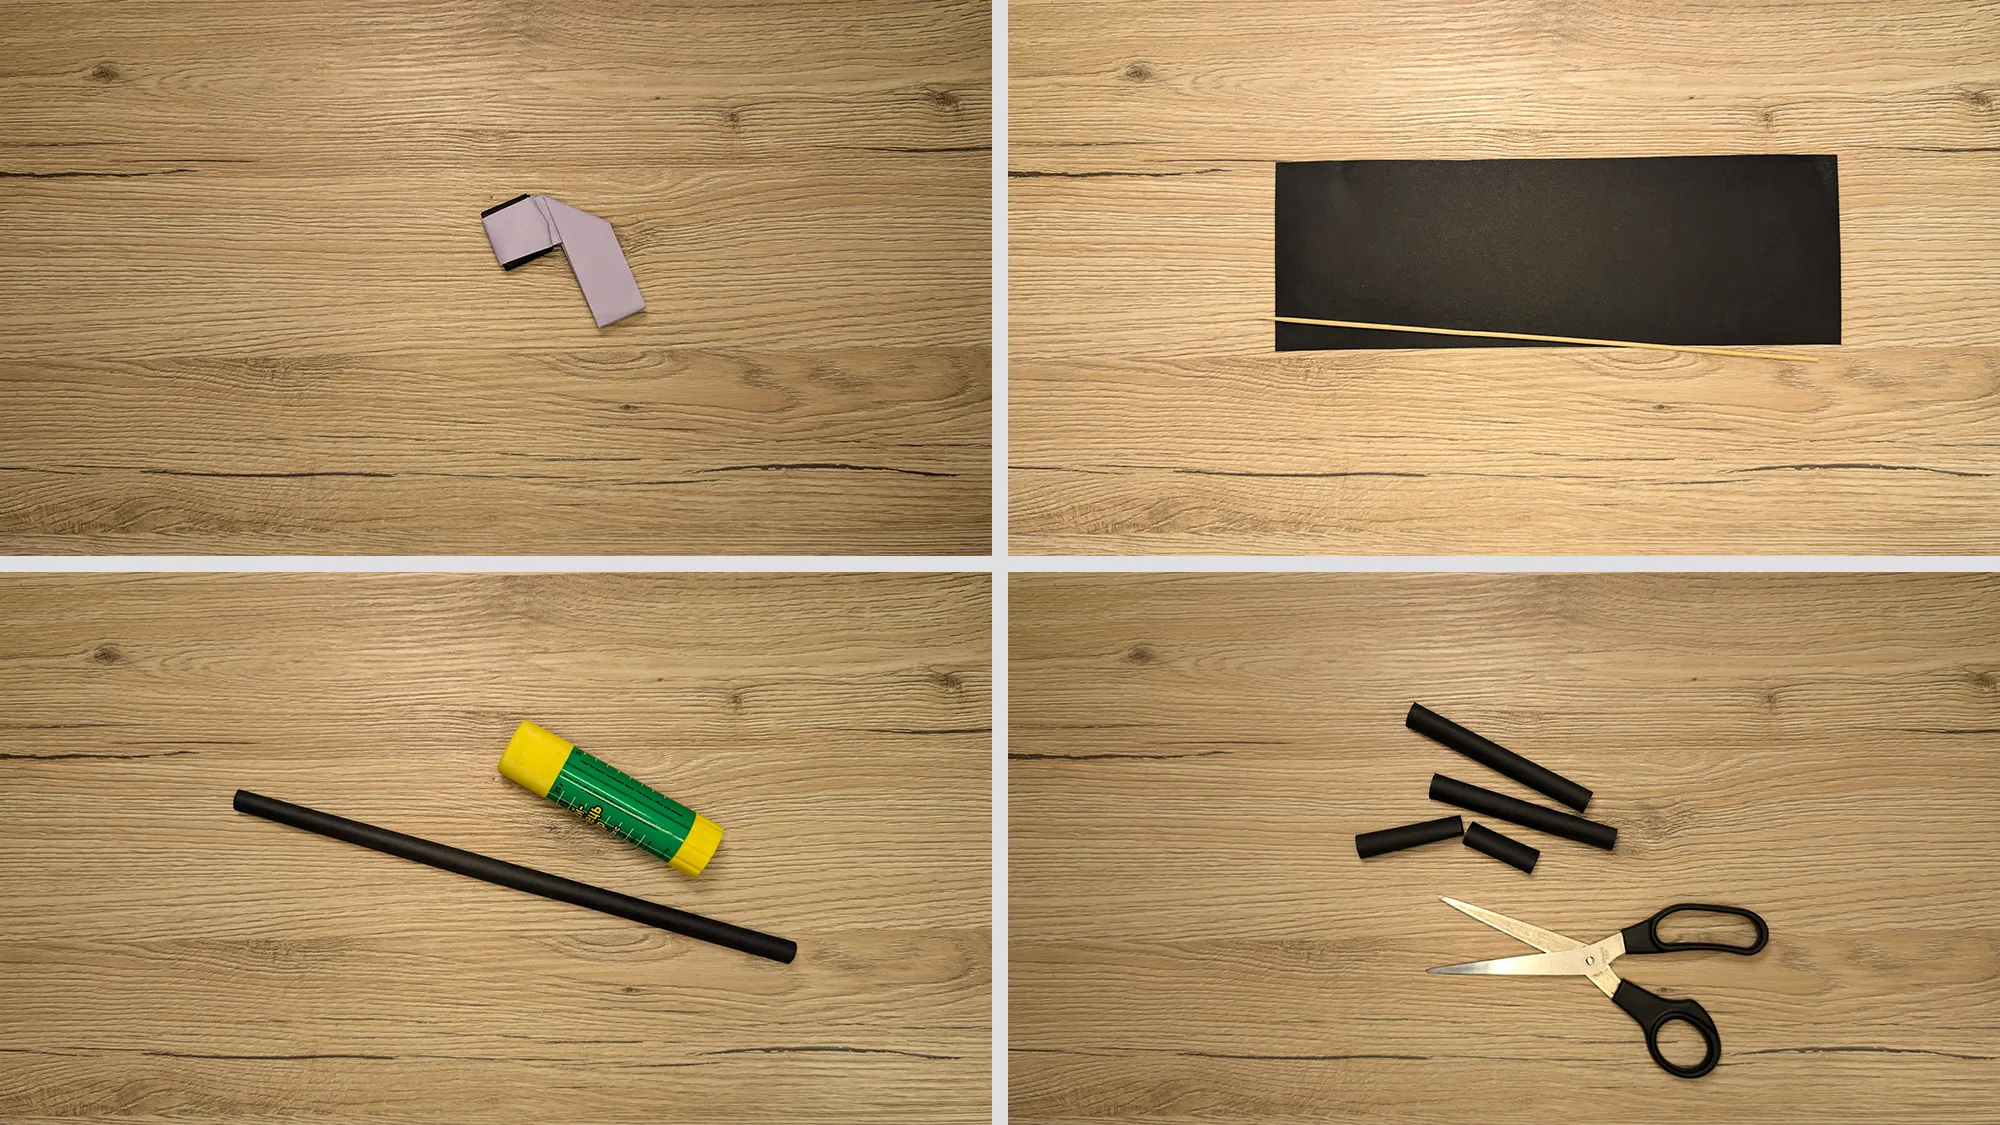
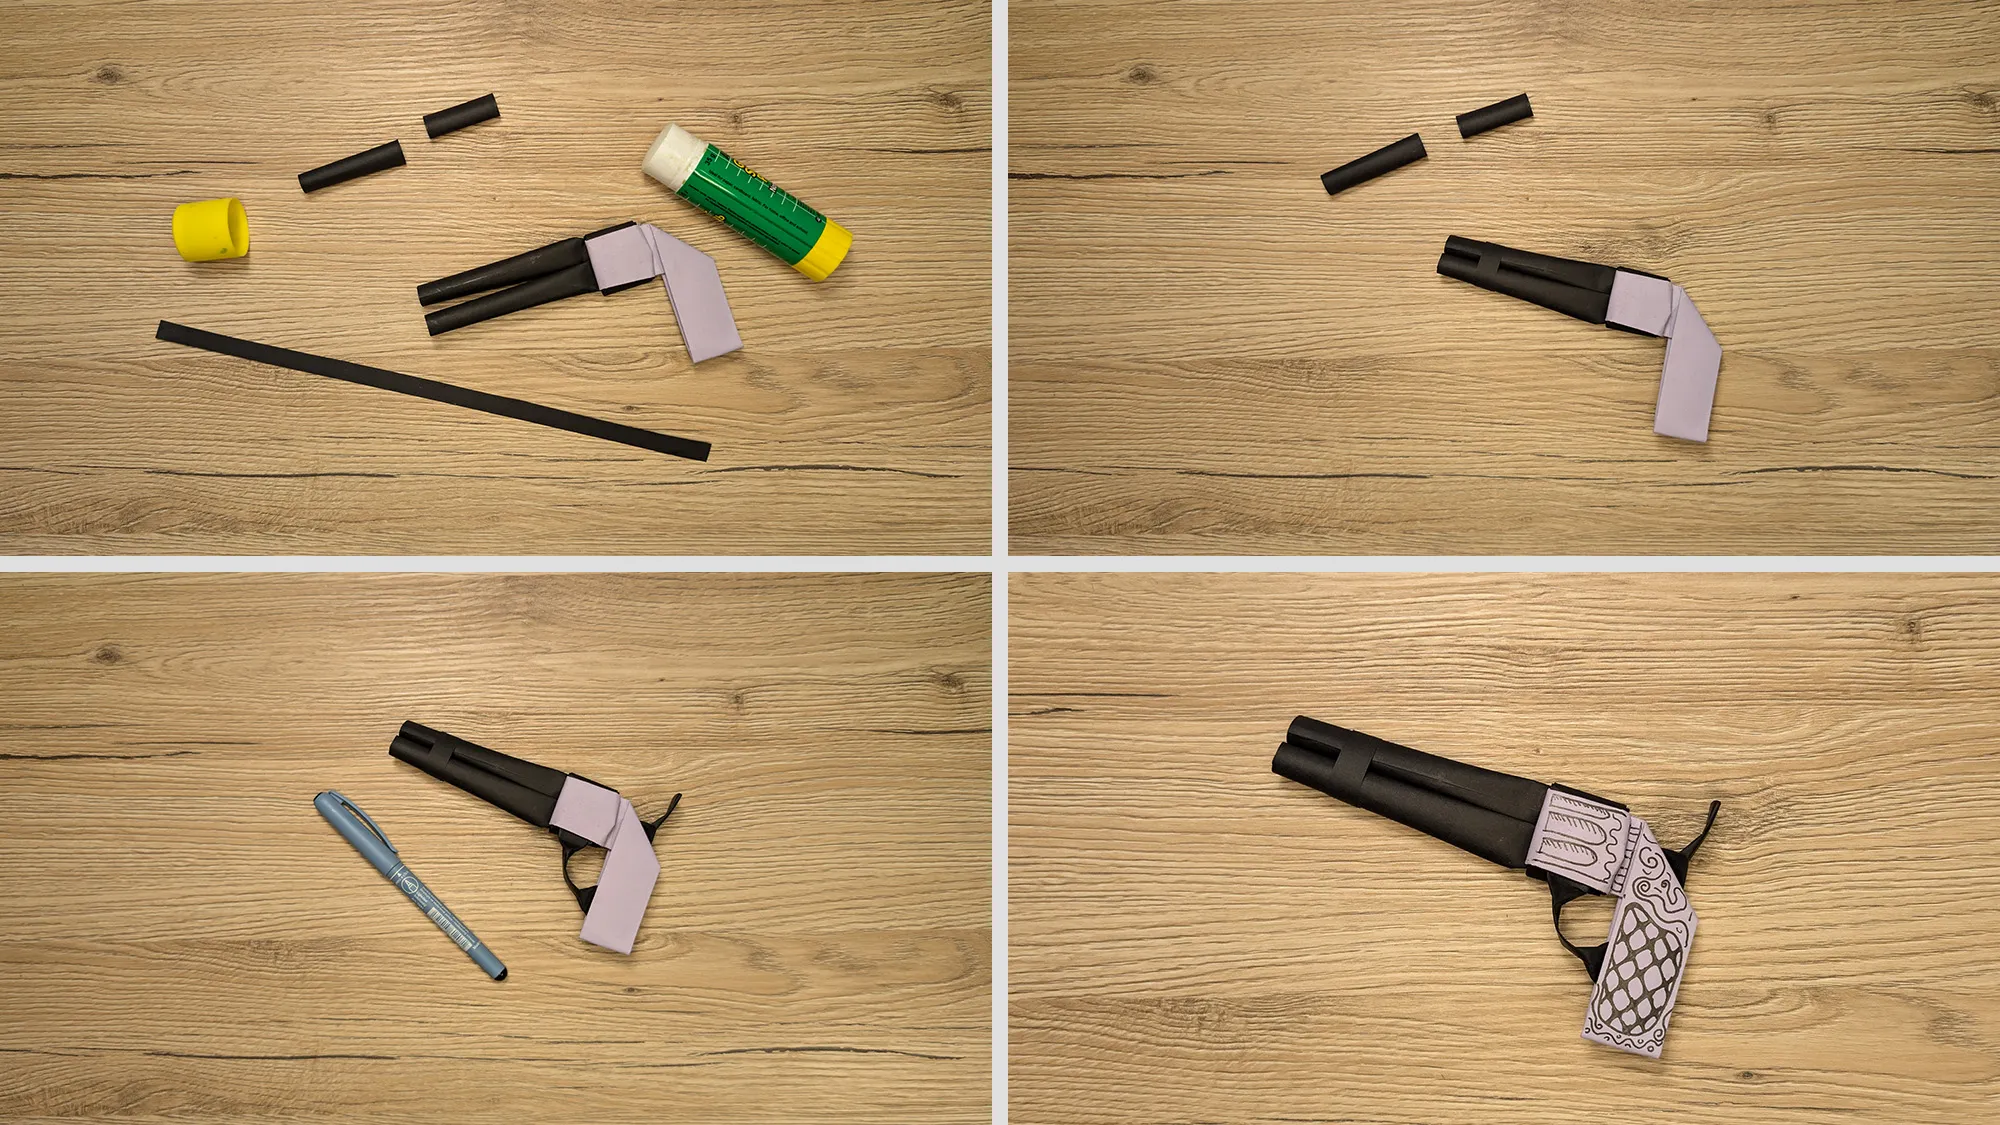
DIY Ideas for Kids: Beneficial for Development
This type of more complex crafting projects is perfect for older children! While folding precisely and assembling, they train their fine motor skills and spatial thinking. Working accurately following instructions promotes concentration and endurance. Particularly for children aged 10 and above, such challenging projects are just right.
The joy and pride when a self-made paper revolver is finished at the end boost confidence. Children also learn that with patience and perseverance, great things can be created. We regularly present new and exciting crafting ideas for different age groups.
DIY Ideas for Kids: Thank You for Being Here!
Thank you for taking the time to follow our instructions! Also, check out our other guides in the category DIY Ideas for Kids. There you will find many more creative ideas for crafting and designing.
From Vitalii Shynakov
