Origami Capybara - Folding instructions with video and photos
Are you looking for an exciting origami guide? A folded Origami Capybara is a cute project that will especially delight animal lovers! This creative origami technique transforms a simple sheet of paper into a sweet rodent with a round face and distinctive ears.
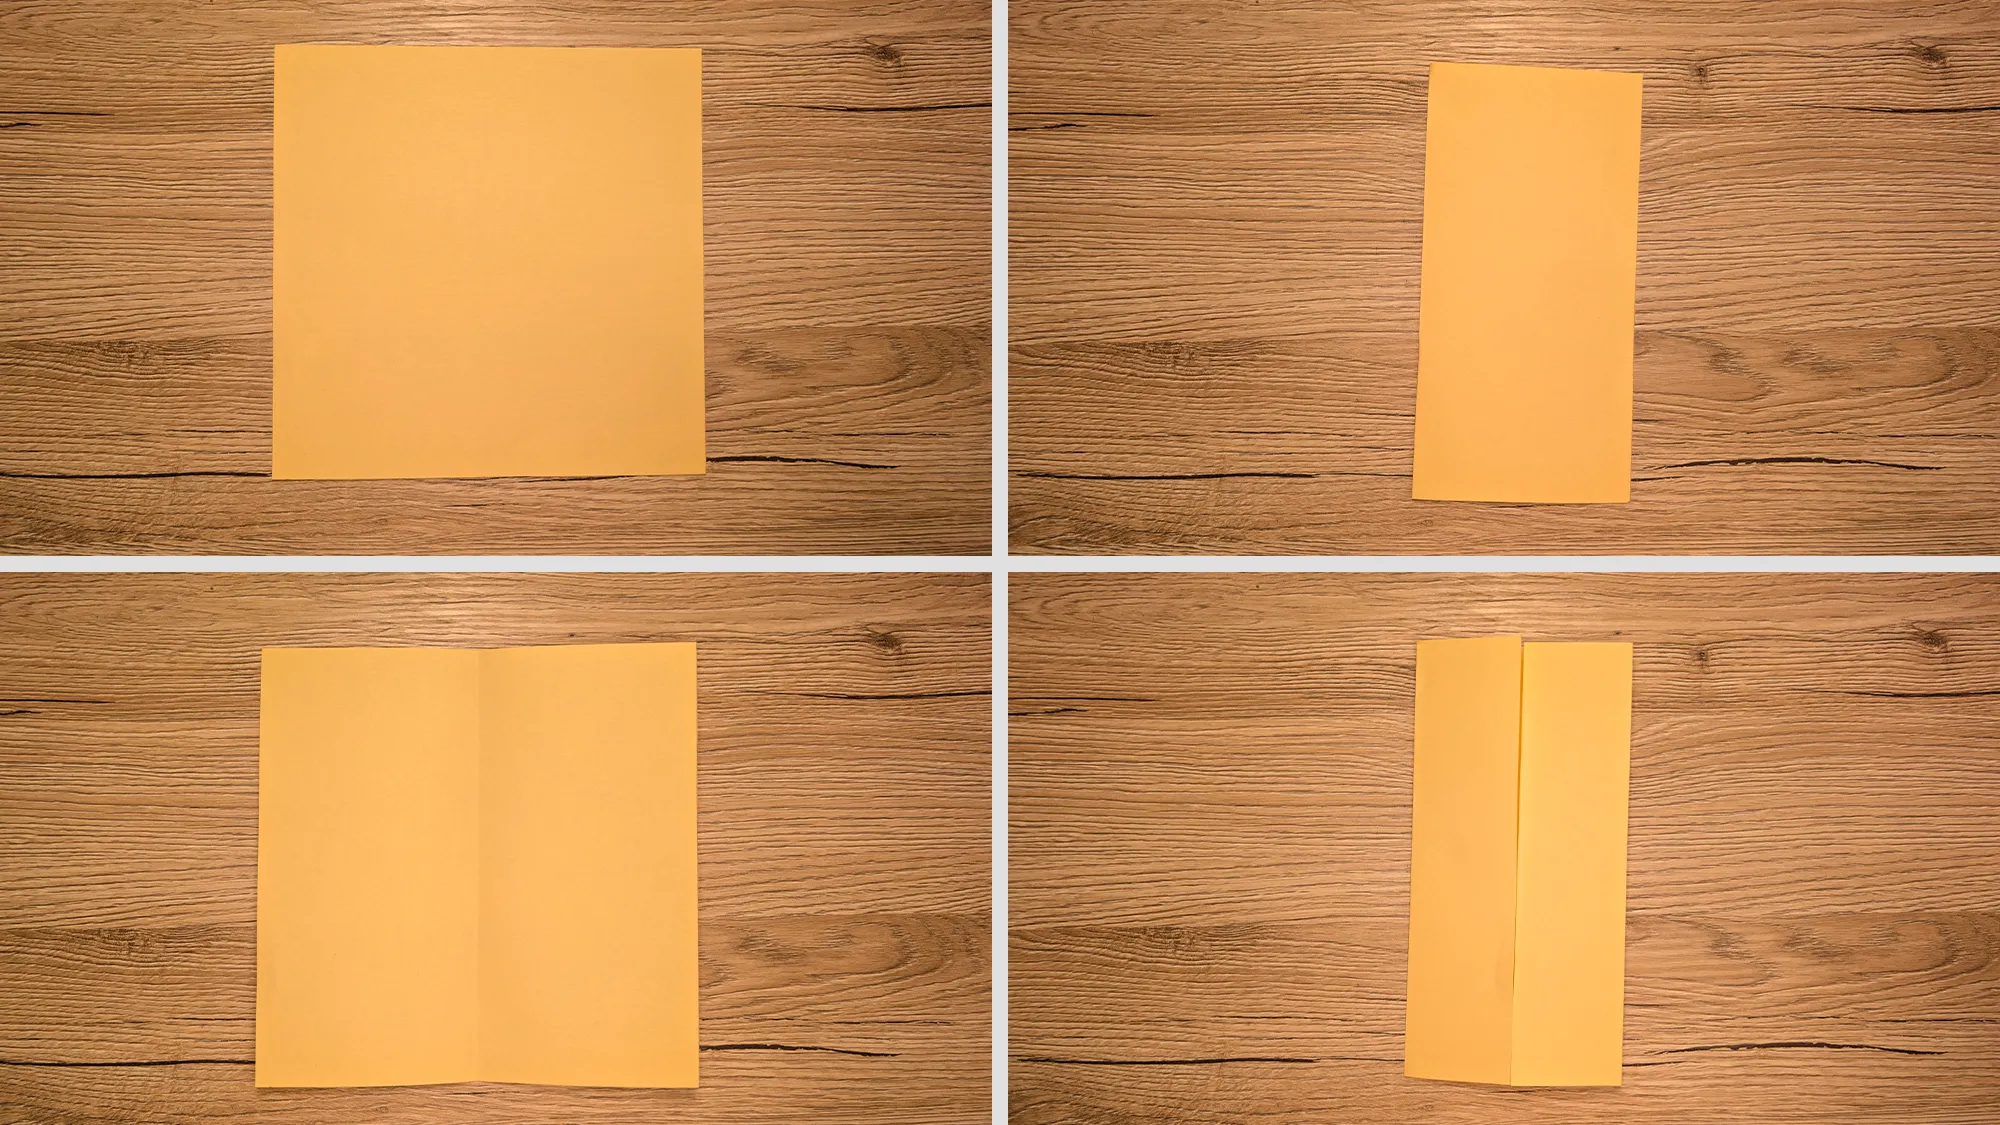
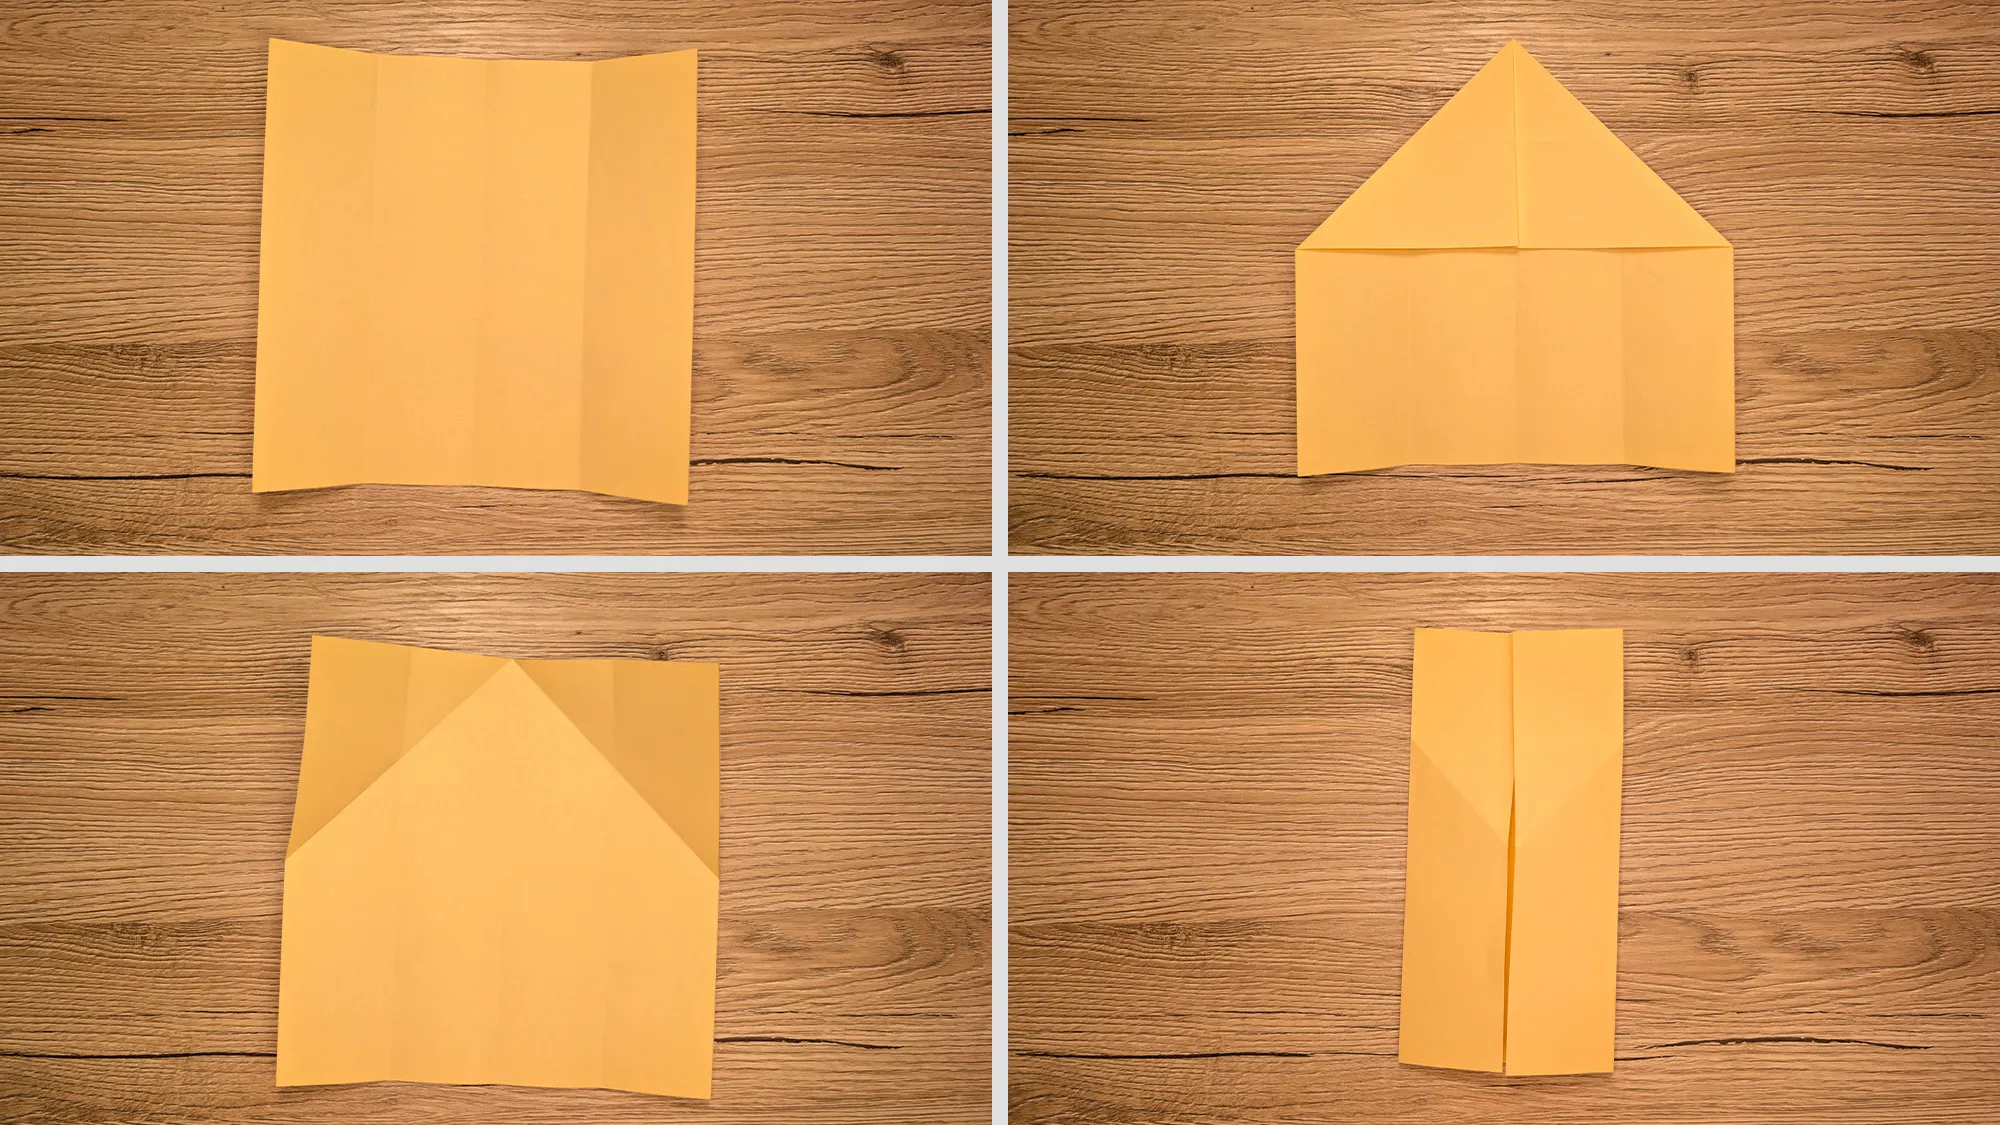
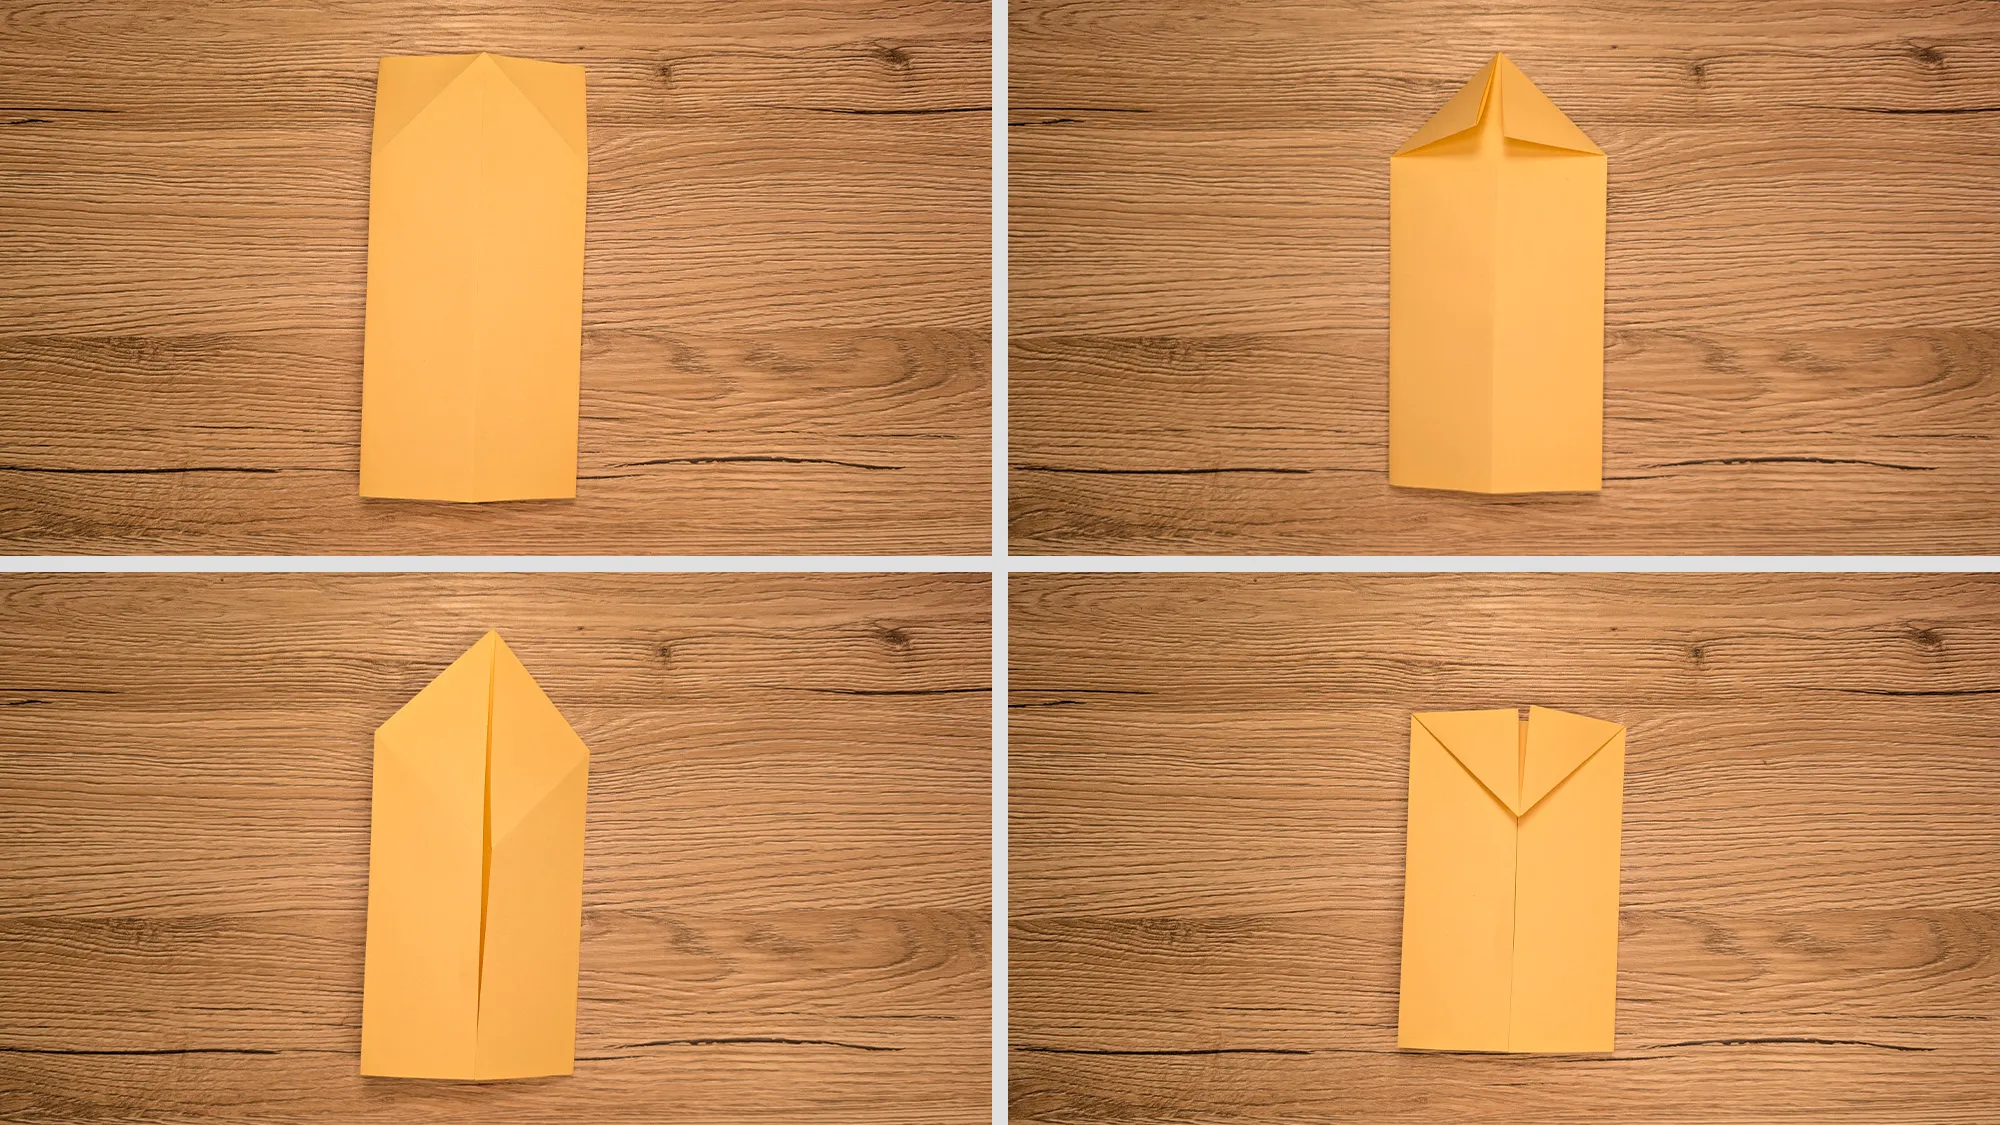
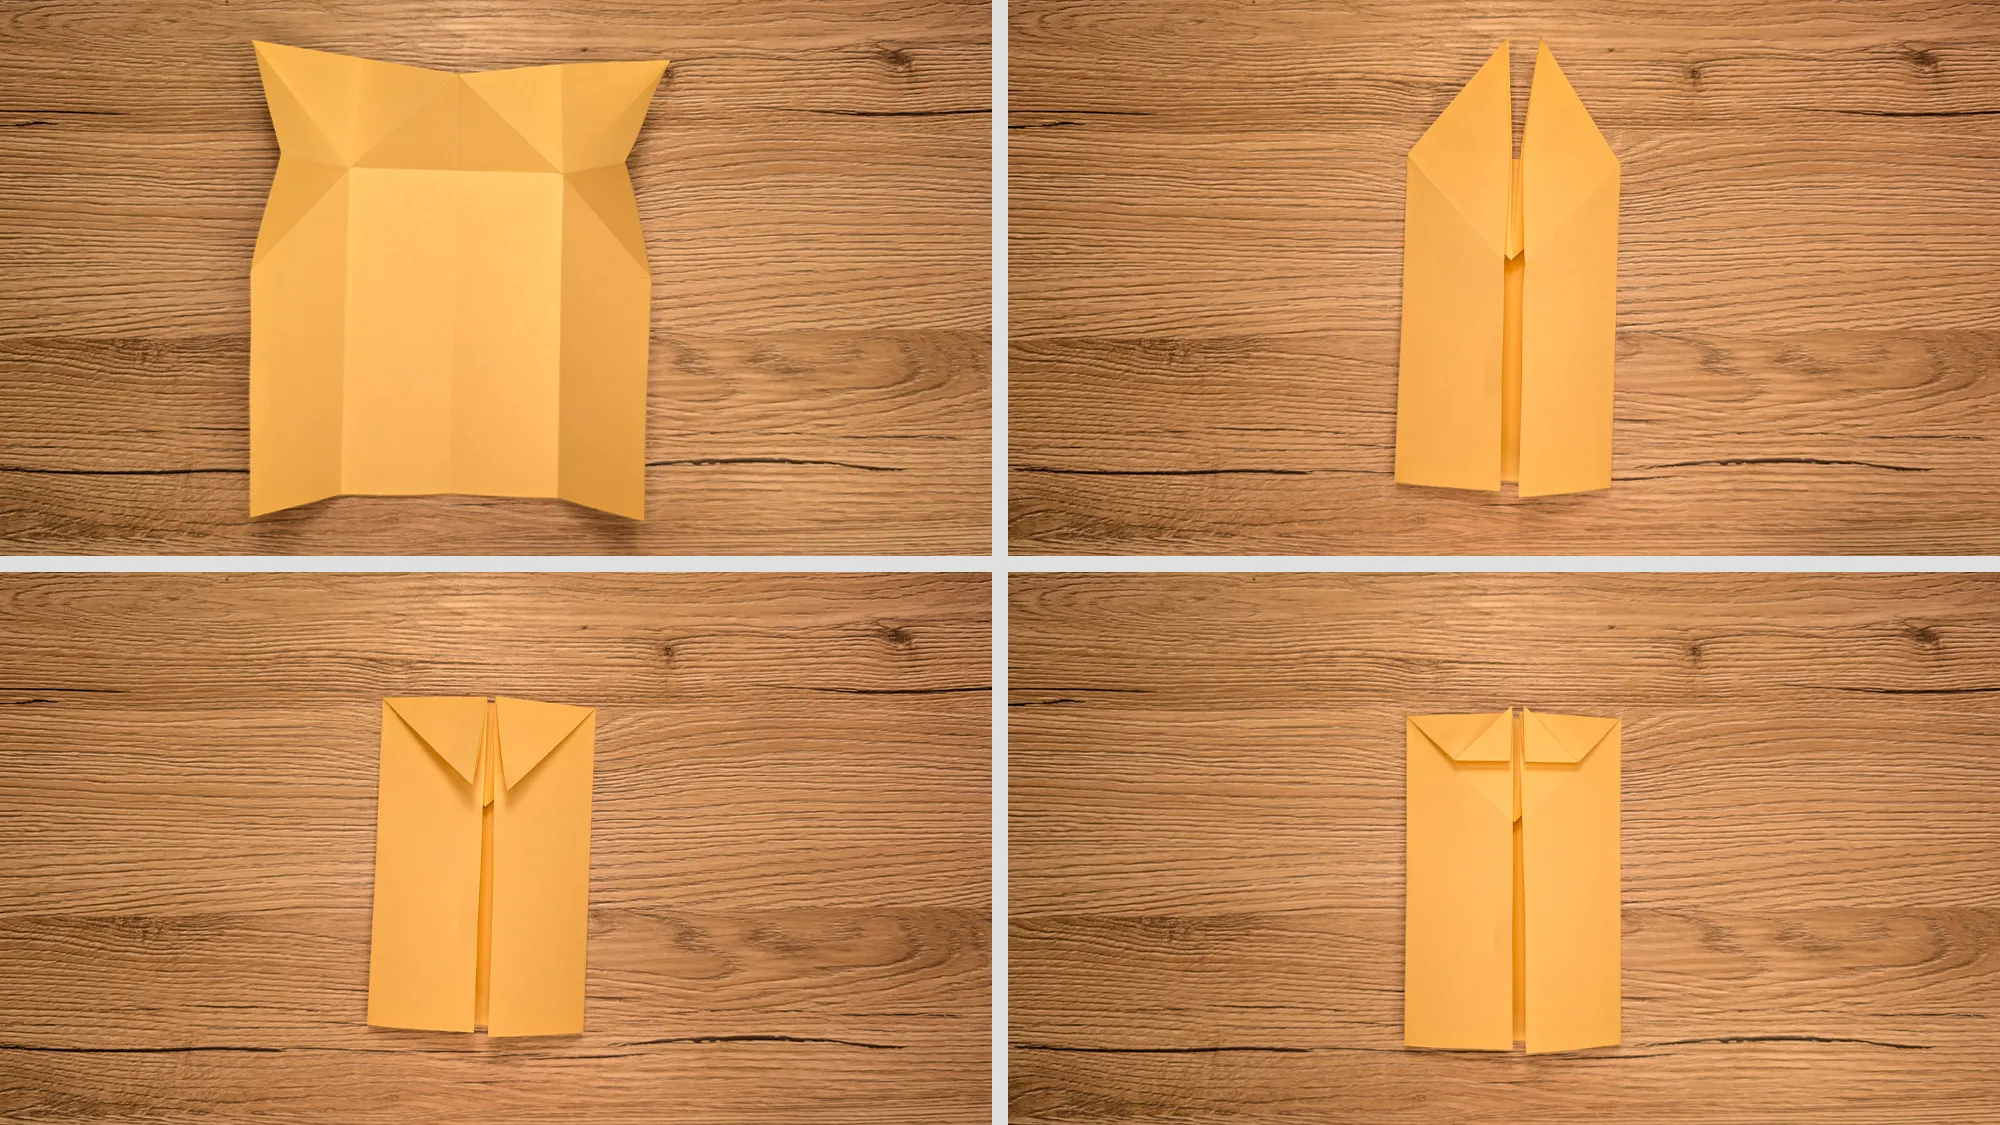
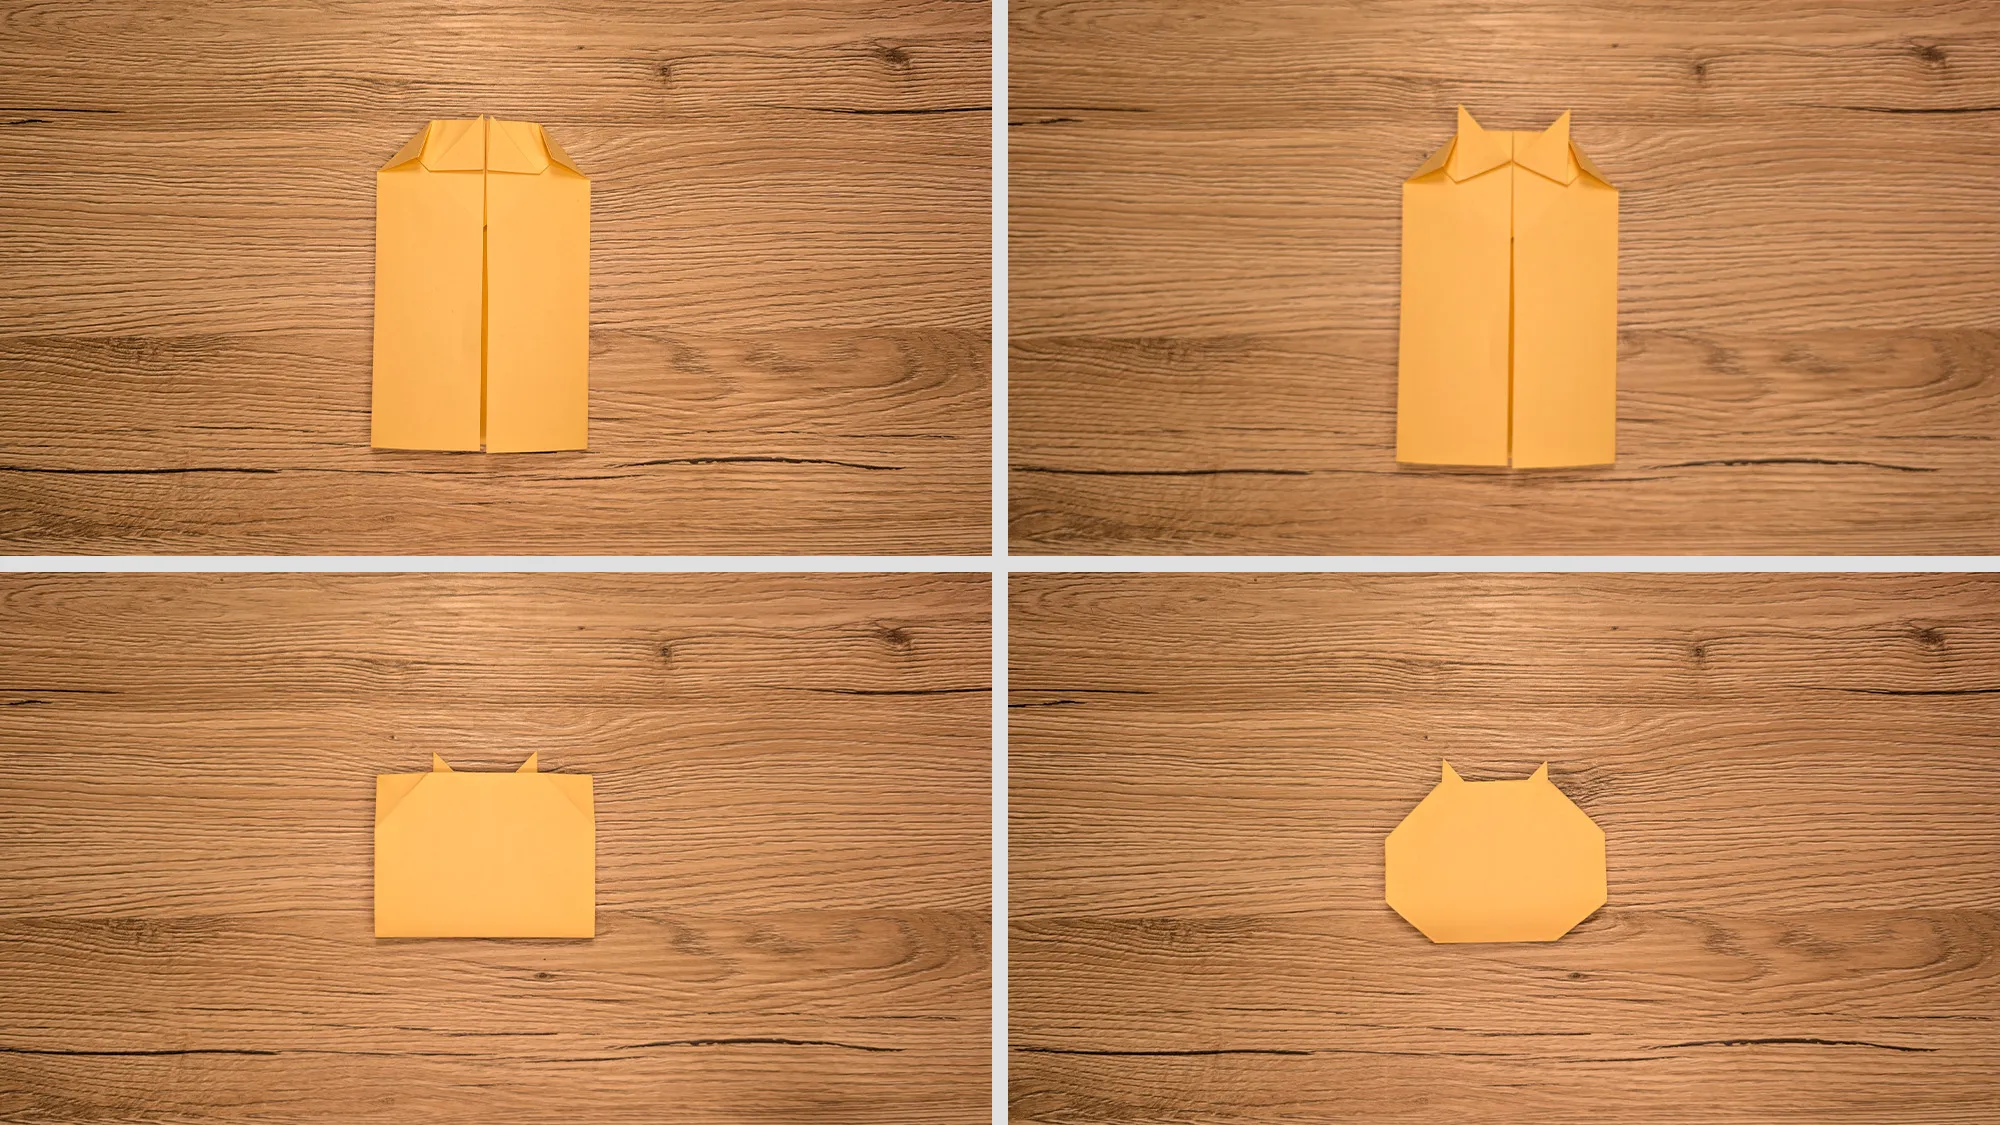
Our guides always include a self-made video and photos for each folding step. This way, you can easily follow along at home. The video shows you exactly how to fold the Capybara step by step. The photos also help you with each individual step. You can watch everything as many times as you like.
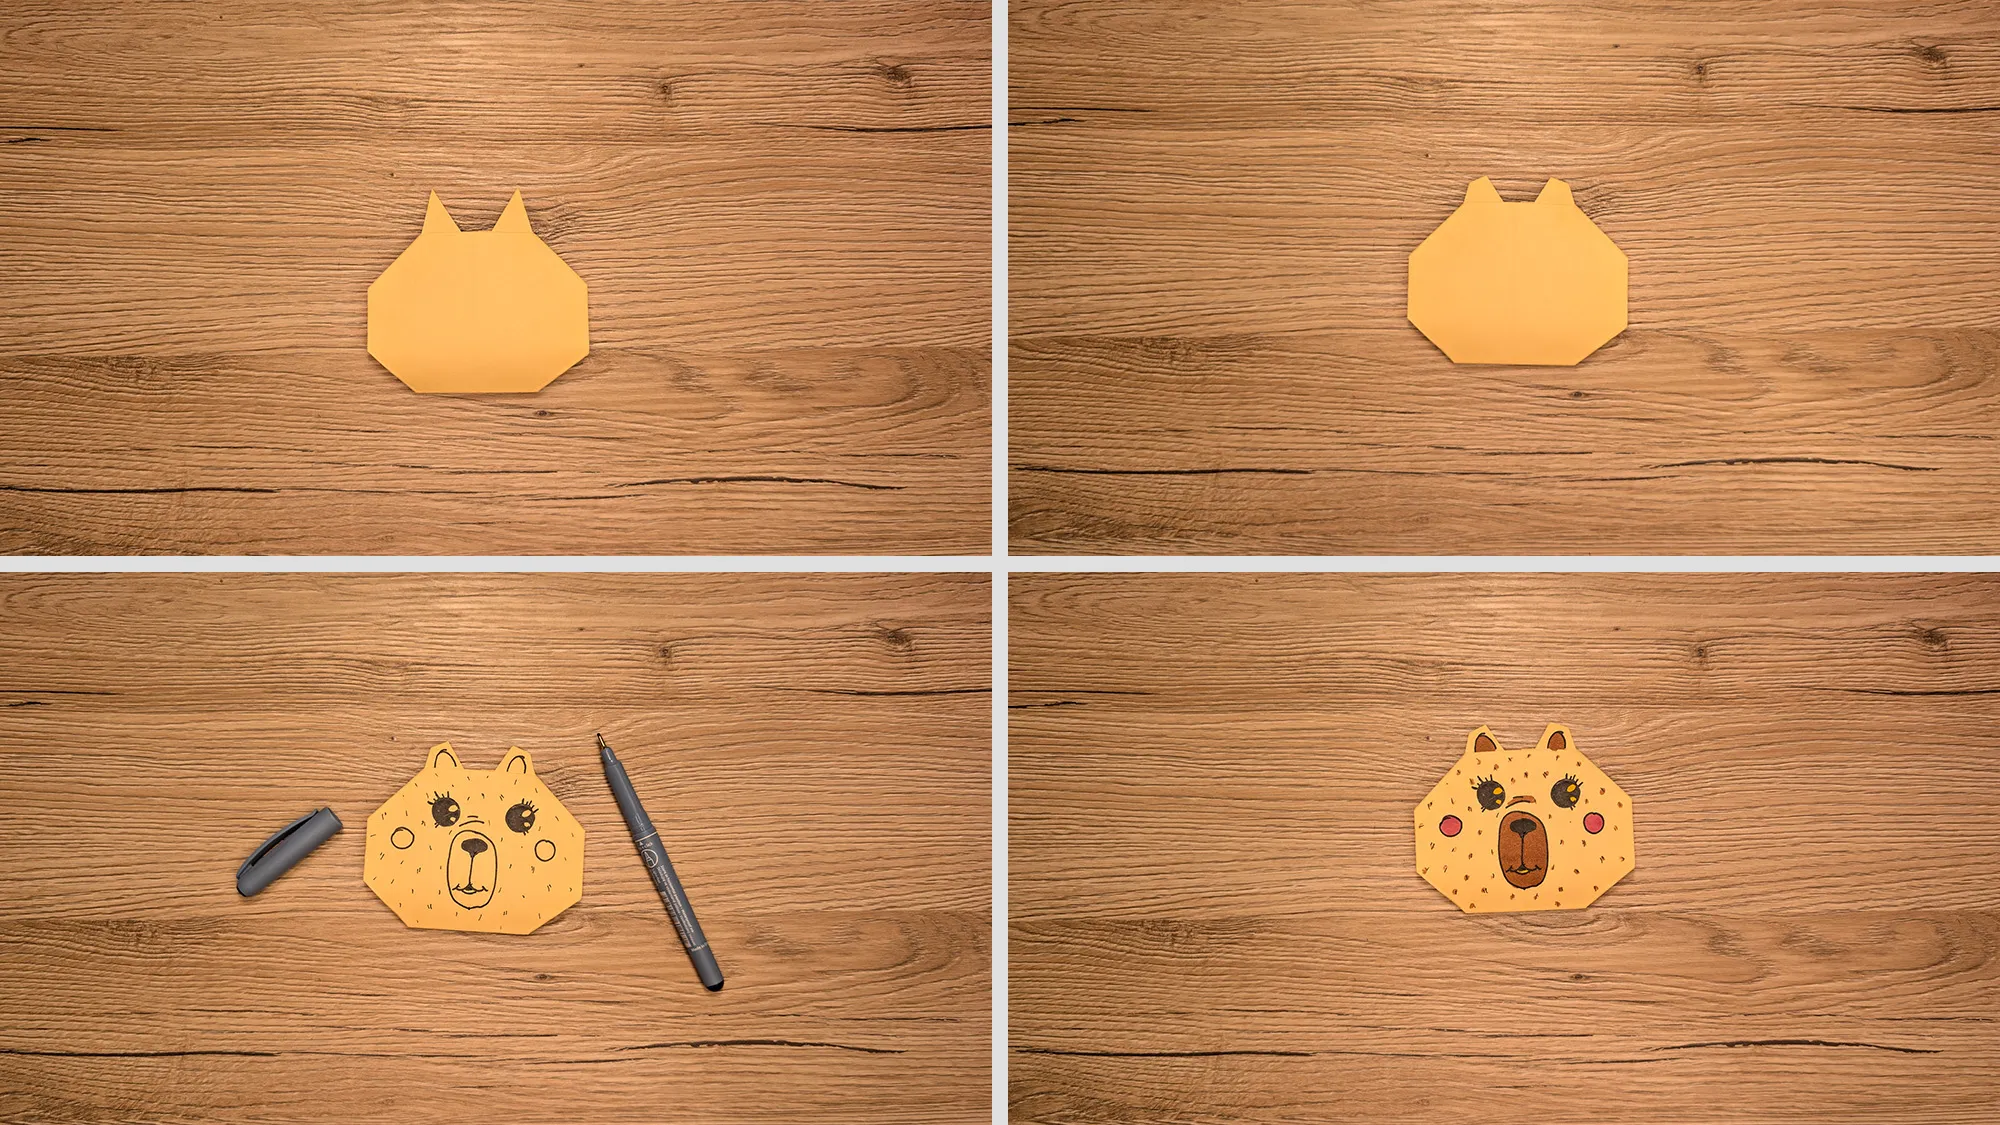
This Origami Capybara is not only cute to look at, but also wonderful for decorating! You can give it a friendly face with markers and even add small details like fur.
Origami Capybara: The Guide with Photos and Text Description
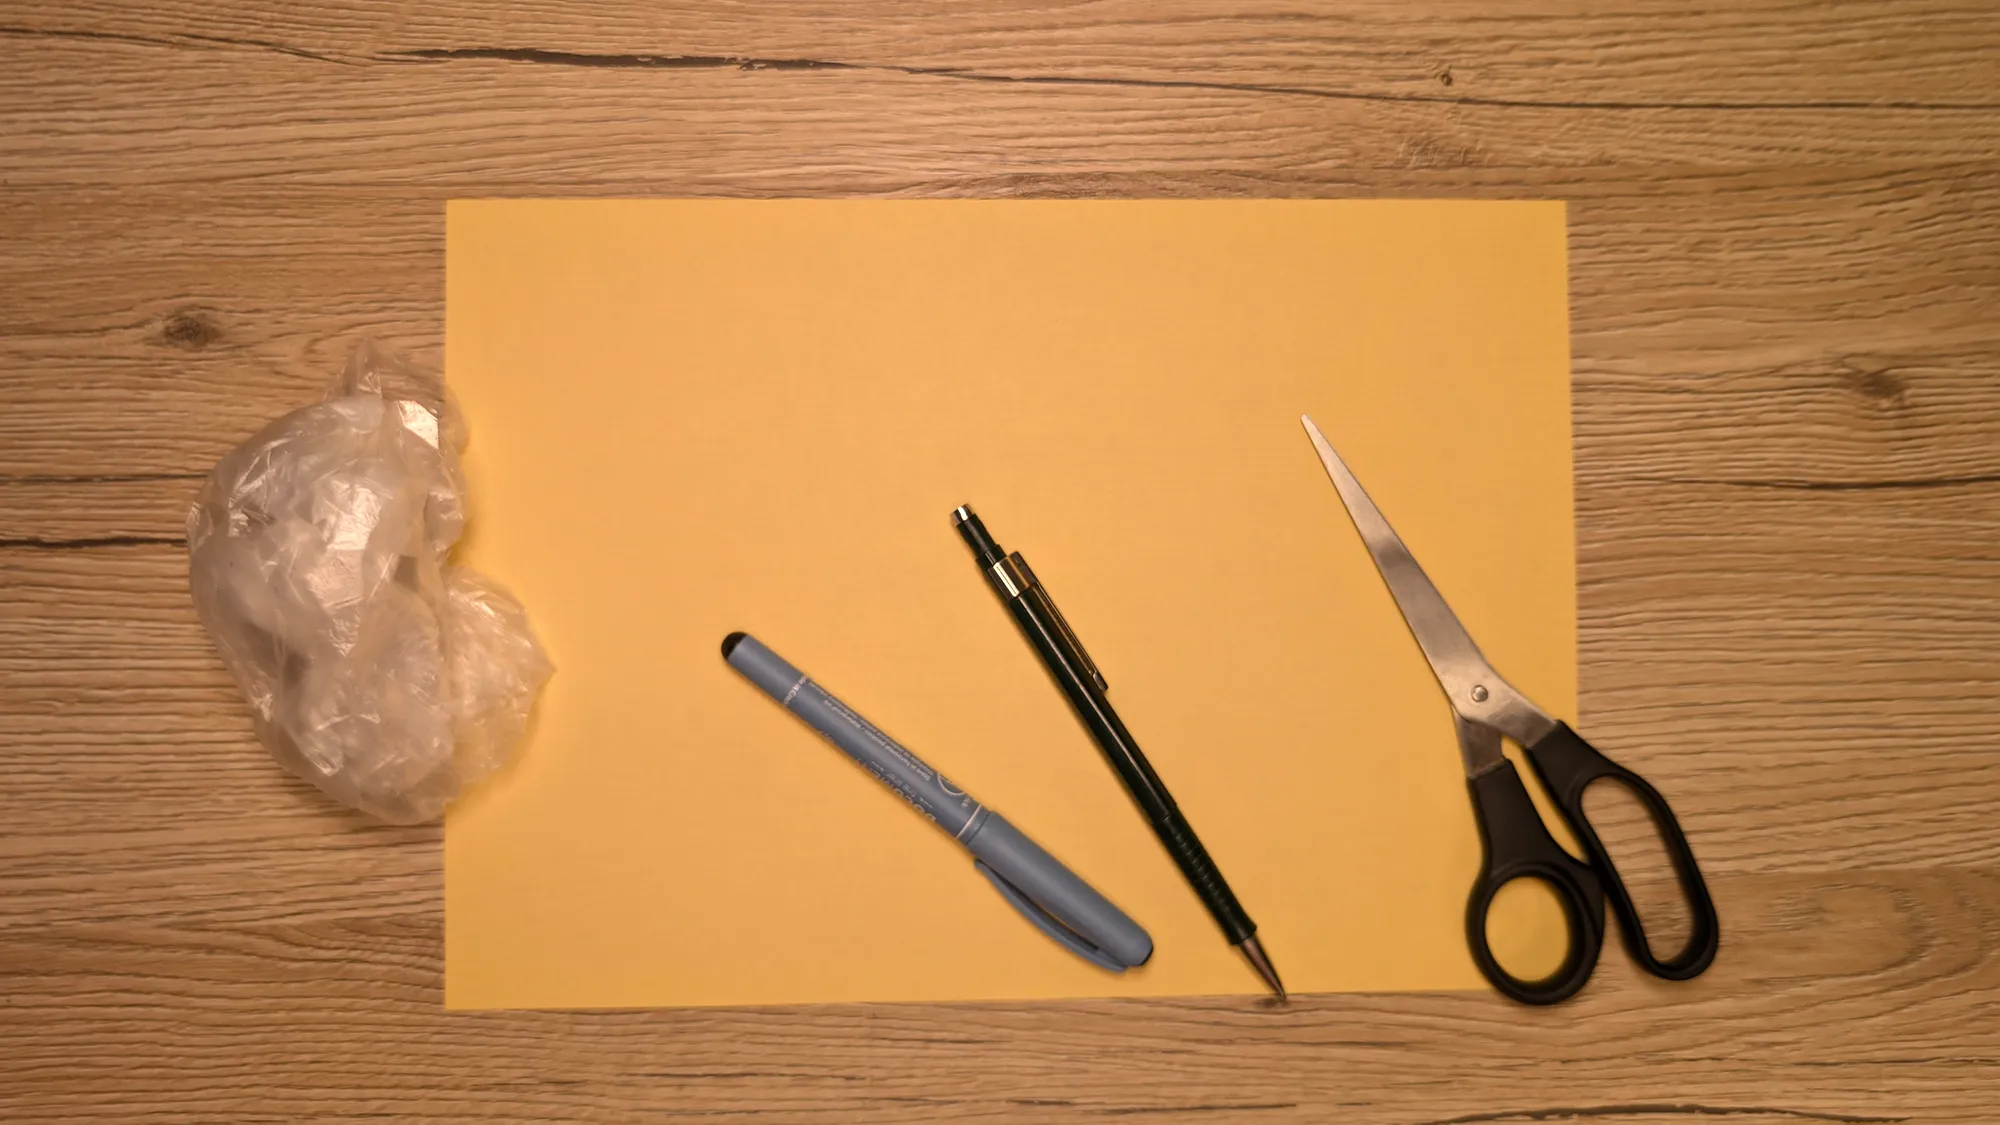
A tip before you start: It's best to buy Origami paper! These special sheets are already cut square, in A4 format, and come in many beautiful colors. Origami paper is thinner than regular paper and much easier to fold. This makes crafting easier and your Capybara will turn out especially beautiful.
Design Your Capybara
After folding comes the creative part! You can draw the eyes and nose with a black marker. Brown areas for the ears and snout will make your Capybara even livelier. Dab sweet cheek spots on the cheeks with a red marker. Add small dots as fur - and your unique Capybara is ready!
Origami Ideas: Thank You for Being Part of It!
Thank you for taking the time to follow our guide! The beauty of origami is that you can create great things with simple means. Our Capybara is just the beginning! In our category Origami Guides, you will find many more exciting folding projects. From cute animals to classic figures to modern designs - there is something for every taste. Our animal origami, perfect for decoration or small gifts, are particularly popular. Discover the fascinating world of paper folding and let our creative guides inspire you. We show you step by step how to fold enchanting animal figures from a simple sheet of paper.
From Vitalii Shynakov
