Building paper airplanes in 5 minutes: Instructions with video, photos, and description
The paper airplane with winglets is an advanced version of the classic paper airplane. The specially folded wingtips ensure better flying characteristics and a more stable flight behavior. This guide shows you step by step how to fold this special flyer.
Building paper airplanes: About this DIY guide
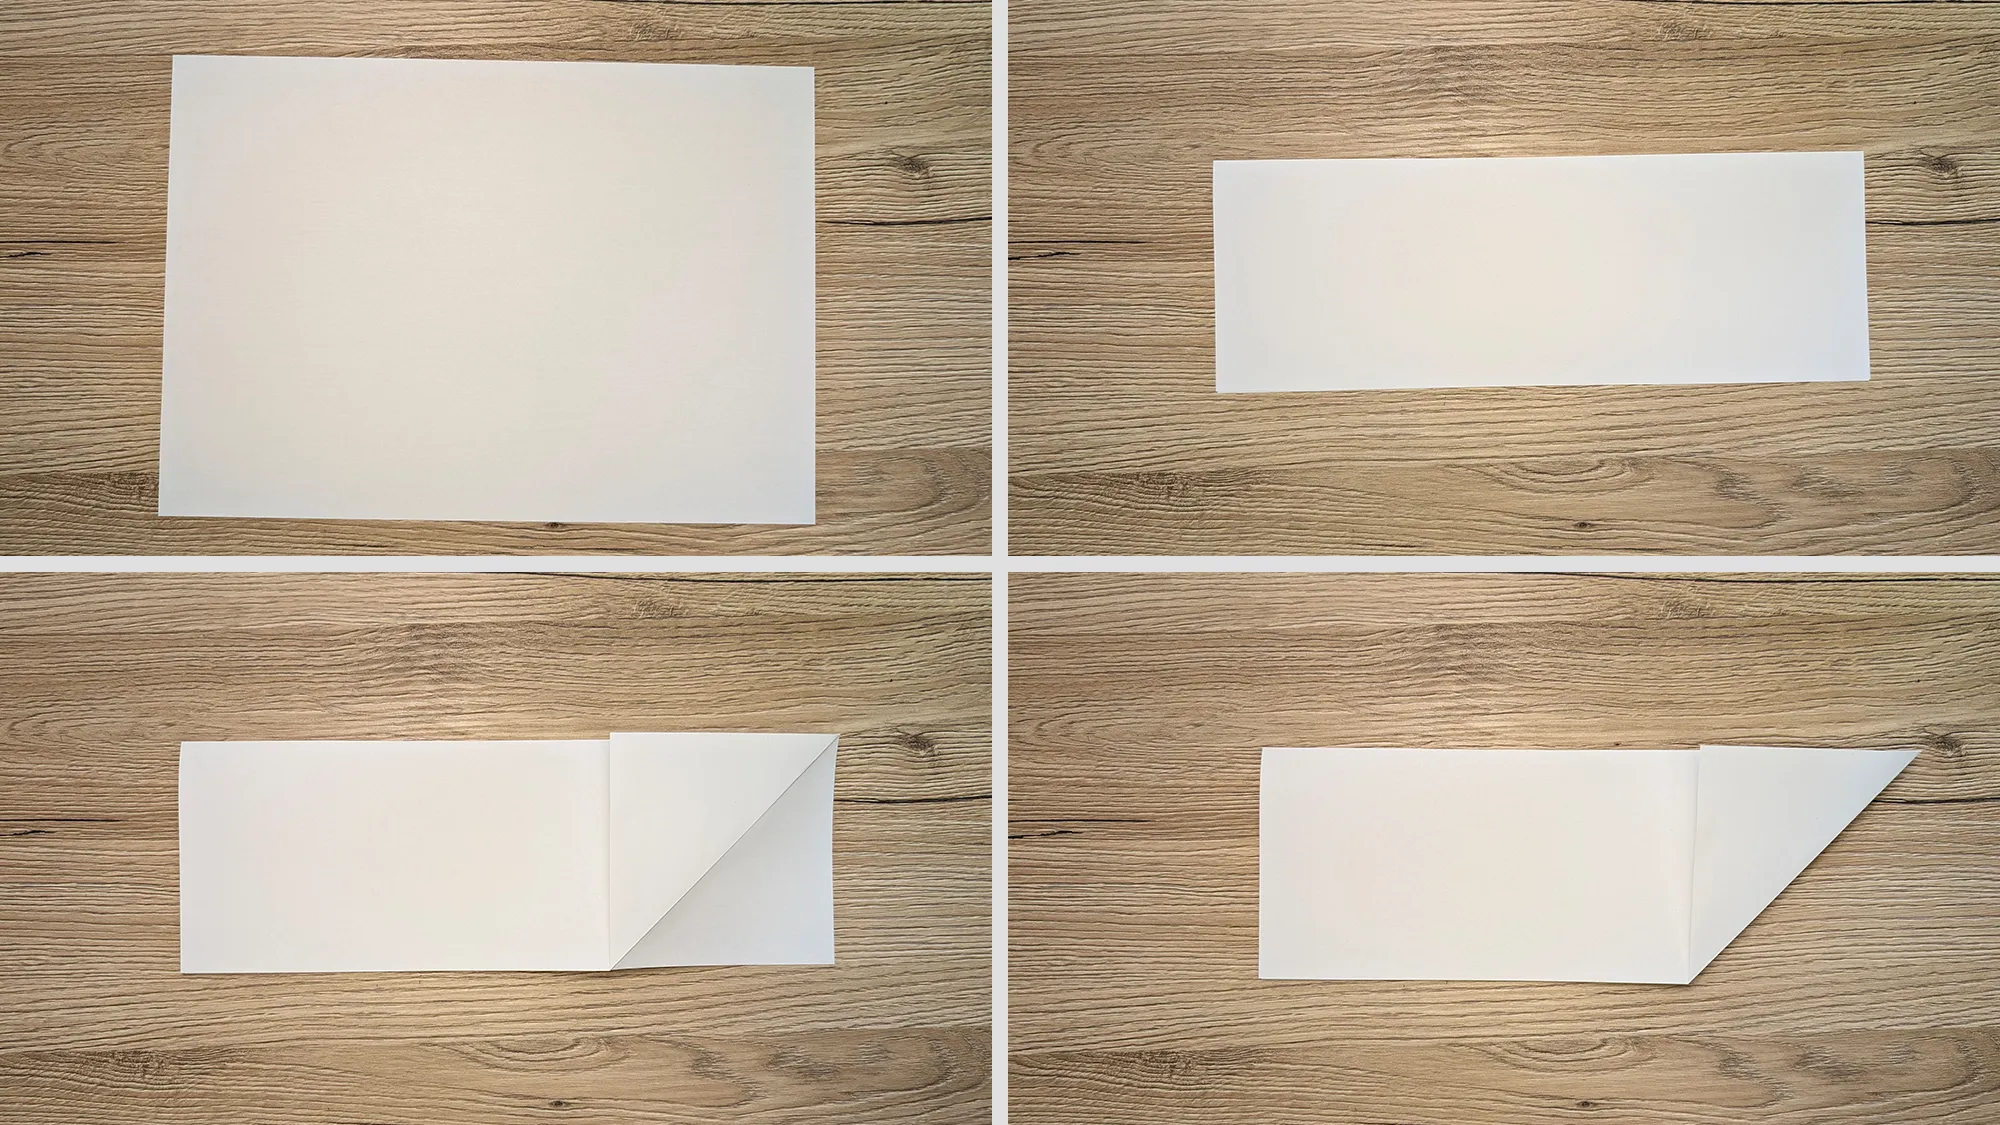
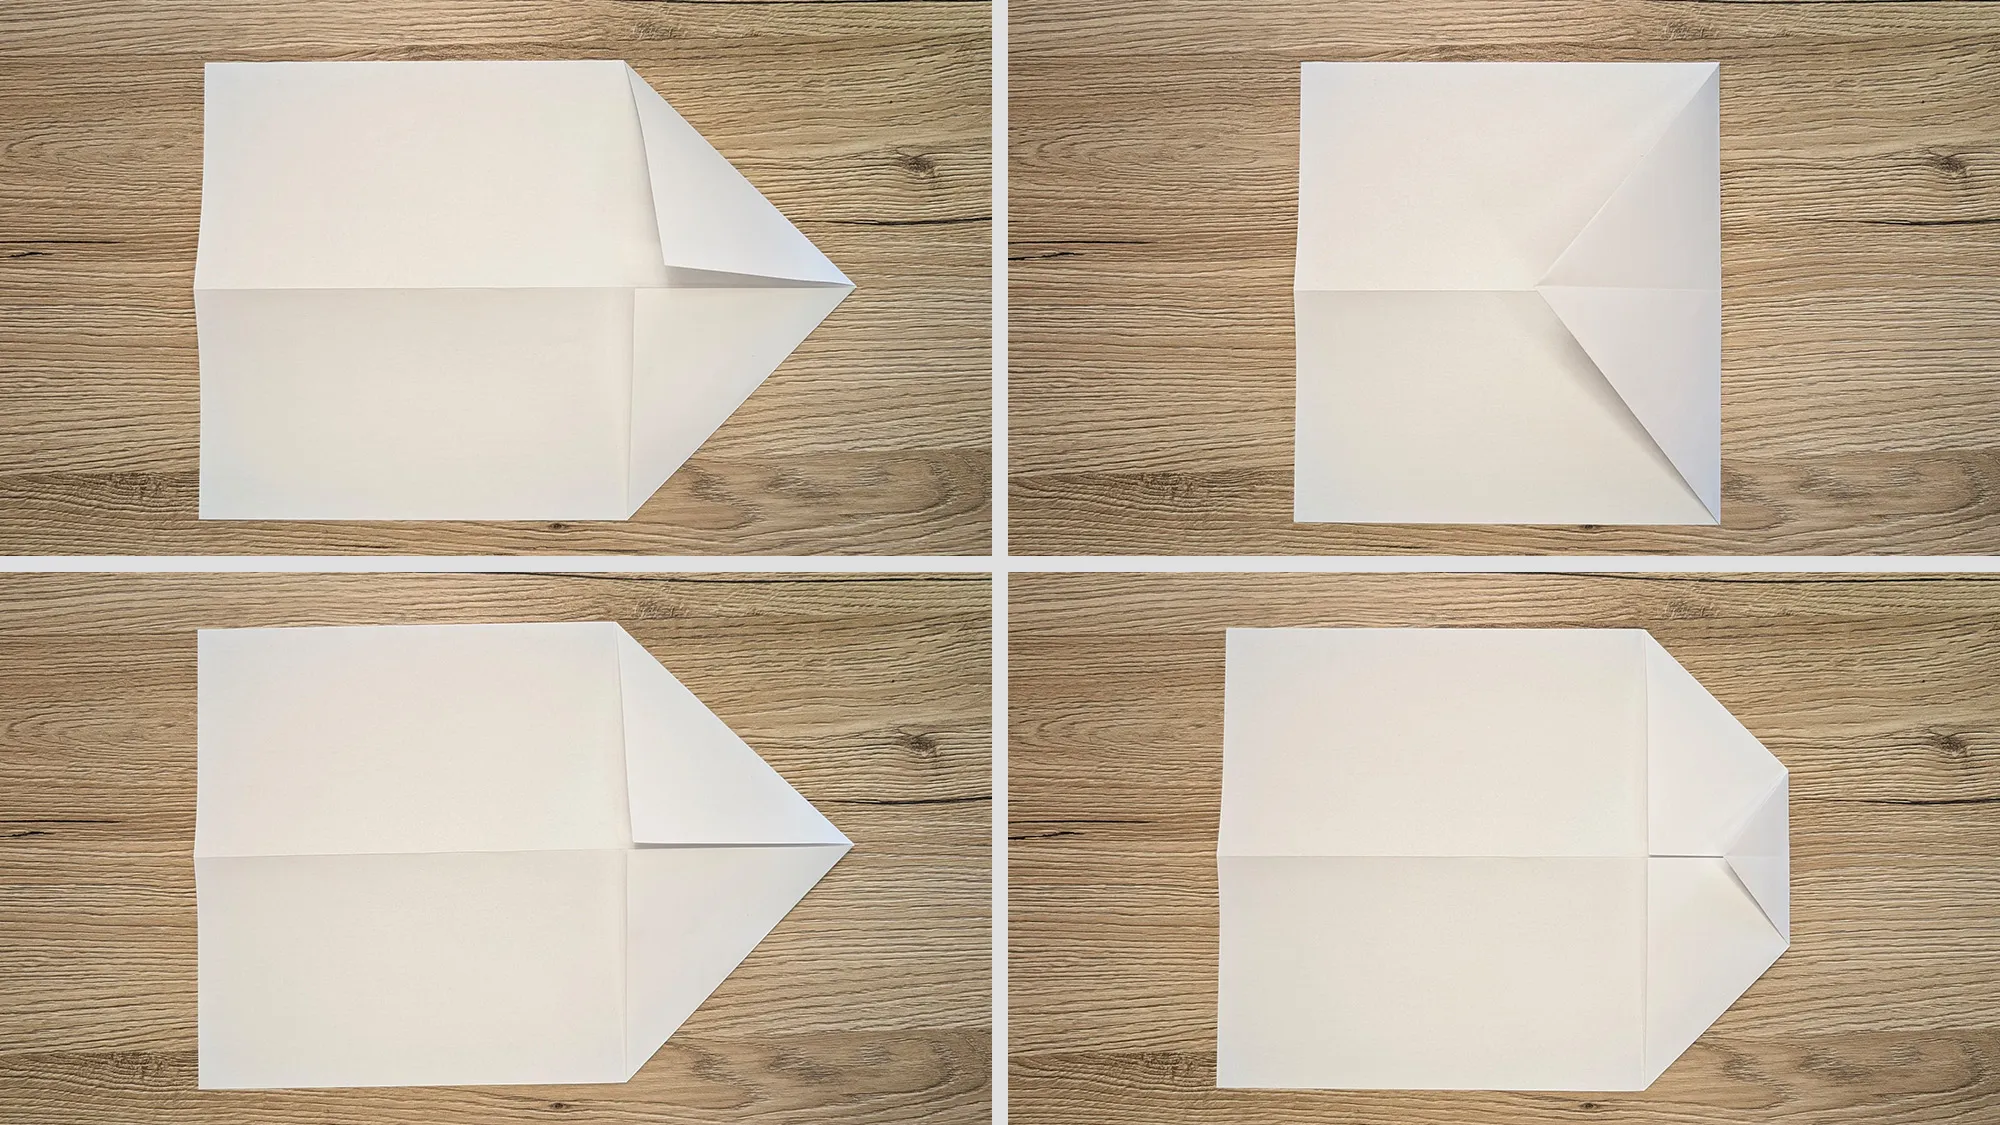
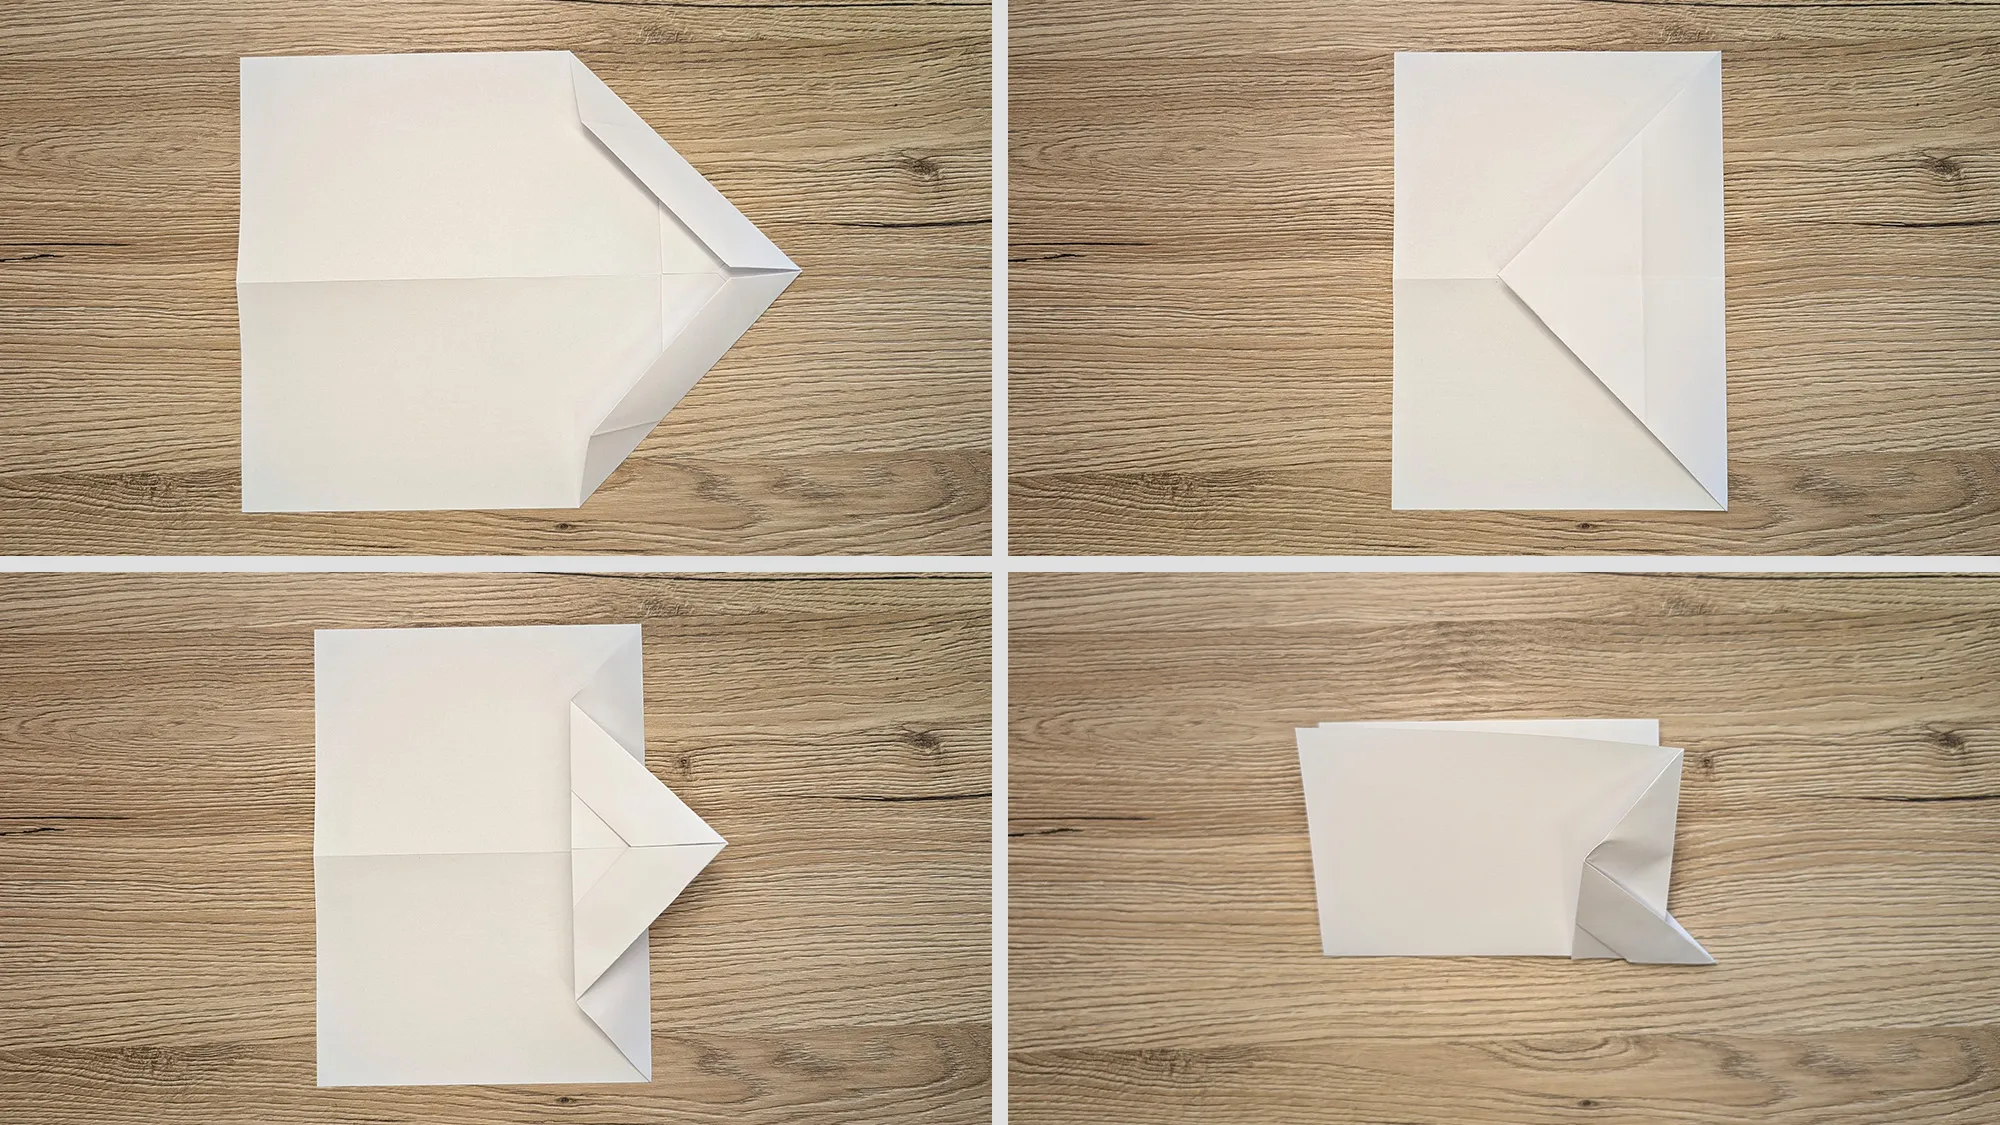
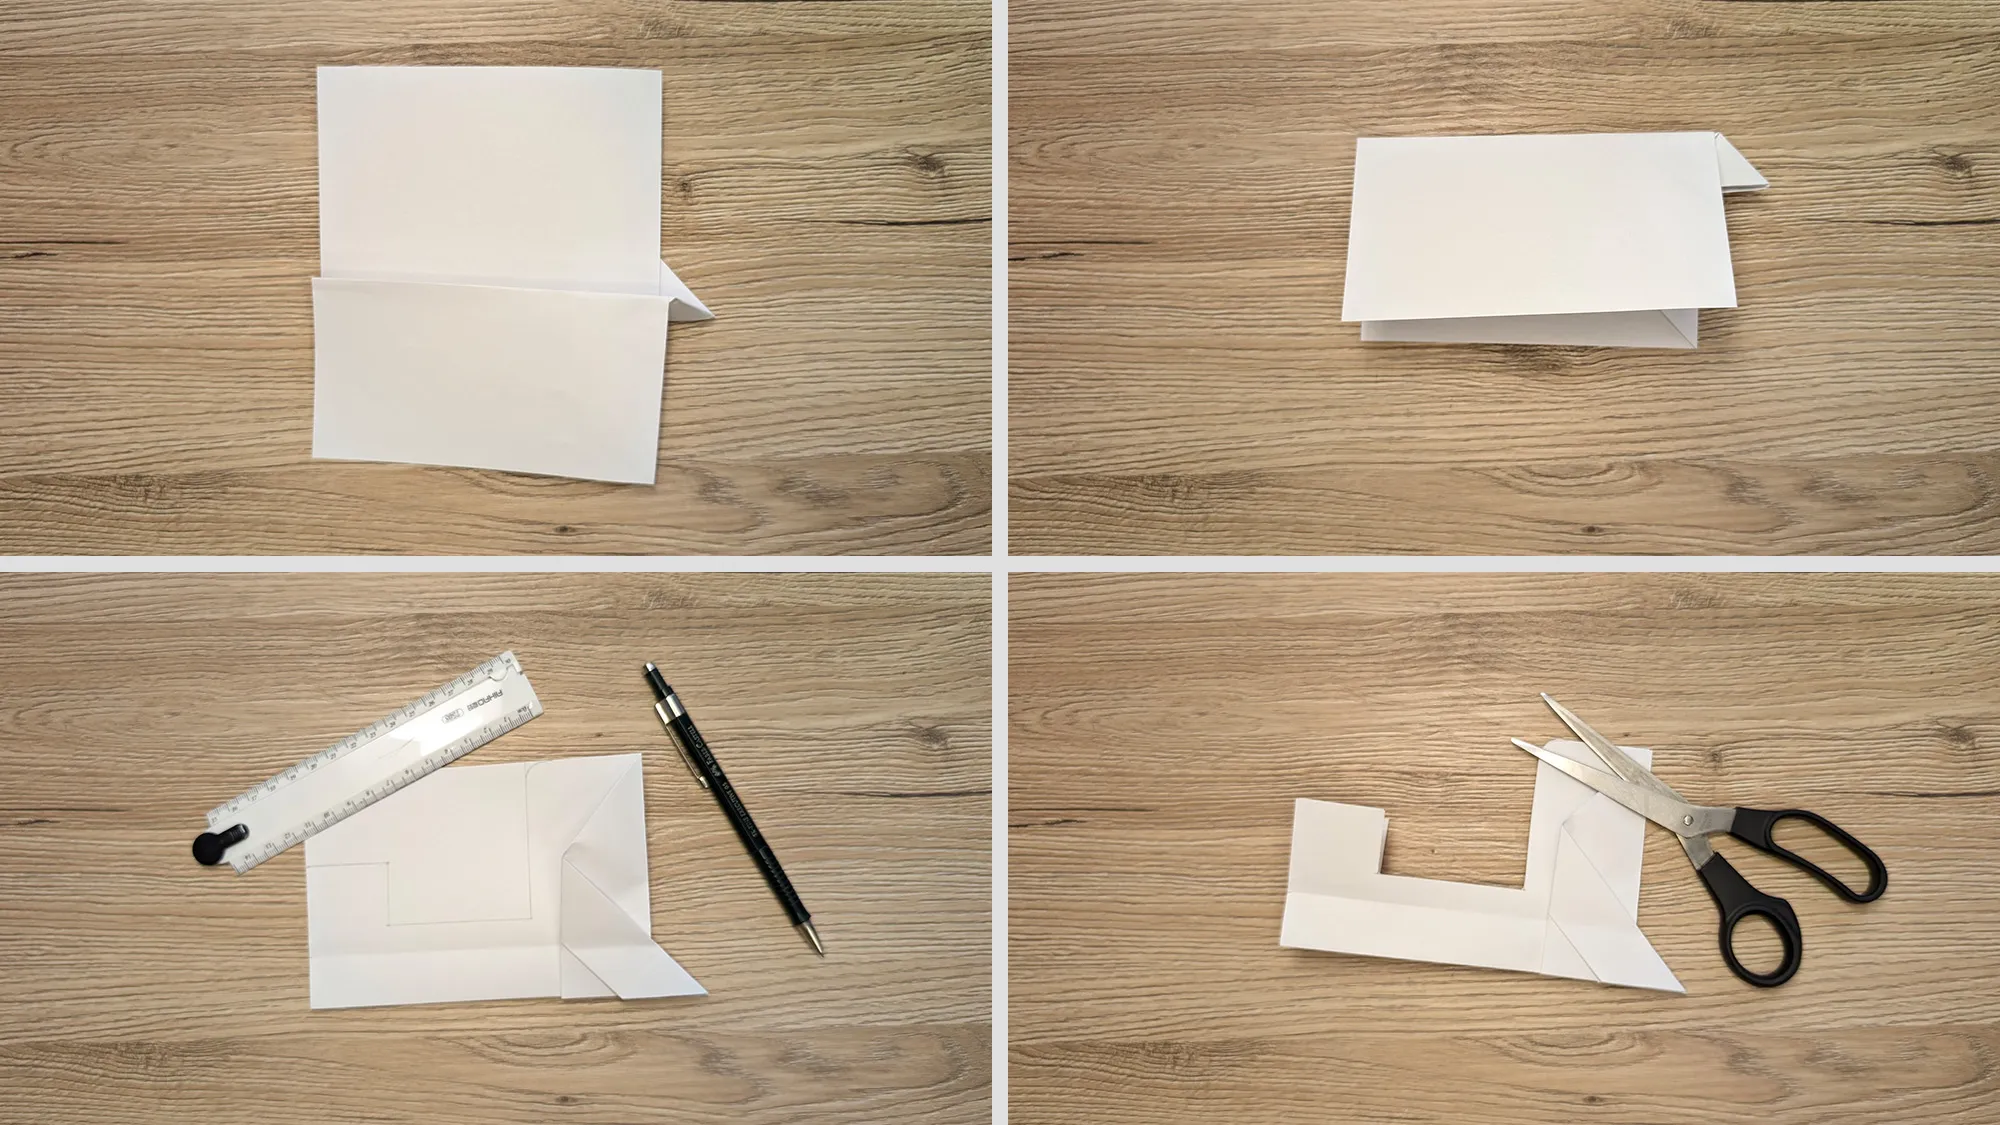
Each of our crafting guides includes a self-produced video and detailed step-by-step photos with thorough explanations. This combination makes recreating particularly easy: First, watch the video for an overview, then follow the individual steps using the photos and descriptions as a guide.
Materials needed:
- An A4 sheet of paper
- Scissors
- Ruler
- Pencil
- A smooth surface for folding
Paper airplane with winglets: Step-by-step guide with photos and description
Before you start folding, it's best to watch the video once or twice. Our detailed photos will then guide you through each step. With a bit of care and patience, you will quickly be able to fold a perfectly flying paper airplane.


Flying tip:
- Make sure all folds are well creased
- The winglets should point upwards symmetrically
- Throw the flyer gently and horizontally
- Experiment with different throwing strengths
Origami promotes child development
Folding paper airplanes and other origami figures is more than just a pastime. It promotes important motor and cognitive skills in children. Precise folding and cutting trains fine motor skills, while following the instructions hones logical thinking. Working with paper in three dimensions enhances spatial imagination, and successfully creating a flight-worthy model boosts confidence and endurance. Particularly valuable is the bonding that happens during crafting: It creates quality time between parents and children and is simply fun. Children also learn that accuracy and patience lead to better results.
Explore more creative paper airplanes
In our Origami section, you will find many more exciting folding instructions for paper airplanes. From simple models to complex constructions, there is something for every skill level. Explore our other creative paper projects and get inspired!
From Vitalii Shynakov
