Paper Tomahawk: Instructions with video, photos, and description
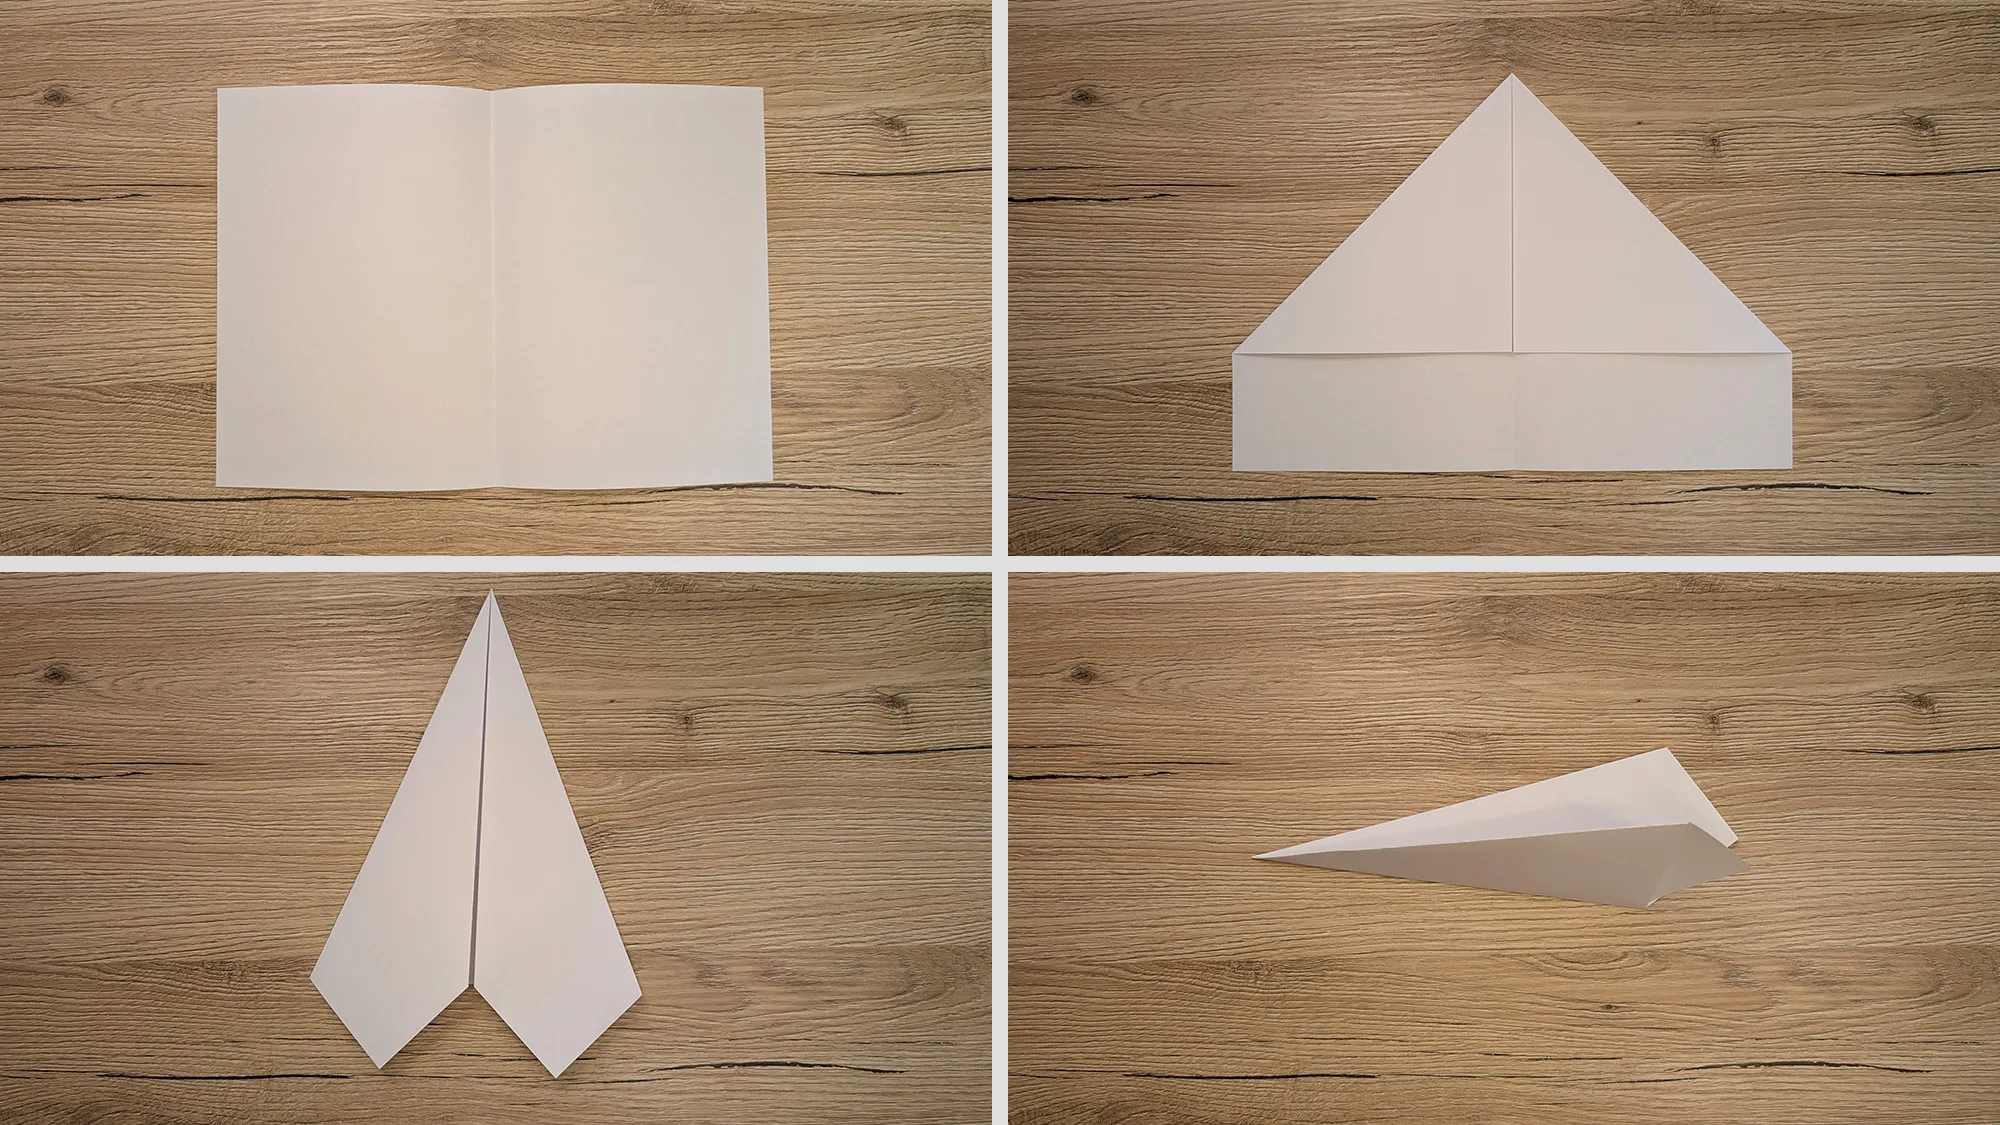
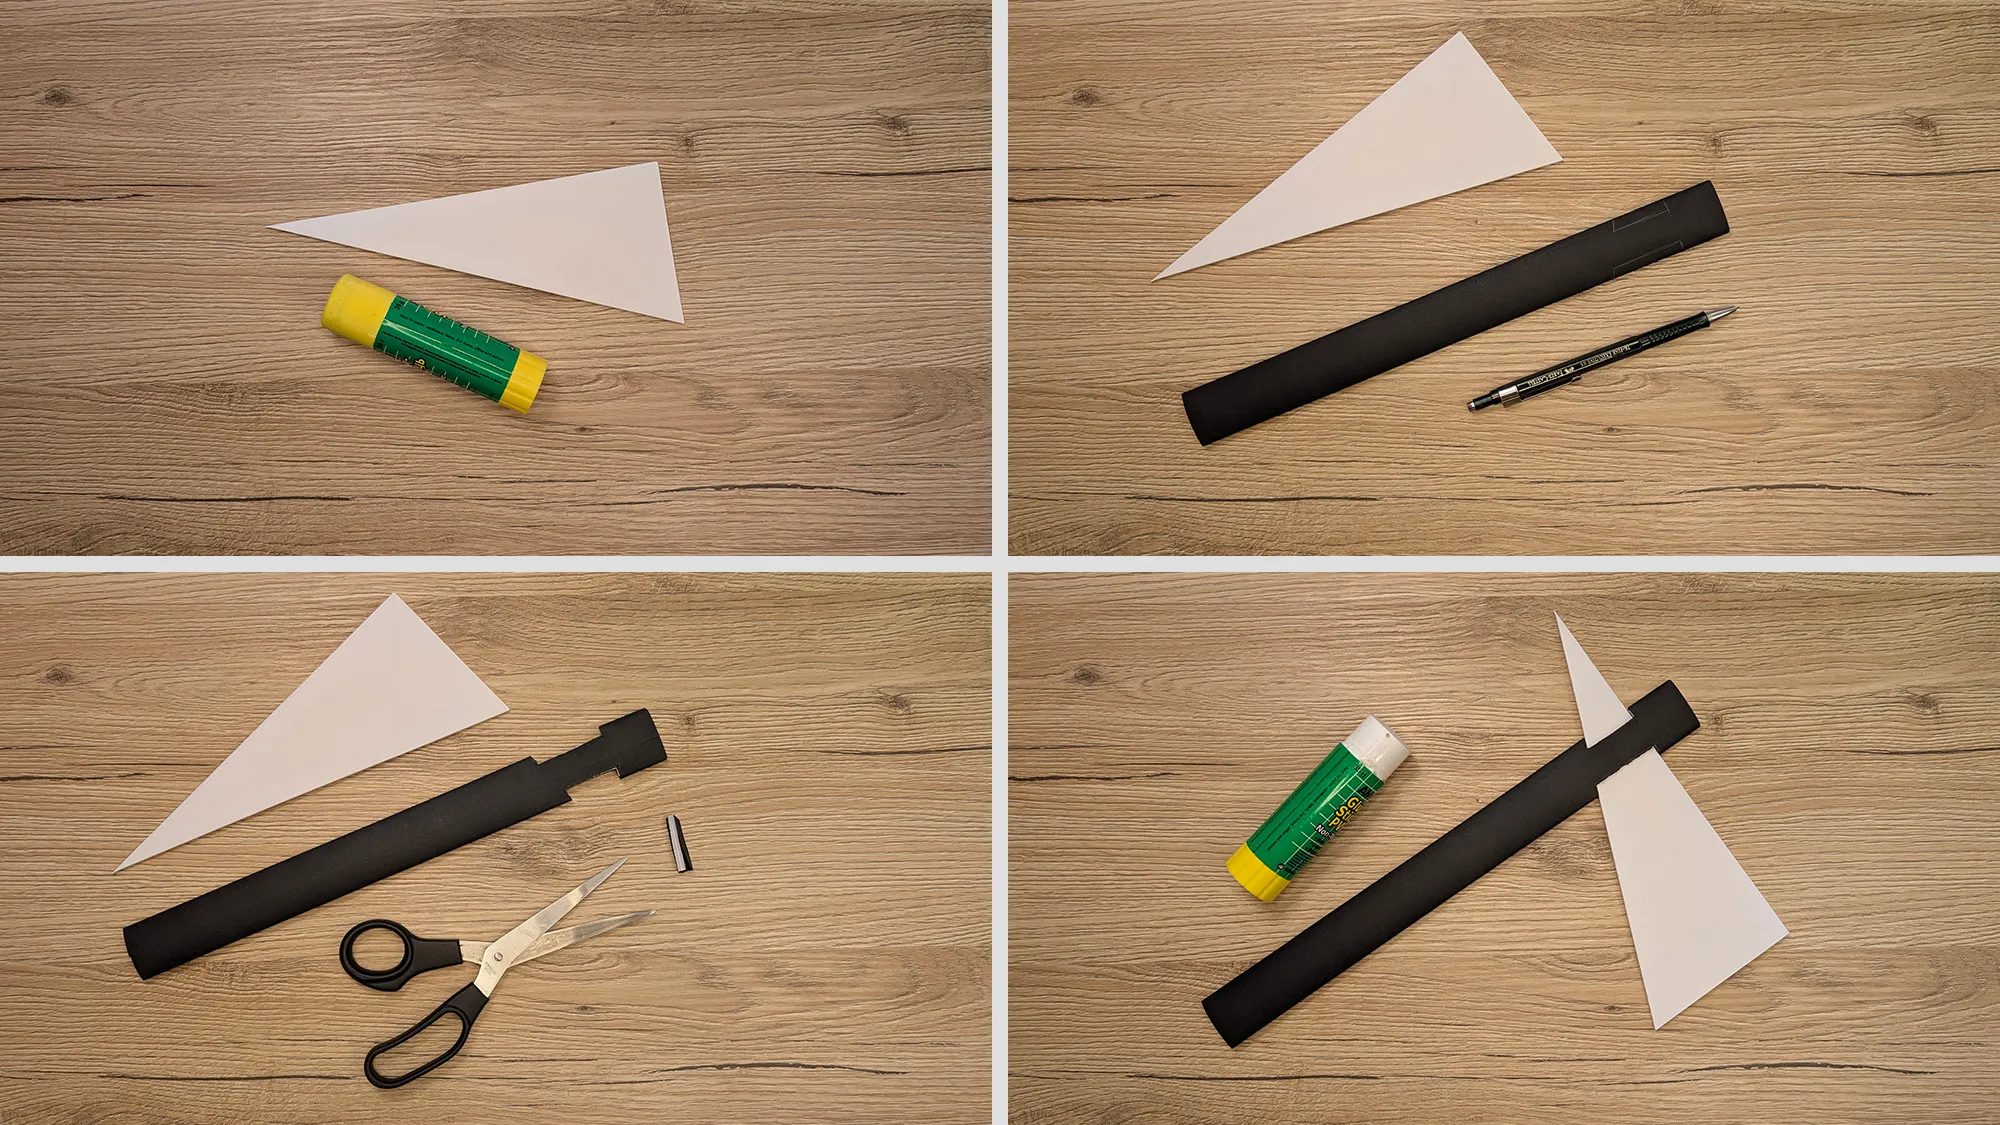
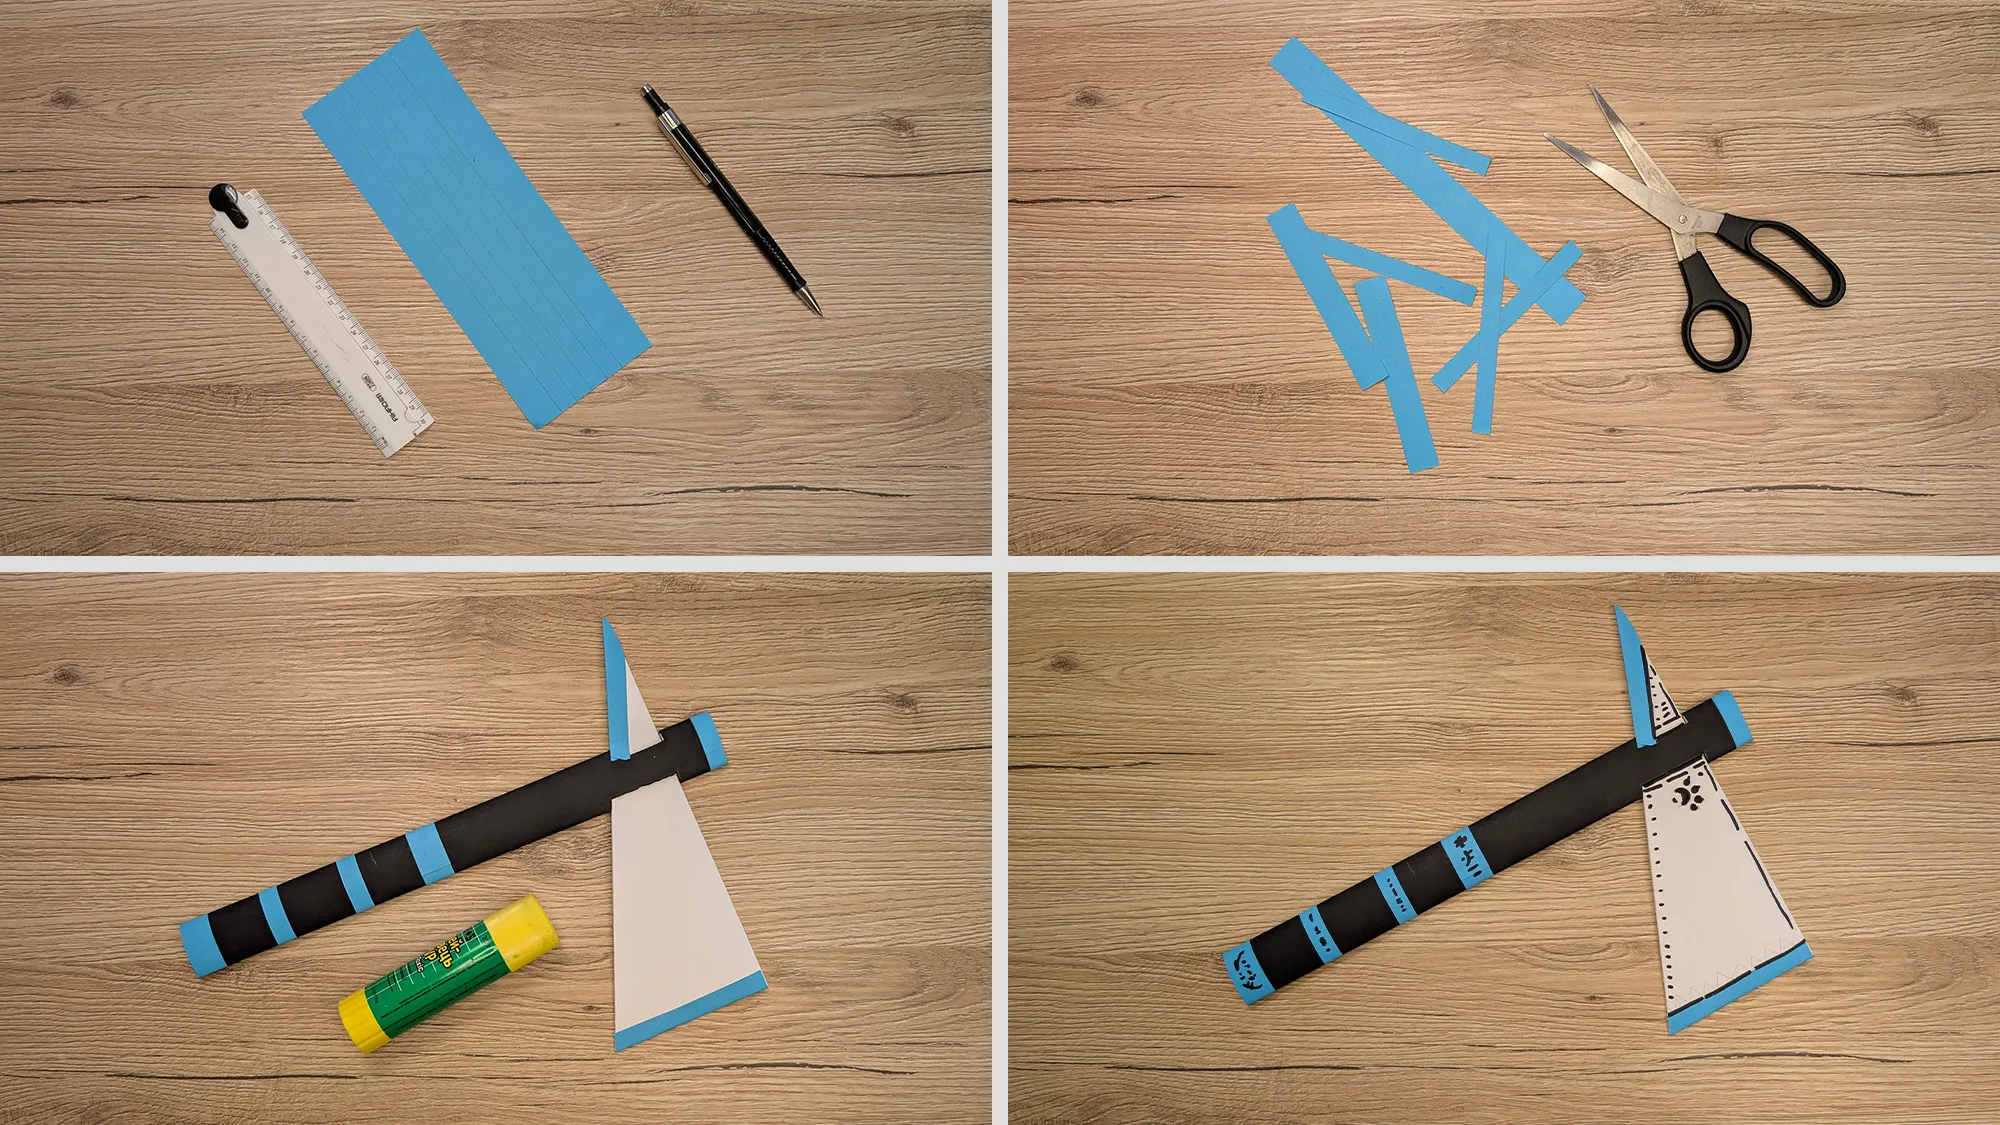
The paper tomahawk is a fascinating craft project that is characterized by its interesting design. The combination of different colors and decorative patterns creates an impressive decorative piece. These instructions show you step by step how to make this creative project.
Each of our crafting instructions contains a self-produced video and detailed step-by-step photos with detailed explanations. This combination makes crafting particularly easy: watch the video first to get an overview and then follow the individual steps with the help of the photos and descriptions.
Materials list:
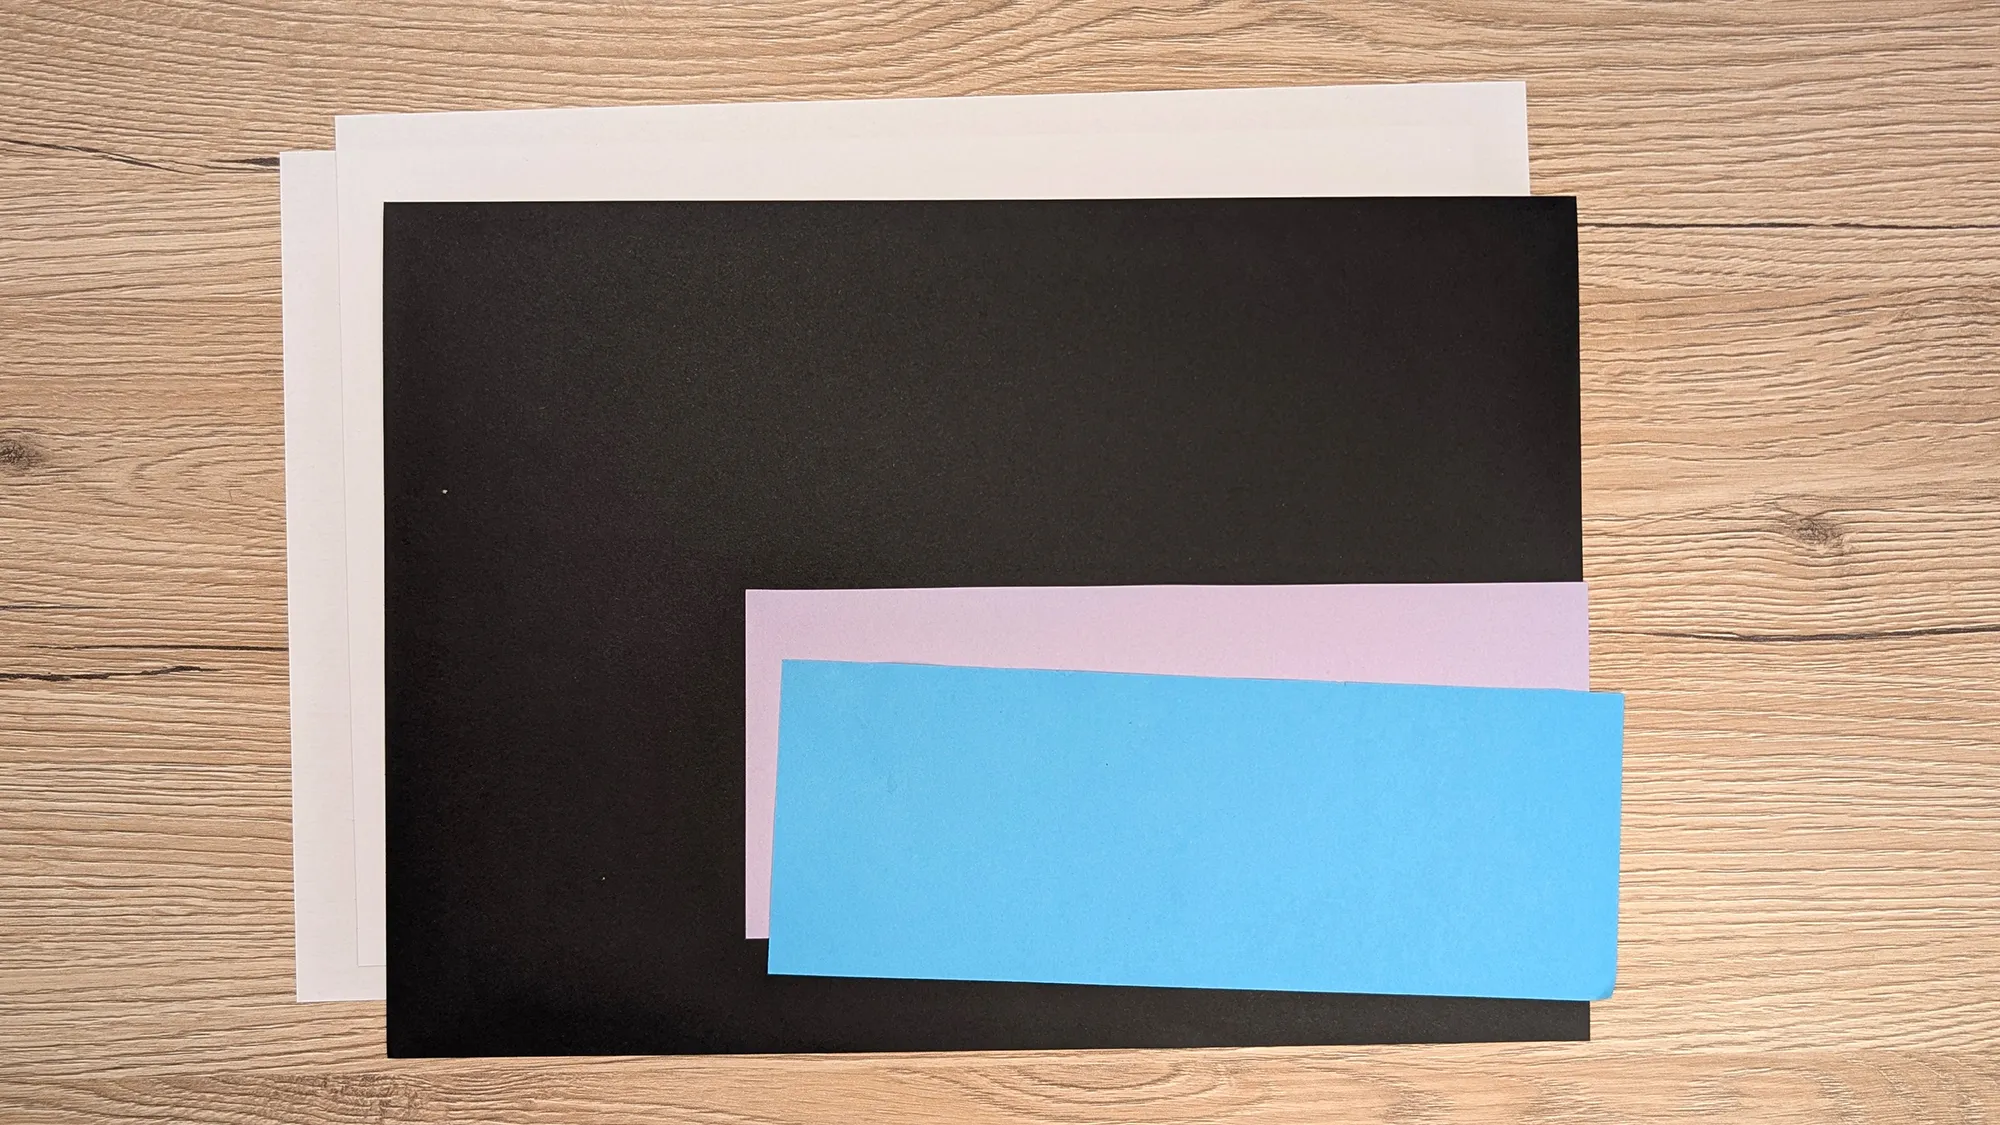
- Colored paper (black, white, blue or other colors)
- Scissors
- ruler
- Pencil
- Black felt-tip pen for decorating
- Glue
Paper tomahawk: step-by-step instructions with photos and description
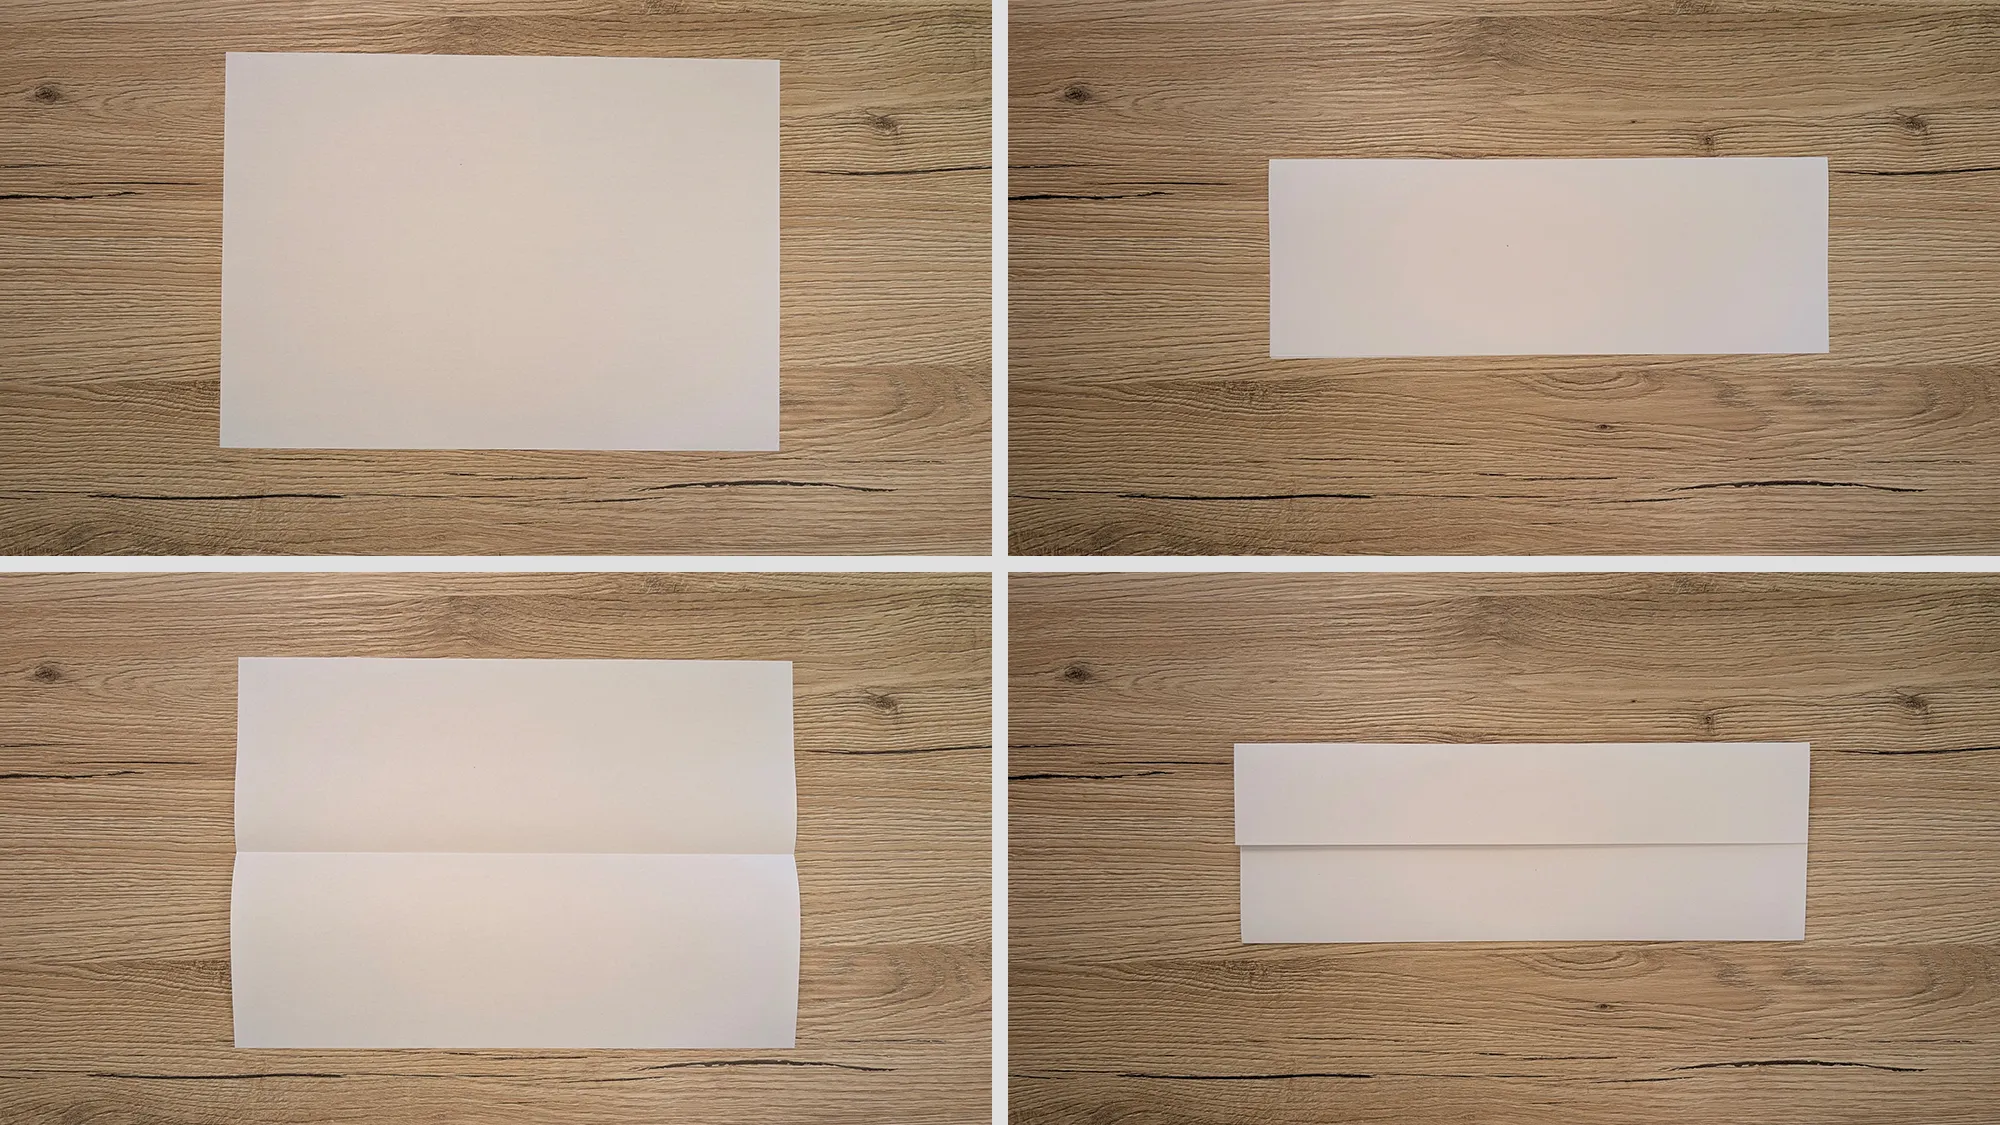
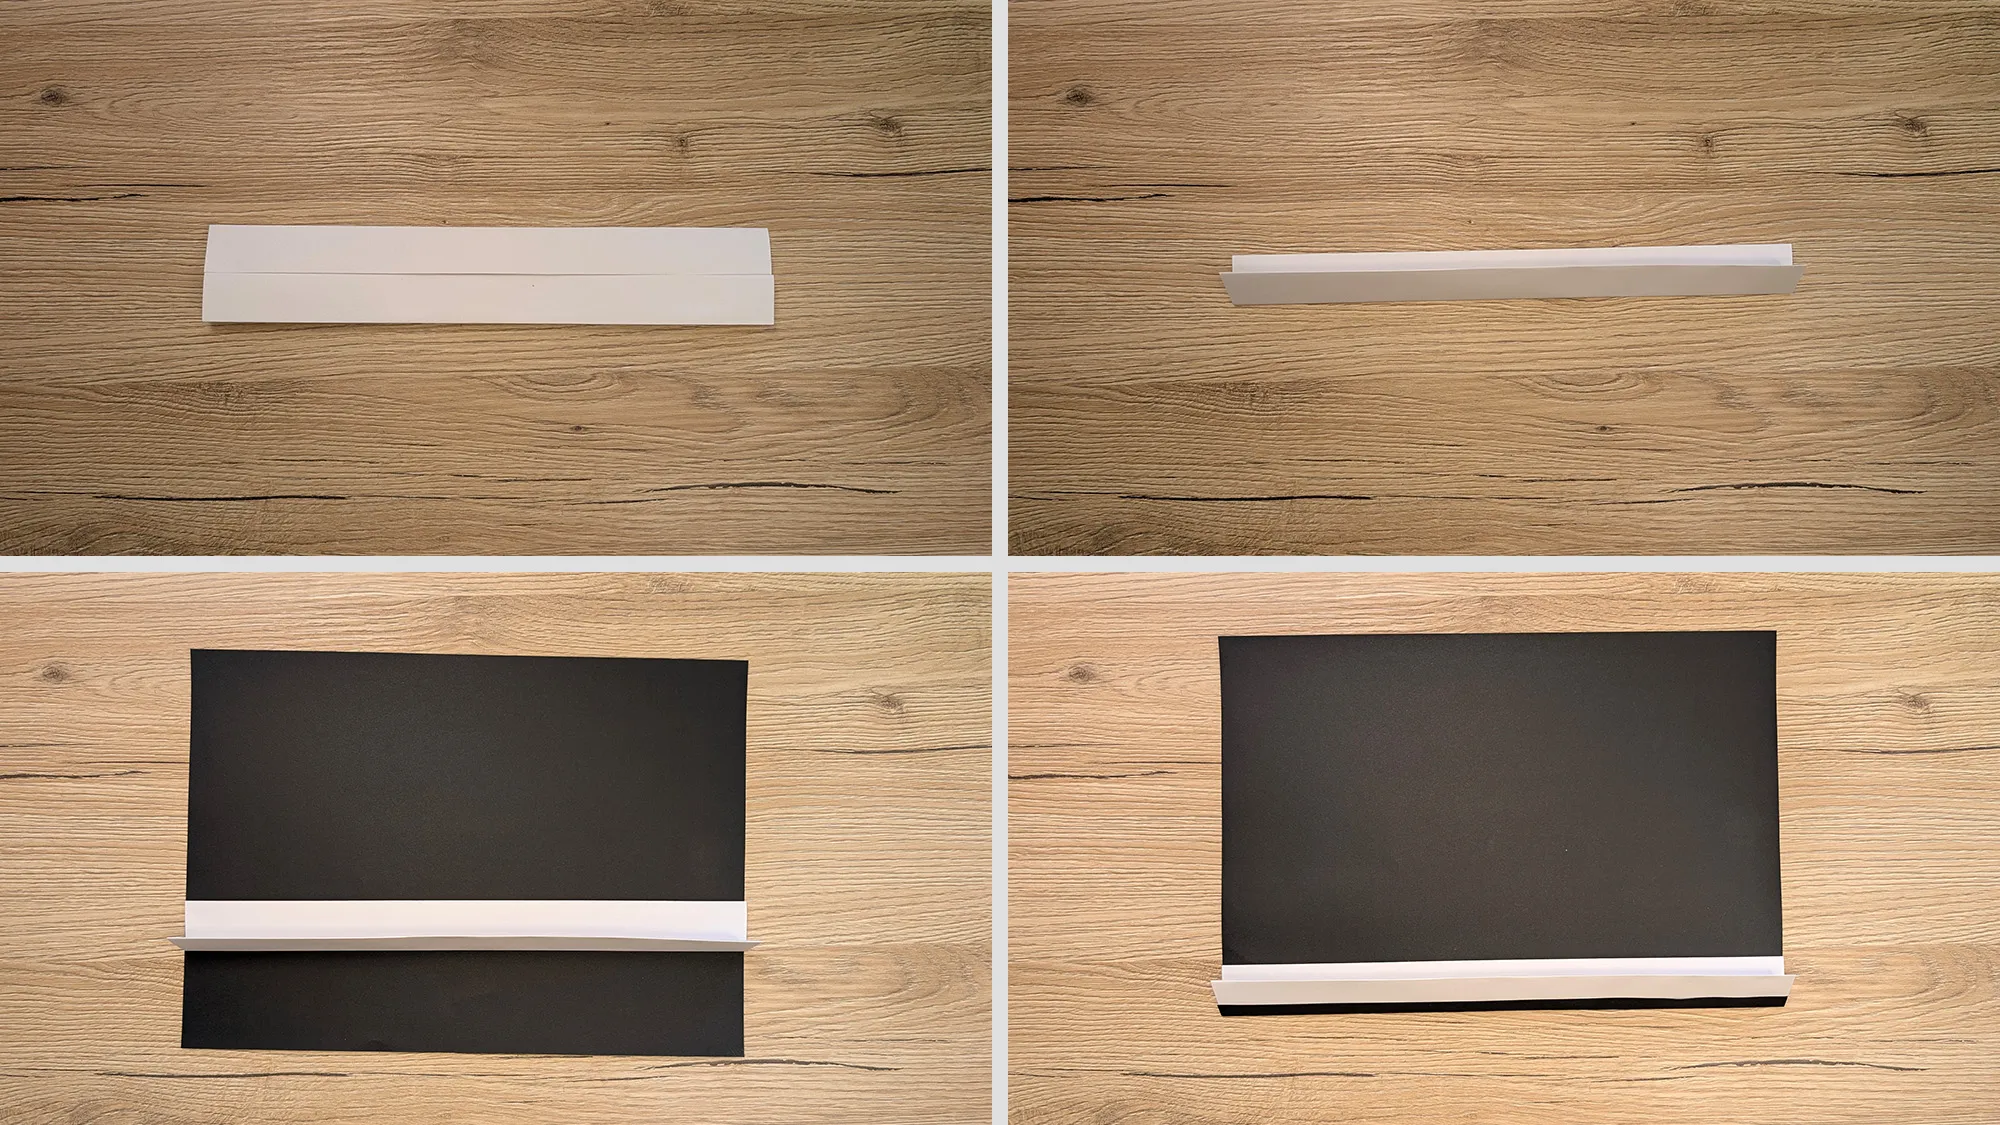
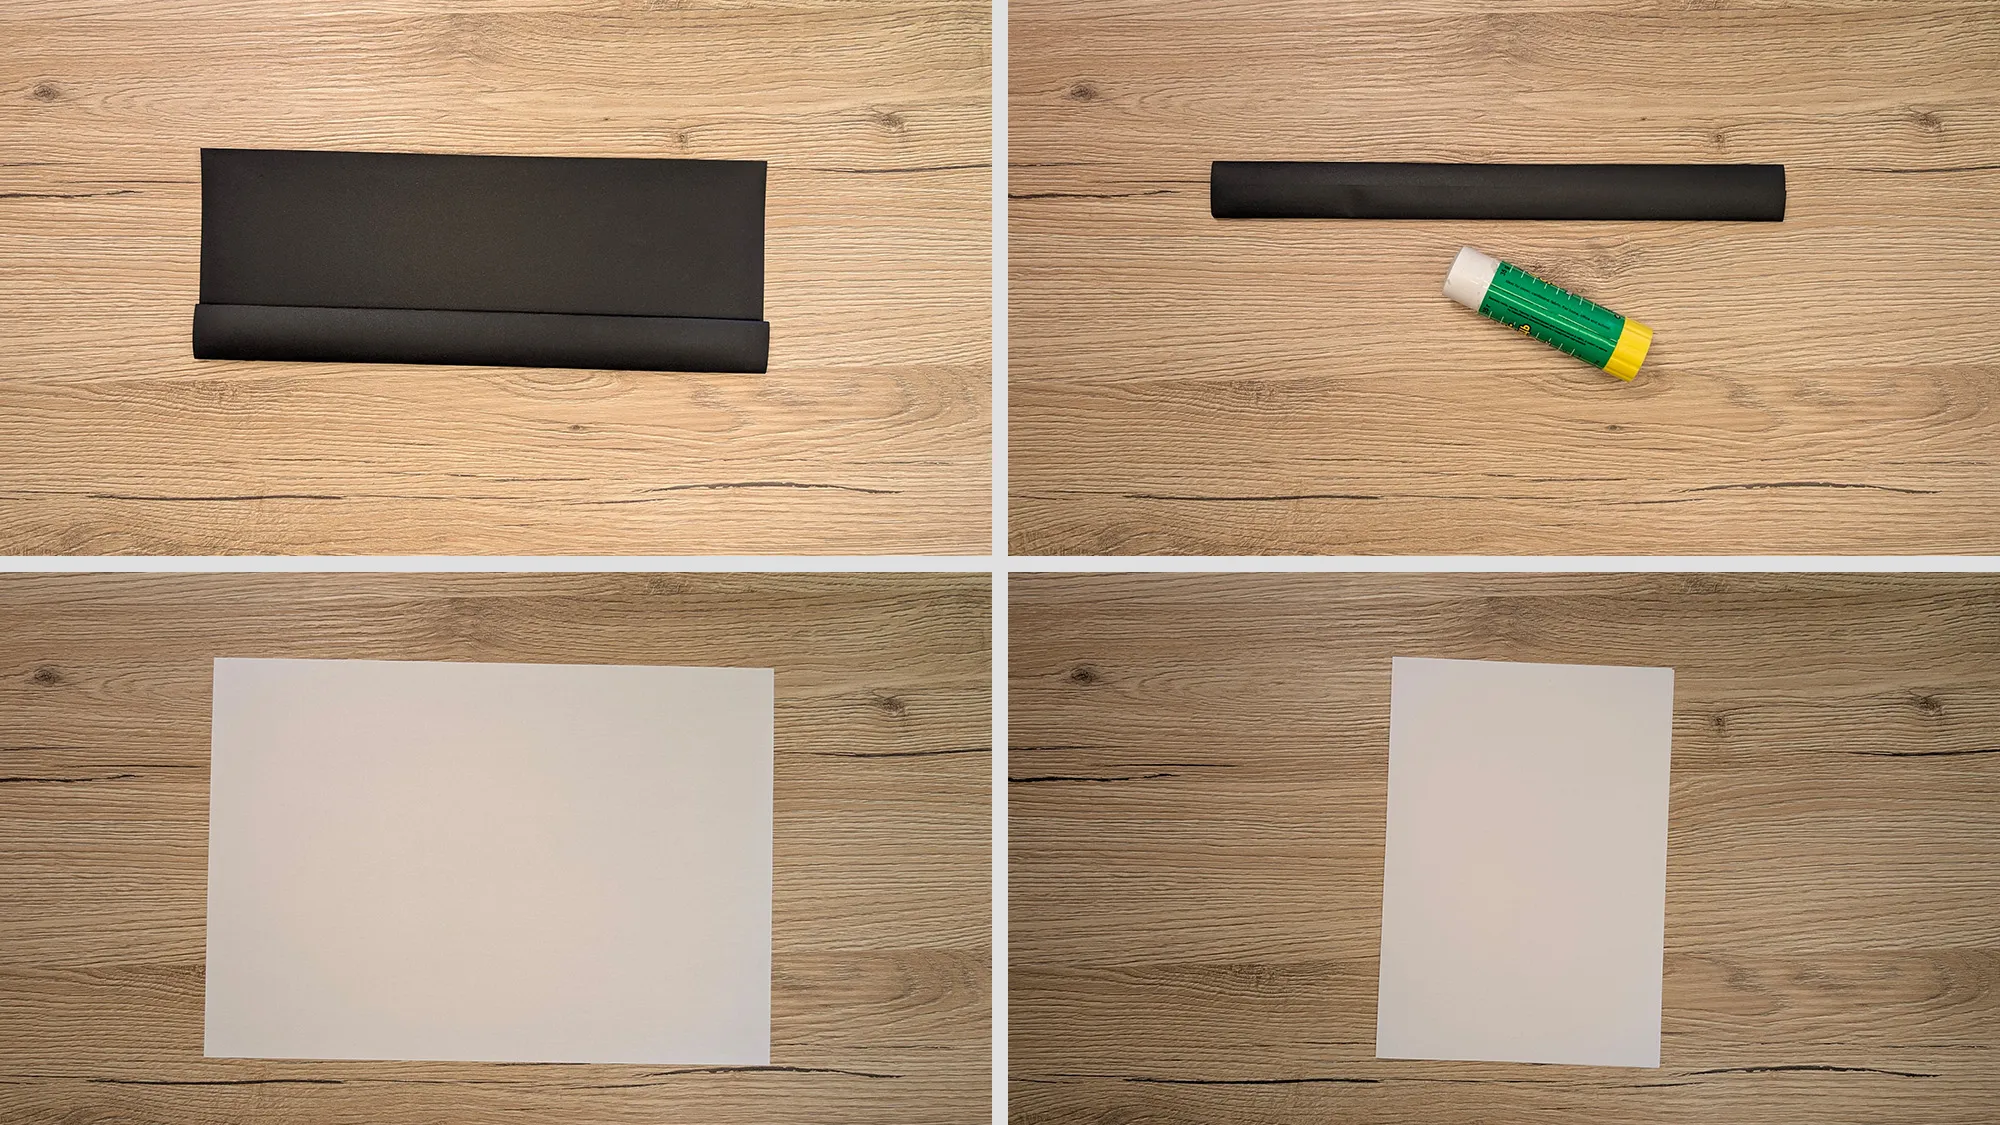
Before you start crafting, get all the materials ready. For this project, you will need different colored paper for a nice contrast. You can choose the color combination according to your wishes.
Crafting tips:
- Make sure the cut edges are clean
- The decorations can also have other colors
- Glue everything down well so that nothing wobbles
- You can also draw your own patterns
- You can add additional details with a black pen
Creative crafting promotes development
Crafting with paper not only promotes creativity, but also important motor skills. Precise cutting and gluing trains fine motor skills, while designing patterns strengthens artistic expression. A homemade tomahawk is not only fun, but also strengthens manual skills.
Discover more creative DIY projects
In our DIY section for children, you will find many more exciting crafting instructions. From simple paper projects to more elaborate crafts, there's something for everyone. Take a look at our other creative projects and get inspired!
From Vitalii Shynakov
