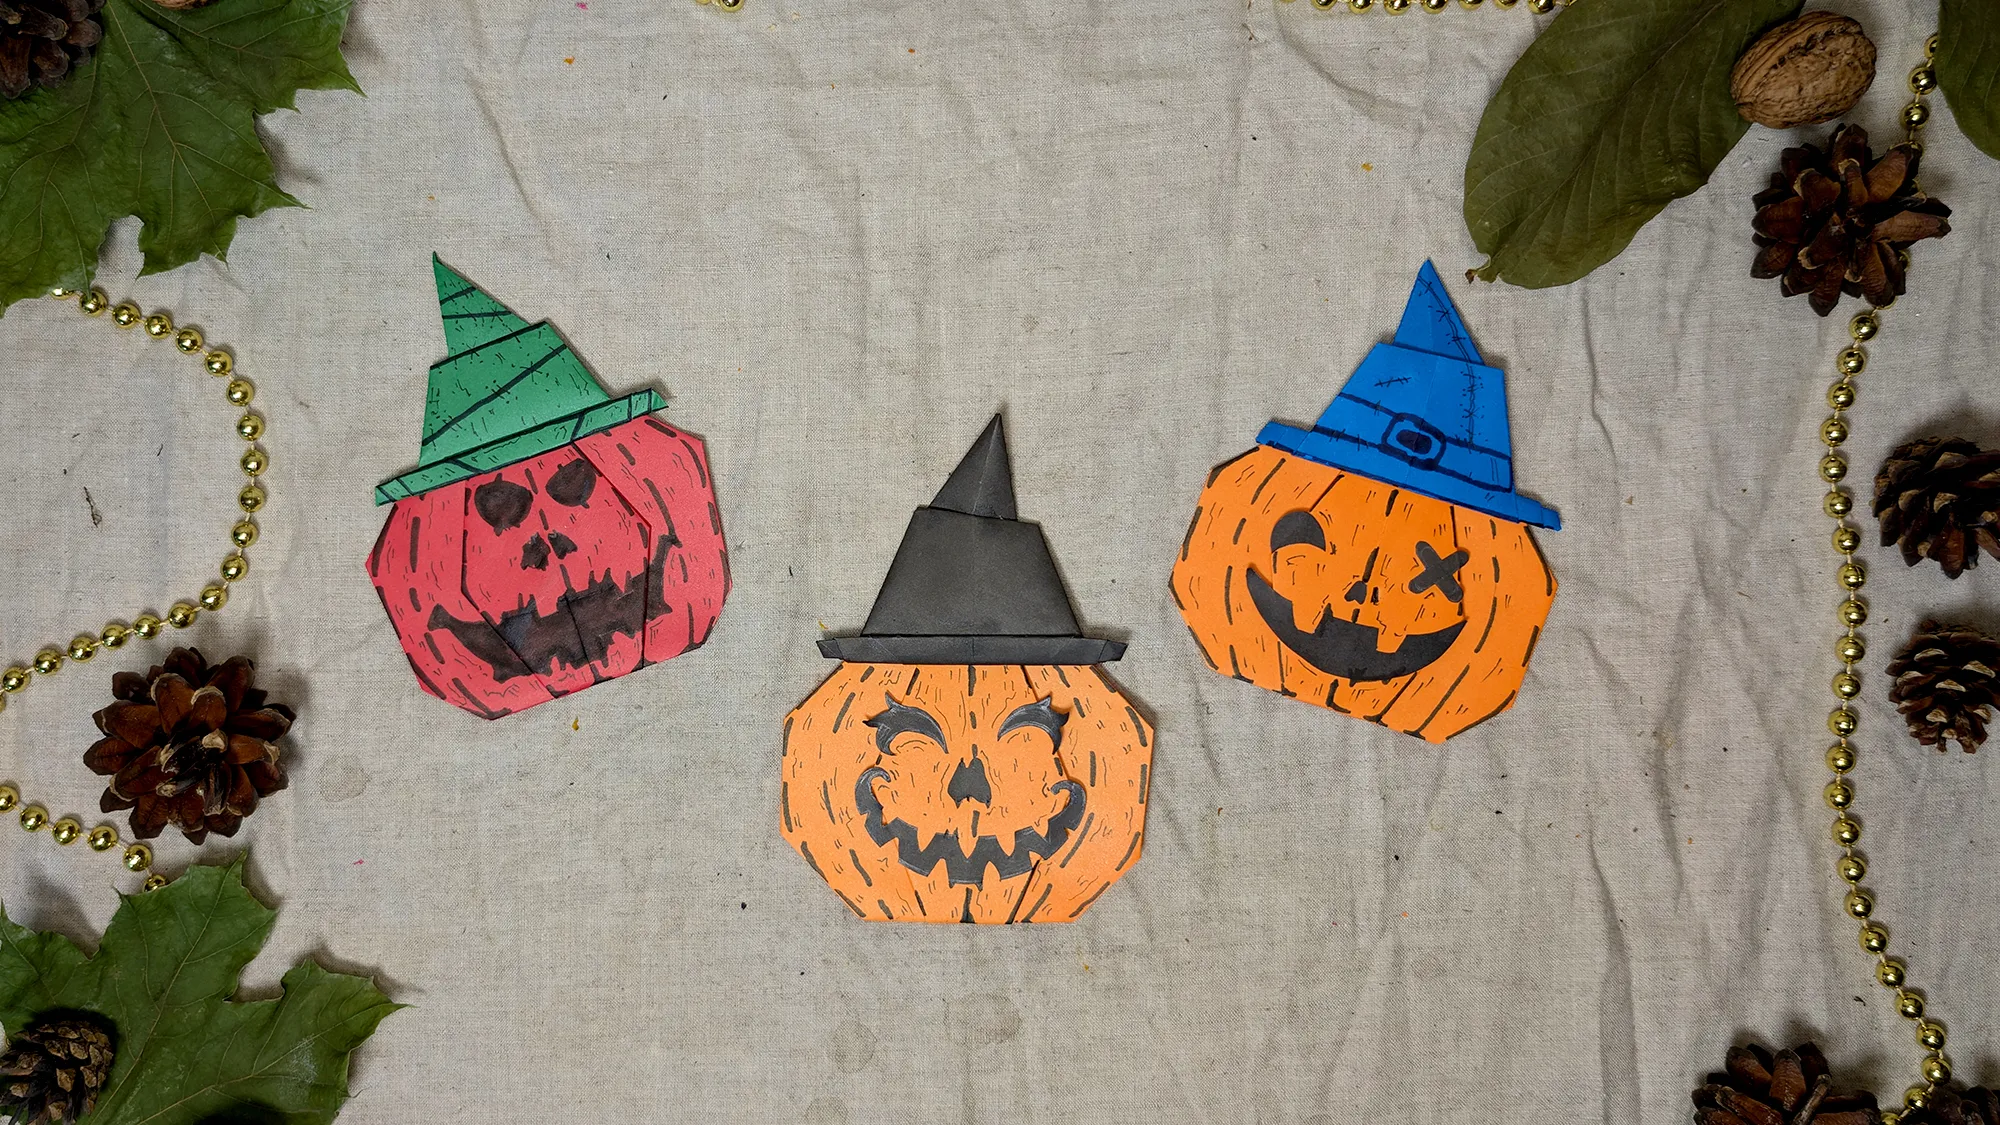
Origami pumpkin faces for Halloween: crafting instructions with video, photos, and text
Are you looking for a guide on how to craft Origami pumpkin faces for Halloween with your child? Then you've come to the right place! Halloween is that magical holiday that children especially love - with spooky costumes, trick-or-treating, and of course, the joint creation of Halloween decorations. Our children only grow up once, and the time when they want to be creative with us passes faster than we realize. Later, it will be too late for these precious shared moments. We know how fulfilling it is to create something unique with your child. That's why we have prepared this detailed step-by-step guide.
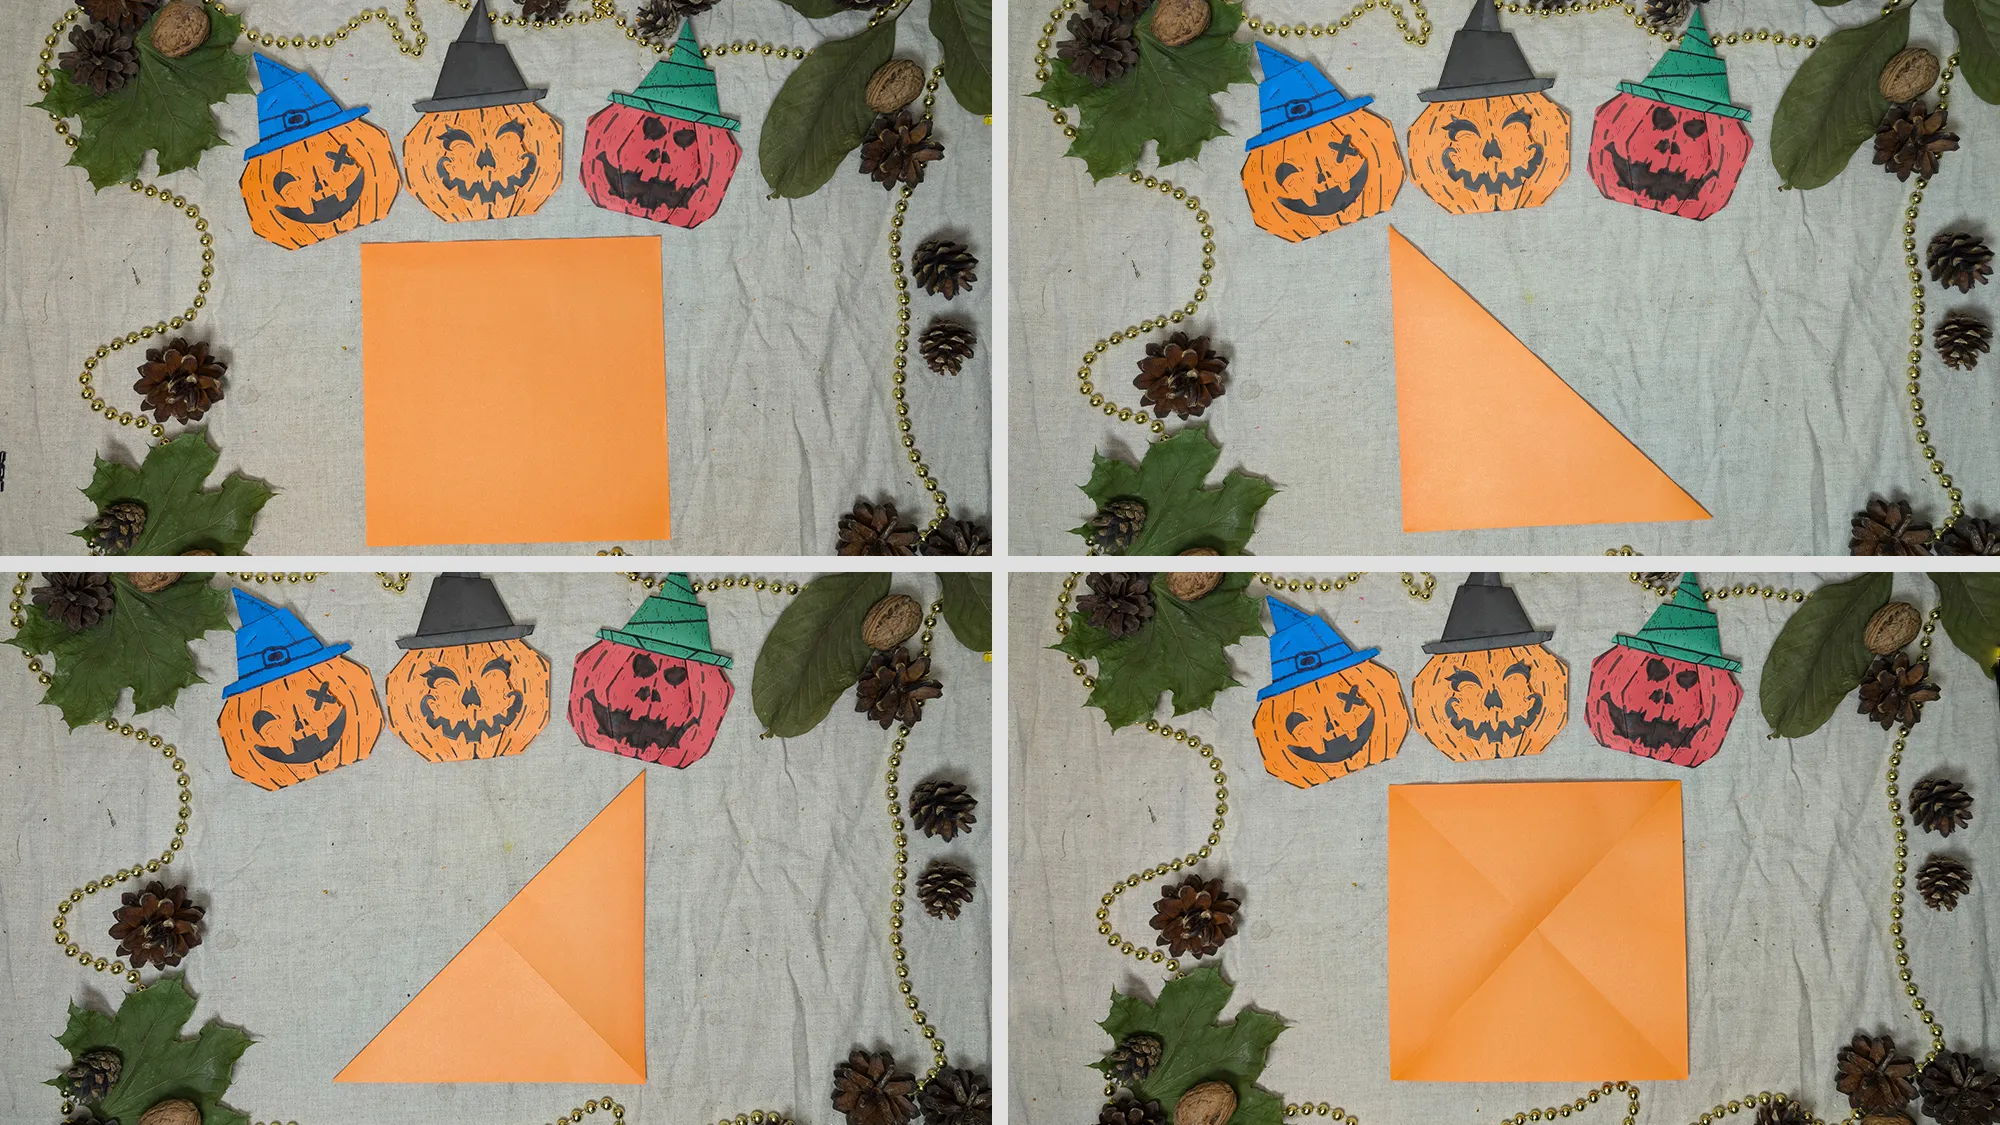
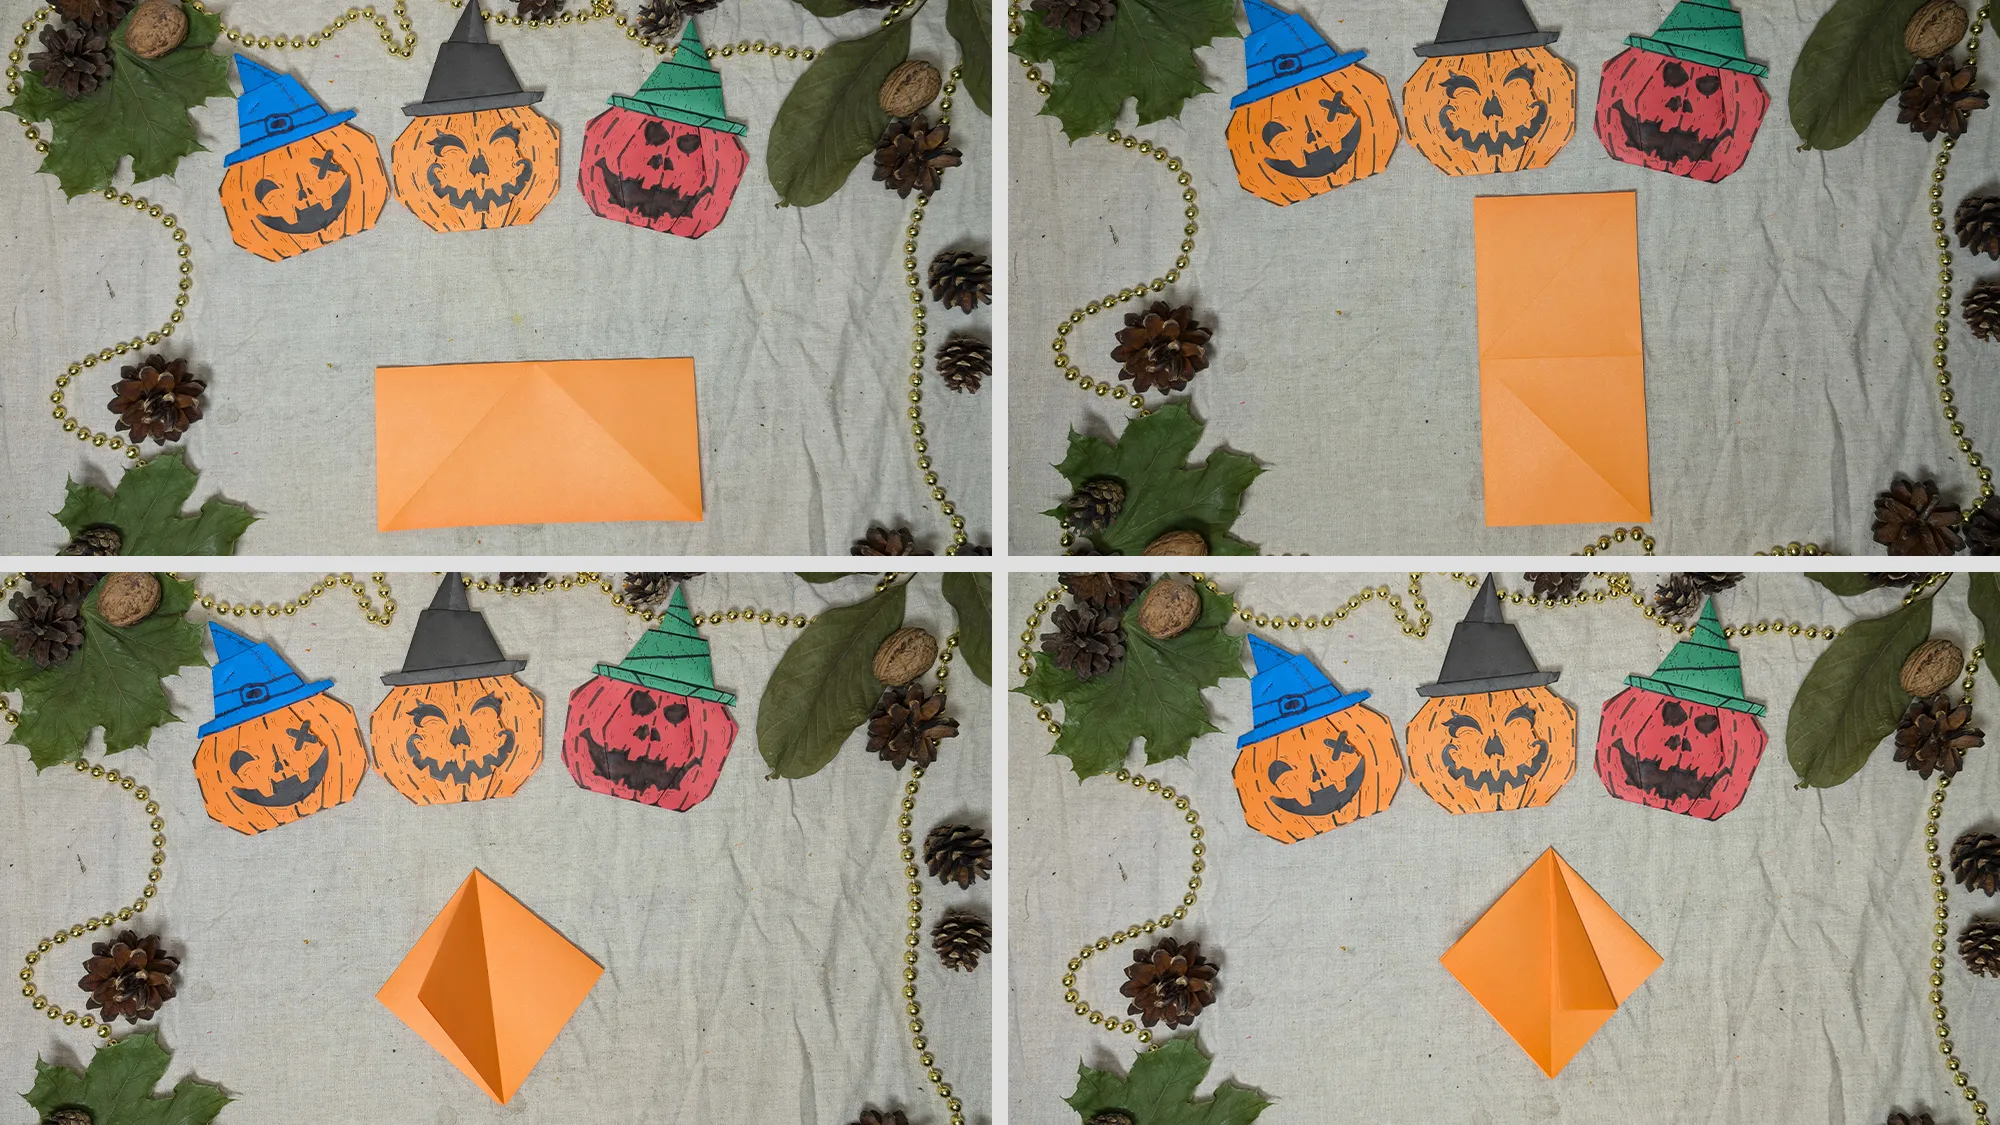
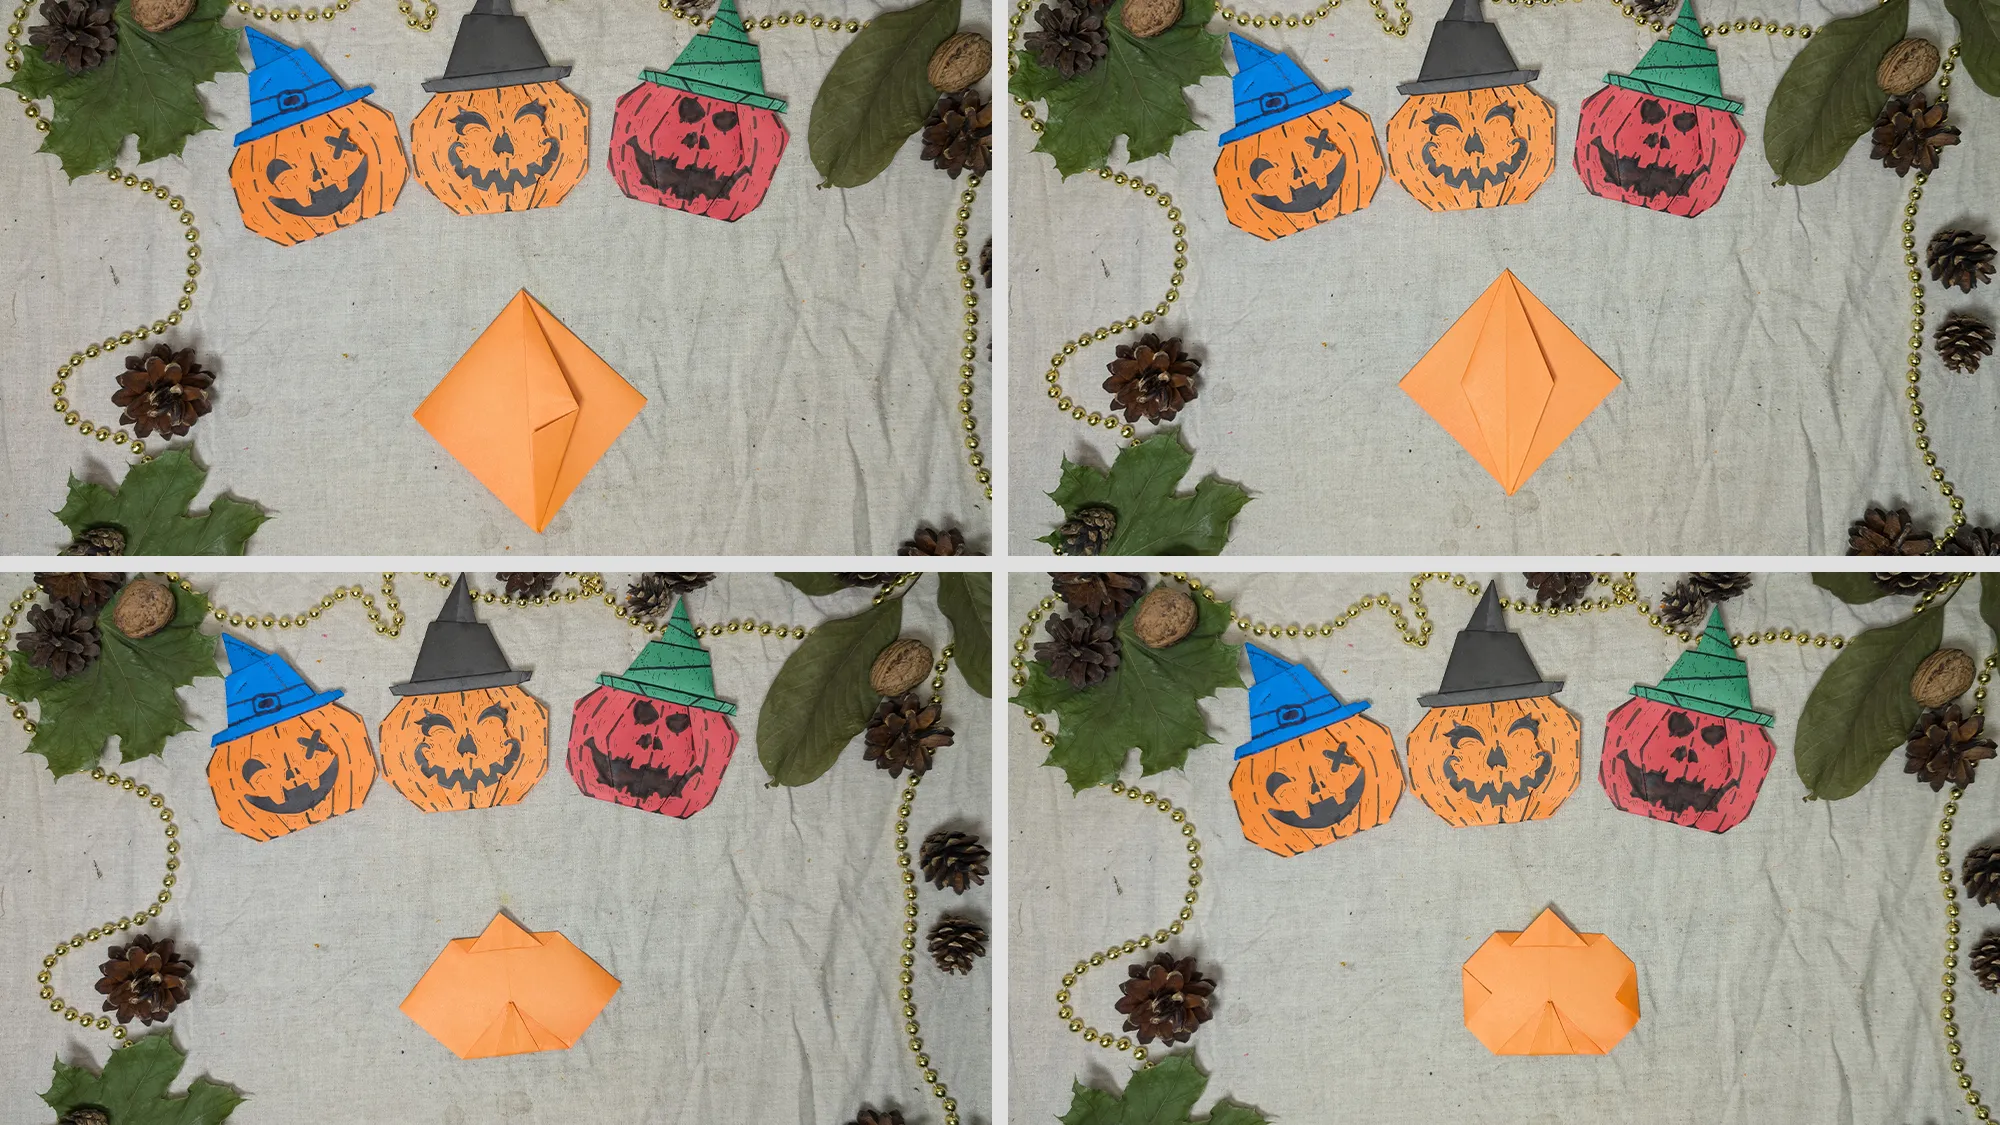
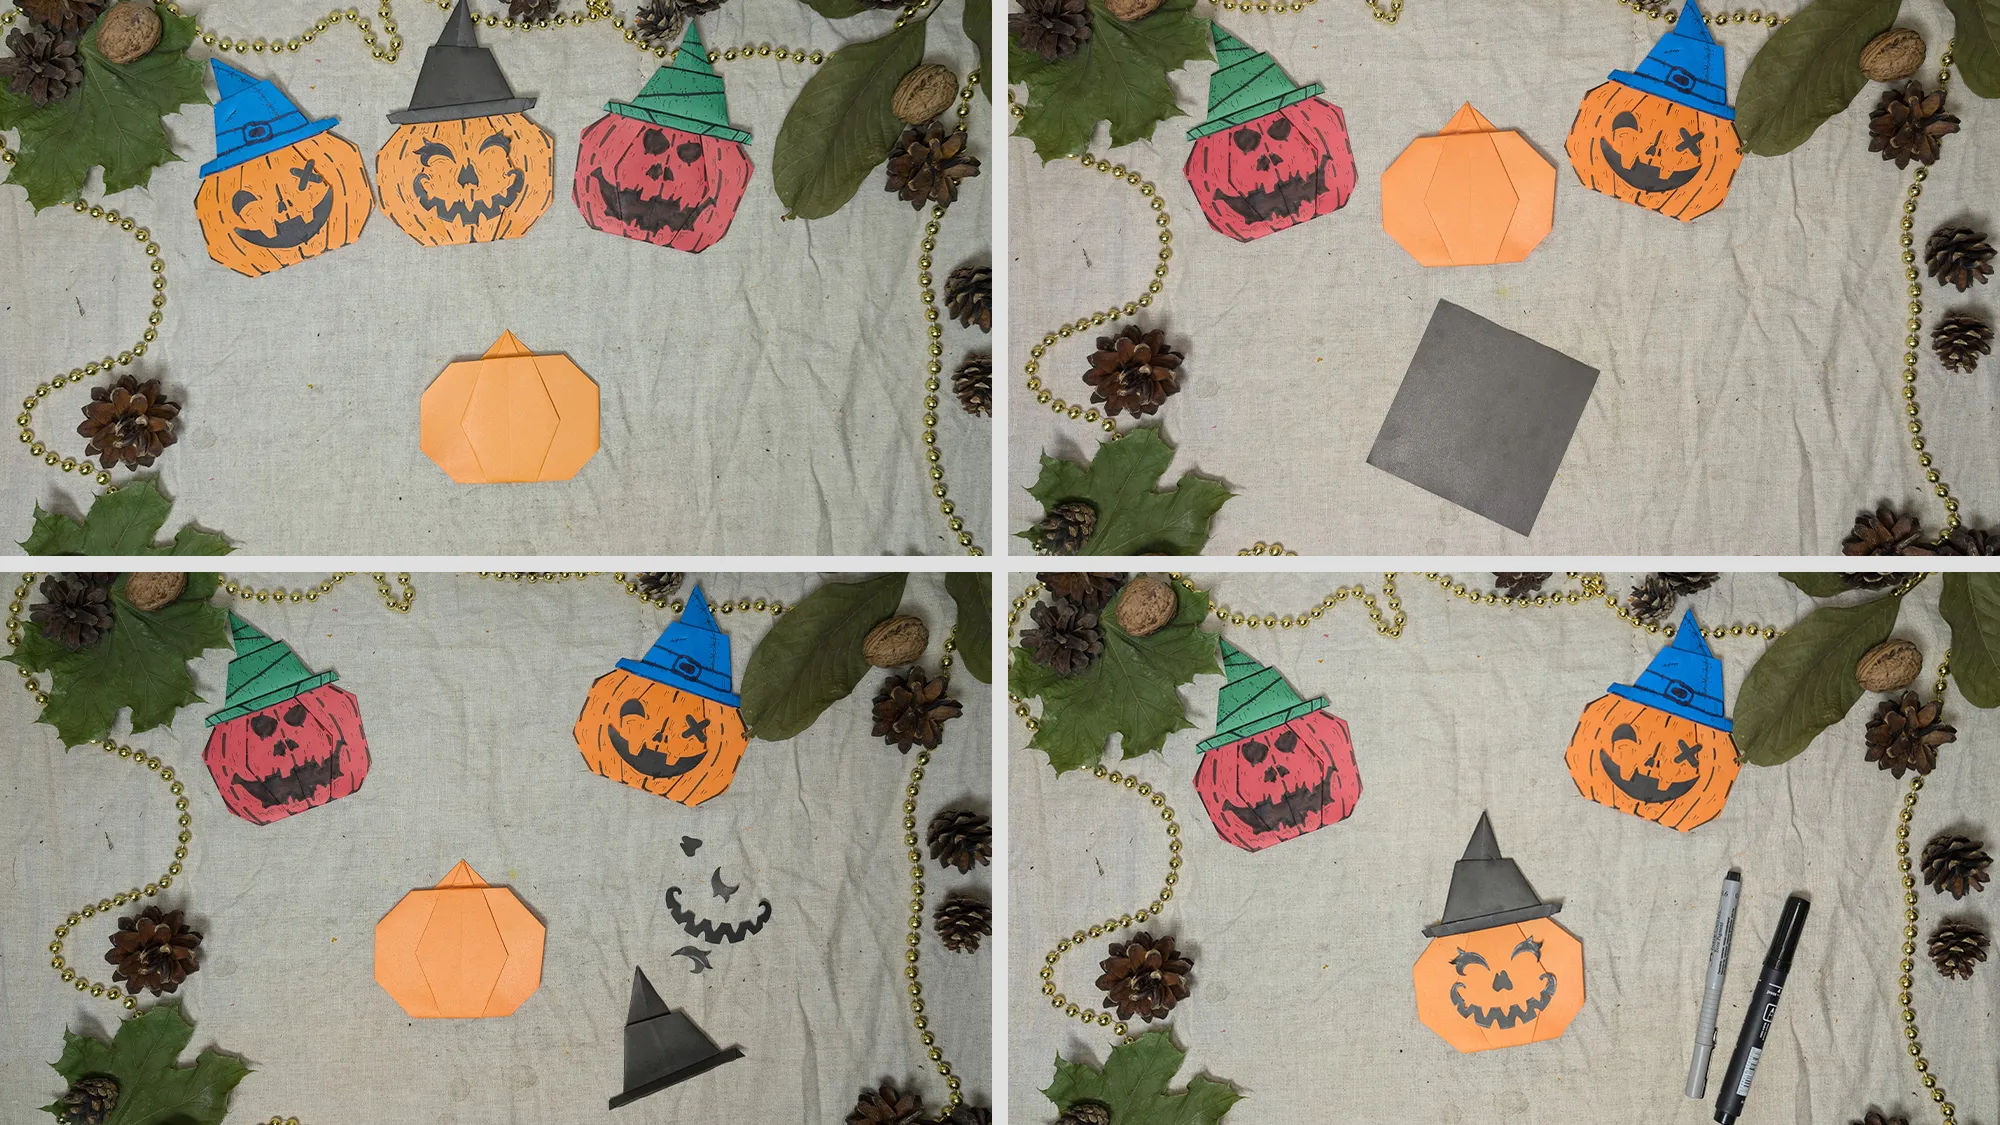
Origami Pumpkin Faces: Step-by-Step Guide with Photos and Text Description
To easily follow how these fun pumpkin faces are created, our guide consists of a detailed video, photos for each individual step, and precise text descriptions. This way, you can effortlessly follow along and know exactly what to do at each step.
Materials
For these Halloween origami pumpkin faces you will need:
- Colored craft paper (orange, green, blue, black, or other colors as desired)
- Scissors
- Glue
- A black marker or felt-tip pen
All of these materials can easily be found in any supermarket in the arts and crafts or stationery section, or you may already have them at home. Since this is a kids' project, we deliberately avoided complicated materials. The crafting of Halloween decorations should be fun and not turn into stress!
Origami Pumpkin Faces: Benefits of Creative Crafting for Child Development
Folding and creatively crafting with hands has immense value for your child's development. The fine motor skills trained in precise folding, cutting, and decorating are directly linked to brain development. Scientific studies show that manual work in children promotes the formation of new neural connections in the brain. These connections are fundamental for overall cognitive development.
As parents, we have the responsibility to promote the development of our children so that they have the best chances for a happy future. Of course, this includes reading together, solving logical puzzles, healthy eating, and physical activities. However, as we can see, engaging in creative activities like crafting Halloween decorations is equally significant. These creative processes not only strengthen motor skills but also concentration, perseverance, and a healthy self-esteem.
Origami Pumpkin Faces: Thank You to Our Readers
We create all the guides on our website ourselves. To produce these photos and videos, we craft everything by hand, and it brings us great joy to know that our work was not in vain. Your presence here on our portal and finding this post interesting is the greatest reward for us. We thank you for your time and hope that you and your child will be successful when you recreate this project.
If our guide has inspired you, why not also discover our other creative projects! In our category Craft Ideas for Kids you will find seasonally appropriate instructions - from cute Christmas figures made of felt to autumnal leaf wreaths to fun Valentine's Day cards. Our original paper ninja stars and colorful Squid Game masks for children's birthdays are particularly popular.
Our Origami instructions offer the right project for every age. For beginners, we have simple paper planes and boats, while advanced users can try their hand at detailed animal models like frogs, birds, or even dragons. During the Christmas season, our festive stars and angels are particularly in demand, while our heart folds are suitable for birthdays or Mother's Day all year round.
In the category Napkin Folding we demonstrate elegant techniques for every occasion - from romantic roses for wedding celebrations to festive Christmas trees to practical cutlery pockets for everyday dining tables. Our New Year's Eve special folds in the form of lucky charms are a highlight every year.
At the time of publication of this article, we have created over 400 video instructions and we do not intend to stop. We wish you good luck and all the best!
From Vitalii Shynakov
