Funny paper rabbit for crafting – simple idea for kids

Hello! Are you looking for a simple DIY idea that you can craft with your child for Easter? We are glad you are here! In this post, I will show you how to make a fun paper rabbit together with your child – perfect for tiny hands and especially suitable as decoration for Easter.

All the photos and the video you find here have been created by us for you. Each of our instructions consists of a video, several images, and a clear description of what is being done in each photo and how you can easily recreate it yourself. So: no worries – you will understand every step with ease!

Before you get started and make your own paper rabbit, first watch our short video – it shows you every step in detail:

If you like how we explain our crafting ideas, feel free to visit our YouTube channel and subscribe to us! We upload new crafting videos daily – with many creative DIY ideas for children.

🐰 Making a paper rabbit: Step-by-step instructions with photos and text

For our crafting ideas, we prefer to use simple, inexpensive materials. You can buy everything you need at your local supermarket or craft store.

🧰 Here's what you need for the paper rabbit:

  • White craft paper or cardstock
  • Colored pencils or felt-tip pens
  • Scissors
  • Glue stick
  • Ruler and pencil
  • Black felt-tip pen for outlining
🐰 Creating a paper bunny: step-by-step guide with photos and text. The picture 1
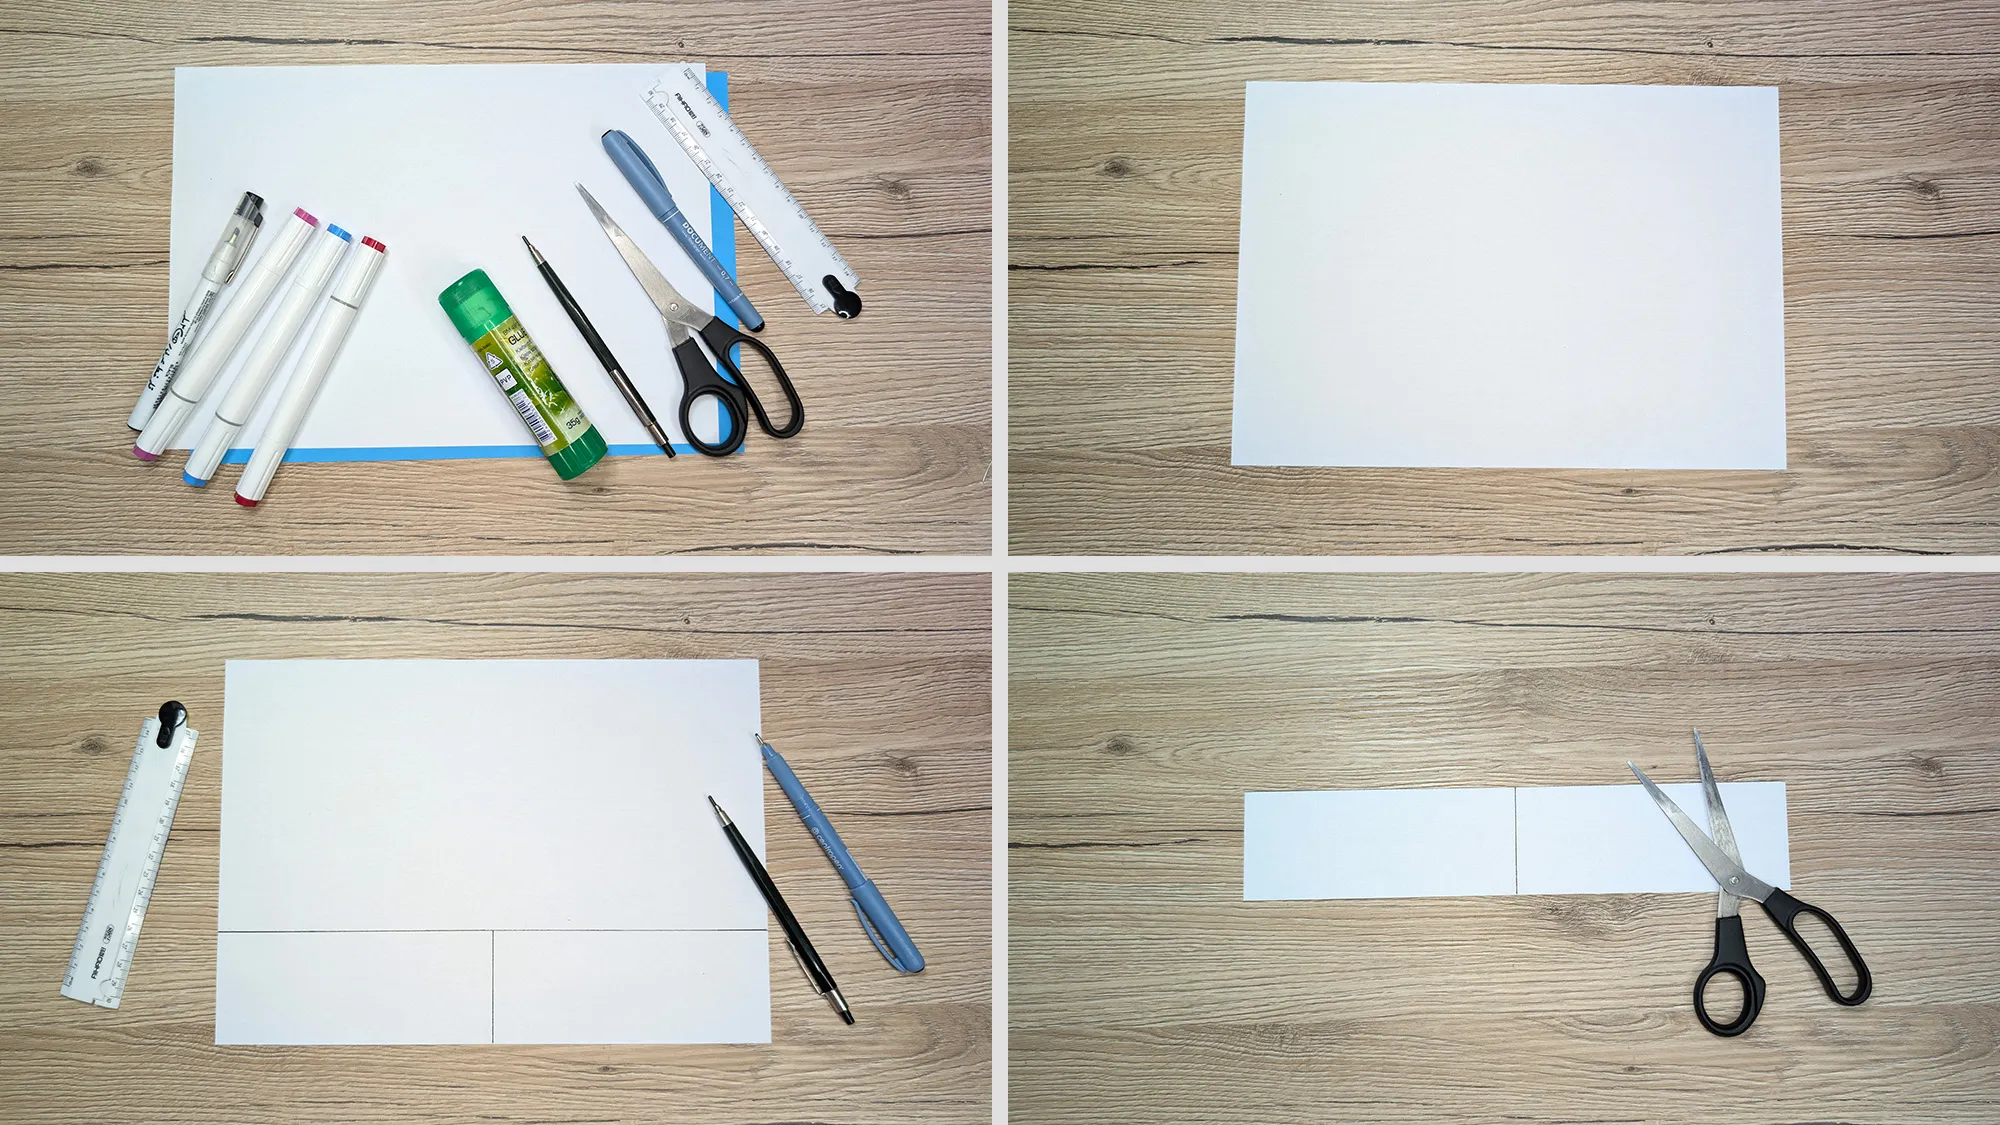
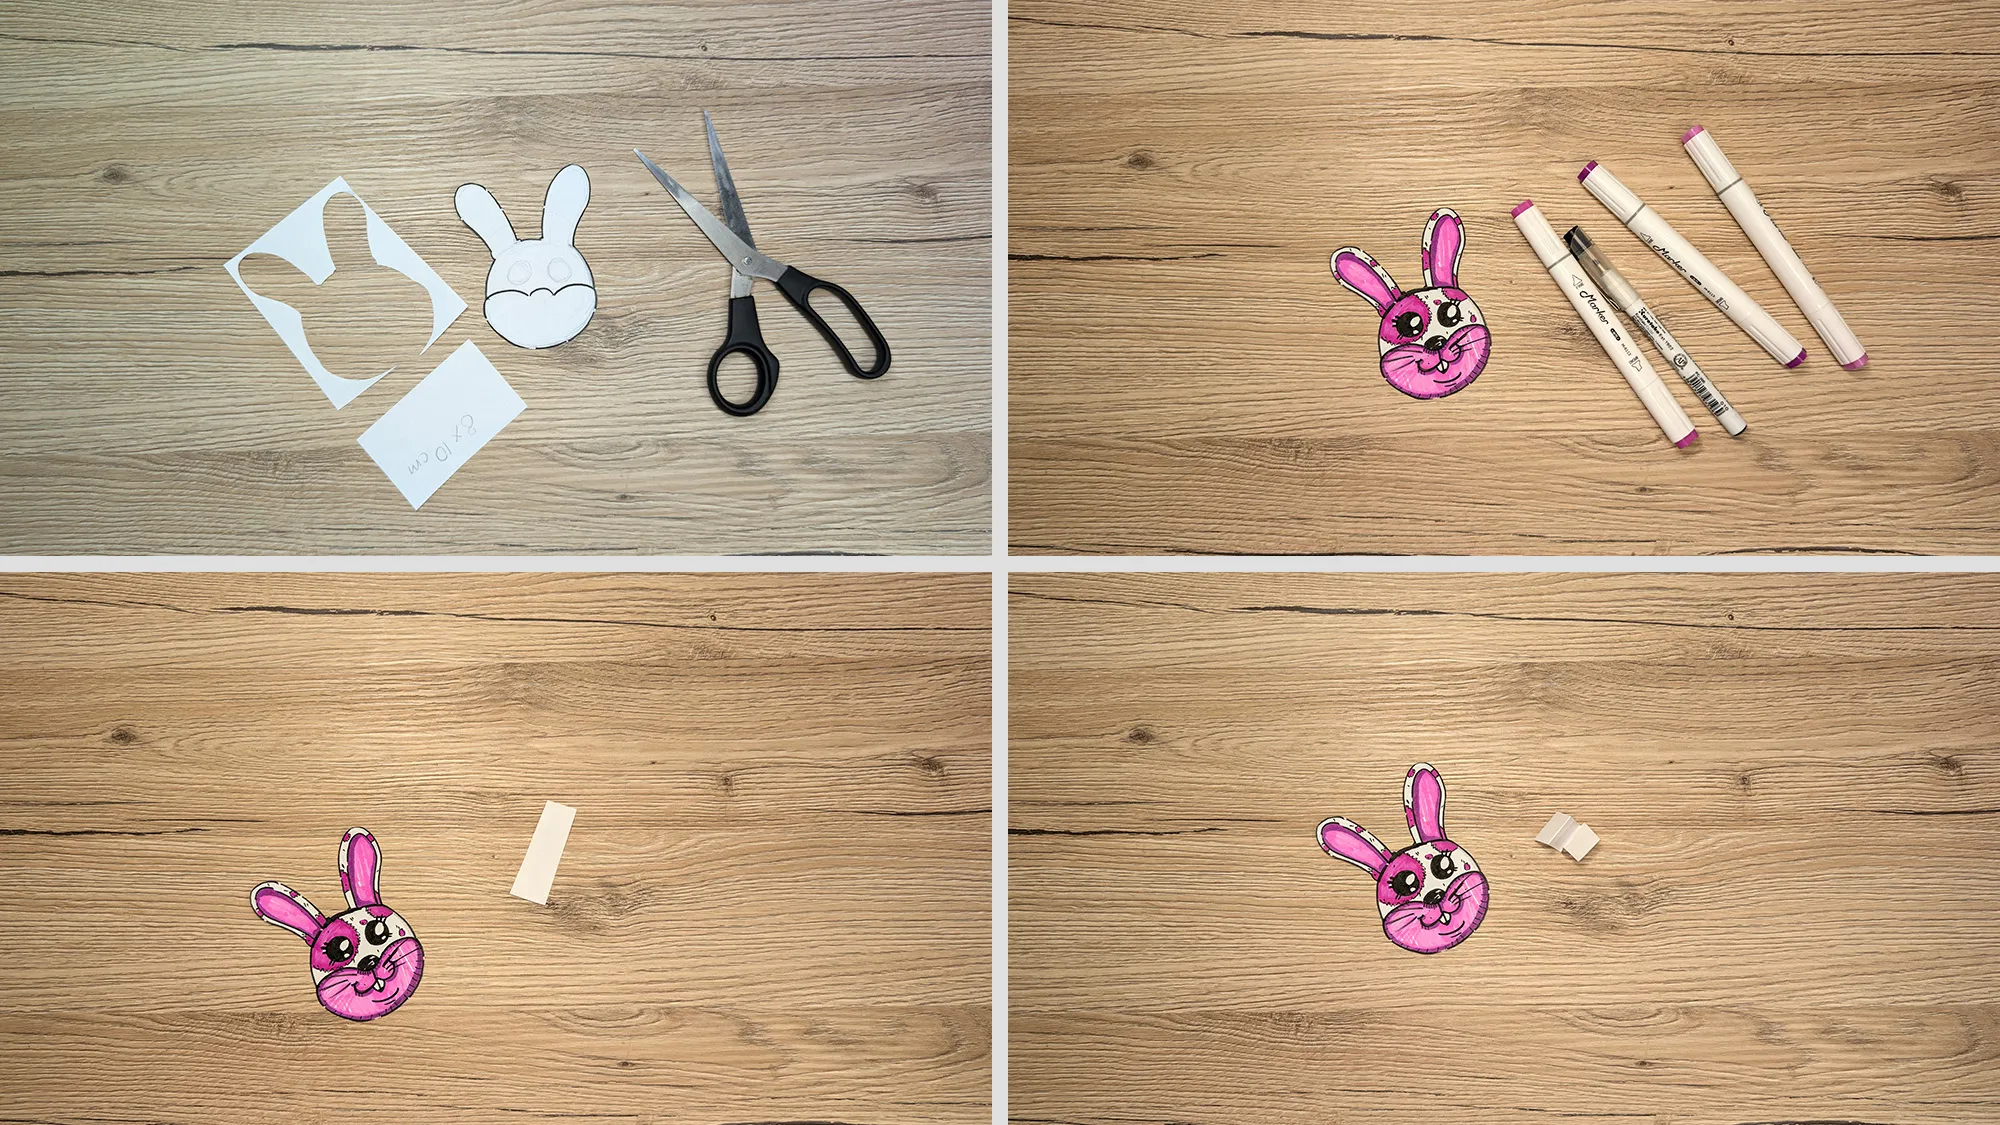
In the first photo, you can see everything you need: white craft paper, possibly colored paper as a base, felt-tip pens, glue stick, scissors, ruler, pencil, and fineliner. Take a sheet of paper and draw a rectangle with the help of the ruler. It should be divided into two equal halves – this is important for folding later on. Cut the rectangle shape out cleanly.
🐰 Create a paper rabbit: step-by-step guide with photos and text. The image 2
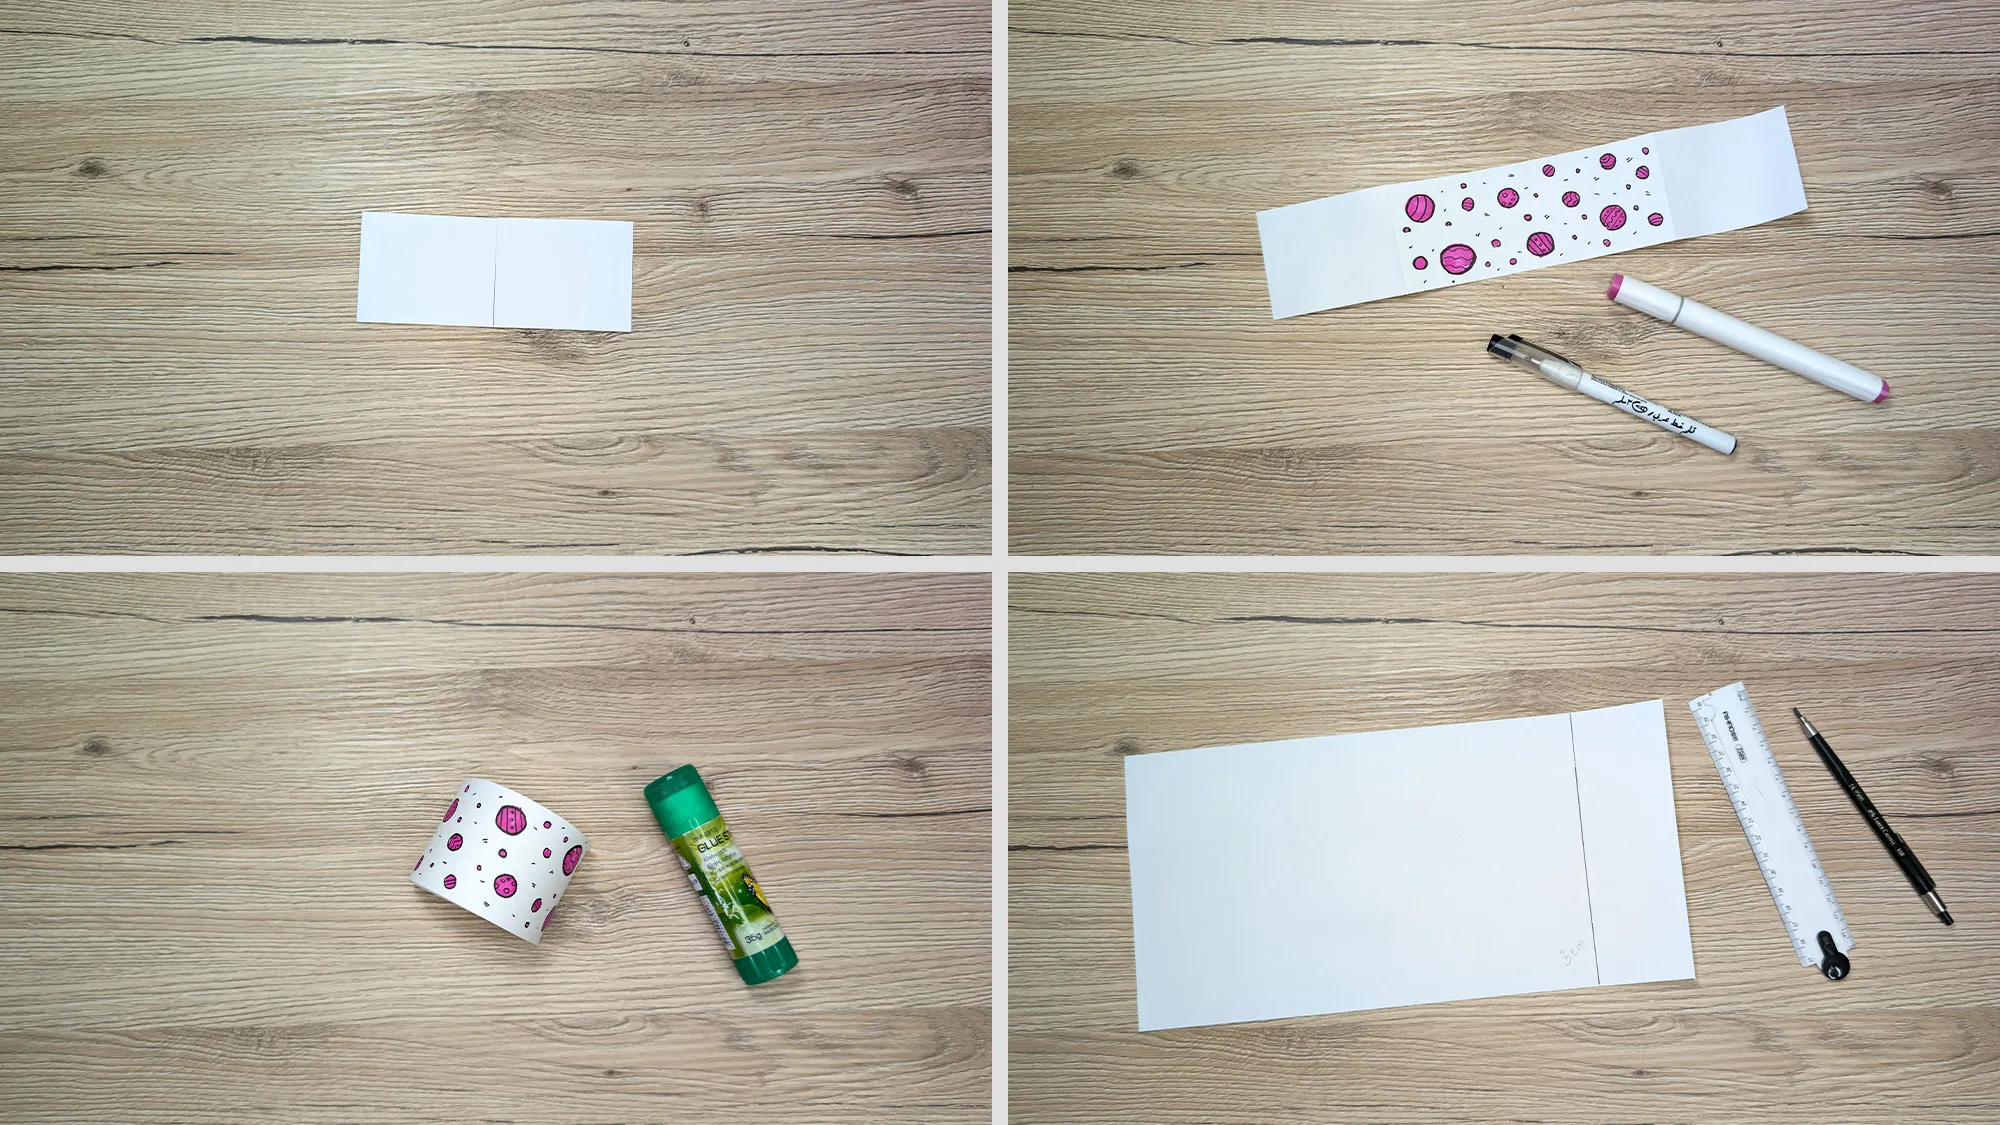
Now it gets colorful! Take your favorite colors and color the rectangle as you like – dots, patterns, stripes, whatever you want. Then apply glue to one of the short ends and stick both sides together to form a sturdy cylinder. This will be the body of your paper rabbit.
🐰 Craft a paper rabbit: Step-by-step guide with photos and text. The picture 3
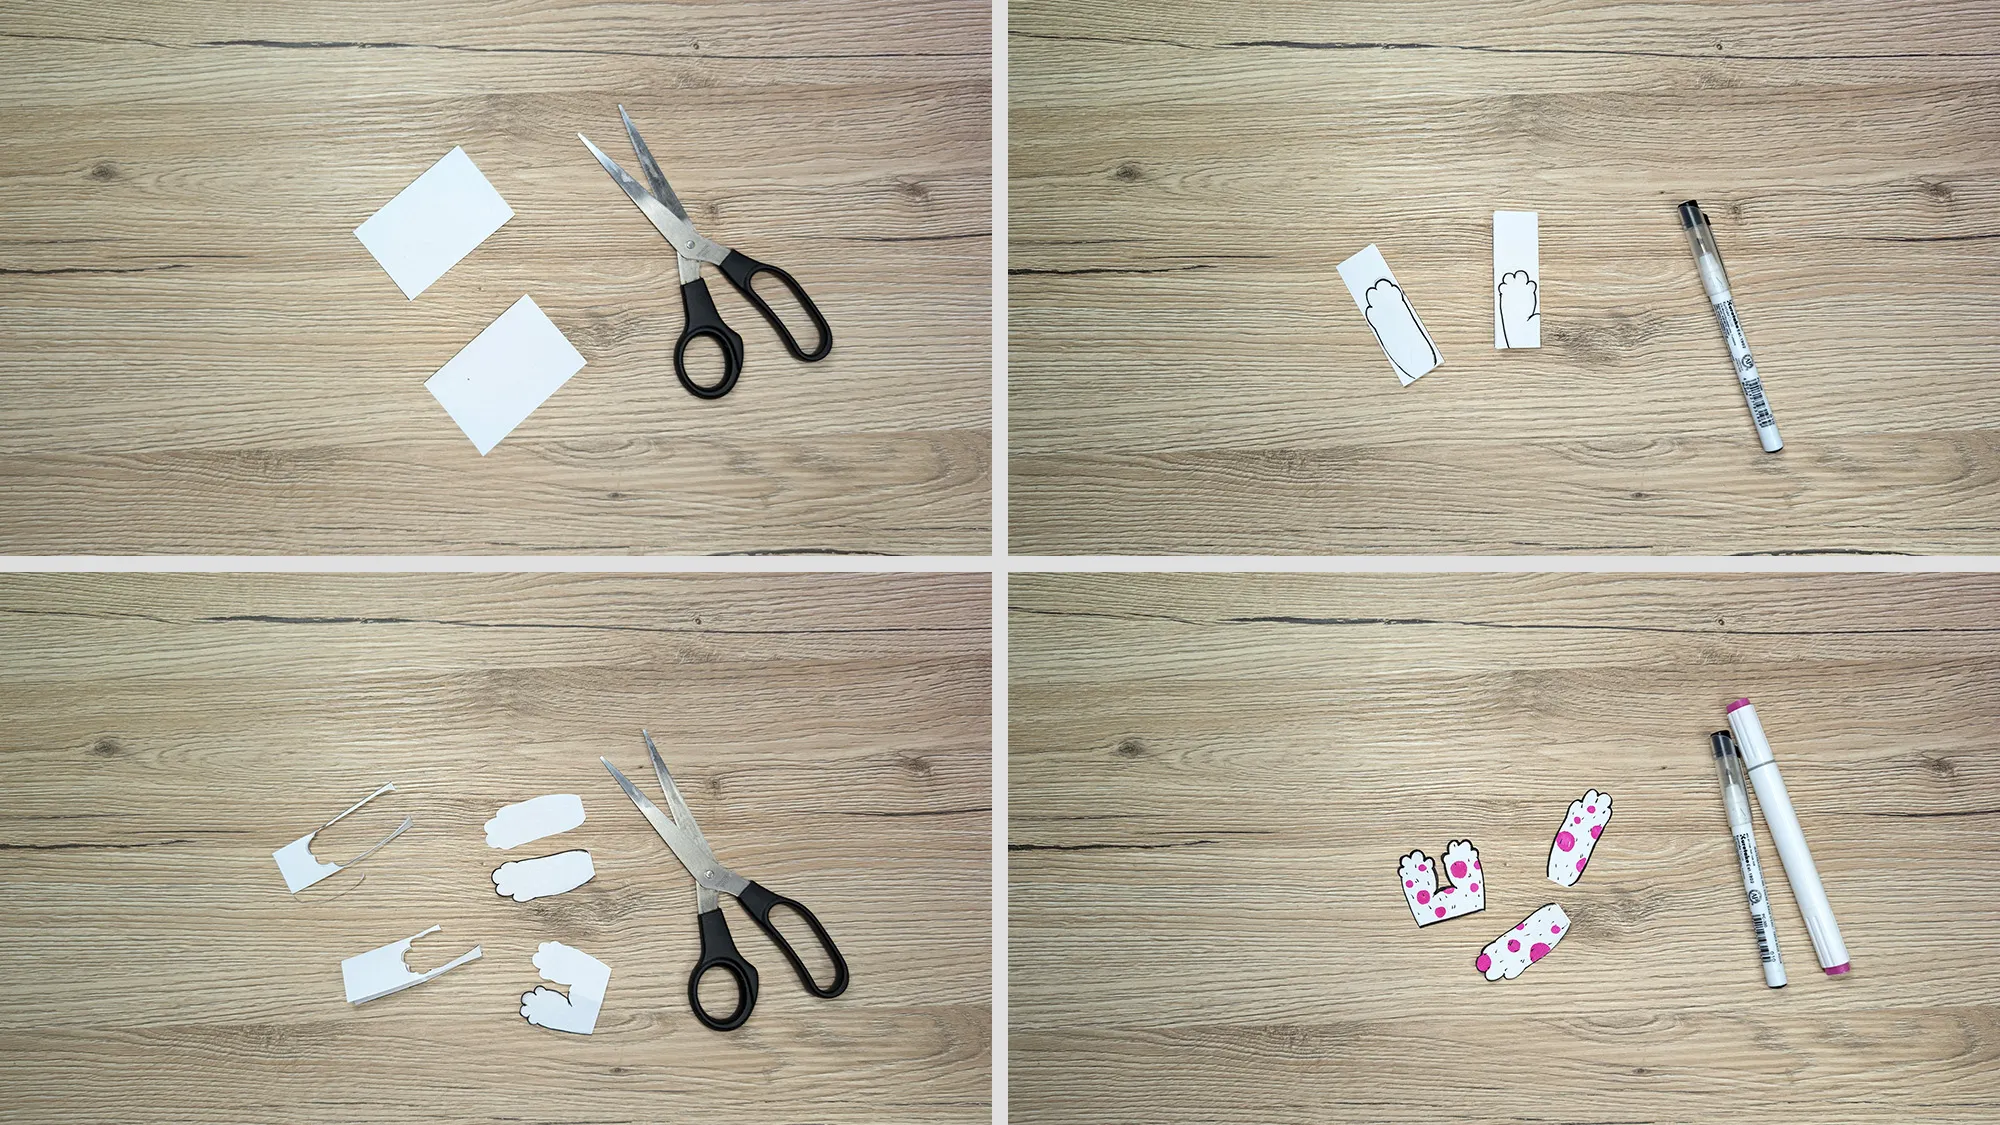
Next, you need two small rectangular pieces of paper. Draw the front and back paws of the rabbit on them – you can easily sketch them with rounded shapes. Cut them out and color them brightly. This way, your rabbit will later have a cheerful character.
🐰 Paper bunny crafting: Step-by-step guide with photos and text. The image 4
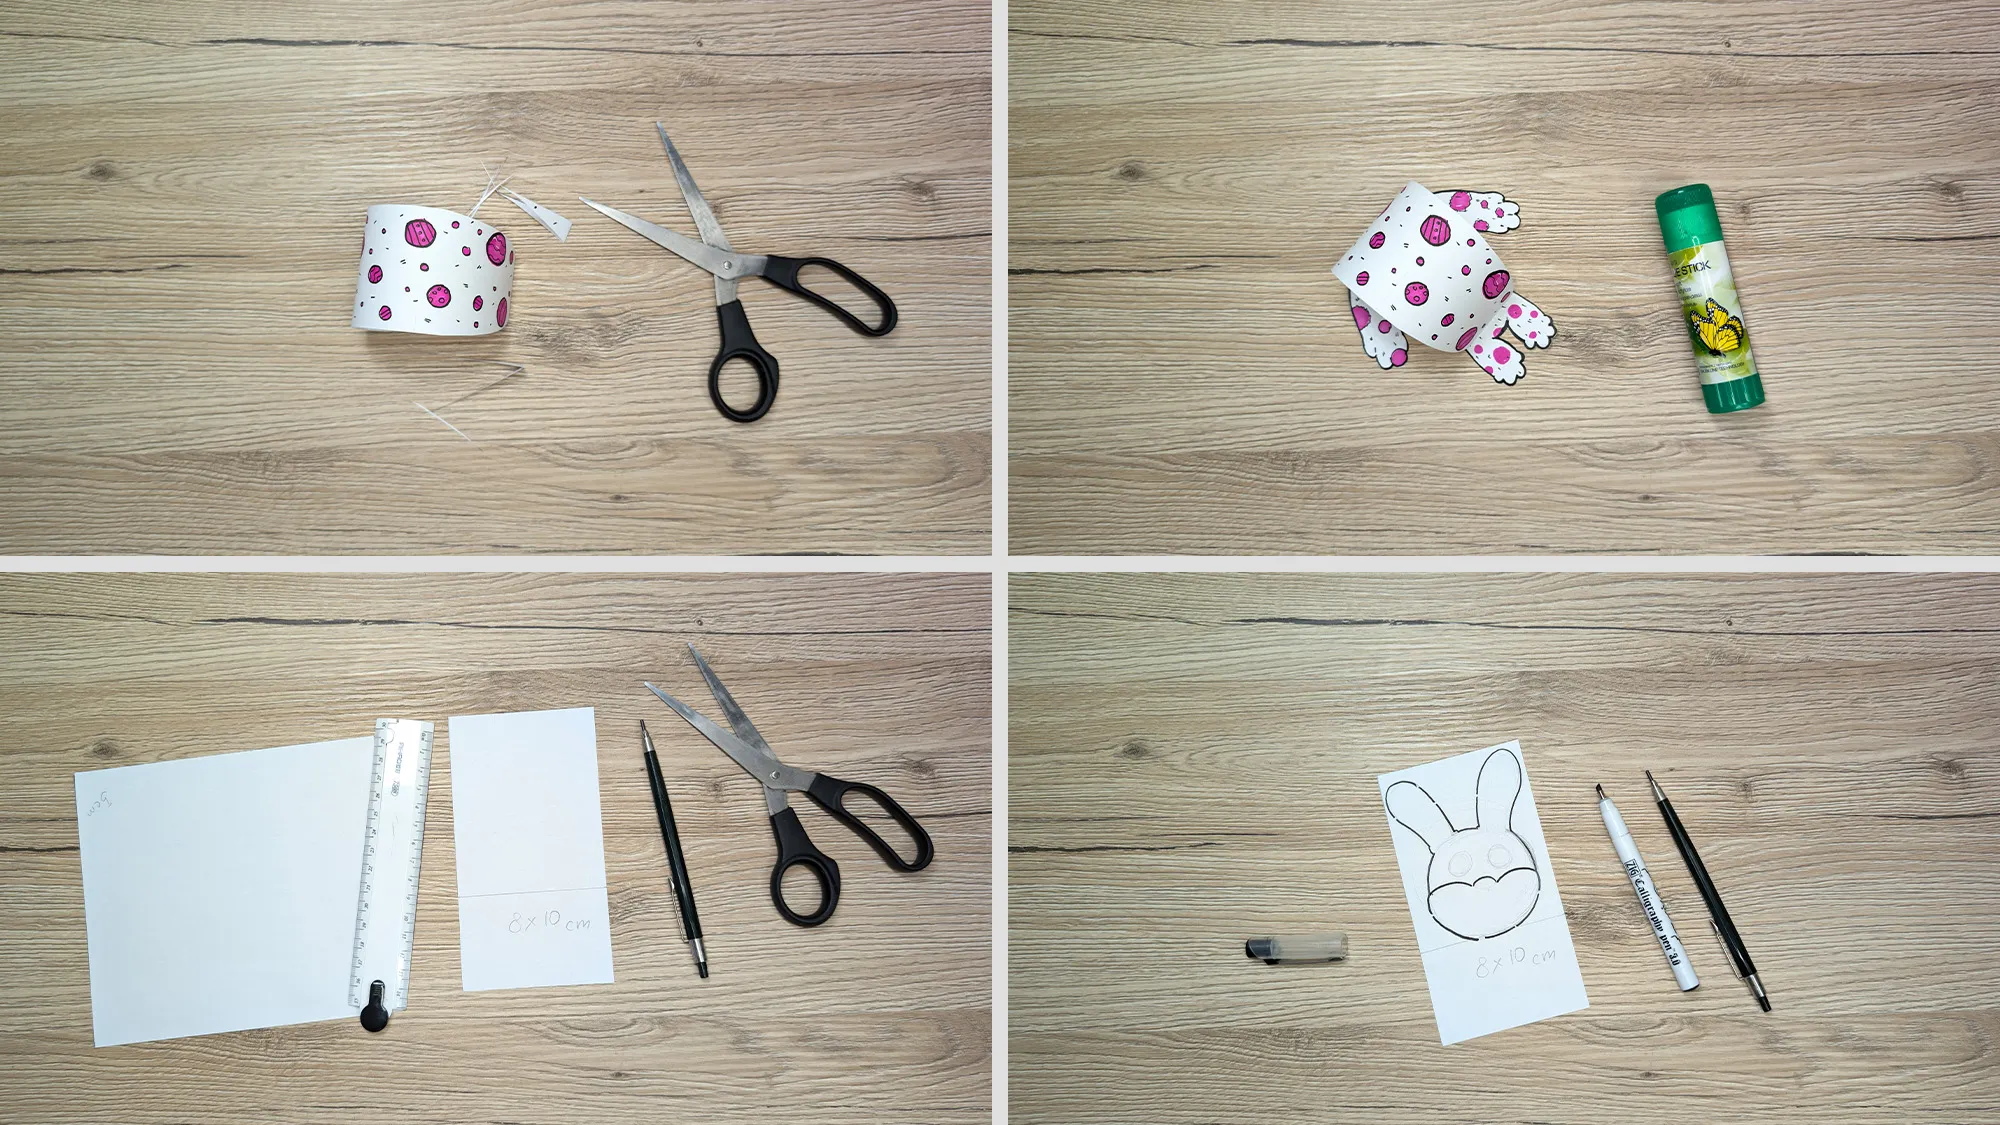
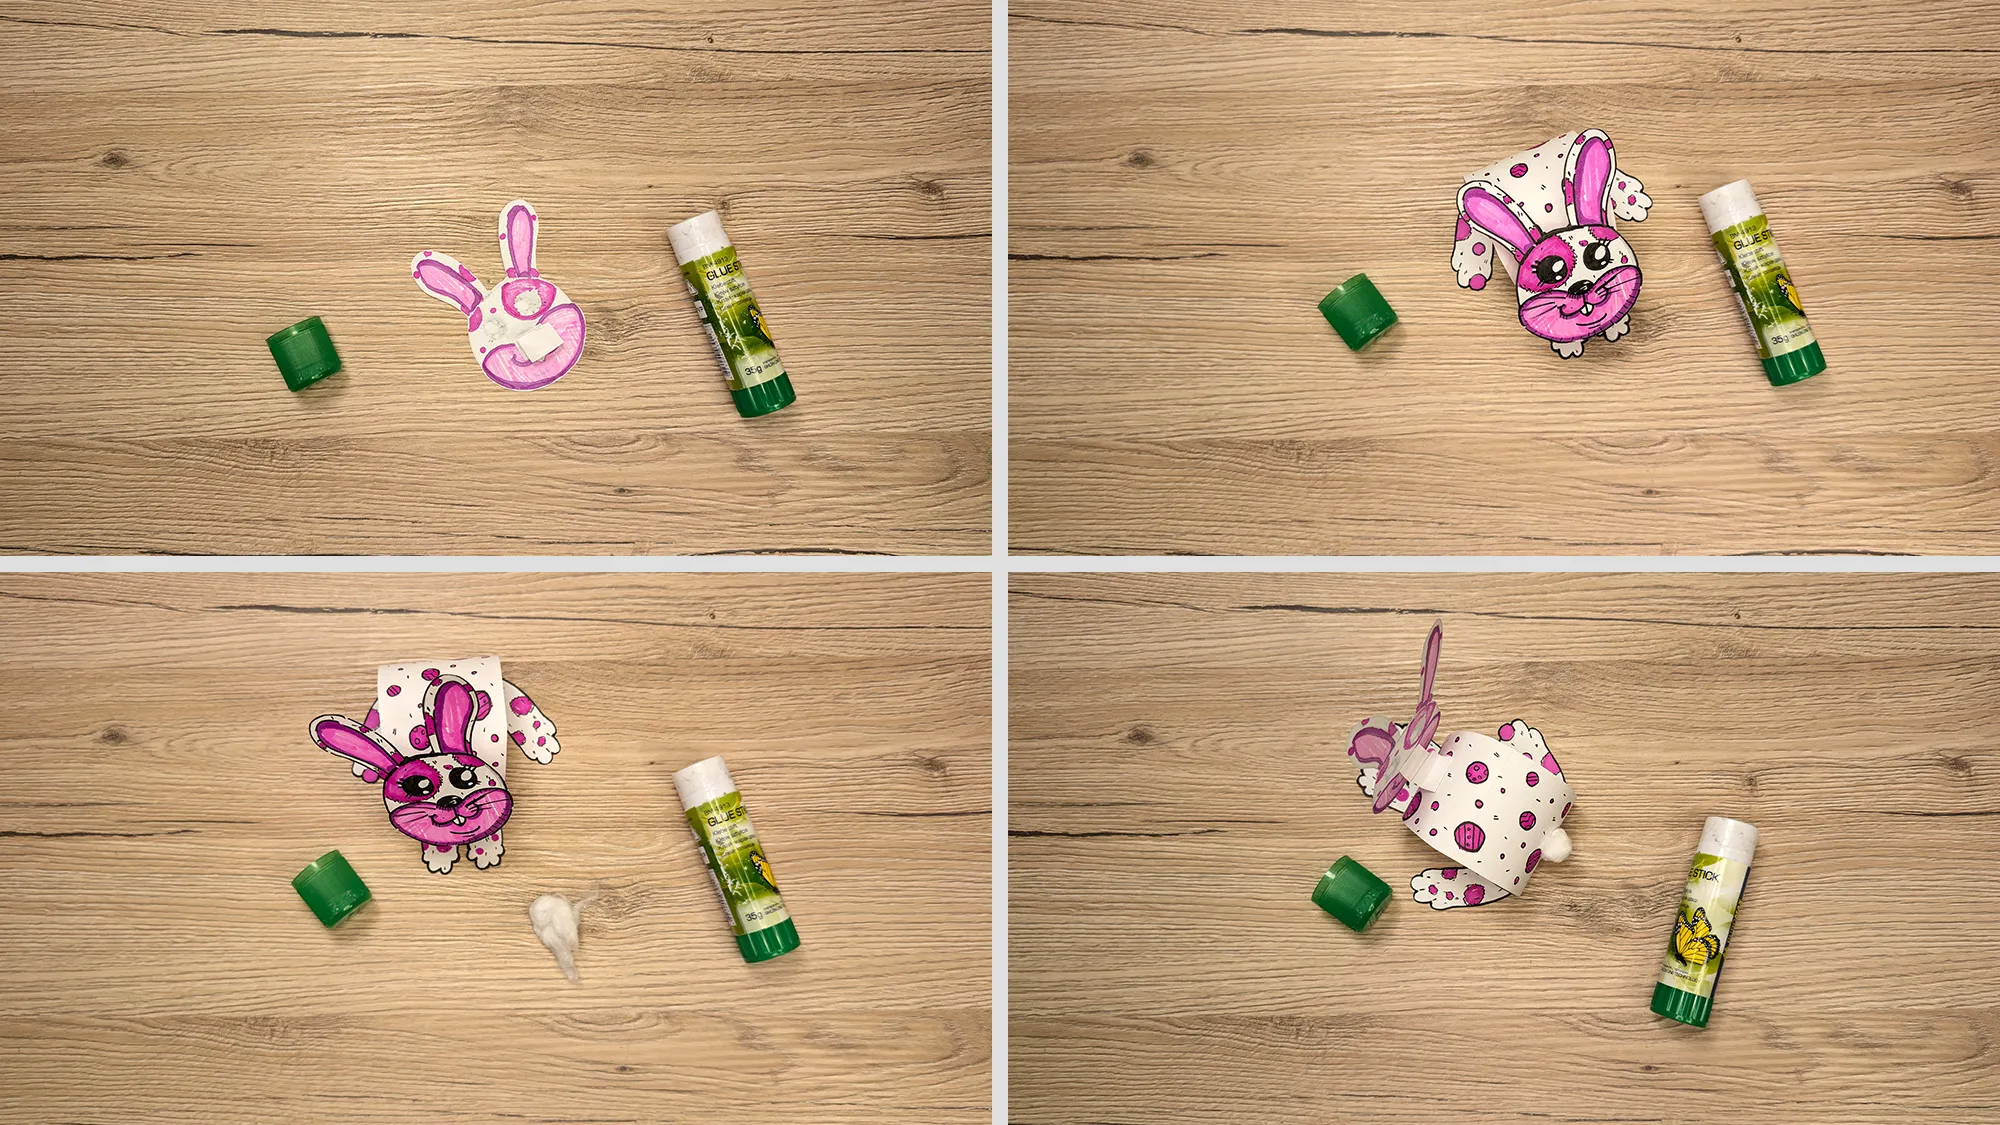
Glue the finished paws to the sides and bottom of the cylinder. This gives your little bunny a stable shape. Now it's time for the head: draw a rabbit's head on a new piece of paper – that is, a round face with long ears. You can make your own version or refer to our video for guidance.
🐰 Crafting a paper bunny: step-by-step instructions with photos and text. The image 5
Now creativity is required! Draw big eyes, a cute nose, a wide smile, or funny freckles on the rabbit. Depending on how you want your rabbit to look. You can make him friendly, crazy, or sleepy – your imagination knows no bounds.
🐰 Making a paper rabbit: step-by-step instructions with photos and text. The image 6
From a small piece of paper, you now make a "connecting piece" – folded in the shape of an M or U. This allows you to attach the rabbit's head to the body a bit protruding. For the tail, you only need a small piece of cotton – this is glued on the back and makes your rabbit even cuter.
🐰 Making a paper bunny: Step-by-step instruction with photos and text. The image 7
Take a look at your creation! Your paper rabbit is now complete and ready for the Easter basket or as decoration on the table. You can stand it up or hang it up with a thread. If you like, make a second one in a different color – maybe in yellow, just like in our example image?

🐣 Why crafting at Easter is a lovely tradition

Easter is a very special holiday for children. They look forward to colorful eggs, small gifts, and cute rabbit figures. Crafting is a fixed part of many families' traditions. It is a lovely opportunity to be creative together and to decorate the home cheerfully. Children grow up quickly – and these shared moments are priceless. So take the opportunity to create something unique together with your child.

🖐️ Crafting promotes fine motor skills – and is fun!

This simple crafting idea is not only cute but also educationally valuable. While cutting, folding, and gluing, your child trains their fine motor skills – this is important for later development, for example, when learning to write. Additionally, creative work stimulates imagination and enhances concentration. And the best part: it's really fun!

h_4144,h_4140,h_4142,h_4141

💛 Thank you for being here!

We hope you enjoyed this crafting idea! The photos, the video, and this article took time and love – that’s why we are very happy that you took the time to look at it. If you want more, feel free to browse through our other crafting instructions. For example, check out our origami or visit our section DIY ideas for kids. There you will find over 400 creative instructions, and new ones are added every week.

Published on by Vitalii Shynakov
Published on:
From Vitalii Shynakov
Vitalii Shynakov has been working in the areas of online retail, marketing and customer satisfaction since 2012. Until 2022, he was the head of personnel development and online sales department of four successful stores. He has been part of the TutKit.com team since 2024.