Creating beautiful paper flowers: A simple DIY guide for children
Hello! Are you looking for a creative craft idea to create colorful decorations? Then we are happy that you found us. In this guide, I will show you how you can together make beautiful paper flowers - a fascinating project that fills your home with color!
All videos and photos you find here have been specially created by us for you. Each of our guides consists of a video tutorial, photographs, and a detailed description of the individual steps. This way, you have no chance to misunderstand what and how you need to do it. Before you start crafting these amazing flowers, watch the video.
If you like how we explain this craft idea, feel free to visit our channel and subscribe to us. We add new tutorials for interesting DIY ideas to our channel daily.
Paper Flowers: Step-by-Step Guide with Photos and Text Description
For this project, you will need the following materials:
- Colored paper (pink and green or other colors as desired)
- Scissors
- Hot glue gun
- Wood skewer for the stem
- Glue
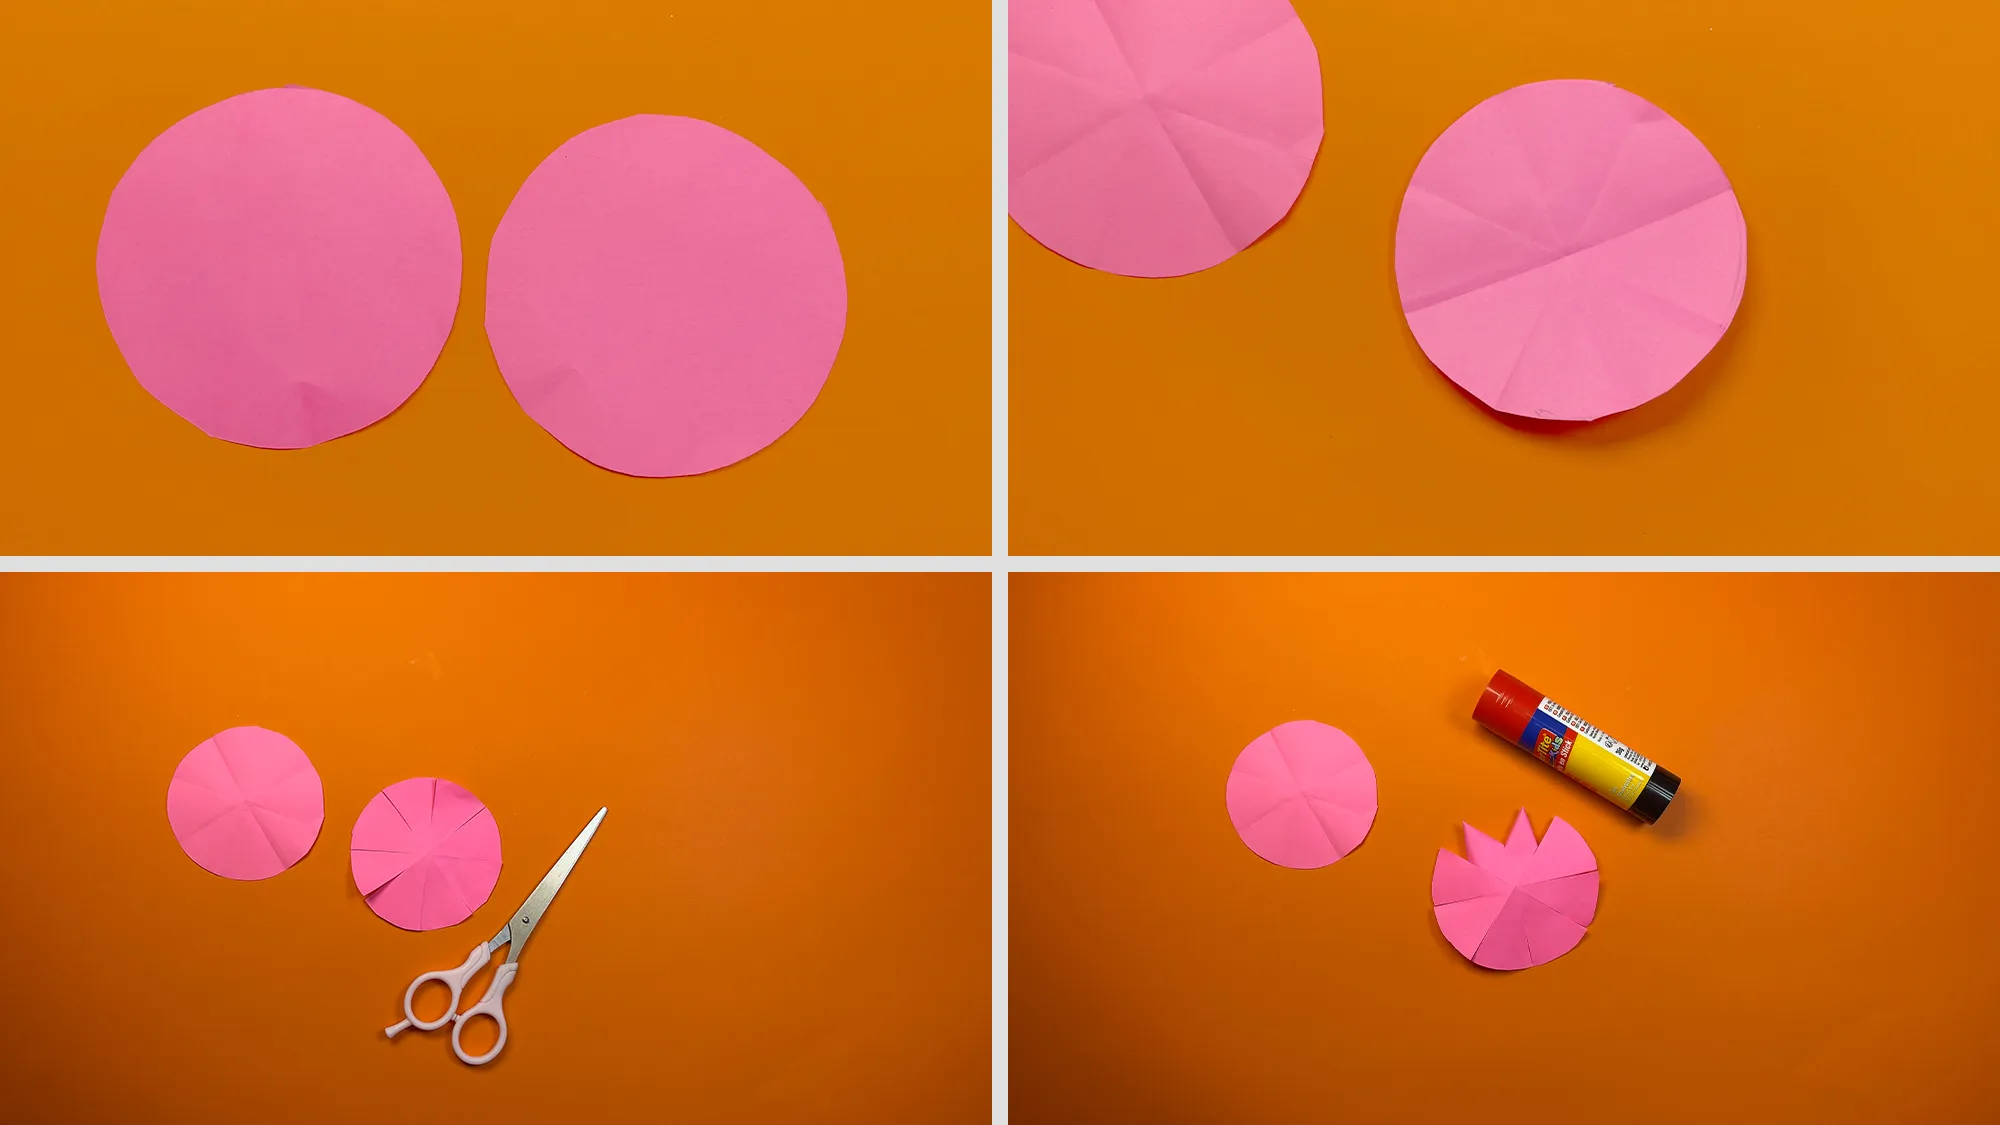
We begin with preparing circles cut from pink paper. We cut out several equally sized pink circles. Then we fold them - first in half and then once more. We make small cuts along the edges to shape the petals.
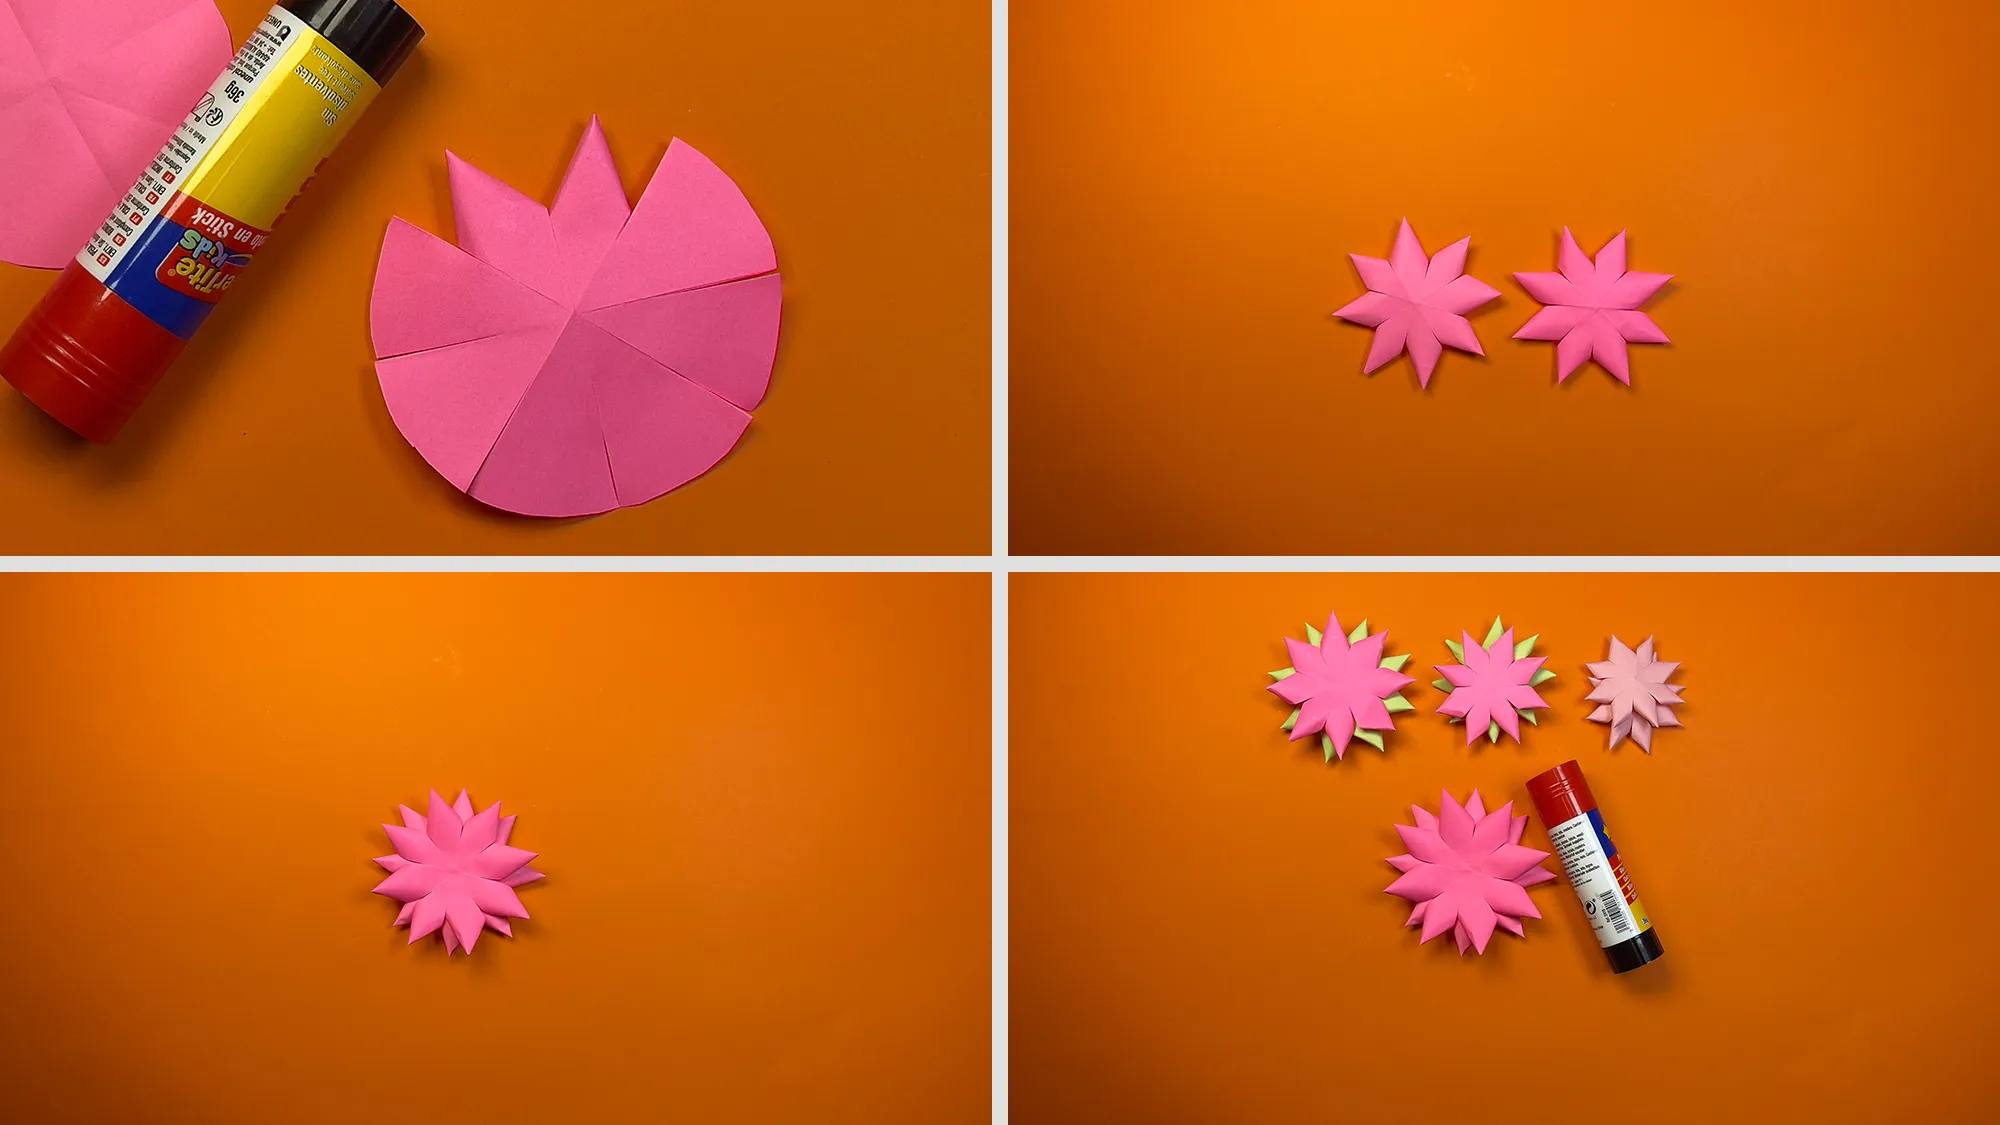
We continue to work with the prepared circles. We apply glue and shape star-like parts from the cut circles. We fold them to create pointed petals. The result is several flat stars that will form the layers of our flower.
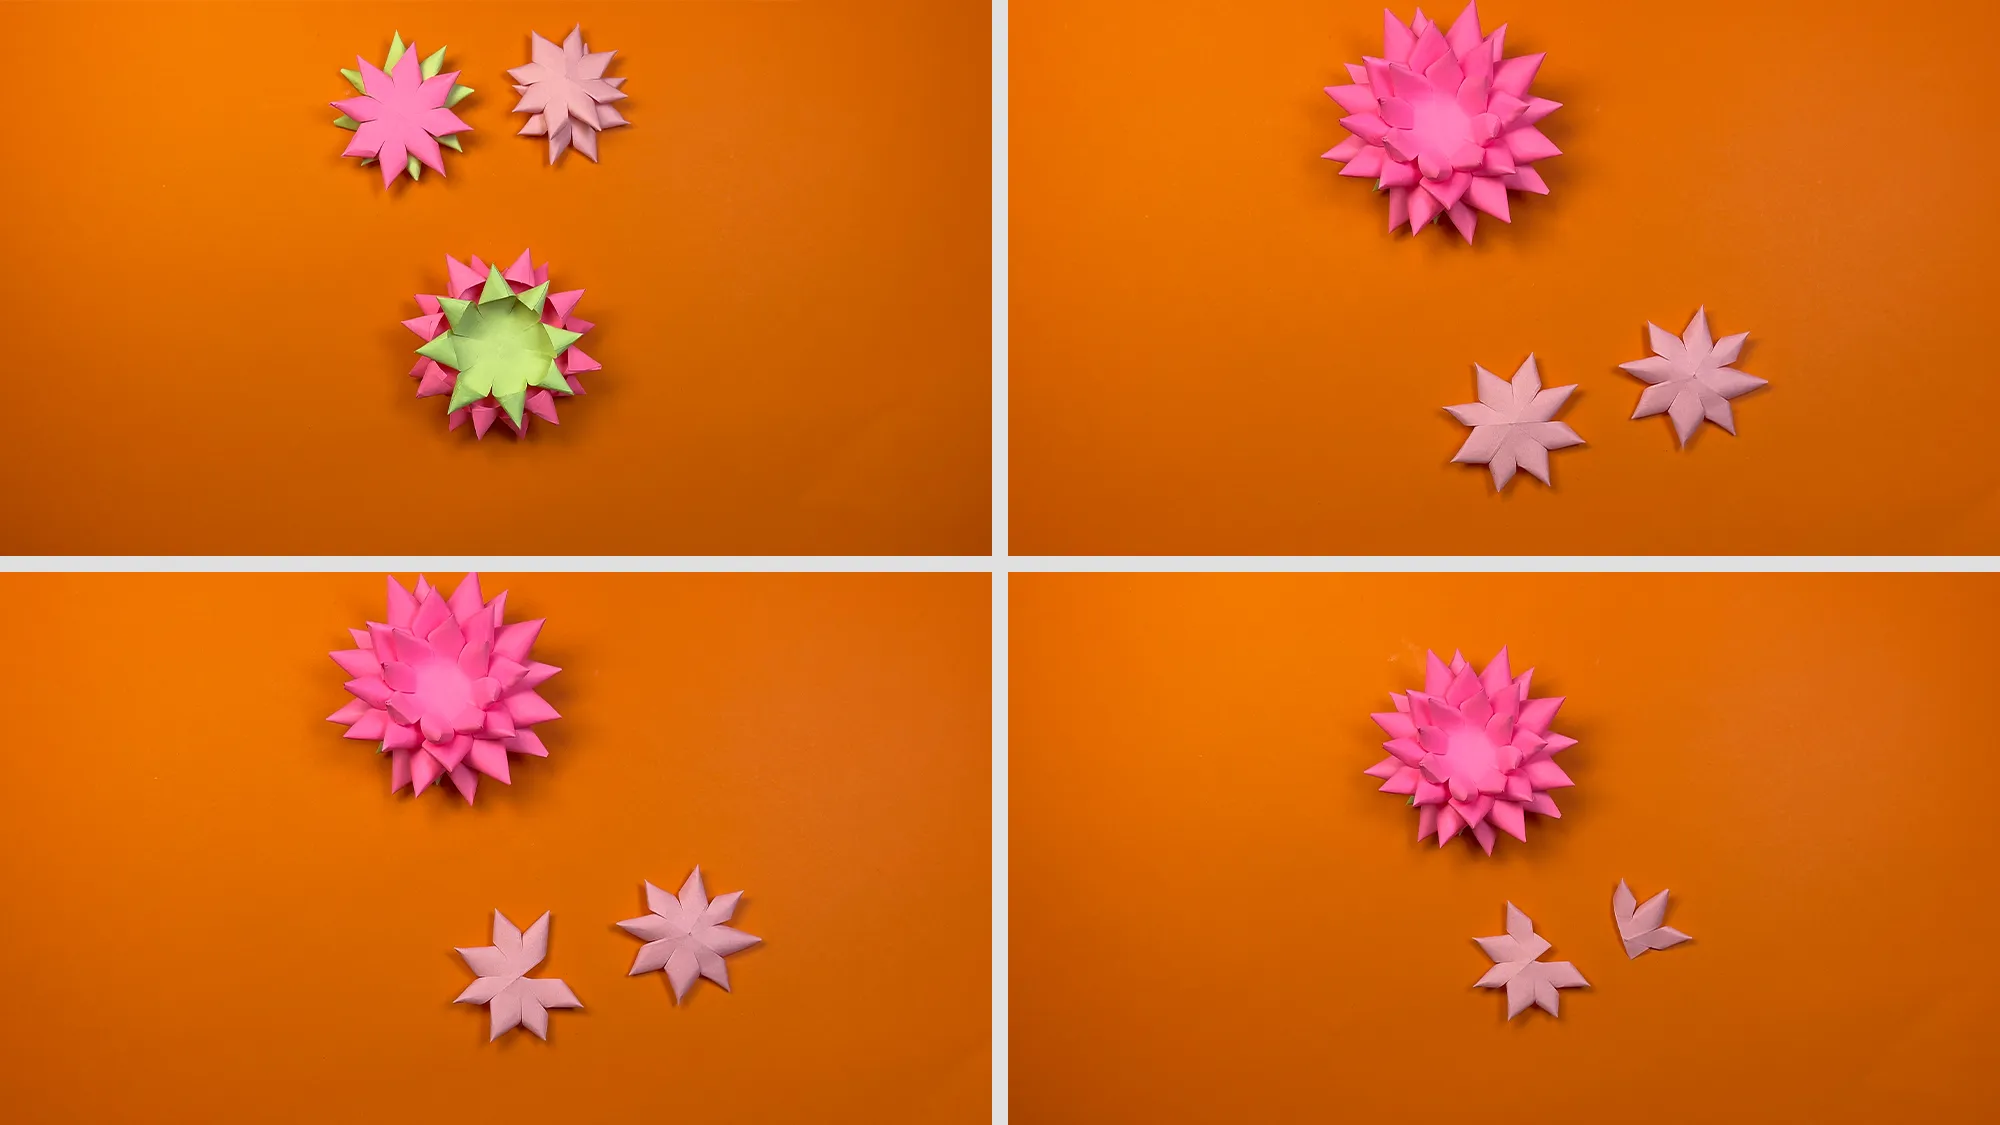
We start assembling the flower by layering the star layers on top of each other. Different shades of pink create a depth effect. We also add a green piece that will form the base for the future leaves.
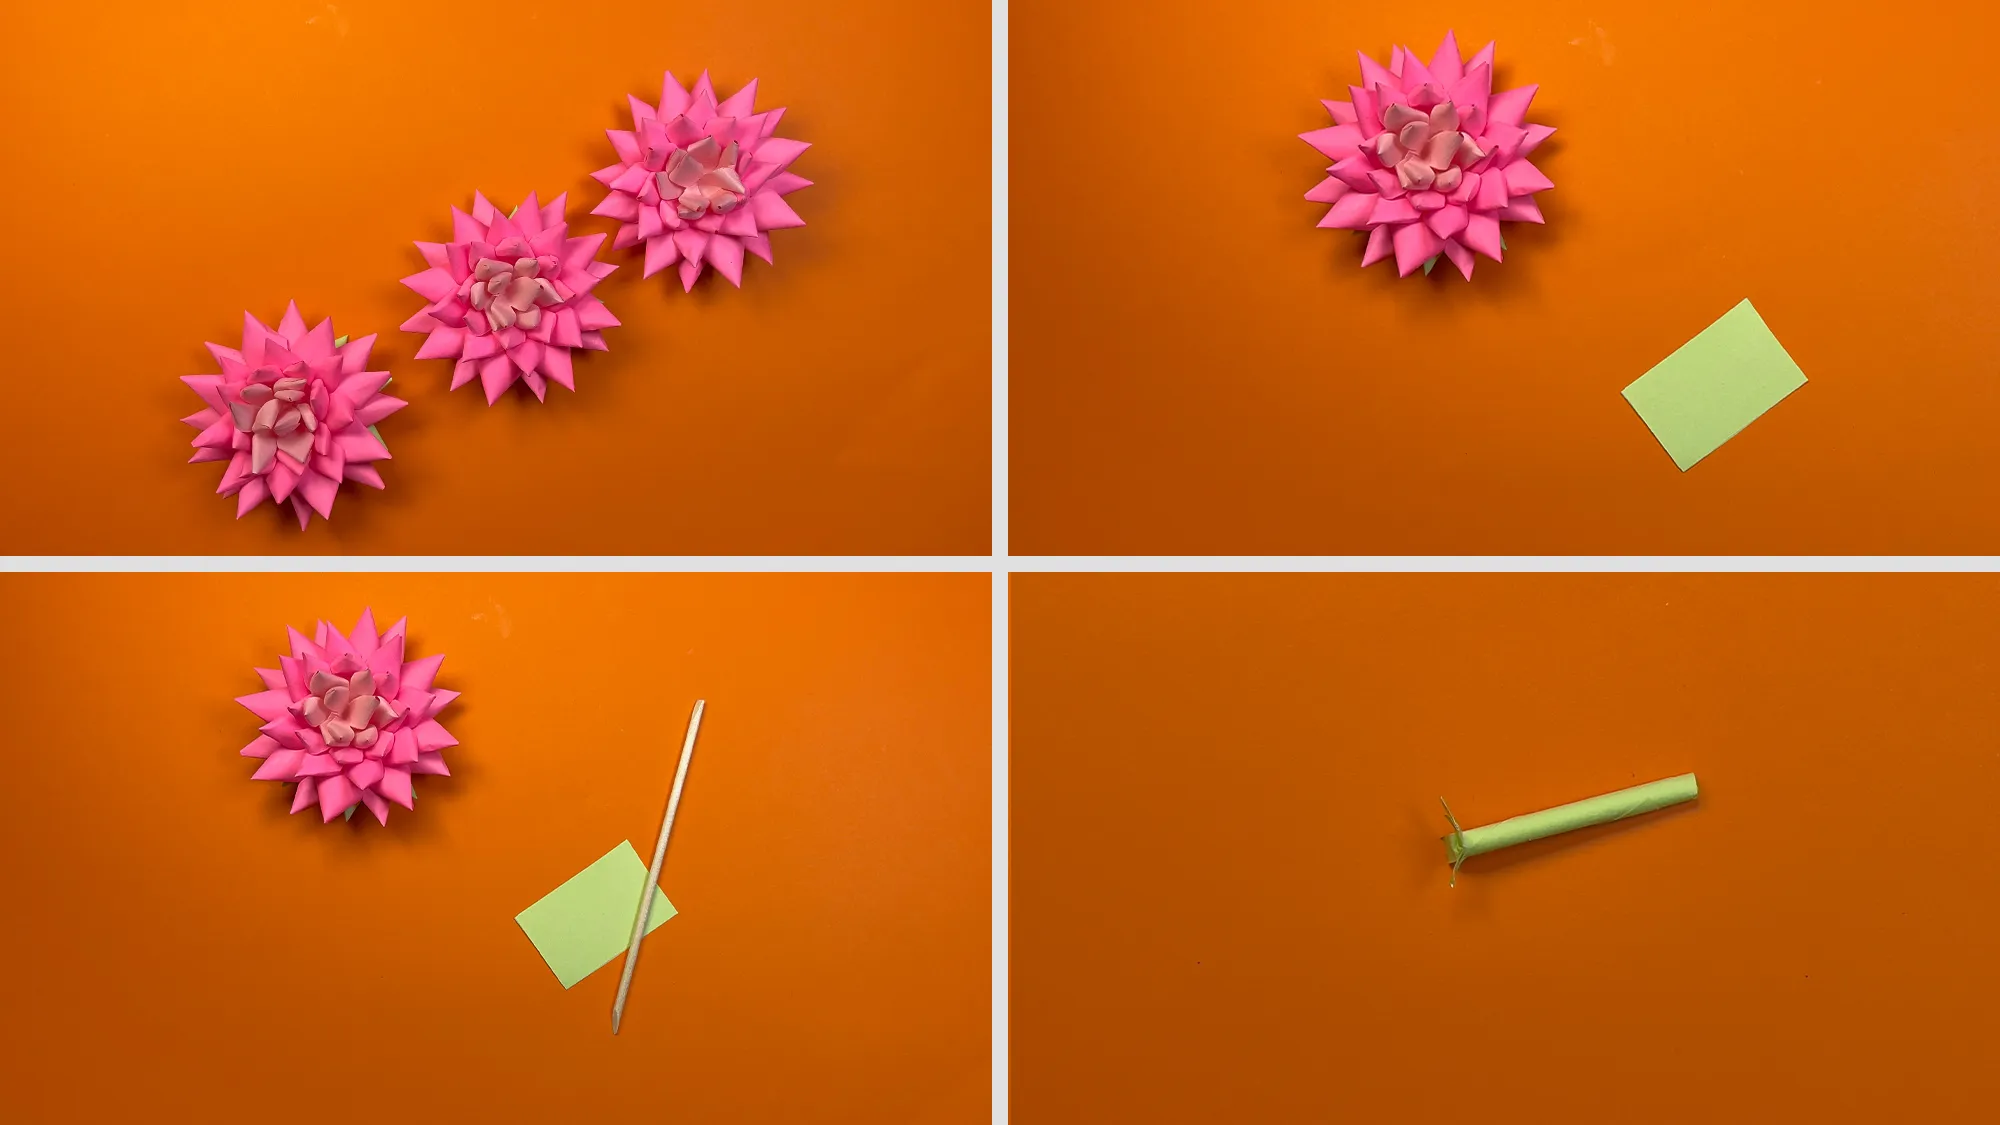
We assemble the finished multi-layered flowers. We prepare a green rectangle for making the stem. We roll it into a thin tube that will serve as the stem for the flower.
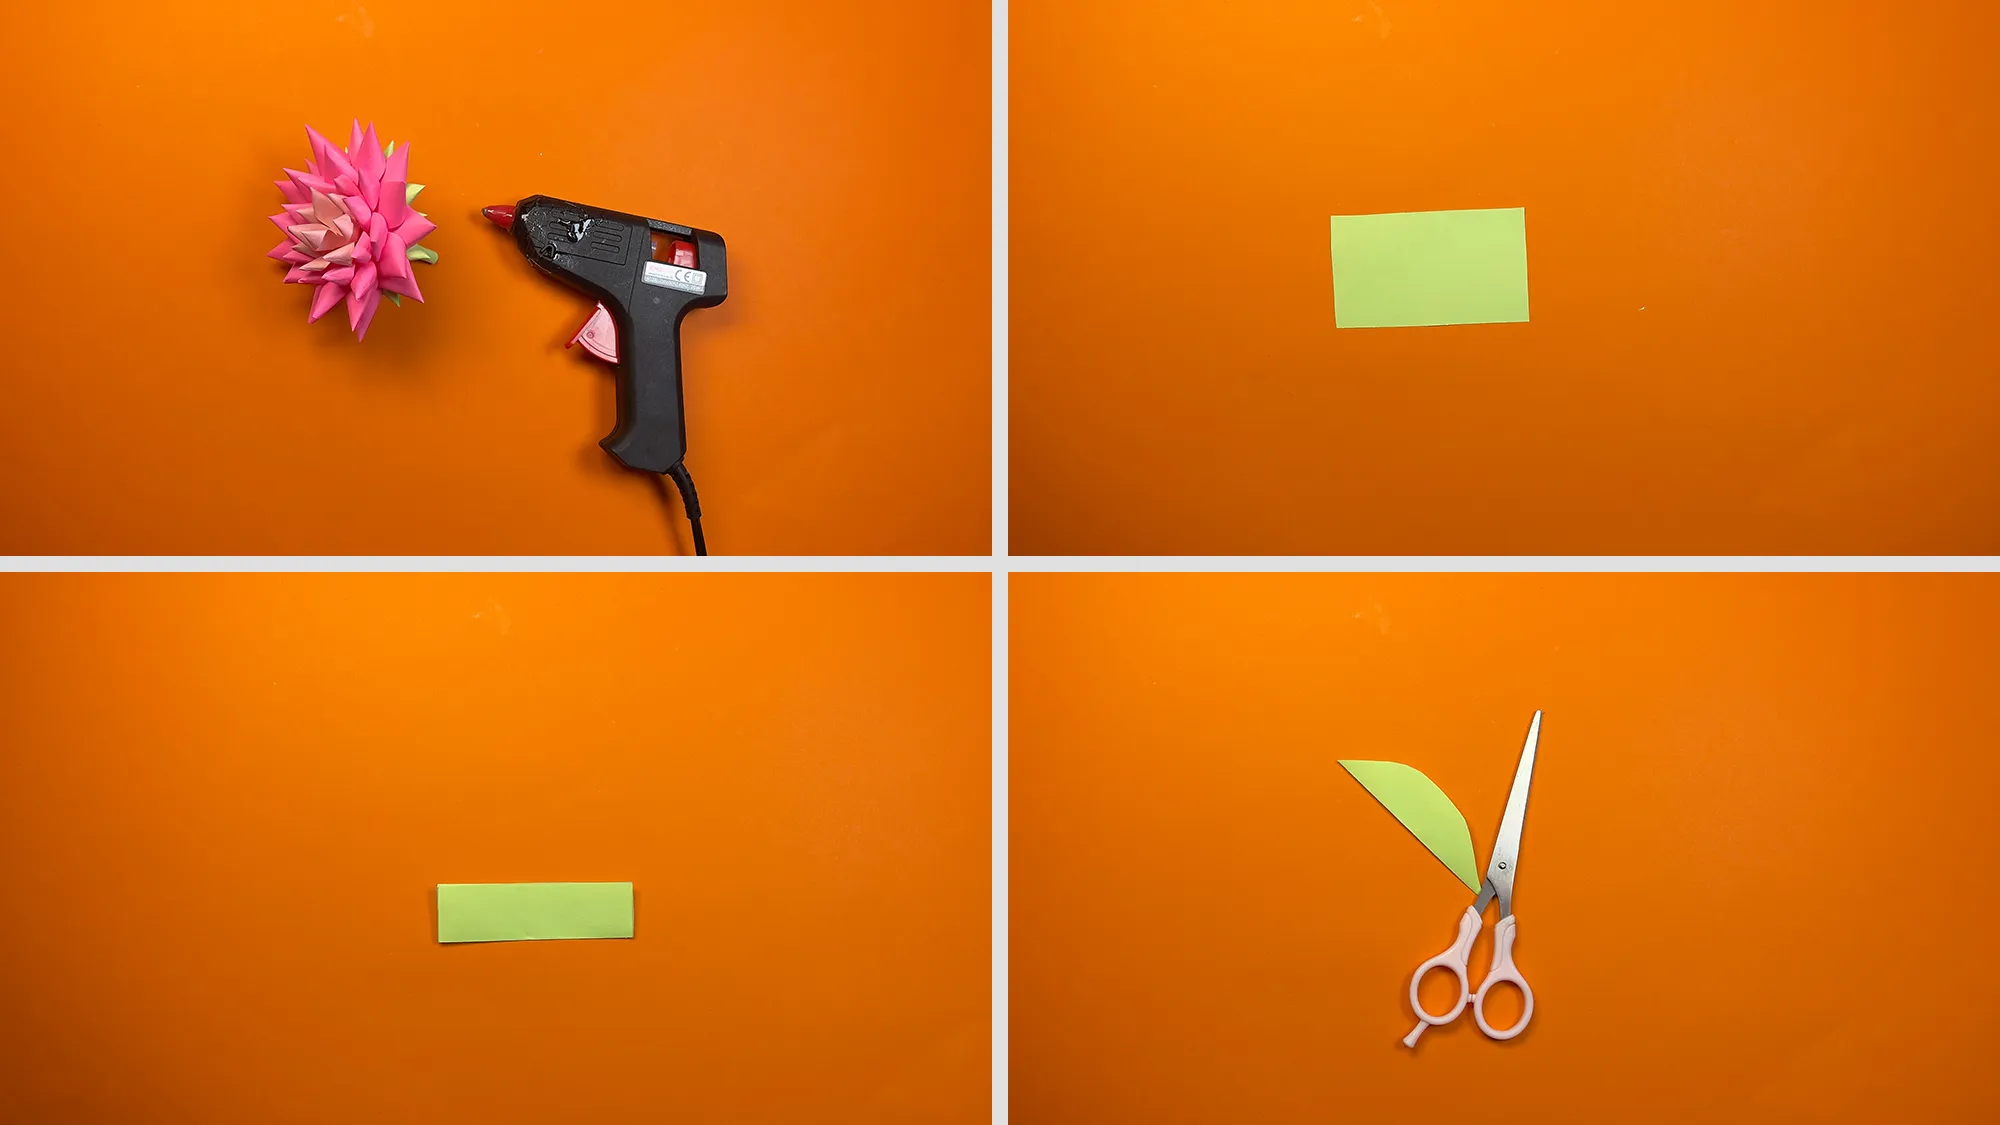
We use a hot glue gun to attach the flower to the stem. We also prepare green paper for making leaves. We cut it into rectangles.
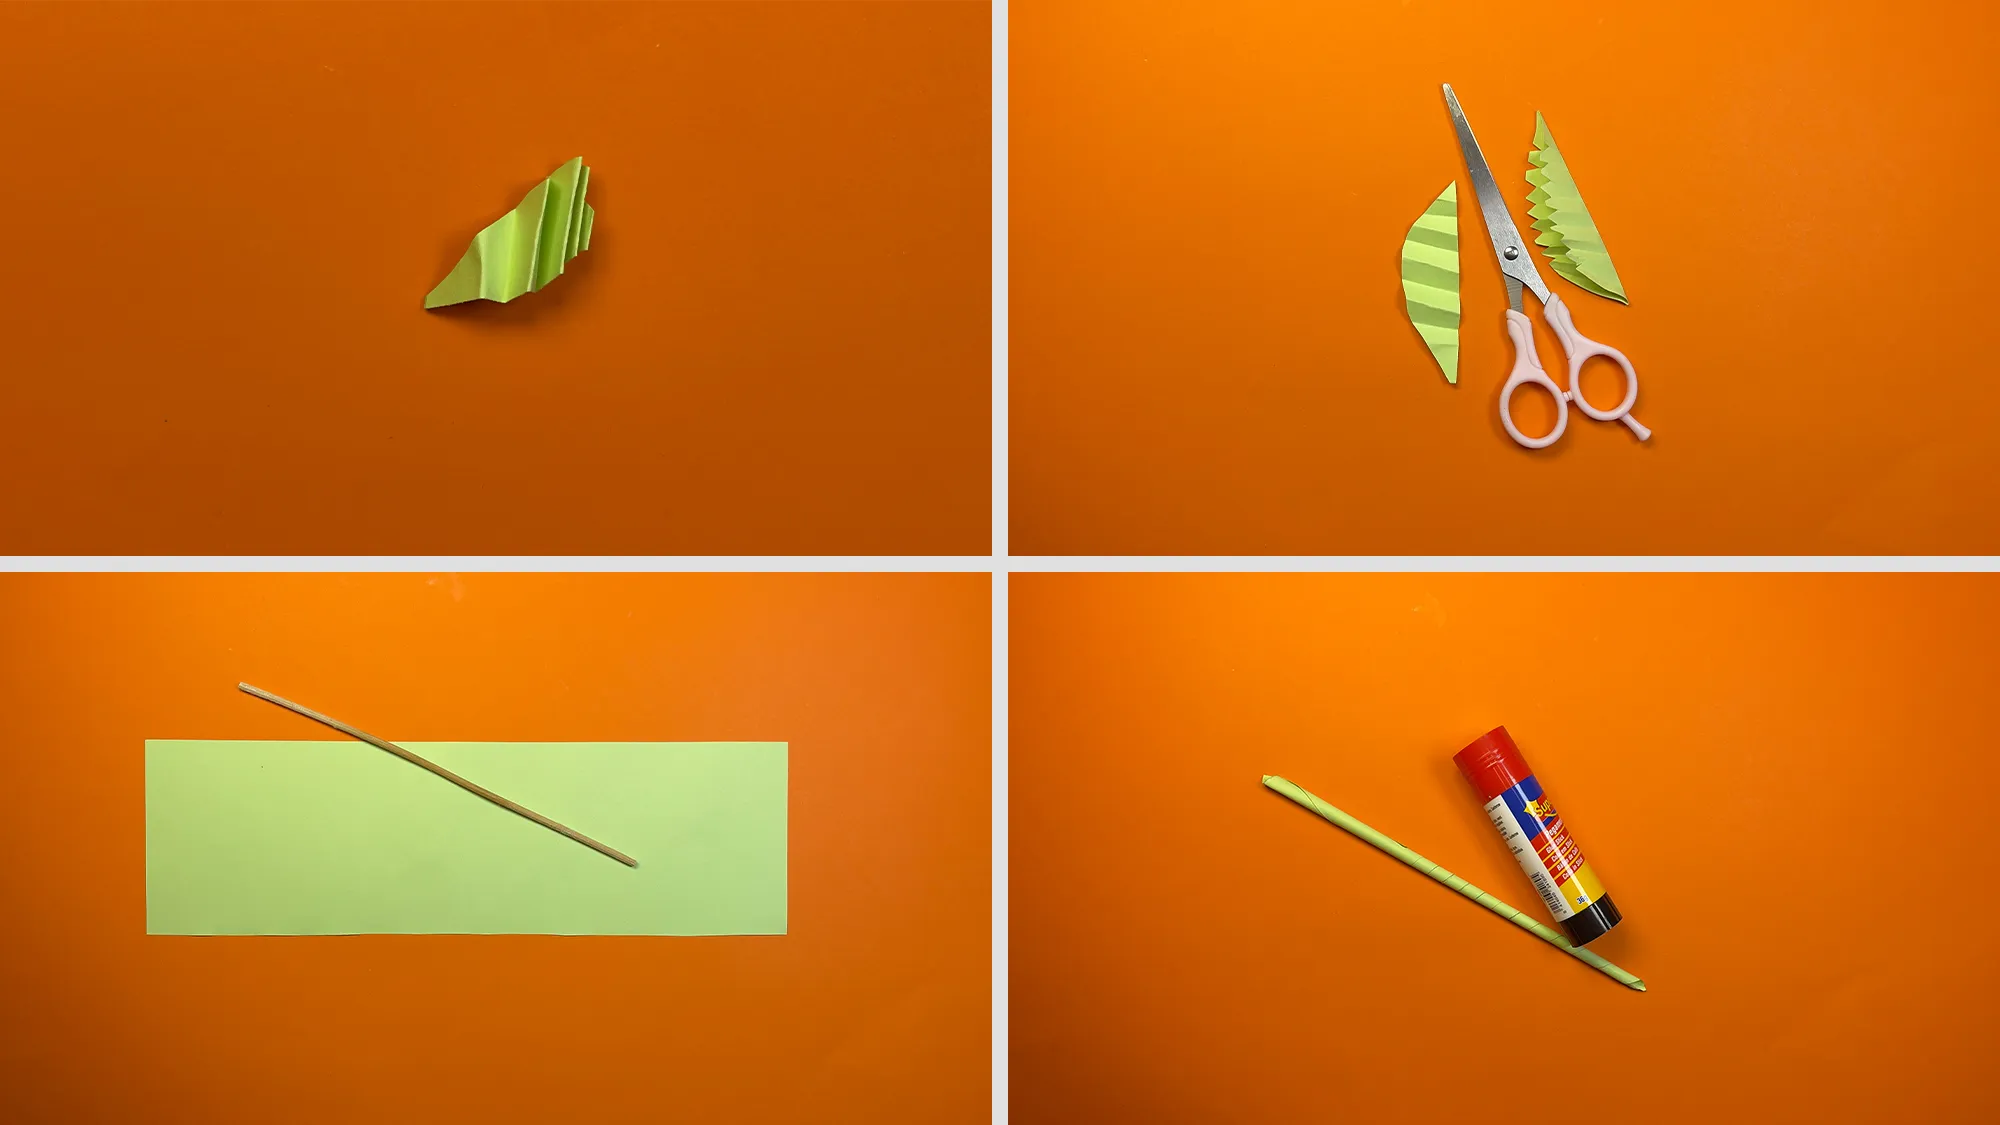
We shape leaves from the green paper. We fold the leaves to give them texture. We cut out the shape of the leaves and create jagged edges. We wrap a wooden stick in green paper to reinforce the stem and glue it securely.
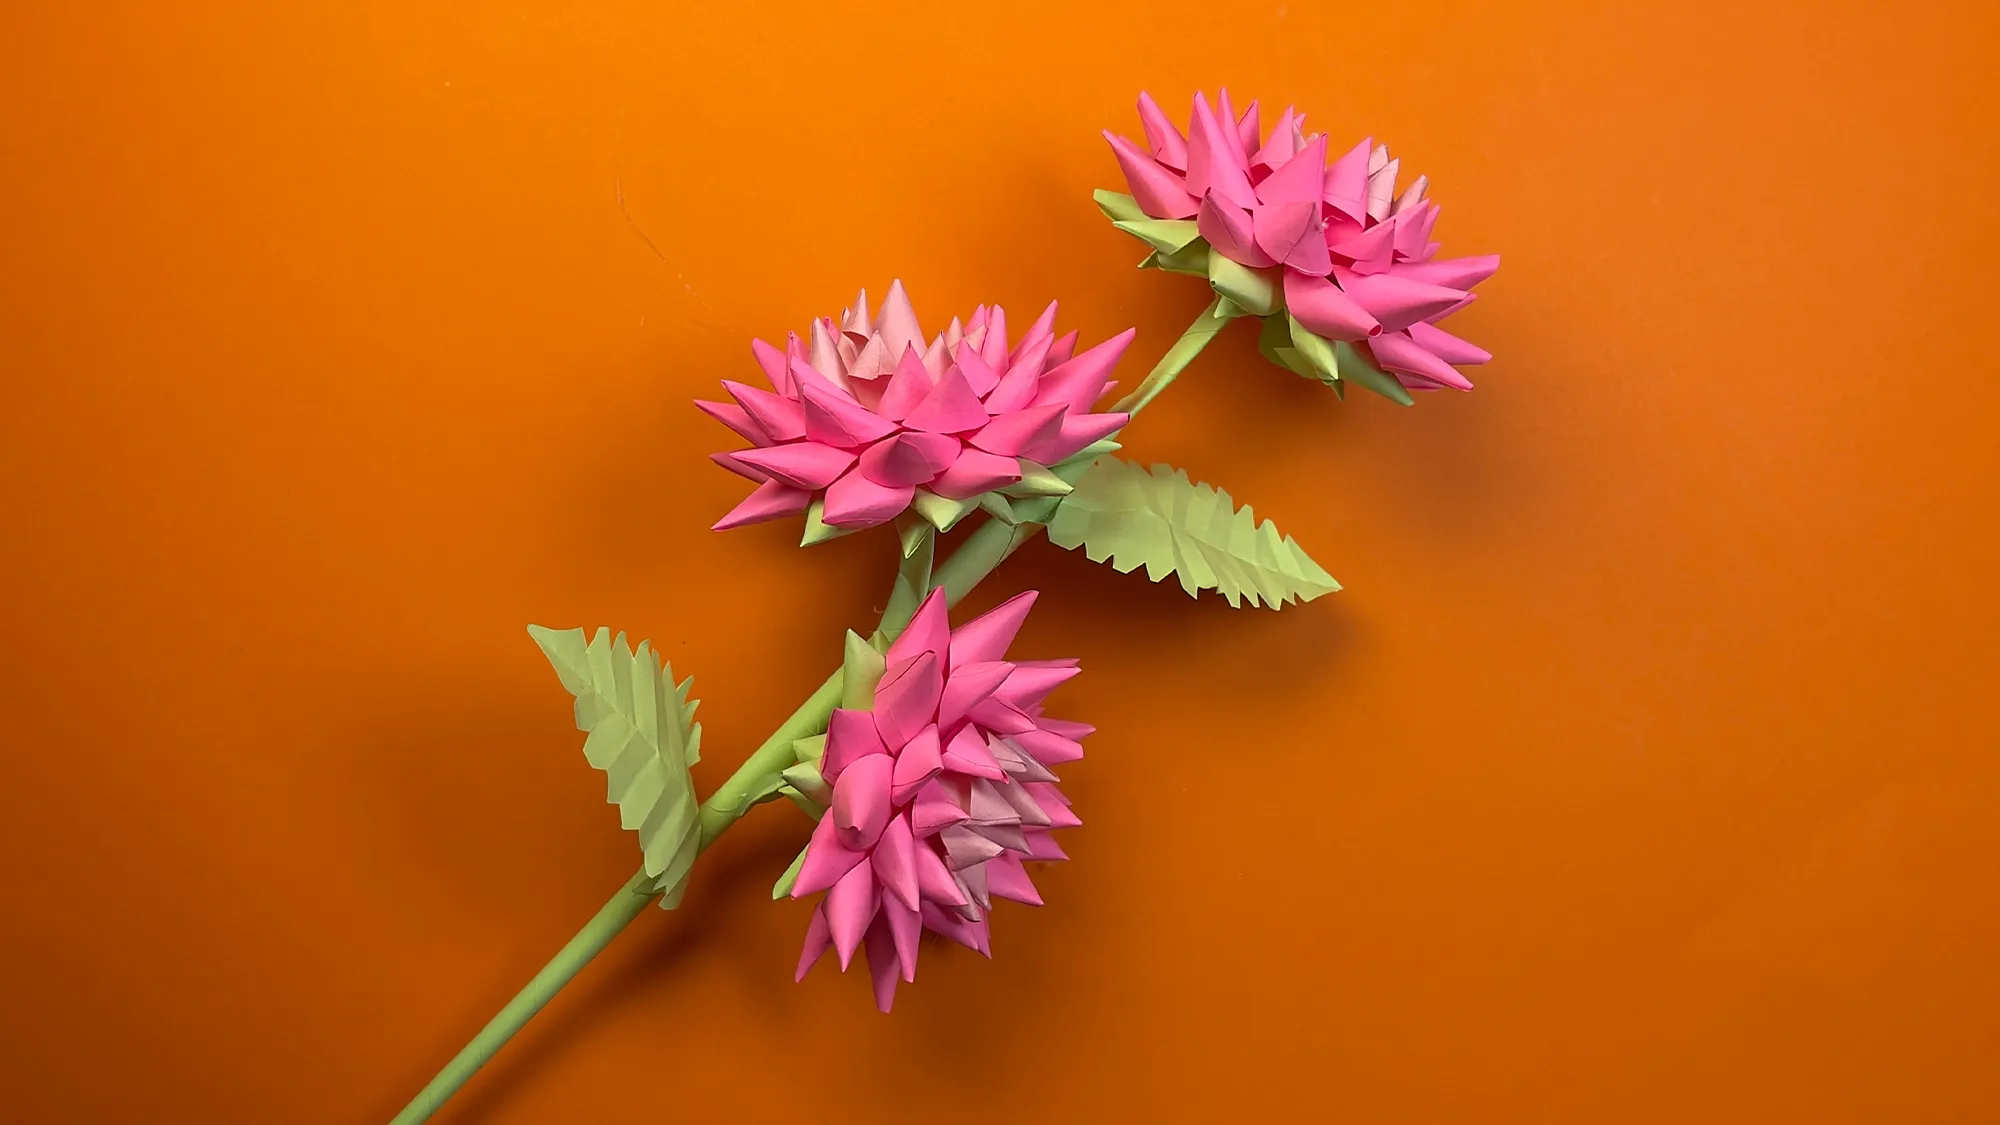
The finished result - a beautiful bouquet of three pink flowers on a green stem with decorative leaves. The multi-layered structure creates a volumetric and realistic appearance reminiscent of asters or dahlias.
The Importance of Creative Crafting for Child Development
fine motor skills in children in a playful way. When children cut, glue, and fold, they train the coordination between hands and eyes and strengthen the muscles in their fingers and hands. These skills are crucial later on for learning to write and for many other daily activities.
Creative activities also stimulate intellectual development. They promote spatial thinking, concentration ability, and problem-solving skills. By crafting together, you also get to know your child's strengths and interests better and can support them individually.
These paper flowers are also great as a gift. Children are particularly proud when they can give handmade gifts. This way, they not only learn craft skills but also experience the joy of giving.
Thank you for your interest!
Creating craft guides, videos, photos, and writing this guide takes a lot of time, and we really hope you enjoyed this craft idea. Thank you for taking the time to read our guide!
If you feel like exploring more creative projects, check out our other guides. Perhaps you are interested in our Origami tutorials or would like to browse our section on DIY ideas for children. Overall, we already have over 400 different guides on our portal, and new ones are added every week.
We wish you and your children lots of fun crafting!
From Vitalii Shynakov
