Easter DIY: Cute napkin bunnies for folding for the festive table
Hello! Are you looking for a great DIY idea for Easter that you can do with your children? Then we are glad that you found us. In this article, I will show you how to fold cute bunny napkins that will wonderfully decorate your Easter table.
All the videos and photos you find here have been specially created by us for you. Each of our guides consists of a video tutorial, photos, and a detailed description of each step. So you have no chance of not understanding what to do. Before you start folding the napkin bunny, watch our video.
If you like how we present this crafting idea, feel free to visit our channel and subscribe to us. We add new tutorials for interesting DIY ideas daily.
Napkin Bunnies: Step-by-Step Instructions with Photos and Descriptions
We always strive to use only everyday, easily accessible materials. Therefore, you can buy everything you need at the nearest supermarket or stationery store.
Materials:
- Napkins in various colors (preferably larger napkins)
- Thin string or cord
Instructions:
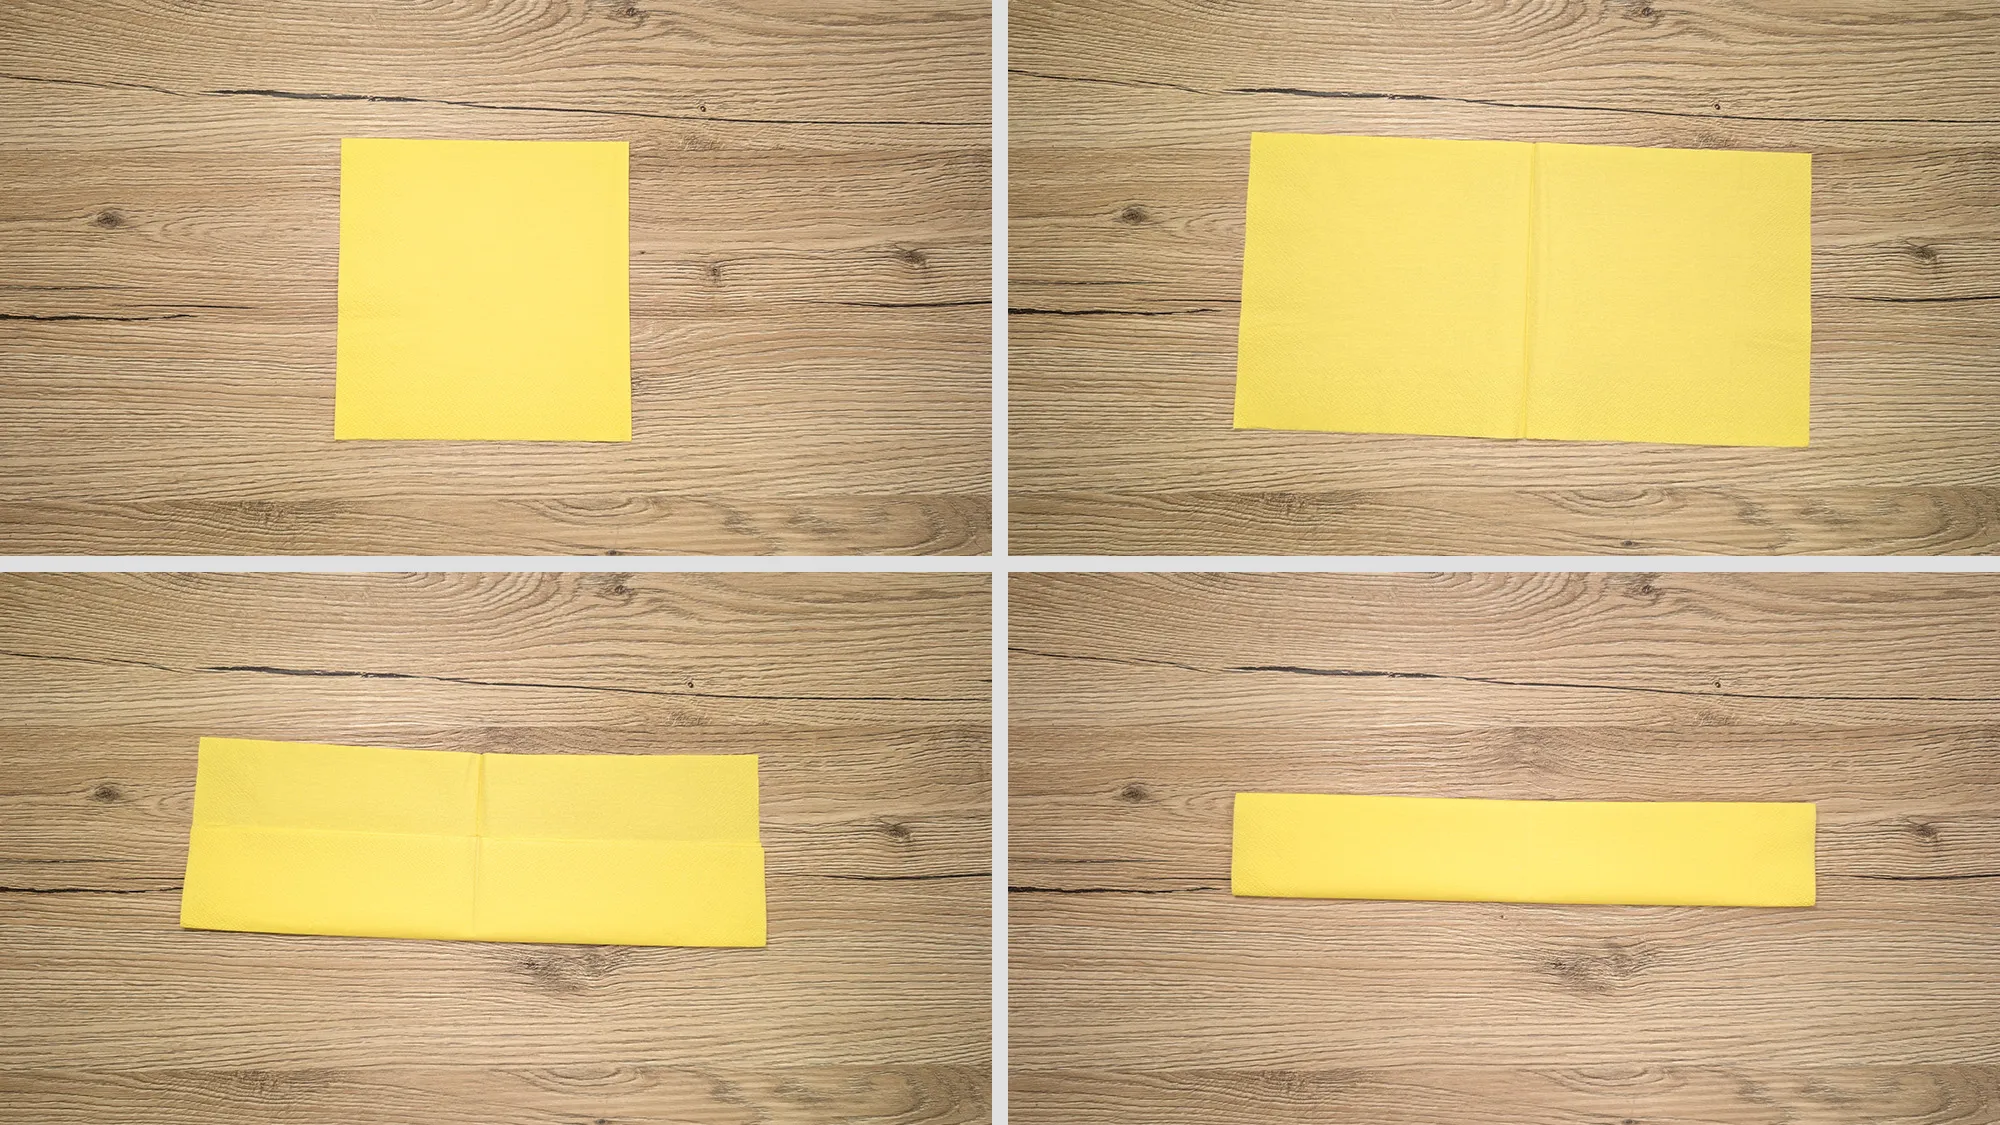
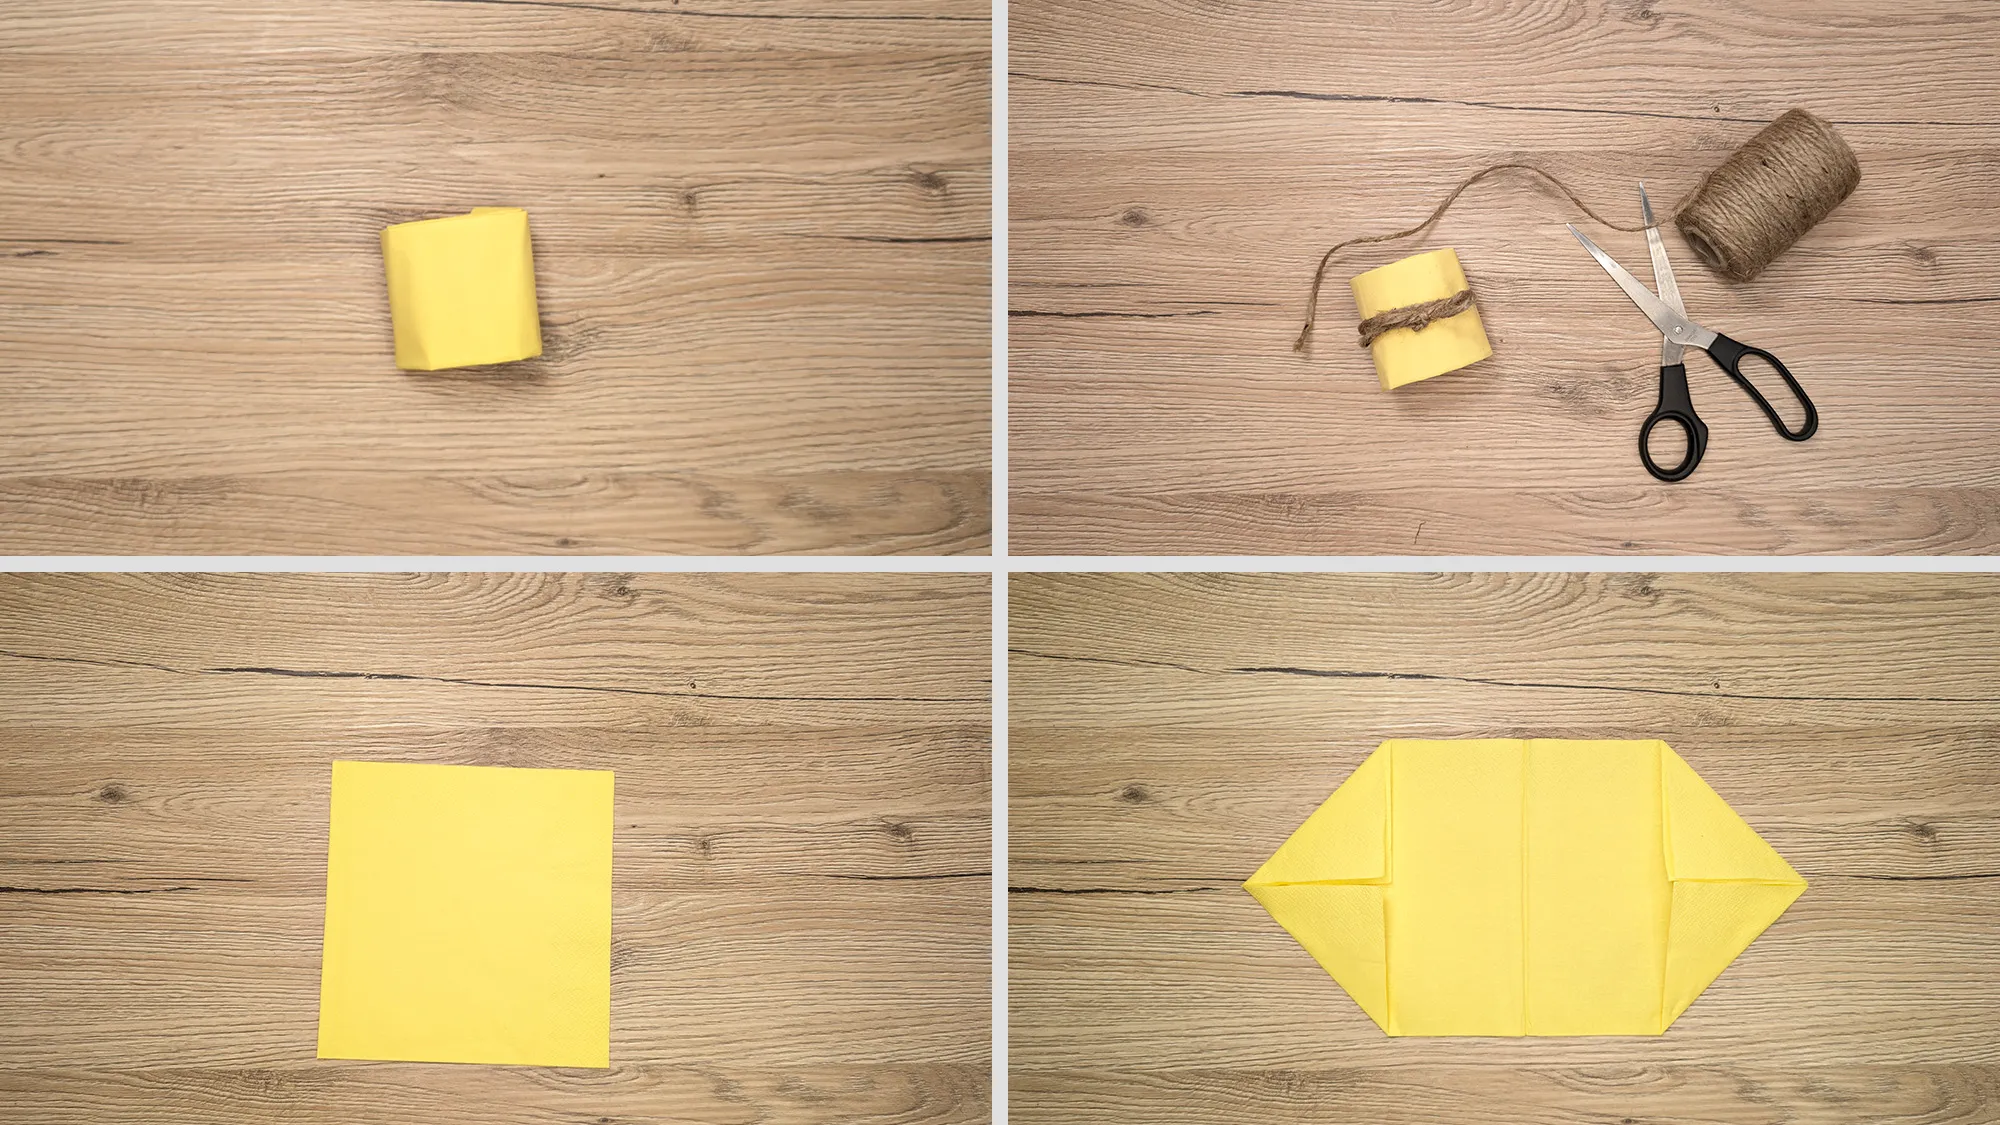
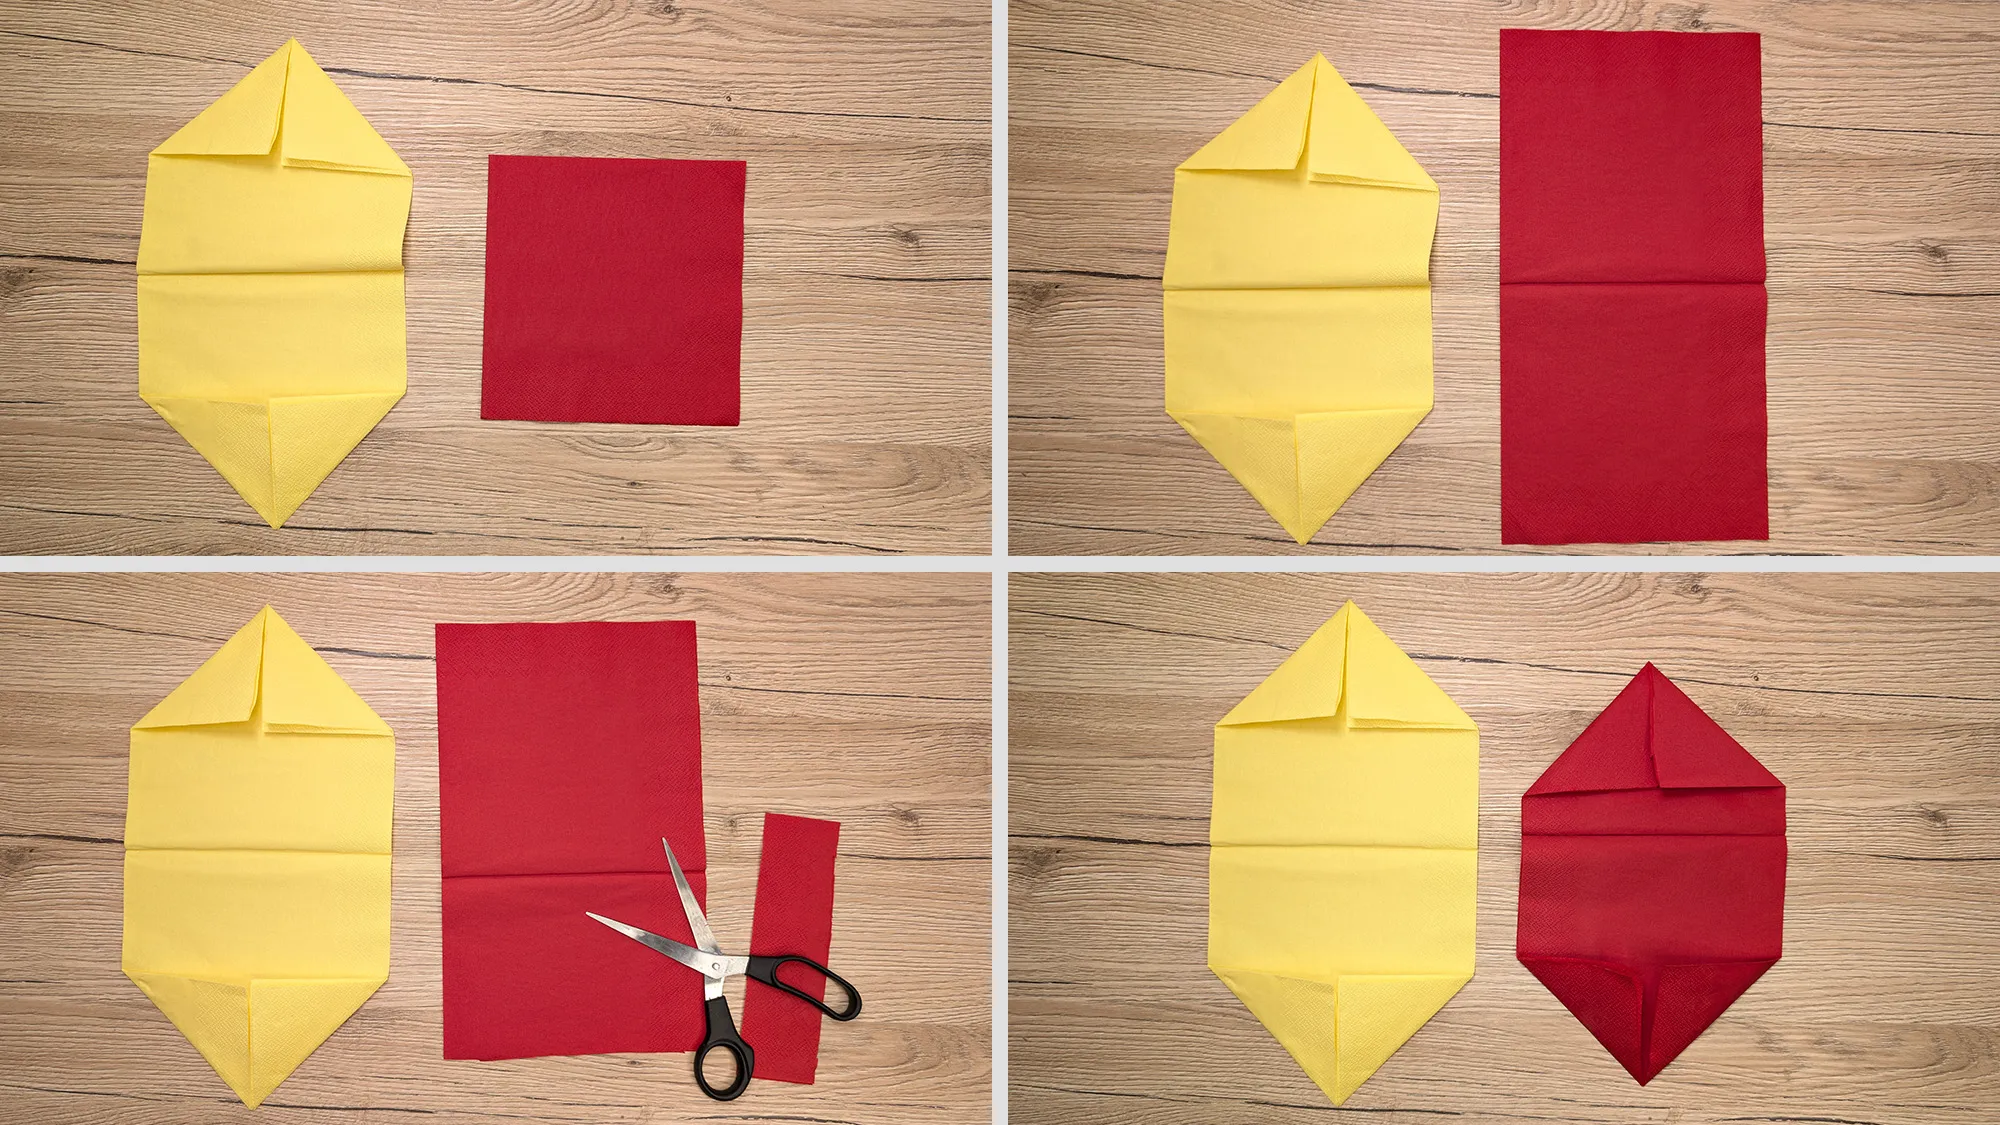
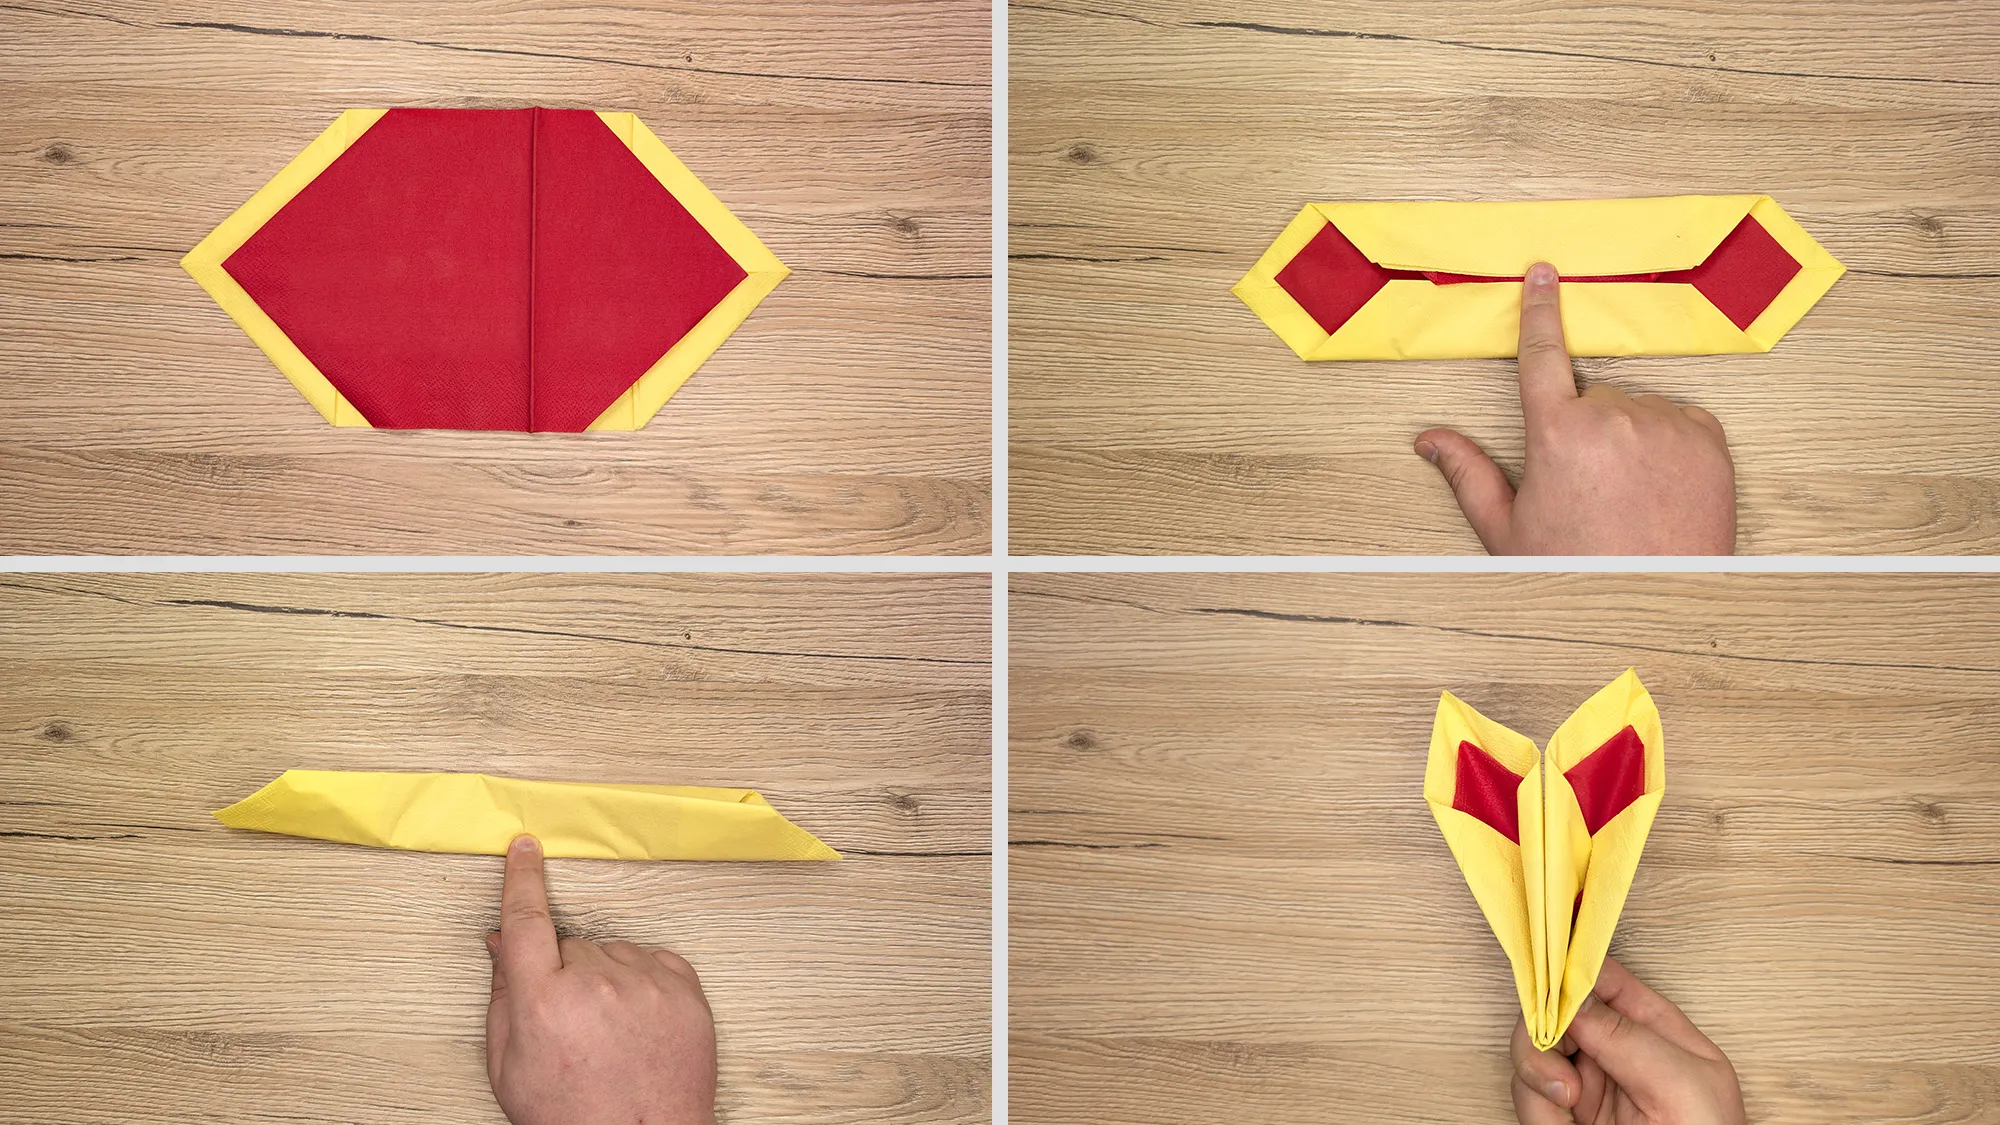
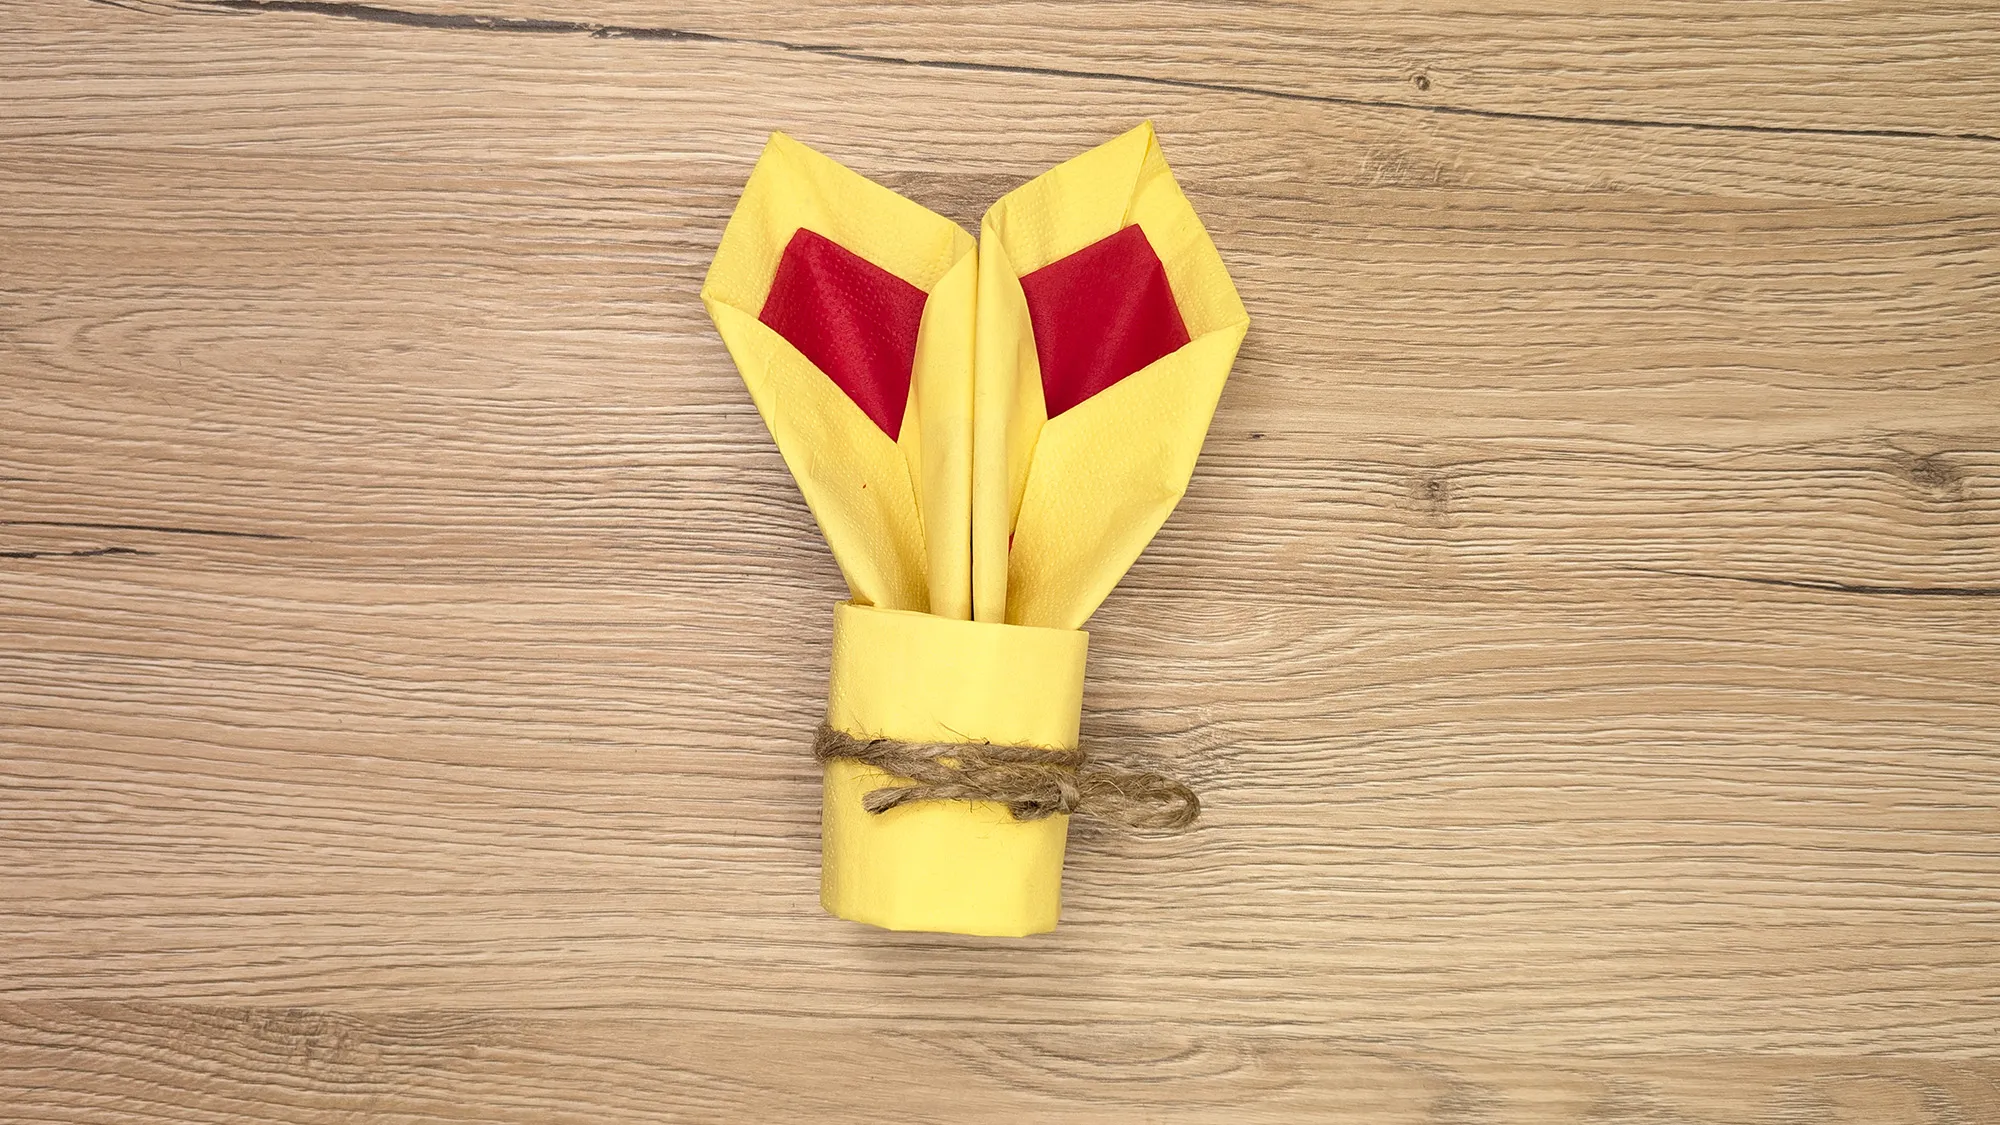
Finally, you can wrap the base of the bunny with a thin string to give it an elegant look, as shown in the photo.
Easter - A Special Celebration for the Whole Family
Easter is a holiday that especially excites children. It offers a wonderful opportunity to craft decorations for your home together with your children. The shared time of creativity not only strengthens your bond but also creates lasting memories.
Children grow and develop only once. Use this precious time to create something special together. The shining eyes of your children when they proudly see their self-folded bunny napkins on the table are priceless. Such moments shape childhood memories and create family traditions that may even be passed on to the next generation.
The Importance of Fine Motor Skills and Creativity for Children
Folding napkins not only promotes creativity in children but also the development of fine motor skills. This ability is crucial for many everyday activities and later school skills such as writing.
When children craft, they train their hand-eye coordination, learn patience and concentration. They also experience a sense of achievement when they see what they have created with their own hands. This boosts their self-confidence and motivates them to take on new challenges.
Crafting together also offers a valuable opportunity for conversation and exchange away from digital devices. In our fast-paced world, such moments of mindfulness and shared activity are particularly valuable for your child's emotional development.
A Heartfelt Thank You
We would like to sincerely thank you for taking the time to read our guide. Creating crafting instructions, videos, photos, and writing this article requires a lot of time and effort, and we really hope you enjoyed this crafting idea.
If you feel like taking on more creative projects, feel free to check out our other tutorials. Perhaps you are interested in our origami tutorials, or you might find something suitable in our section craft ideas for children. Overall, we have already published over 400 different tutorials on our portal, and new ones are added every week.
We wish you and your family a wonderful Easter celebration filled with many creative moments!
From Vitalii Shynakov
