The Origami Crane enchants both young and old alike. Origami, the traditional Japanese art of paper folding, exerts a special attraction on children. This activity promotes fine motor skills, which are closely linked to brain function. This makes Origami a valuable activity for children and seniors. The art of paper folding teaches perseverance, concentration, and precision. It also imparts an important lesson: a mistake often means starting over from scratch. Thoroughness pays off.

Our instructions are clearly structured. Each step is illustrated with photos and videos. The beginning may seem challenging, but we assure you: you will master it!

h_904,h_906,h_907,h_902

Origami Crane: Step-by-Step Guide with Photos

Before you begin folding, here are some useful tips: Special origami paper can be found in stationery stores. It is square, colored, and thinner than regular paper, making folding easier. Be sure to execute all folds precisely and in a smooth motion to obtain clean, straight lines. To protect your fingernails and avoid paper cuts - which are rare but sometimes happen - you can use a ruler or a coin as a tool. Choose a calm, well-lit workspace that provides you with enough folding space. Take your time and be patient - Origami is an art that requires practice, but you will improve with each attempt.
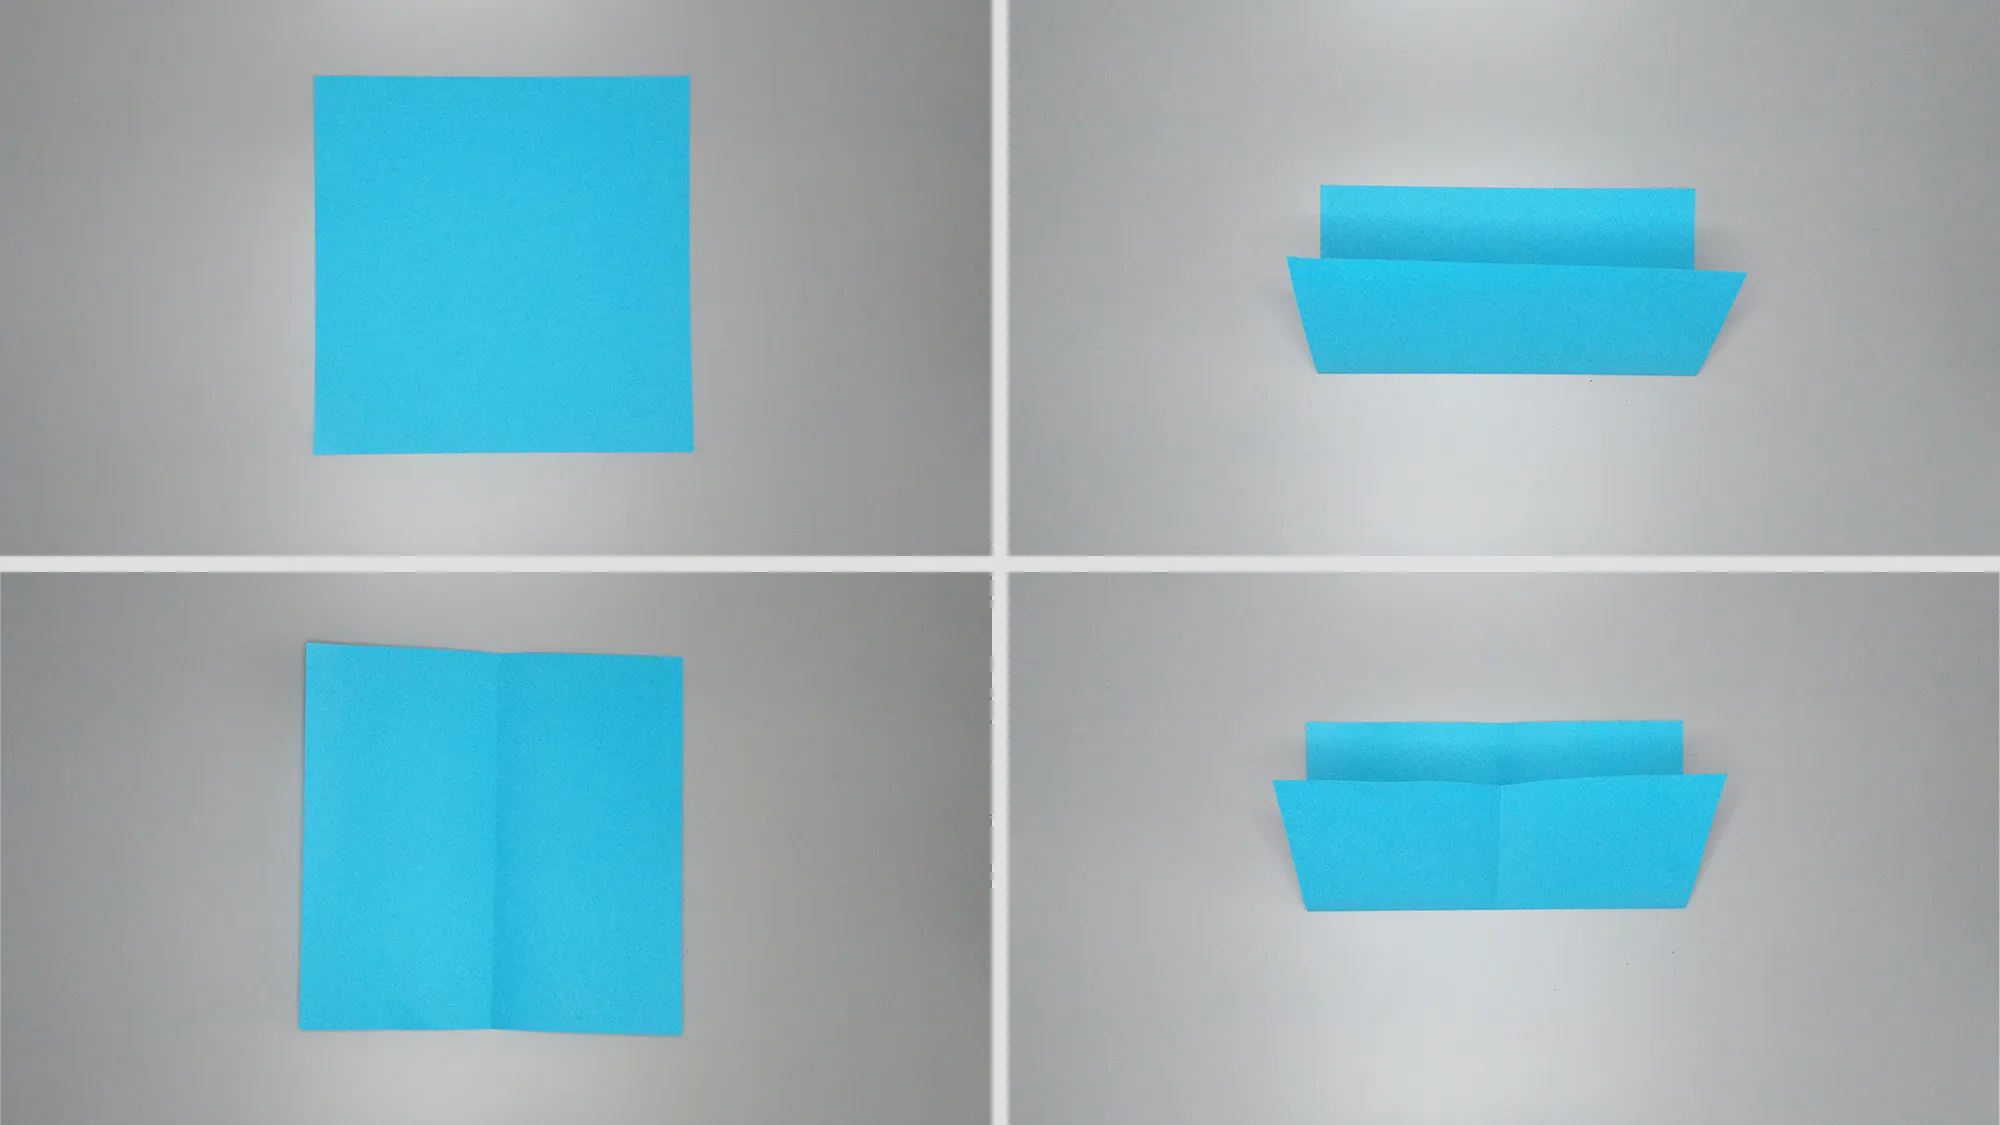
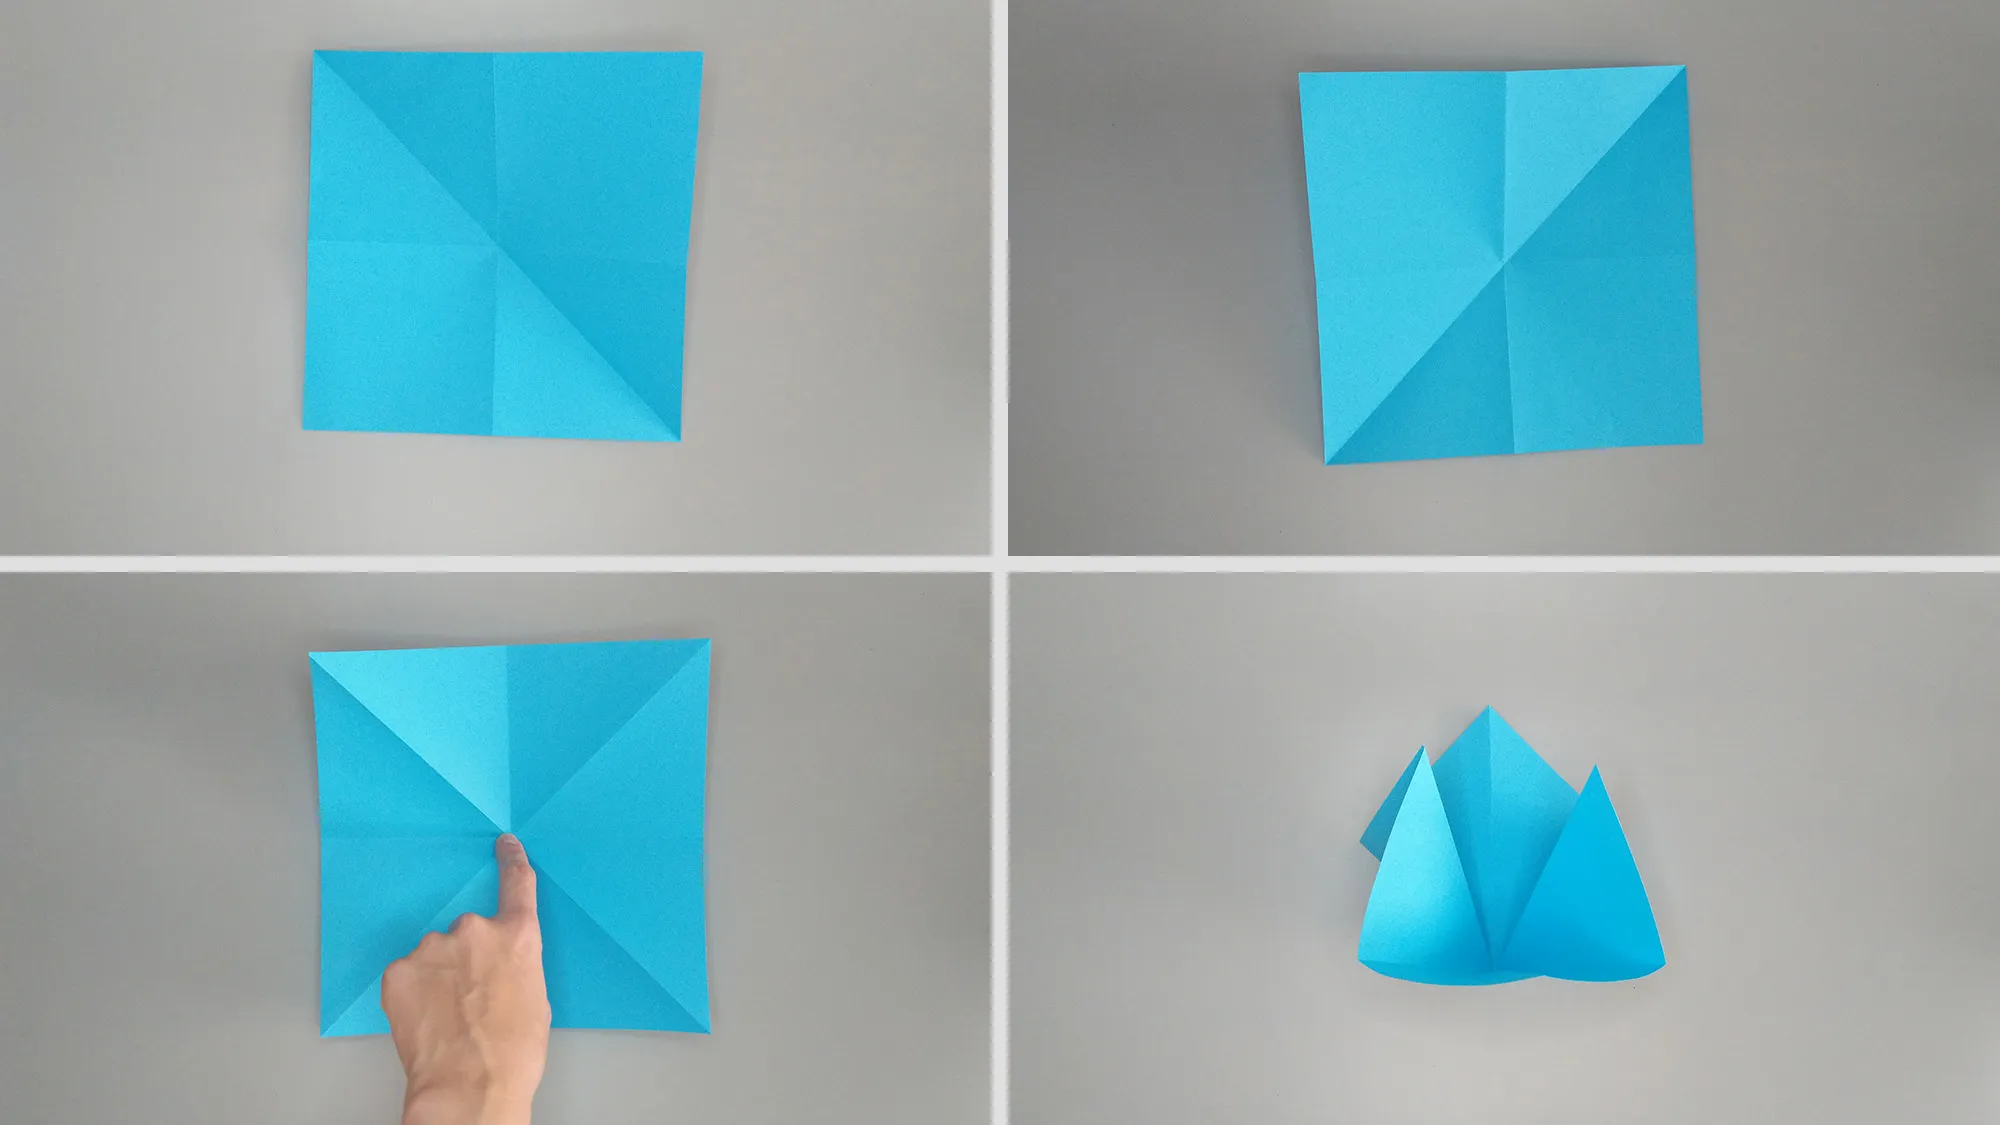
Folding an origami crane out of paper. Figure 1
Step 1: Fold the paper first horizontally, then vertically. We need clear and straight folding lines at the beginning of the work.
Folding an origami crane out of paper. Figure 2
Step 2: Now, we do the same but to create diagonal folding lines.
Folding an origami crane out of paper. Figure 3
Step 3: Now, hold the center firmly and lift the corners upwards.
Folding an origami crane out of paper. Figure 4
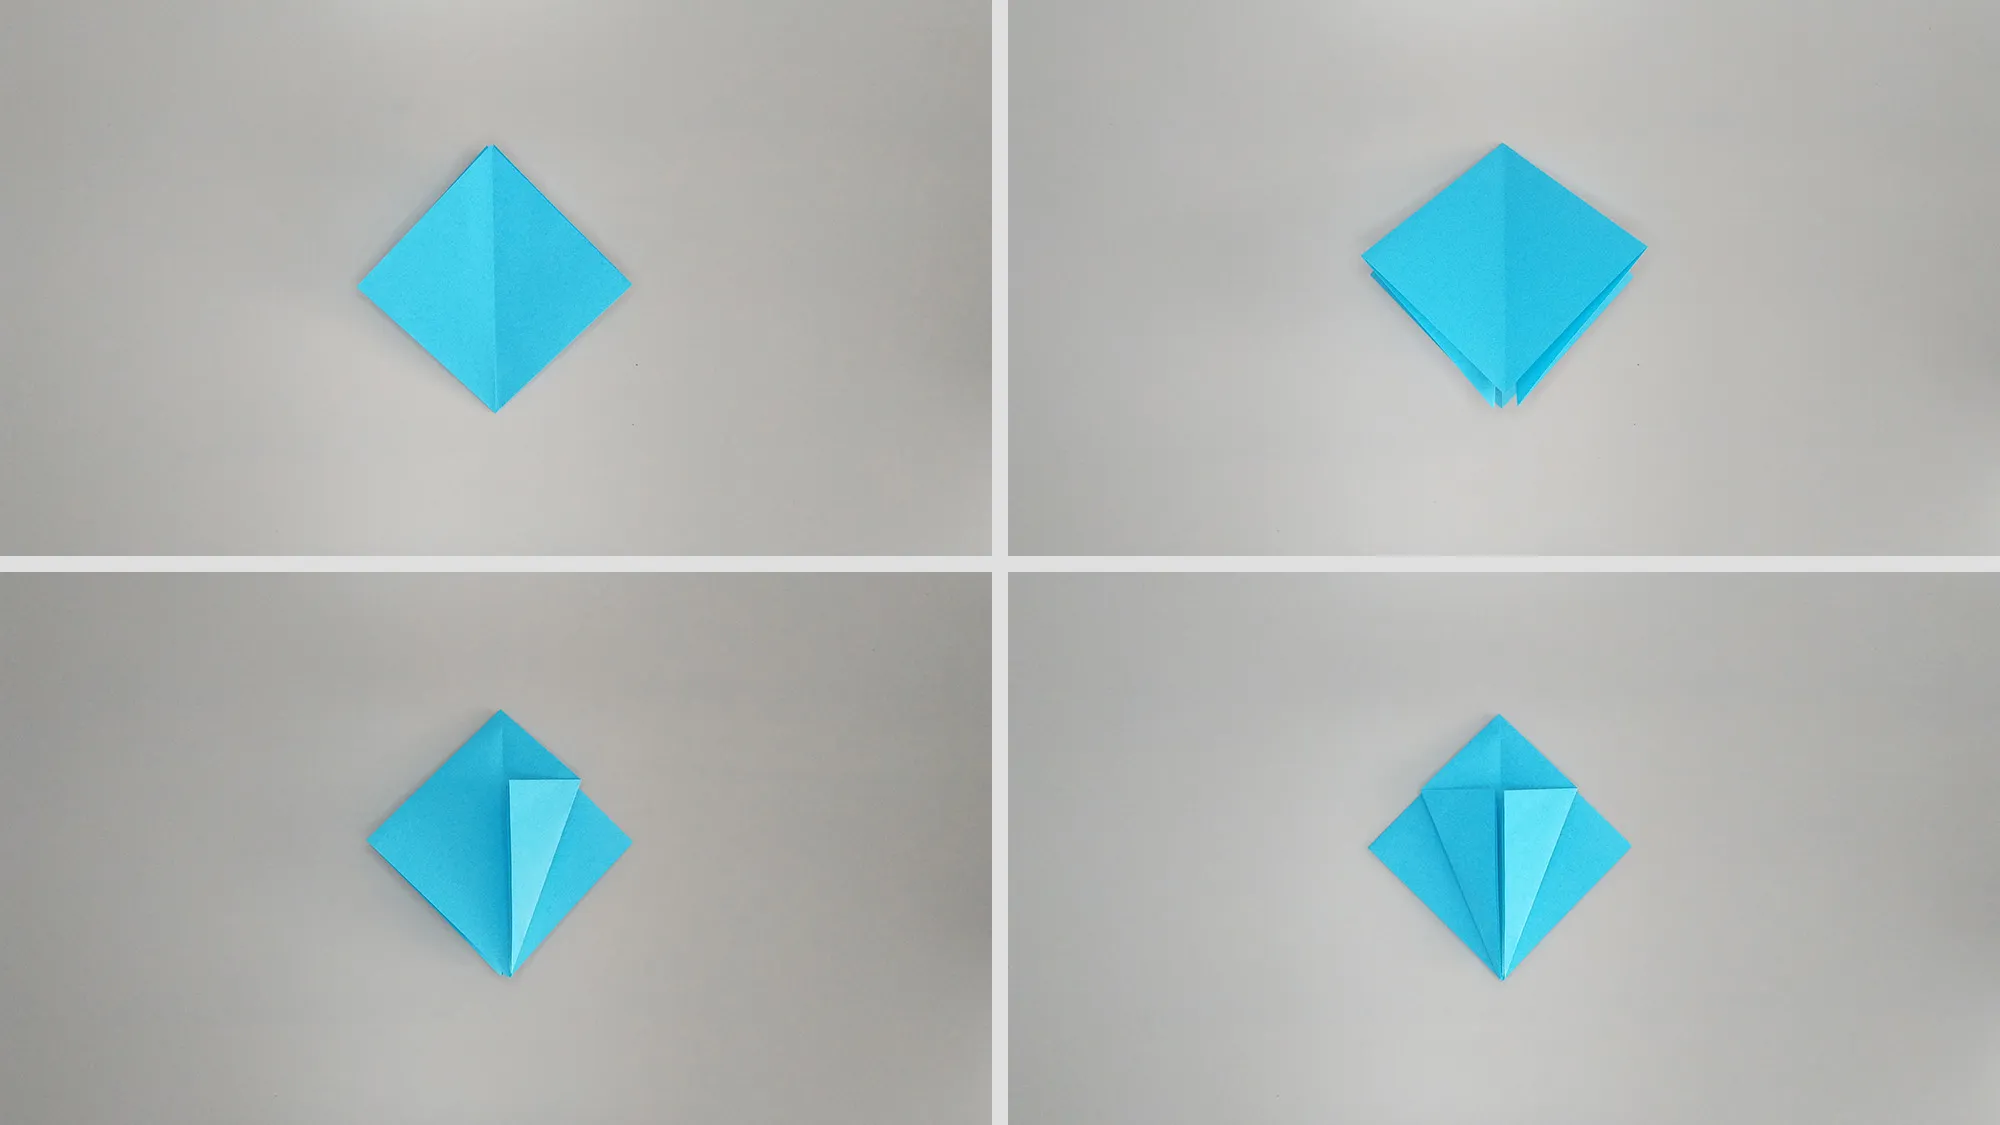
Step 4: A small square should be formed. Fold the corners towards the center, as shown in the image.
Folding an origami crane out of paper. Figure 5
Step 5: Turn the paper over and repeat this action on the other side. Then create a new folding line.
Folding an origami crane out of paper. Figure 6
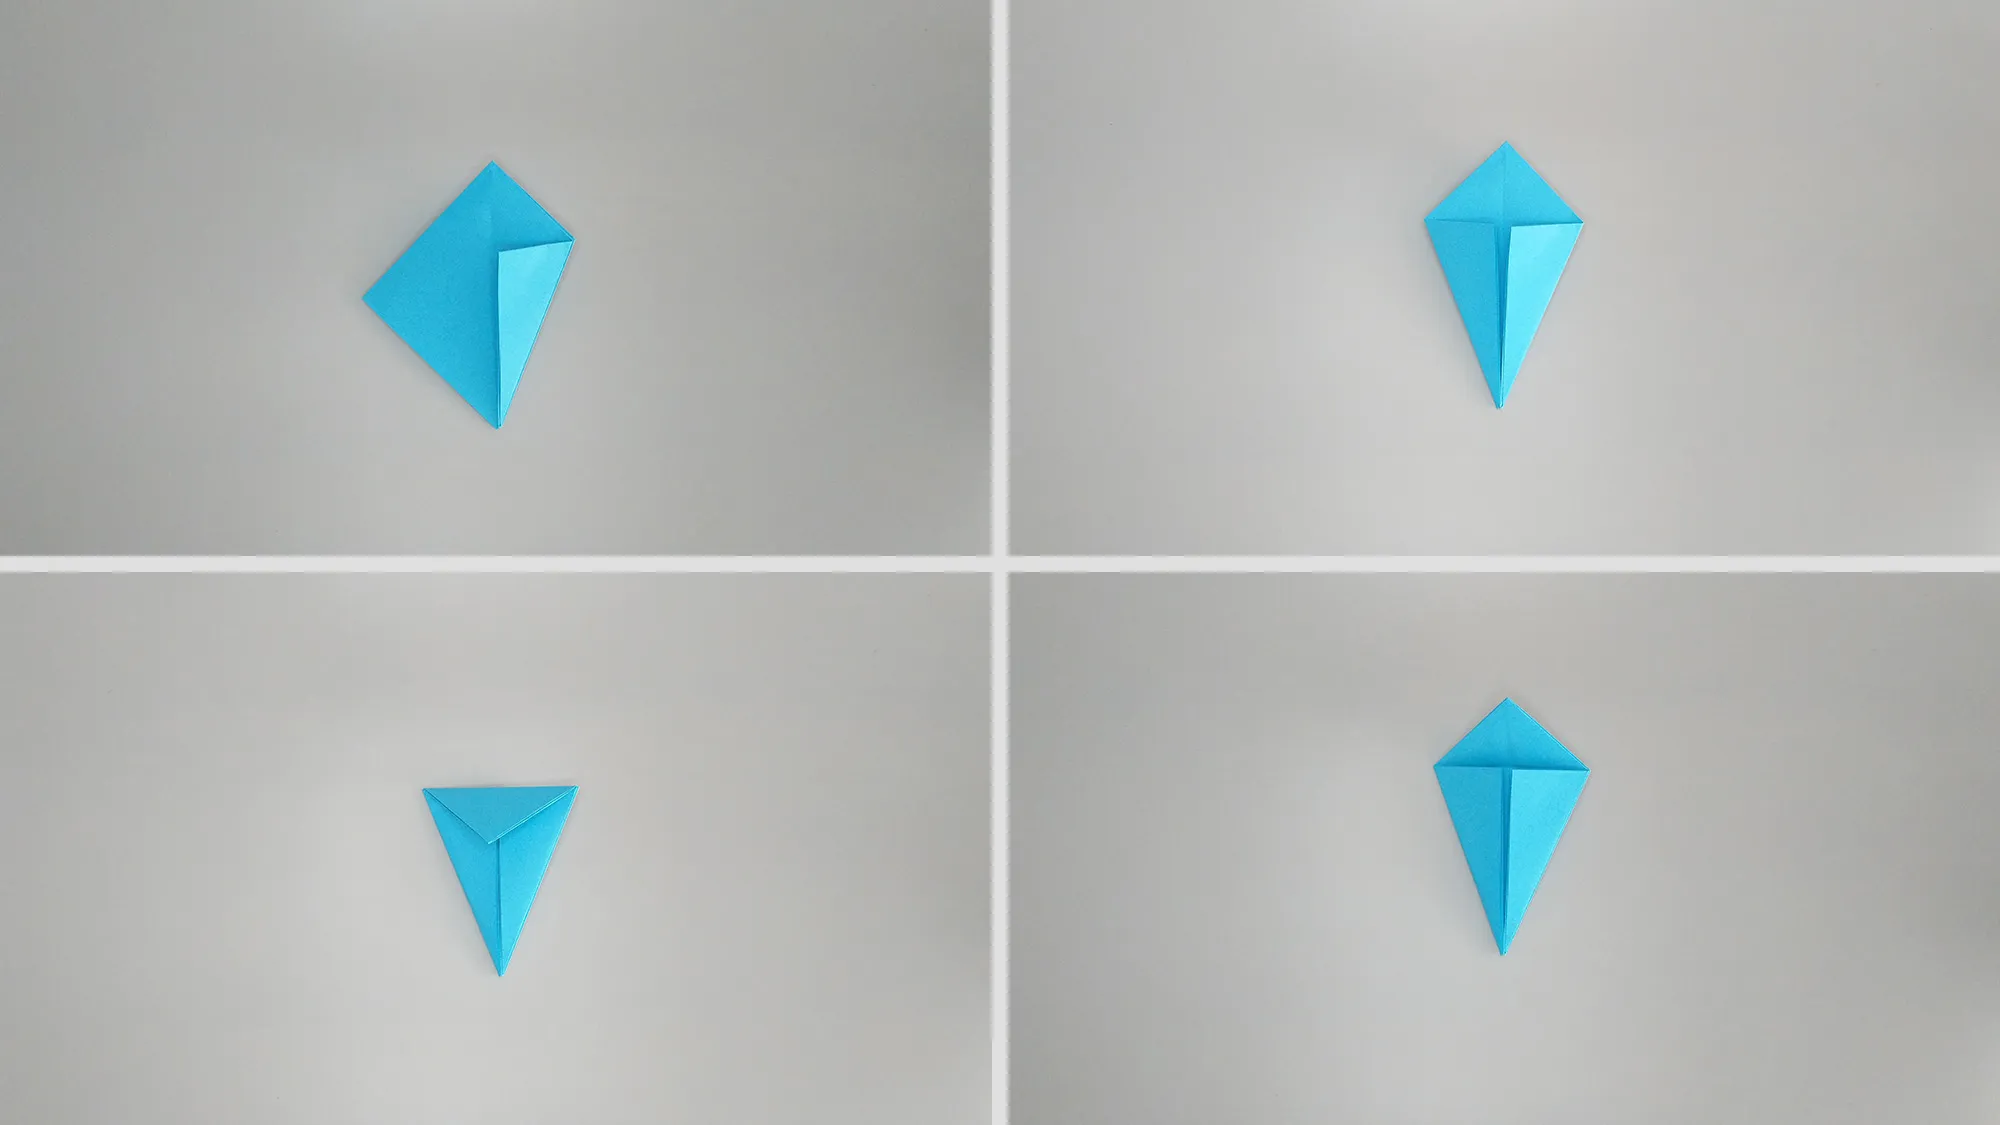
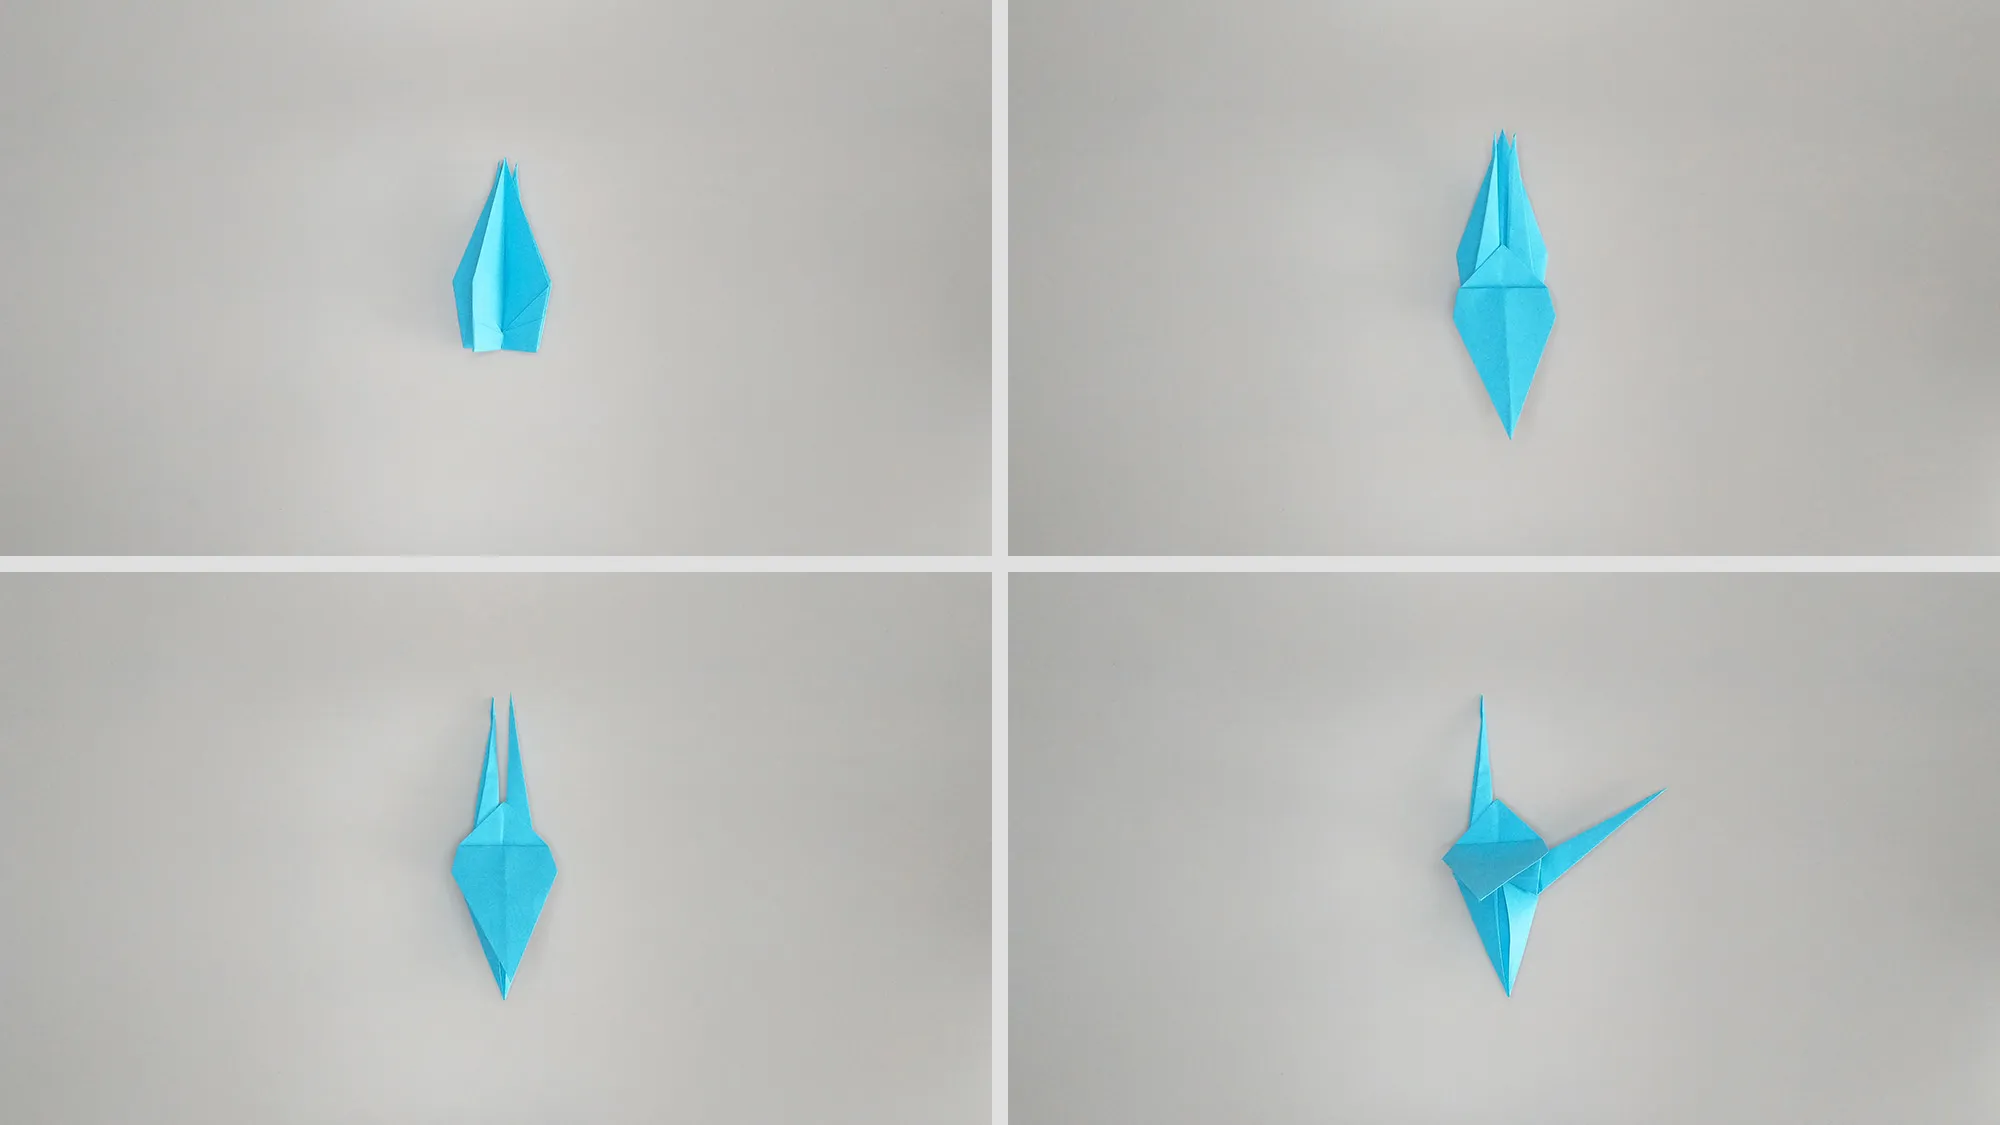
Step 6: Now, unfold the folded parts and lift the top sheet to form the head of the crane. Turn the work over and repeat the process.
Folding an origami crane out of paper. Figure 7
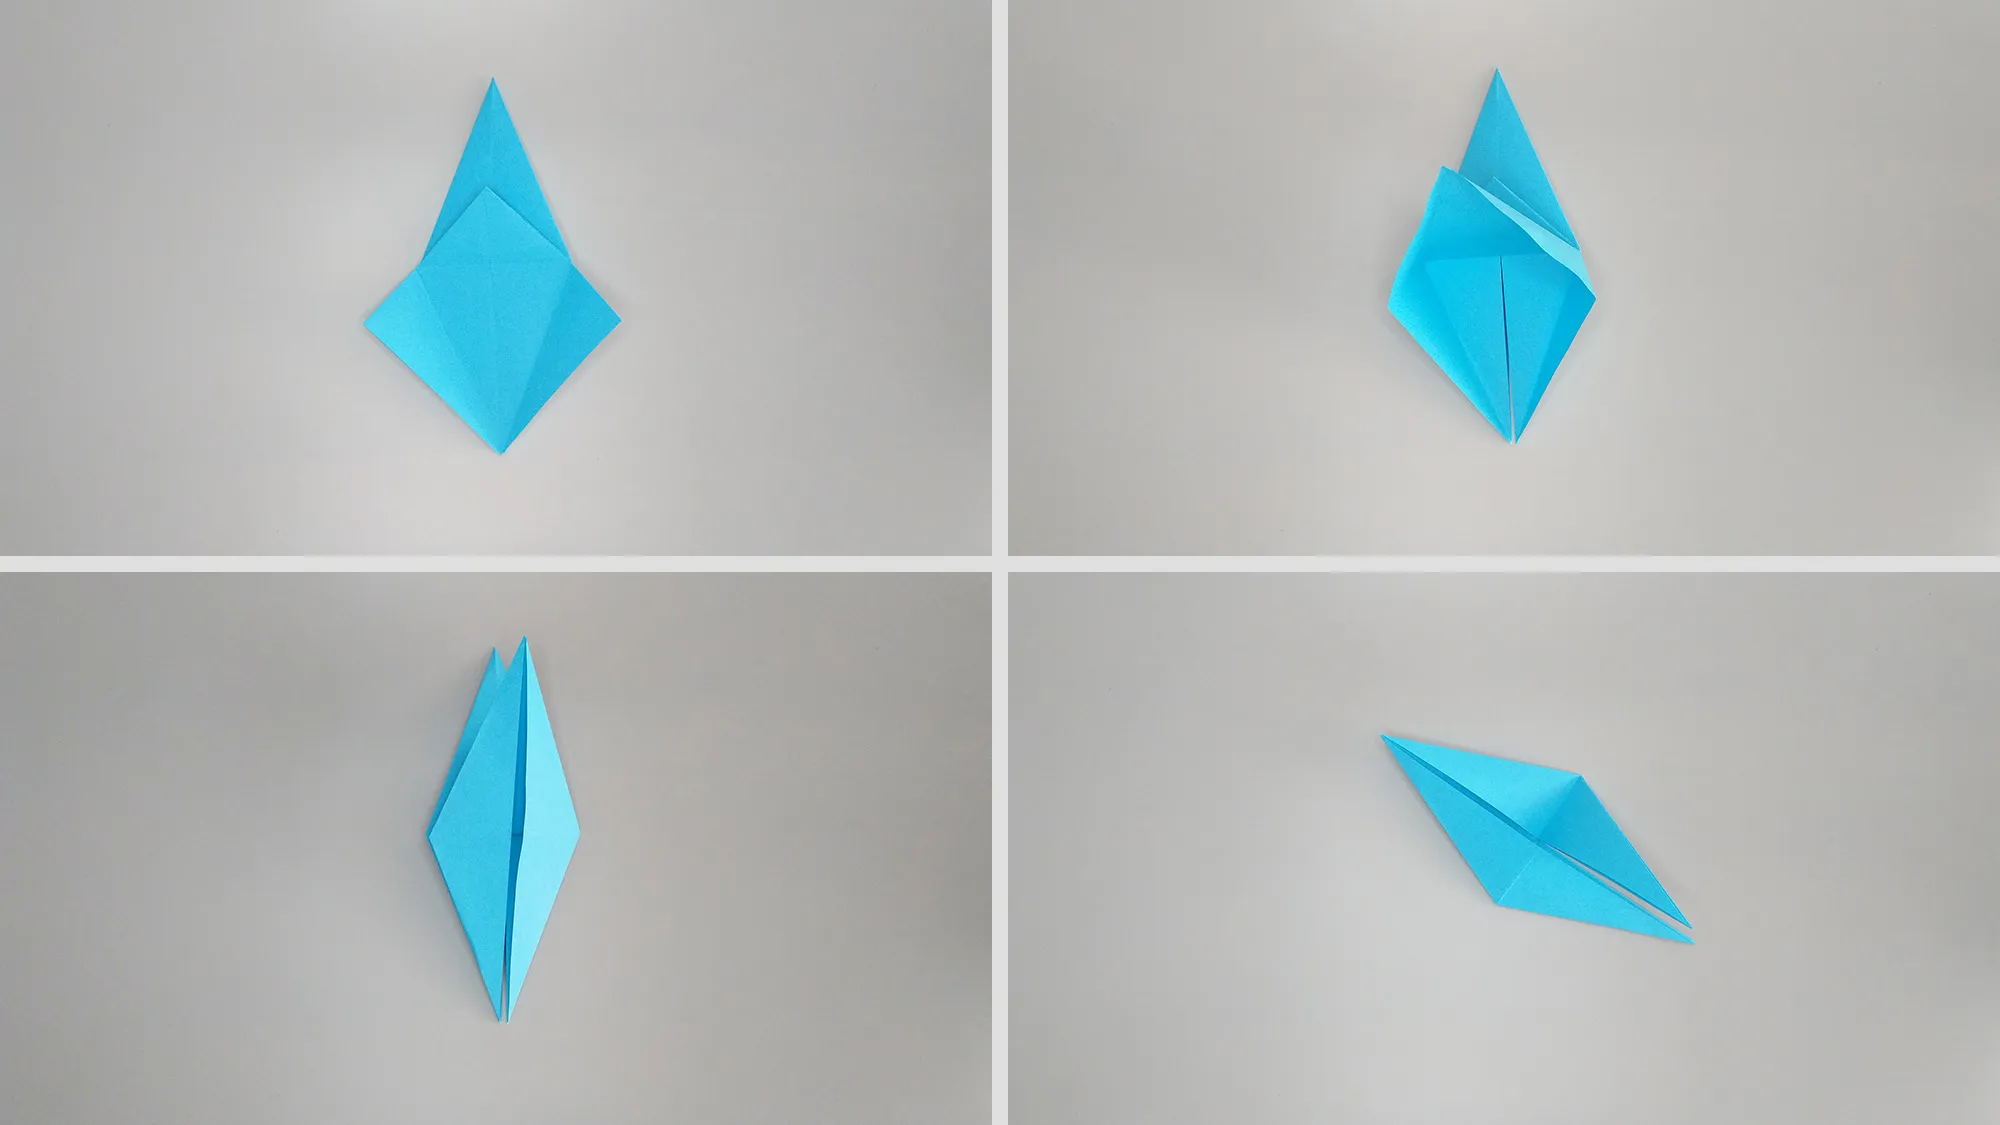
Step 7: Our future head and tail are finished. Now, unfold the sides as shown in the image.
Folding an origami crane out of paper. Illustration 8
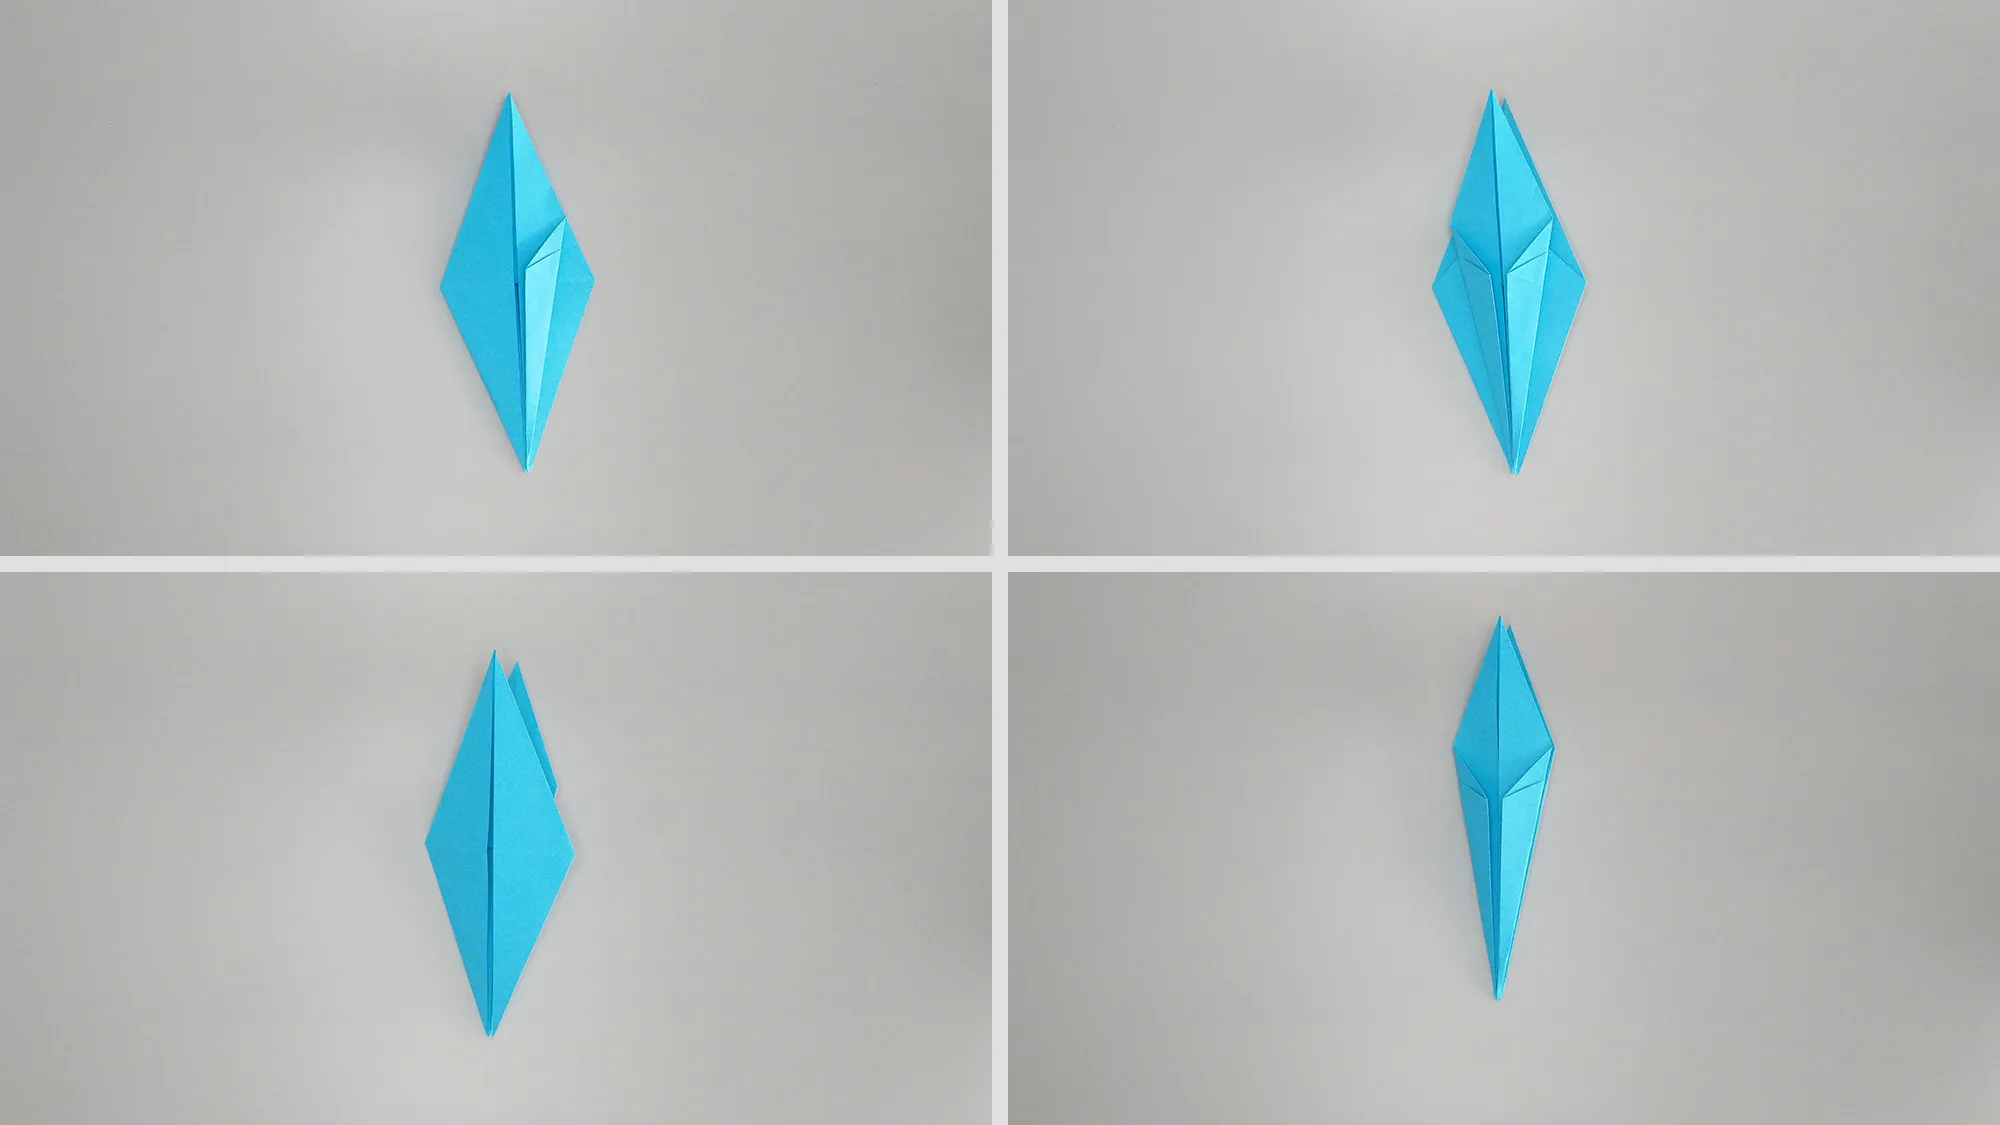
Step 8: Fold the edges to make our future head and tail thinner and more elegant.
Folding an origami crane from paper. Figure 9
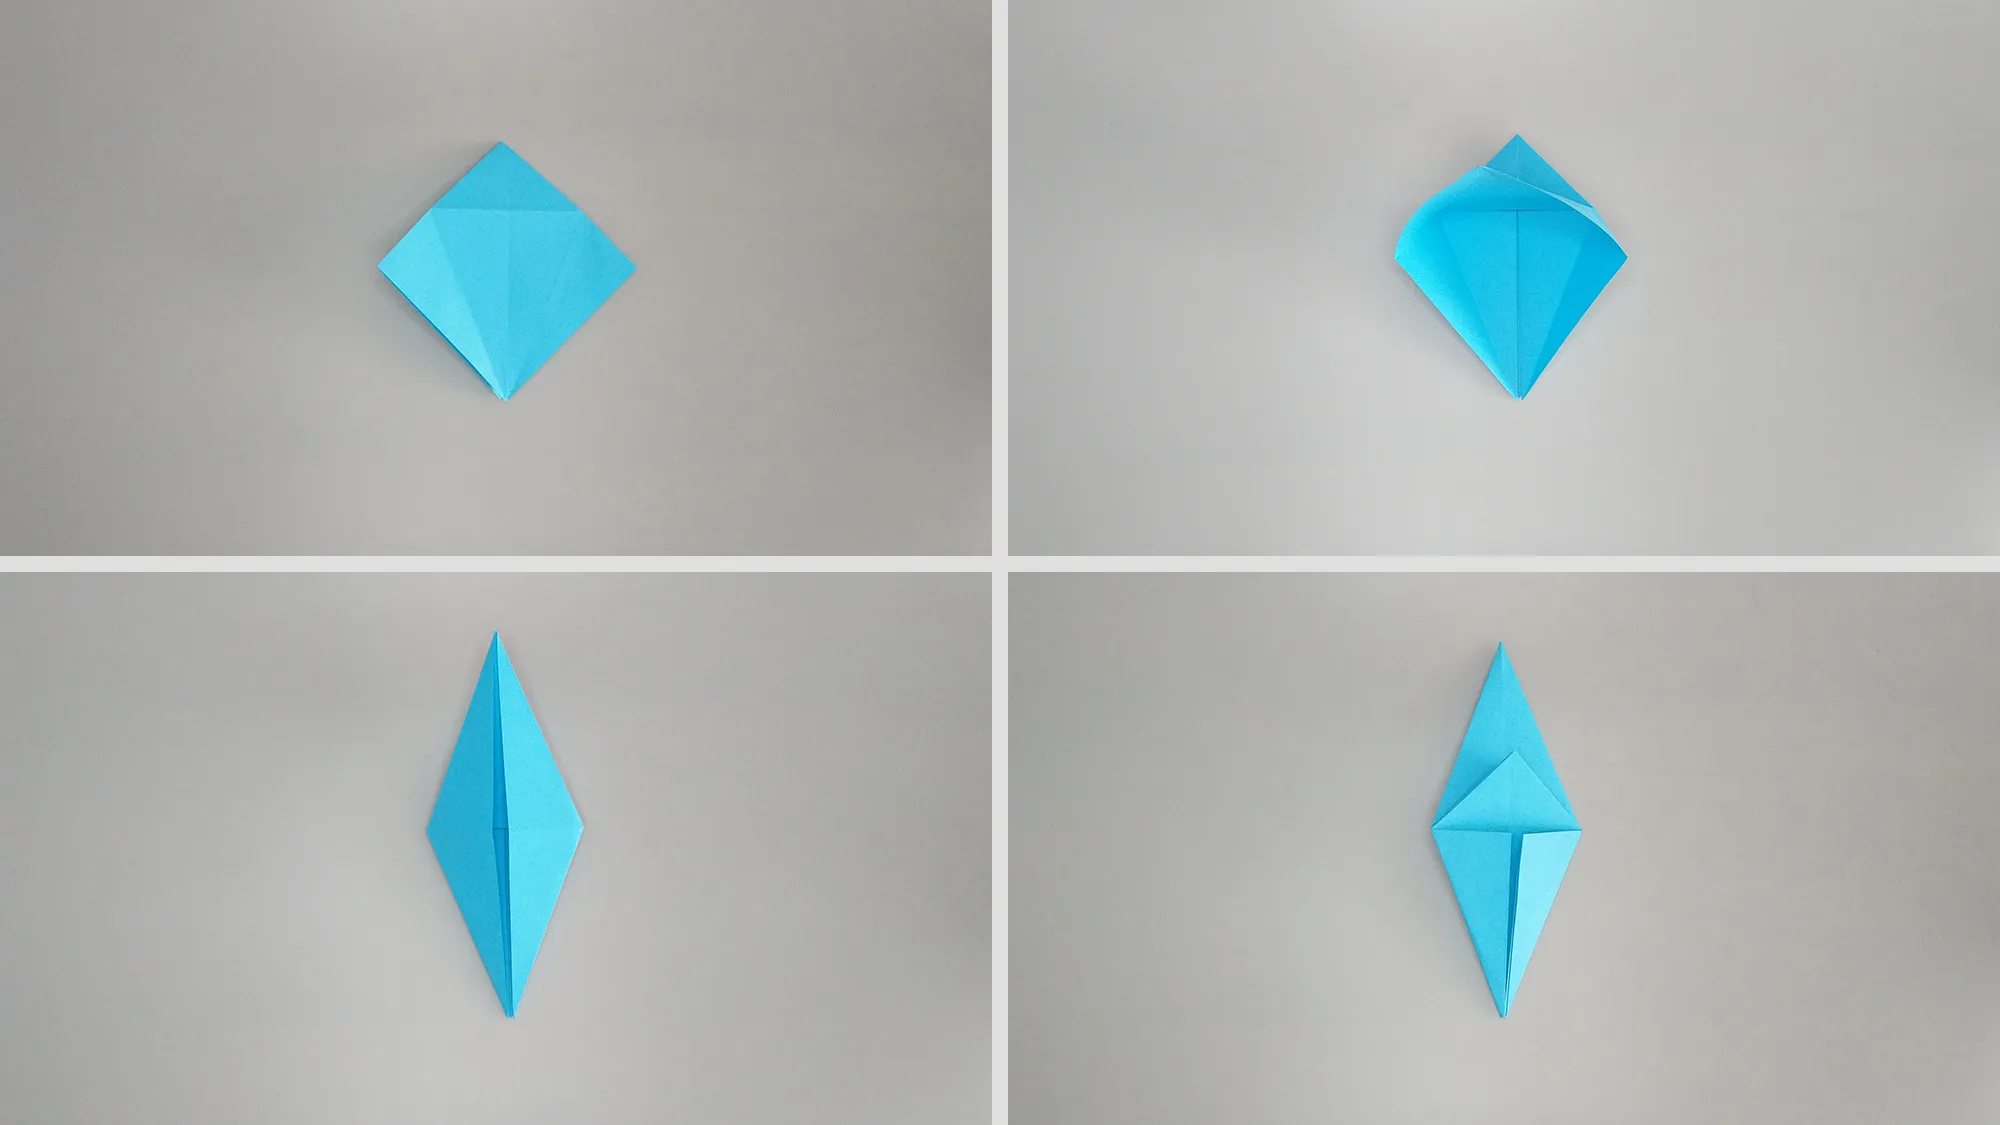
Step 9: Join the opposite edges once again. Check if yours looks the same as in the image.
Folding an origami crane out of paper. Figure 10
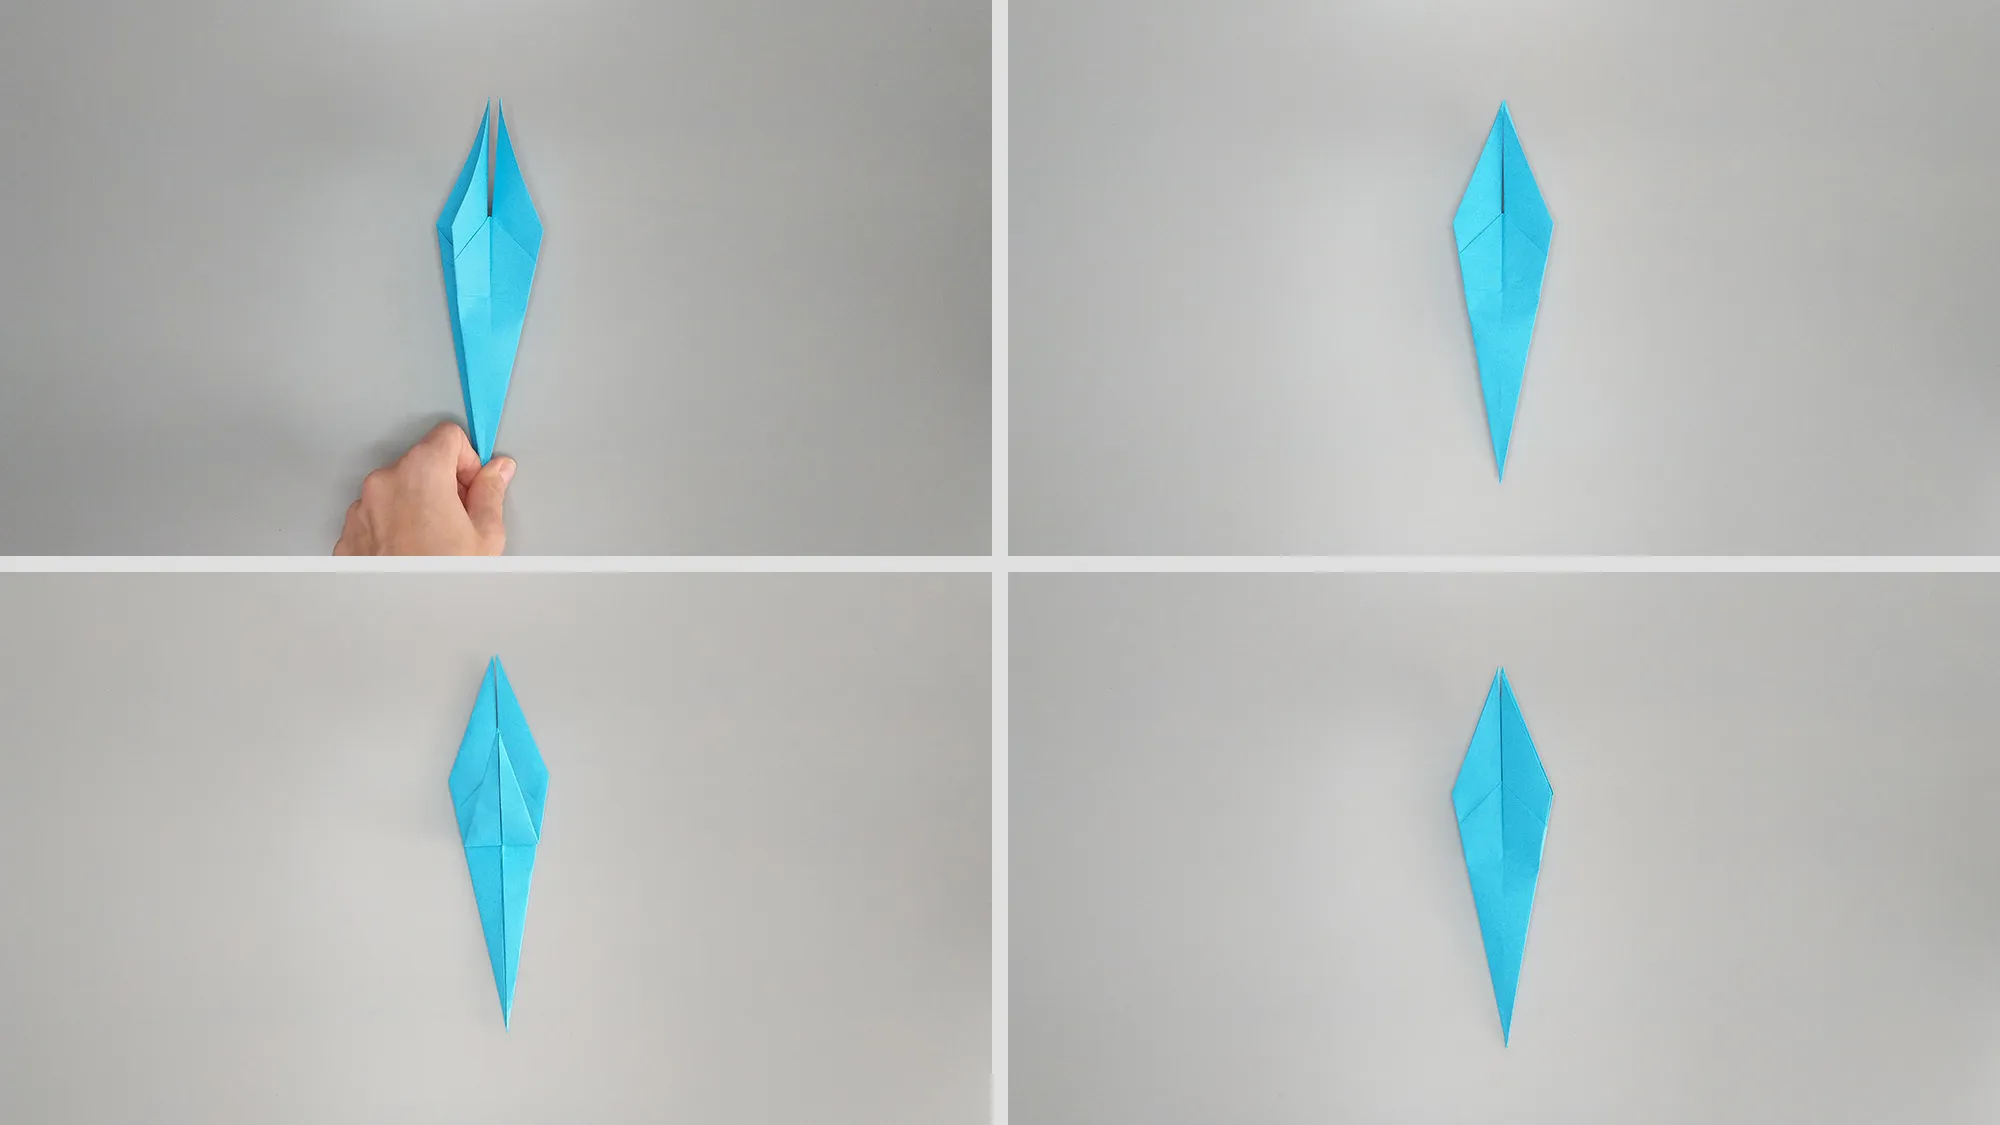
Step 10: Next, we shape the wings. For this, you need to make two more folds as shown in the image.
Folding an origami crane from paper. Figure 11
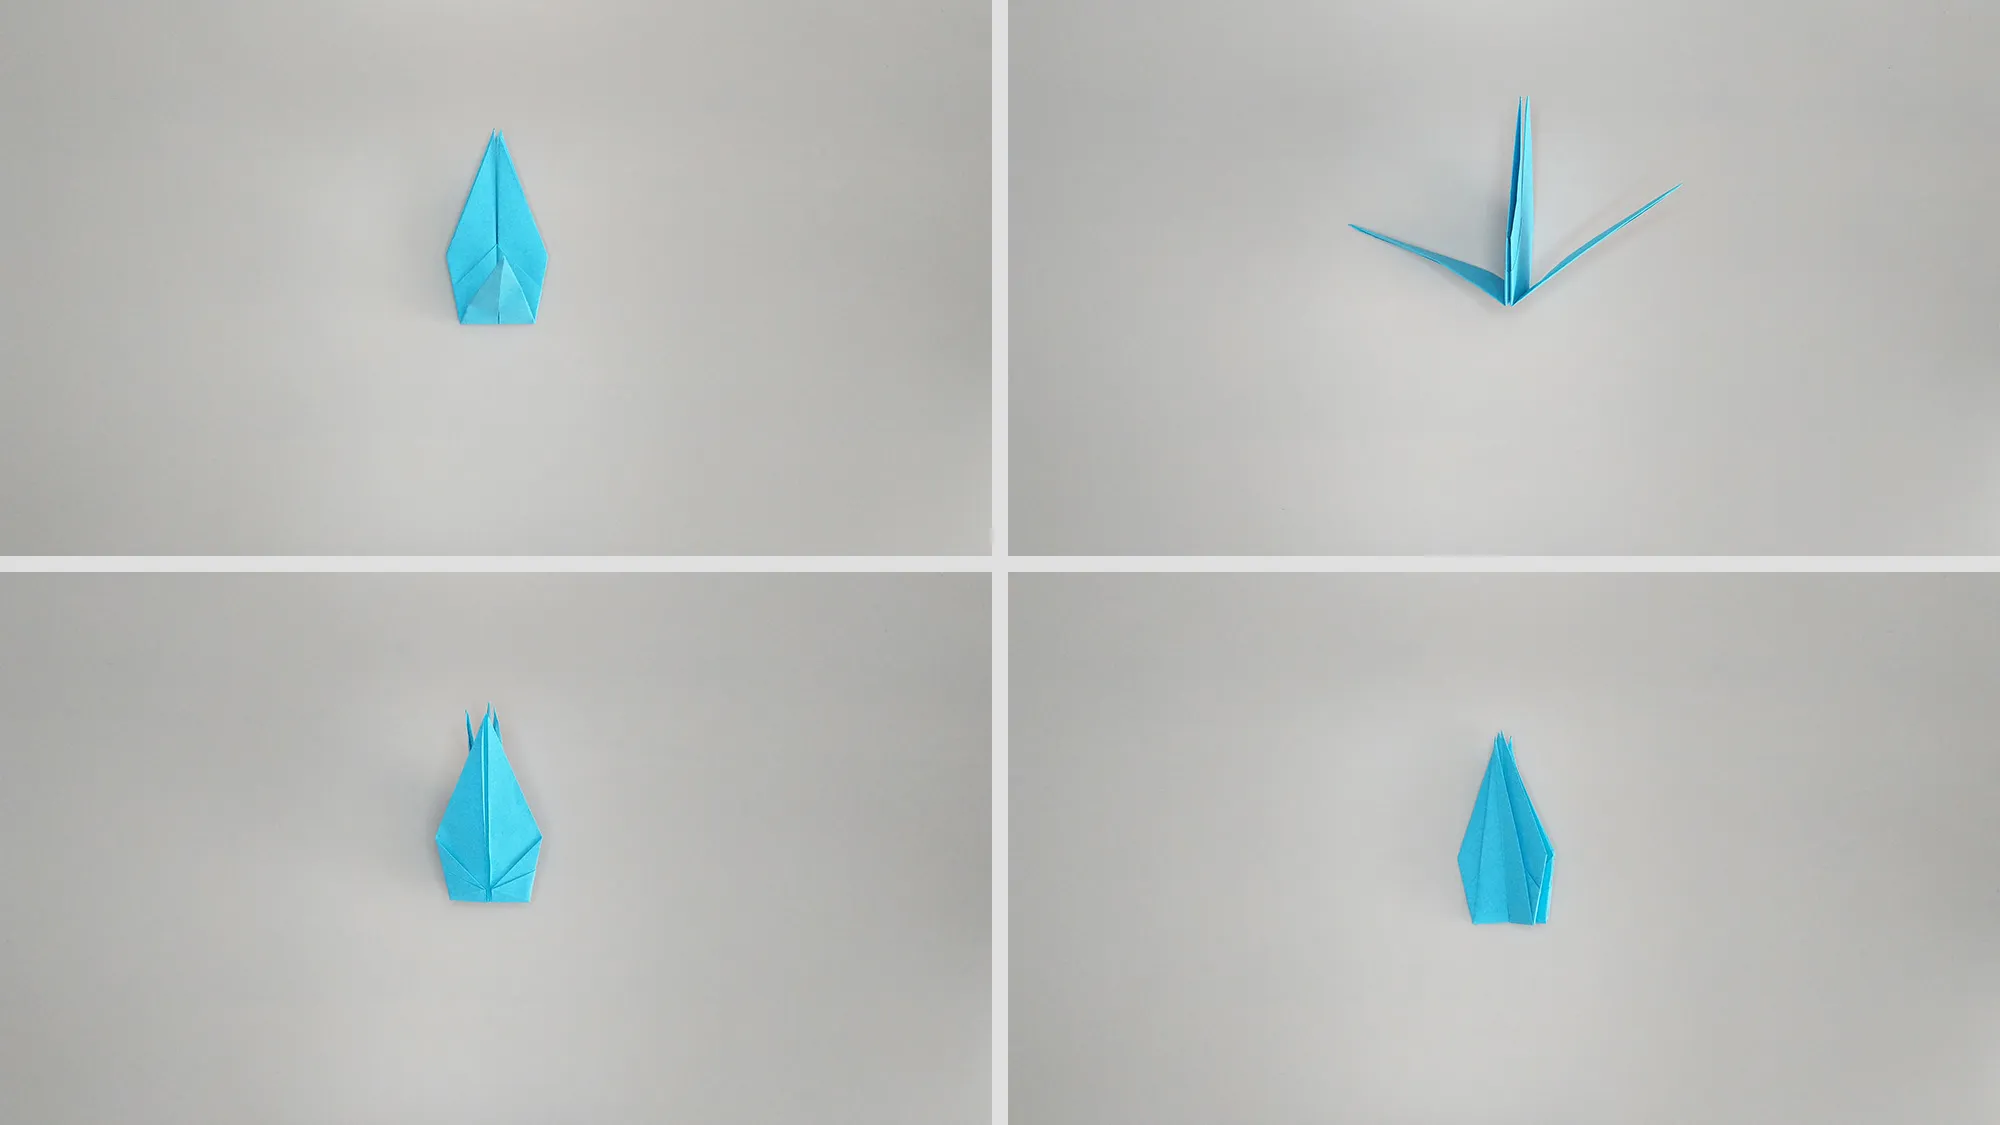
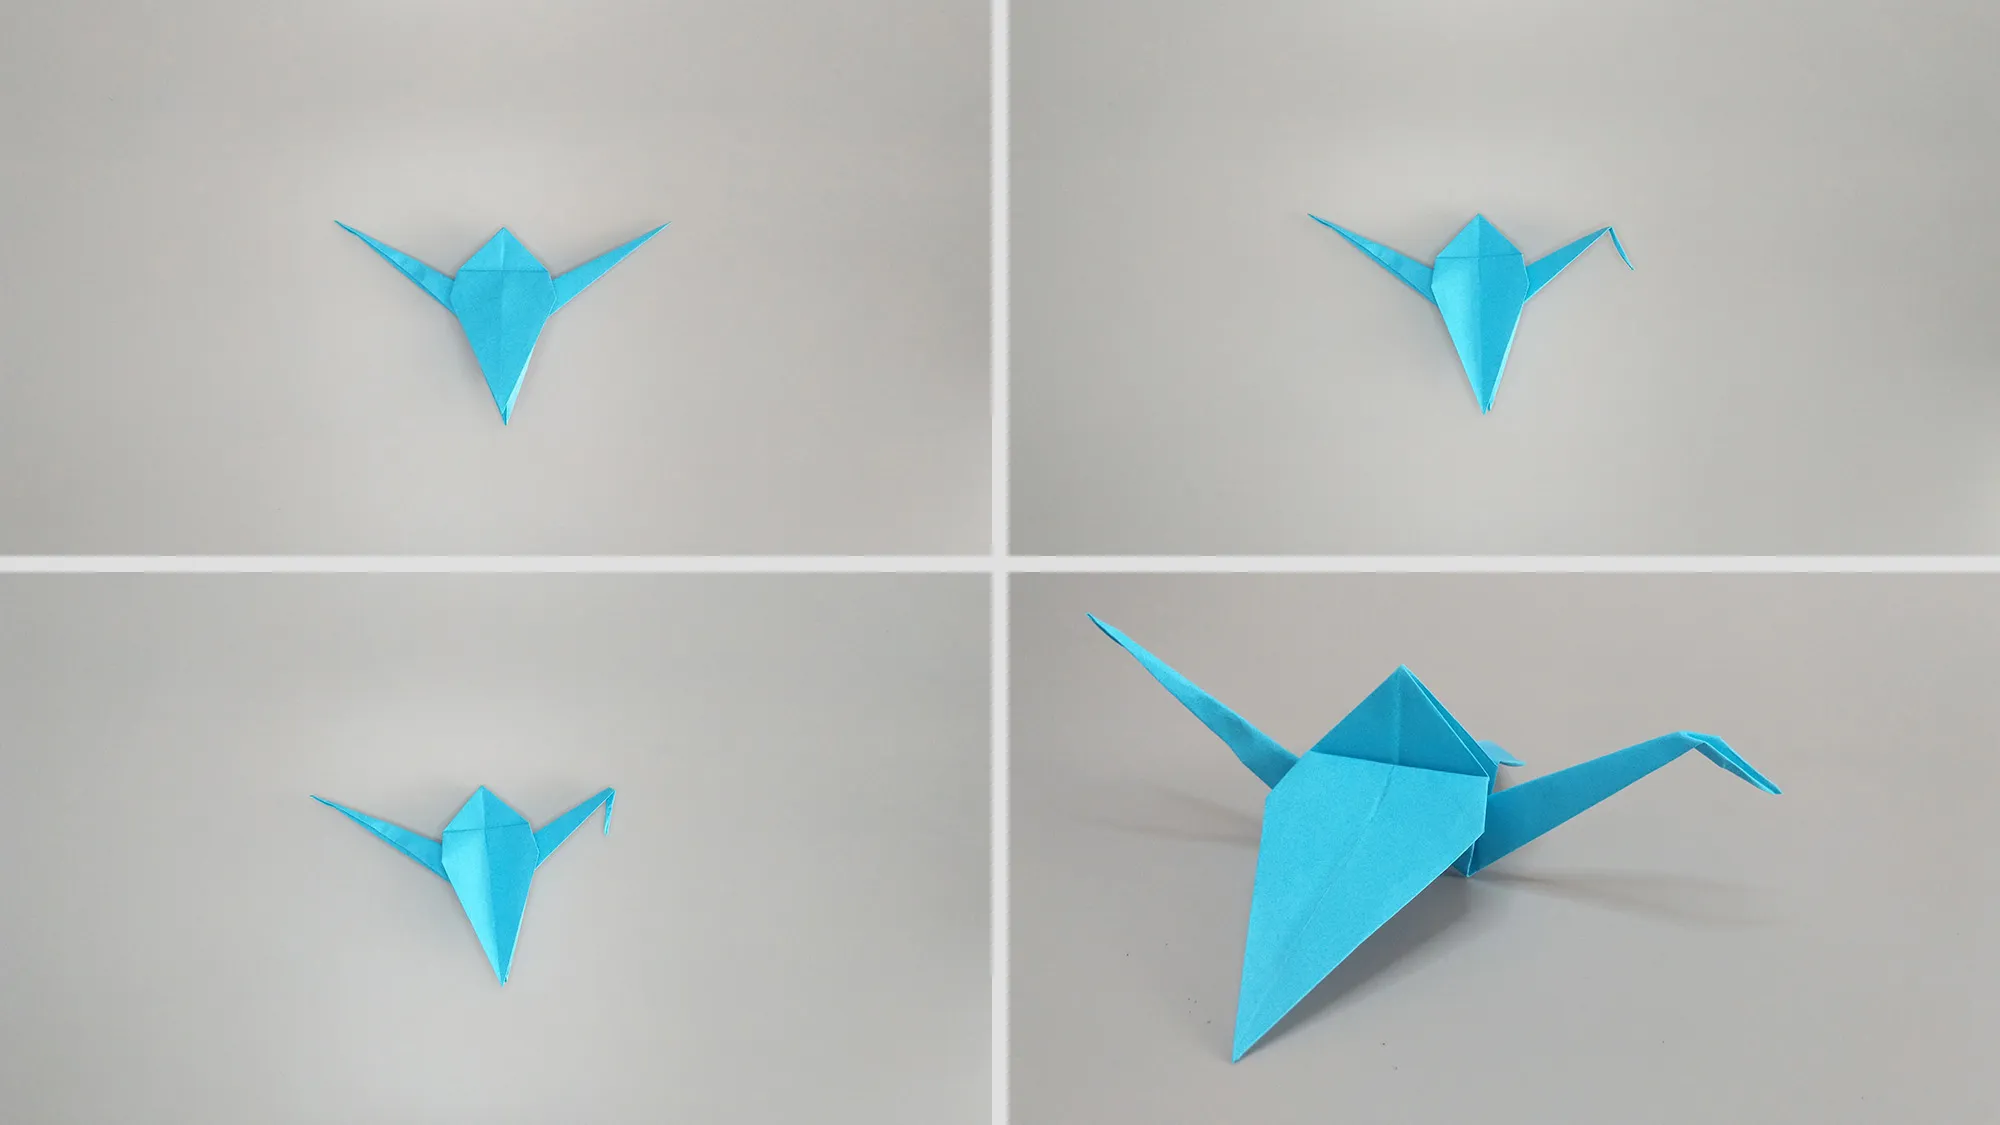
Step 11: Pull the neck and tail in opposite directions. Do this gently to later press and fold them cleanly. Work slowly and carefully.
Folding an origami crane from paper. Figure 12
Step 12: Now, you just need to make two more folds to shape the head and wings. Everything is now complete!

Origami Crane: Postscript

Thank you for your time and effort in folding the Origami Crane. We support your enthusiasm for this project. If you did it with your child and it worked out - fantastic job!

Let yourself be inspired by this success. We have numerous more instructions with videos for Origami and crafting projects with children. Discover new figures and enjoy the creative development.

Folding origami crane: Instructions with photos and video

Published on by Vitalii Shynakov
Published on:
From Vitalii Shynakov
Vitalii Shynakov has been working in the areas of online retail, marketing and customer satisfaction since 2012. Until 2022, he was the head of personnel development and online sales department of four successful stores. He has been part of the TutKit.com team since 2024.