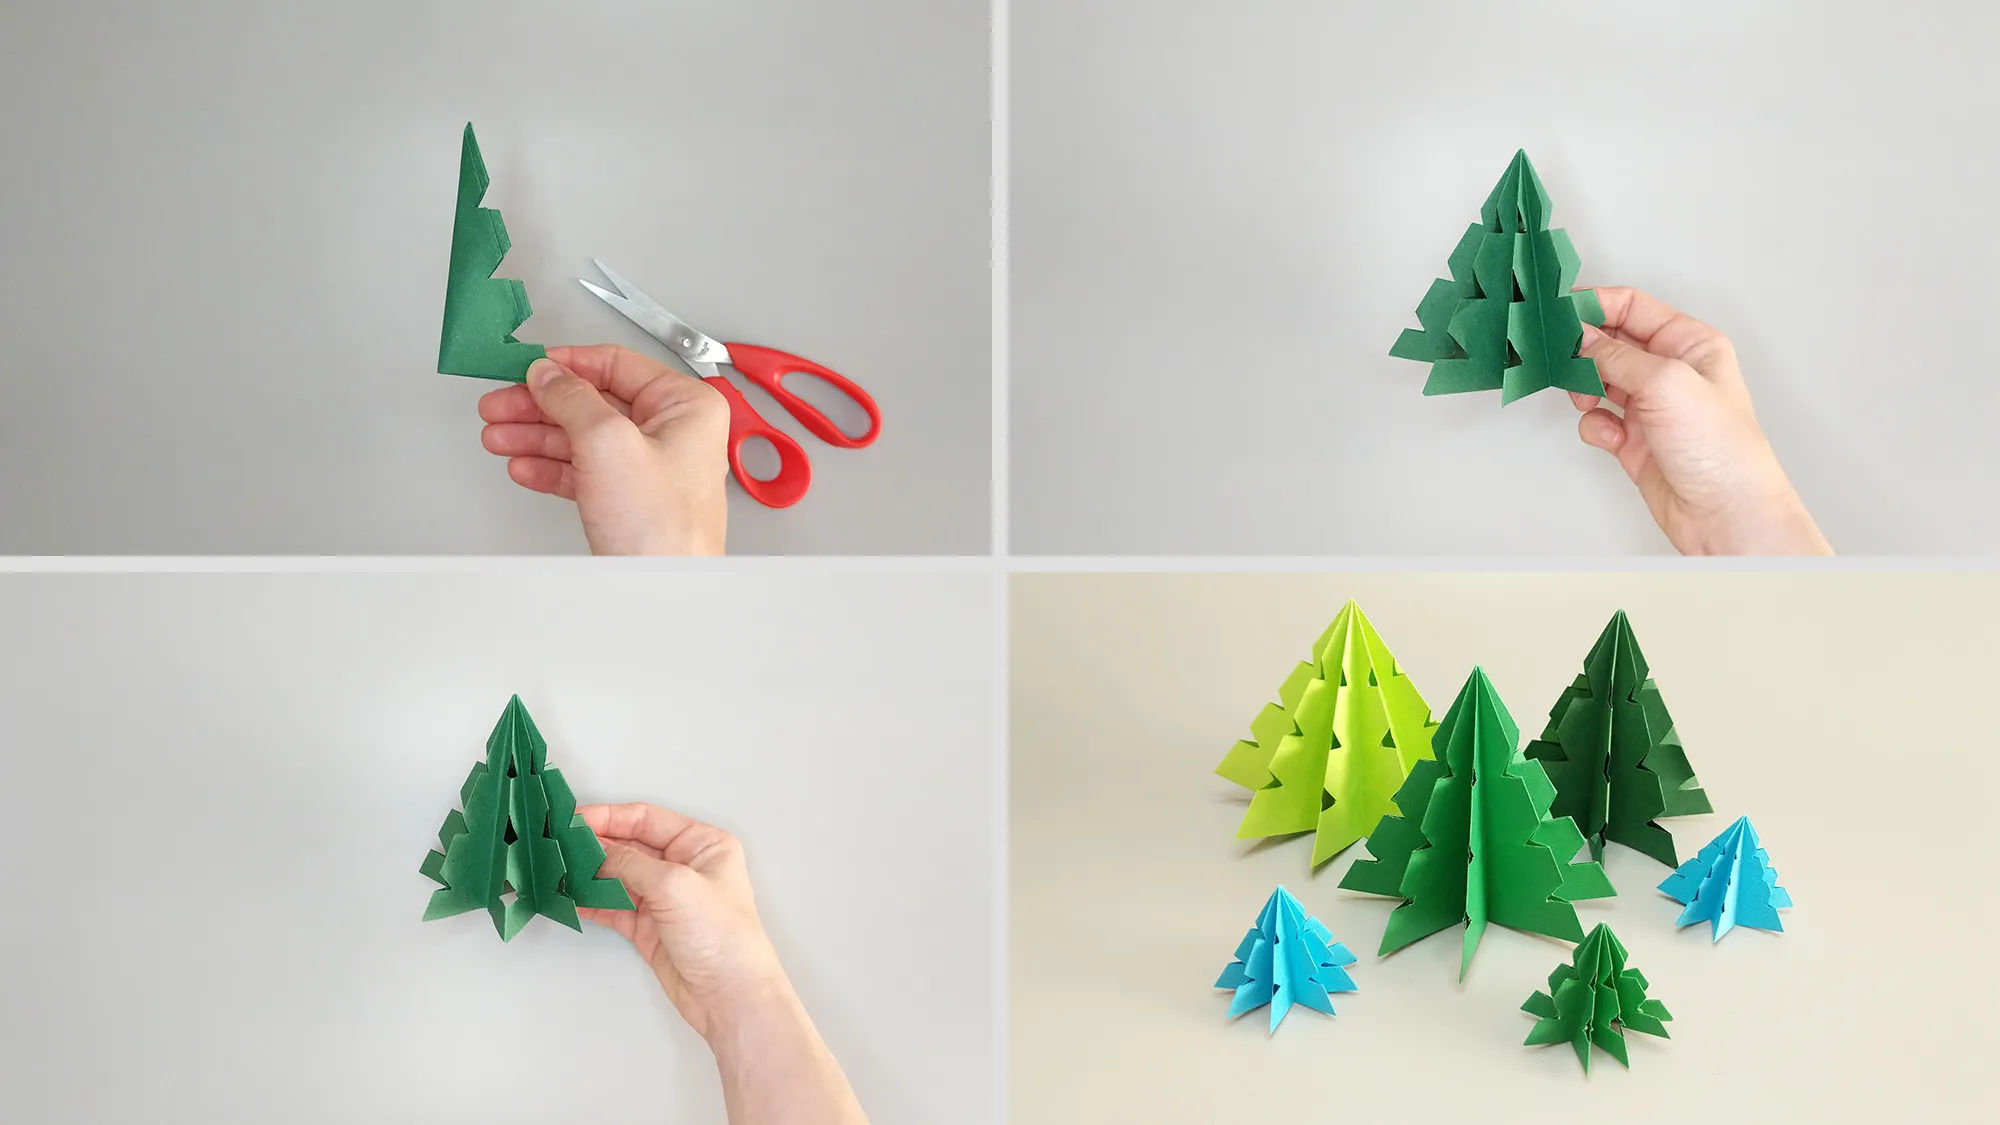
Origami Christmas Trees make children's eyes light up. This Japanese folding art delights young and old alike. Origami promotes fine motor skills, which are closely linked to brain development. Therefore, children and seniors alike benefit from this creative activity. Our instructions are easy to understand, with videos and photos for each step. The beginning may seem challenging, but we assure you: You will master it!

Origami Christmas trees evoke associations with Christmas, winter forests, and cozy evenings. Children love folding these festive trees because they can create their own little winter wonderland. Paper folding cultivates patience, concentration, and precision. It teaches an important lesson: If a step is executed incorrectly, you have to start over. This experience shows that working slowly and carefully leads to the goal.

h_904,h_906,h_907,h_902

Origami Christmas Trees: Step-by-step guide with photos and description

Before you start folding your origami Christmas tree, we recommend watching the video once or twice. For better results, you can use special origami paper. This is available in almost every stationery store. A pack usually contains square sheets in various colors. The advantage of origami paper is its thinner thickness, making it easier to fold the figures.
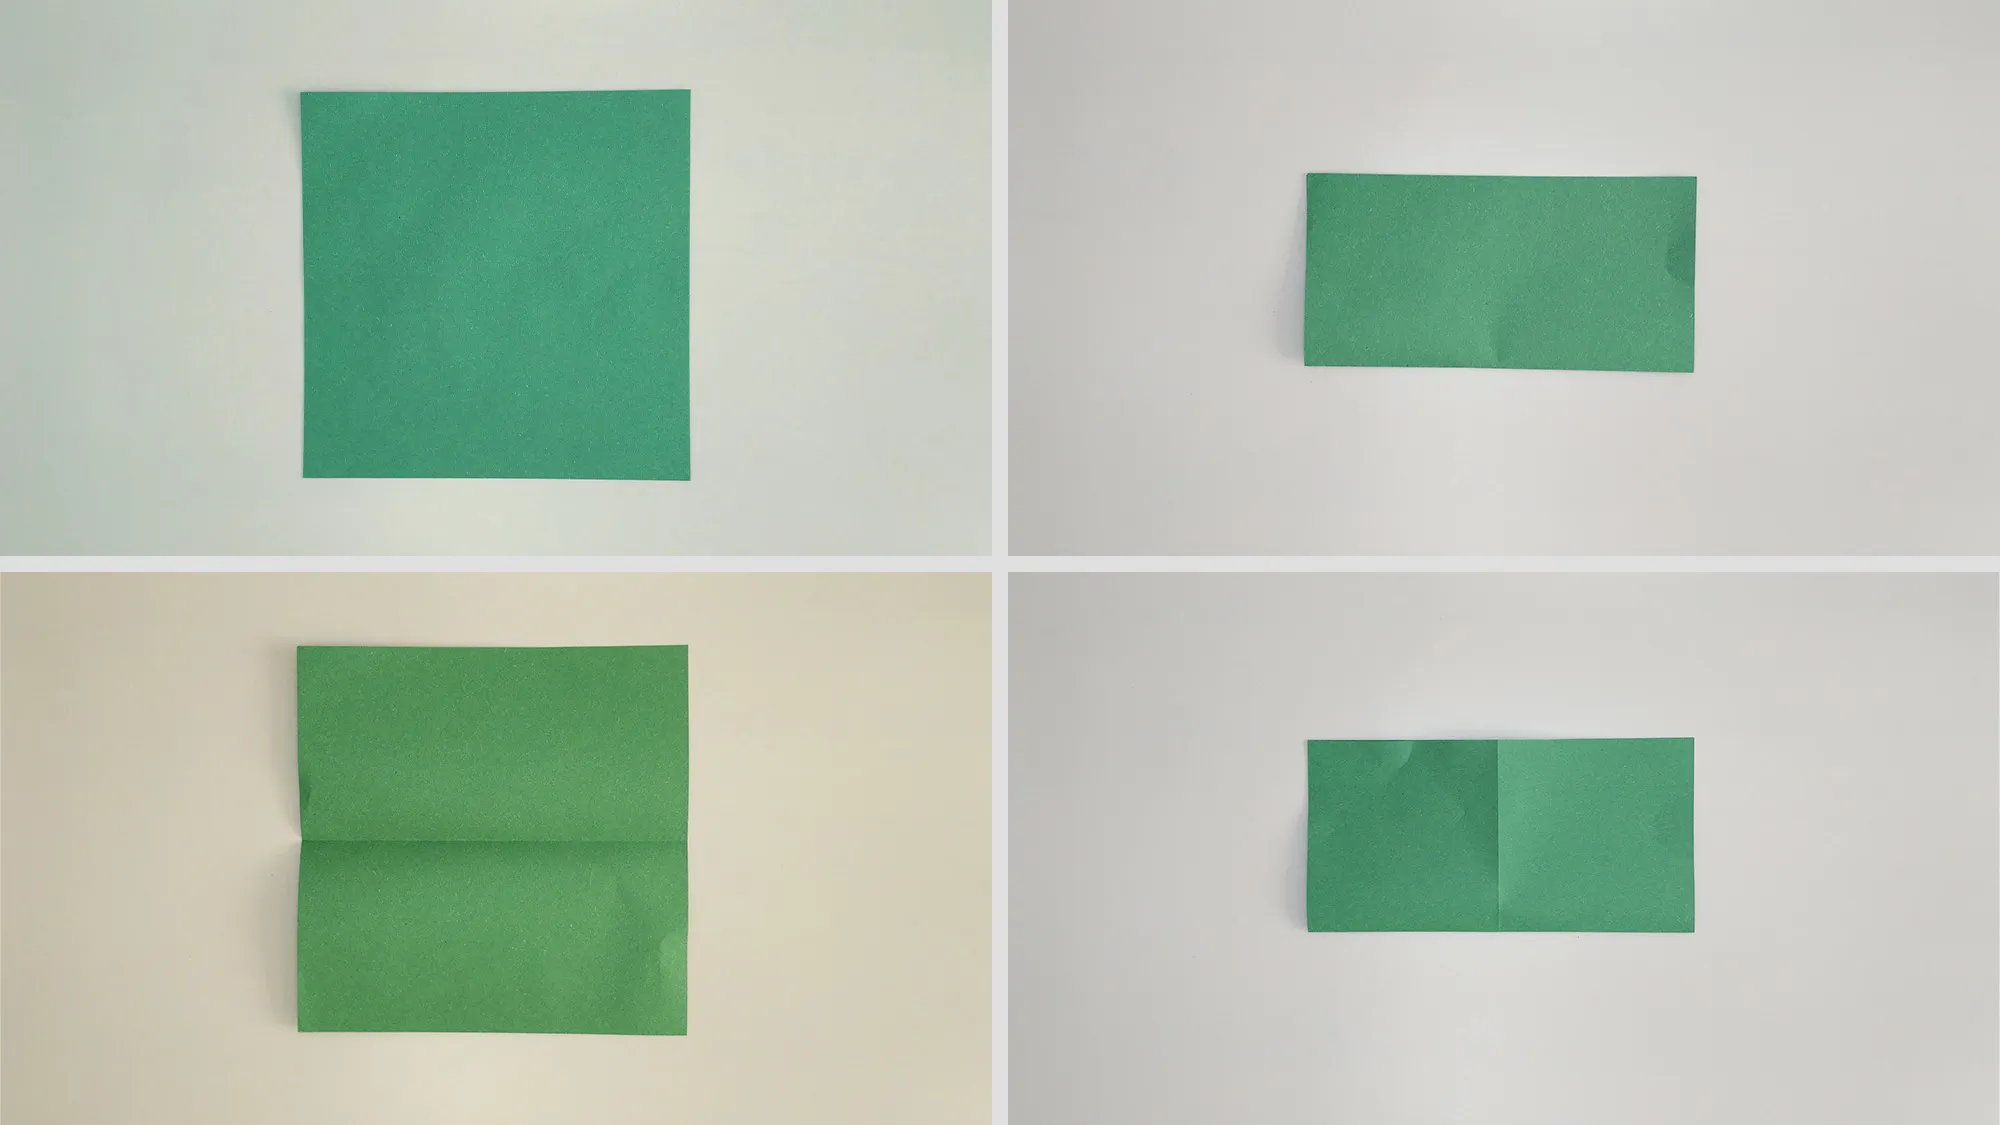
Origami, Christmas tree, Illustration 1
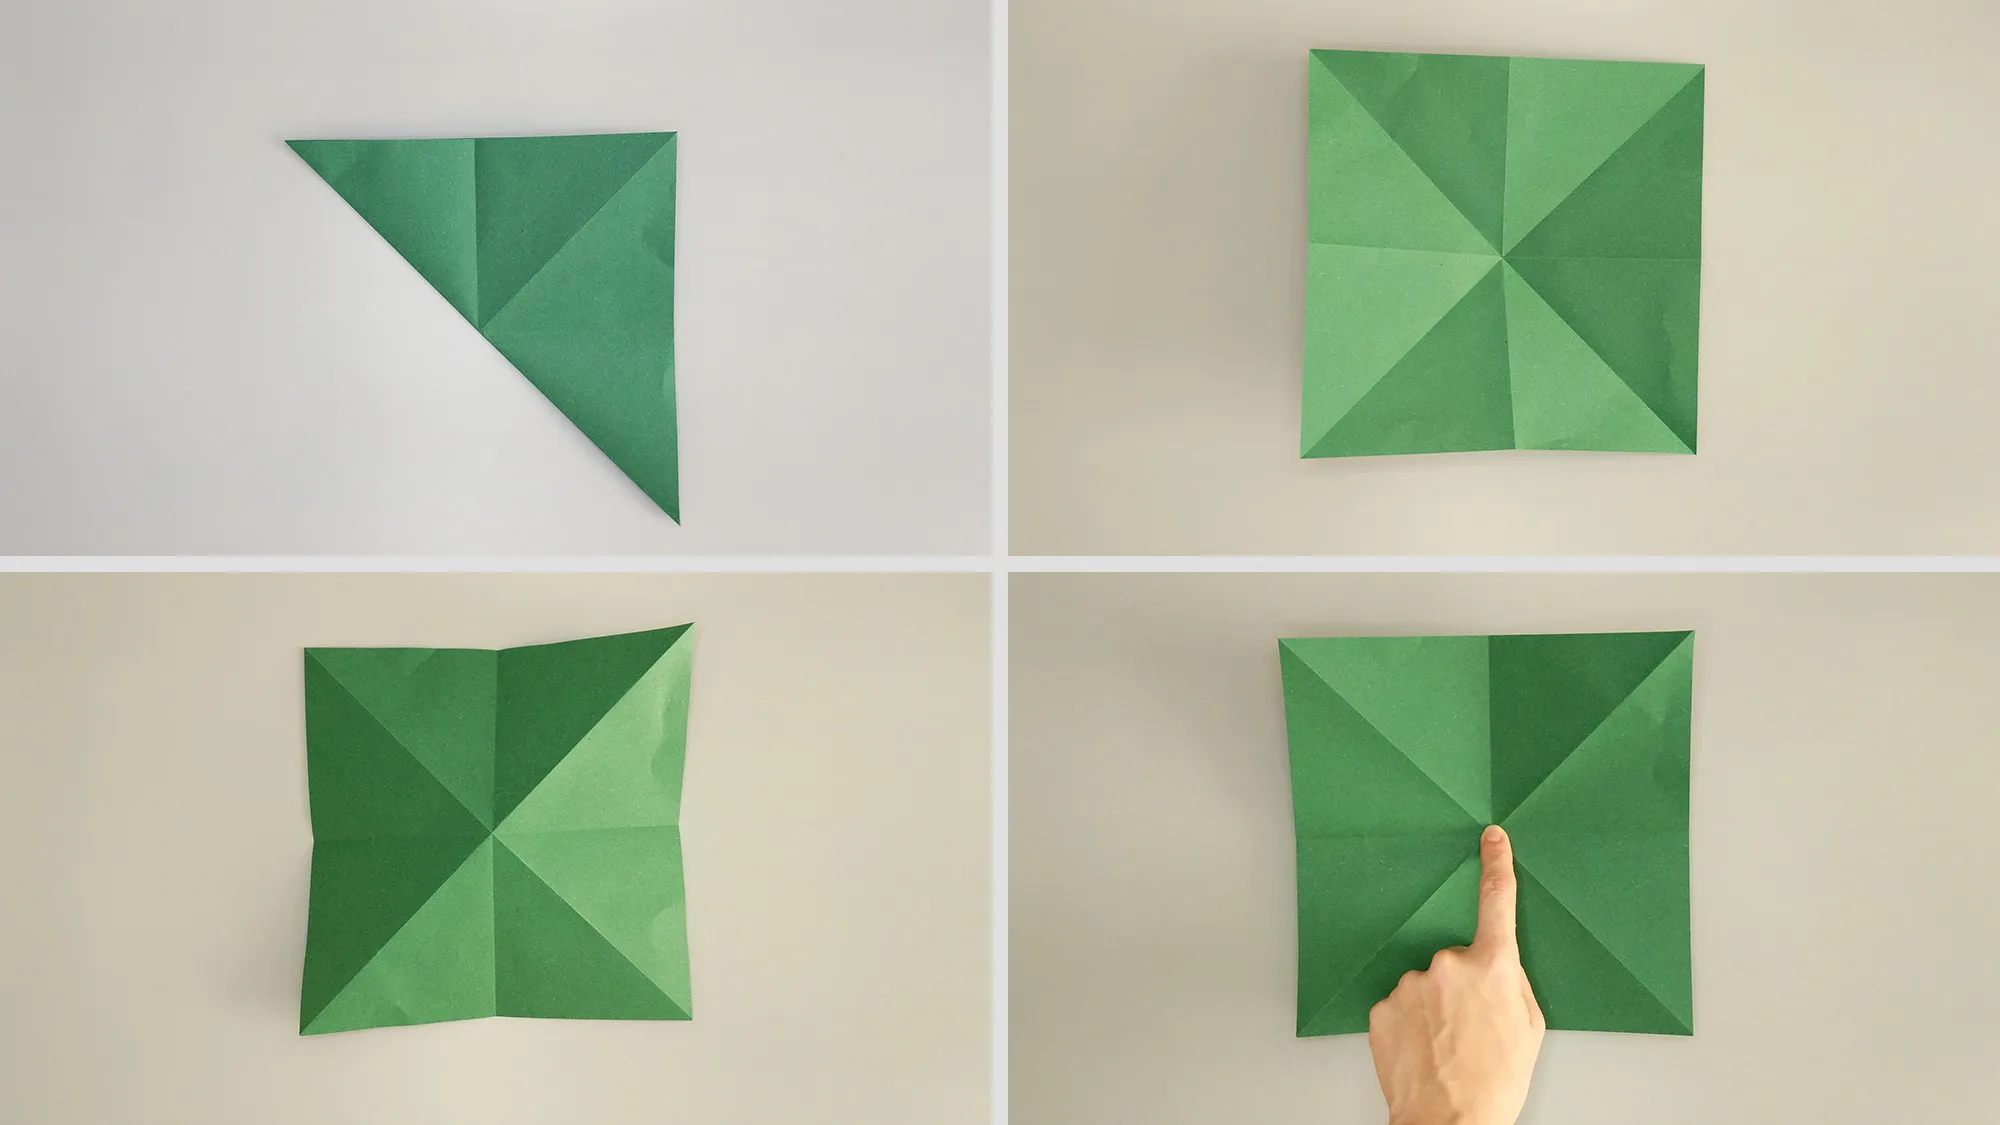
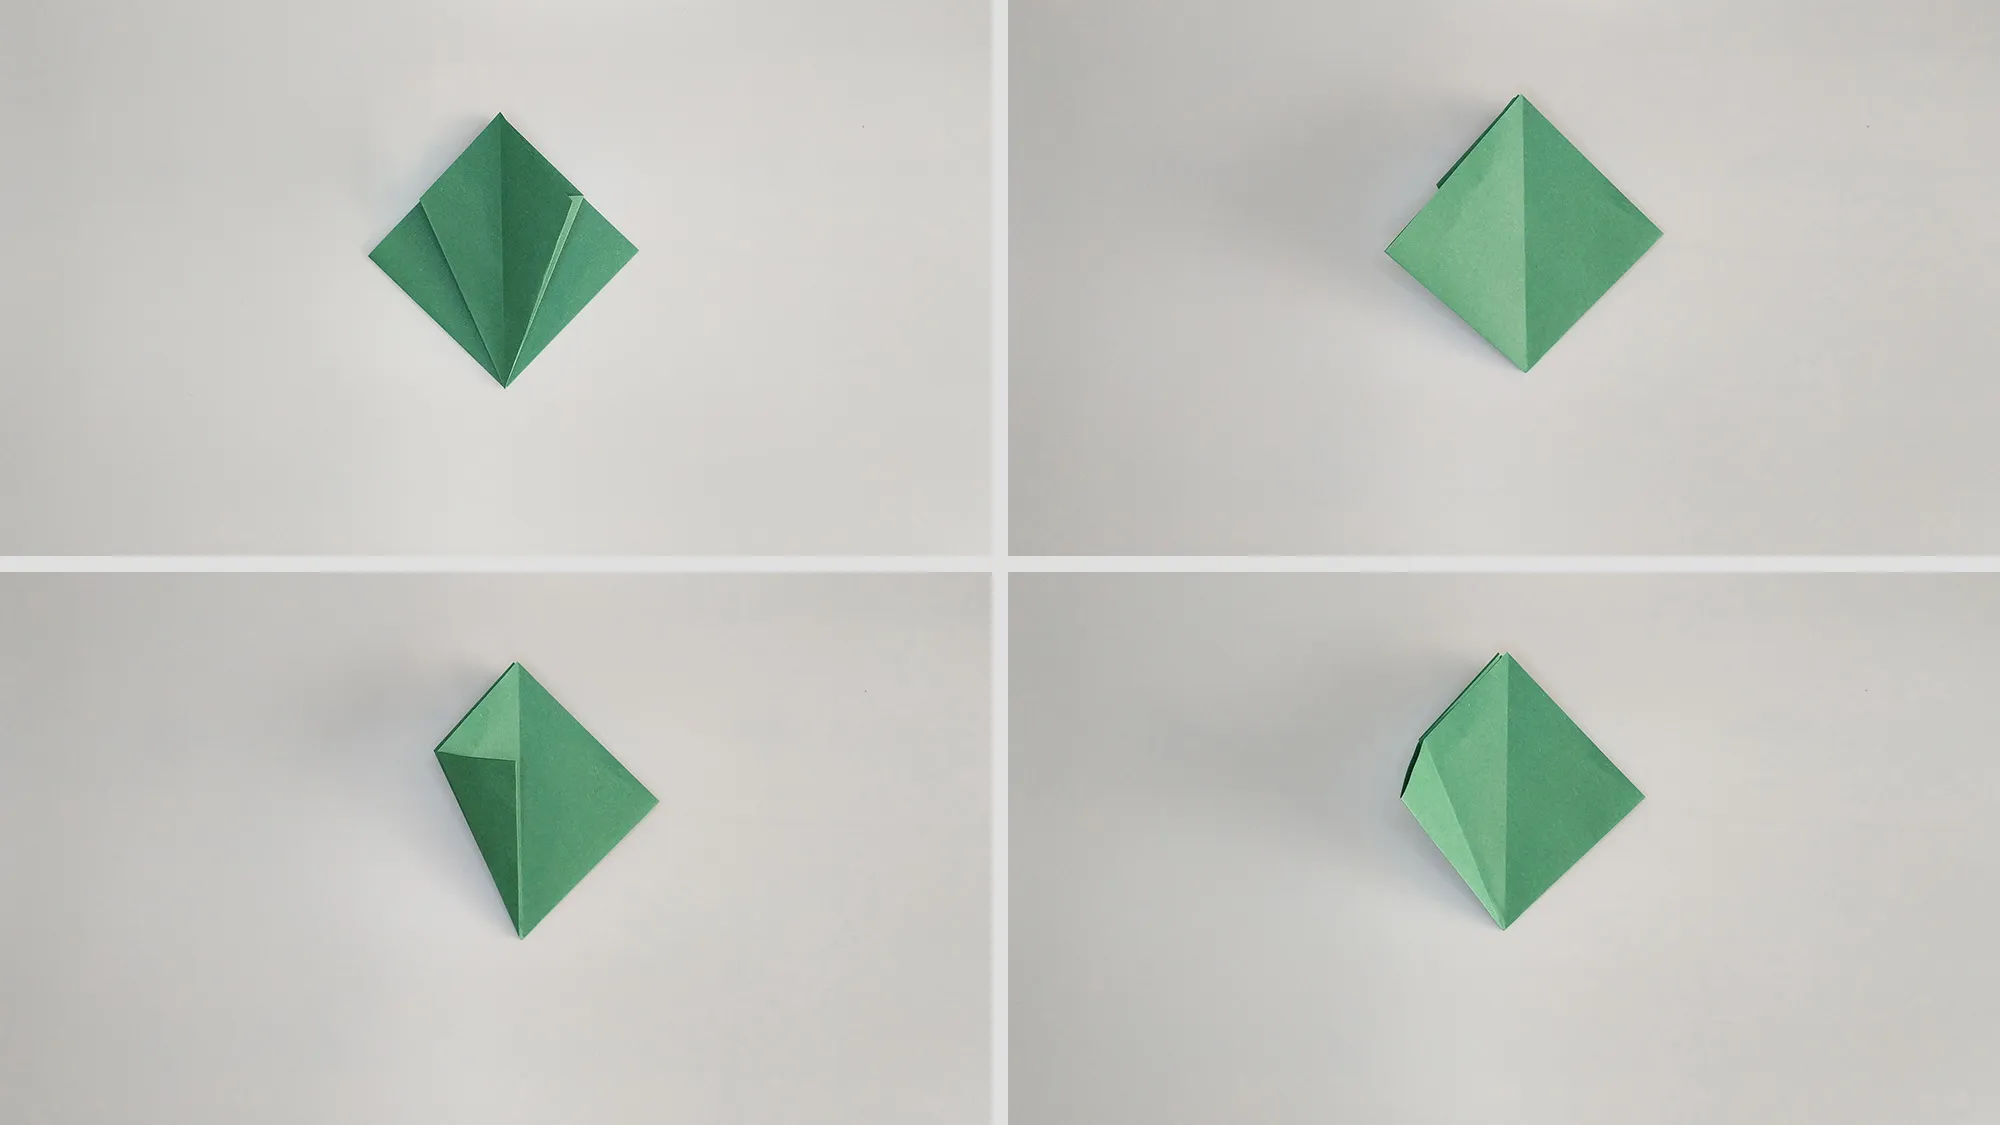
Step 1: First, we create the folding lines.
Origami, Christmas tree, illustration 2
Step 2: Fold the sheet horizontally and vertically.
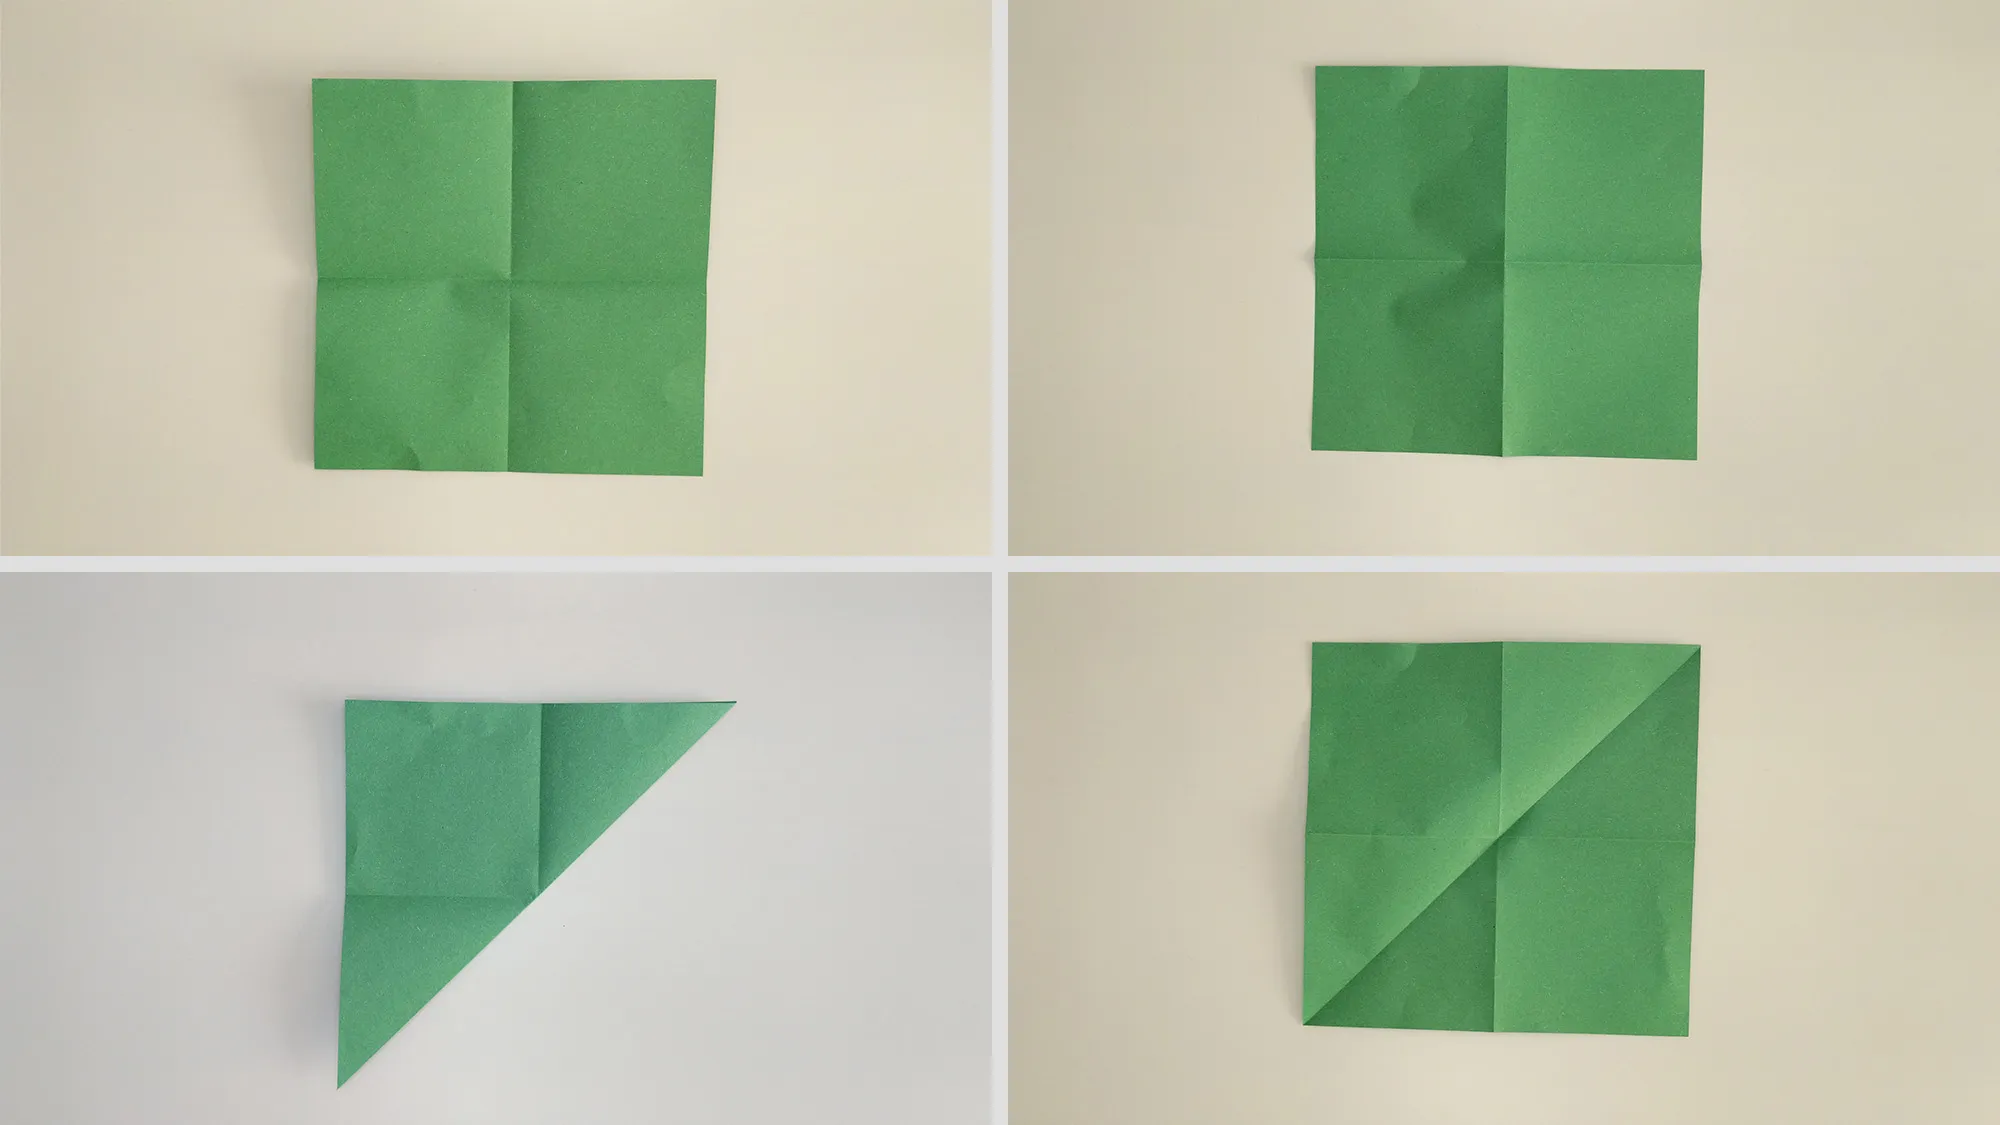
Origami, Christmas tree, Illustration 3
Step 3: Then fold along both diagonals.
Origami, Christmas tree, illustration 4
Step 4: Fold the corners inward as shown in the photo.
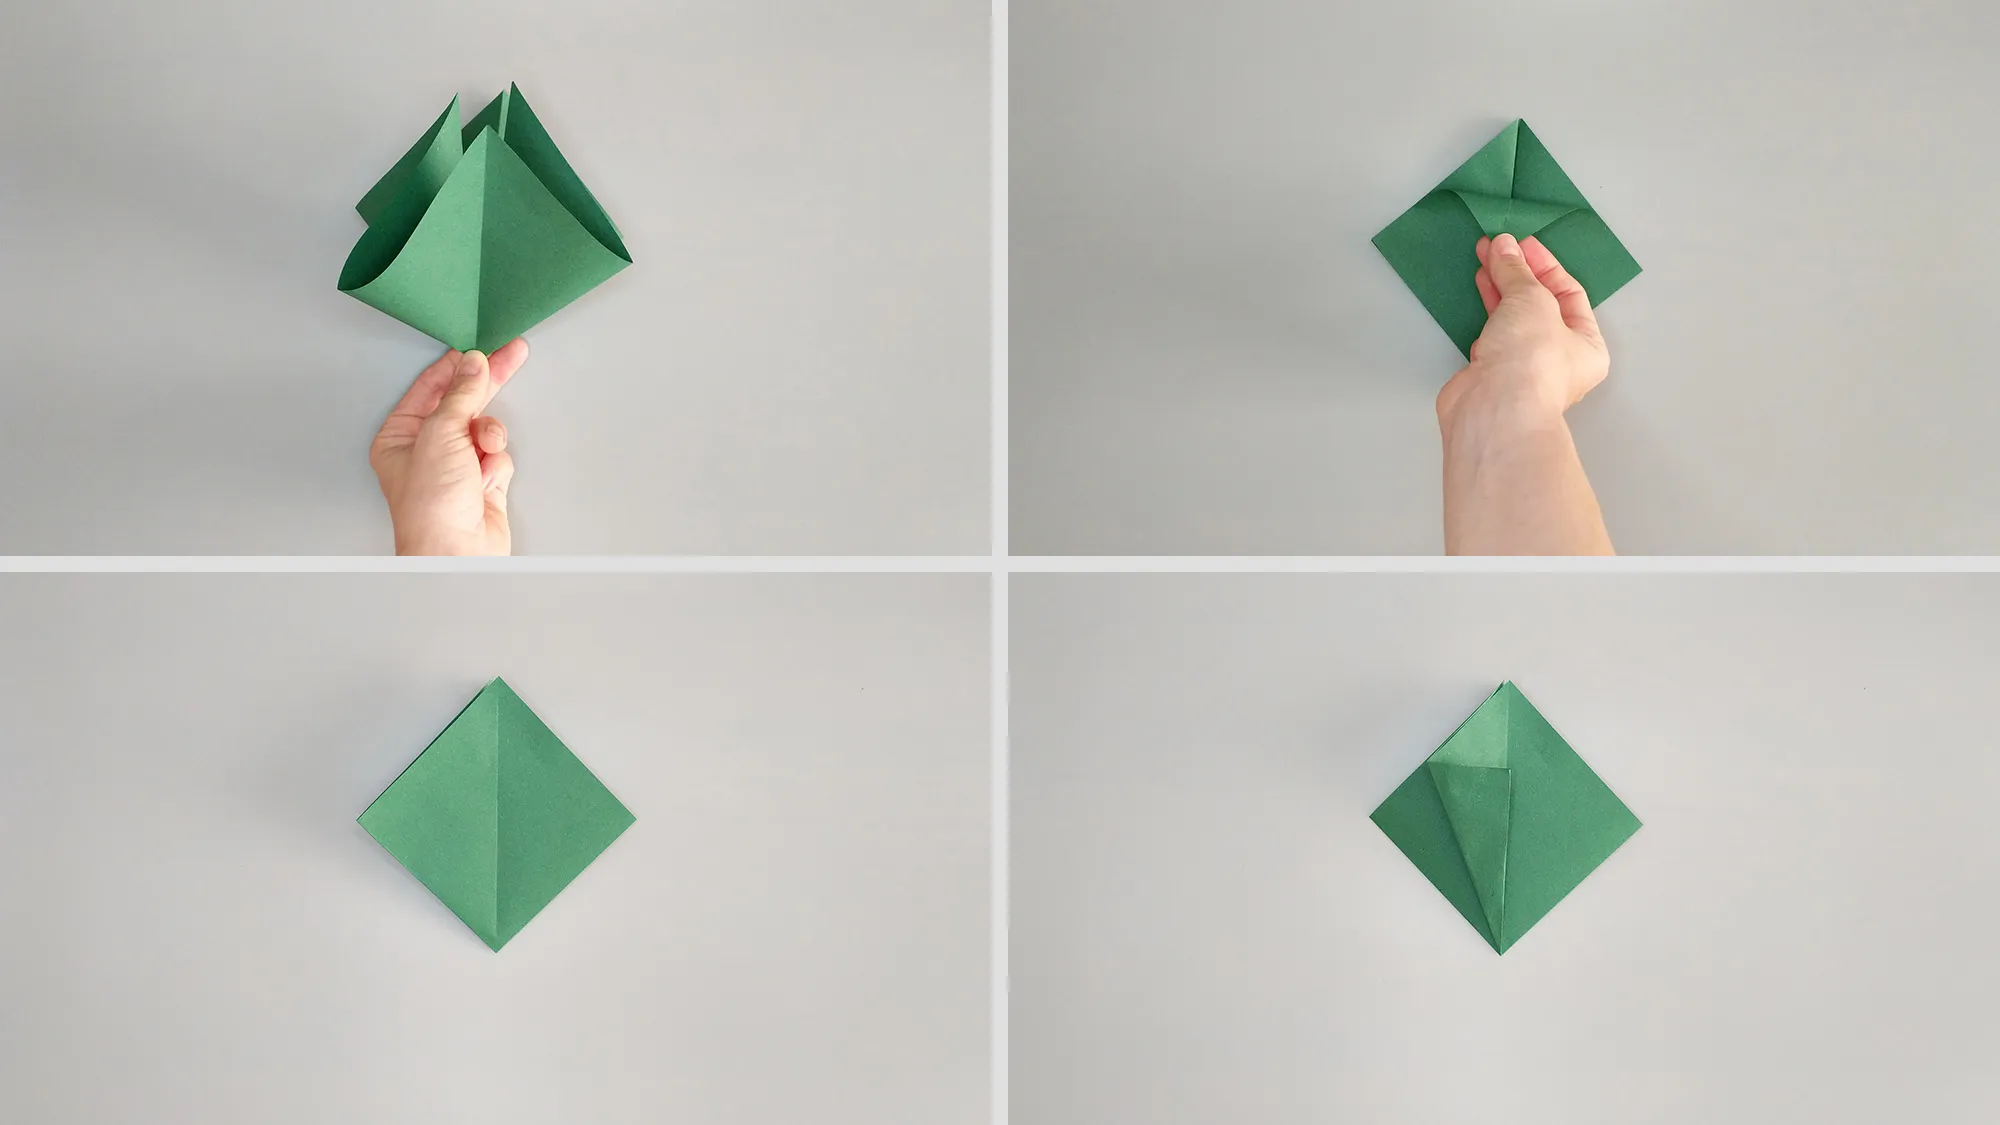
Origami, Christmas tree, illustration 5
Step 5: Our goal is to fold all edges inward.
Origami, Christmas tree, illustration 6
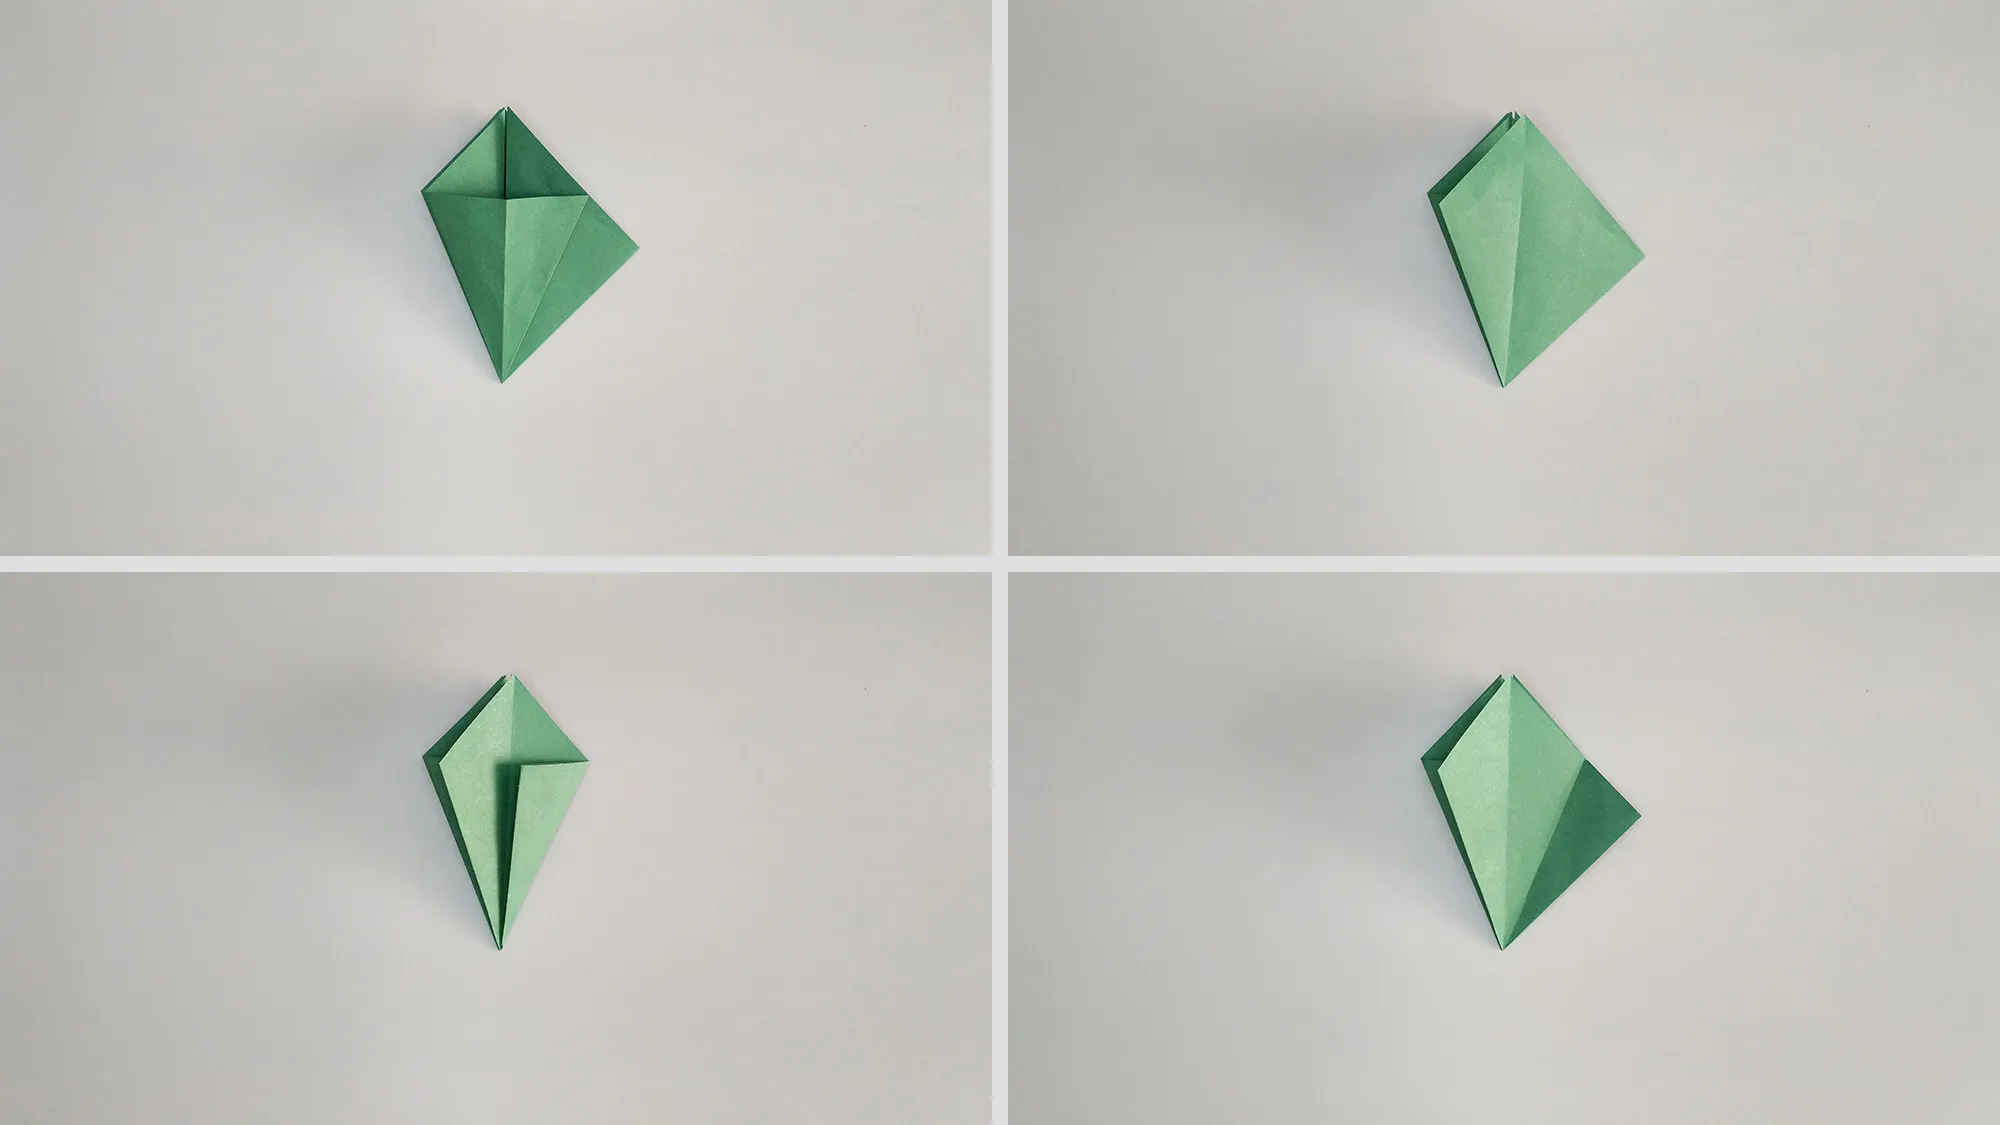
Step 6: First, mark new folding lines and then fold the sides inward along these lines.
Origami, Christmas tree, illustration 7
Step 7: This creates additional sides for your future Christmas tree.
Origami, Christmas tree, illustration 8
Step 8: Fold the edges slowly and carefully. Watch the video to ensure you are folding the edges inward correctly.
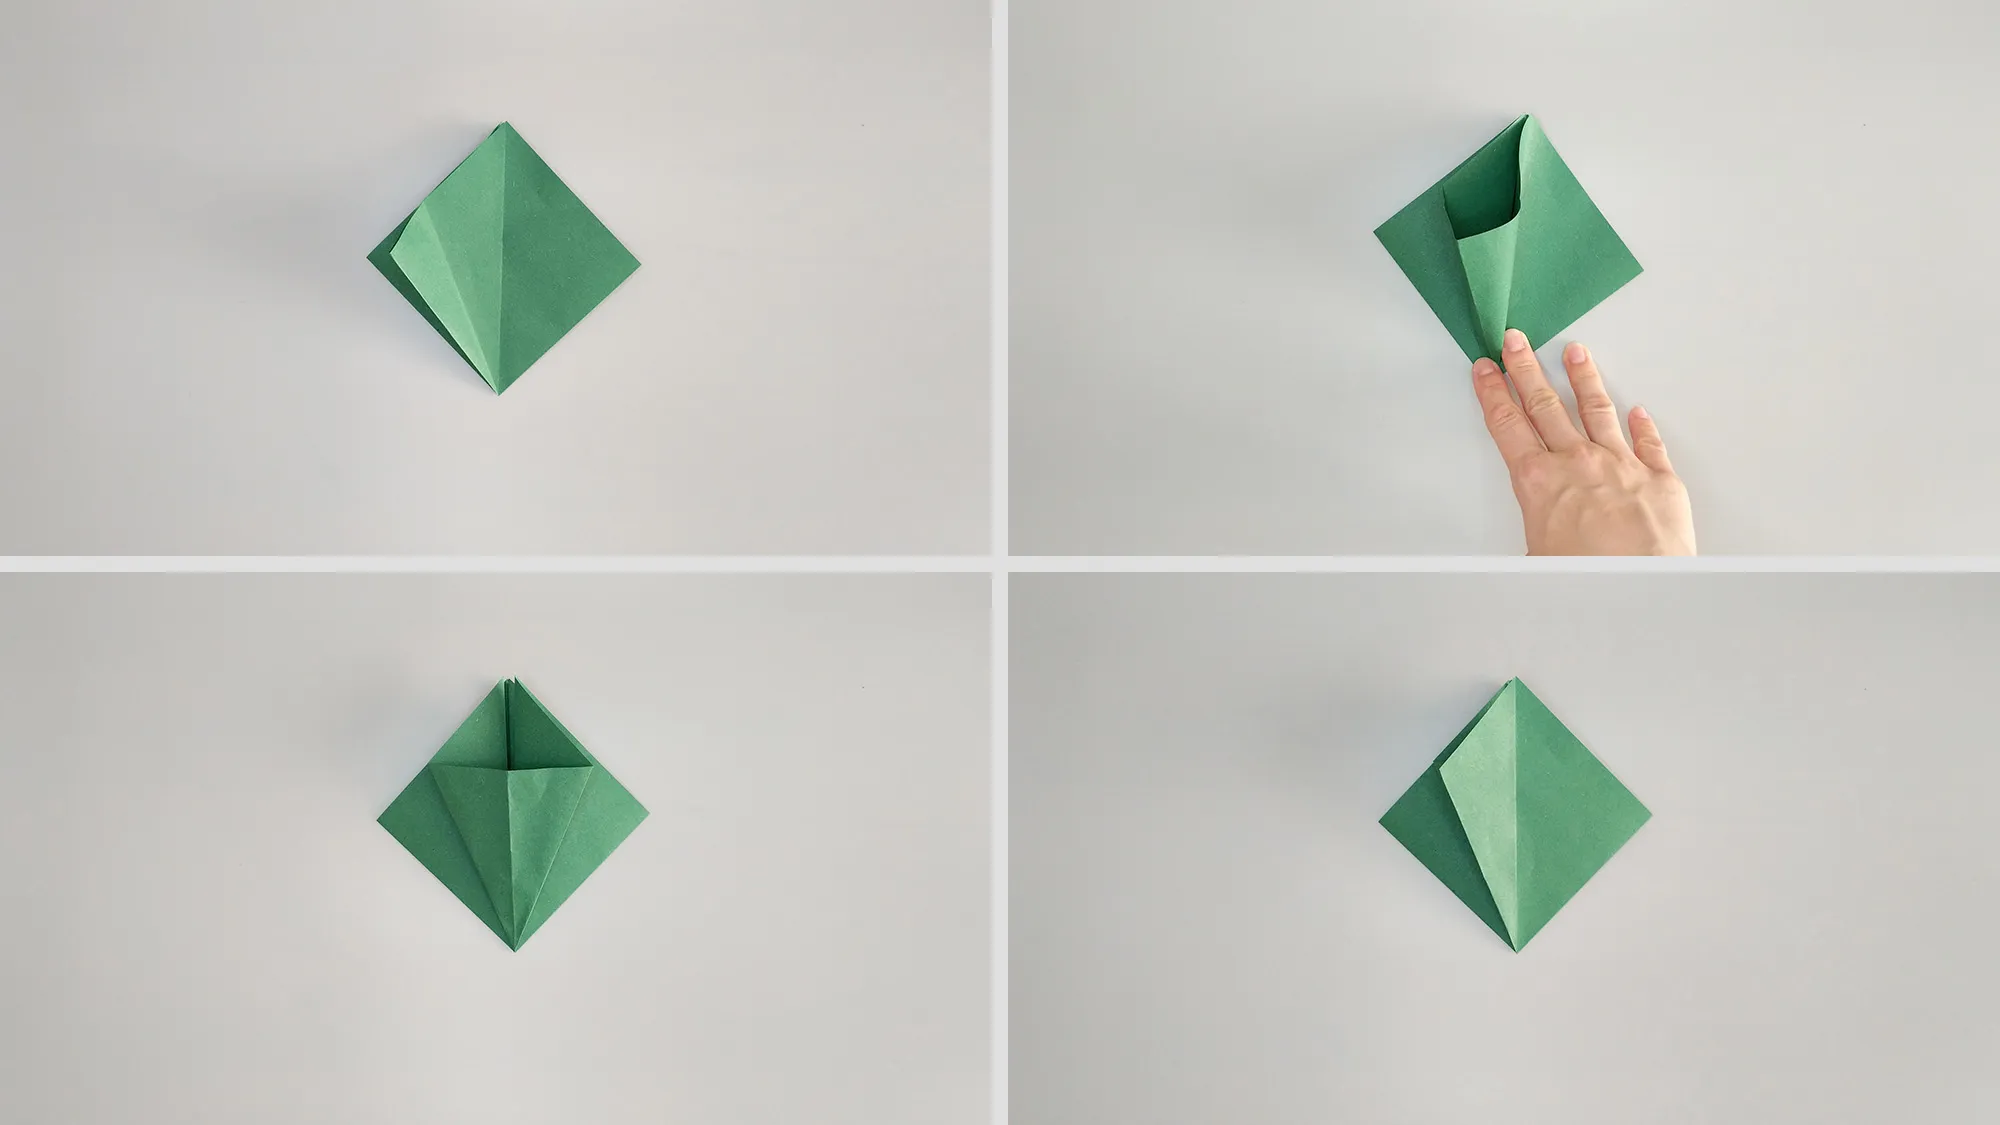
Origami, Christmas tree, Illustration 9
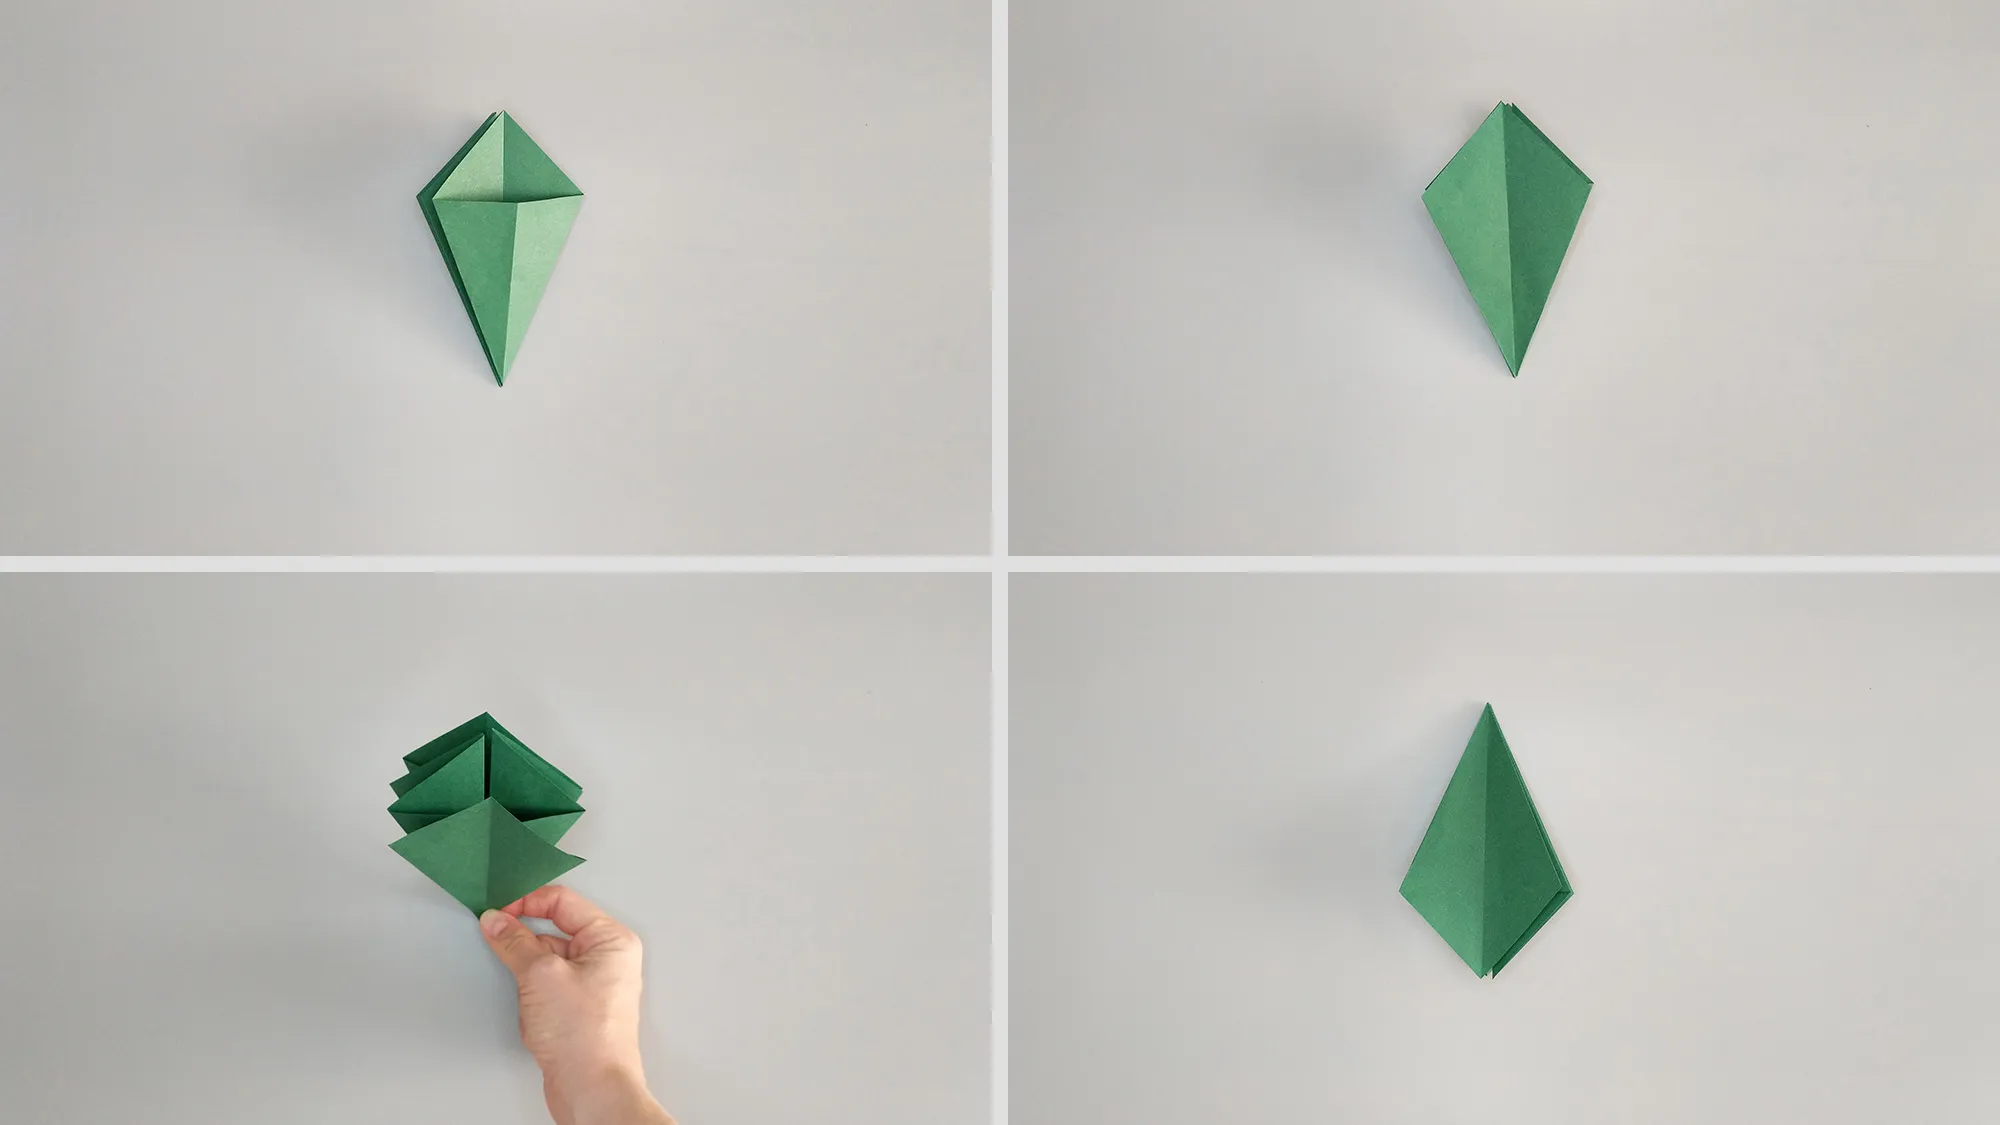
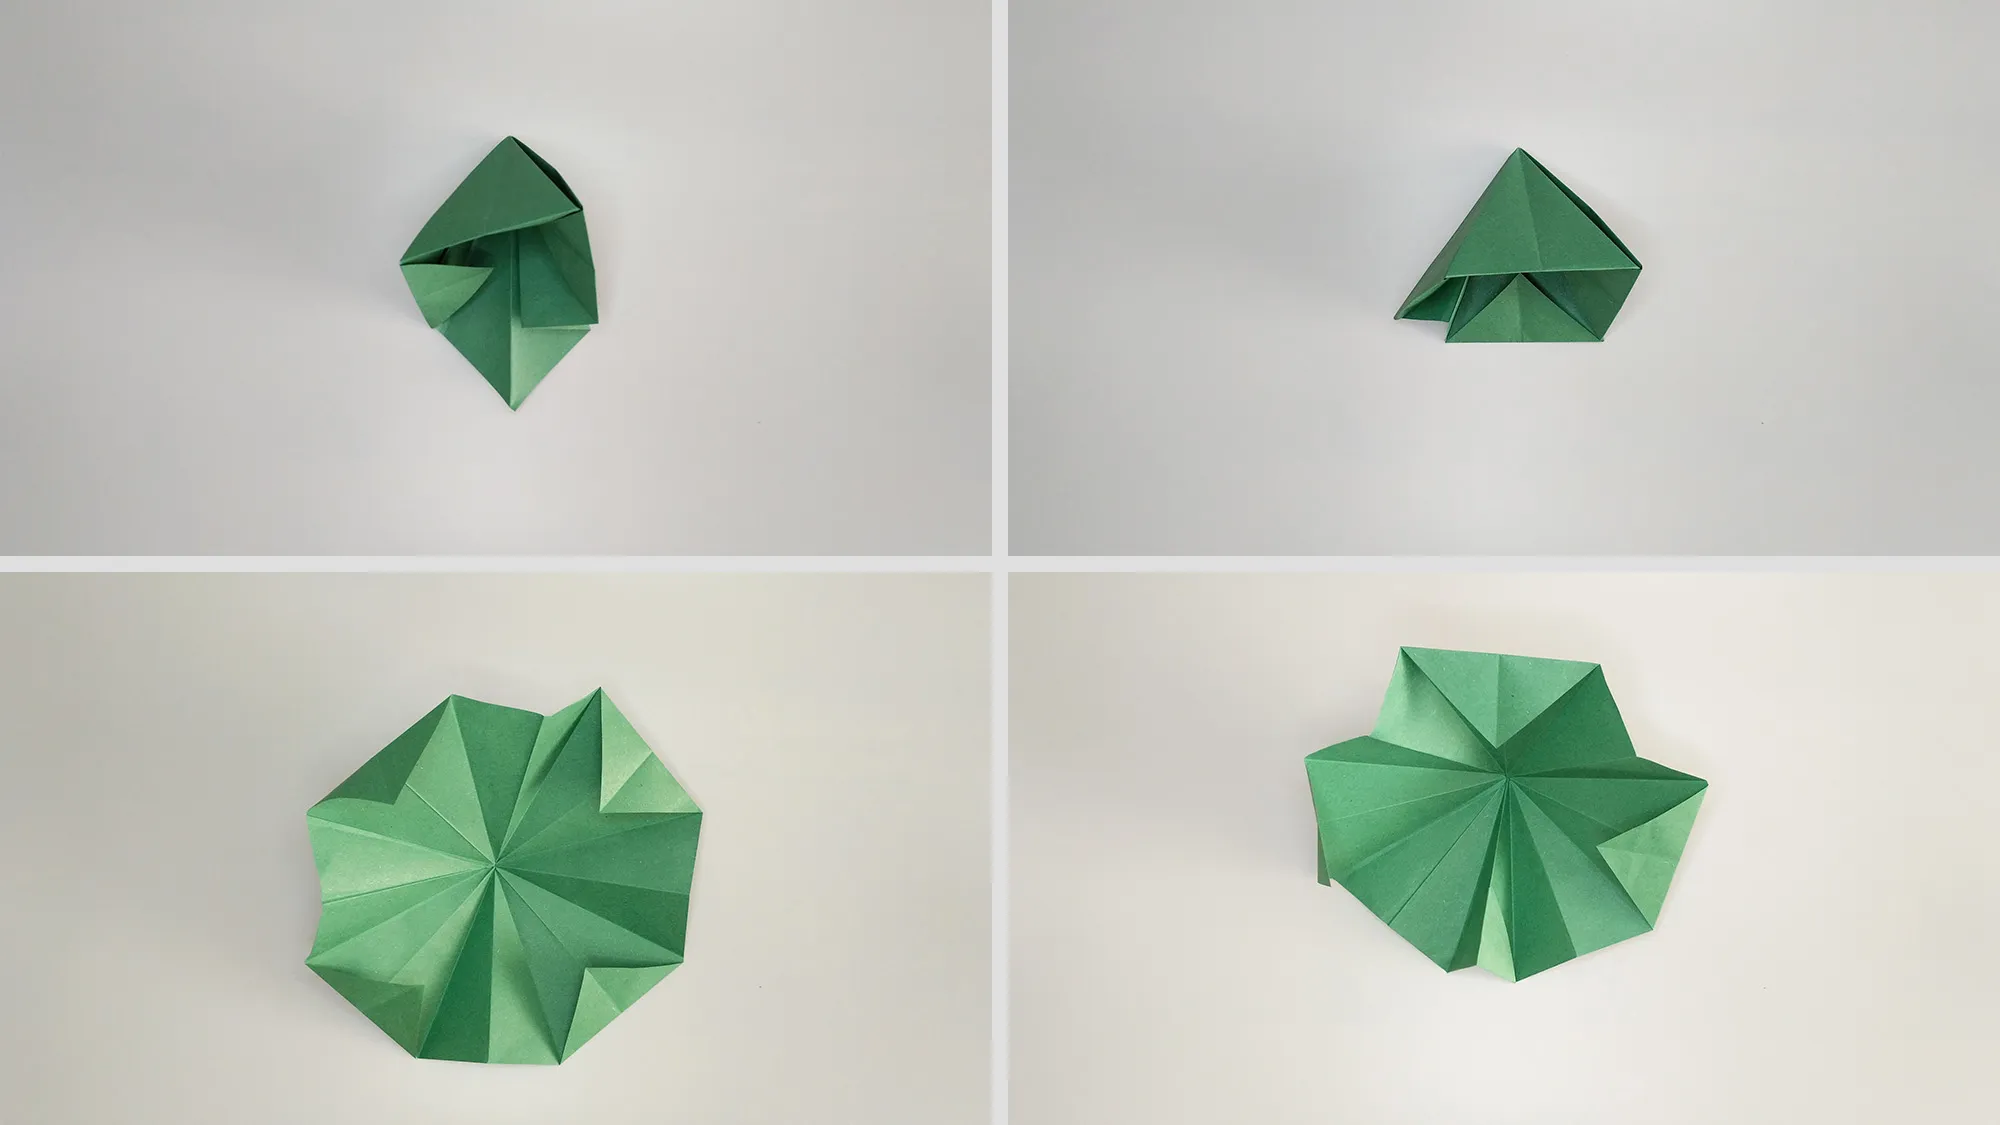
Step 9: Congratulations, half of the work is done! However, in this form, our little tree cannot stand yet due to the pointed bottom part.
Origami, Christmas tree, illustration 10
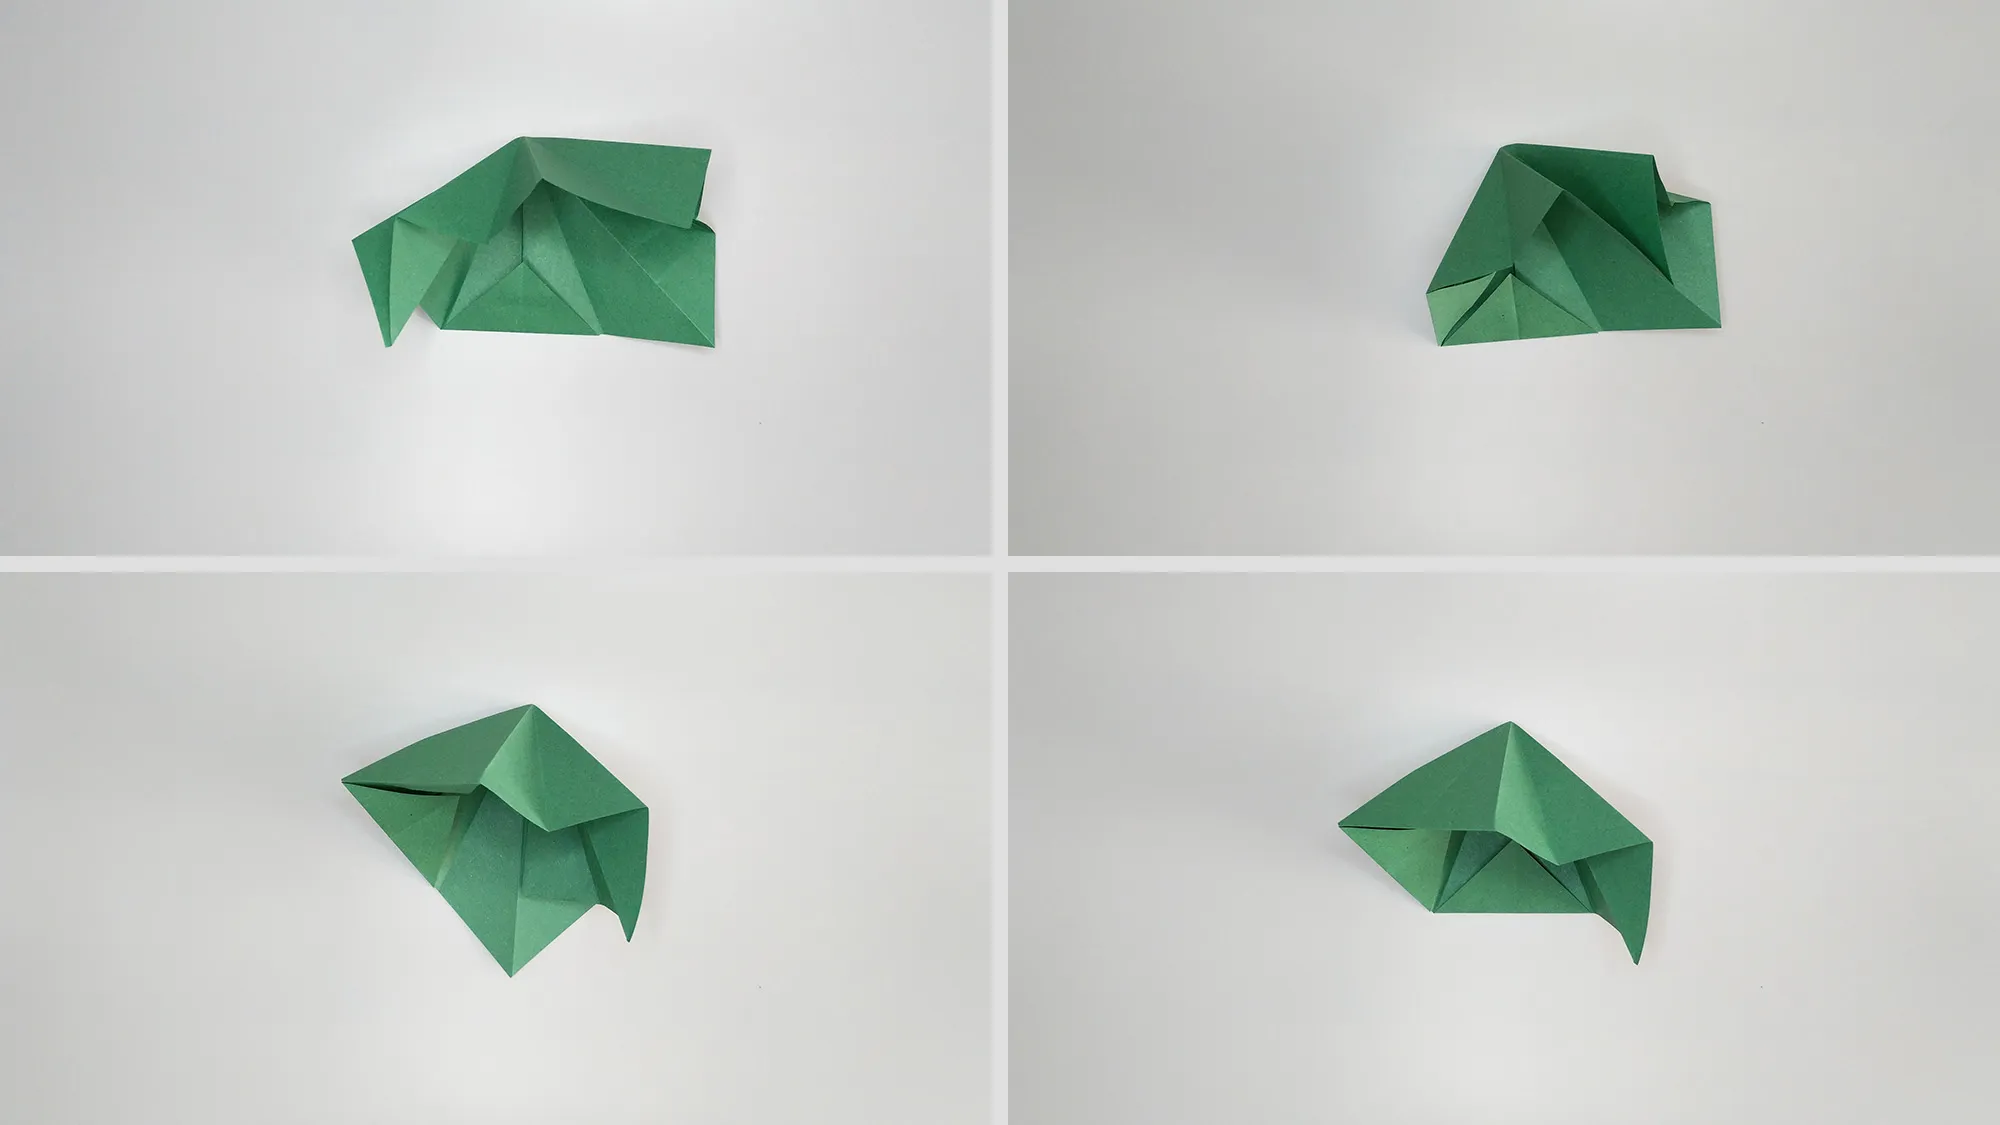
Step 10: To remove this pointed part, unfold the sheet slightly and fold the edges inward gently.
Origami, Christmas tree, Illustration 11
Step 11: Fold the edges inward step by step without missing any.
Origami, Christmas tree, Illustration 12
Step 12: Fold the pointed corners inward, leaving the blunt corners out.
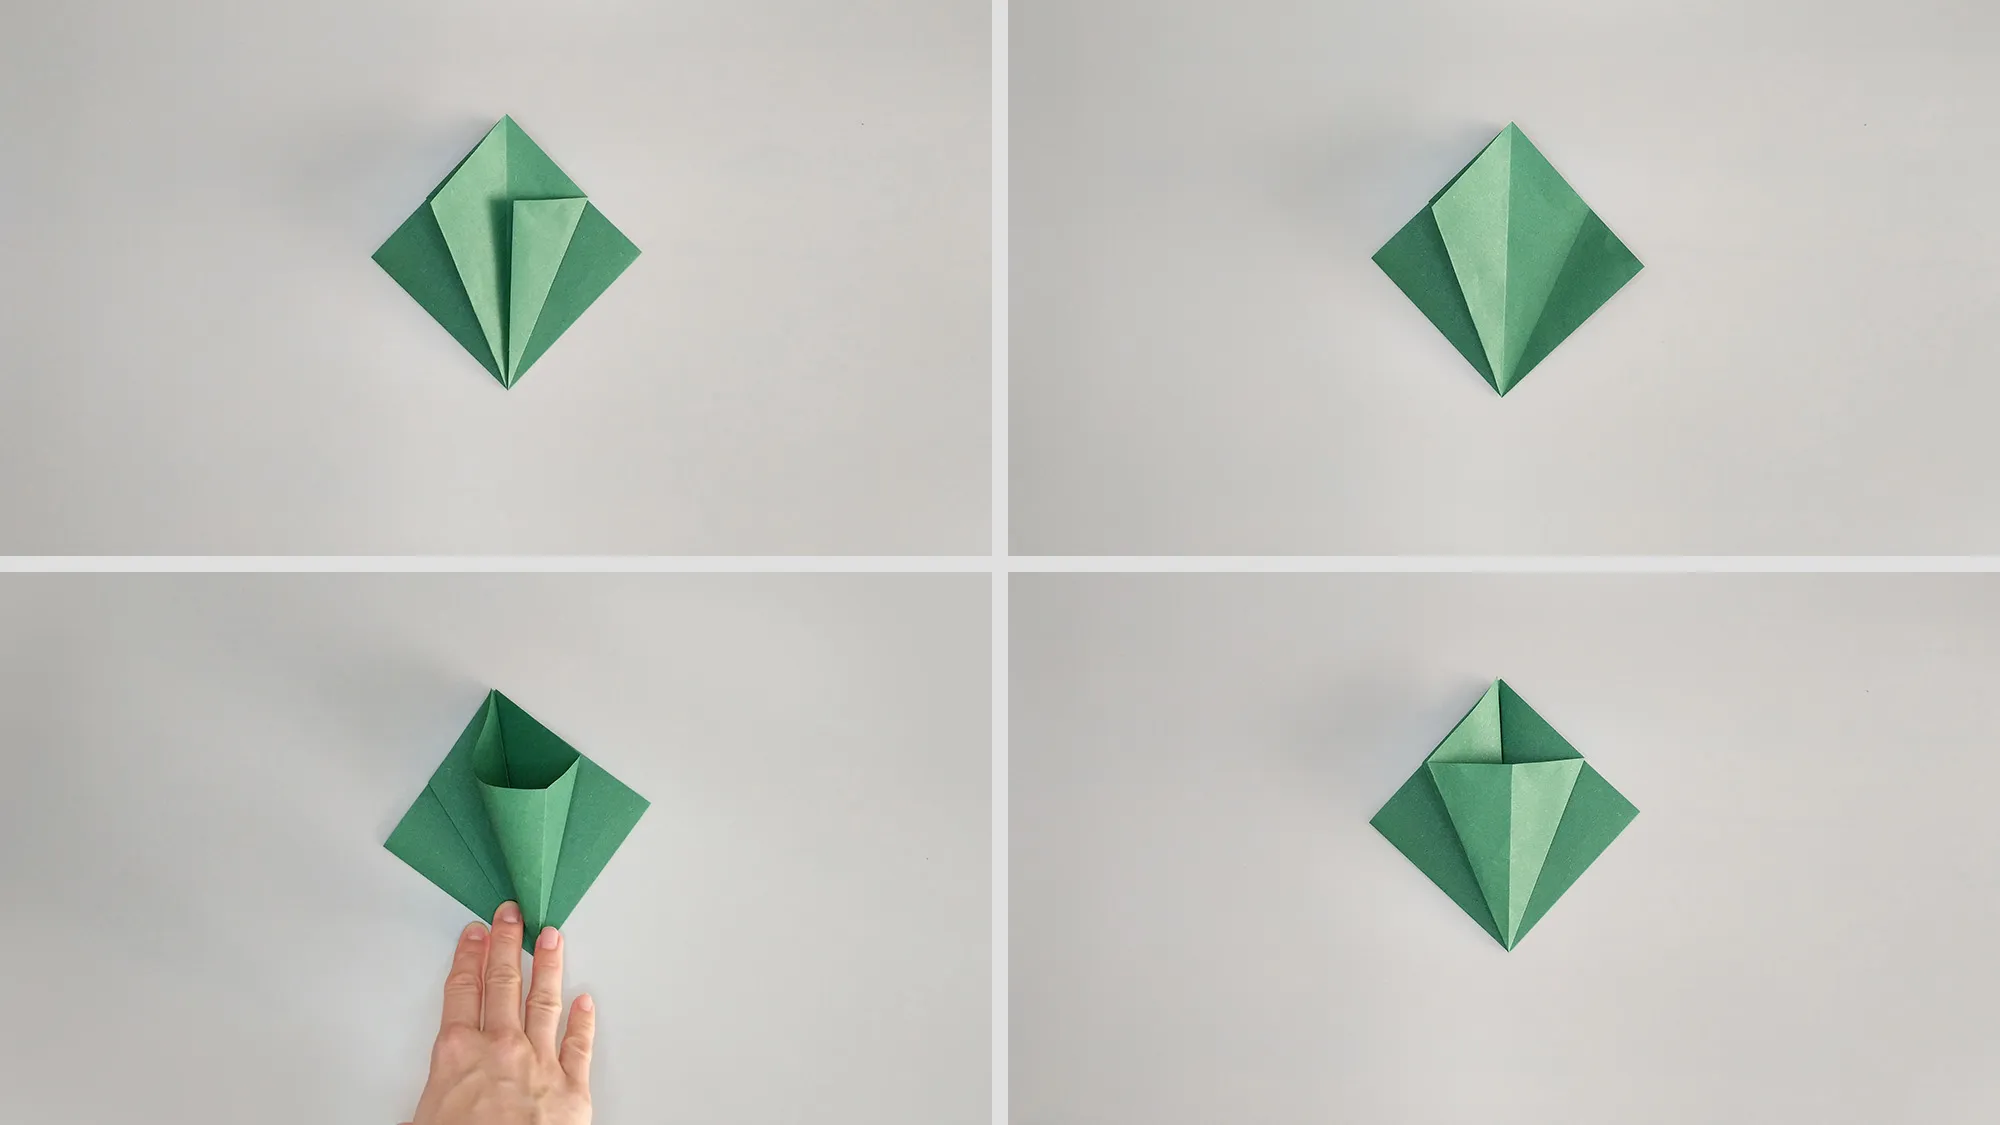
Origami, Christmas tree, Illustration 13
Step 13: Fold the model back to the position it was in a few steps ago. Now your little tree can stand on its own.
Origami, Christmas tree, illustration 14
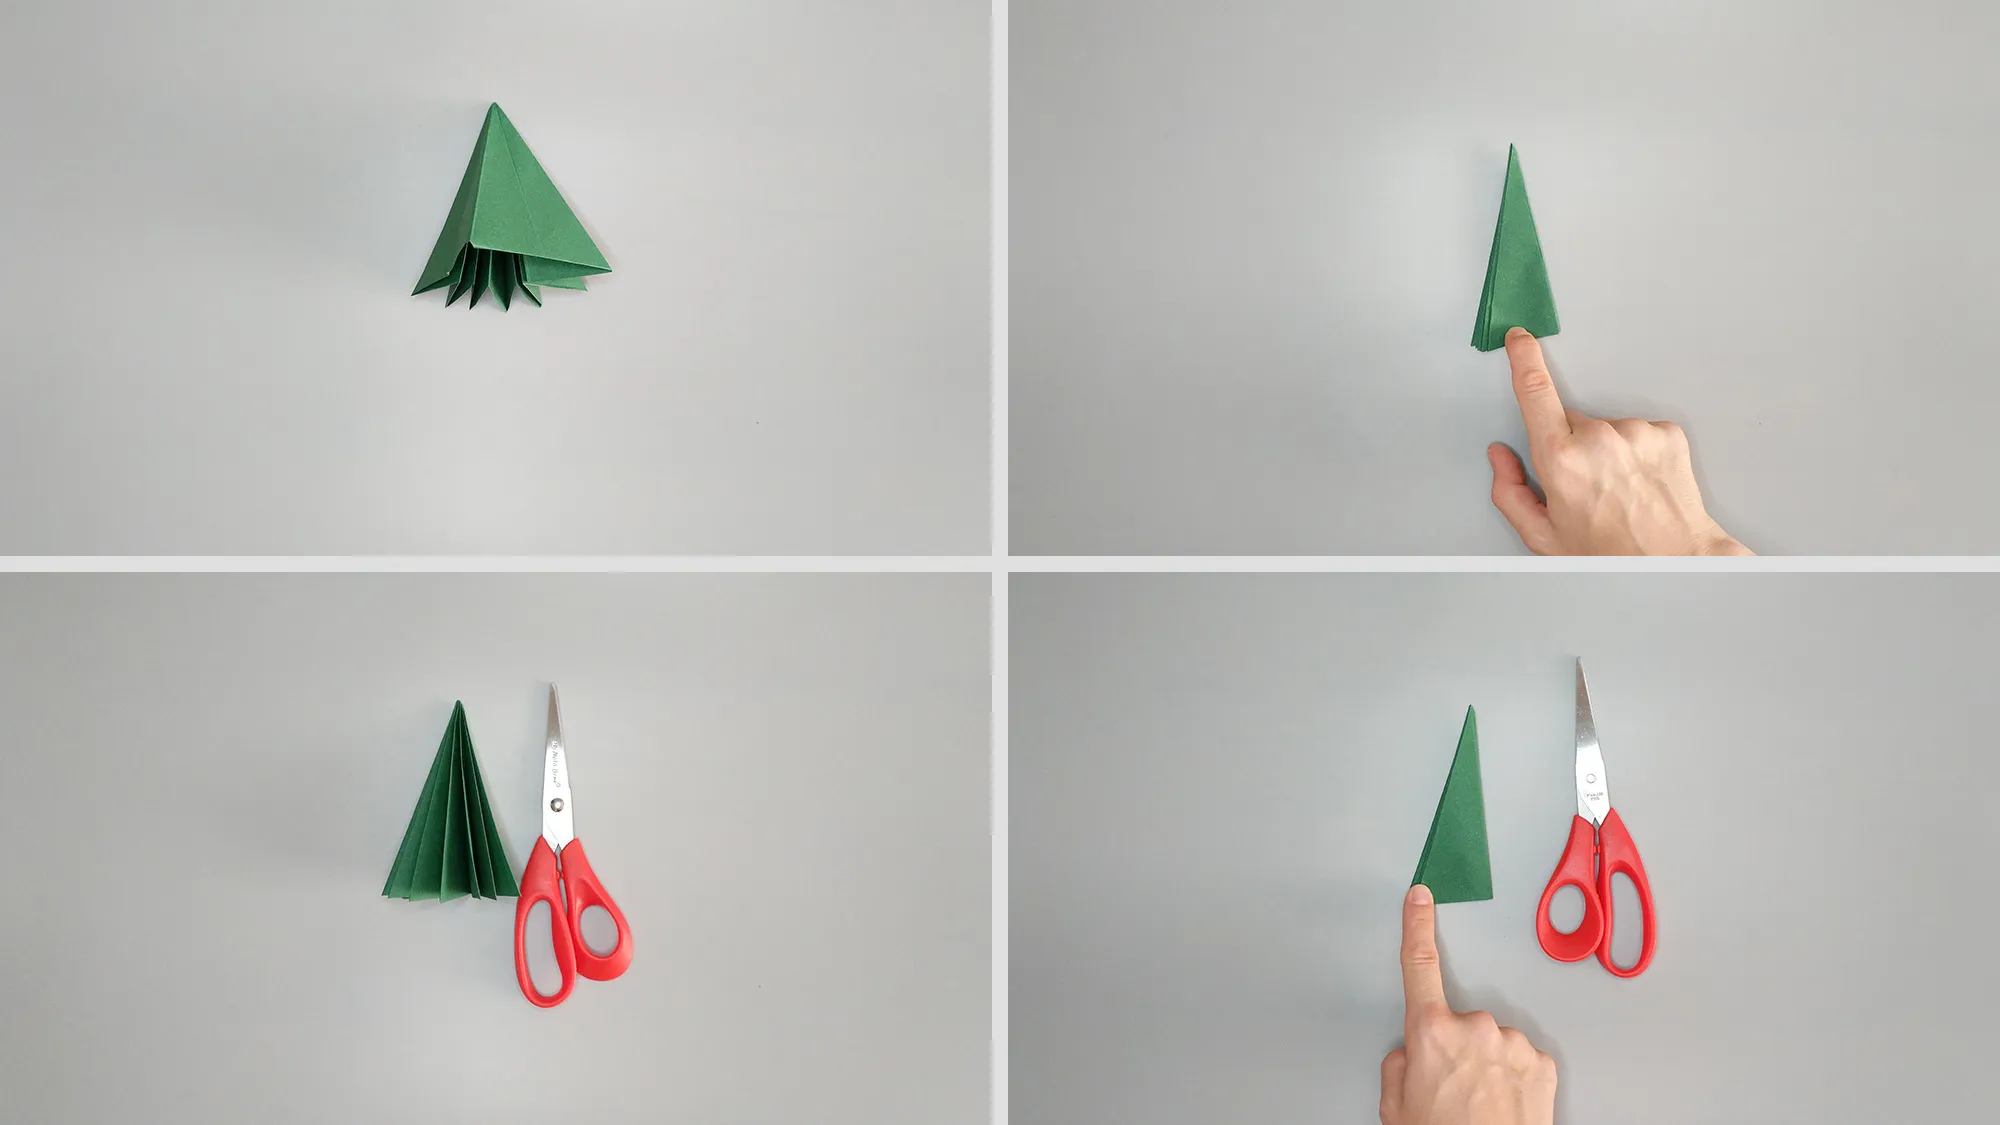
Step 14: Fold all sides together and grab a pair of scissors.
Origami, Christmas tree, Illustration 15
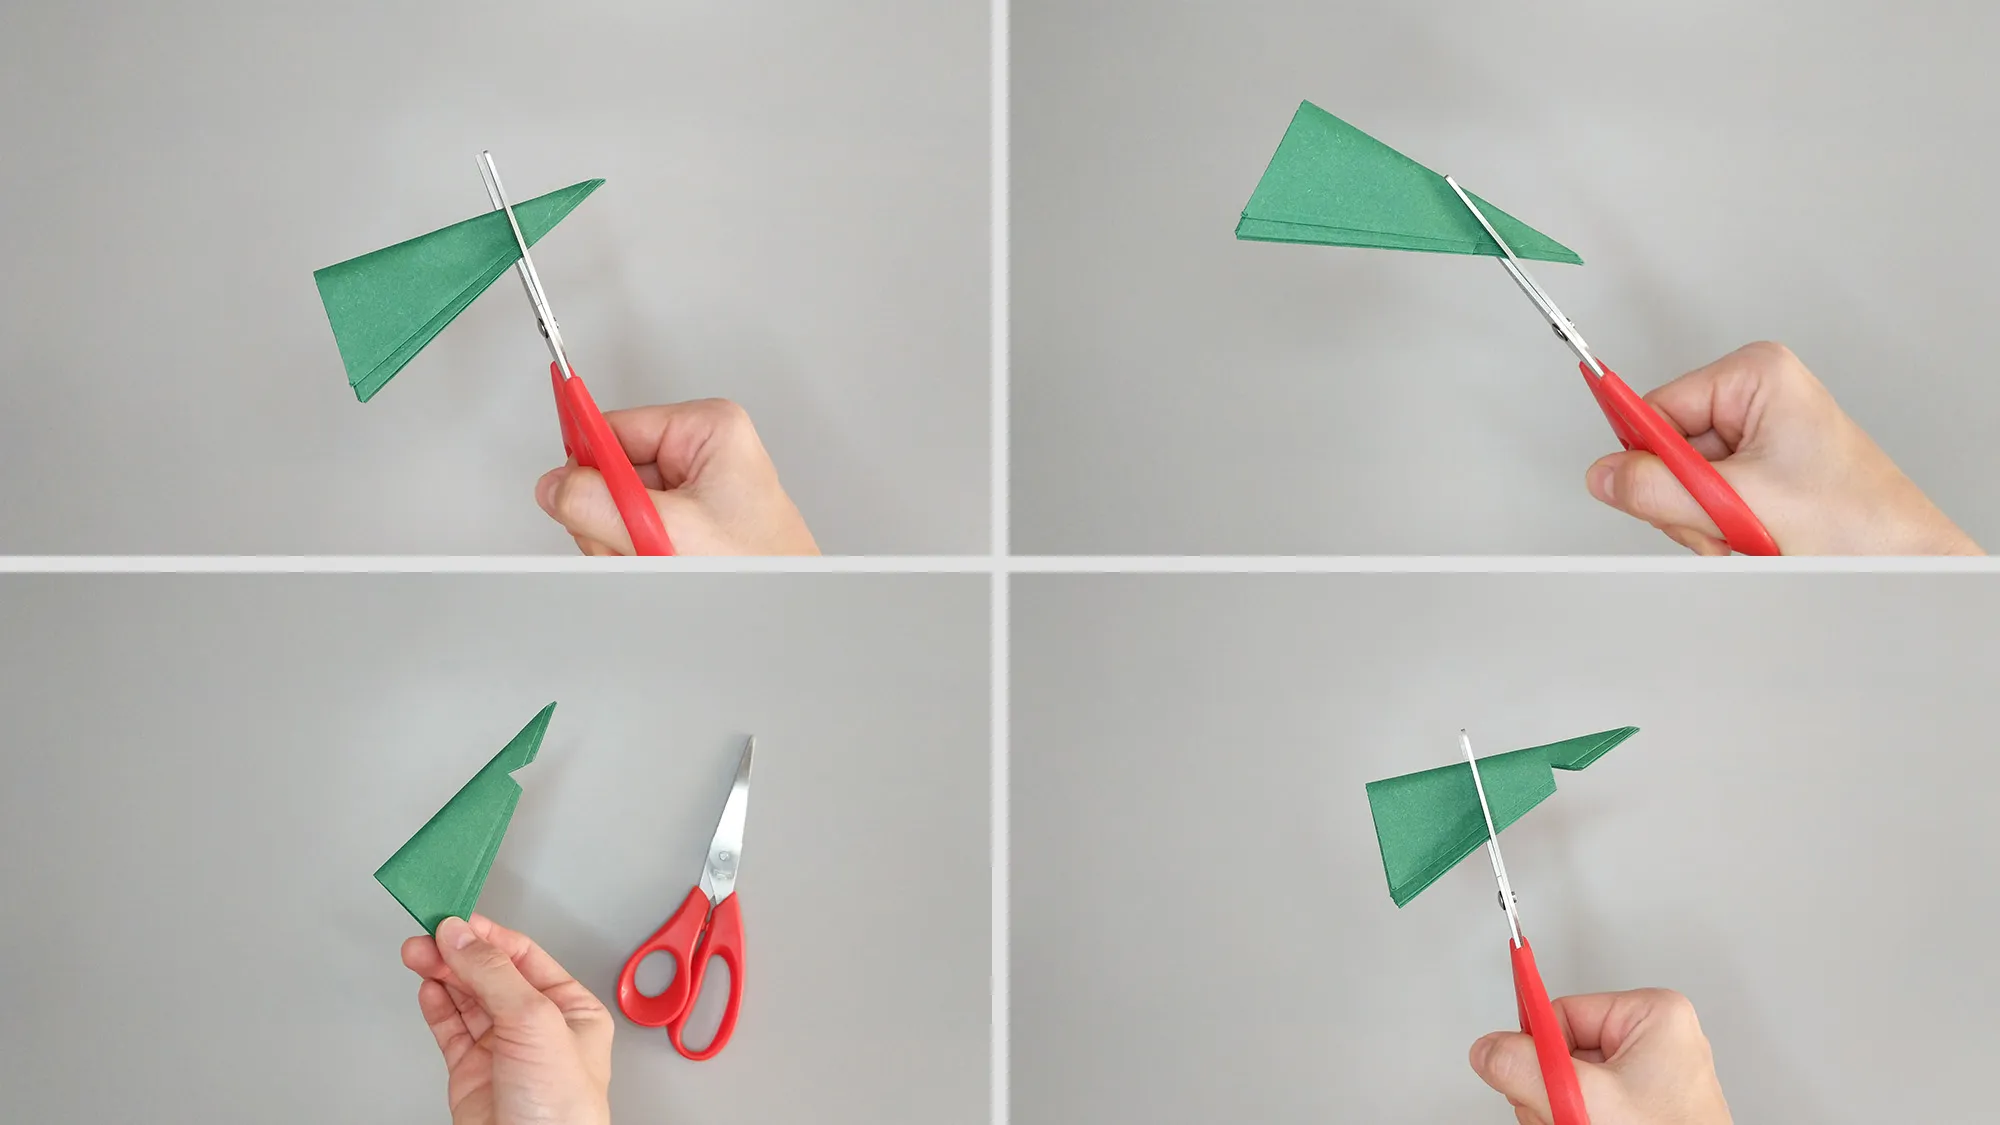
Step 15: Cut out tree silhouettes along the hypotenuse.
Origami, Christmas tree, Illustration 16
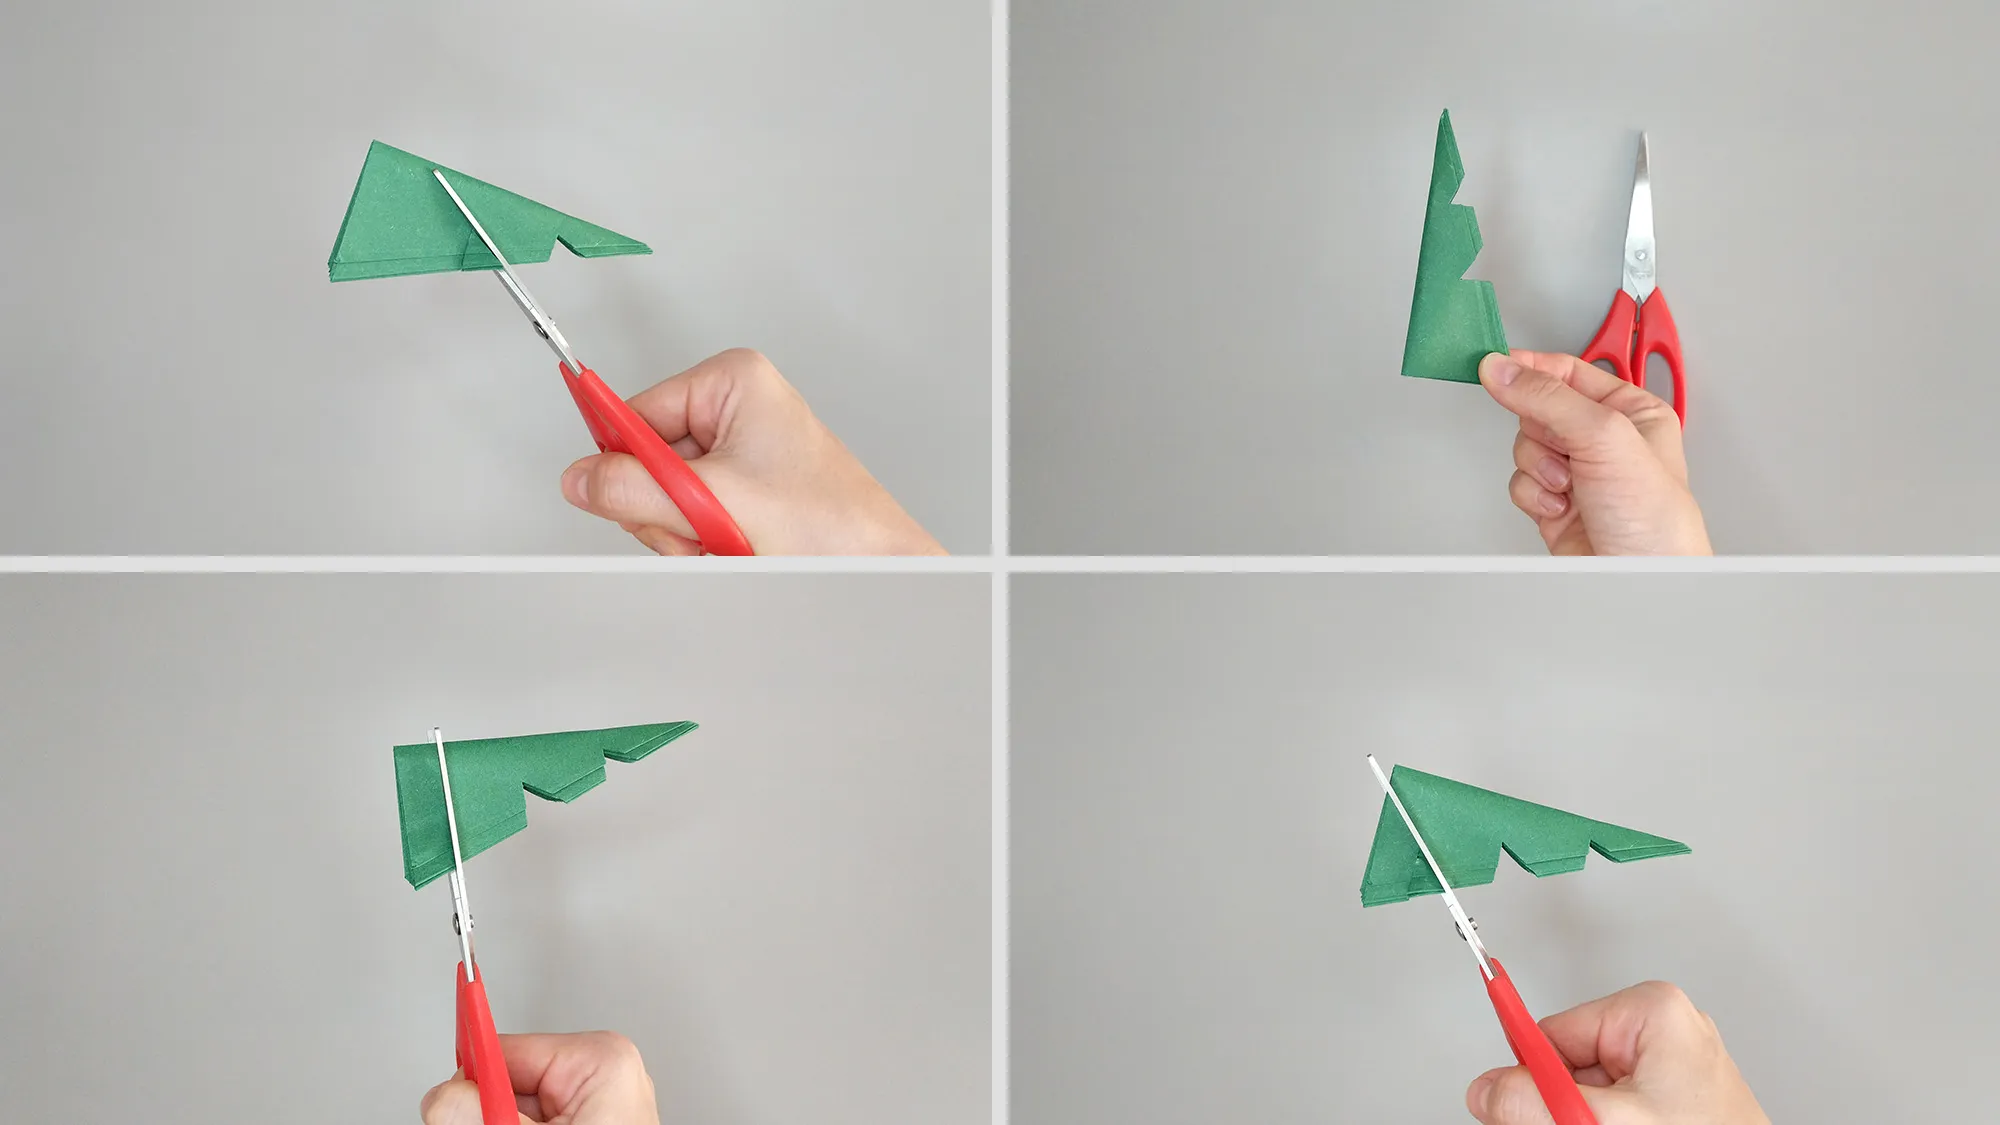
Step 16: I recommend cutting out at least 3 tree silhouettes, but you can make more if you wish.
Origami, Christmas tree, illustration 17
Step 17: Finish cutting. Unfold your tree. Done! You did it, I'm happy we did it together!

Conclusion

Thank you for your interest in Origami Christmas Trees! We are delighted that you are enthusiastic about this magical art of folding. If you have completed this project with your child, we congratulate both of you on your success! Why not continue? We offer numerous origami video tutorials and other crafting activities with children. Explore the diverse world of paper folding art with us!

Folding origami Christmas tree easy tutorial ๐ŸŽ„

Published on by Vitalii Shynakov
Published on: From Vitalii Shynakov
Vitalii Shynakov has been working in the areas of online retail, marketing and customer satisfaction since 2012. Until 2022, he was the head of personnel development and online sales department of four successful stores. He has been part of the TutKit.com team since 2024.