Craft idea: Christmas tree decoration in the shape of a star
Christmas and New Year are a wonderful time full of magic and joy. A great way to feel the holiday spirit is to craft Christmas decorations together with your child. This fosters creativity and helps to spend time cheerfully and meaningfully. This creates family traditions that transform the holidays into magical memories for a lifetime.
Christmas crafts are particularly popular because they offer the opportunity to showcase creativity and create something unique with your own hands. According to a recent survey, 78% of people believe that homemade decorations add a special festive atmosphere to their homes. Furthermore, 65% of parents are convinced that crafting together as a whole family helps bring them closer and create warm memories. So, let's give it a try too!
Making a Christmas Star for the Tree
I will show you how to make a Christmas tree ornament - a star to decorate your tree. A wonderful decoration with a simple manufacturing process that leaves a radiant impression. I recommend doing this activity with children aged 6 and older. Some adult assistance may be required in certain steps.
Before we begin, let's agree on some simple safety rules:
- Hot glue: Only adults should use it. Keep it away from children's hands to avoid burns.
- Scissors: Let the child use only safe scissors under your supervision.
Remember, safety is a top priority. We want the process of making the star to bring only joy and pleasure!
Materials for Making the Christmas Star for the Tree
To make the star, you will need:
- Cardboard (can be packaging cardboard)
- Twine or jute string for wrapping
- Scissors
- Hot glue
- Paints (white or a color of your choice)
- Decorative elements: pine cones, berries, pine branches, beads, etc.
Have you gathered all the materials? Great! Now you are well-equipped and ready to work wonders!
Step-by-step Guide with Photos for Making the Christmas Star for the Tree
To ensure your success, we have prepared a step-by-step guide for you. But before you start crafting Christmas ornaments with your child, we recommend watching the short video. You may see some details there that are not visible in the photos.
Step 1: Preparing the Materials
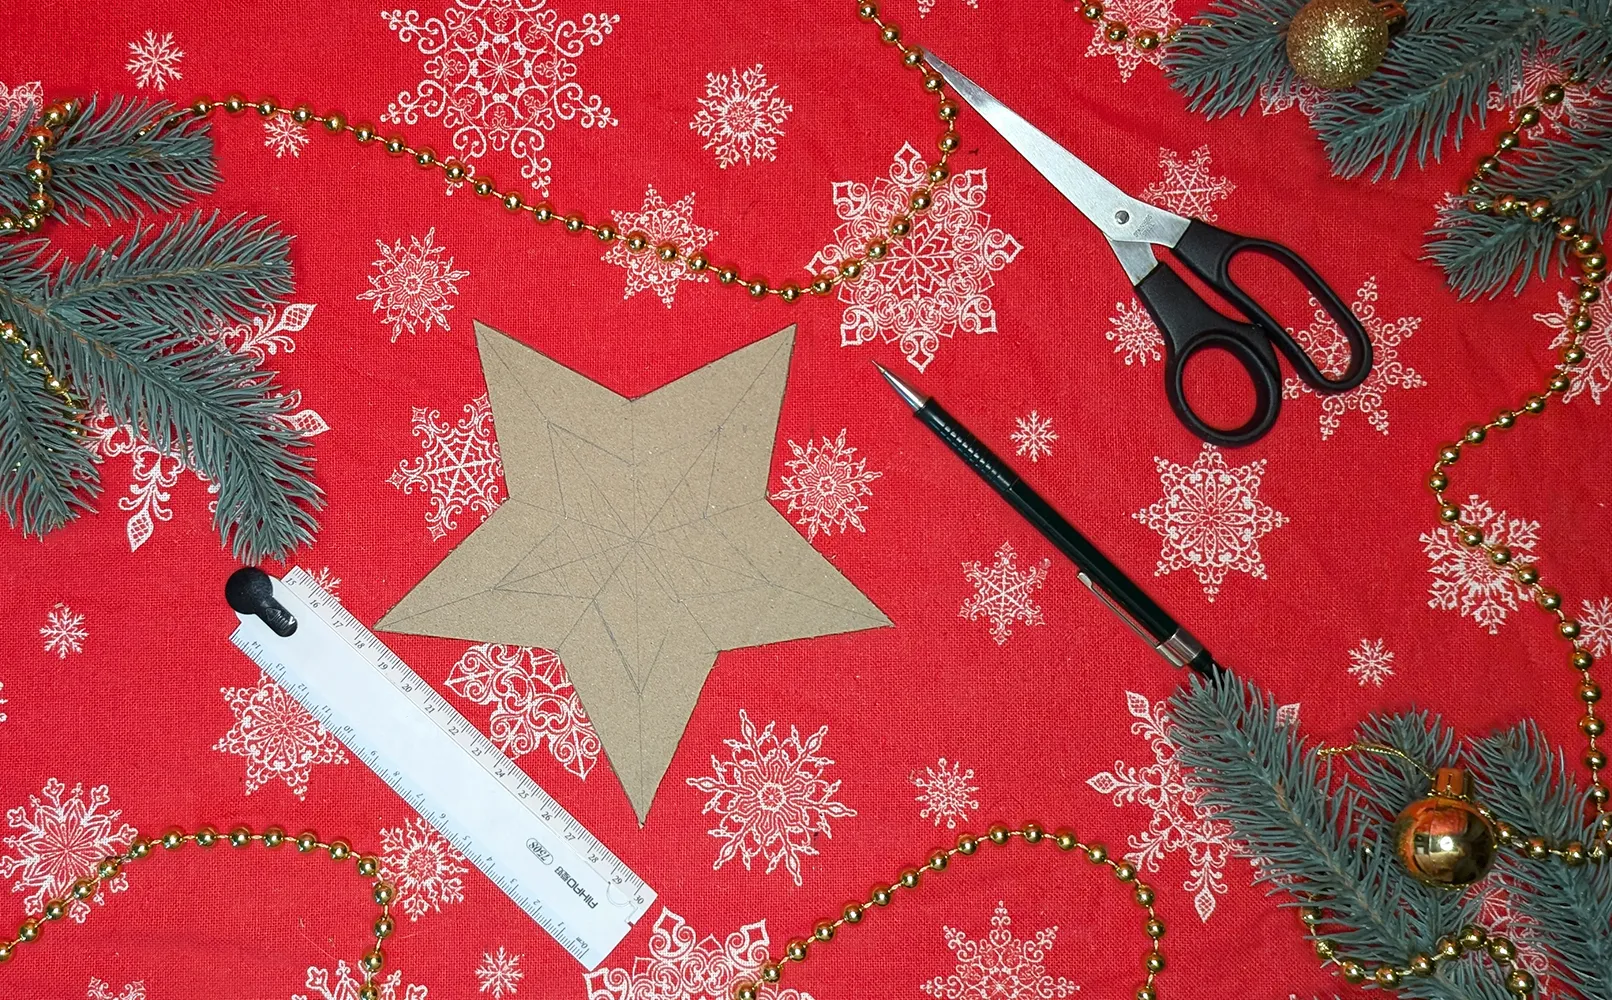
Let's start with the simplest step - preparation. Lay out all the materials in front of you like a true master. Choose the decoration you like and set it aside. Take the cardboard, a ruler, and a pencil. It's time to draw our future star! Don't worry if it's not perfect on the first try - that's the charm of handmade work.
Step 2: Cutting out the Inner Part of the Star
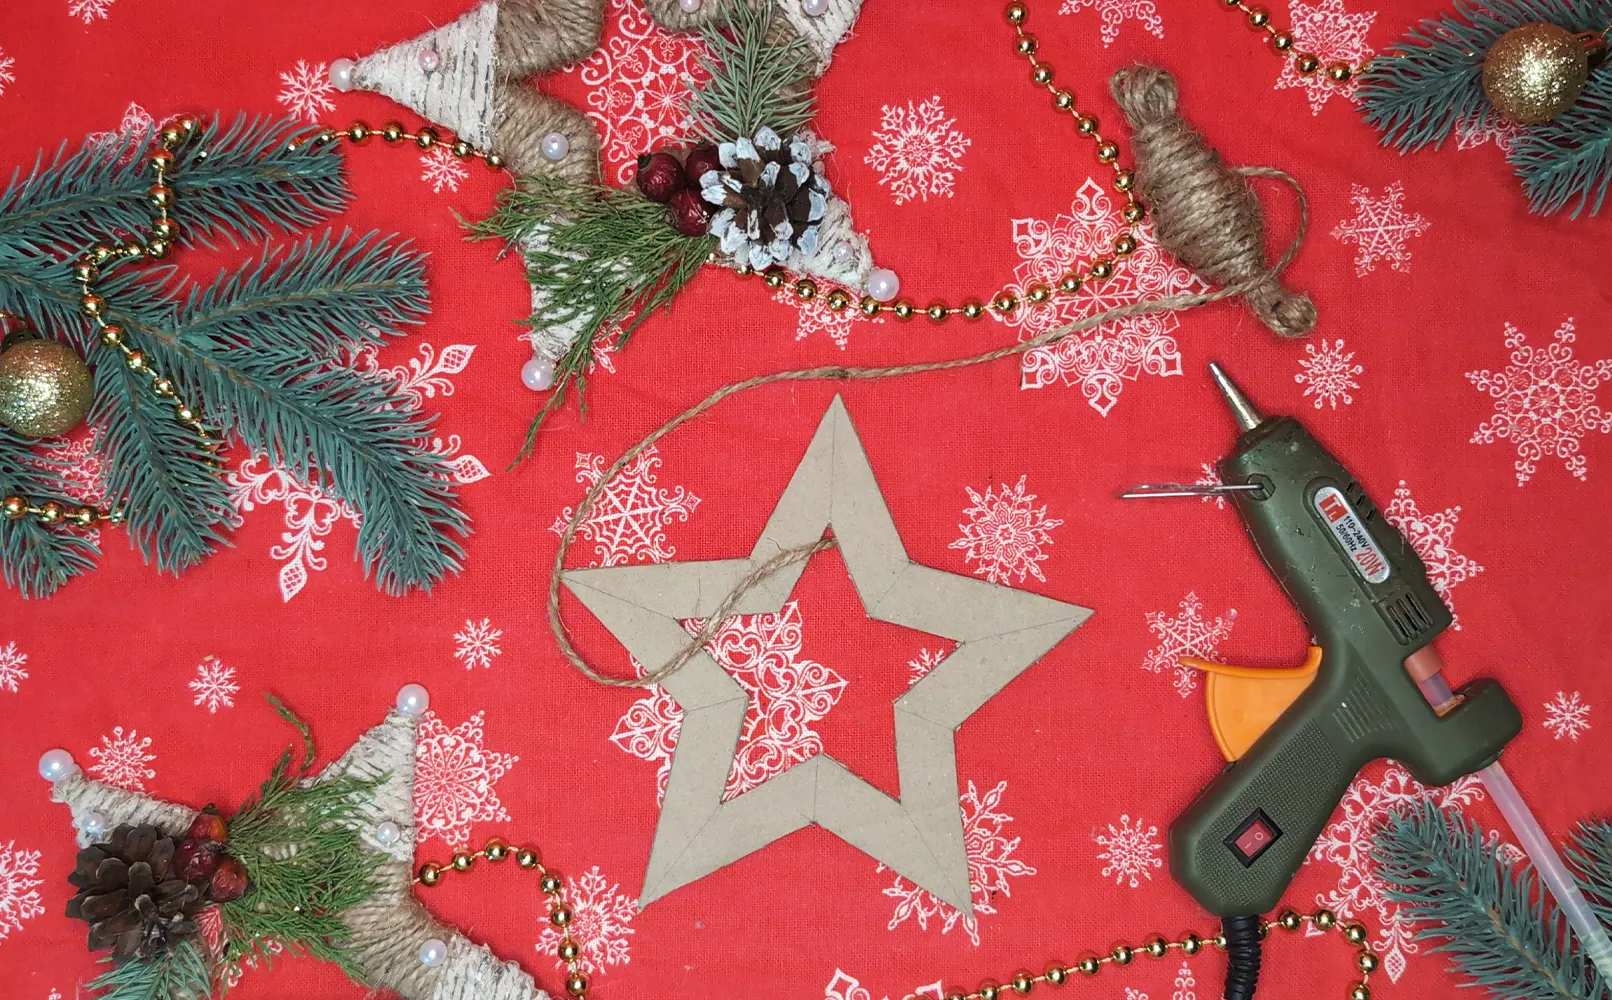
Great, the base is ready! The next step is to make our star more interesting. Draw a smaller star inside the cut-out cardboard star, about 3-4 cm away from the edge. Do you have a frame? Wonderful! Carefully cut out the inner part, leaving only the star-shaped frame.
Step 3: Wrapping the Inner Part of the Star
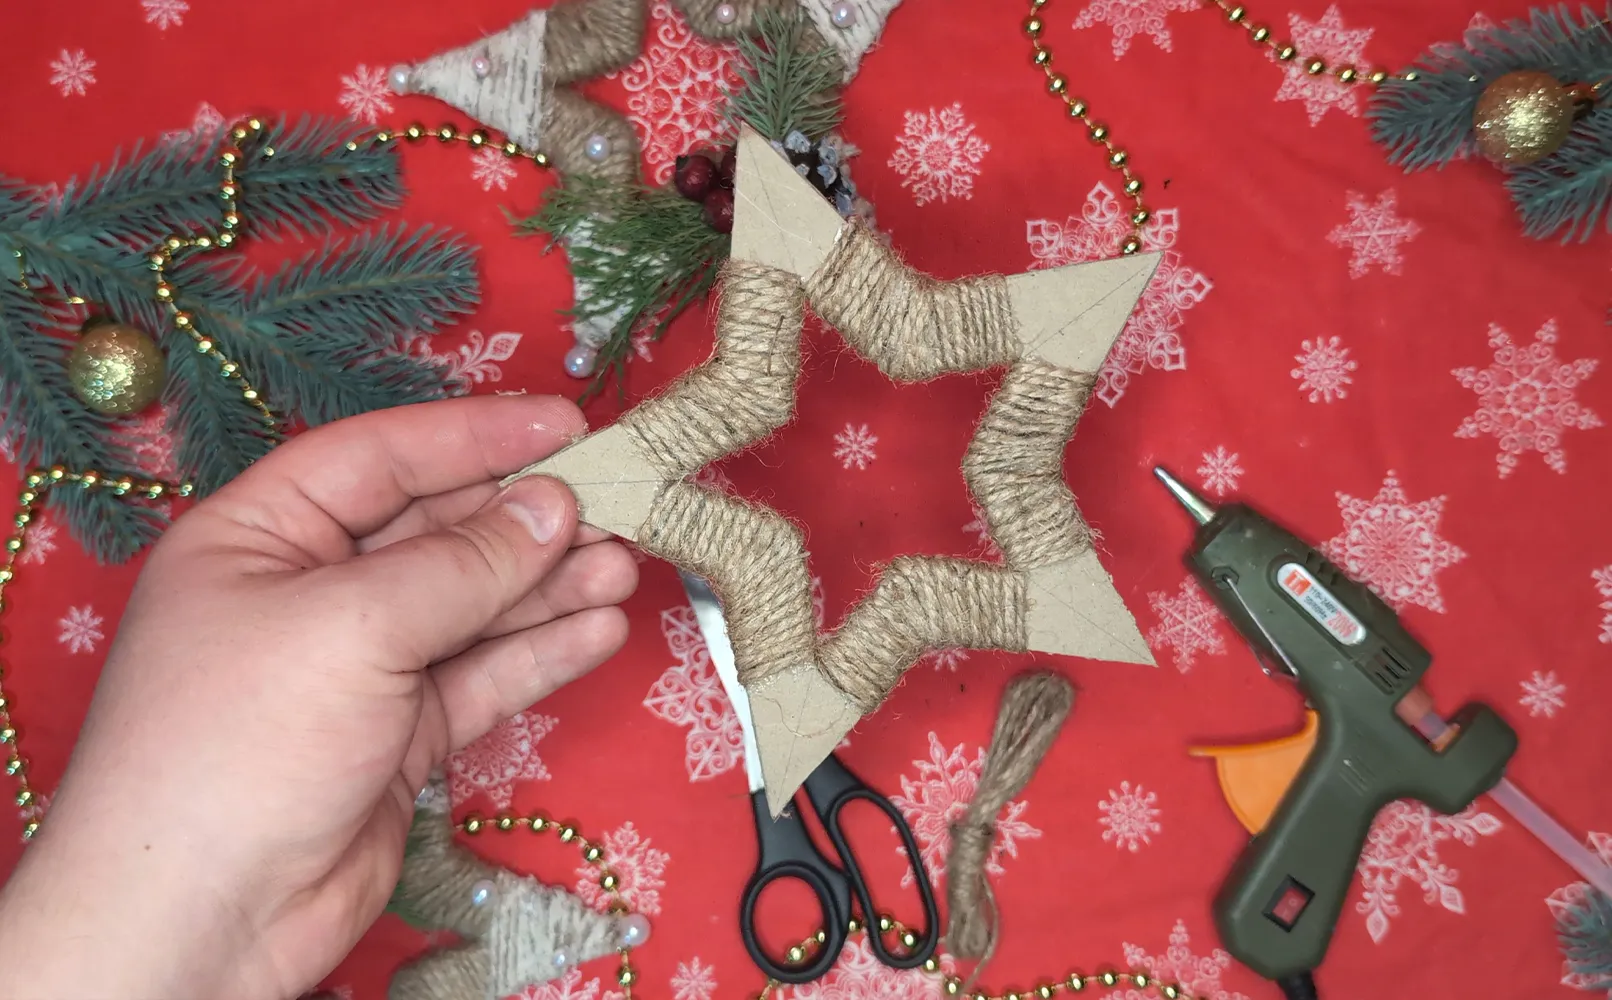
Now it's time to give the star a cozy look! Take the twine, attach the end with hot glue, and start wrapping it tightly around the inner frame of the star. Leave the tips for now - we'll deal with them later.
Step 4: Wrapping the Star Tips
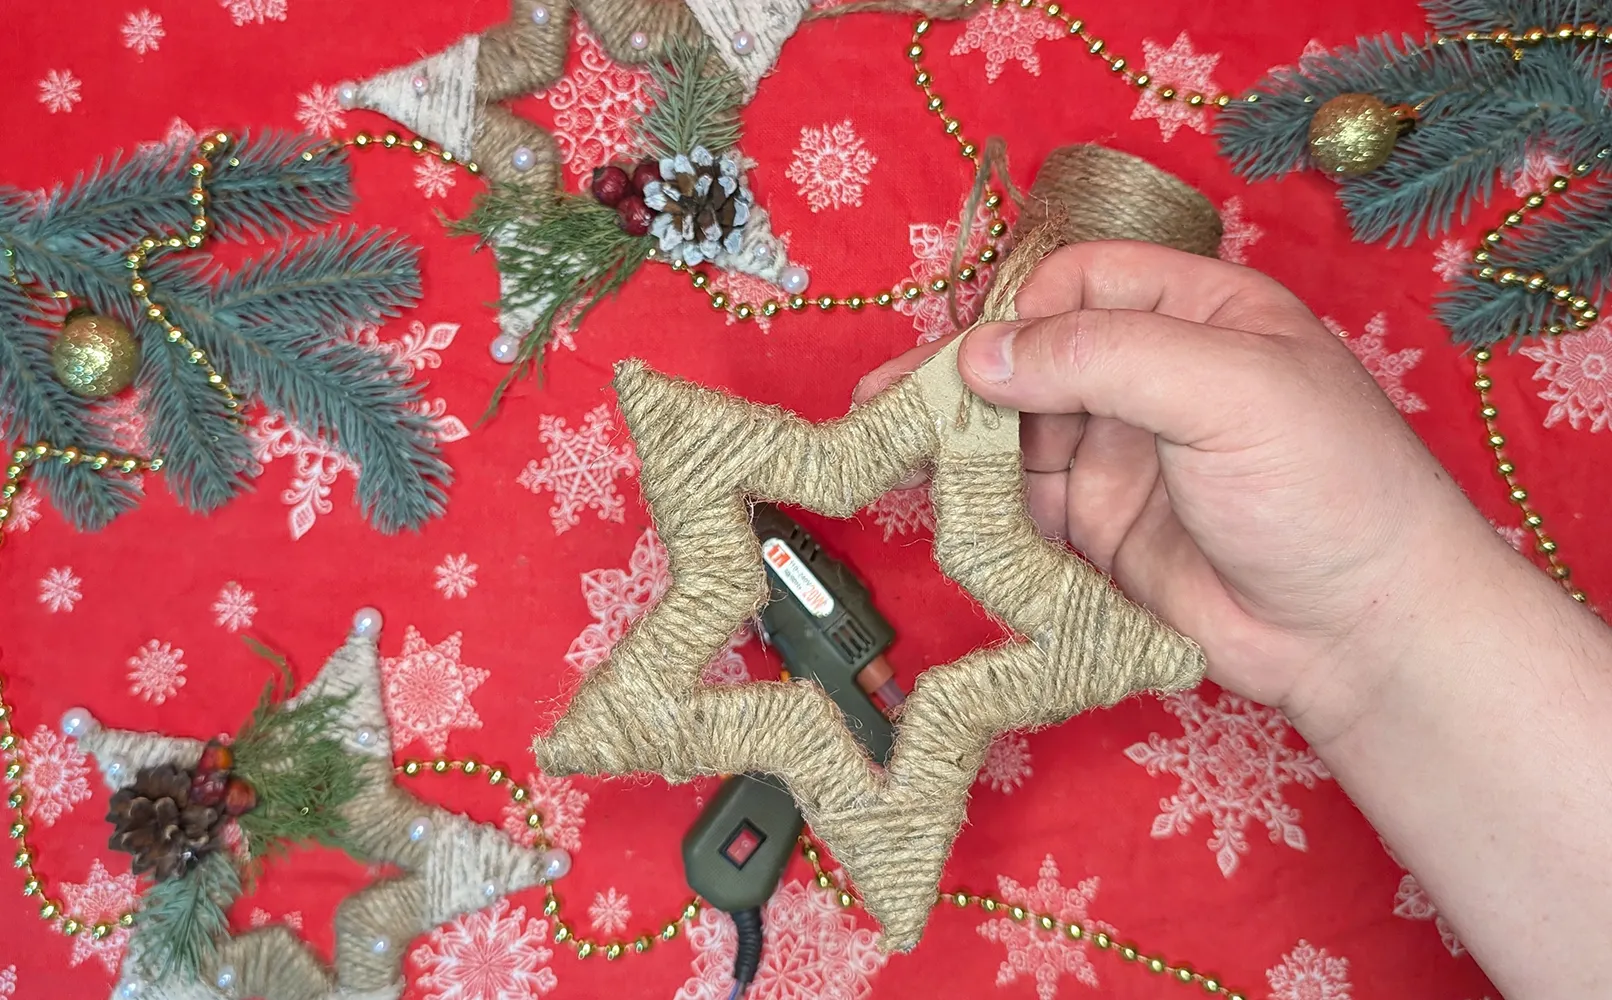
The most interesting part - the star tips. Start where wrapping the inner part left off. Wrap each tip while slowly moving upwards.
Step 5: Transitioning to Painting
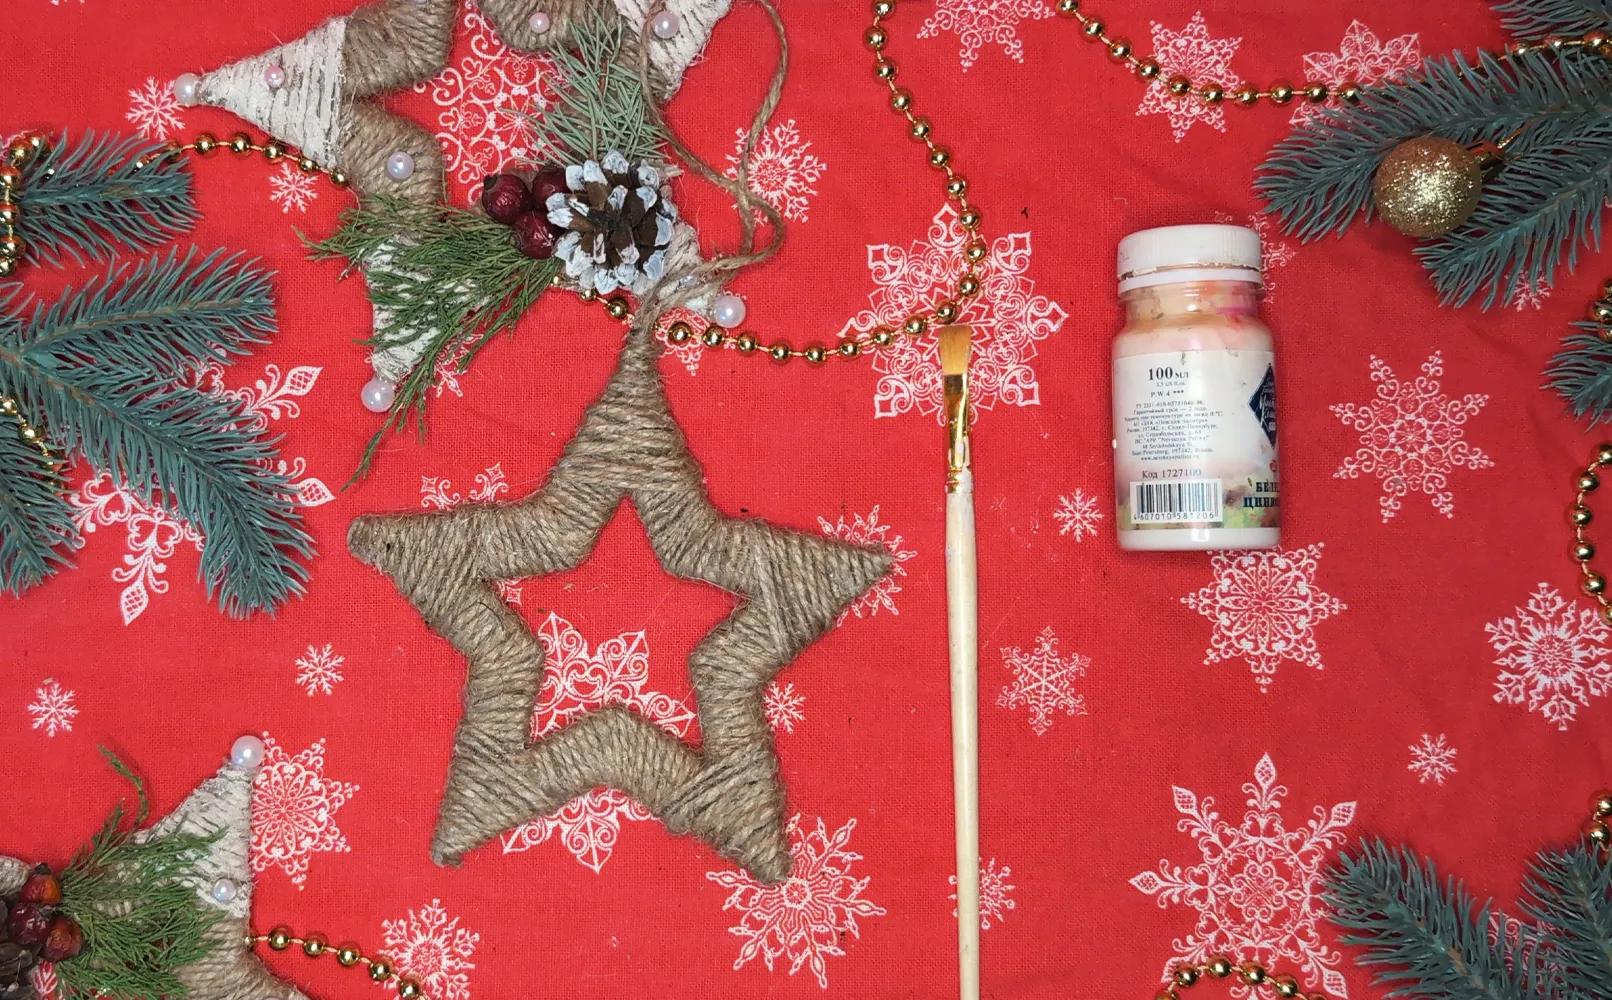
Hooray, the base is ready! Let's give our star a wintry feel. I usually use white paint for the tips - this way the star looks as if it's covered in snow. But you can choose any color you like!
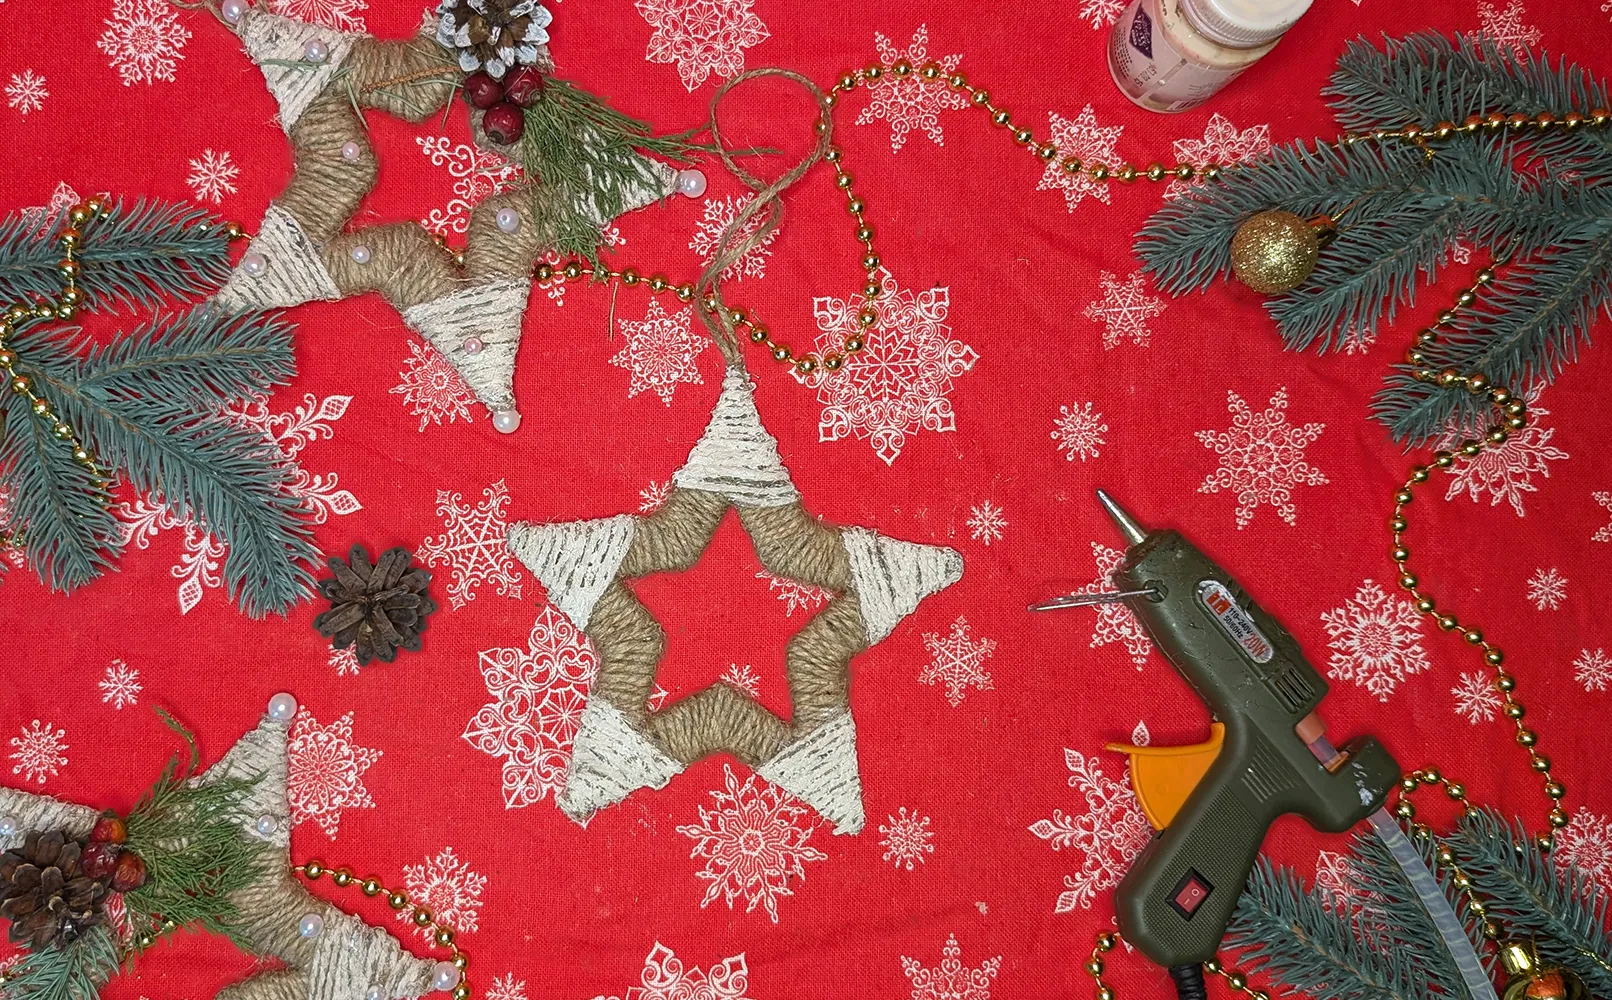
Step 6: Adding Decorations
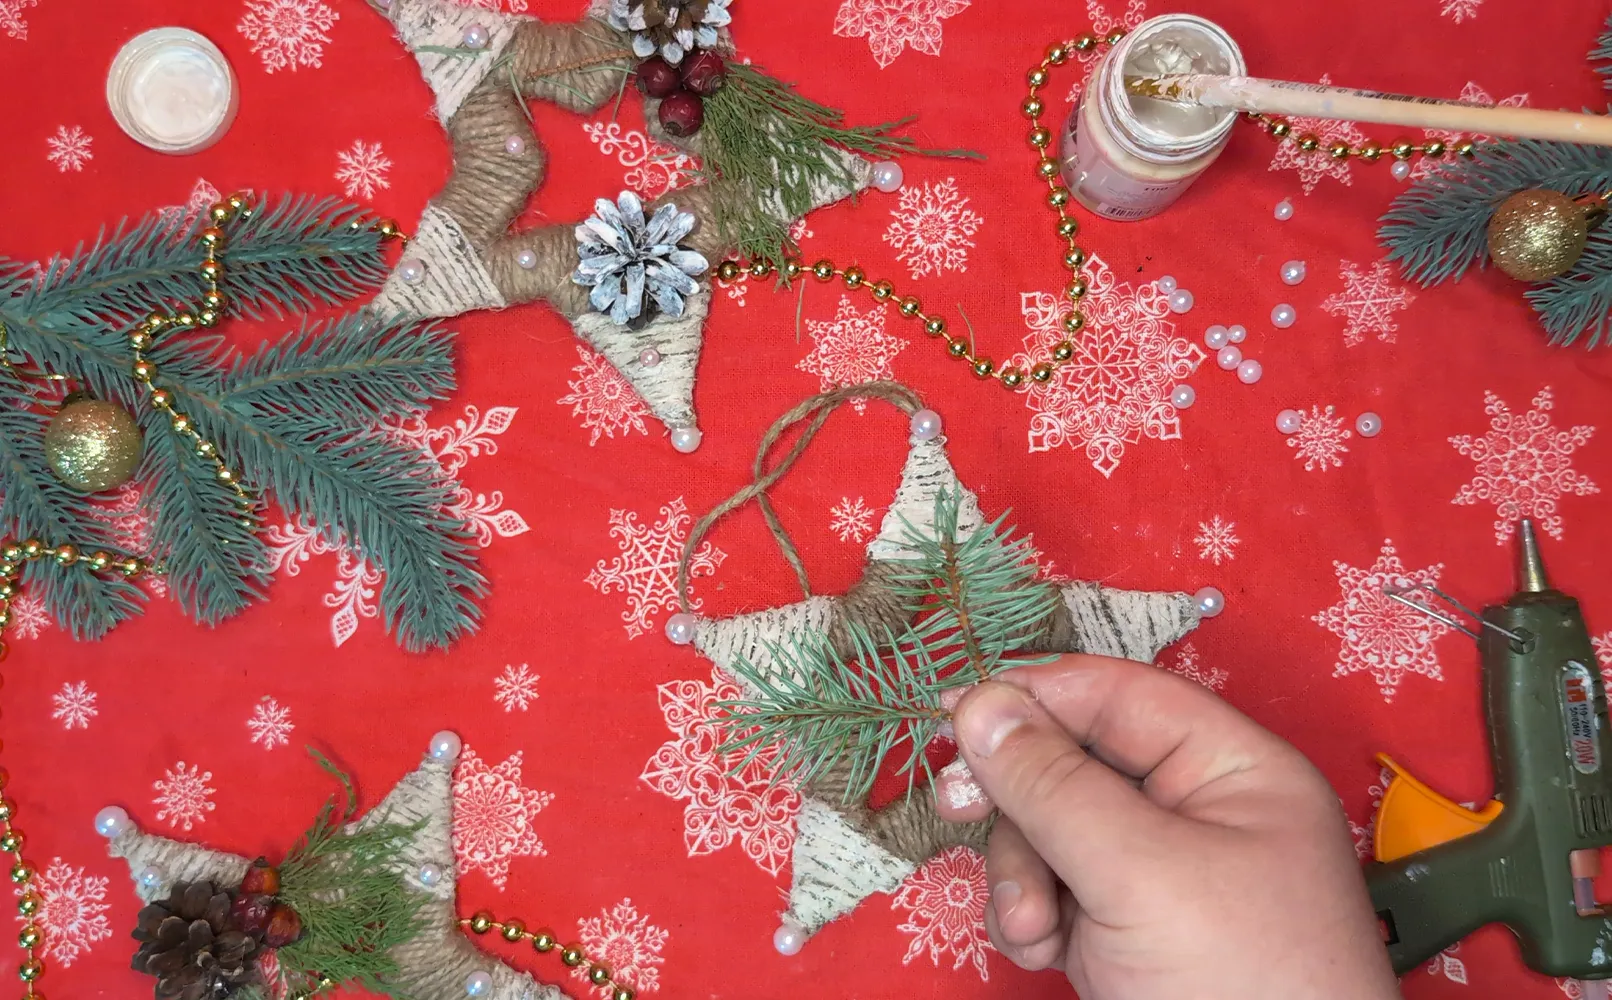
Now we've reached the most creative part! Spread the selected decorative elements on the star and try out different arrangements. Once you find the perfect composition, start attaching each element with hot glue.
Step 7: Creating a Hanging Loop
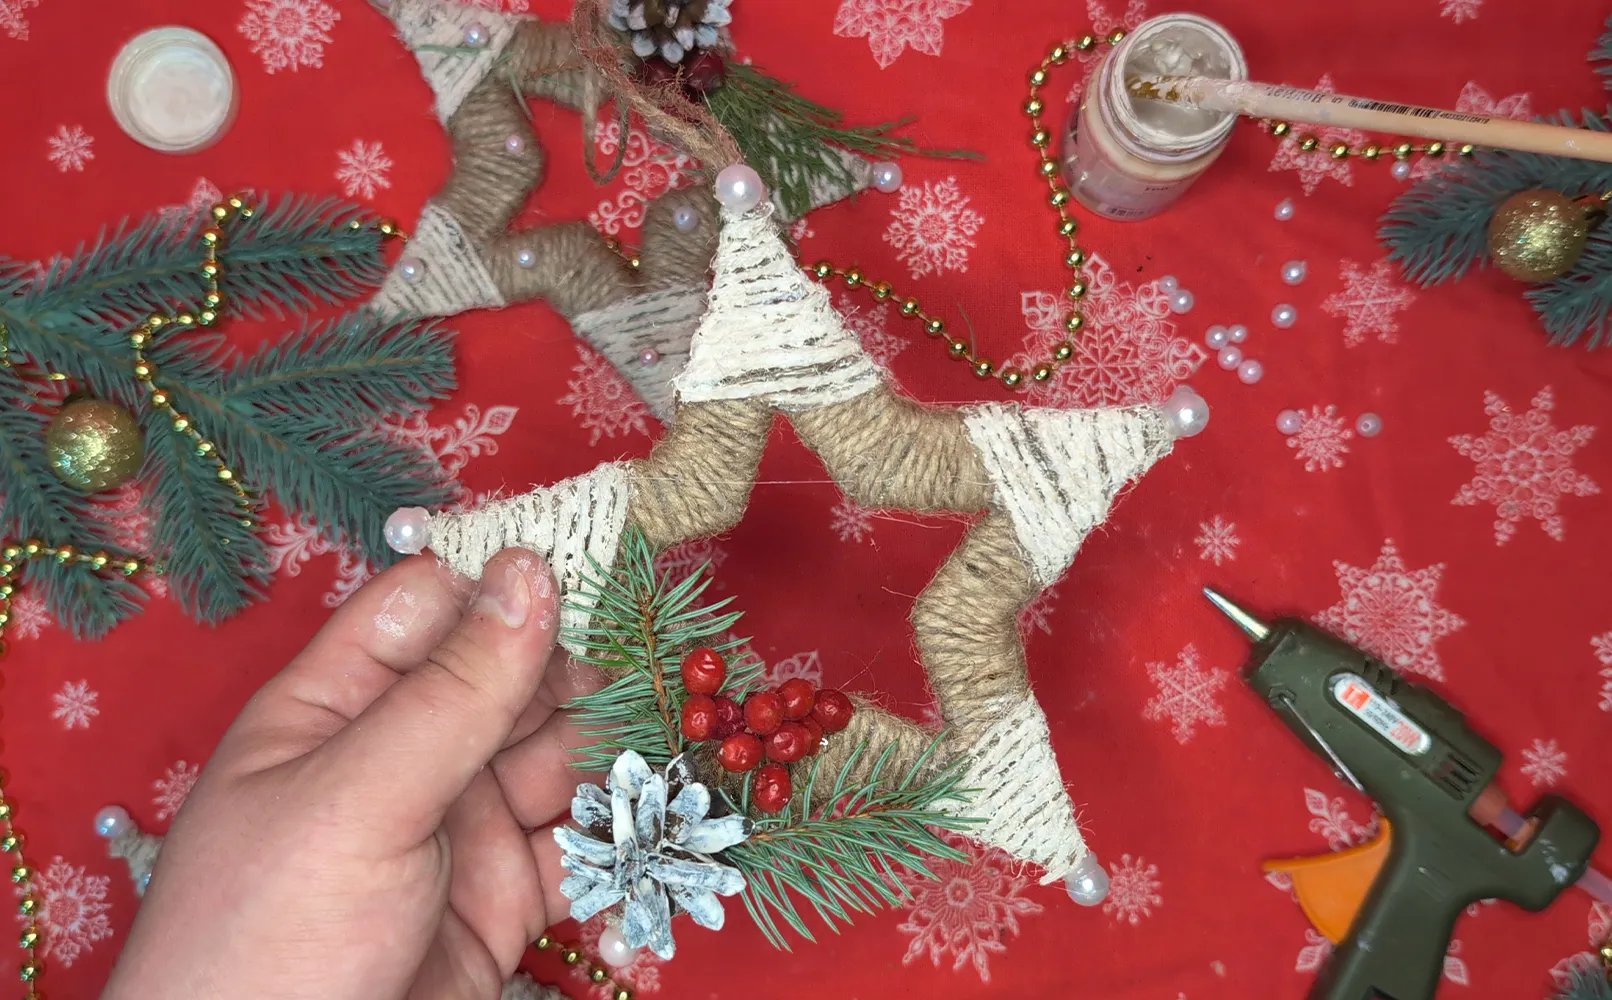
The final touch - a loop for hanging. Cut a piece of thread, form a loop, and glue it to the top of the star on the back.
Conclusion
So, your Christmas star is ready! I have several of these little stars at home, and when my friends saw their beauty, they immediately asked me to make some for them too. That's why I decided to describe the manufacturing process in detail so that they and you can make them yourselves and delight your loved ones.
And you know what the most beautiful part is? For next year, I already know what I will give to my friends. I think stars are a great gift because they are beautiful and create a cozy atmosphere. You can gift them to friends, coworkers, or relatives. This craft project is perfect as a small souvenir that will definitely be useful during the Christmas season. And with a little humor added, you could even say that you can use them until March! A joke of course, but isn't it great to have something so versatile and stylish?
This star could be the beginning of your own Christmas tradition. Every year - a new star, a new story. In a few years, you will have a whole constellation of memories!
Don't stick to just one star. Experiment with colors, sizes, decorations. Let your imagination shine brighter than any string of lights!
From Vitalii Shynakov
