Folding a star from paper is a popular origami technique that excites children and adults alike. Origami, the Japanese art of paper folding, not only fosters creativity but also fine motor skills and cognitive abilities. When folding a star, you train your concentration and patience. Our instructions are designed to make every step clear and understandable. With videos and numerous photos, we guide you through the entire process. Don't worry if it seems difficult at first - we assure you that you will succeed. Each instruction is tested by a 10-year-old child. If they can do it, so can you!

h_904,h_906,h_907,h_902

Folding a Star: Step-by-Step Guide with Video and Images

Before you start folding the star, we recommend watching the video once or twice. For optimal results, you can use special origami paper. This is available in almost all stationery stores and usually comes in packs of square, colorful sheets. Origami paper is thinner than regular paper, making folding easier.
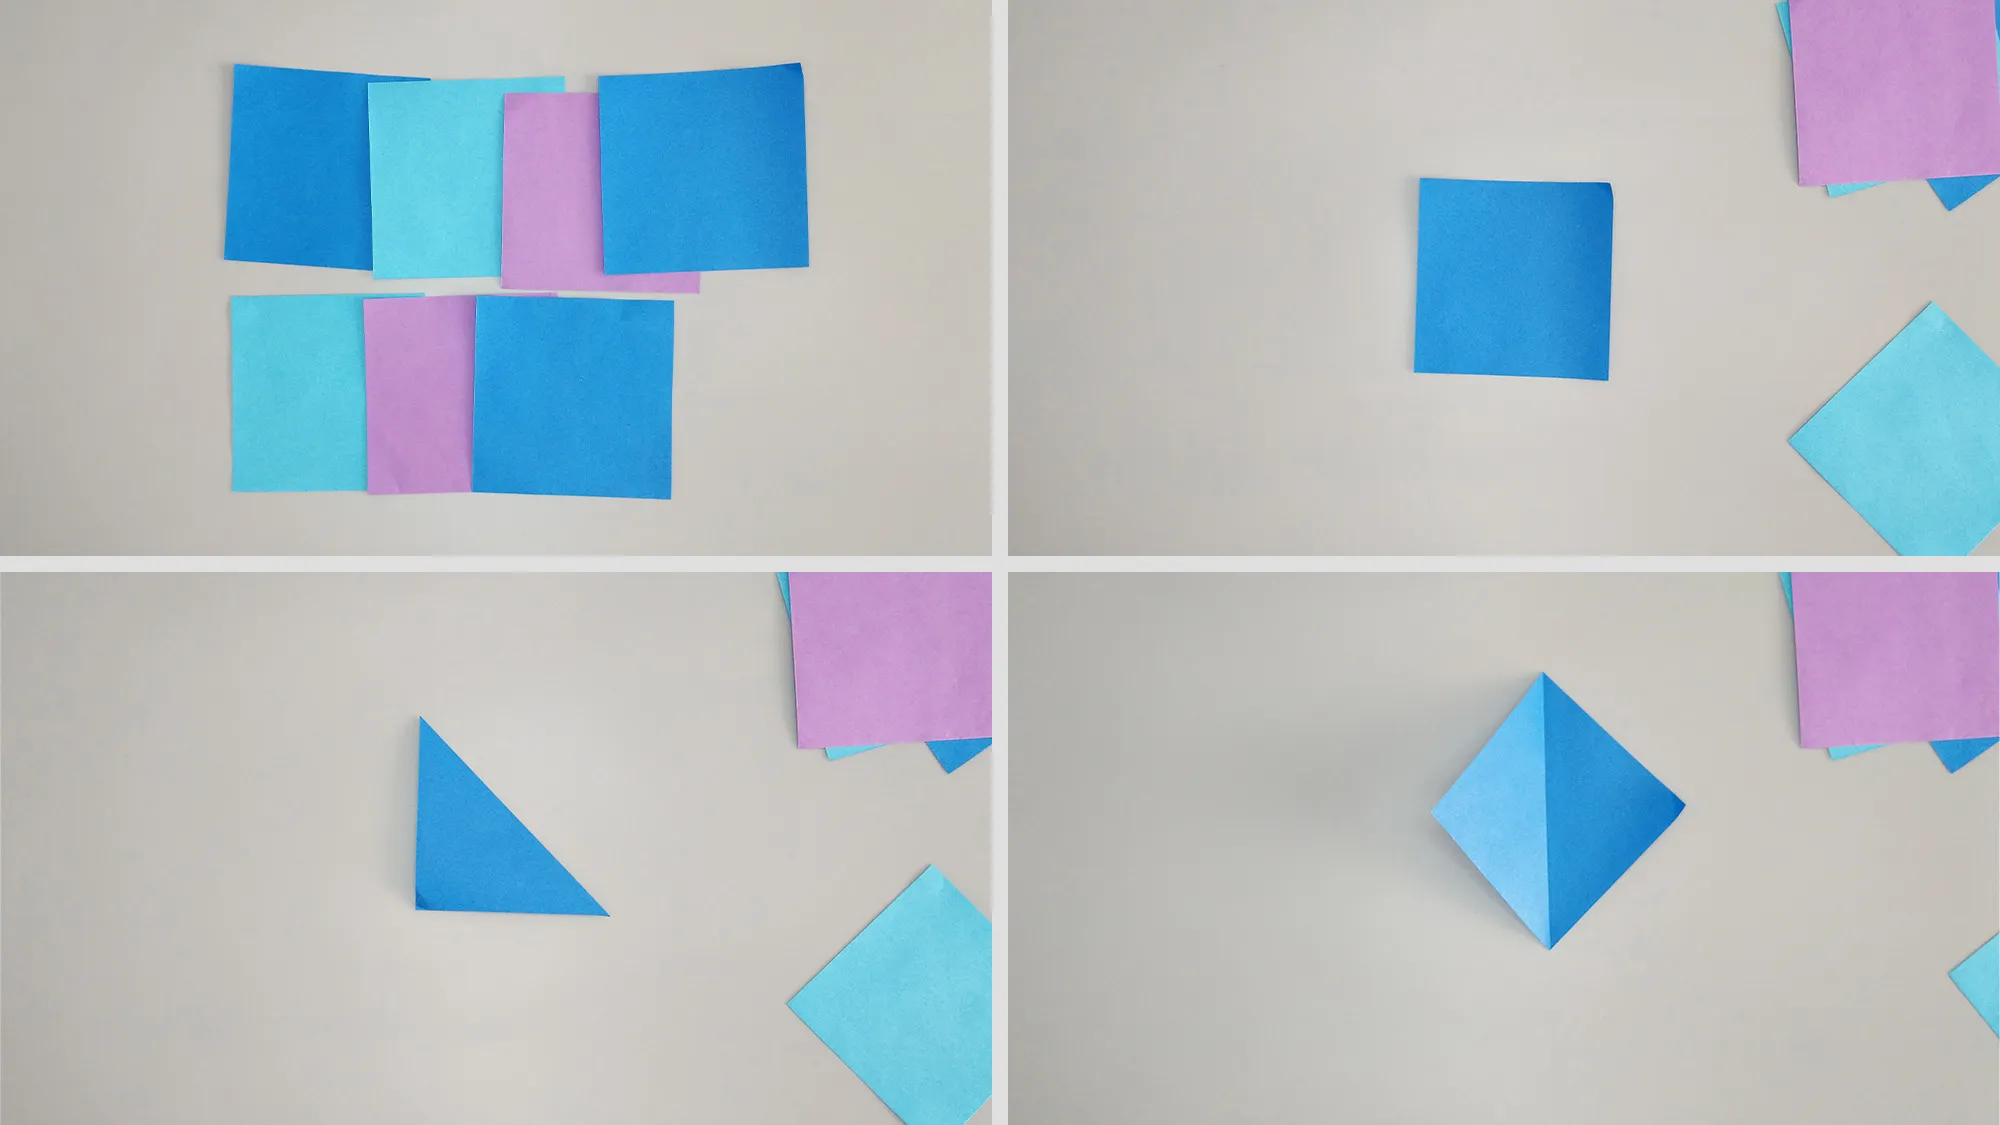
Step-by-step instructions for folding an origami star out of paper. Step 1
Step 1: The origami star is quite different from most of the crafts we have done here. Although you can use regular origami paper measuring 21 cm, I recommend buying small sticky notes for the origami star. Those are those small square notes for messages.
Step-by-step instructions for folding an origami star out of paper. Step 2
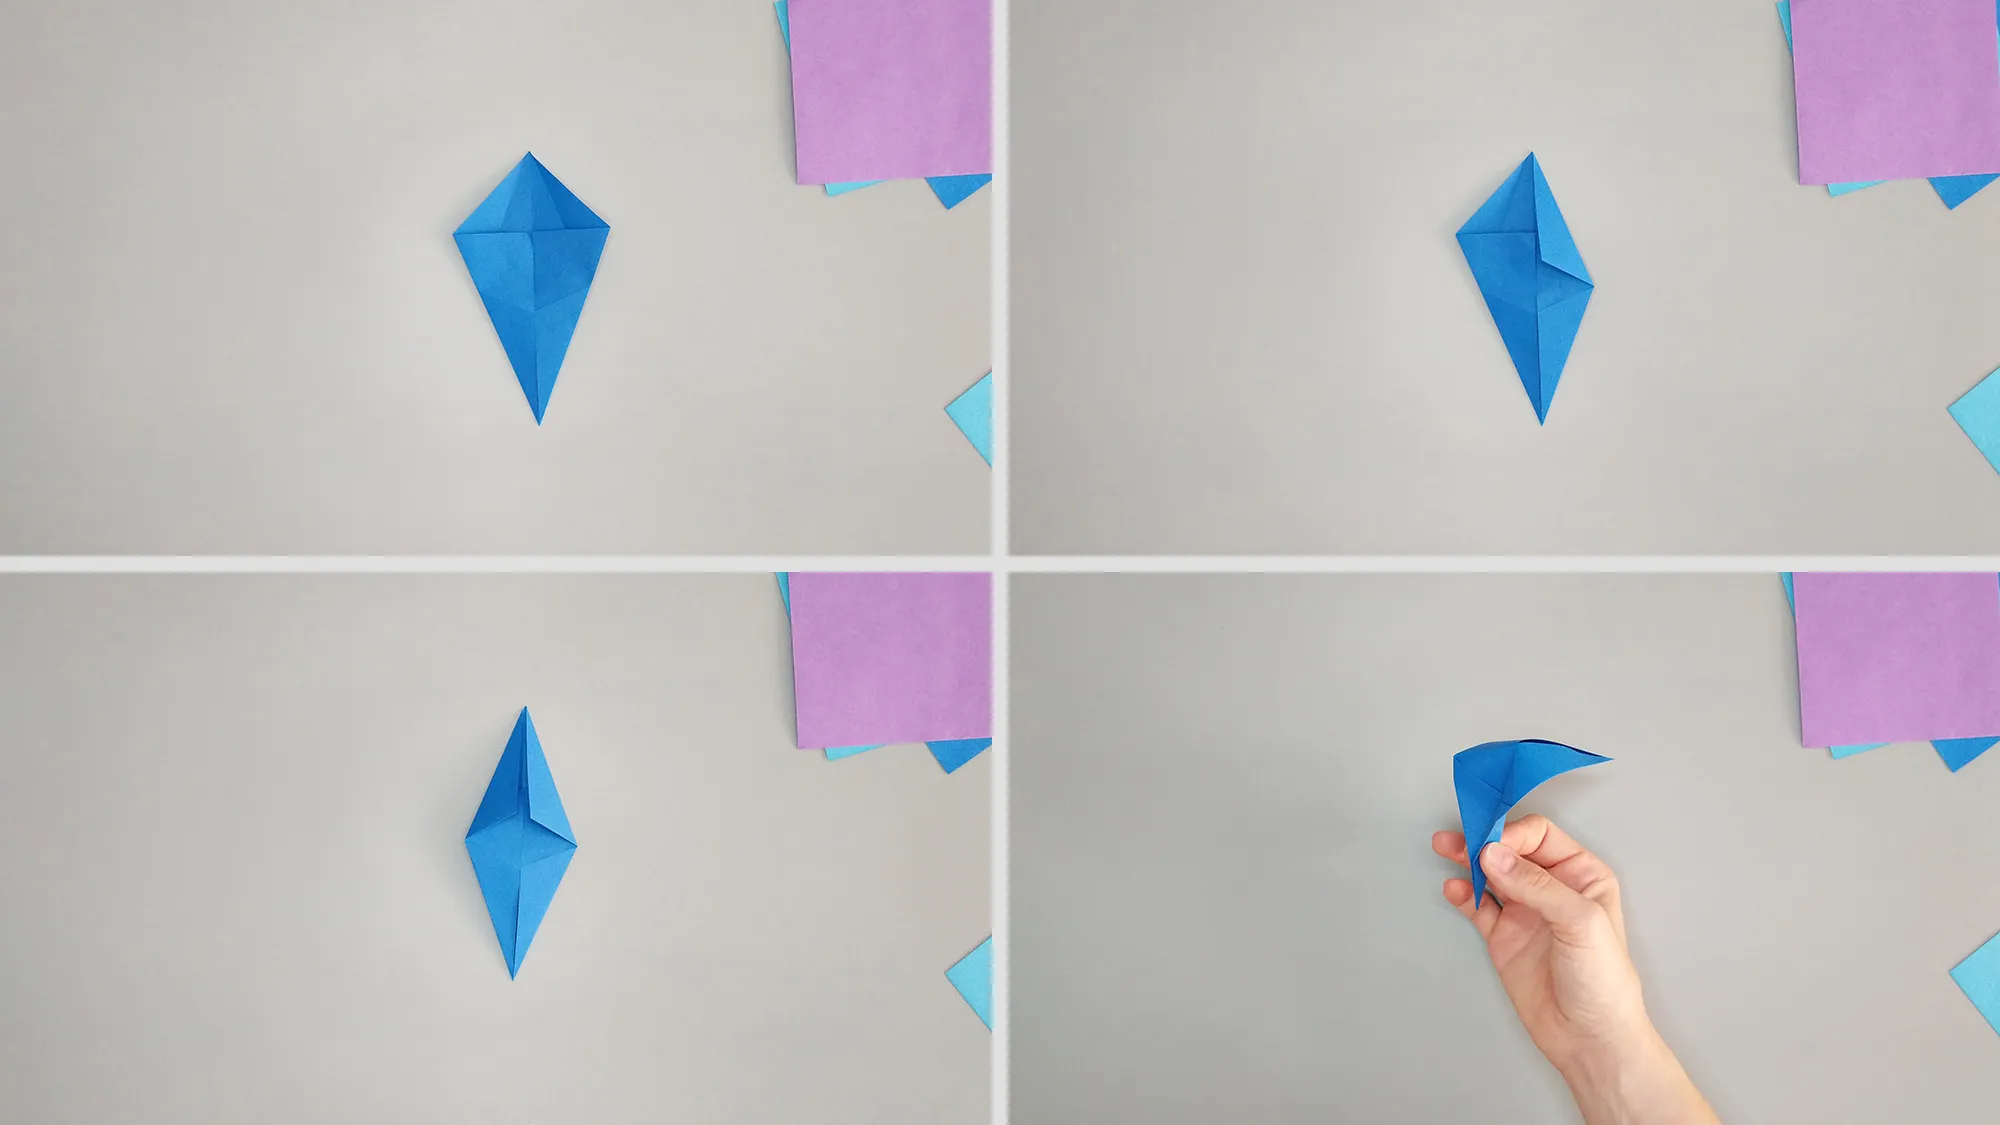
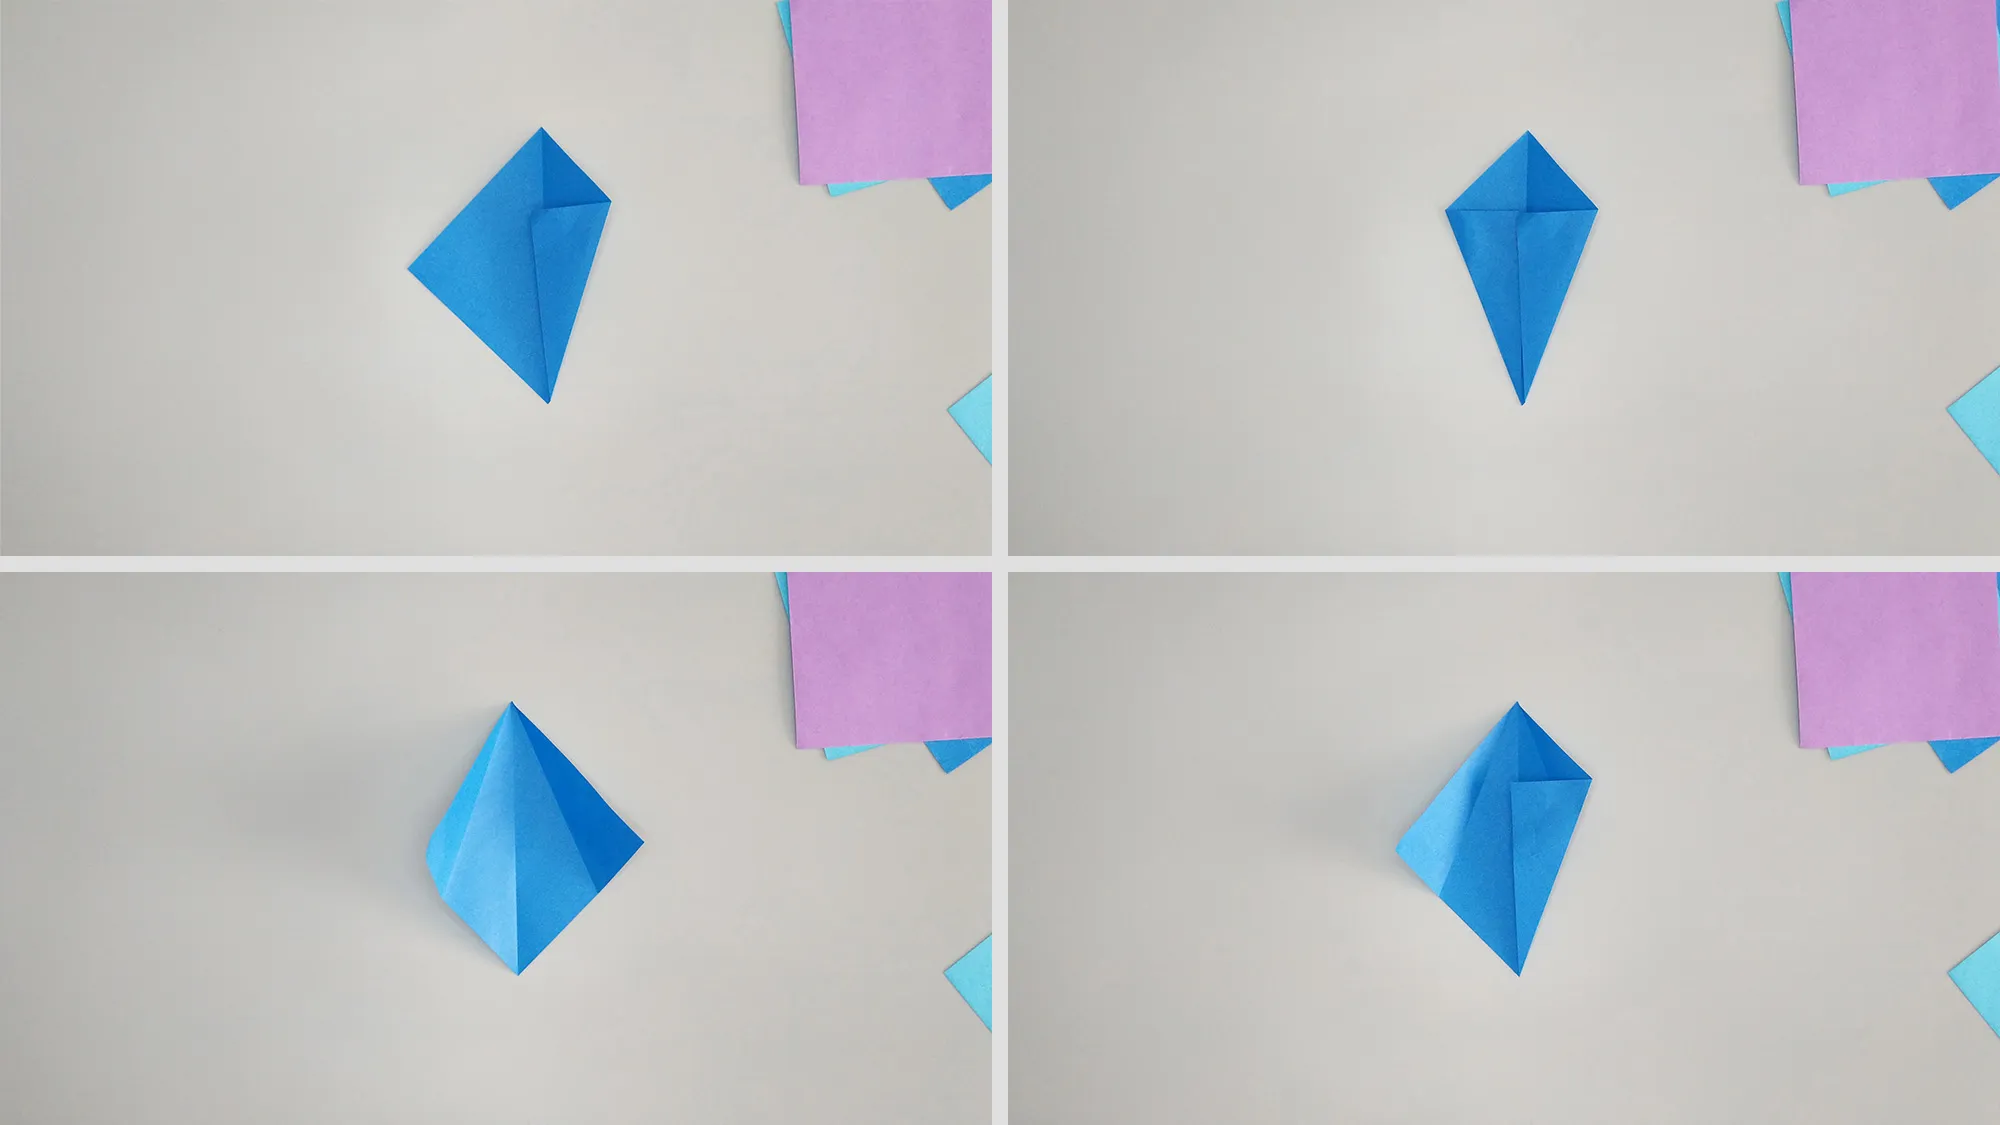
Step 2: We need 7 pieces. All notes must be folded in the same way before assembly. I'll explain what you need to do with one note, and then you repeat this process with all notes. So, fold the notes diagonally and then both edges on one side and the other side, as shown in the illustration.
Step-by-step instructions for folding an origami star out of paper. Step 3
Step 3: Now you need to fold the part along the existing crease lines. If it's hard to understand from the photos, there is a video above in the text showing how to do it.
Step-by-step instructions for folding an origami star from paper. Step 4
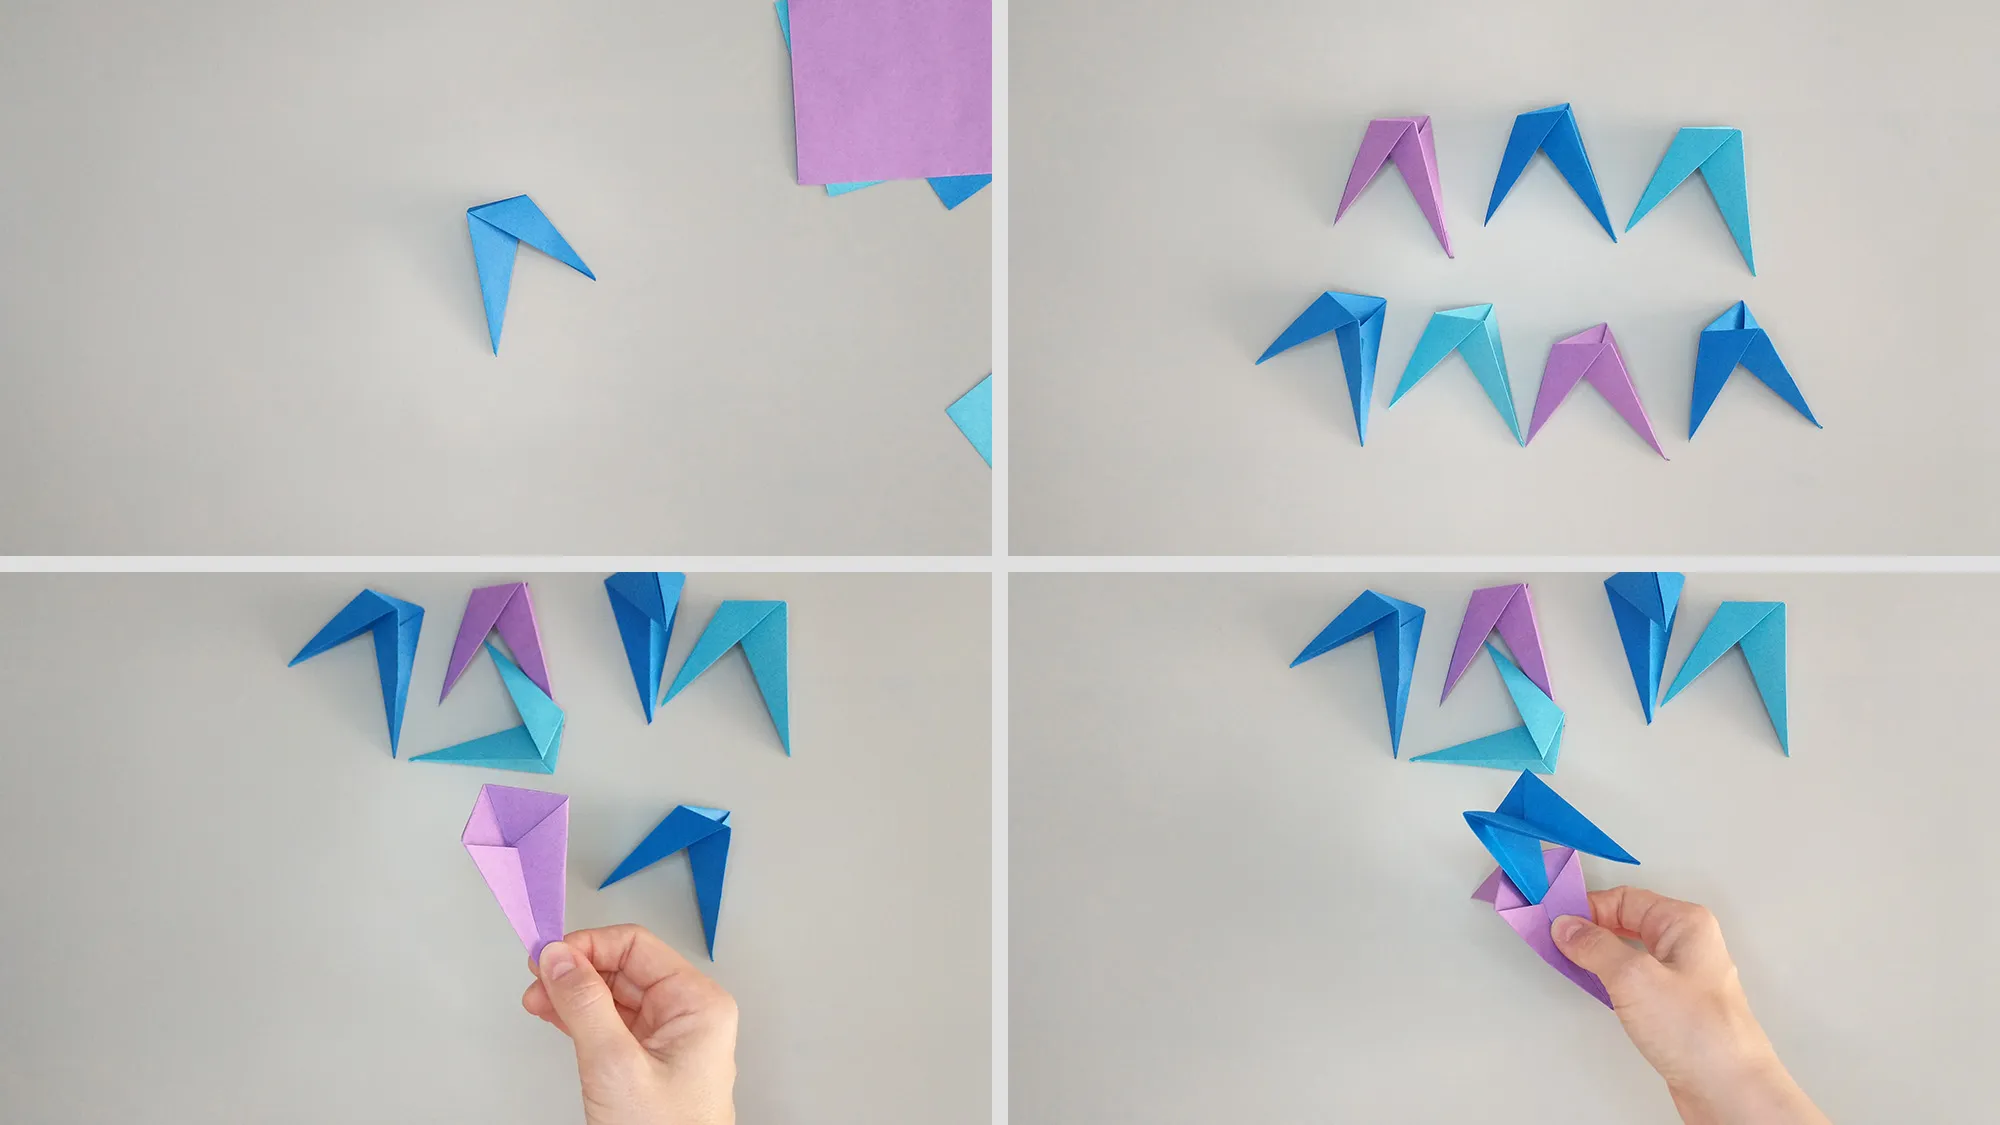
Step 4: Now do the same with the remaining six notes. Before assembling the star from seven parts, we should have 7 half-finished pieces, to put it in technical terms.
Step-by-step instructions for folding an origami star out of paper. Step 5
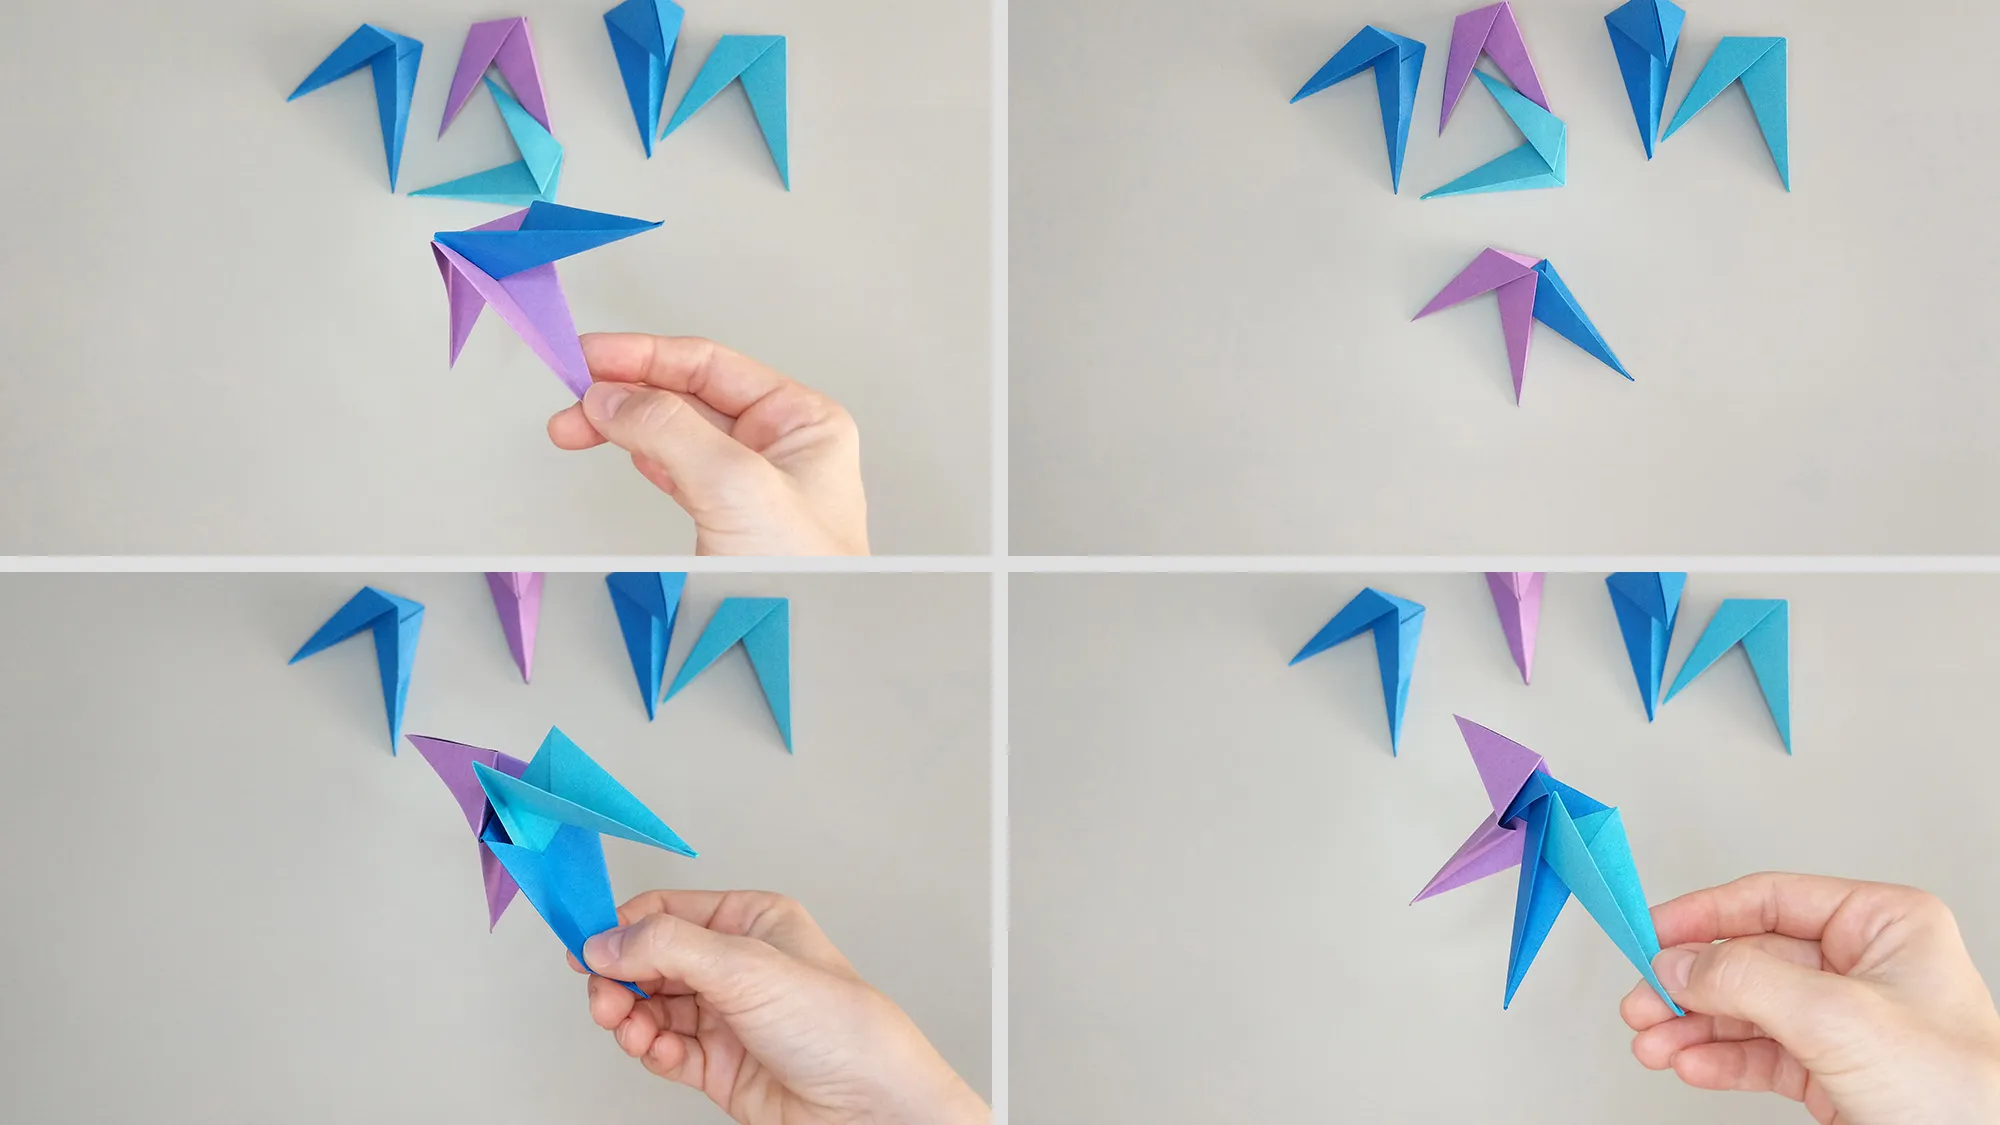
Step 5: Now we connect our star parts together.
Step-by-step instructions for folding an origami star from paper. Step 6
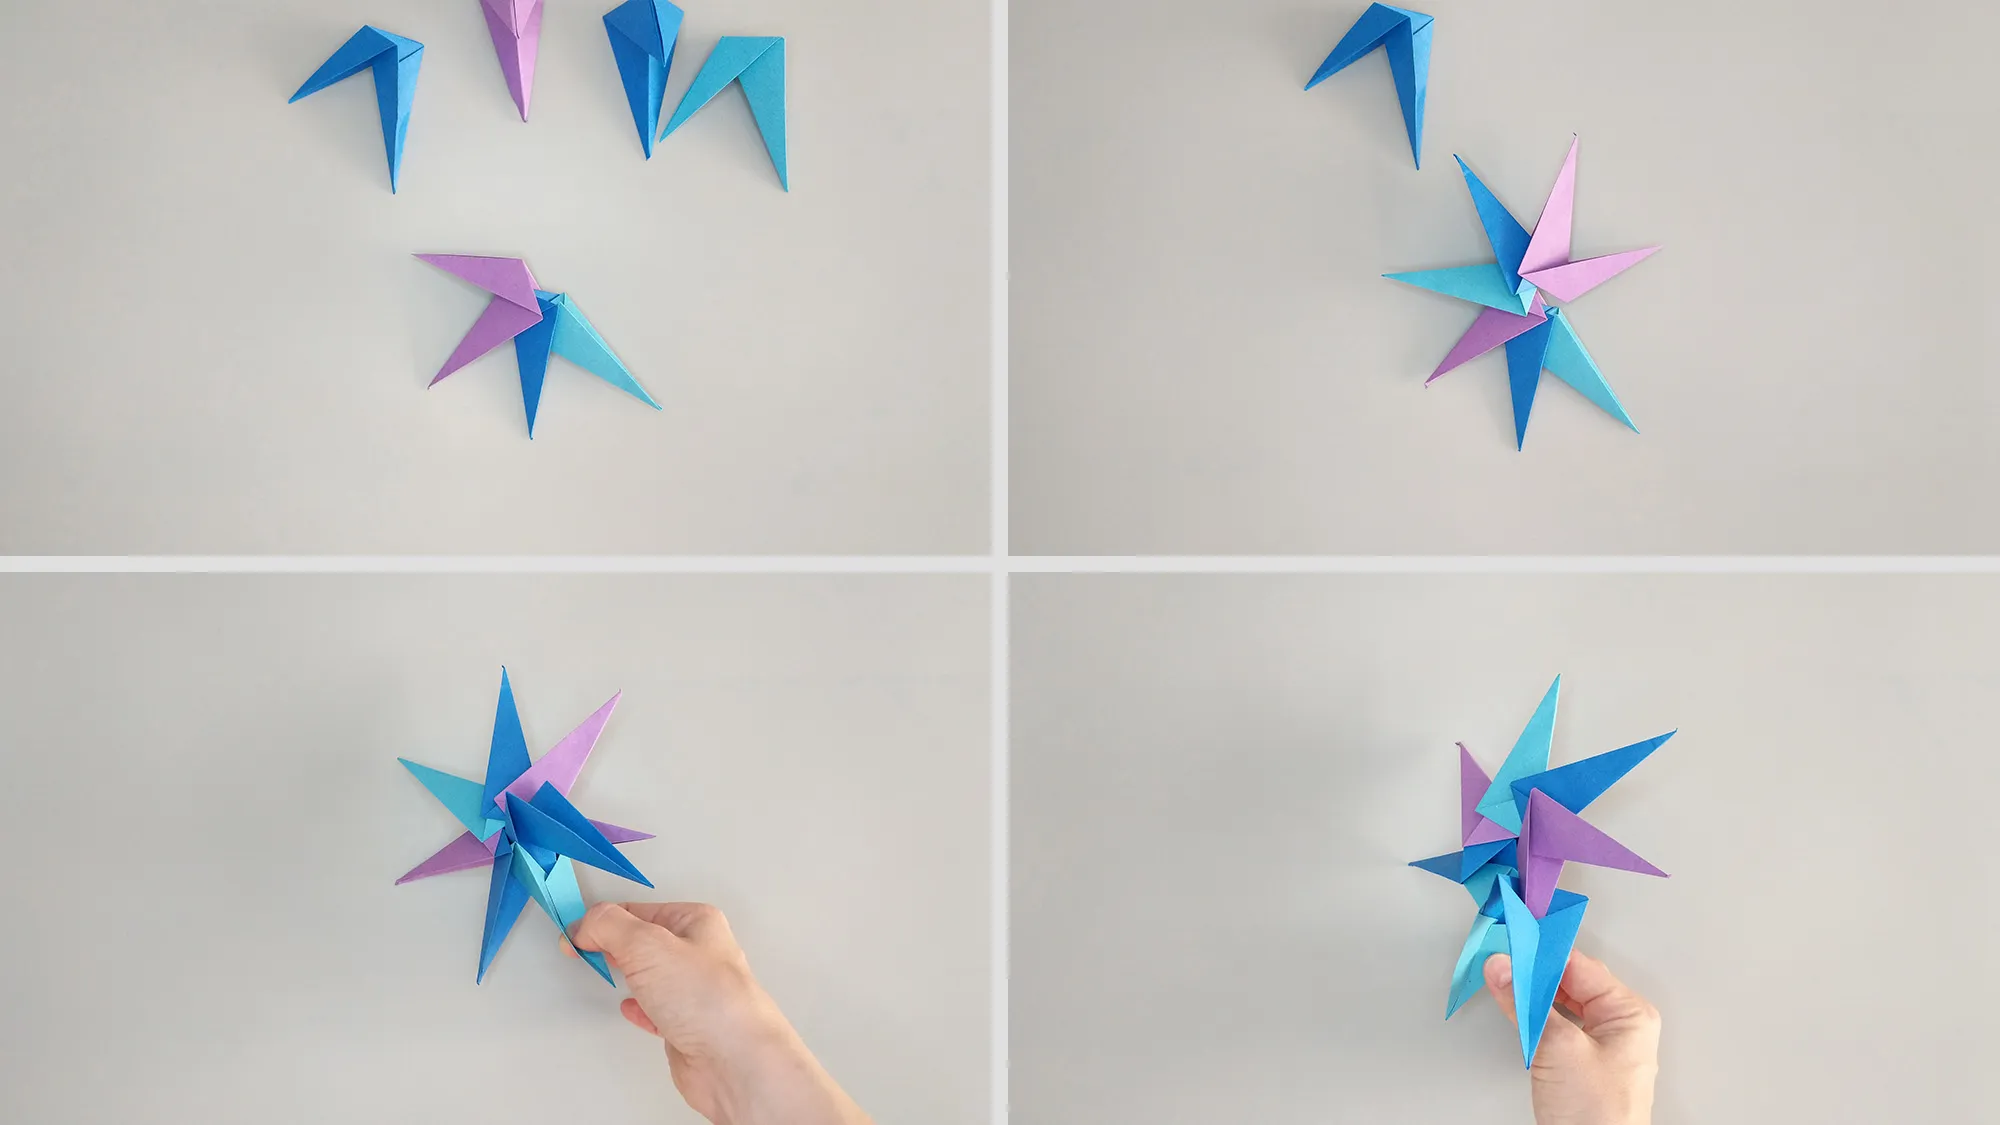
Step 6: Connect them in a circle and alternate the colors of the parts for a more beautiful star appearance.
Step-by-step instructions for folding an origami star out of paper. Step 7
Step 7: Done! Look at what a beautiful star has been created. This type of origami is actually called 3D Origami. So, you can confidently say that you can also fold 3D Origami.

Folding a Star: Afterword and Thank You

Thank you for taking the time to fold a star. We are glad that you chose this creative activity. It's especially nice if you folded the star together with your child. Children grow up so fast, and it's valuable to share such moments with them. Crafting together not only enhances their skills but also creates valuable memories. If you're interested in more origami projects, feel free to check out our other instructions. You will surely find more exciting figures to fold!

Fold origami star from paper

Published on by Vitalii Shynakov
Published on:
From Vitalii Shynakov
Vitalii Shynakov has been working in the areas of online retail, marketing and customer satisfaction since 2012. Until 2022, he was the head of personnel development and online sales department of four successful stores. He has been part of the TutKit.com team since 2024.