Folding fish from money: Instructions with photos and video
Folding fish from money can be a really great gift idea. "Folding money" is a creative variation of Origami, the Japanese art of paper folding. By giving an employee money in the form of a fish, you show appreciation and creativity. With relatives or close friends, you turn a simple money gift into something special and personal. Folding money into fish shapes is an art that you can easily learn with a little practice. In this article, we will show you step by step how to fold money into fish shapes.
Such money gifts in the shape of a fish are especially suitable for birthdays, weddings, or graduations. You can present the folded money fish in a small gift box or showcase it in a paper or cardboard aquarium. For a wedding, you could even let a whole school of money fish swim in a self-made "wedding sea".
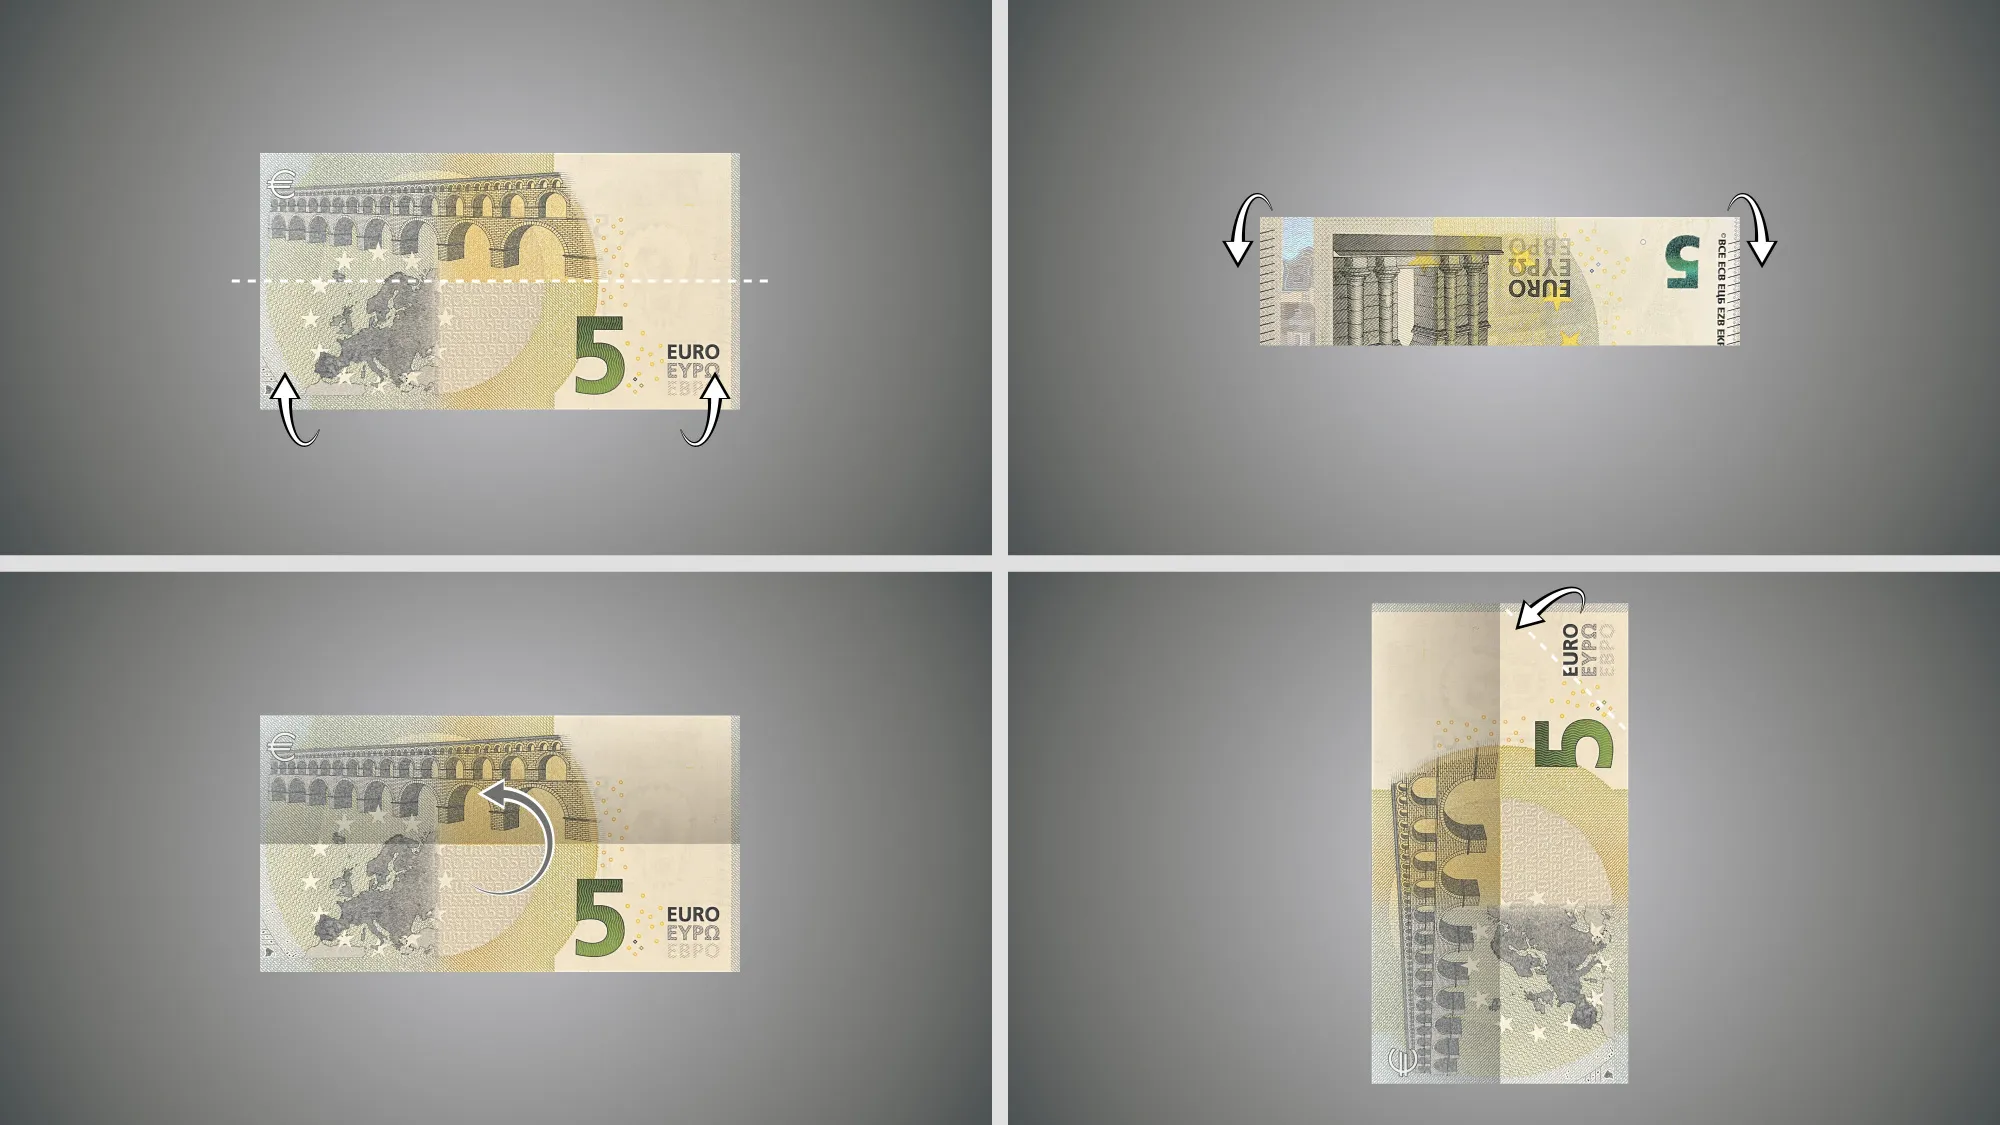
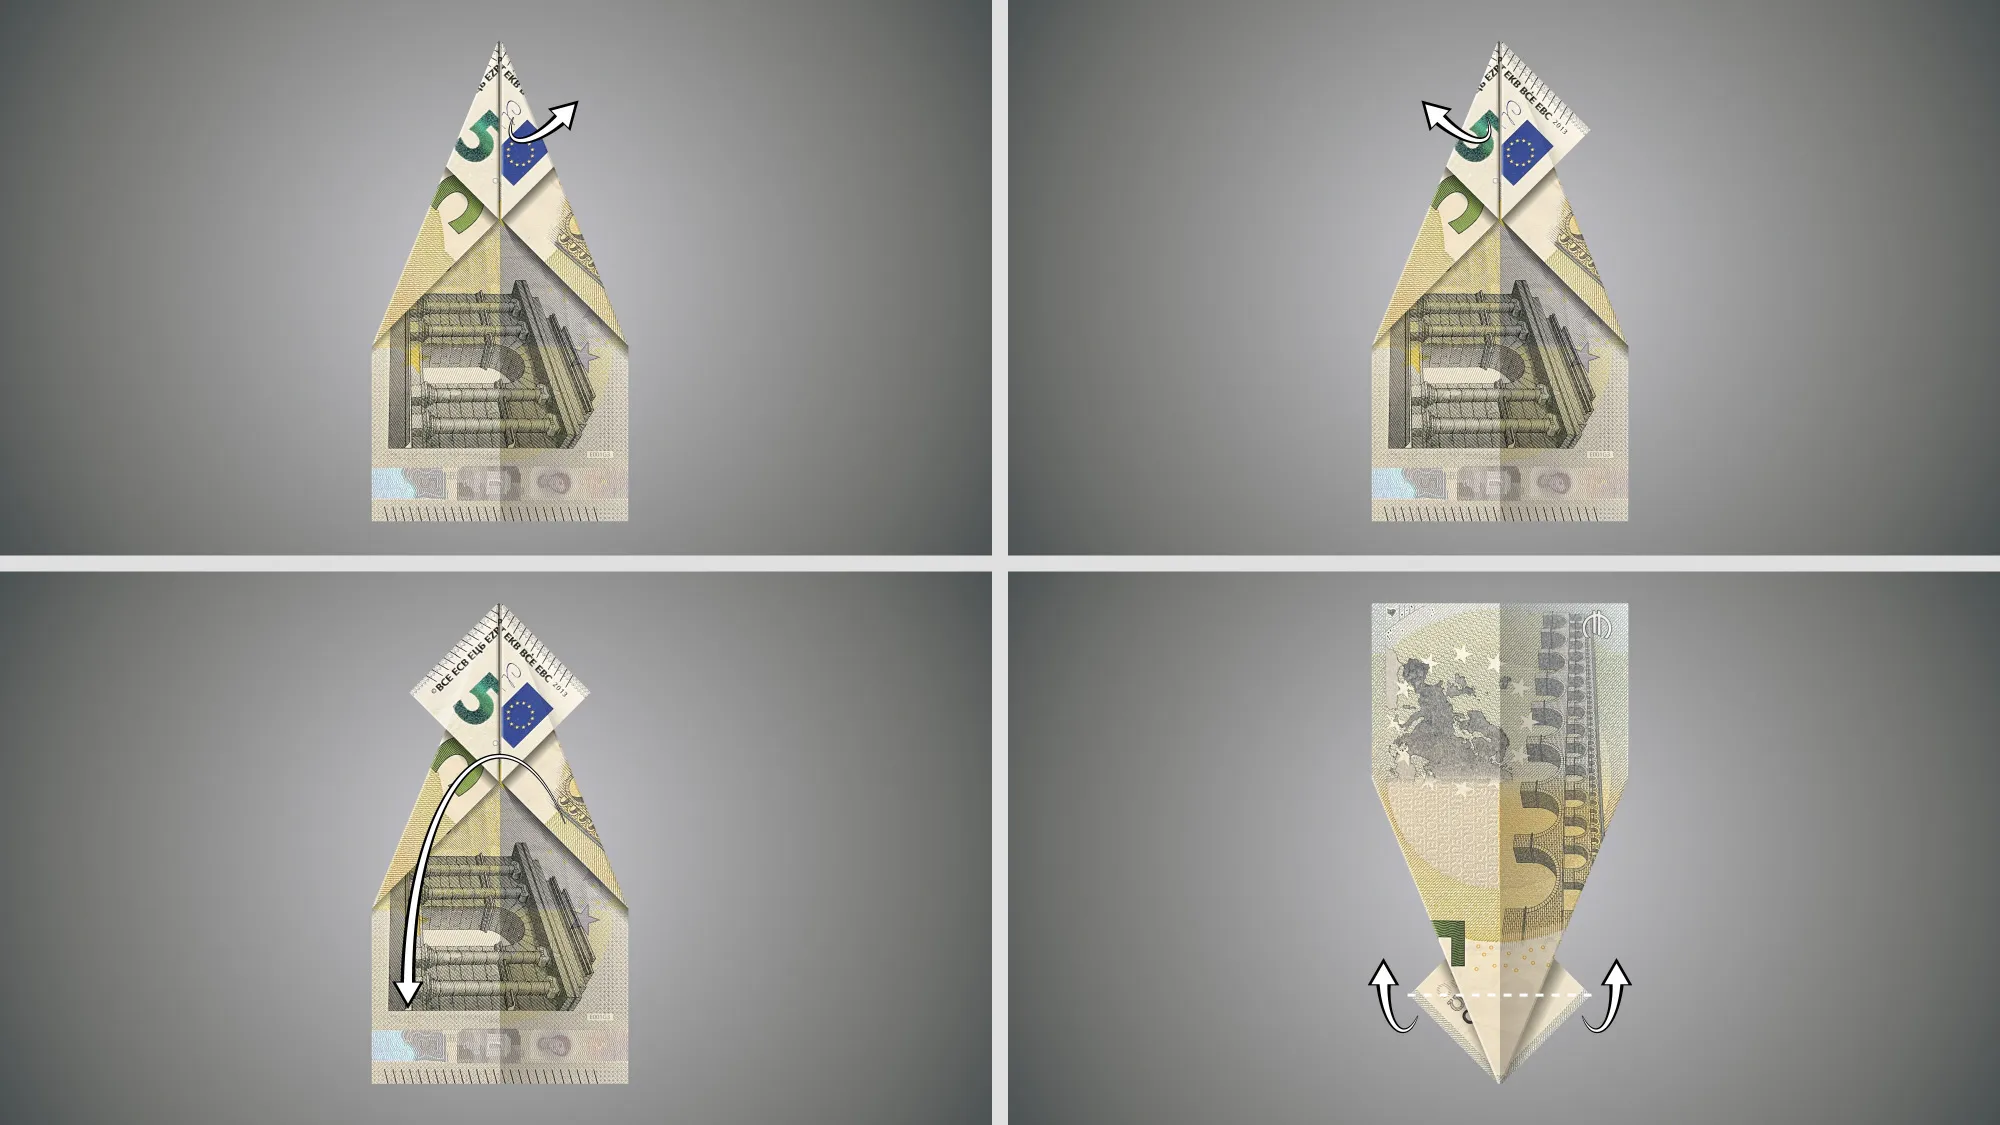
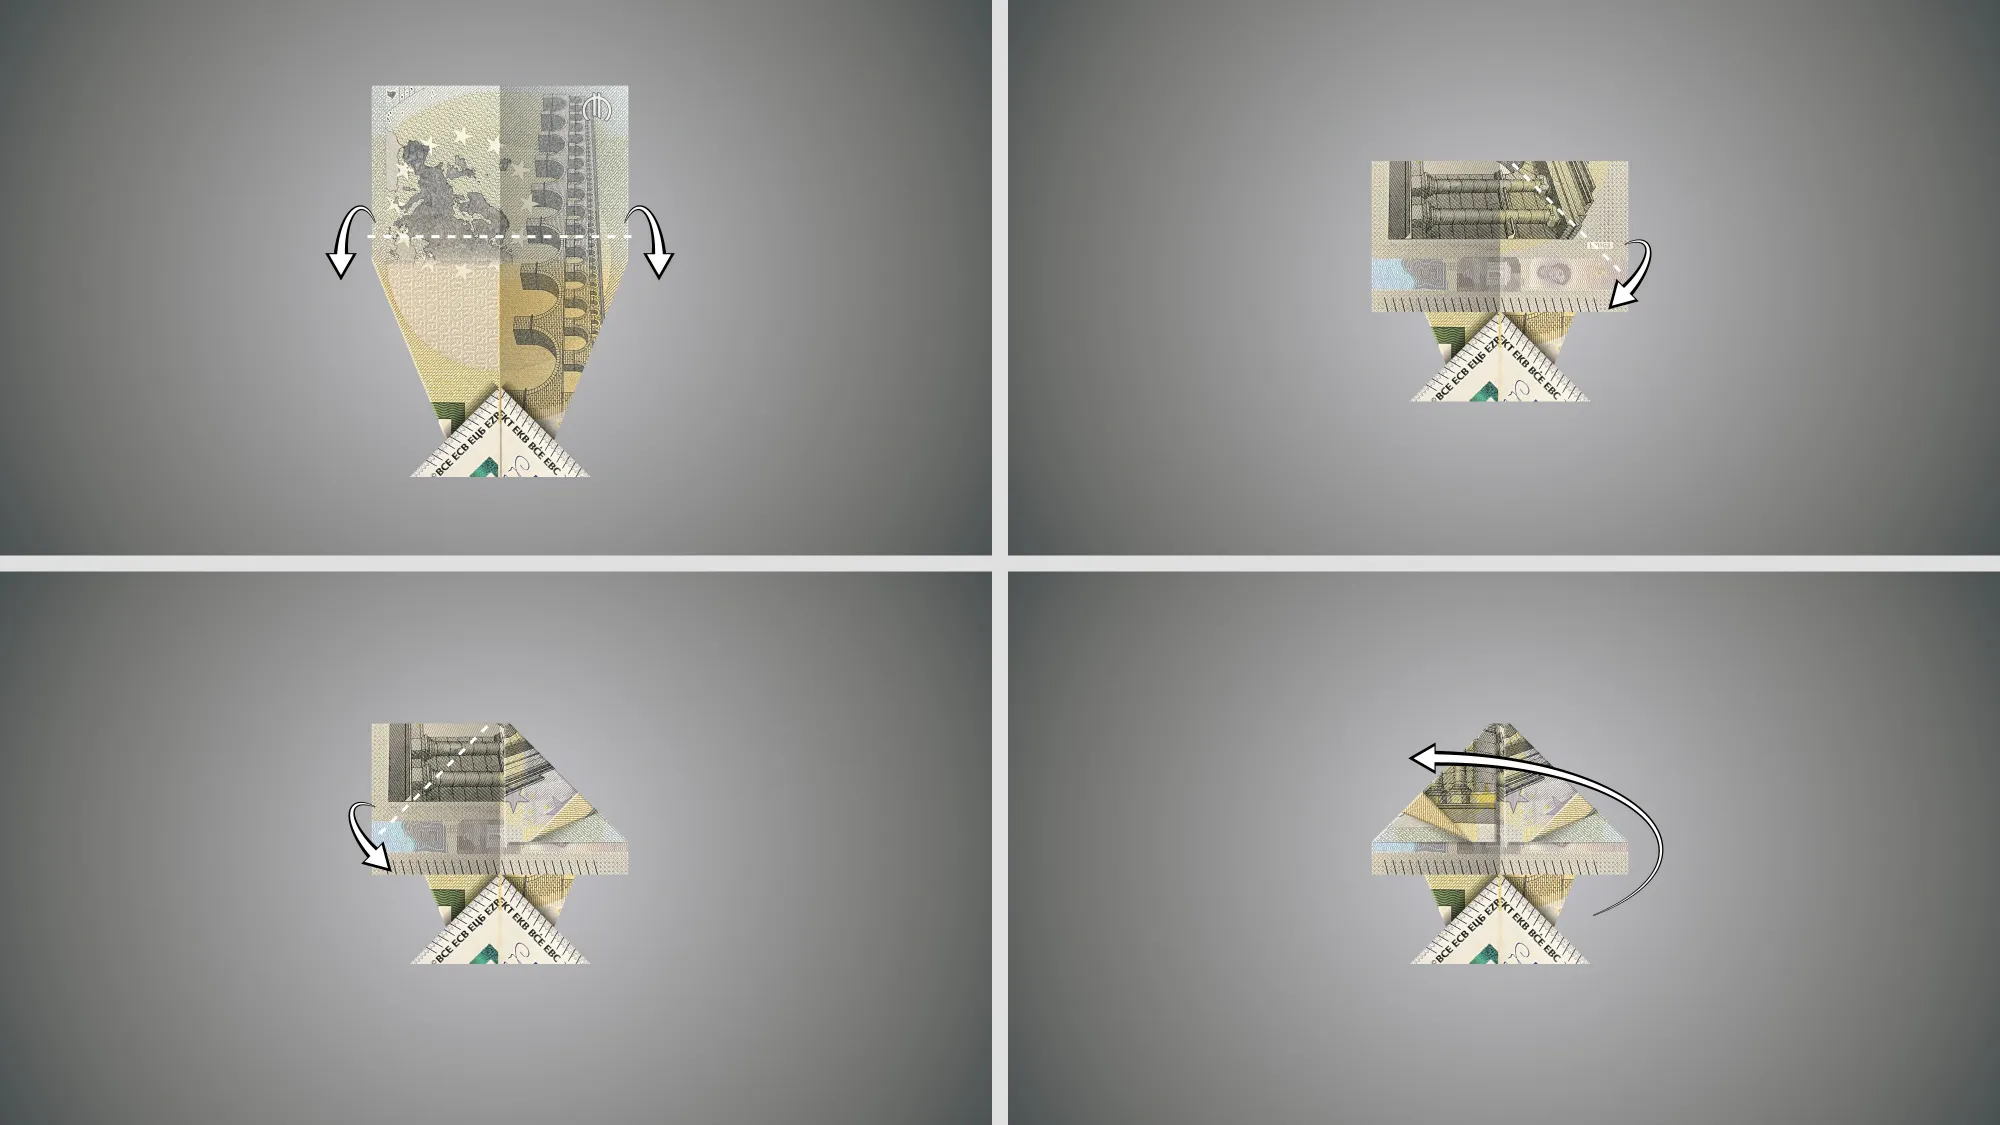
Folding money into fish shapes: Step-by-step guide with video, photos, and text description
To make folding money easier for you, we have recorded a video showing all the important steps. First, watch the video and then use our step-by-step guide with photos. We have photographed every single step, so don't be afraid to try it out - you can do it!
Tip: If you have never folded money before, practice first. You have two options for this: Either cut paper strips the size of banknotes, or buy a pack of play money for practice. As with Origami, remember: don't rush, work slowly and carefully.


Folding fish from money: Conclusion
Thank you for taking the time to read through our guide! We hope you found the guide on folding money into fish shapes helpful. If you're up for more: We have many other guides on folding money. Check out our category for more creative ideas!
We wish you lots of fun trying and gifting your self-folded money fish. Your recipients will surely be thrilled by this special way of handing over money. Until next time!
From Vitalii Shynakov
