Folding napkins "Pumpkin" for autumn, Halloween, birthday
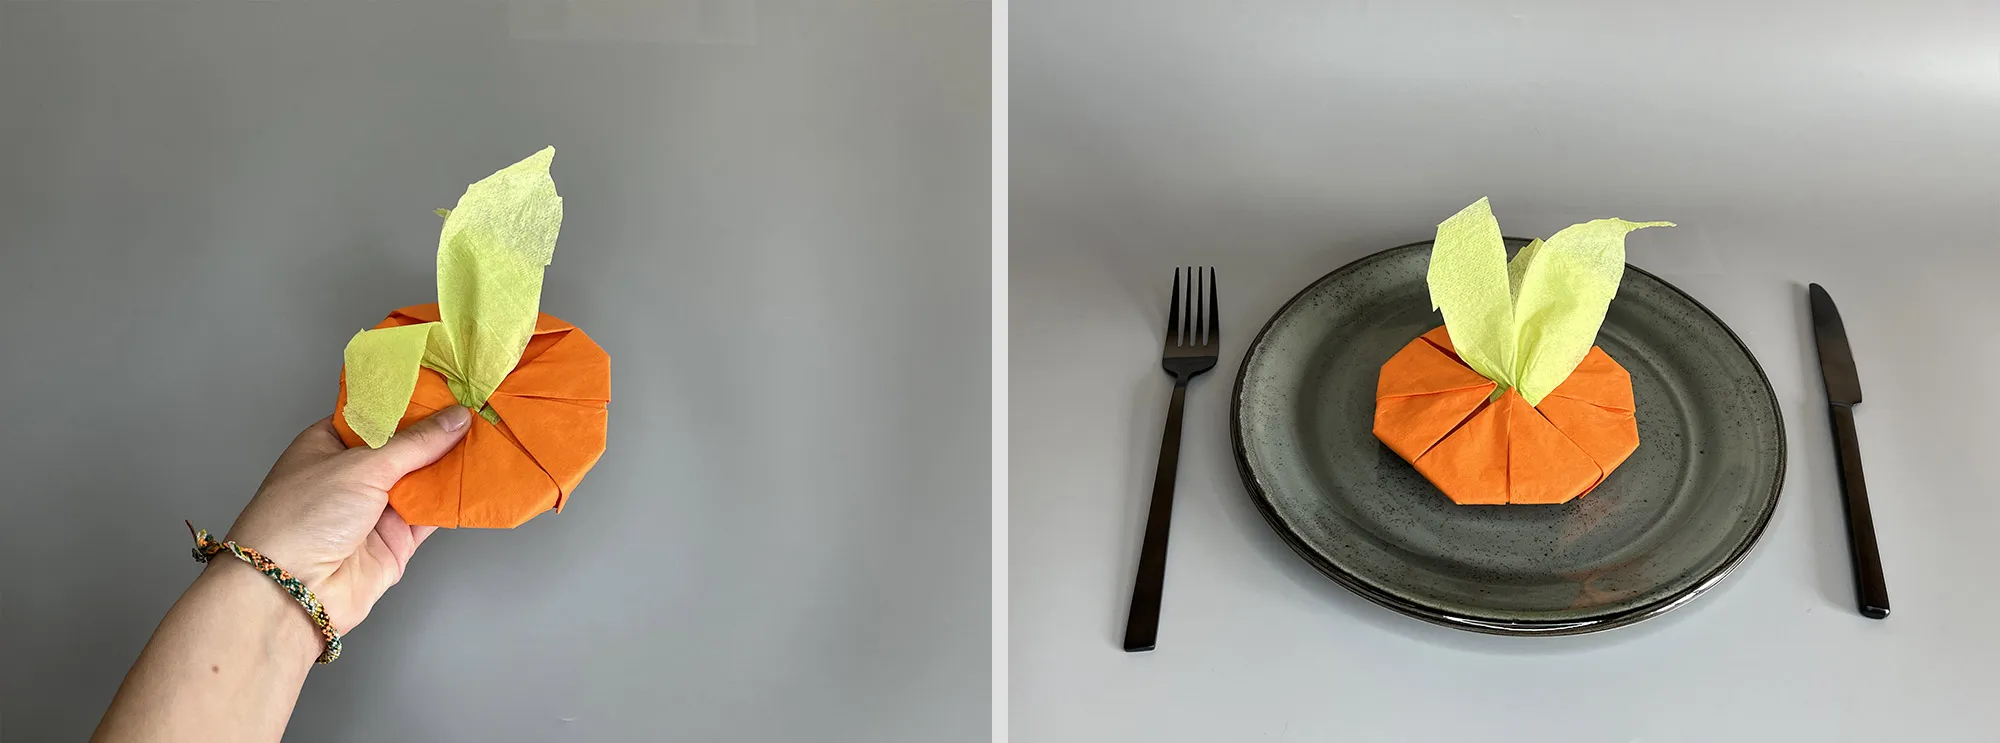
Do you want to create a festive atmosphere without waiting for special occasions? All it takes is good mood, delicious food, and a touch of magic through a beautiful table decoration. In just 30 seconds, you can fold a napkin into a pumpkin shape and give your table that extra something. This creative way of folding napkins is perfect for various celebrations: Whether it's a wedding, birthday, or Thanksgiving – a pumpkin napkin always fits! For Halloween, it adds a spooky-cozy touch to the table, while for Thanksgiving, it brings a autumnal vibe. It also delights children's fall birthdays or cozy family meals. Let's discover together how easy it is to surprise your guests with this folding guide!
Folding Pumpkin Napkin: Step-by-Step Guide with Photos and Description
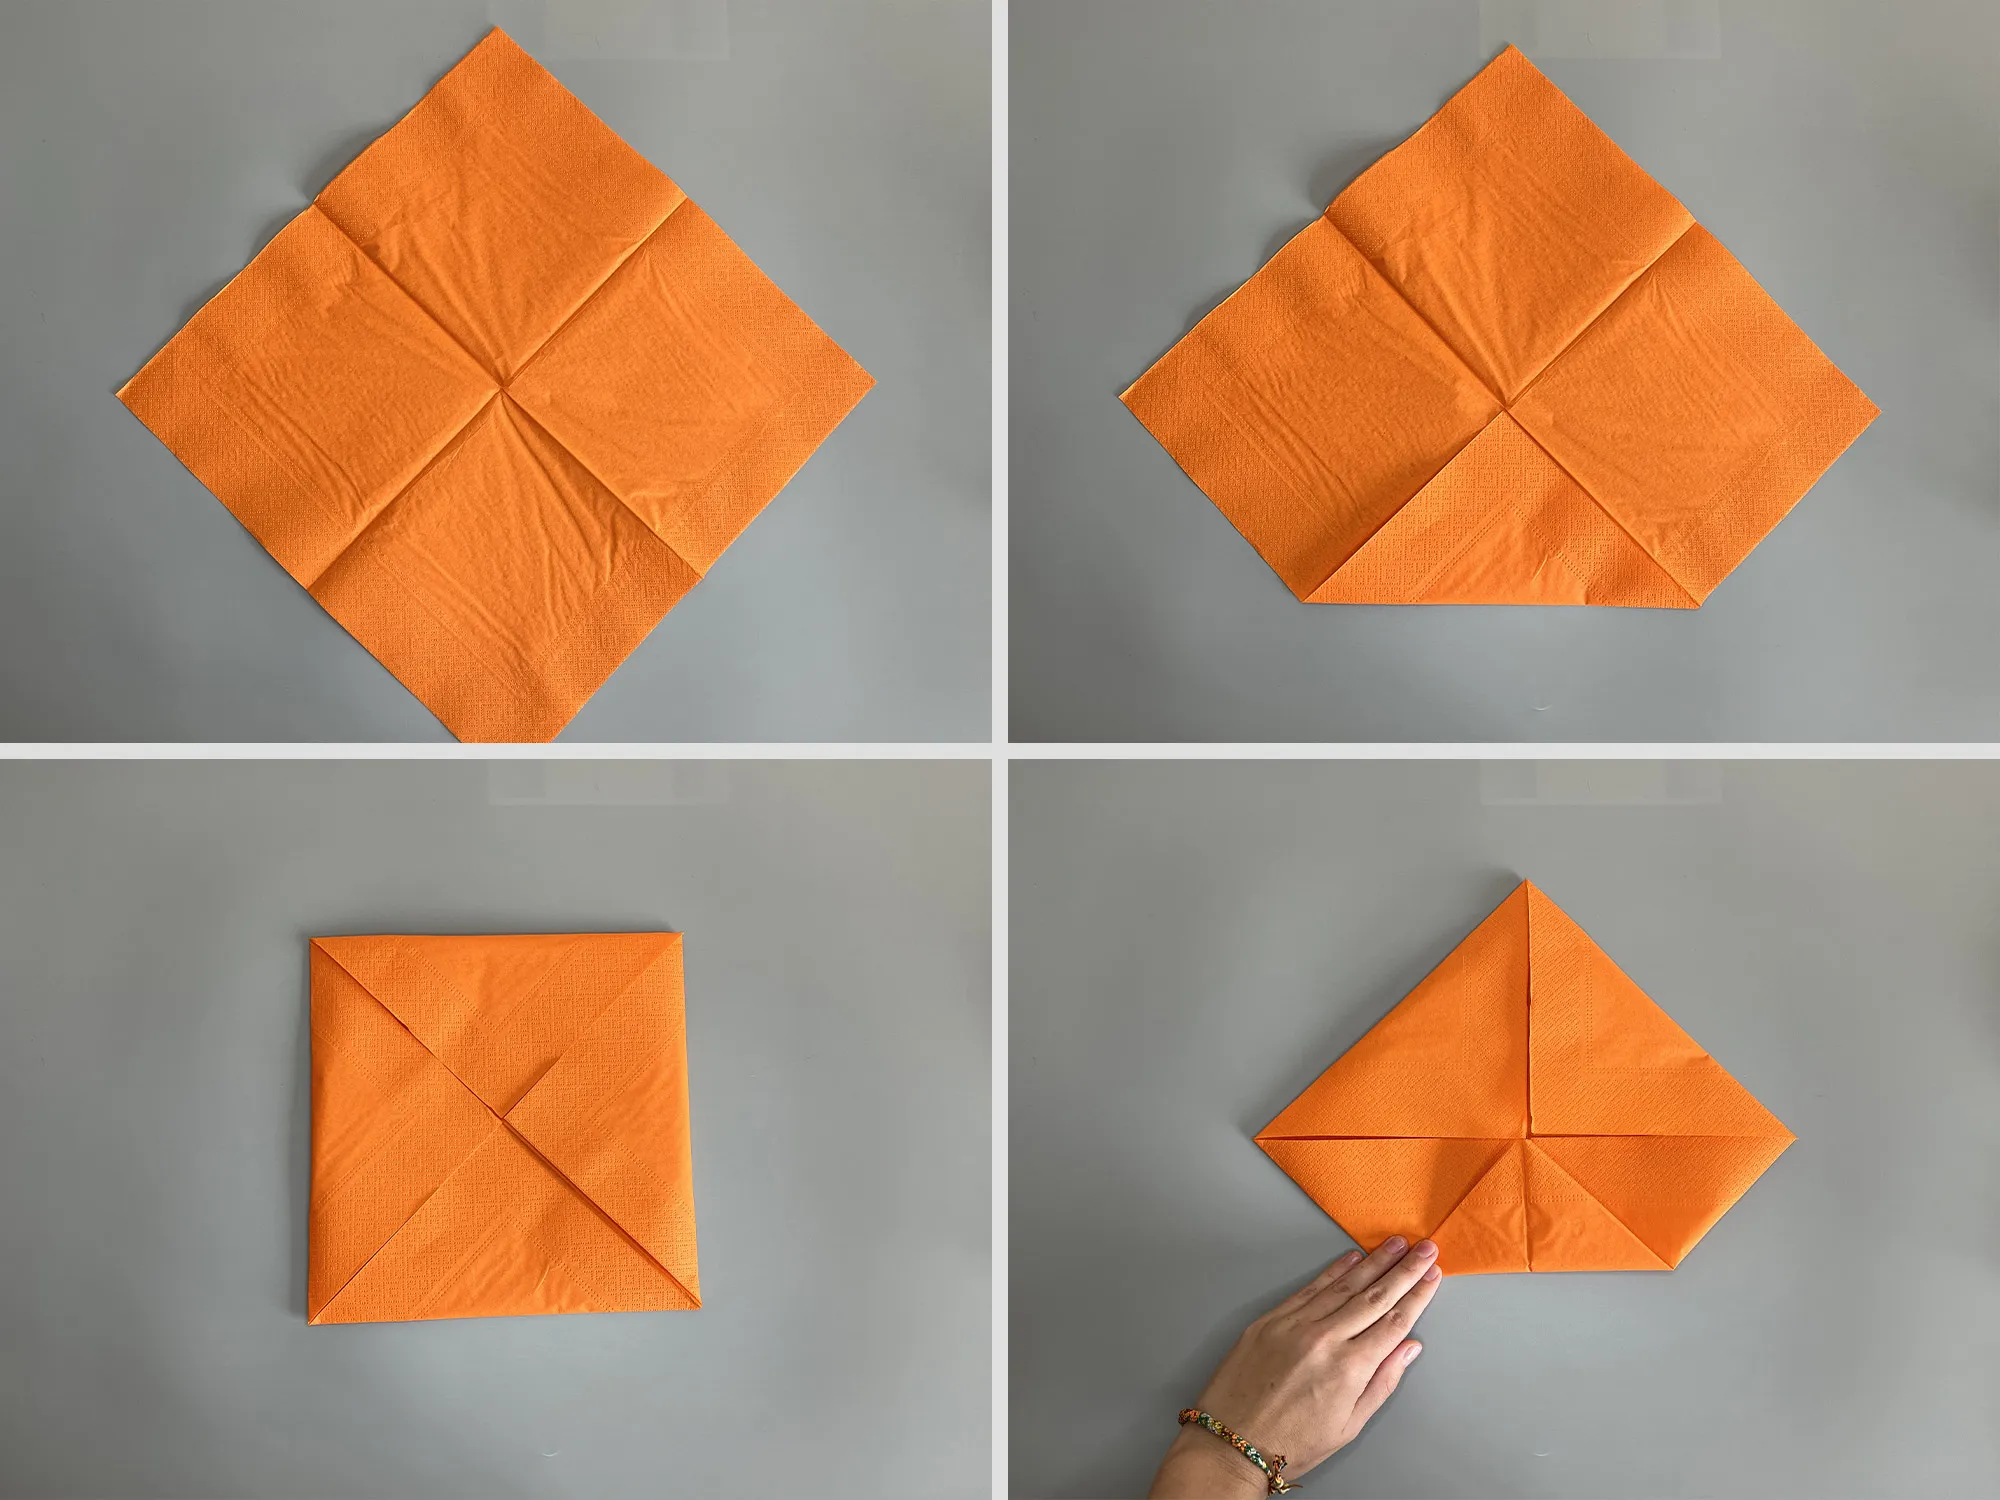
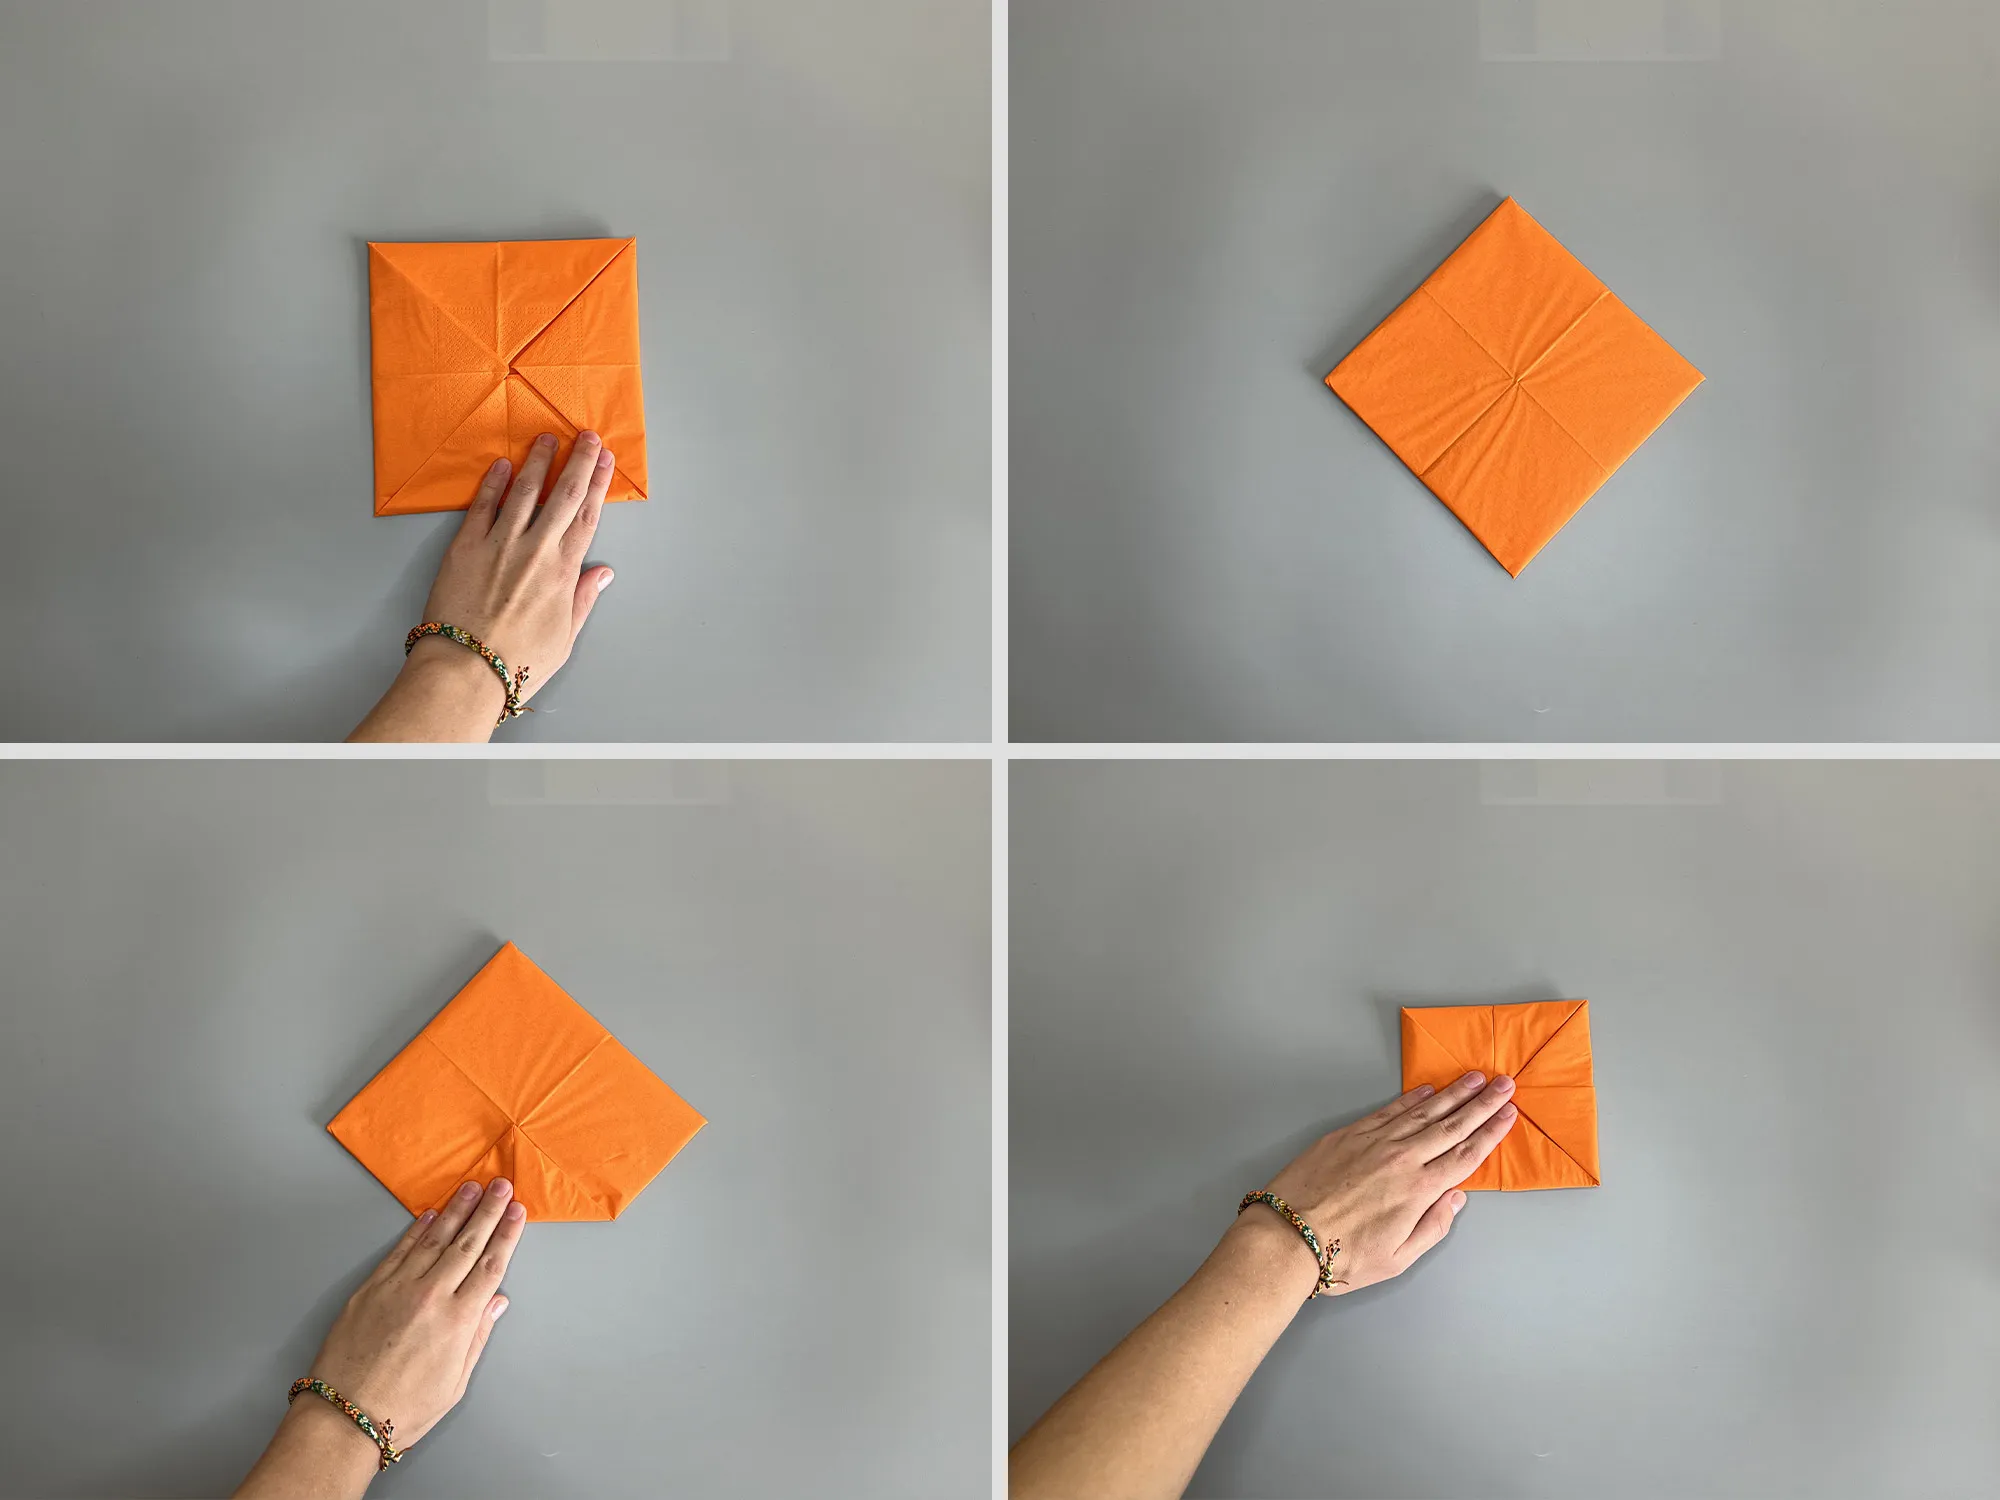
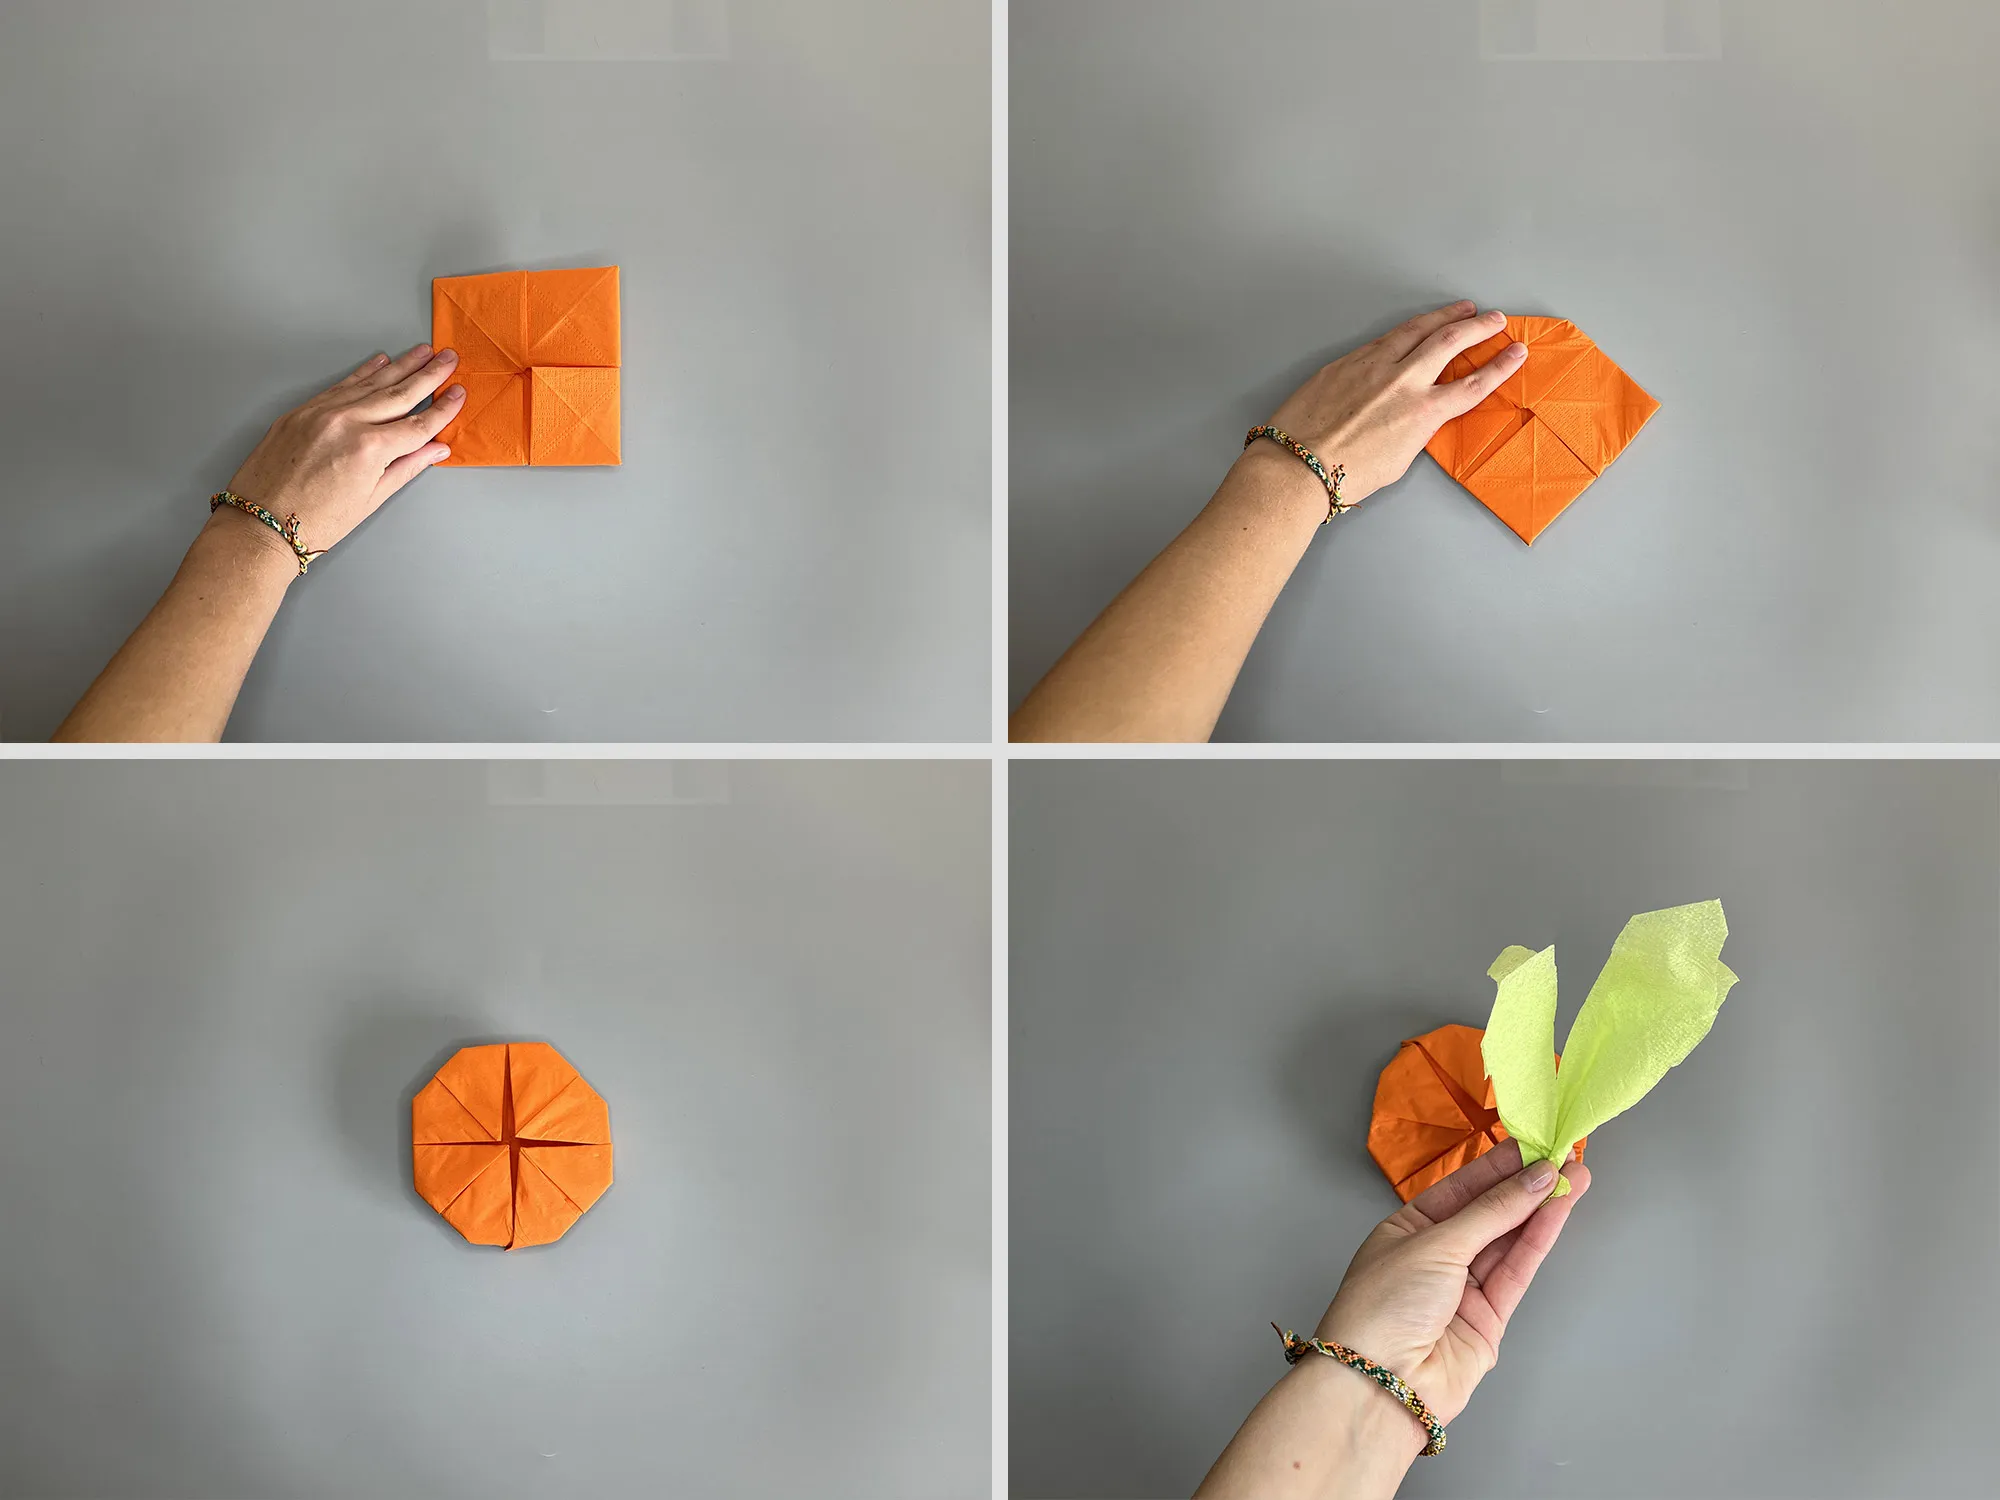
On our platform, you will find numerous tutorials with photos and videos on folding napkins. Before you start folding your pumpkin napkin, I recommend watching the video. Then you can follow the step-by-step guide. We have provided a photo for each action so you can easily understand the technique. A tip from us: Do not skimp on the quality of the napkins. A cheap white napkin won't hold its shape and won't have the magic that transforms a regular meal into a festive dinner.


Folding Pumpkin Napkin: Closing Words and Thank You
We have created this guide specifically for you and would be delighted if you tried folding your own napkin following our instructions. Hopefully, you succeed on your first try! We wish that your celebration or romantic evening becomes even more beautiful with this special table decoration and that you enjoy it greatly. Thank you for taking the time to read and try out our guide. We wish you all the best in your napkin folding and hope you have fun! If you're interested in more creative ideas, feel free to check out our other articles with tutorials on folding napkins. Whether it's for children's birthdays, family gatherings, or special occasions – we have the fitting folding guide for every occasion. Let your creativity flow and enchant your guests with intricately folded napkins!
From Vitalii Shynakov
