Word: update everything and edit fields
Quick guide and example of editing an invoice template
Here you can find out how to edit fields in Word and update everything in a Word document . Explained briefly and then in more detail using our Word invoice templates as an example.
Quick navigation
- Quick guide: Editing fields in Word and updating everything
- Updating fields in Word - how our invoice templates work in general
- Adding and editing new fields - customizing the invoice templates
- Edit all fields and update everything - tips for a fast workflow
Quick guide: Editing fields in Word and updating everything
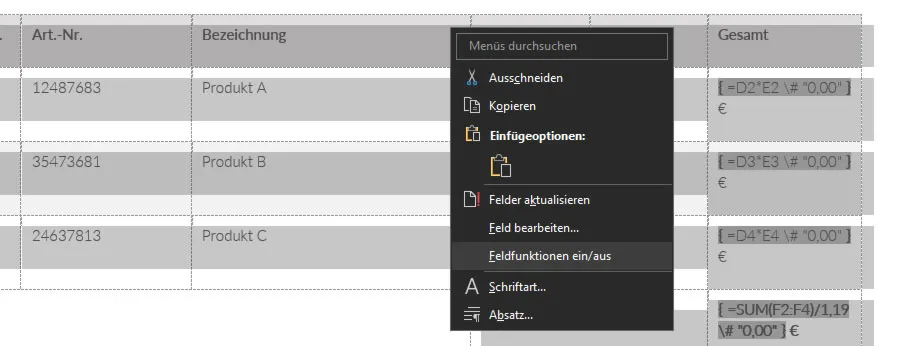
How to display all field functions for editing fields in Word:
- Select the entire document with the shortcut Ctrl + A.
- Right-click to open the context menu.
- Click on Field functions on/off.
This allows you to update everything in a Word document , such as fields or the table of contents:
- Select the entire document with the shortcut Ctrl + A.
- Then press the F9 key.
Updating fields in Word - how the invoice templates work in general
Our invoice templates for Word contain fields for automatically calculating values. In this example, we explain how to edit individual and all fields in a Word document:
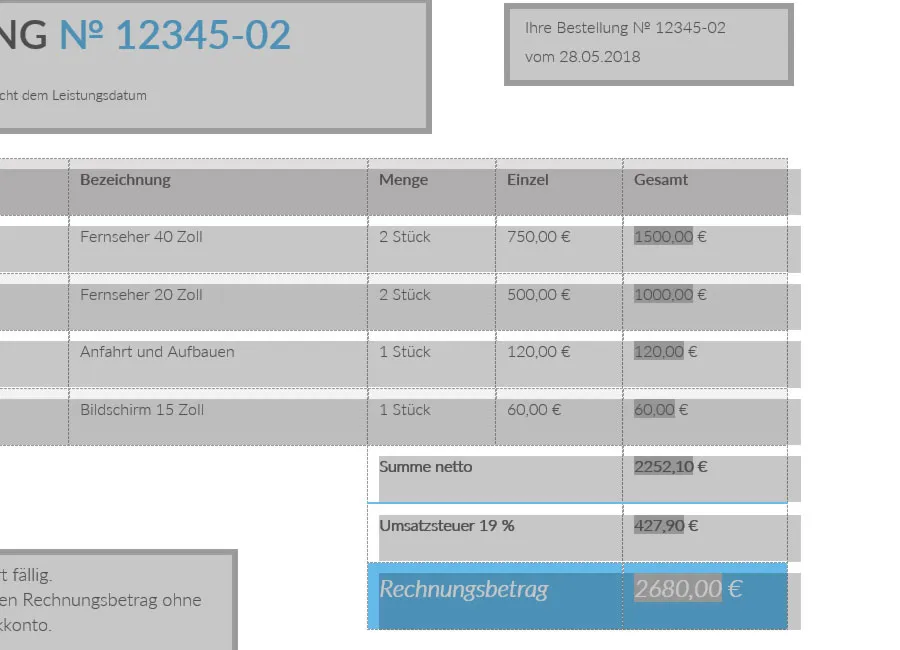
After downloading, open the version of the Word invoice template that has a calculation function. If you click on a number in the back column where the total prices are calculated, it will appear on a gray background. The reason for this is that these are fields with formulas . In the example shown, the field in the Total column multiplies the quantity specified in the row by the corresponding unit price.
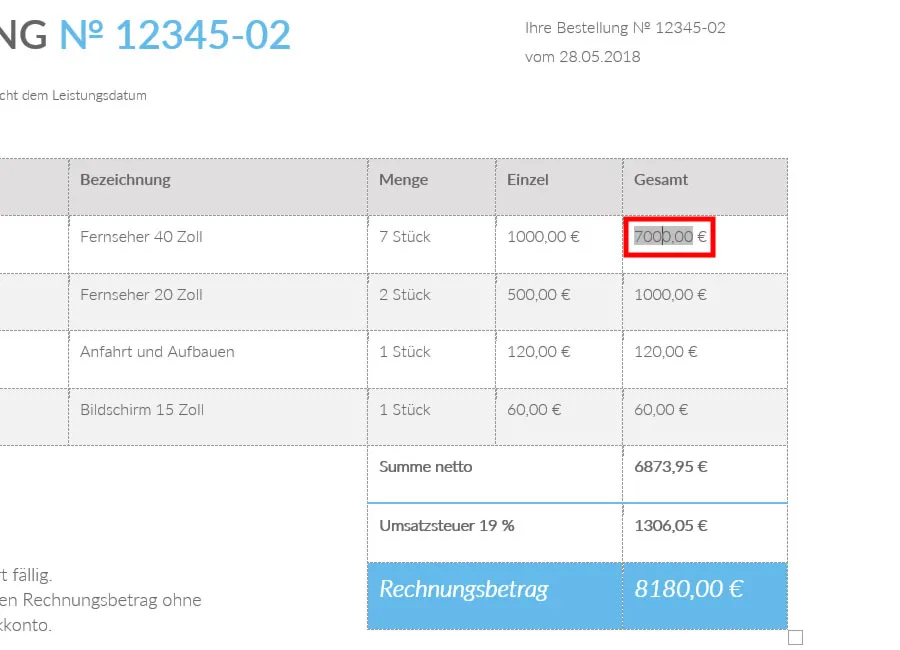
If you change values that a field uses for the calculation, the result in the field initially remains unchanged.
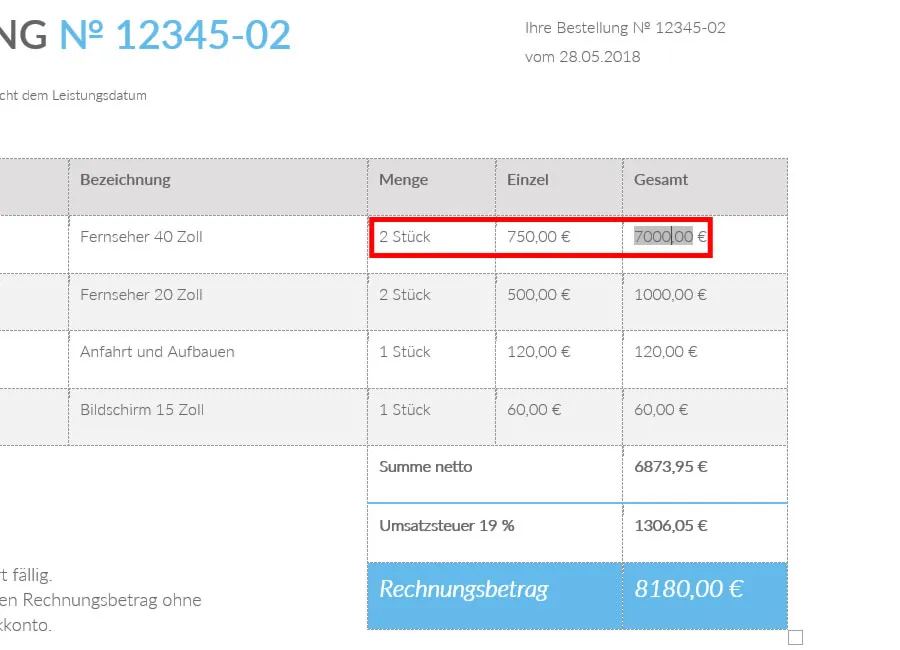
In order for the field to perform a new calculation, you must update the field . There are three ways to do this:
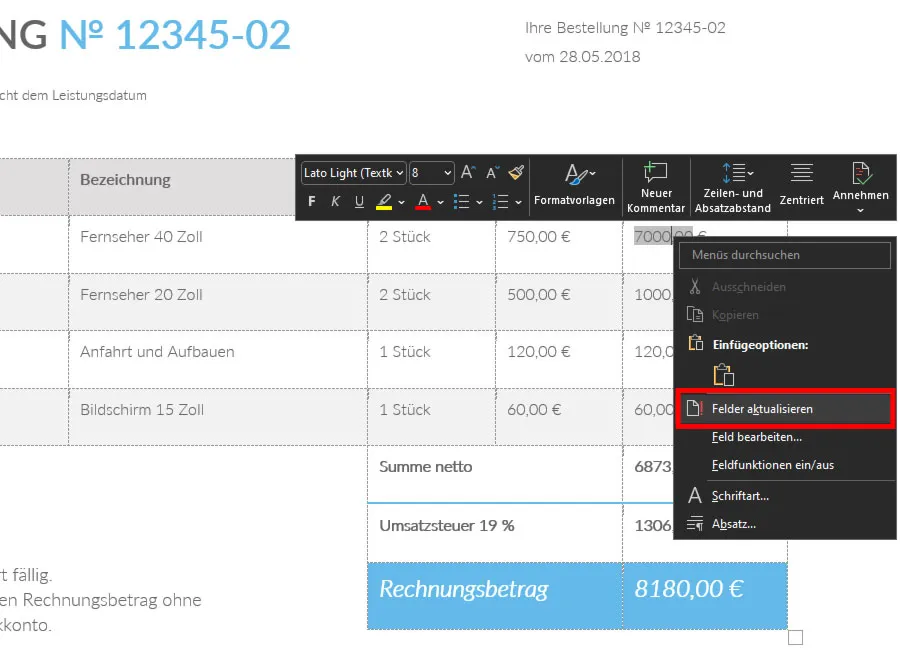
- Update individual field via the context menu: Right-click on the field and select Update fields.
- Update single field via shortcut: Select the field by clicking on it with the left mouse button and press F9 on the keyboard.
- Update all fields in the Word document : Select the contents of your entire document using Ctrl + A. Then press F9.
Add and edit new fields - customize the invoice template
Of course, your invoices will rarely have the same number of invoice items. If you want to add more items, proceed as follows:
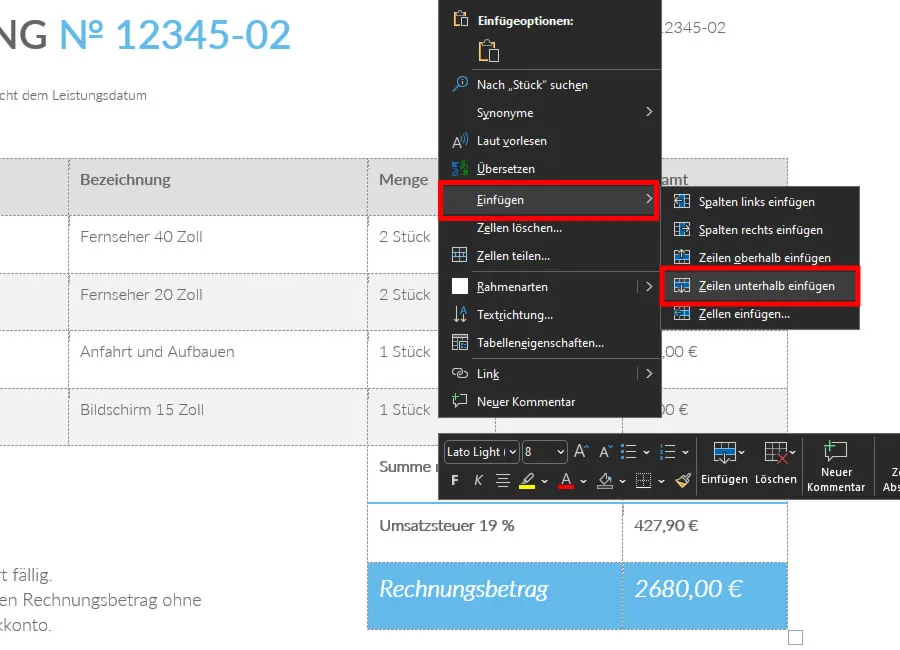
Right-click on the line of the current last item. In the context menu, select the Insert lines below option under Insert.
Fill the new line with the desired values. For the column at the back for the automatic calculation of the total prices, simply use an existing field: select a field in one of the upper rows, copy it and paste it into the new row.
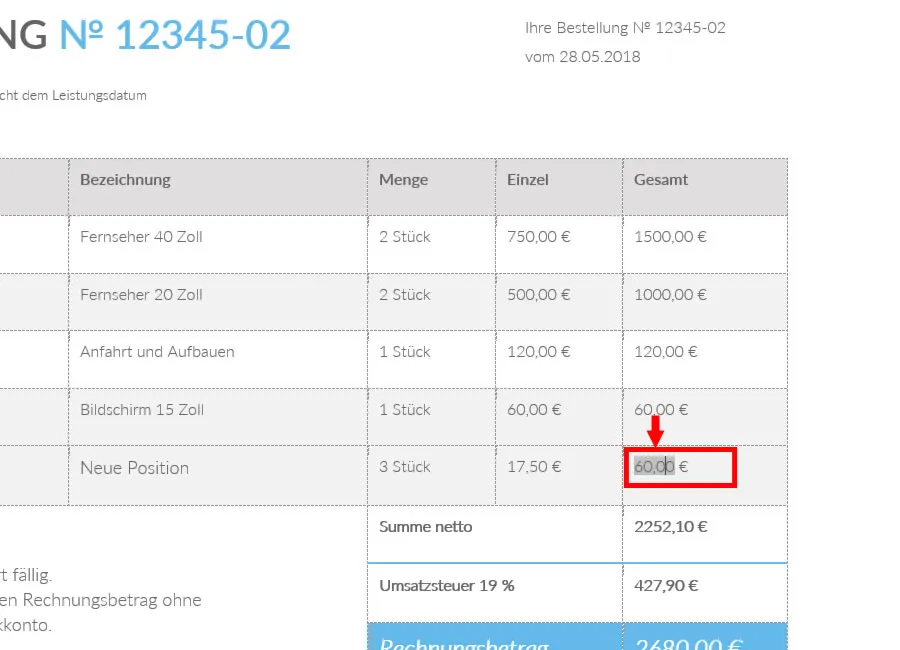
If you now update the field, you will notice that the values are incorrect. The reason for this is that the formula refers to the cells that were specified in the field you copied. You must therefore now adjust the references in the formula .
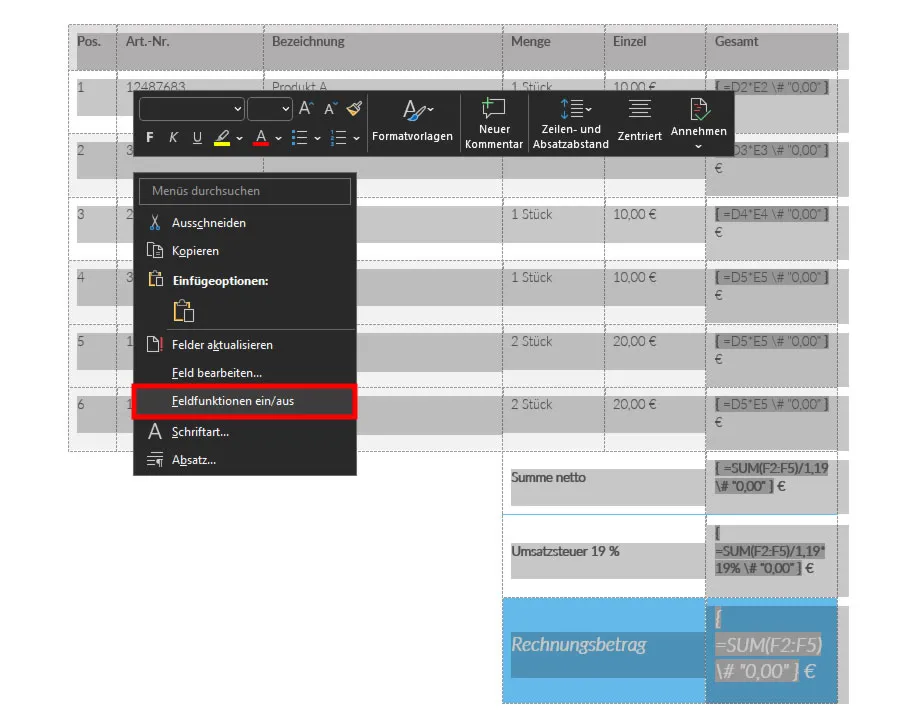
You can display the formula of a field by right-clicking on the field and selecting Field functions on/off.
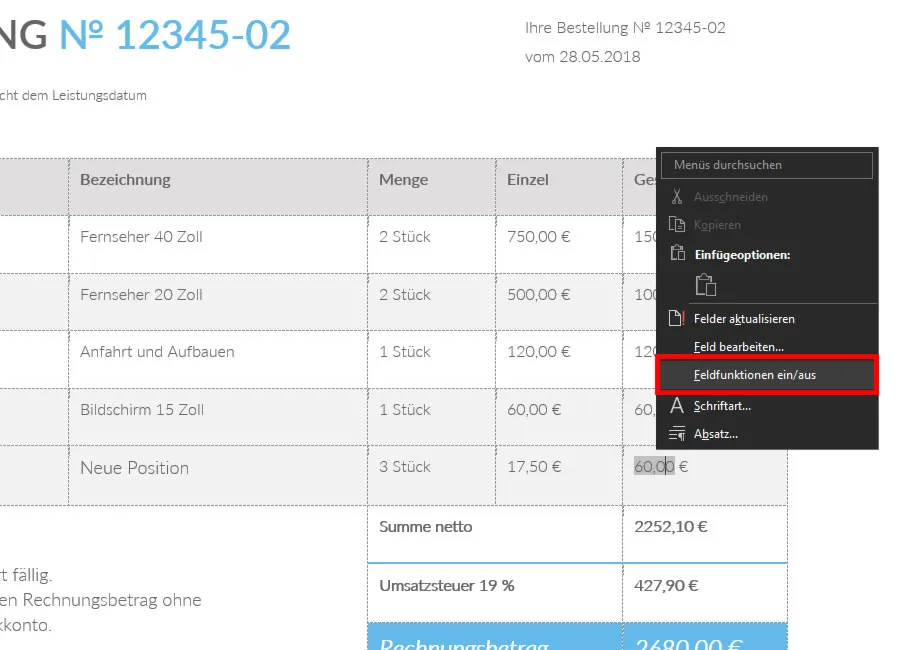
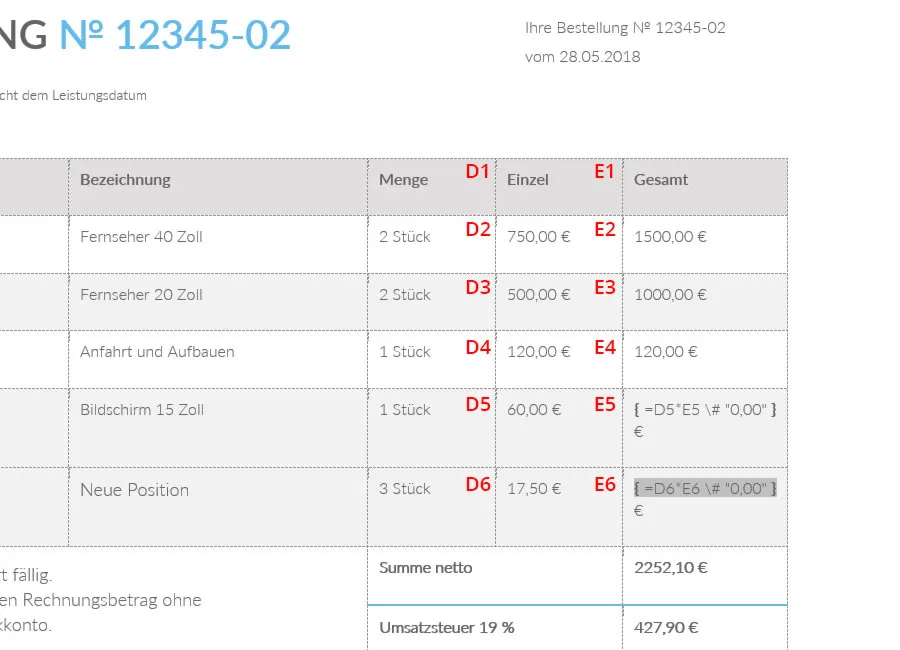
Now you can change the references. The cell numbering works in exactly the same way as in Excel: At the top left of the table, counting starts with cell A1.
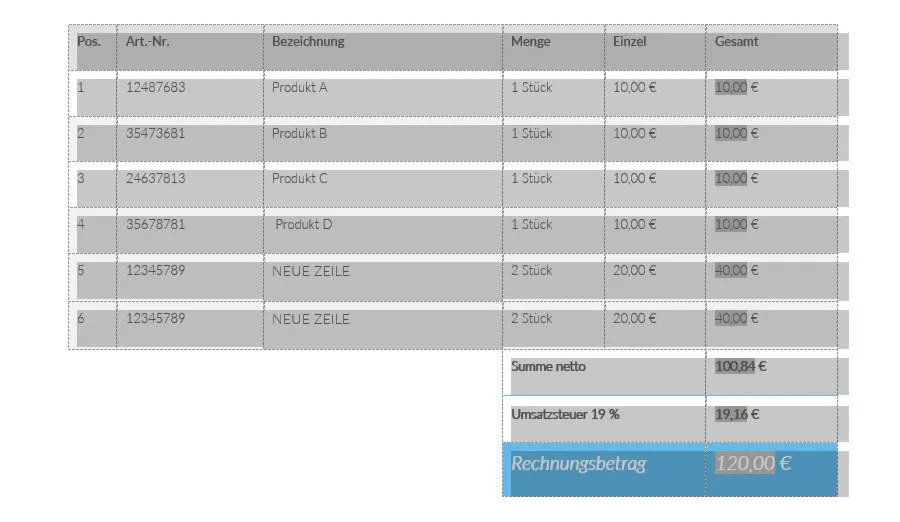
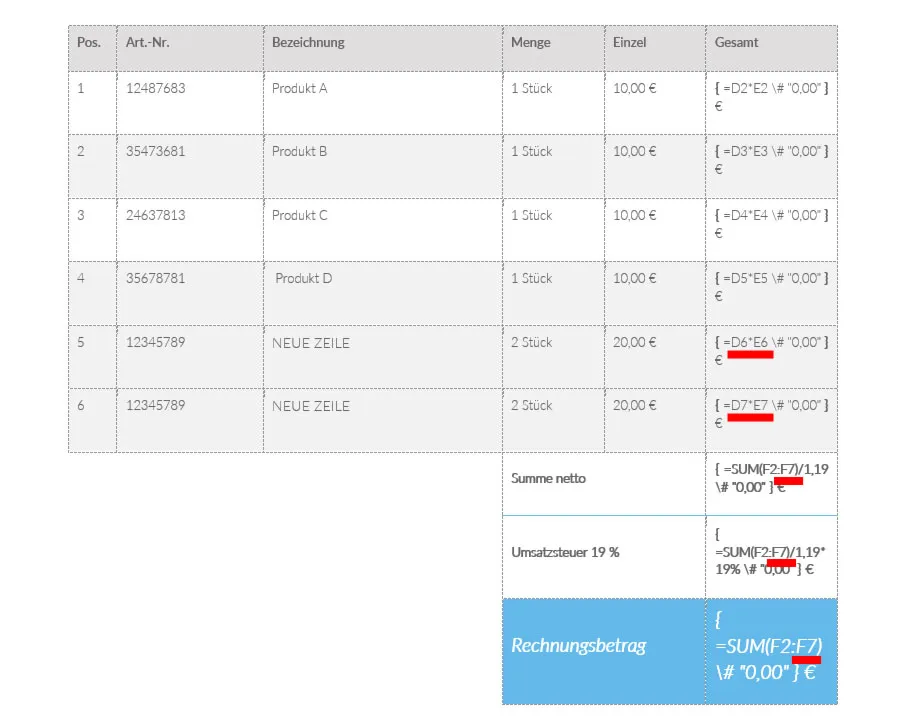
For the example shown: In the Total column, the field for the new position was previously copied from row 5 of the table. However, to ensure that the correct value is calculated for row 6, we have set the references to D6 and E6.
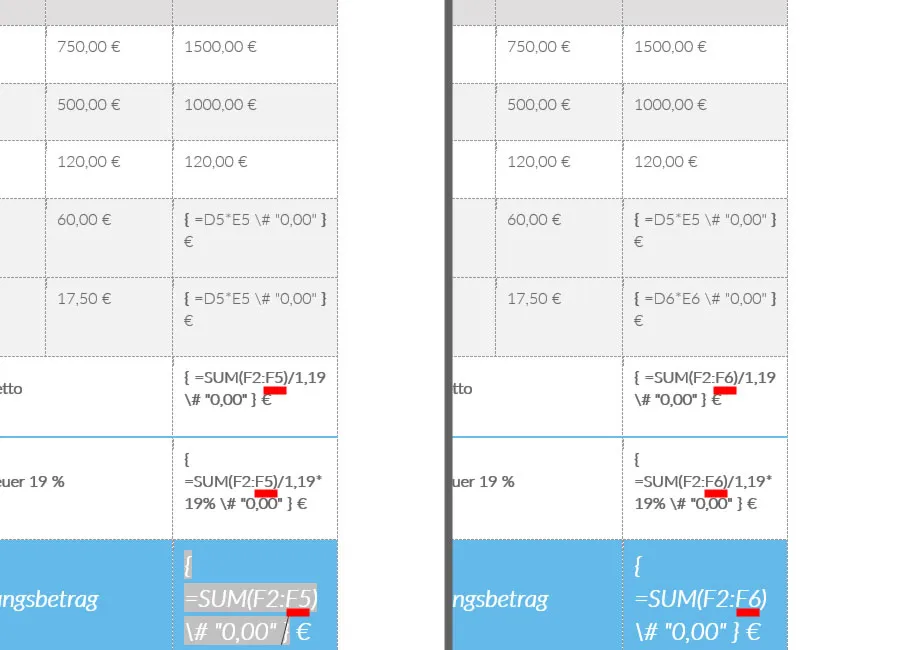
Important: The net price, the VAT amount and the total invoice amount are also calculated automatically. Therefore, as soon as you add new lines to your table, you must also change the references stored there. The same applies if you remove existing rows.
For the example shown: In order for the new line 6 to be included in the totals below, the references there must also be set from F5 to F6.
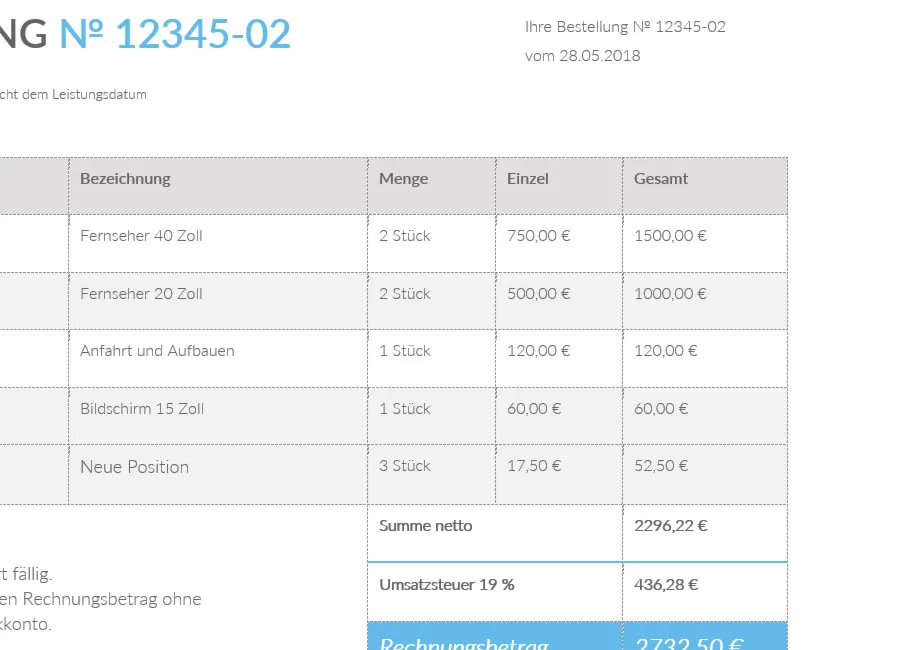
After you have adjusted all formulas correctly, hide the field functions again (right-click > Field functions on/off) and update the fields.
Edit all fields and update everything - tips for a fast workflow
To quickly adapt the invoice templates to your invoice items, we recommend the following workflow:
Open the Word template and insert the lines for all new items on your invoice as well as the corresponding details for all items. Or remove too many existing lines.
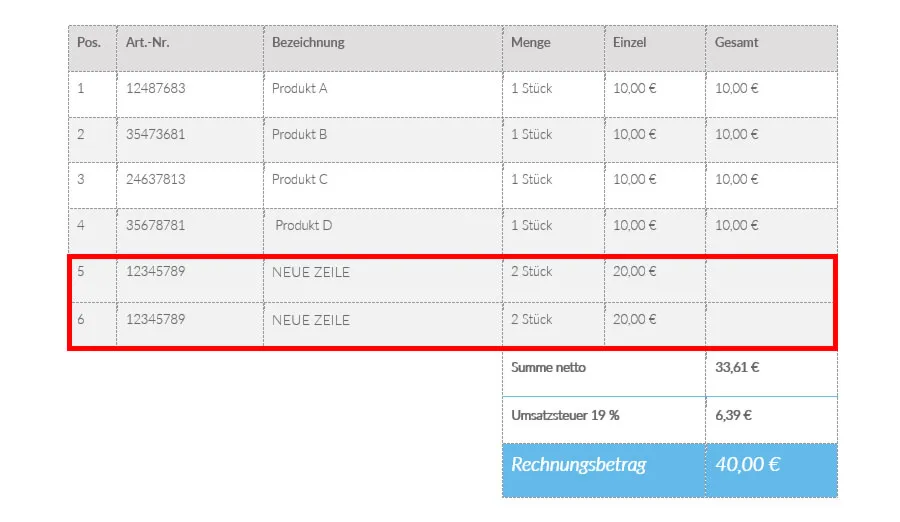
Now copy one of the fields from the column for the total prices and paste it into all new rows.
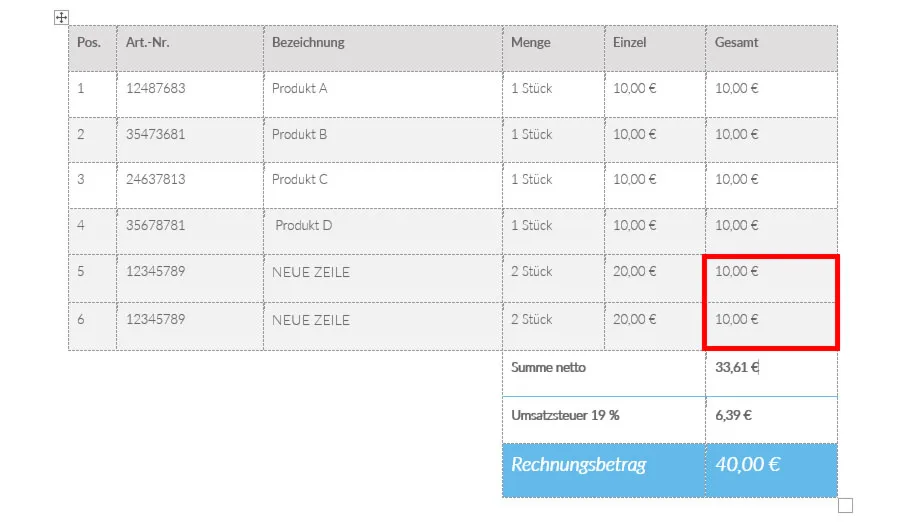
Select the entire document using the shortcut Ctrl + A. Click the right mouse button and show all field functions via the context menu.
Now adjust the references for all newly added fields as well as for the net, sales tax and total amount.
Select the entire document again, hide the field functions via the context menu and press F9 to update all fields.
