
Microsoft OneNote (Tutorial): How to keep track of everything with the digital notebook

- Create your digital notebook with Microsoft OneNote
- Get to know the application and its functions in detail
- Keep track of all your notes at all times with OneNote
- Ideal for sorting your private and professional to-dos, appointments and ideas
- An almost three-hour video tutorial by trainer Fabio Basler
Jot down notes, make plans, file pictures, create spreadsheets ... for work ... for home ... See how Microsoft OneNote works and open your own digital notebook.
42 Videos, 171 minutes
Introduction
Microsoft OneNote: 1.1 | How is the course structured?
In this first lesson of the OneNote tutorial, you will get an overview of how the course is structured and what you will learn in the course. You will be shown all the important learning objectives and you will be given a structure of how to proceed in the course.
Microsoft OneNote: 1.2 | Why use OneNote?
In this video you will learn why you should use Microsoft OneNote as visualization software and what advantages the application offers.
Microsoft OneNote: 1.3 | OneNote Windows 10 vs OneNote App
When using OneNote, the first question that arises is what the difference is between OneNote for Windows 10 and OneNote Desktop. Let's take a look at the most important differences here.
Microsoft OneNote: 1.4 | Getting started with OneNote
Now let's start with OneNote! We will now start the application and learn how to open, close and save OneNote. I'll give you some important tips along the way.
Microsoft OneNote: 1.5 | Structure of a notebook
What is the basic structure of a notebook? Let's take a look at the basic structure of a notebook in this lesson.
Microsoft OneNote: 1.6 | The user interface at a glance
How is the OneNote user interface structured? In this video, I will show you how OneNote is structured and which tabs are located in the application.
Microsoft OneNote: 1.7 | Basic concepts in OneNote
Learning an application is just like learning a language. Therefore, in this lesson you will learn the most important basic concepts of OneNote.
The project file contains screenshots of OneNote in which the most important areas of the application are highlighted.
Microsoft OneNote: 1.8 | OneNote options
There are various setting options in the options dialog. Let's take a closer look at these in the video.
Microsoft OneNote: 1.9 | Quick access toolbar
Customizing quick access allows us to use OneNote even more quickly. This lesson will give you important tips on how to do this.
Microsoft OneNote: 1.10 | Customize menu bar
The ribbon customization can also be user-defined. You will learn how to do this in this lesson.
Microsoft OneNote: 1.11 | Using the search function
The search function in OneNote can be used to search for selected commands and actions.
Notepad on the example
Microsoft OneNote: 2 | Create new notebook
Let's now move on to a practical application in which we create a new notebook. We will clarify the most important terms and learn how a digital notebook is fundamentally structured using a practical example.
Start
Microsoft OneNote: 3.1 | Text formatting
Next, we will use text formatting in OneNote.
Microsoft OneNote: 3.2 | Clipboard
What is the clipboard in OneNote for? Here you will learn how to use it in the application.
Microsoft OneNote: 3.3 | Styles
Format templates also help us when dealing with notebooks in OneNote.
Microsoft OneNote: 3.4 | Categories
Which icons are in the categories in OneNote and how can we use them?
Microsoft OneNote: 3.5 | Email and meetings
OneNote's interface to Outlook can also be interesting for using notes in emails or in meetings.
Insert
Microsoft OneNote: 4.1 | Insert tables
Tables can also be inserted into notes in OneNote. Let's first take a look at the static tables in the video. Then we will look at the interface between OneNote and Excel.
Microsoft OneNote: 4.3 | Insert images
Now we also want to insert images efficiently into OneNote.
Microsoft OneNote: 4.4 | Insert media and links
In addition to images, various media and links to websites can also be inserted.
Microsoft OneNote: 4.5 | Record audio and video
Now let's add audio and video to OneNote.
Microsoft OneNote: 4.6 | Using timestamps and page templates
Now let's move on to inserting timestamps and page templates in OneNote.
Microsoft OneNote: 4.7 | Symbols, formulas, stickers, emojis
How can we use symbols, formulas, stickers and emojis in OneNote? That's what we're going to look at in this lesson.
Draw
Microsoft OneNote: 5.1 | Drawing tools
OneNote also provides us with a tool for drawing. This is what we will be using in this lesson.
Microsoft OneNote: 5.2 | Using and editing shapes
Now we want to use shapes and edit them.
Microsoft OneNote: 5.3 | Convert drawings
In this lesson you will learn everything about converting in OneNote.
course
Microsoft OneNote: 6.1 | Mark notes as read and authors
Notes can also be marked as read after they have been inserted.
Microsoft OneNote: 6.2 | Versions and notebook recycle bin
The version history helps us to work with different versions in OneNote. We will now also look at the notebook recycle bin.
Check
Microsoft OneNote: 7.1 | Spelling
How can we use the spelling function to correct sentences?
Microsoft OneNote: 7.2 | Language and translations
The language function can be used to translate entire texts into other languages.
Microsoft OneNote: 7.3 | Password and linked notes
Learn all about passwords and linked notes in OneNote.
View
Microsoft OneNote: 8.1 | Views
We can use different views in OneNote. In this lesson, you will learn everything you need to know.
Microsoft OneNote: 8.2 | Set up page
We can also use the page setup in OneNote to optimize our notebooks.
Microsoft OneNote: 8.3 | Use Zoom
Next, I'll show you how to use the zoom function in OneNote.
Microsoft OneNote: 8.4 | Manage windows
Now we want to manage our windows in OneNote in a targeted manner.
Release and Print
Microsoft OneNote: 9.1 | Print
How can work results be printed in OneNote? Here you can find out everything about printing drawing sheets in OneNote.
Microsoft OneNote: 9.2 | Release
How can final work files be shared? Here you will learn everything about sharing files.
Smartphone and OneNote Web Clipper
Microsoft OneNote: 10.1 | Smartphone app
OneNote can also be used as a digital notebook on your smartphone. Here you can learn how to download and use the app.
Microsoft OneNote: 10.2 | Web Clipper
The Web Clipper allows us to transfer structures directly from OneNote to the cloud when navigating in the browser. Learn everything you need to know here.
Conclusion
Microsoft OneNote: 11 | Thank you!
Finally, I would like to thank you for your interest in my Microsoft OneNote course. I hope you got a lot of valuable tips from the course that you can use for your projects in OneNote. I wish you continued success and best regards, Fabio.
Examples of use
-
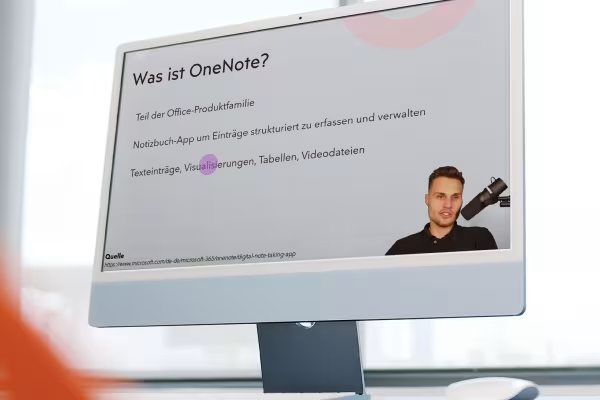 Get to know all the important functions of Microsoft OneNote and keep track of everything important in your digital notebook.
 -
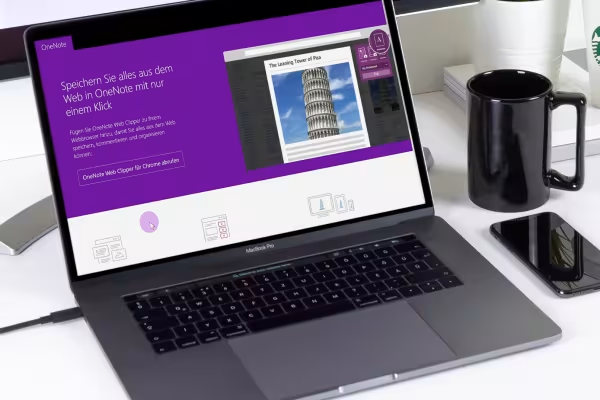 Start the tutorial and get started using OneNote quickly.
You might also like

How the AI can help you
Effectively create modern slides
Faster results in your tables

This saves you time and effort!
Comment now „Microsoft OneNote (Tutorial): How to keep track of everything with the digital notebook“