
InDesign Video Training - Modern Practice

- No theory - implement versatile examples directly
- Optimal practical relevance with individual video training sessions that encourage you to follow along
- Creation of: Calendars, flyers, posters, menu cards, seminar papers and much more.
Your way to the best placement! Learn from real-life examples and bring your layout to the top!
26 Videos, 529 minutes
Create an illustrative poster
Poster design in Adobe InDesign - Part 1: Beam effect
Creating a poster is not difficult in Adobe InDesign if you know how. Here we show you how easy it is to create an attractive poster with just a few tricks. The first part shows you how to set up the document correctly and create an ingenious beam effect.
Poster design in Adobe InDesign - Part 2: Ribbon effect
Creating a poster is not difficult in Adobe InDesign if you know how. Here we will show you how easy it is to create an appealing poster with just a few tricks. The second part shows you how to create a banderole and insert your first texts.
Poster design in Adobe InDesign - Part 3: Adding text
Creating a poster is not difficult in Adobe InDesign if you know how. Here we show you how easy it is to create an appealing poster with just a few tricks.
The third part shows you how to place all the text in the poster and emphasize it with a few form elements.
Poster design in Adobe InDesign - Part 4: Creating QR codes and textures
Creating a poster is not difficult in Adobe InDesign if you know how. Here we show you how easy it is to create an appealing poster with just a few tricks. The fourth part shows you how to generate a QR code for free, even as an EPS file. It also shows you how to add textures in InDesign and how to quickly create your own in Photoshop. There is also a tip on how to use Pathfinder. The result is included with the working file (PDF and IMDL file from InDesign CS4).
Create a foldable flyer
Flyer design in folded format using the example of a sports studio/fitness studio - Part 1
Using a gym flyer as an example, I would like to show how a design for an A4 folding flyer can be created. On the one hand, I will show you how to set up a flyer with a fanfold or zigzag fold and with a wrap fold. On the other hand, it's about the design of the flyer: This includes the placement of a visual eye-catcher, the guidance through the flyer with a design element and the sensible and structured arrangement of text content. No more ugly flyers at last! The first part is about setting up the flyer and cropping the model.
Flyer design in folded format using the example of a sports studio/fitness studio - Part 2
Using the example of a gym flyer, I would like to show how a design for an A4 folding flyer can be created.
On the one hand, I will show you how to set up a flyer with a fanfold or zigzag fold and with a wrap fold. On the other hand, it's about the design of the flyer: This includes the placement of a visual eye-catcher, the guidance through the flyer with a design element and the sensible and structured arrangement of text content.
No more ugly flyers at last!
The second part is about designing the cover page.
Flyer design in folded format using the example of a sports studio/fitness studio - Part 3
Using a gym flyer as an example, I would like to show how a design for an A4 folding flyer can be created.
On the one hand, I will show you how to set up a flyer with a fanfold or zigzag fold and with a wrap fold. On the other hand, it's about the design of the flyer: This includes the placement of a visual eye-catcher, the guidance through the flyer with a design element and the sensible and structured arrangement of text content.
No more ugly flyers at last!
In the third part, two more pages are completed and I give tips on how to handle the insertion of photos in circles.
Flyer design in folded format using the example of a sports studio/fitness studio - Part 4
Using the example of a gym flyer, I would like to show how a design for an A4 folding flyer can be created.
On the one hand, I will show you how to set up a flyer with a fanfold or zigzag fold and with a wrap fold. On the other hand, it's about the design of the flyer: This includes the placement of a visual eye-catcher, the guidance through the flyer with a design element and the sensible and structured arrangement of text content.
No more ugly flyers at last!
In the fourth part, the remaining pages are created. Here I mainly show the correct alignment of text blocks.
Flyer design in folded format using the example of a sports studio/fitness studio - Part 1
15 min OpenFlyer design in folded format using the example of a sports studio/fitness studio - Part 2
16 min OpenFlyer design in folded format using the example of a sports studio/fitness studio - Part 3
14 min OpenFlyer design in folded format using the example of a sports studio/fitness studio - Part 4
15 min OpenTabular designs and calendars
Create timetable in Adobe InDesign
Creating an appealing timetable in Adobe InDesign is relatively easy if you like working with tables.
And that's exactly what this video training is all about. Among other things, it shows tricks for working with tables and gradients, as well as how to cleverly insert transparencies into tables.
Of course, I have peppered the video training with various tips and tricks.
Design photo calendars incl. cover page in Adobe InDesign
This video training is about creating an attractive photo calendar. First, I'll show you how to quickly create the cover page. Then it's on to the months. There are tricks for working with the Pathfinder and tables including cell formats.
Stationery in modern and creative
Classic/modern and playful stationery design in Adobe InDesign
In this video training, I show you how easy it is to create stationery that looks simple yet modern. At the end of the video training, I give tips on how easy it is to create a slightly playful design with just a few elements from the modern design. I also give tips on high-quality paper and DIN standards.
Business cards incl. data merging
Create business cards in portrait and landscape format incl. data merging
In this video training I show how a business card can be created quite quickly and still look good. I also give tips on how to quickly create the landscape format as a portrait format at the same time (for CS6 users).
As a bonus, there is an excursion into data merging, as known from Word under the name mail merge function. This allows you to create business cards for all employees of a large company quickly and without a great deal of additional effort.
The video training is of course packed with a wealth of tips and tricks!
Create business cards in Adobe InDesign - Classic style: Doctor design
In this video training, I'll show you how easy it is to create a business card in Adobe InDesign. Let's start with the search for a suitable logo. I also give tips on how to read vector logos in InDesign (especially because InDesign cannot read SVG files). After that, we need really elegant fonts. I'll give you tips on how to get free fonts quickly. In the first step, I create the design for a double-sided business card in landscape format. Finally, I'll explain how easy it is to create a portrait version in the same file and how you can even use the same character/paragraph formats. A must for anyone who wants to create a beautiful business card themselves and avoid problems when printing later (keyword: bleed).
Job advertisement for newspapers
Designing a job advertisement in Adobe InDesign
In this video training, I show how a job ad can be created fairly quickly and still look good.
I also give tips on how to use individual bullet points and show you where you can download new ones.
Design menu card in folding format
Designing a professional menu in Adobe InDesign - Part 1
This video training contains 4 parts and shows you how easy it is to create a professional bistro card in Adobe InDesign.
Part 1 includes the following content:
- correct setup of the right format
- Designing the title page and clever merging of areas
Designing a professional menu in Adobe InDesign - Part 2
This video training contains 4 parts and shows you how easy it is to create a professional bistro card in Adobe InDesign.
Part 2 includes the following content:
- Logo creation in InDesign with a few areas
- Completing the front page (create your own background texture)
Designing a professional menu in Adobe InDesign - Part 3
This video training contains 4 parts and shows you how easy it is to create a professional bistro card in Adobe InDesign.
Part 3 includes the following content:
- Enhancing the inner part with vector graphics and quickly designing your own graphics
Designing a professional menu in Adobe InDesign - Part 4
This video training contains 4 parts and shows you how easy it is to create a professional bistro card in Adobe InDesign.
Part 4 includes the following content:
- Clever use of texts (price right-aligned with just one click, although the entire line is left-aligned)
- The working file contains the complete menu card (without icons from Fotolia)
DVD cover and DVD label
Designing DVD covers and labels - Part 1: Setting up the document and creating the first form with effects
In this series I show how the InDesign Training - Basics & Tricks cover and label were created.
The first part shows how to set up the document correctly. Then I give an insight into the PSD file that makes up the actual cover (typo effect on the face). I also show how to create the first area with a gradient and other effects.
DVD cover and DVD label design - Part 2: Finishing the cover
In this series I show how the InDesign Training - Basics & Tricks cover and the label were created.
The second part shows how to complete the cover. I will show you various tricks for working with shapes and texts as well as how to create your own barcodes.
DVD cover and DVD label design - Part 3: Creating labels in Photoshop
In this series I show how the InDesign Training - Basics & Tricks cover and the label were created.
The third part shows how I design the label in Adobe Photoshop (although everything would also be possible in InDesign, but we have always used Photoshop for the label so far). There are tips and tricks on how to work with clipping masks and how to use the drawing pen. The fourth part then shows how to design the label in InDesign.
DVD cover and DVD label design - Part 4: Creating labels in InDesign
In this series I show how the InDesign Training - Basics & Tricks cover and the label were created.
The fourth part shows how to design the label in Adobe InDesign. Although this part is short, it contains lots of little tips and tricks.
Designing DVD covers and labels - Part 1: Setting up the document and creating the first form with effects
13 min OpenDesigning seminar papers
Designing professional seminar papers: The table of contents
In this video training, I show you how easy it can be to create a modern table of contents in Adobe InDesign. A bachelor thesis by Lena Kremer with the topic "Analysis for the recommendation of a digital communication concept for Pier A-Plus at Frankfurt Airport" serves as an example. If you watch this video training from start to finish, you will know exactly how ingenious creating a table of contents in Adobe InDesign can be.
Designing professional seminar papers: Creating the title page
What good is the best bachelor thesis if the title page looks like nothing? This video training shows you how to create a decent title page with little work. I give tips on how to work with vector graphics and transparencies.
Designing professional seminar papers: Main part and tips & tricks
In the last part I would like to give a number of tips and tricks for dealing with bachelor theses/seminar papers:
- Dealing with sample pages
- Quickly create an airplane runway yourself
- Cleverly position the airplane differently on each page - flipbook
- Preflight - How to quickly find and fix errors (missing fonts, graphics)
- Inserting anchored images
- Dealing with color management - Be careful when printing black and white pages ... not everything that looks black and white is really pure black
- Final check with Acrobat
A must for anyone who wants to produce bachelor theses/seminar papers professionally and accurately.
Professional application design
Creating a professional application design: the minimalist style
Whether you are applying for a traditional profession or a creative job, there are certain rules that must always be adhered to. This video training will focus on these rules and show you a few ways to deviate from the standardized application look and impress with your own, yet not too playful style. The classic style of a cover letter and CV according to DIN 5008 is deliberately neglected here.
Note: The video training presents a professional application design in a minimalist style according to our standards, which can, however, be interpreted differently by recruiters depending on the industry and application.
Examples of use
-
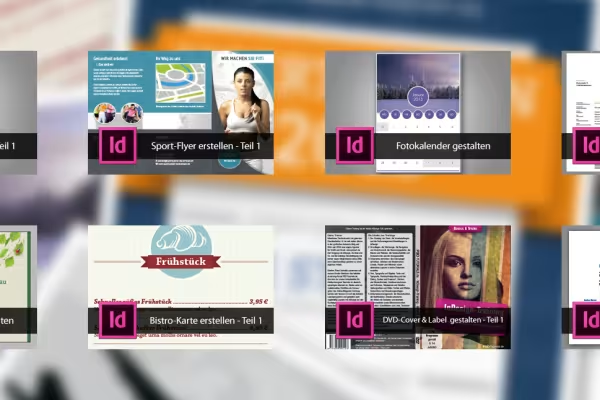 Get into modern practice with InDesign
You might also like

More style, more power, more templates!

Full power, more inspirations, maximum WOW effect!

Live your layout now!

Save time with artificial intelligence
Comment now „InDesign Video Training - Modern Practice“