Introduction:
Of course, your post-processing depends on whether you provide the couple with all the files digitally or the client only receives a few edits from you.
In either case, you need to know how to edit your RAW files in batches and how to enhance individual files later with Photoshop. As this tutorial is also aimed at absolute beginners, I would like to start right at the beginning. If you are already familiar with it, you are welcome to skip to the other points.
I hope that there will also be a few things here for more experienced amateur photographers. Please understand that I cannot explain all the functions, tools and options in Bridge and Photoshop down to the smallest detail, as this would go beyond the scope of a complete tutorial series. I have therefore concentrated as far as possible on my process and the most important elements of your beauty retouching.
This tutorial is structured as follows:
- My workflow
- Bridge - Camera Raw: Batch processing
- Bridge - Camera Raw: Single image processing
- Photoshop - Tools
- Photoshop - Beauty retouching
- Photoshop - Actions and filters
- Image presentation
- Technical literature
1. my workflow
Before I explain the exact process to you, I would like to describe my own workflow for every wedding in a few sentences. I would recommend that you take your wedding photos (preferably all photos, of course) in RAW format. You have a lot more editing options afterwards, which you shouldn't waste. I am also very grateful for this, because in manual mode it often happens that I take one or two pictures that are too bright or dark when the lighting conditions change quickly. Sometimes I don't have time to check it directly and have to rely on quickly switching the camera. A little readjustment is therefore necessary here and there.
As I work exclusively with Bridge (Camera Raw), I will leave Lightroom out of this tutorial. This is also because I only use additional tools such as filters and actions in Photoshop. In general, however, I would recommend that you test both programs and use the better one for you and your workflow.
So my workflow starts with copying all image files in RAW format to an external hard disk. The RAW files are backed up directly to two memory cards when shooting anyway, so this is now the "third" backup. I do not move or delete any image files until I have backed up all RAW and later JPG files in duplicate on two external hard disks. Only then do I format the memory cards.
After the backup, I open the wedding folder with my RAW files in Bridge and display them in larger batches (up to 250 photos at a time) in Camera Raw. Here I check the images for cropping, exposure, color temperature and make more or less strong corrections if necessary. I also delete unusable files (closed eyes, blurred images, etc.) - of course I look at every single image. I then save the files as JPGs on my external hard drives.
Only after I have viewed all the images do I bring my "favorite images" into view and edit them in detail in Photoshop - according to my wishes. These only serve as an initial orientation for the couple on the CD as to how their pictures could look edited. Later, they will tell me what they want and I will of course edit their selected images according to their wishes. I like to put the couple's pictures in folders sorted by theme (e.g. preparations / wedding ceremony / guest pictures / couple pictures / location / editing samples etc.) before I burn them onto CD. That way the photos are also a bit more organized. Of course, you can also decide this according to your wishes. Now let's go through this workflow in detail.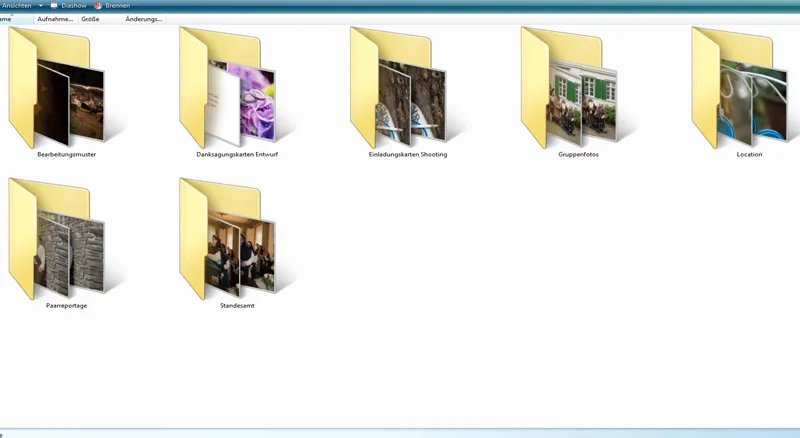
2 Bridge - Camera Raw: Batch processing
If you have never worked with Bridge before, you should first familiarize yourself with this program. It offers countless options for viewing and preparing your images before you edit them in detail in Photoshop.
The view of your images depends on your taste. I have chosen the filmstrip with small images and a large preview image. I find this just as useful for batch processing as it is for my best-of selection later when editing individual images.
View: Filmstrip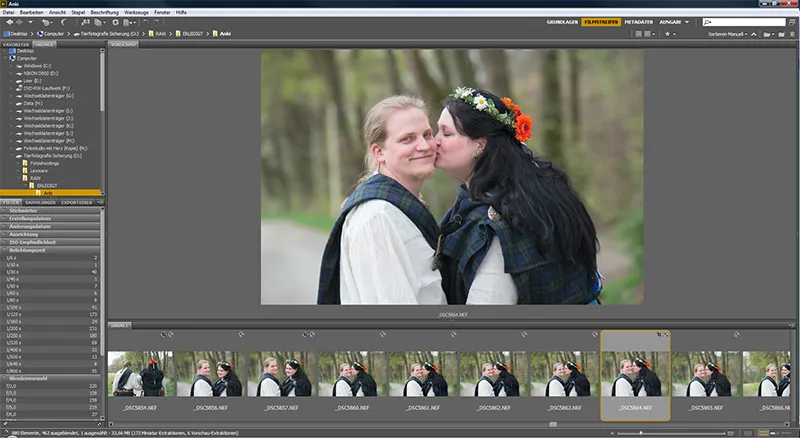
View: Basics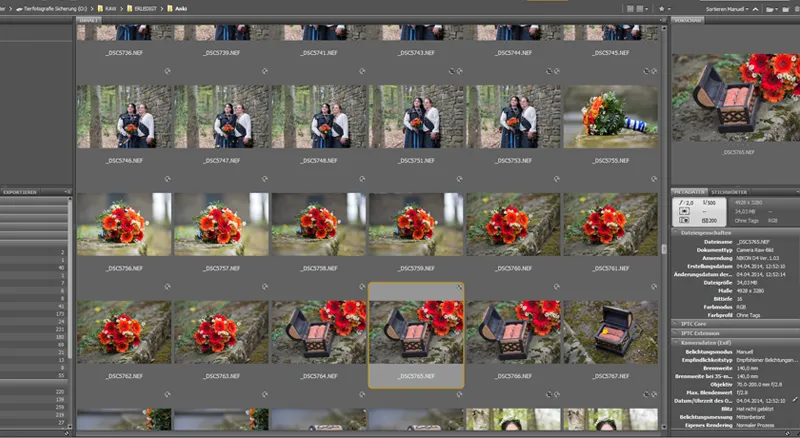
Now I gradually open all the images from the wedding reportage for batch processing without looking at them individually beforehand. I usually select 150-250 at a time and display them in Camera Raw. Whether you open just as many or only 10 at a time or even the whole folder is up to you.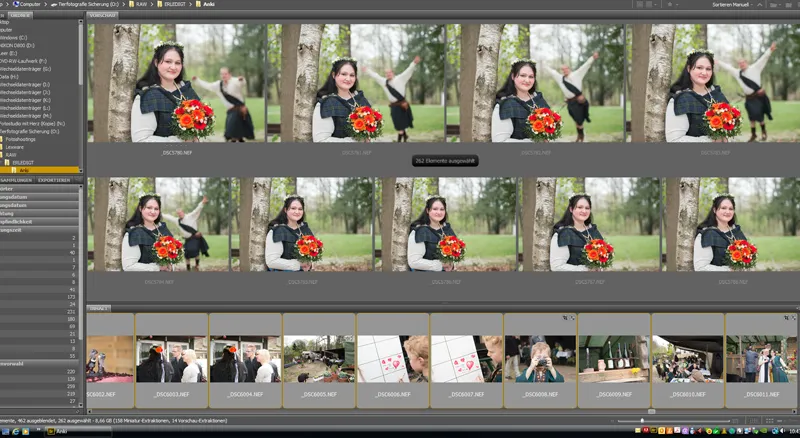
Since the images all have to be loaded into Camera Raw first, I don't like to open more than 250 at a time, otherwise the batch processing will take too long to load or - in the event of a program crash - all the work will have been for nothing. This doesn't happen often, but it is annoying if it does happen. Surely it also depends on the strength of your PC, just try it out!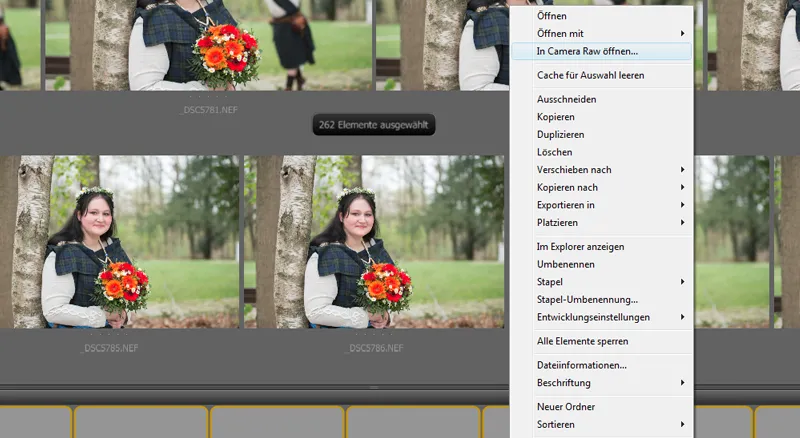
After opening the images in Camera Raw, I wait a few minutes for them to load completely. Then the review is much faster. If you have a fast PC, you'll be able to do this straight away without having to wait.
Before we get into the detailed changes, which you can of course also apply to all the photos you have open in Camera Raw at the same time (point 3 Single image processing), I'll show you what I do in the first step. This window opens in the Camera Raw view. You can see the selected image in preview modeand the view strip for all selected photos on the left. You now have the option, if only one image is selected, to make all changes to just one image using the tools at the top or the bar on the right, or, if you have selected all images with Ctrl+A, to apply changes directly to all images using the tools and functions.
General workflow functions can be found under your image in the preview (see next image). In batch processing, please first select all the images you have edited (Ctrl+A). In the window that opens, you can now select the color space in which the images are to be saved, the color depth and the size of your files that will be output later. Also the desired resolution.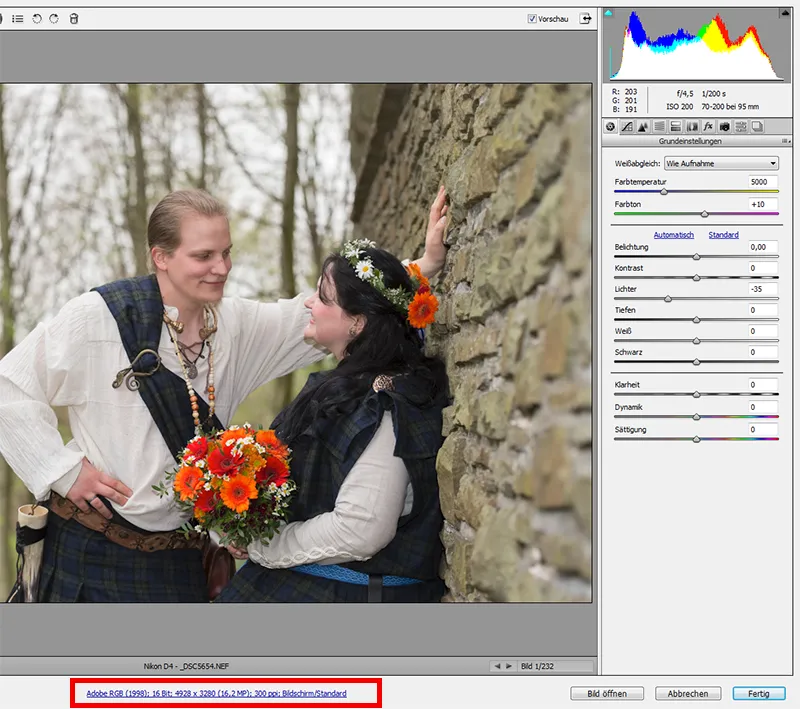
I make almost all the changes that can be made in Bridge in the single image selection or for a series of images that were taken with the same settings. For example, if you have photographed an entire series that is too bright, you can select it and apply the same changes to all the images (exposure compensation in this case).
Here I have intentionally brightened a few pictures as a sample. If we now assume that these were taken in this way, I could mark the series (left preview) and then use the Highlights / Exposure sliders until they match my desired result. Camera Raw has little helpers here, which you can of course activate or deactivate according to your wishes. For example, you can click to display areas that are too dark or too light (overexposure = red, underexposure = blue). You can use the Highlights and Shadows sliders to correct these accordingly. White areas in particular tend to be blown out.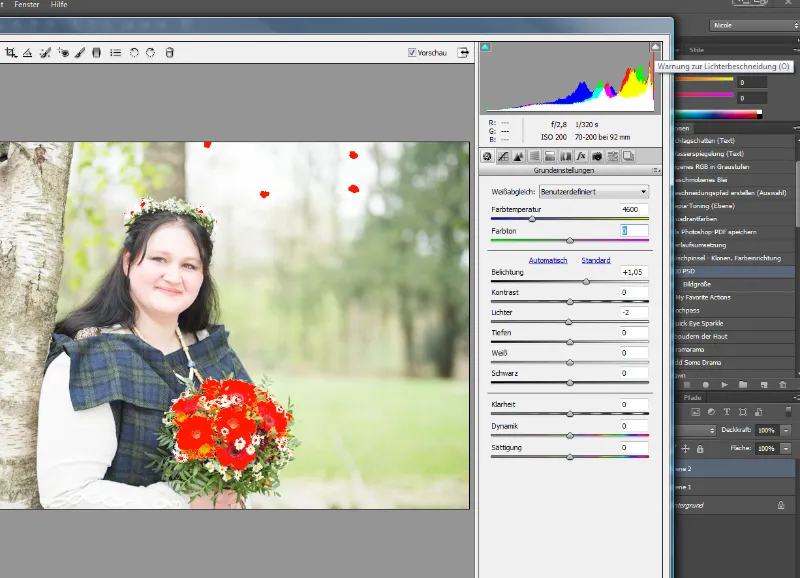
As a precaution, it is better to expose your shot a little darker than too bright. Once the structure has been lost, you cannot restore it. However, if they are only slightly overexposed, you can partially repair them with the Highlights slider! That's why I use this very often. I generally only use the Exposure, Highlights, Depths and Color Temperature functions for batch processing and then only apply them to entire image series. I apply all other functions to each image individually.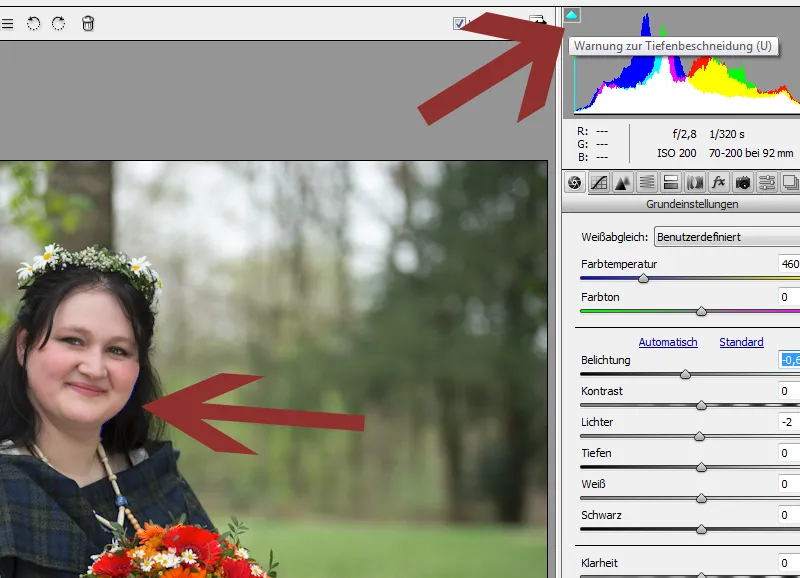
Now we come to saving the processed RAW files in a different image format (Jpg). This button is important for this: Save image. When batch processing, you must of course first select all the images. In the window that opens, you can now specify how you want to save your images and select a folder in which the files should be saved, for example as a jpg. You can of course select several options for the metadata, so you can decide here which image data should be saved.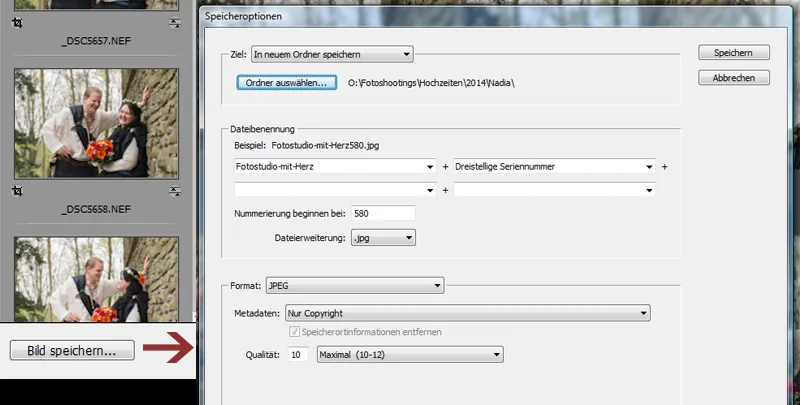
That's it for batch processing for now. Let's move on to individual image processing in the next section.
3 Bridge - Camera Raw: Single image processing
Generally speaking, I have to say in advance that for every type of editing in Camera Raw, it is of course crucial which photo is involved. I use completely different tools in Camera Raw for a beauty retouch that I want to make look very strong and perhaps a little more fairytale-like later than for a naked baby whose skin color I want to edit. In the same way, I would go into much more detail if I didn't provide all the data digitally for the wedding. I sometimes sit with over 1,000-2,000 image files, which I can't possibly edit individually in various options. However, if I only select 4-5 files for subsequent editing in Photoshop during a shoot, I will make much more use of the Camera Raw options here than is the case with batch wedding processing.
Camera Raw is very extensive and the same generally applies here: Many roads lead to Rome. Every photographer will find their own way of processing. Some already sharpen their images now, while I, for example, generally only sharpen in Photoshop. And there are many possibilities here too! So let's briefly go through the tools and most important options. How you use them later is up to you! This is also just the workflow for weddings.
You'll find some helpful tools in the bar at the top.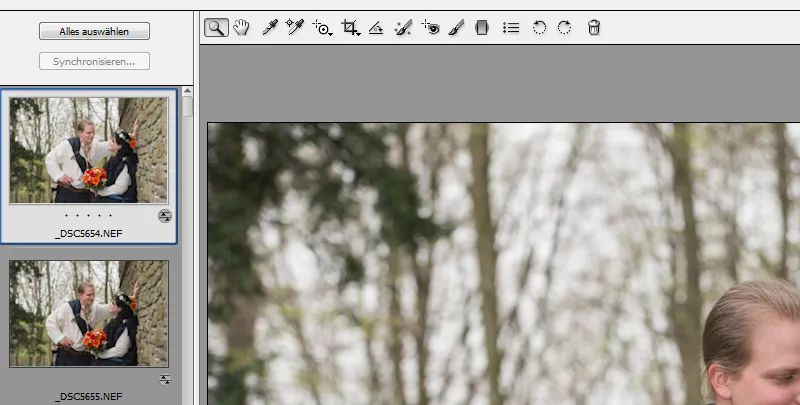
For example, you have the option of selective adjustments, a zoom tool and a crop tool. I usually only use the crop tool here. Almost all my pictures are slightly cropped, that's a habit of mine..webp?tutkfid=43835)
However, I make sure that the images are never too small. You should also make sure that you don't go below 6 megapixels.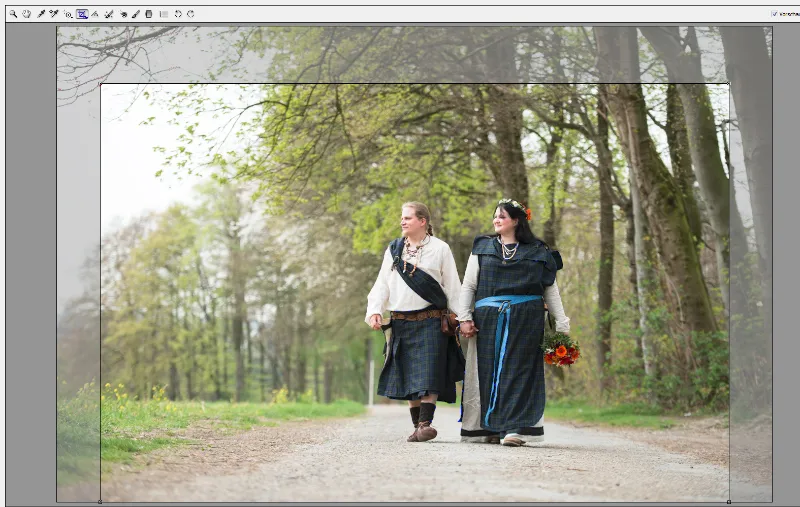
Now let's move on to the options on the right-hand side (basic settings). As already mentioned in the previous point, I also take a look at the exposure of the individual images and adjust the highlights, shadows or exposure if necessary. I also take a look at the white balance, which you can change a little depending on your taste. Sometimes I add a little contrast to the image. I hardly ever use the hue, clarity, dynamic range and saturation points for wedding photos. However, these are options that I like to use in beauty and fashion photography.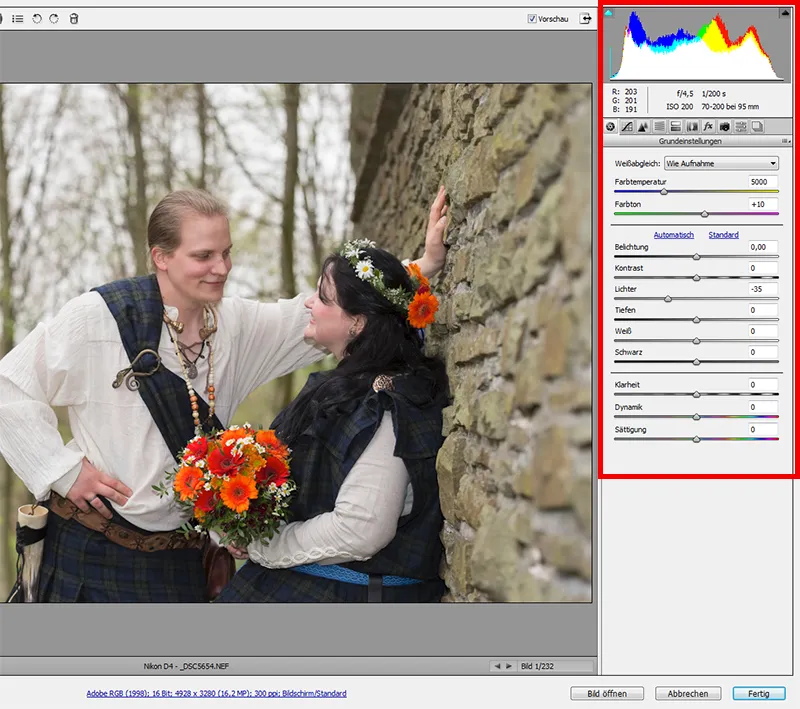
I would also like to mention the areas (top right tab) Gradation curve and Details. I also like to work here, but I use these points very rarely and not at all in the wedding workflow. As mentioned, I only use sharpening in Photoshop. However, Bridge gives you the option of using these functions via batch processing. When using this option, please remember to enlarge your image so that you can really see whether it has been sharpened properly or not.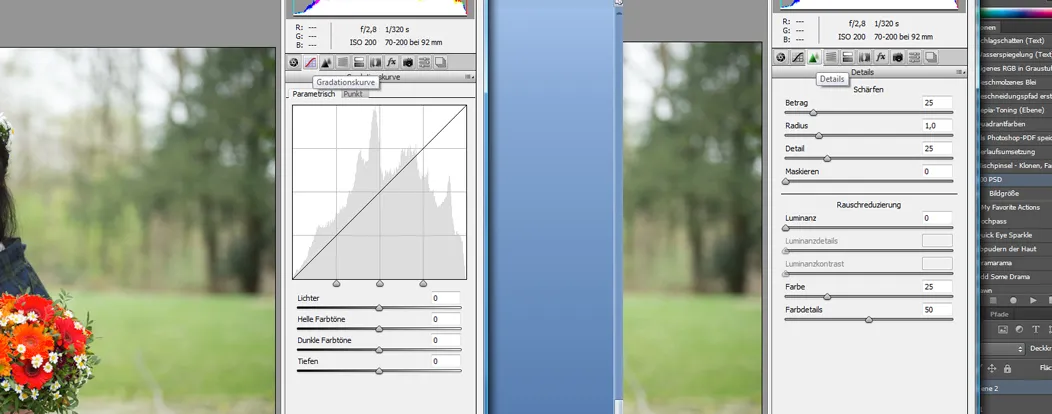
By the way: The preview checkmarkat the top of the image must be set so that you can see directly how all changes affect your image.
In addition to the Save image function just used, you can of course also use the Open image (image is opened in Photoshop) - Cancel (all changes are discarded and you return to Bridge) and Done (all changes are saved and you return to Bridge) options at the bottom right of the selection. For single image editing, we will now select Open image in Photoshop and focus on the detailed editing of your photo.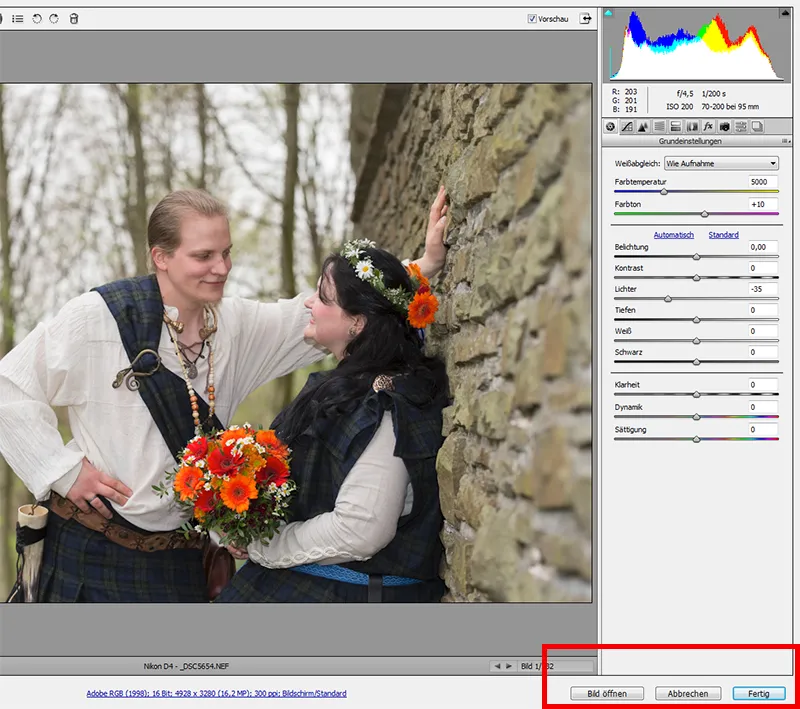
4 Photoshop - important tools
Photoshop is incredibly extensive. We all probably only use a small fraction of all the possible options. That will be enough for you for now, so we will only deal with the most common tools for beauty retouching, which you will probably also find in any specialist literature. Having attended many workshops with other photographers, I know that almost everyone prefers their own methods, whether it's sharpening, retouching skin, cropping or using individual effects and filters. It's certainly not wrong to try out 1-2 variations to find out what suits you. In order not to make the tutorial too long, I would just like to show you my variations and try to convey the most common methods.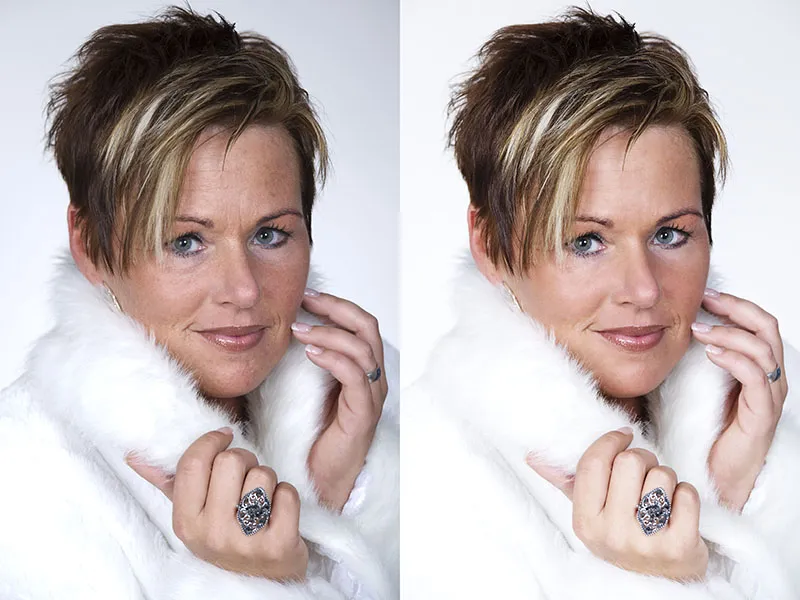
A small note in advance: Make sure you create a new layer with a layer mask every time you edit. This way you can undo your changes at any time without having to start from scratch. If you have never worked with Photoshop before and don't know what layers are, I would ask you to search the Internet - depending on the version of PS you are using - for beginner tutorials or video training courses, such as those available here on PSD-Tutorials.de. Here I will only deal with the further processing, as this would otherwise go beyond the scope of the tutorial. Before going into the detailed editing, I will briefly explain the most important tools in advance:
Here you will find - if you still want to crop your image a little - the appropriate cropping tool. As you can see in the bar at the top after selecting the tool, you can also easily select a different format here, e.g. 3:4 or even 1:1.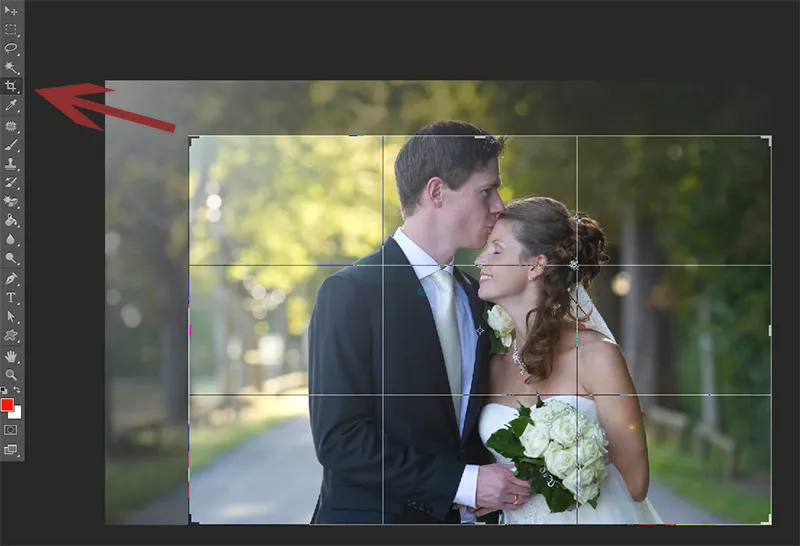
In beauty retouching, I like to use the area repair brush and the touch-up tool. You should definitely remember these. Just like the copy stamp, which you can find further down in the toolbar. I will explain exactly how to use the tools in the next part. Of course, the normal brush is also very important for you. You will definitely use it a lot.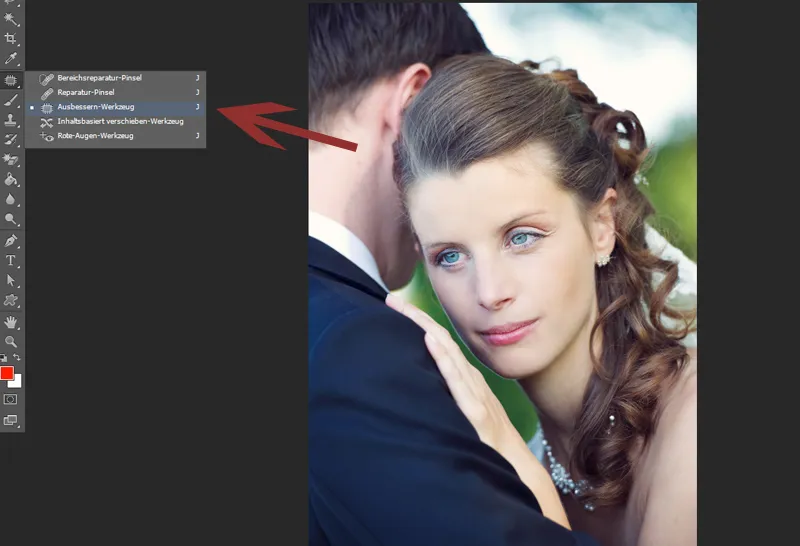
Then there are three very important functions that you should know about. I have marked these in the next image. The upper arrow shows you the layer functions, so you can set the layer mode or the opacity here, for example. If you have just applied something to a layer mask, be it a filter or retouching, you can influence it here. Try it out once. You will often work with this too.
Your layers and the layer masks are displayed under arrow 2. Once you have completed a work step, you can of course merge the corresponding layers. Simply select the layers and right-click to reduce to one layer. This makes a lot of work easier for Photoshop and your PC. You will always find the eye symbol next to your layer. You can use this to show and hide your layer. I find it useful to check again after every edit to see whether the image has actually changed for the better. It is not uncommon for me to minimize the opacity of the effect or delete it completely.
Arrow 3 also shows important functions. In this bar you will find, for example, the Create new layer, Add layer mask and Create new fill or adjustment layer tools - you will use these options frequently. Now let's see how we integrate these tools into our workflow.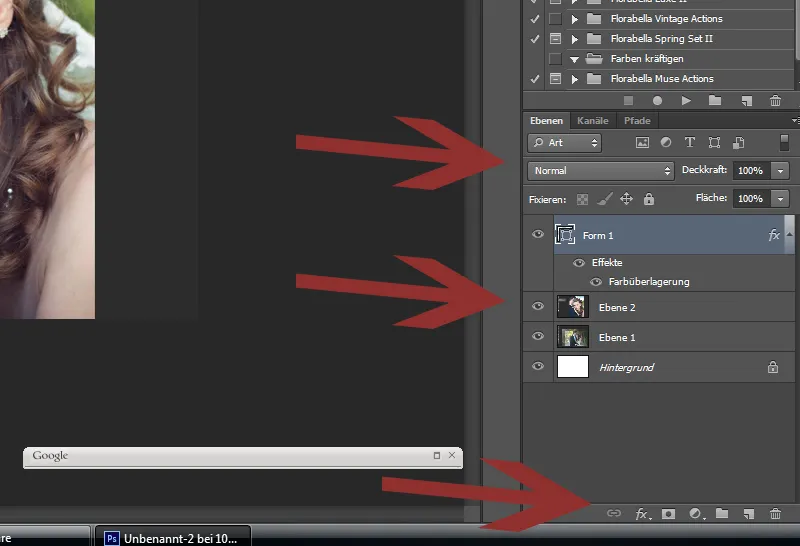
5 Photoshop - Beauty retouching
Remove blemishes and hair
The first step is to start with skin retouching.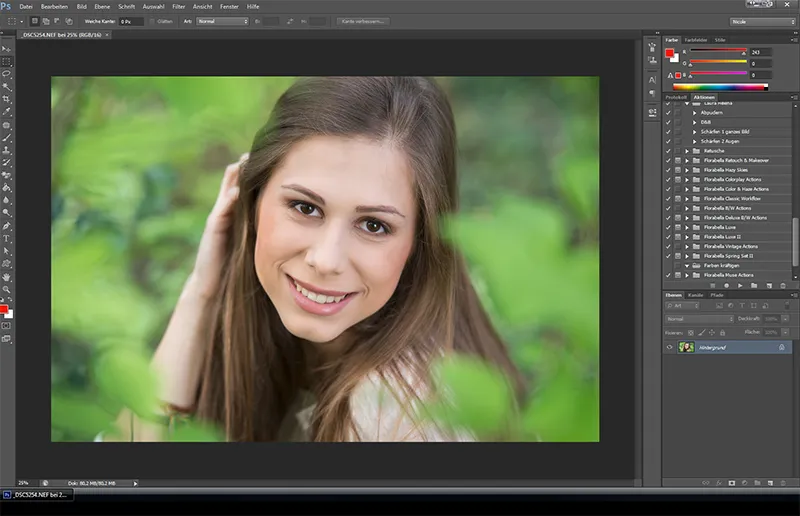
In other words, I enlarge my image considerably (at least 60 %) and edit the face lightly with the touch-up tool and the area repair tool. For the time being, I only pay attention to larger disturbing factors. Loose strands of hair, spots and blemishes. I leave moles and scars in place unless the model wants them removed! They are part of the personality and should not be removed by you without being asked. With the area repair brush, choose a small brush tip that covers the spot you want to retouch. For strands of hair, it should cover the width of the hair. Now PS will use surrounding areas as a base to cover the "blemish". Of course, you will reach the limits of this tool if you get close to edges that are not suitable for your area filling, such as the hairline or the eyebrow. Pimples in the middle of the forehead can be removed quickly and easily.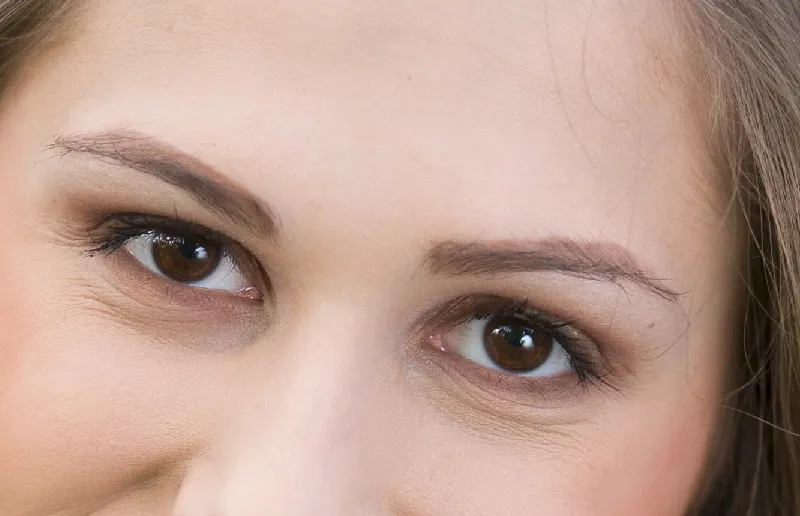
For other areas, the touch-up tool is in the next option. For example, select strands of hair that you want to remove - simply outline them with the mouse button held down and mark them. Now simply drag this selected area with the mouse to an area that you want PS to use as an area repair. If possible, it should be a nearby, equally light/dark area with the same structure.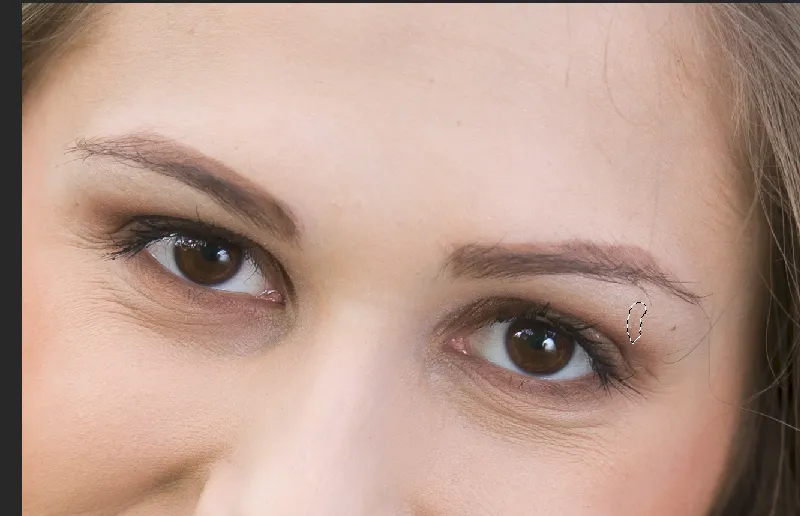
I only use the copy stamp toolif absolutely necessary. I don't like to stamp around in faces - this tool is used more for background retouching. That's what I learned in my first photo editing workshop and I can only confirm it. But if you don't know how to use it, you can of course use it. The copy stamp is very easy to use. After selecting the brush size, hold down the Alt key and select the area you want to copy to another location. Release the Alt key, go to the position where you want to use it and PS will show you what it would look like. Simply click with the mouse to apply the copy. A little practice with these three tools will quickly convince you of their capabilities.
Of course, you can also use this method to remove hair sticking out of your head!
Lighten shadows
Before I go into detail with the skin retouching (next step), I lighten the wrinkles and shadows. Here I use two options that I would like to show you.
A. You create a new layer and set it to Lighten - Now you need the touch-up tool again. Simply select the shadow areas and wrinkles individually and drag them into lighter and finer areas of the skin. Later you can use the opacity to influence the strength of the result.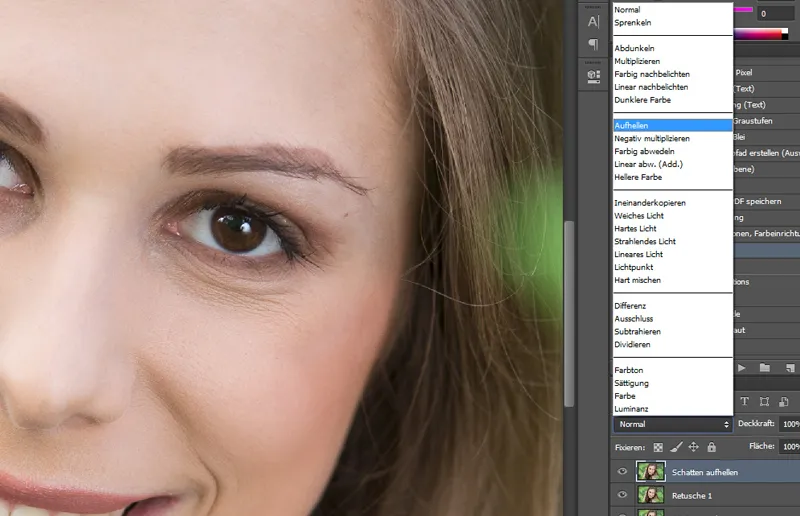
B. A slightly finer way of working is to use the copy stamp. You create a new layer and now use the copy stamp with an opacity of approx. 15 % +/- and copy from lighter areas into the dark areas or over the wrinkles that you want to lighten.
Both can be done very quickly and achieve good results. Please check the strength of the effect again by fading the layer in and out and scrolling out of your image. You often have to look at the whole face again to do this! You can then also see whether you have worked on both halves of the face in the same way.
Skin retouching / powdering with Photoshop
For the subsequent skin retouching, I recommend a ready-made action. There are many ways to achieve beautiful skin retouching. You can find a ready-made action here, for example.
When retouching the skin, please remember: less is more! It should be subtle. So feel free to fade out the layer from time to time and reduce the opacity again if necessary for a natural result. Don't forget the arms or other areas of skin so that it doesn't look unnatural! My model in this picture has professional make-up and the soft daylight in the shadows makes it very easy for me!
I prefer to work with less coverage and go over areas that need it a little more several times. You'll quickly get the right feeling here.
Emphasize eyes
The eyes are of course always an eye-catcher. However, if you overdo the effect, you will quickly spoil a lot. This applies to sharpening as well as brightening. You can also use Dodge and Burn (see next point) for pure brightening. If you want to emphasize the eyes once again, you can also choose the gradient conversion. To do this, set the color palette to black/white and select the soft light mode. It also looks nice if you apply this step to the whole picture, but with little opacity (approx. 20%) and then apply a little more to the eyes, lips, clothing, etc.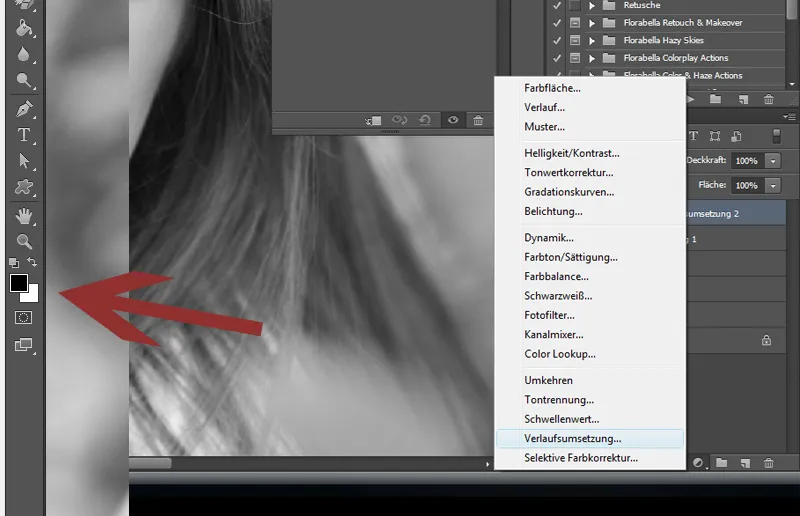
If you want to use the gradient conversion for a certain color mood, you can also achieve this effect with a pink/white color palette, for example!
Dodge & Burn
Dodge & Burn is a simple effect with a very big impact. However, you can also exaggerate here. True PS artists naturally use this effect all the time and master it perfectly! The purpose of working with light and shadow is not only to emphasize positive areas and soften negative ones, but it can also lead to a visual streamlining.
For Dodge & Burn, simply create a new empty layer and set it to Copy one into the other. Now you can paint directly in this layer with a white or black brush, depending on whether you want to lighten or darken. Please use a very subtle opacity; start with 10 % and paint over if necessary!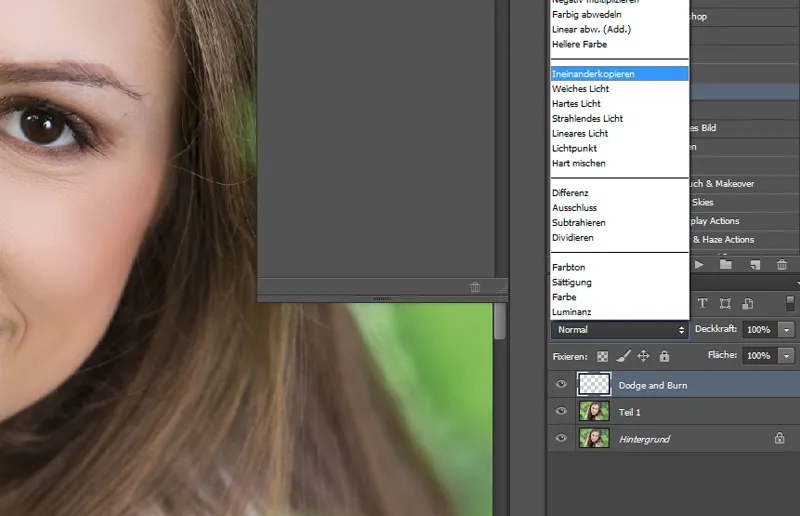
In general, it takes a little practice to work properly with Dodge & Burn! As I often don't have the time for very elaborate and lengthy retouching in my customer work, I often have to limit myself to the essentials. This means that when I use Dodge & Burn, it's usually for simple tricks, such as slightly brightening the eyes. On the other hand, you can slightly darken the edges of the eyes at the top and bottom, which gives the eye that certain something! You can also take this effect to the extreme, e.g. lighten the bridge of the nose, cheeks, chin and forehead, but please do so very subtly. You can lighten unattractive, heavy shadows or, of course, practise optical slimming on an arm. If you work cleanly and discreetly, you can really do a lot with this effect!
Here is another example of optical slimming. If you lighten parts of the body a little on the inside and darken the outside, it automatically looks slimmer. With a little practice, you'll soon be much fitter than me!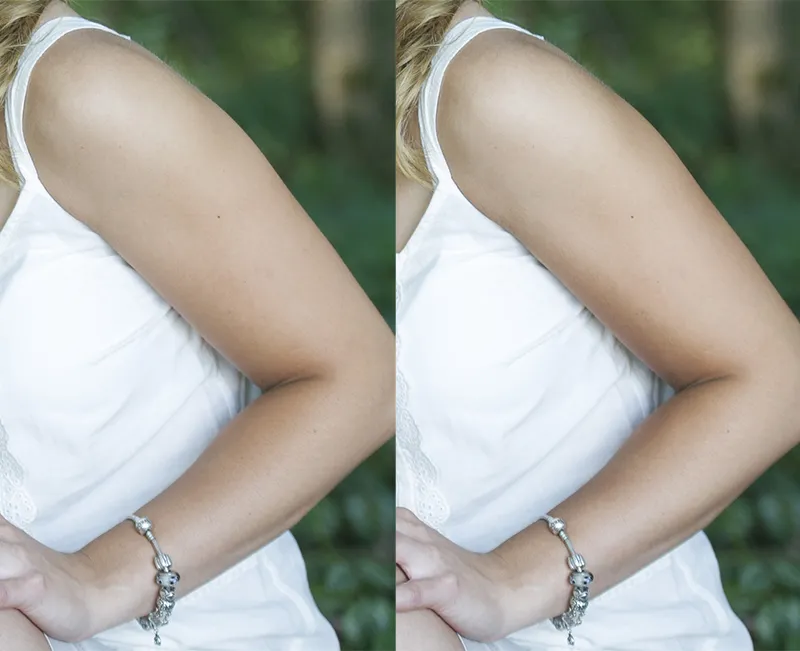
Slimming down
We women know the problem: we are always too fat. In general, of course, you have to be careful not to let a customer in your photo lose 20 kg just like that. But some ladies explicitly want this. Then you should be familiar with the Liquefy filter. Here you will find the so-called contraction tool. Just give it a try! But please choose a brush of the right size so that you don't end up with bumps in your arms and legs! The other tools from the liquefy tool can also be used very well. I recommend that you simply practise a little here.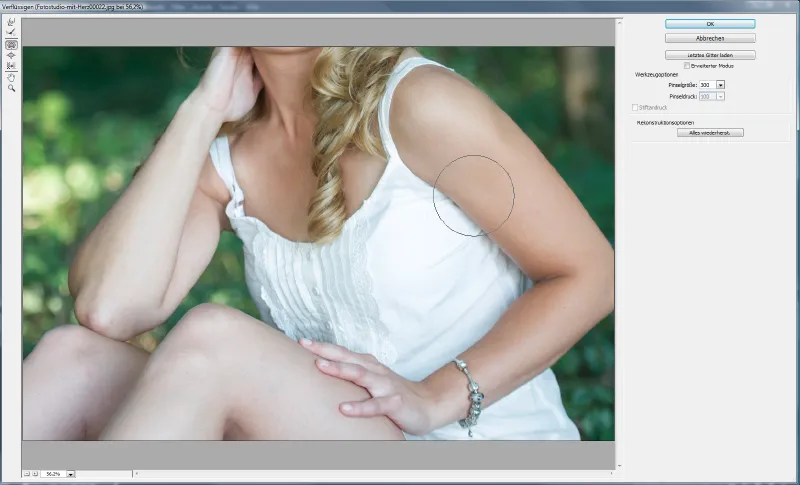
By the way, here's another great filter for an exciting effect: Render filter>Blend spots.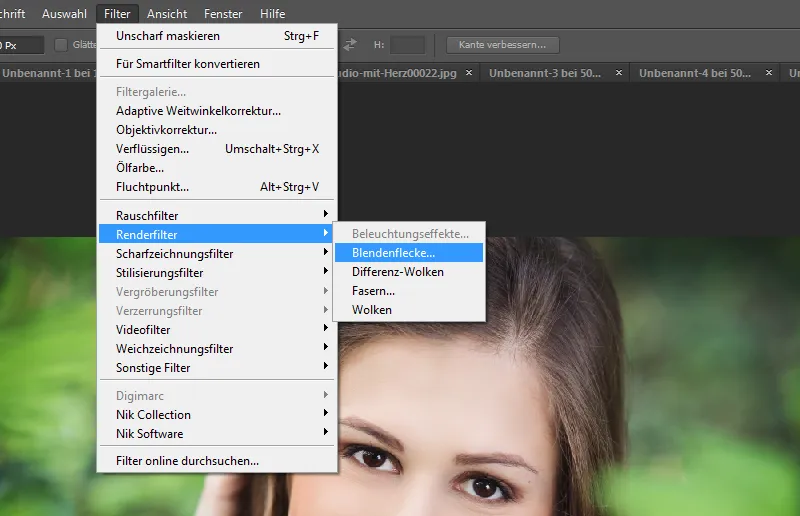
If you don't know it yet, give it a try!
Of course, there are plenty of other options for perfect beauty retouching. If you'd like to explore them further, I recommend a bit of literature below.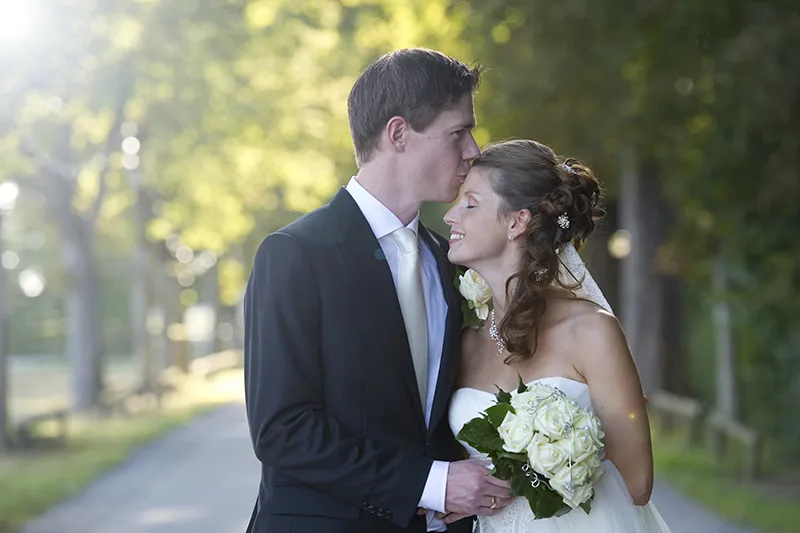
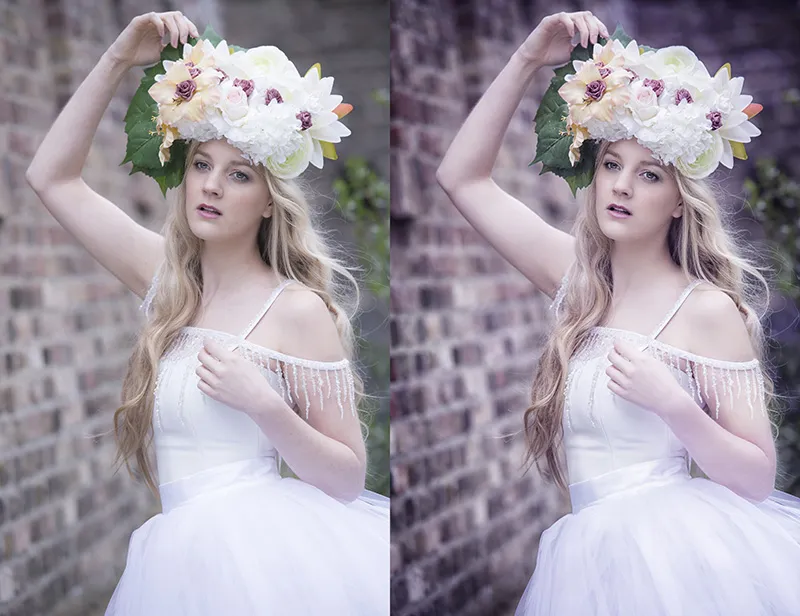
Here we have the before/after picture of my model. It has gone through all the steps described and now a small action from the next step as well as a vignette. Done! The whole procedure only took a few minutes and is - in my opinion - a natural result, but definitely an improvement. What do you think?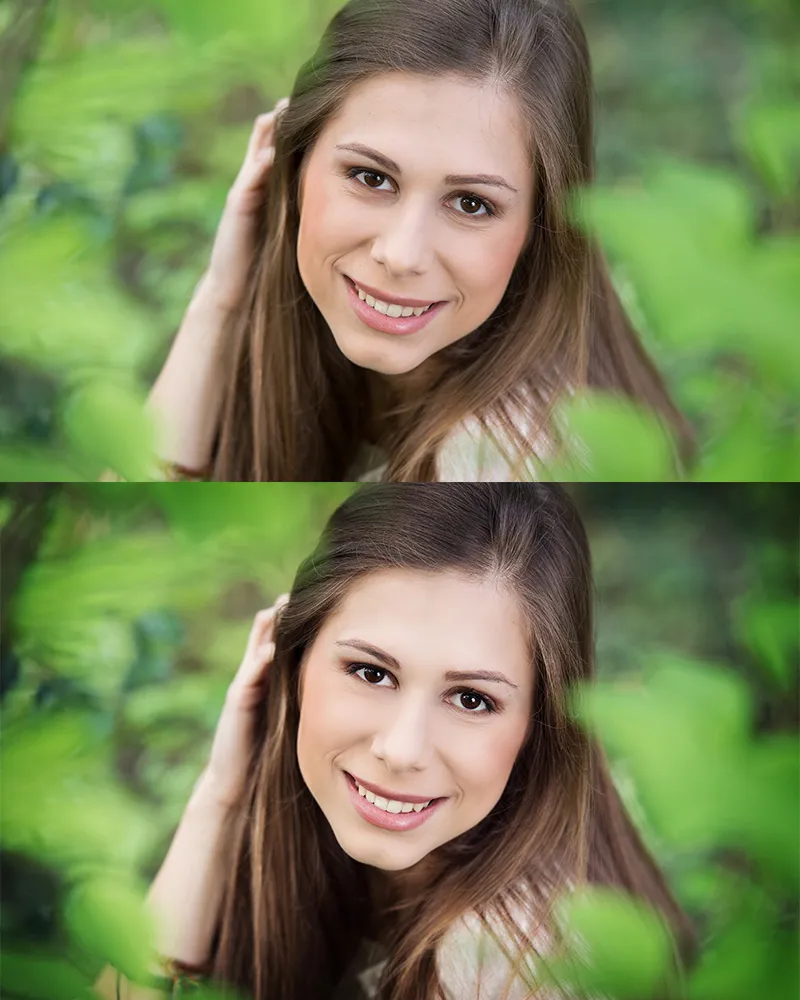
Sharpening
I usually sharpen with the high-pass filter. It's important that you don't work on the background layer, but create a new layer for it using a layer copy. Then select Filter>Other filters>High pass. In the window that appears, you can now adjust the strength of the high-pass filter. Select Soft light for the High pass layer. Now apply it with the layer mask (black) and use a white brush to paint out the areas where you want to apply it, especially the eyes and hair. Pay a little attention to the strength of the effect. Not too much of a good thing!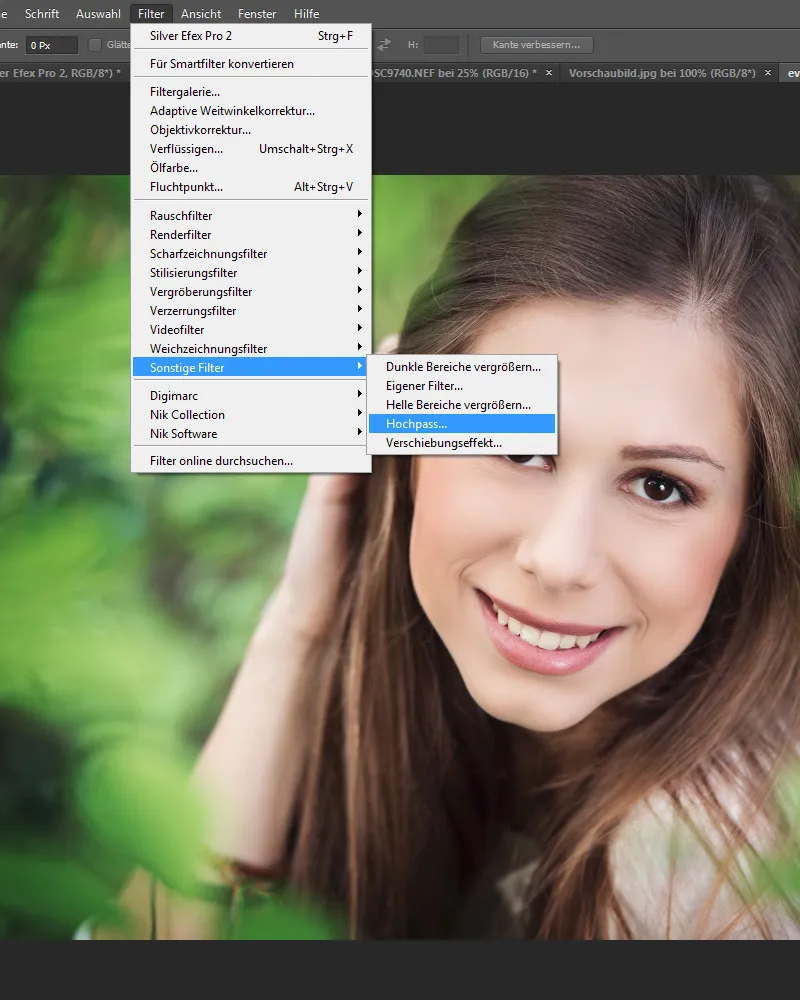
6 Photoshop - Actions and filters
In Photoshop, you not only have the option of saving frequently used workflows in actions and simply reusing them, but also of using ready-made actions or filters. One very popular tool is NikFilter, which is now called Google Nik Collection. Since they were bought up by Google and can be purchased through them, they have become really affordable. I bought them in packages back then and unfortunately paid a lot of money for them.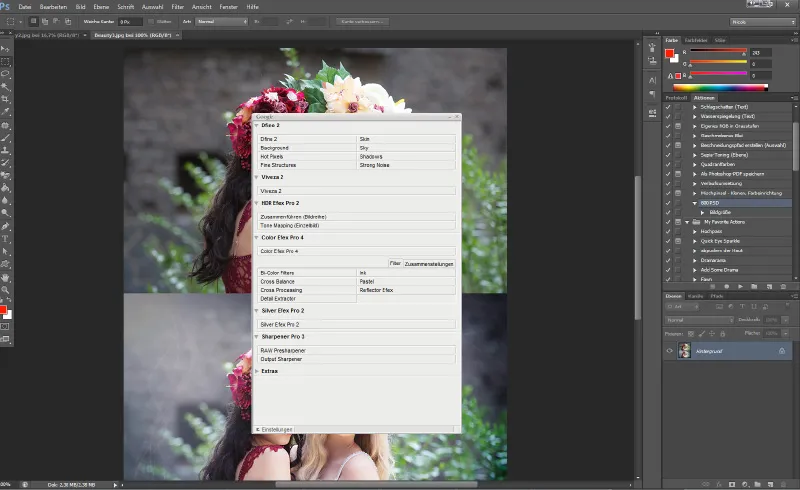
These filters integrate themselves into your PS software after installation and can be accessed via Filters. Here you have a lot of editing options that you should definitely try out. Silver Efex Pro, for example, offers great black and white filters for your motifs. You can also customize and edit each filter individually. Try them out, you're sure to be impressed.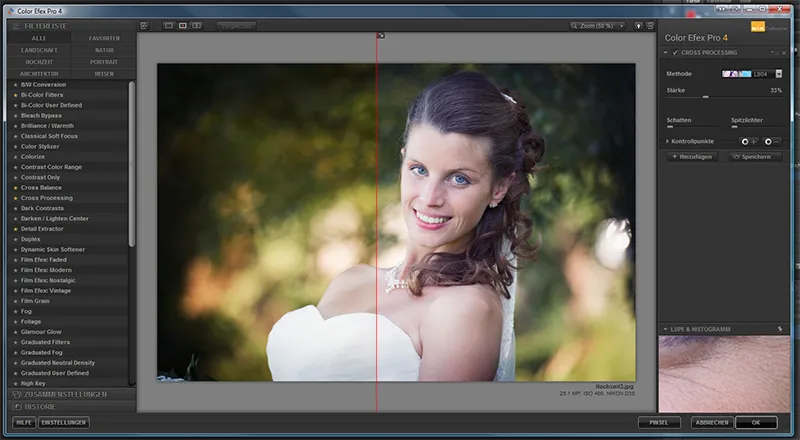
I also like to work with ready-made actions. There are countless providers, and of course you can also download many great actions from PSD-Tutorials.de. Some providers that offer very nice actions for purchase and that I like to use are
- www.florabellacollection.com
- www.painthemoon.net
Here you can find actions for beauty retouching as well as ready-made color filters. I have brought you a few examples. Of course, you can reduce the opacity of all filters to get softer versions of the respective effect. I also like to work with textures or light effects that I fade into the image.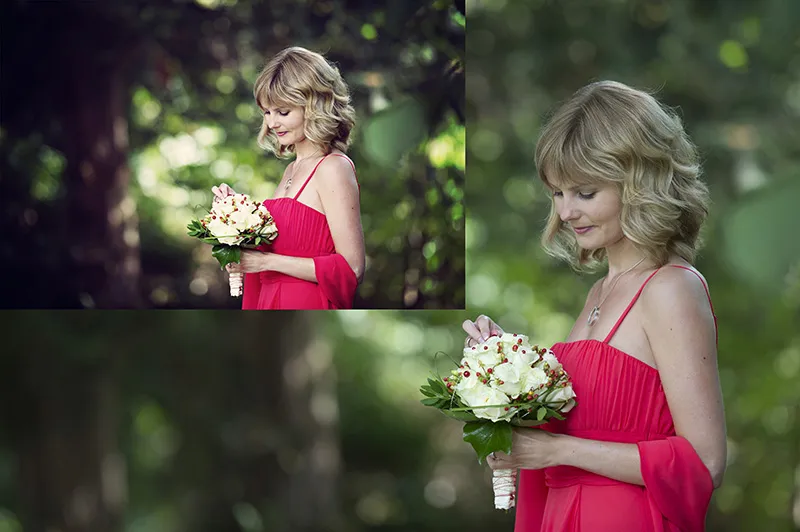
I have brought you a few examples of this. You can simply draw textures as a layer over your images and fade them in with soft light, for example. It takes a little practice to achieve a mild and harmonious effect. The opacity must not be too high and of course some areas of your model must also be faded out. You can of course find lots of textures and effects on the internet, free of charge and sometimes also for little money.
I work relatively little with brush tips, but that's also because I haven't quite mastered how to use them and I'm not that playful. You should just get creative here. It's certainly a great way to enhance your pictures a little.
I really like using vignettes! I like it when the edges of the picture get a nice dark effect. Just give it a try. Here I would like to show you some all-in-one actions ...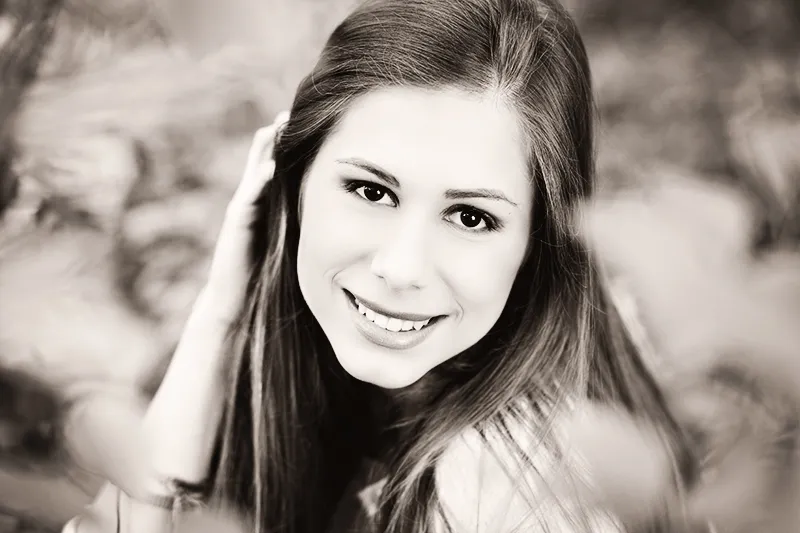
... which can of course also be combined very well.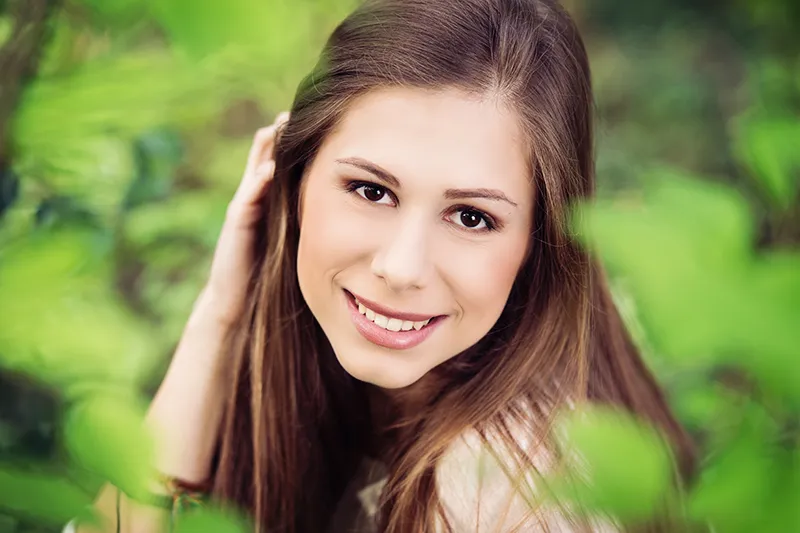
These applied ready-made actions are from Nikfilter ...
... and Florabellacollection.com.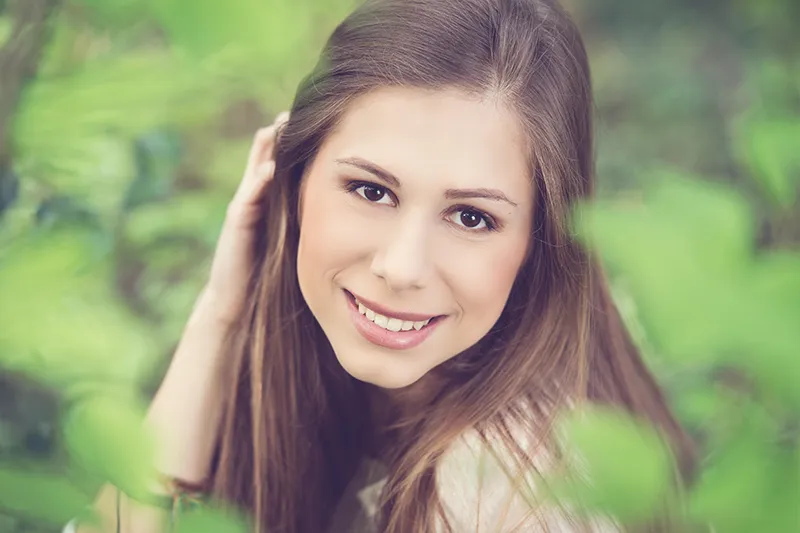
I have used an image to illustrate this.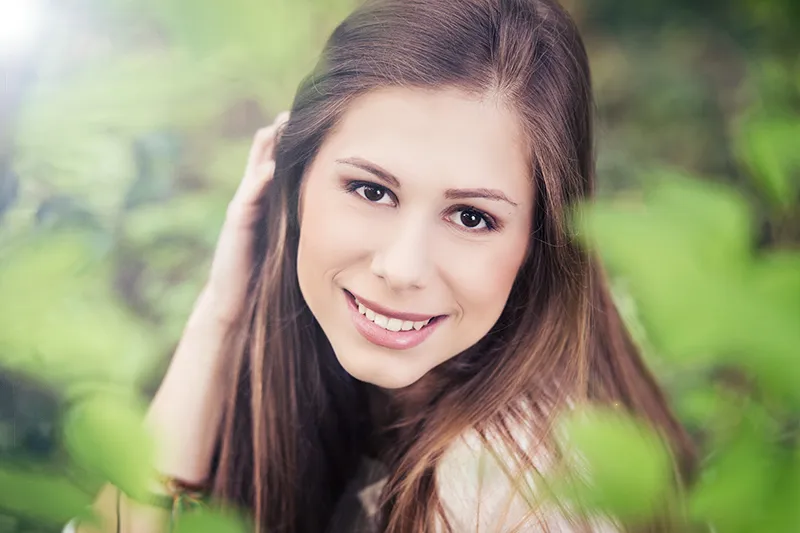
7. image presentation
Now your pictures are edited and waiting to make your customers happy. Now the only question is: How do we present the photos properly? Of course, it can never be professional enough, but this is also a question of cost, especially if you have accompanied the wedding out of pure joy and as a hobby. Image presentation is of course passed on to the customer and should therefore not go beyond the scope. As I try to keep my wedding reportages affordable, I also have to do without some of the bells and whistles. Individualized CDs and photo folders are simply very expensive and are produced in large quantities. I buy my presentation items from Schoeller & Stanzwerk, where you can register as a commercial customer. The company Studioexpress, from which I purchase my cardboard backgrounds, also has articles on the subject of image presentation. You will certainly find many suppliers. Of course, it has to fit into your frame.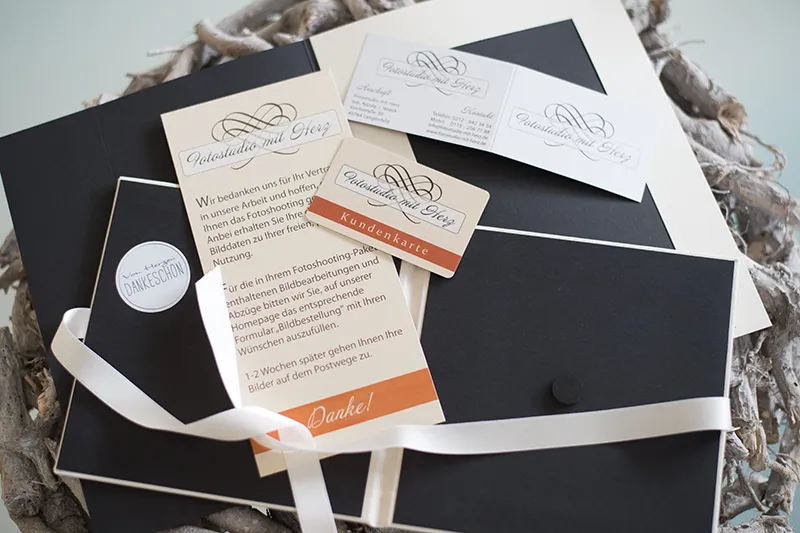
Incidentally, I used to make my own photo folders, but now I just have too many shoots for that.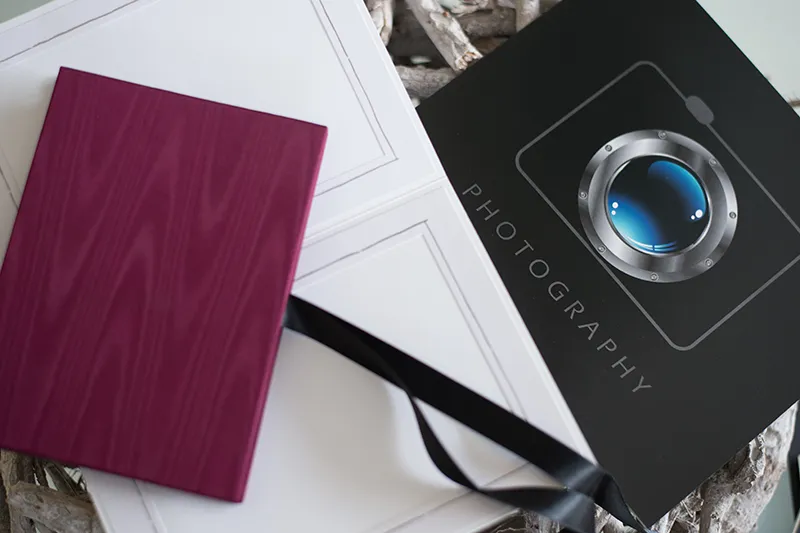
8. specialist literature
If you are looking for further inspiration beyond the tutorials and video training on PSD-Tutorials.de, I have a few tips for literature/DVDs on the subject of image editing:
- I can highly recommend the book by Scott Kelby: Portrait Retouching Tricks for Photoshop. Here you will find many more very useful tips and the right edits for your time management. Easily explained and, as always, a typical Scott Kelby book!
- I would also like to recommend "Das Photoshop-Buch People & Porträt" by Maik Jarsetz. Lots of useful tips for image editing, from basic retouching to more elaborate work.
- If you want to be a little more creative, you can take a look at the DVDs from Galileo by Matthias Schwaighofer "Kreatives Fotodesign". You won't be disappointed!
- Photoshop Artworks by Galileo is also highly recommended. The tricks of the Photoshop pros.
That's it for this tutorial. I hope you have enjoyed it and that it has helped you in one way or another. Now there's just one last part left, which I'm really looking forward to. Thank you very much for your trust.
Nicole Schick
www.fotostudio-mit-herz.de
