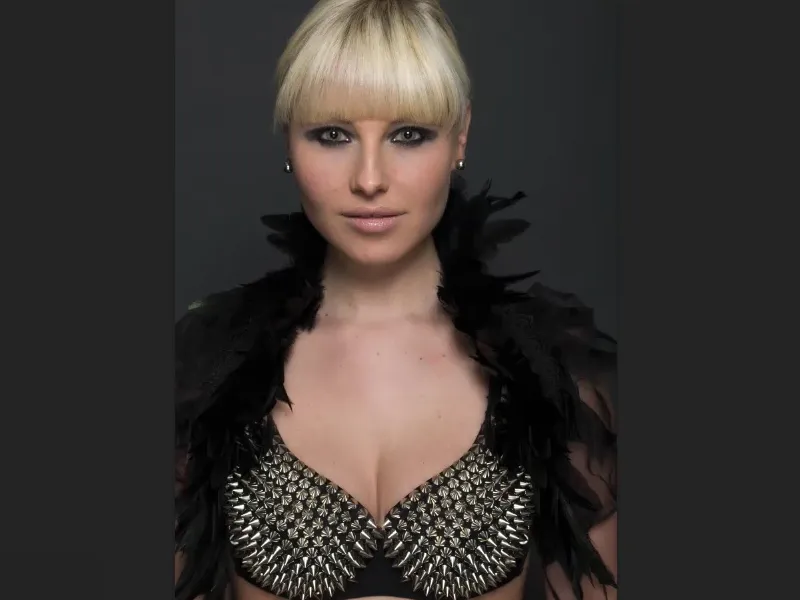
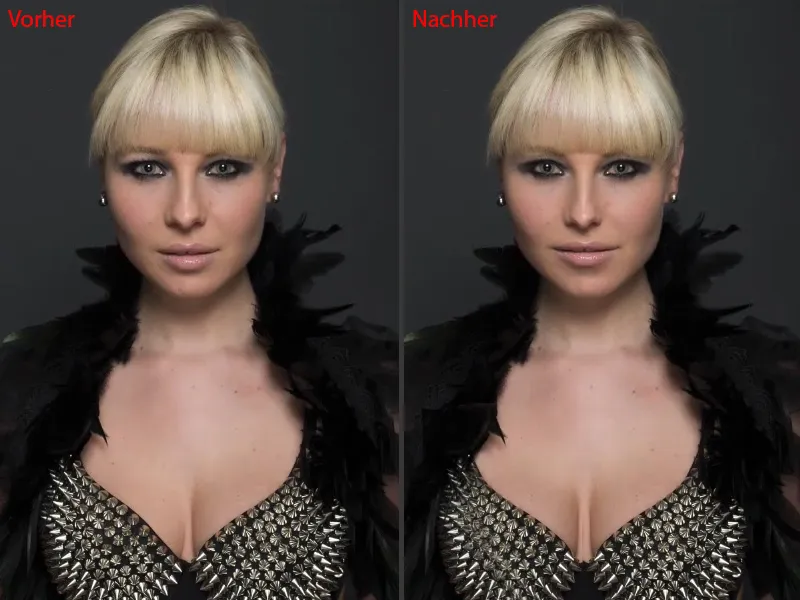
In this tutorial, I'll show you my current favorite technique in Photoshop when it comes to replacing large areas. I'll show you the before and after. It will look like this: The eye has been moved, the nose has been narrowed, the lips have been changed, ...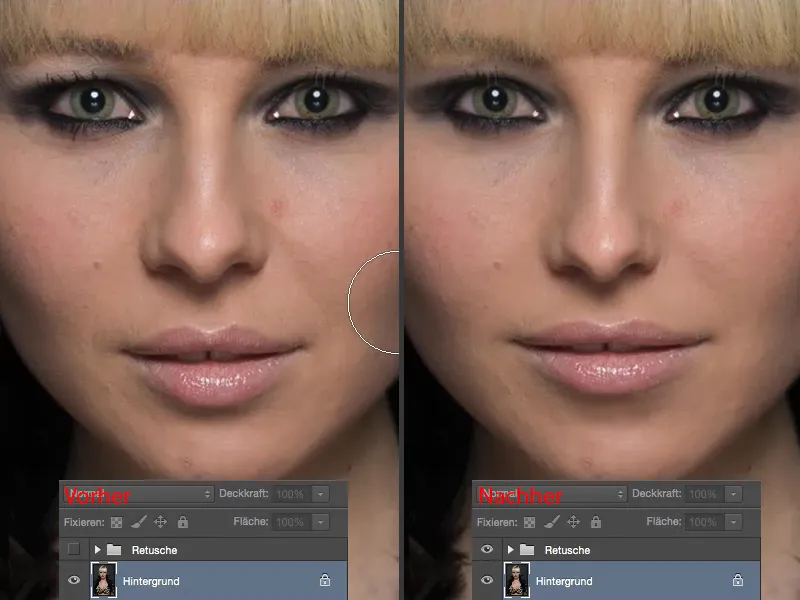
... the décolleté has also been adjusted. These are all things that have to do with large areas. And now I'll show you how easy it is in Photoshop.
Editing the lips
First of all, you need the lasso (1). You now need to cut out the areas you want to change. Please don't do this (2) by selecting the area as tightly as possible, but leave a lot of space around it (3). The more space you have, the better and the nicer you can conceal the whole thing.
Then copy it to a new empty layer using Cmd + J (or Ctrl + J). This is now here (4).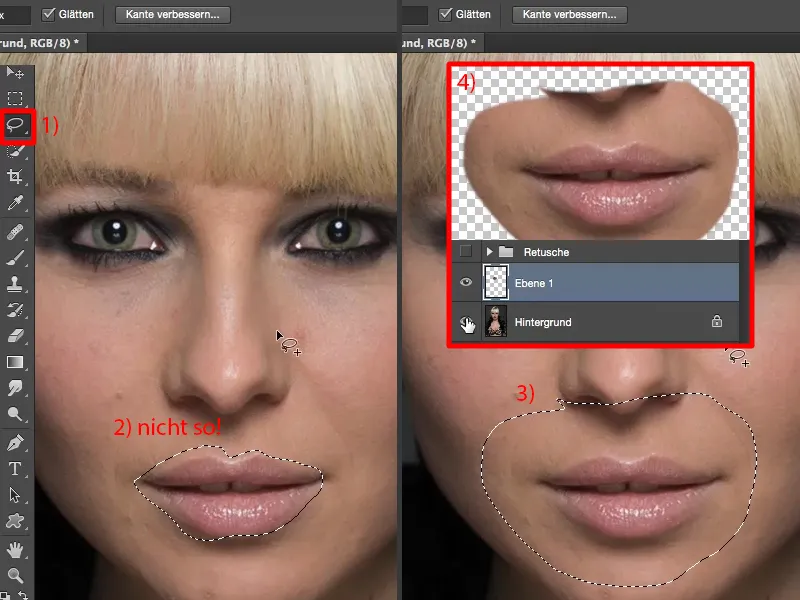
And now you can change everything here using Free Transform. I'm going to make the lips a little bigger (1), compress them a little (2) and make them a little wider (3). Then I put them back to the center like this (4).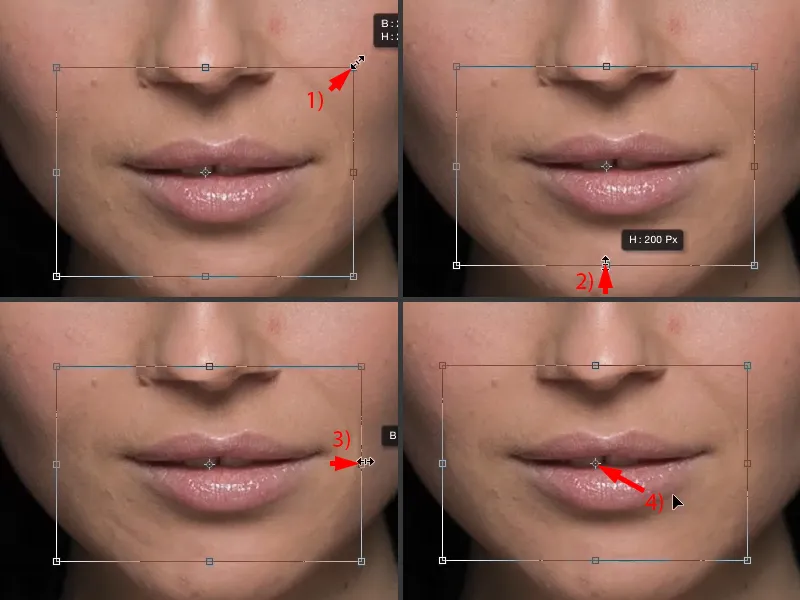
All you have to do now is conceal these soft edges. You do this here below using a mask (1). Take the brush (2), reduced opacity, 30 to 50 % (3), and then you just have to brush over it. We'll now bring back the nose and soften these edges (arrows in the portrait).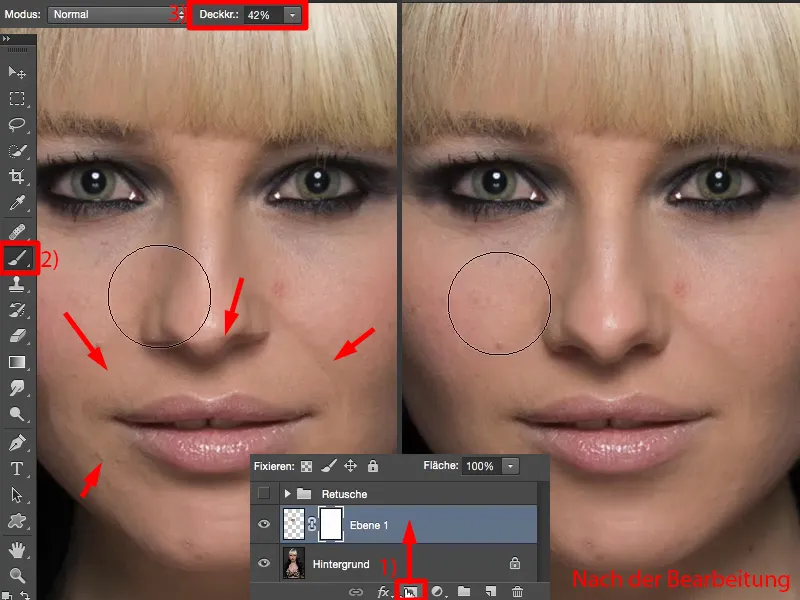
And that's it already. That's how easy it is to change the position, size, angle and so on of the lips.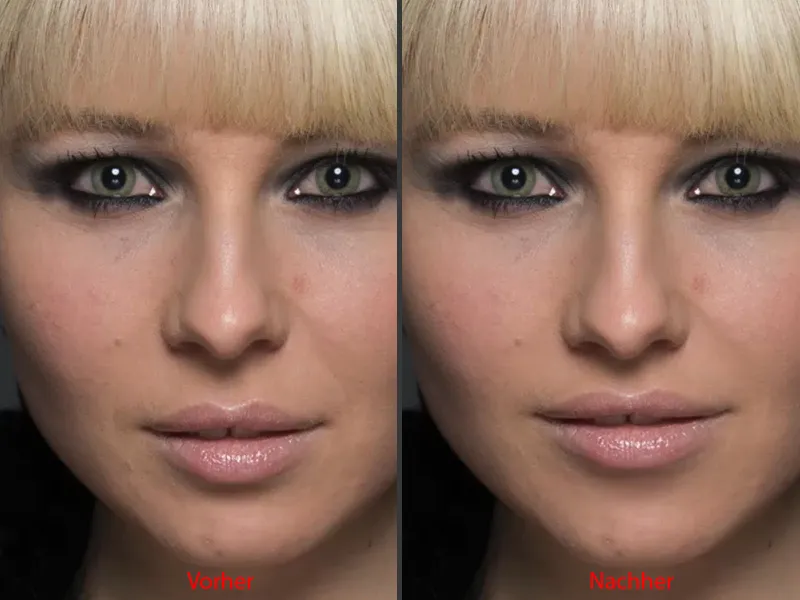
Editing the nose area
We will now do this with many areas. You go back to the starting level. Hold on - for the sake of clarity, you should perhaps rename the whole thing "Lips" (1).
Then we go back here to the lasso (2). We want to influence the nose, so I'll cut it out as large as possible (3), place it on a new empty layer (4) - and place it in the stack above the lips (5). If I put it underneath, I might have the problem later that you would see an edge here again. So this is the new nose.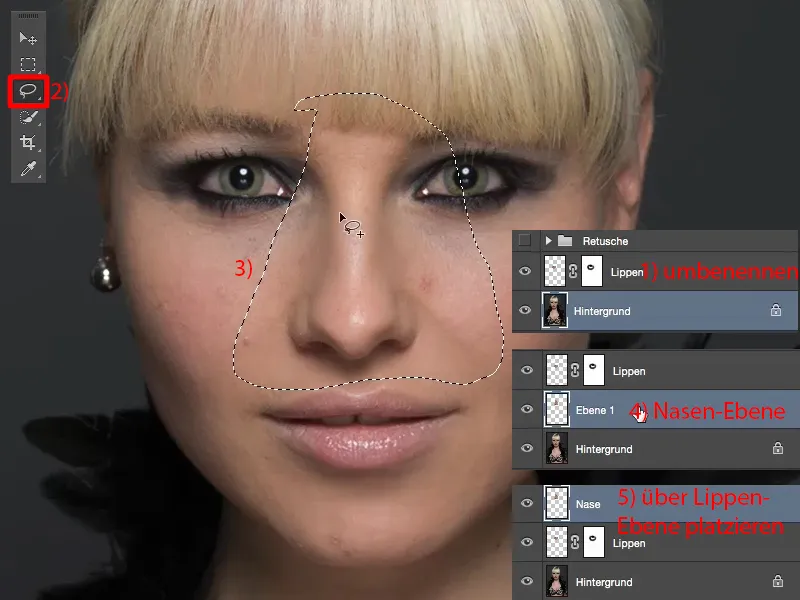
Here, too, I transform the whole thing, holding down the Shift key so that the aspect ratio remains the same (1). And now you can already see what's happening: The shadow of the original nose is still in the picture (2). This means that I can make it smaller, but I have to move it down a little (3) until this shadow is hidden again. And I'd say it looks pretty good from there.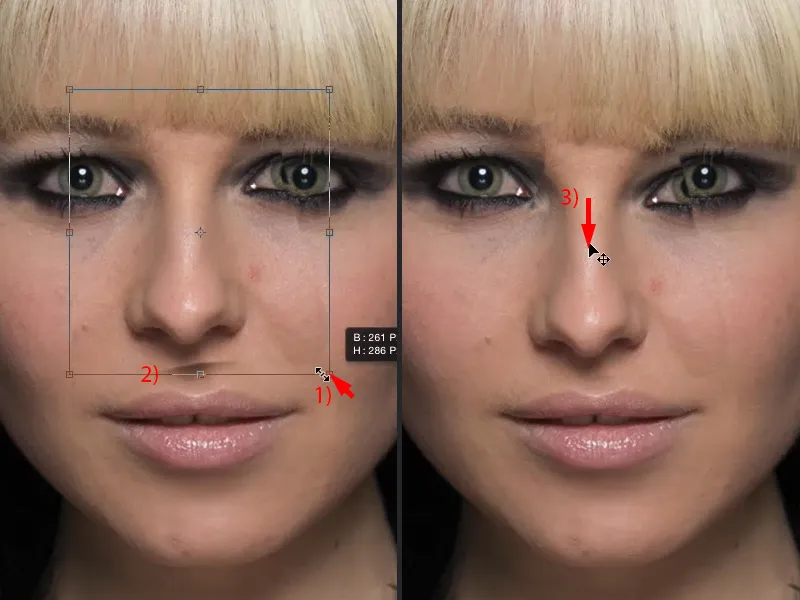
Then I'll get a mask again (1), take the black brush (2) and brush back everything that doesn't belong here (arrows in the portrait), especially around the eye ... and the nose is already narrowed and integrated into the picture (3).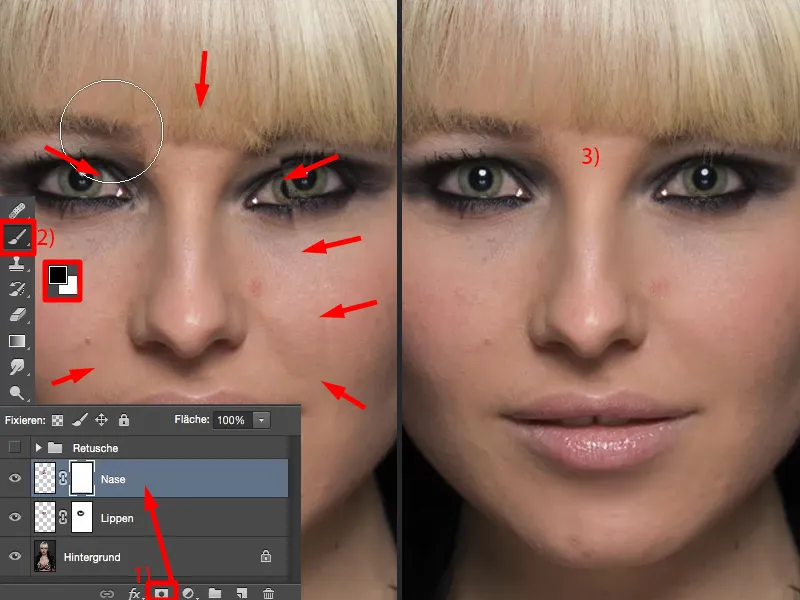
Editing the eye
I can do the same here with the eye. Everyone always has one eye that is awake and one that is tired. This one is the awake one (1), this one is the tired one (2), because it's a bit deeper, even if it's only three or four pixels, but it's a bit deeper. It's like that for everyone, strangely enough. I don't know why.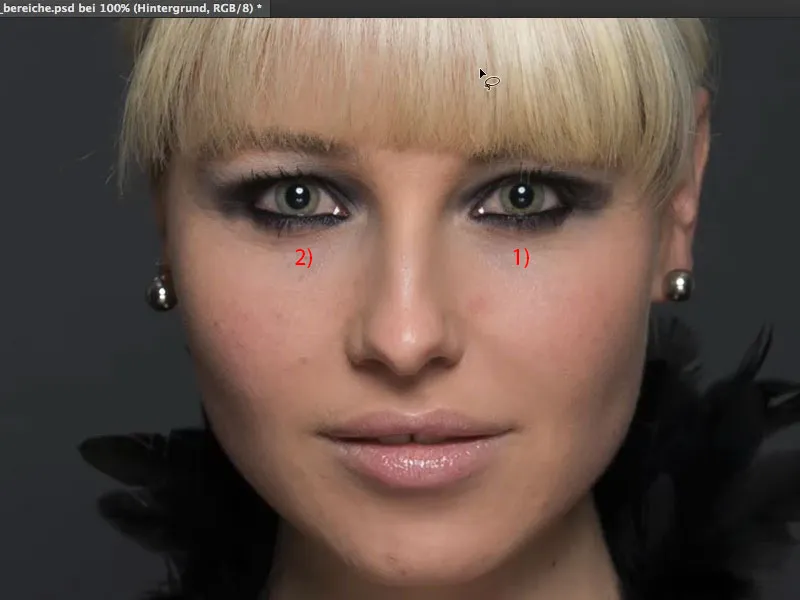
Now I cut out this area (1), copy it to a new empty layer and move it over the nose (2). I go back to Transform and then I transform that (3), but horizontally (4). I mirror the eye.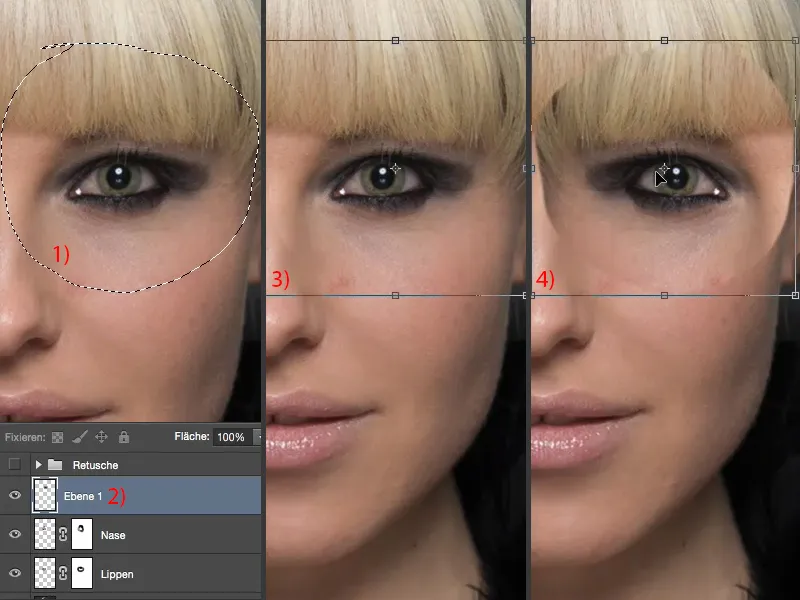
Now I have a problem: I have to put it in the right position. Where is the position? It's quite difficult to find it. There's a little trick you can do here, which is to simply lower the opacity.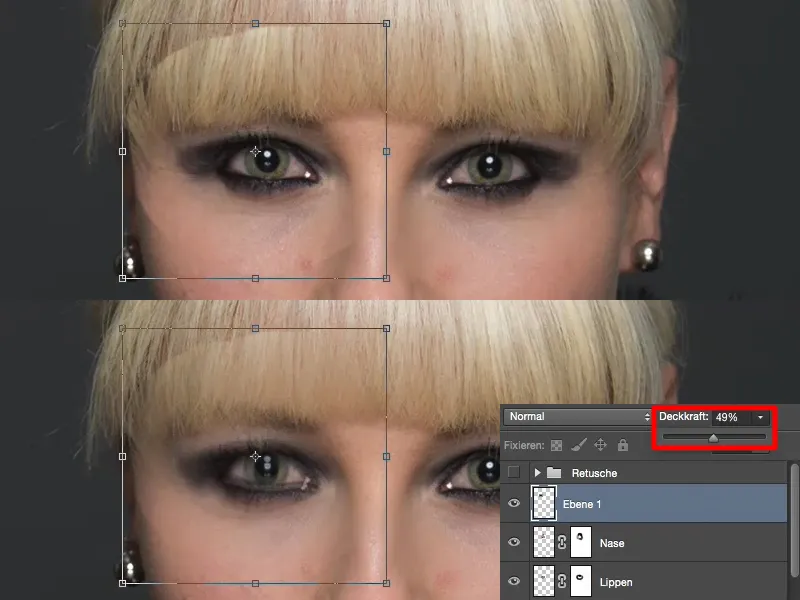
I have the reflexes in my eyes here and I can use them as a wonderful guide. This way, the eye sits with roughly the same coverage (1). And now I'll just go up a few pixels (2). That was the tired eye, if you remember. And now I'll increase the opacity again and confirm the transformation (3).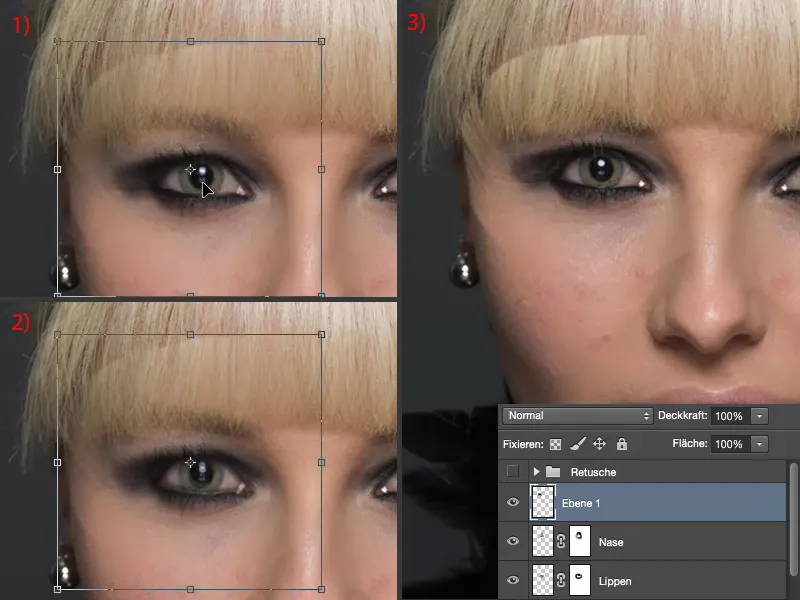
Now I need my mask again and can easily soften this. Even in the hair, many people always think: "It doesn't work on hair." It works best with hair because I have structures here - and I can blend structures wonderfully using soft transitions.
And now the person suddenly looks much, much more alert. It appeals to me even more (after image).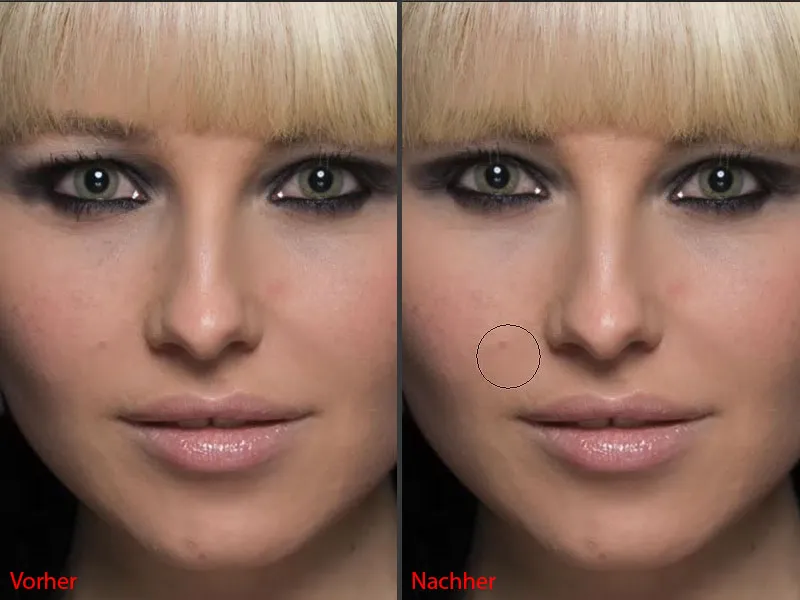
If the whole thing is a bit too high up - I have the feeling it should be two pixels lower - then simply activate the move tool again or press Ctrl + T again and go down a pixel or two here, the mask is soft anyway and we definitely have that much air here.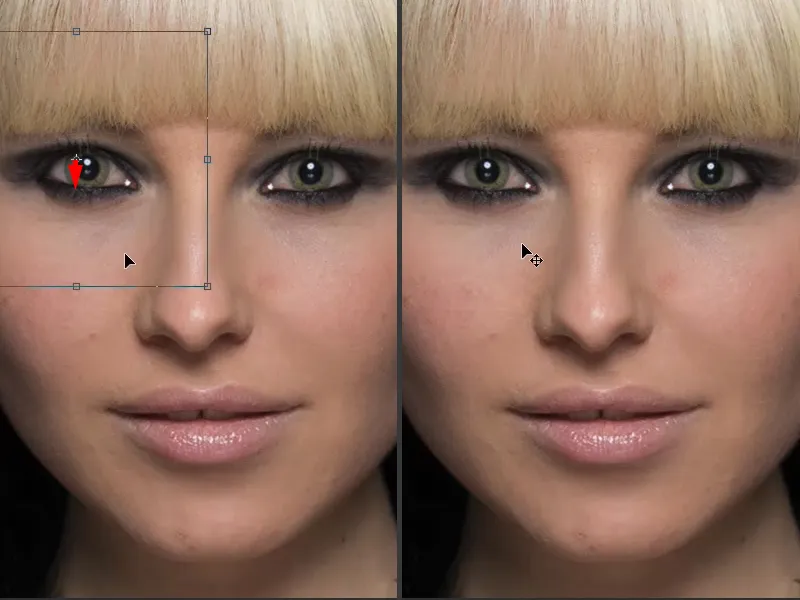
We've now completely changed the nose, lips and mouth in two or three minutes. Of course, this no longer has anything to do with the original person, but normally you wouldn't do these things so drastically, you would just make small changes, tweak the image a little or optimize the shape of the face a little.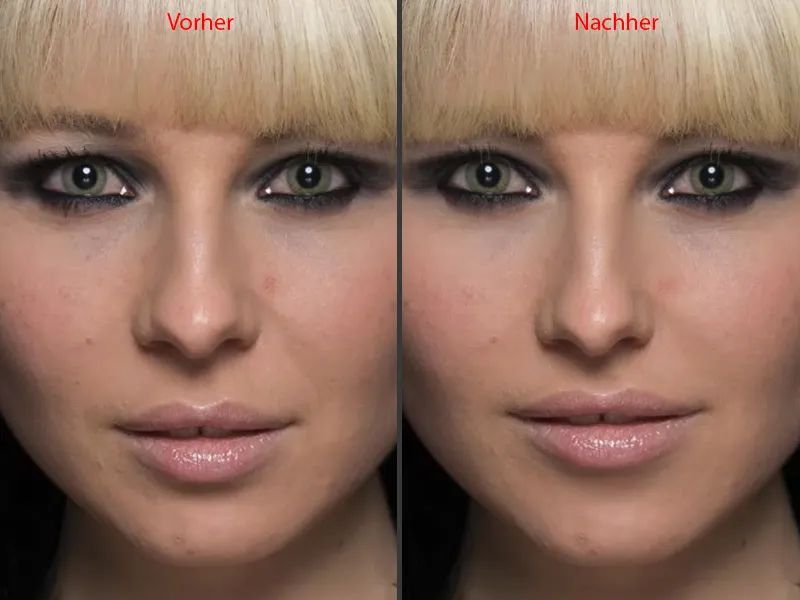
Editing the décolleté
I can now do the same here in the décolleté area. I'll take the lasso again , go back to the background layer and simply draw right in the middle, completely around the outside here (1). Something like this. And then I'll bring that onto a new empty layer and move that up in the stack here (2). I don't actually have to do this for the décolleté, but I've gotten into the habit of doing it this way.
And of course this is also transformed again. Transform>Mirror horizontally (3).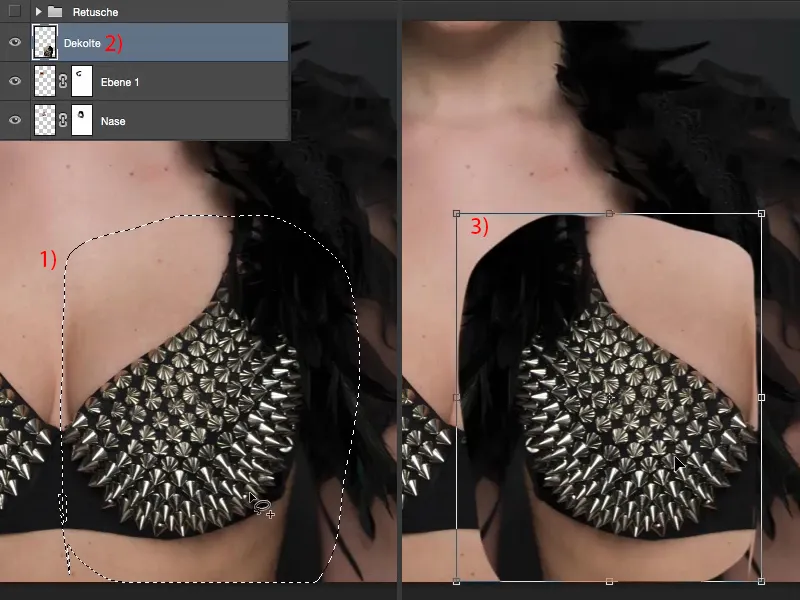
I need to adjust this. I can't see where the bra is actually sitting, so I go down with the opacity just like I did with the eye (1), and realize: If I set it up like this (2), it should look pretty good. I increase the opacity again (3).
Then I need my brush again , reduced opacity. I'll get this feather back first, I really need it (4).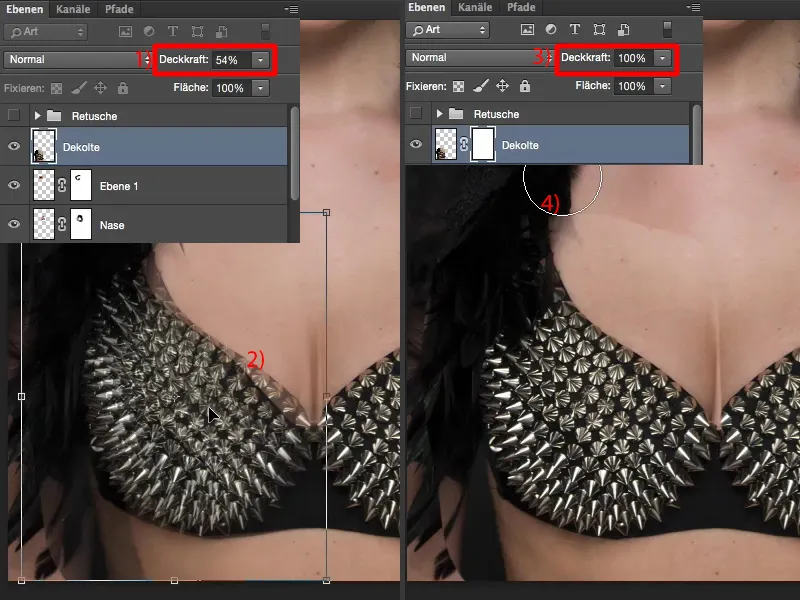
I'd like this one at the bottom (1) from this layer, because otherwise I'll have a problem: I can't have a smooth transition from the old bra to the new one in the skin, which would of course be immediately visible. Here at the front it works perfectly again (2). I take a look at where the edge runs (3), it runs a little over here, so I adjust it like this. I don't touch anything there (4) and it fits perfectly there too (5). I still have to do something to the back of the arm (6).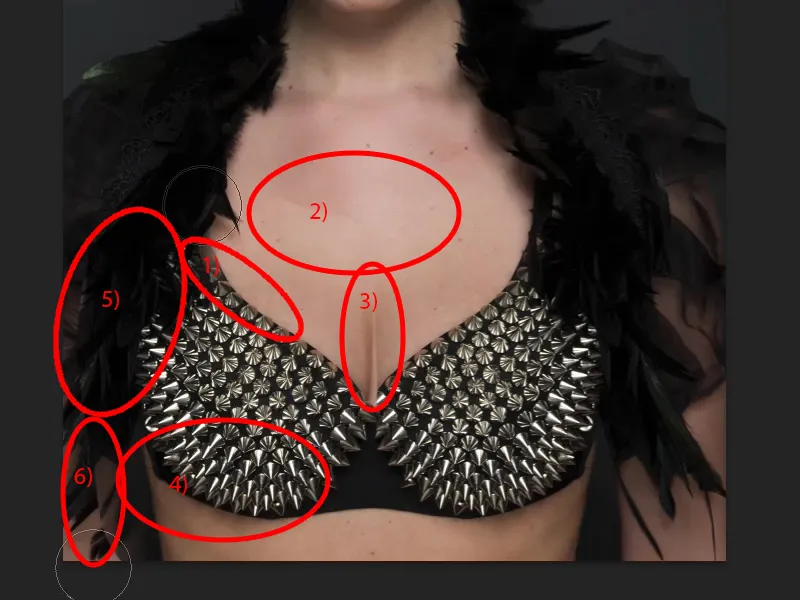
And that's it. And I'd say the neckline has been perfected.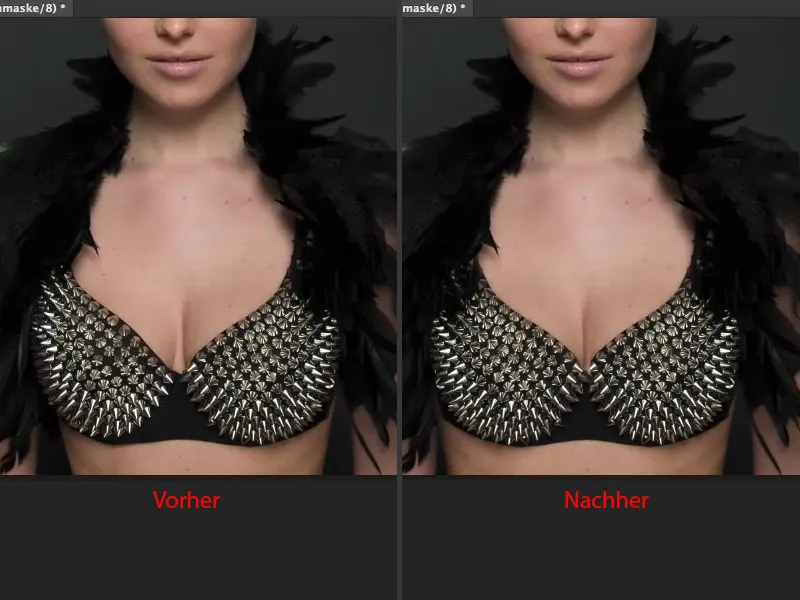
Conclusion
So it can be that easy when you work with this technique in large areas. You can very, very quickly correct the smallest deficits on the face or the whole body. You can also apply the whole thing to the waist, for example. You take the waist, make it a little narrower, create a soft transition to the background - it's no longer a problem with this simple technique.