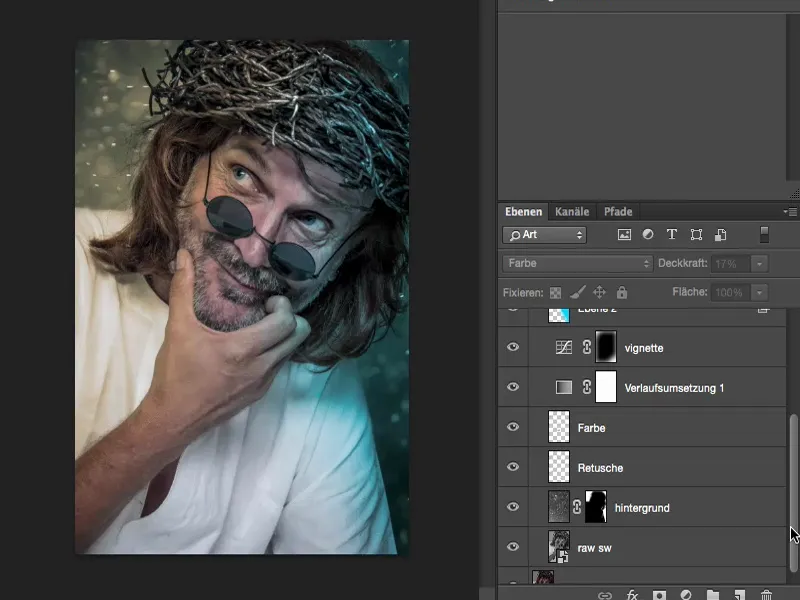
In this tutorial, I would like to show you how important the correct workflow is for you. The longer you retouch, the more you will find a personal workflow for yourself. Many people make the mistake at the beginning and say: "Okay, I'll make a copy of the layer, then I'll start retouching and then I'll merge the layers, maybe even onto the background layer. And then I'll make a new copy", and so on and so forth. At some point you then realize: "Dear me, I should actually change something I did at the very beginning or two hours ago - but I can't change it anymore because I've merged all the layers onto the background layer or I've produced so many new pixel layers that I can't get to the information anymore."
What do you do then? Either you are lucky and you can jump back so many steps in the history, your timeline, and can repair it or, in the worst case, you have to redo the image. And to save you that: That's what this tutorial is for.
Here you can see an image that is about 80% retouched, and there are seven or eight layers.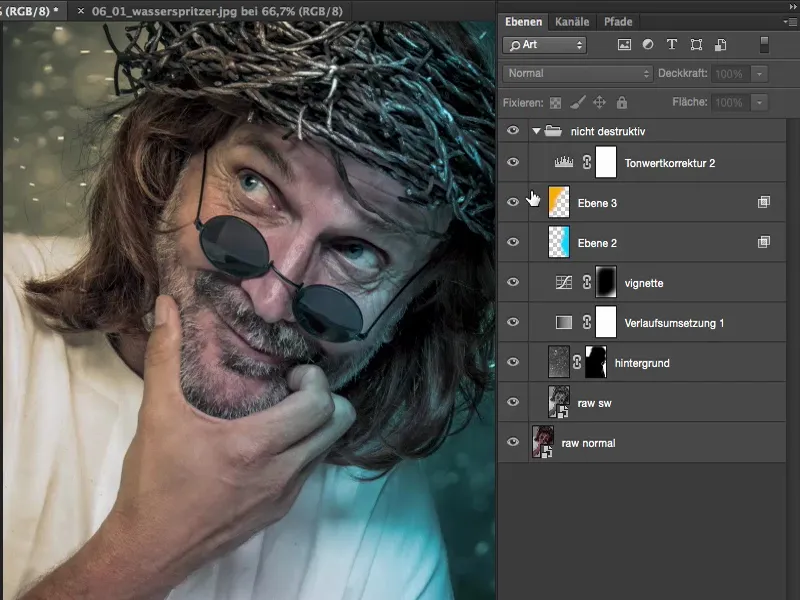
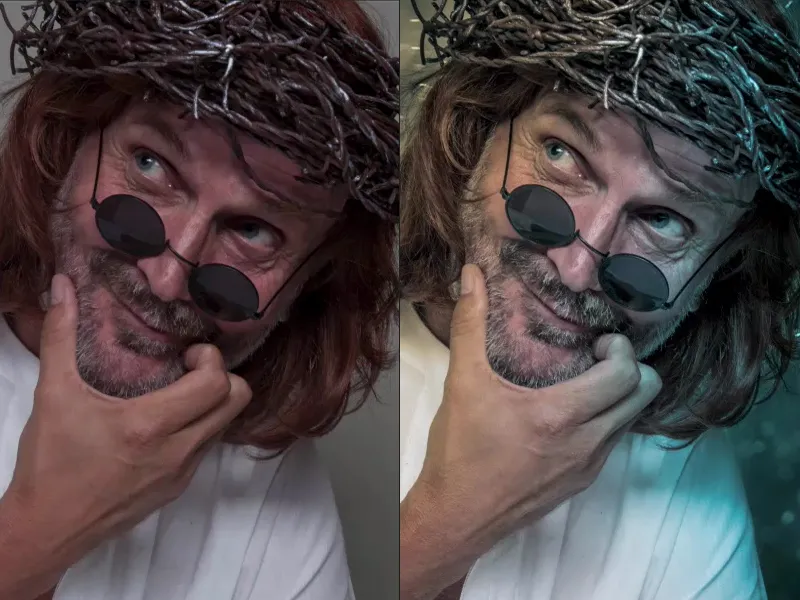
Not that much has happened on these layers, but if you look at the before (left) and after (right), a lot has happened.
I've added a new background (1), I've used two raw developments (2), I have a blue glow on the right (3) and an orange glow on the left (4), I have a tone correction in there (5), a vignette (6), a gradient conversion (7). I've actually already worked quite well on the look.
The nice thing about this layer stack is that the only pixel layers on which my model is now located are the following: the raw development down here (8) and a second raw development (9), which provides details and brightening. And from then on I can actually move the layers back and forth, I can insert intermediate layers. And I would now like to explain the logic behind this layer stack to you.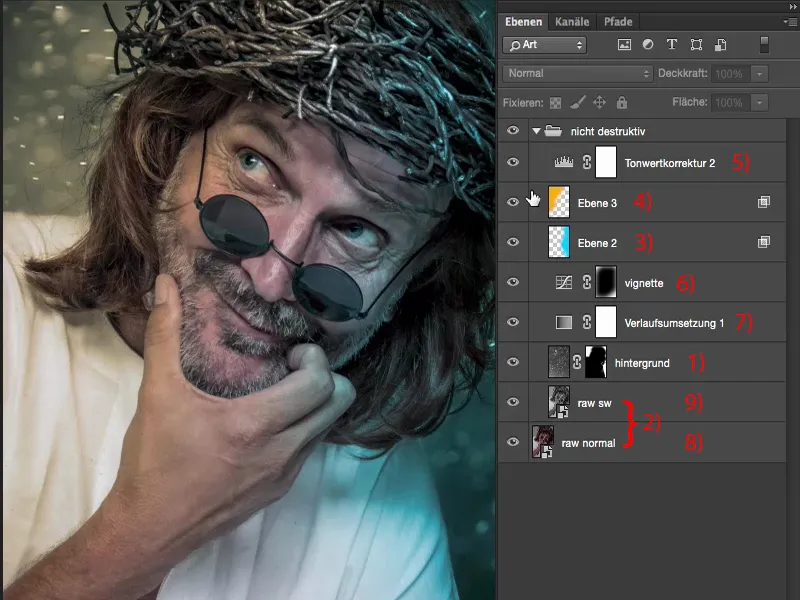
I'll go all the way back to the starting point here. This is what the image looks like correctly exposed, with the correct white balance on the neutral gray background, when it comes out of the raw converter.
Now I thought to myself: with a guy like this, it will certainly look good if as many details as possible appear.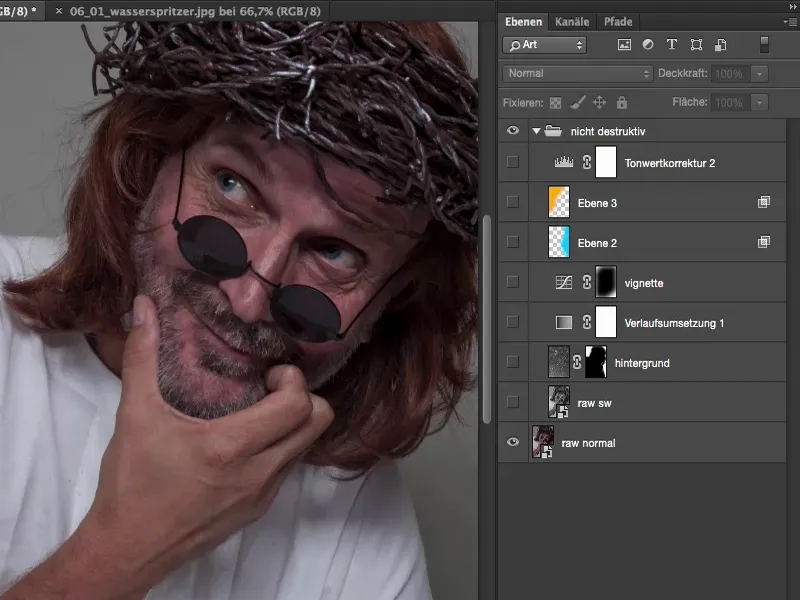
Emphasize details, new smart object by copying
There are various methods for doing this. The simplest, if you haven't done anything, is to simply duplicate the background layer, this raw layer. However, the whole thing doesn't work by simply dragging this layer down (1), as this would result in the smart object behind it also being duplicated. Then you think to yourself: "Well, that's actually exactly the same as what I did here with the second raw." Unfortunately, this is not the case. If you simply make a layer copy of this smart object layer, the smart object is copied, but the link to the XMP file that is stored here in Raw is not separated. This means that it makes no difference at all whether you make a change on the background layer or on the raw copy layer, both smart objects would always be updated at the same time and you would not see any change.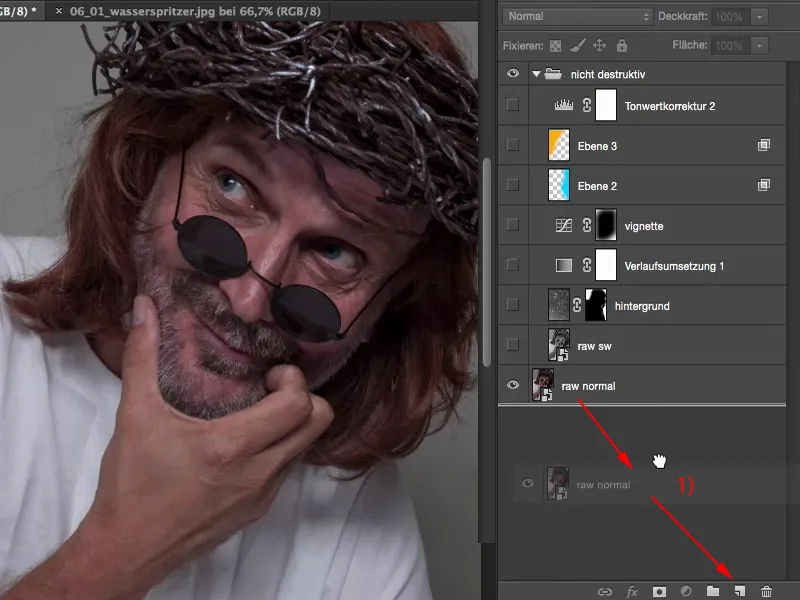
You can only do this by right-clicking here (1) and then using the New smart object by copy function (2). Then, as the name suggests, you really get a new smart object that is empty. You will not get a copied smart object of your originally opened raw file, but you will get a new smart object by copy, on which you can now make all the settings again. And then you have the opportunity to really work with two raw developments, with two real raw developments.
I'll go back to the layer here, double-click on it (3).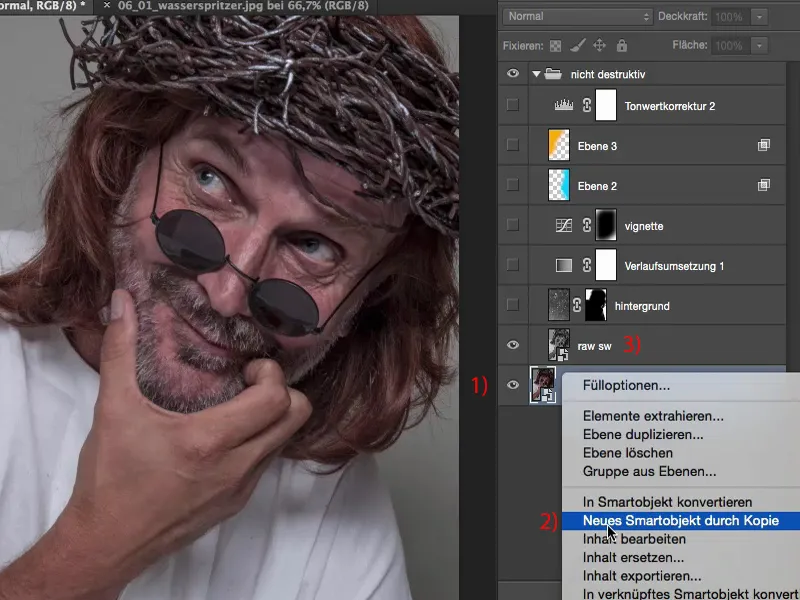
And then you'll immediately see what I mean: This is not my original developed image, this is a black and white copy. And I made this copy because this layer is in Luminance mode (1).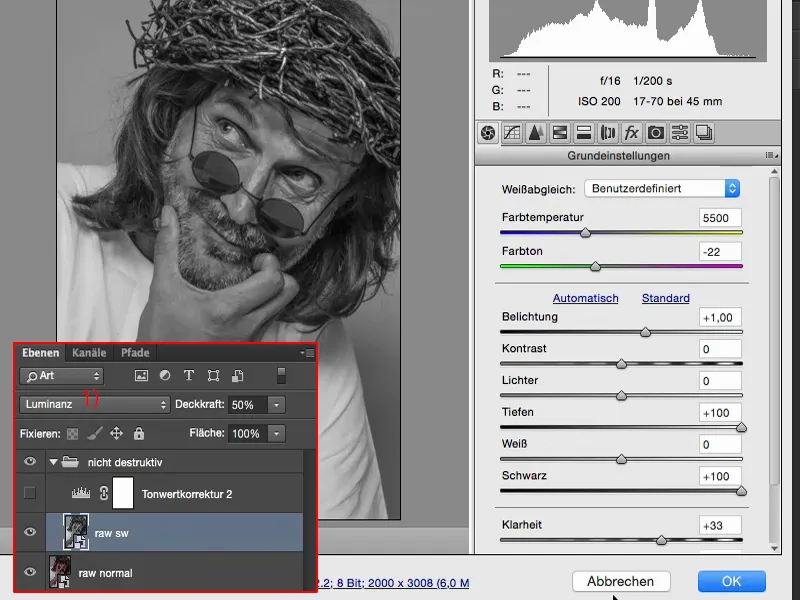
If it appeared in Normal mode, I would have a very, very desaturated image. I've already set the opacity here to 50%, and if I go to 100%, I'll have this story here too.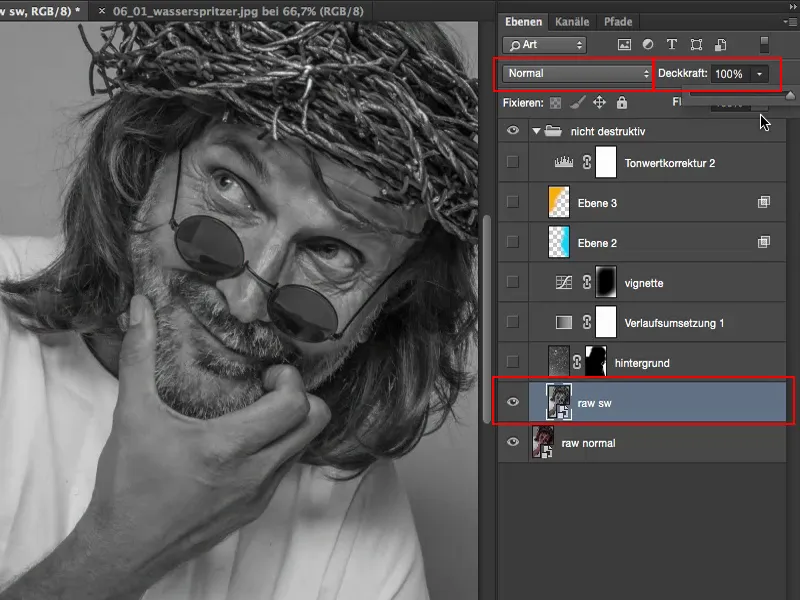
But I want to have the whole thing in Luminance mode and create a lot of detail here, so I've just left it at 50, 60 % opacity. Because if I use a black and white layer in Luminance overlay mode, then color no longer plays a role.
I would like to have the original color from this raw (1), but I would like to have the luminance from this black and white development (2).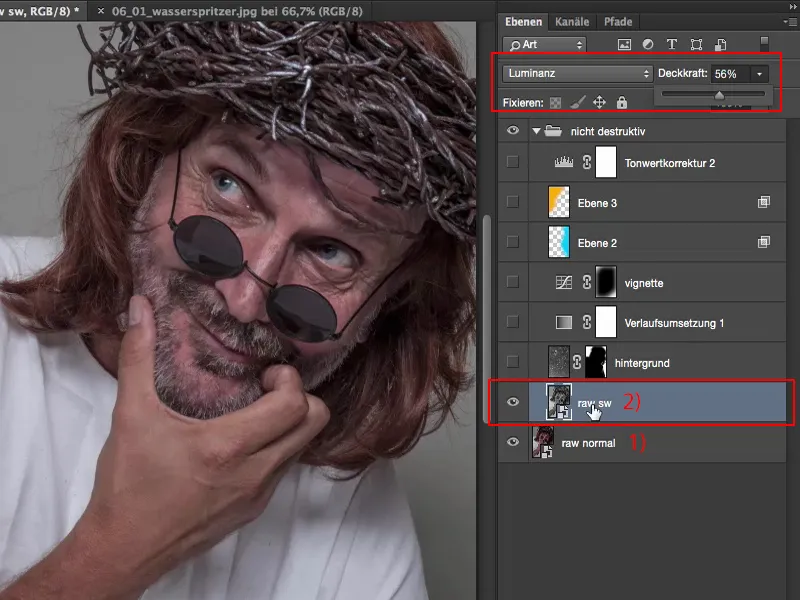
So here you simply go to Convert to grayscale (1) and then you can adjust the brightness quite nicely with all these color sliders here in black and white. In the basic settings (2), I made it so that I brightened the depths (3) and black (4) to the maximum. I pulled up the clarity (5) and I went one Blender brighter with the exposure (6).
So that's all that's happening on this second raw now. And that's just to increase the mid-tones and shadows enormously, and the clarity sliderdoes the rest for the details.
Then the whole thing is calculated back again. You can actually see the effect quite clearly, especially in the face. I can now see the iris completely and otherwise it is almost hidden in black, in the shadows. All the skin structures are also much, much nicer, the beard has more detail, even here at the back of the hair, there's a bit of noise, but that doesn't bother me at all in this picture. That's the first story.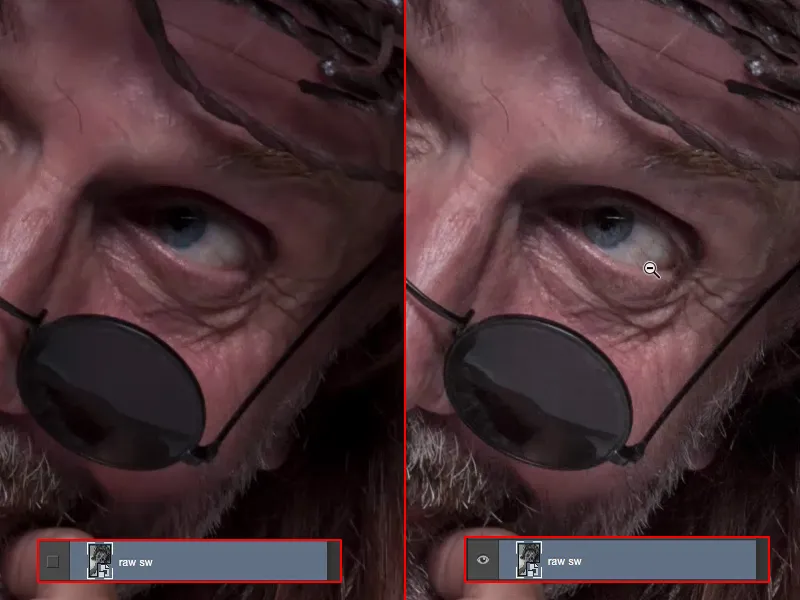
If you are perhaps quite happy with the first raw, but you think to yourself: "I could tease out even more if I could somehow do another raw development", then simply make a copy of the smart object, but only using this function New smart object by copy.
So much for that.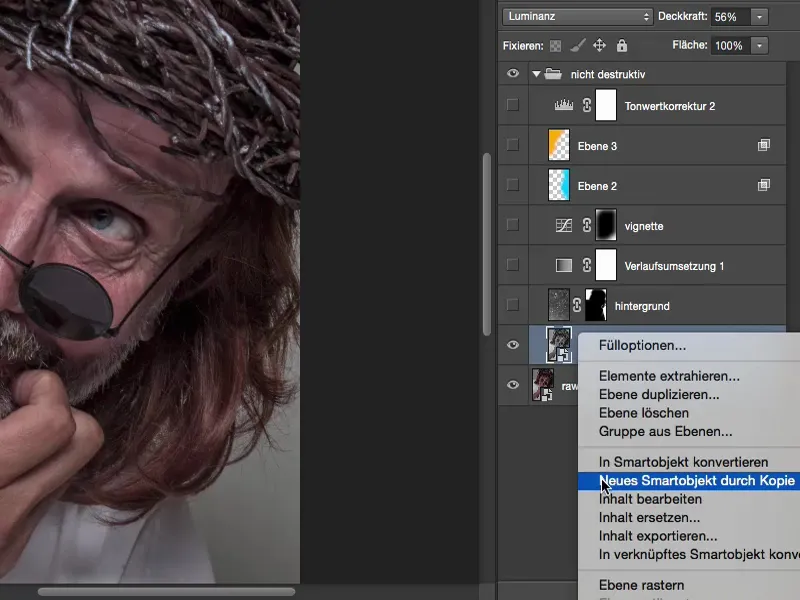
Background
Then I thought to myself, this picture is really quite cool. I still think it's very funny, the background is just studio gray - something else has to happen. And then the next step, before I start retouching and overlaying the look, is to build in a background. I've now decided to use light reflections and water splashes like this, and I'm also having them colored grey.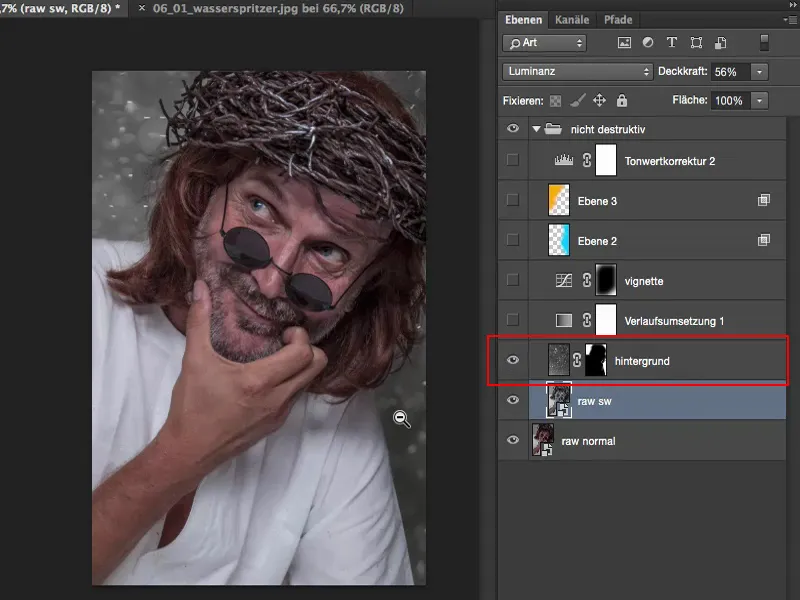
The background looks like this in the original. These are simply splashes of water, manually focused, in front of the fountain. And when the sun really hits it, you get these white spots.
When you see something like that as an image editor, it almost has to click in your head and it screams in your head: "Multiply negative, multiply negative!" This causes the dark parts of the image to fade out - and then you can very quickly integrate it into a composition.
I'll cut it out now, Cmd + A, Cmd + X, Cmd + W (or with Ctrl) and close the whole thing. I could also insert it via Place, but I've gotten into the habit of doing it this way.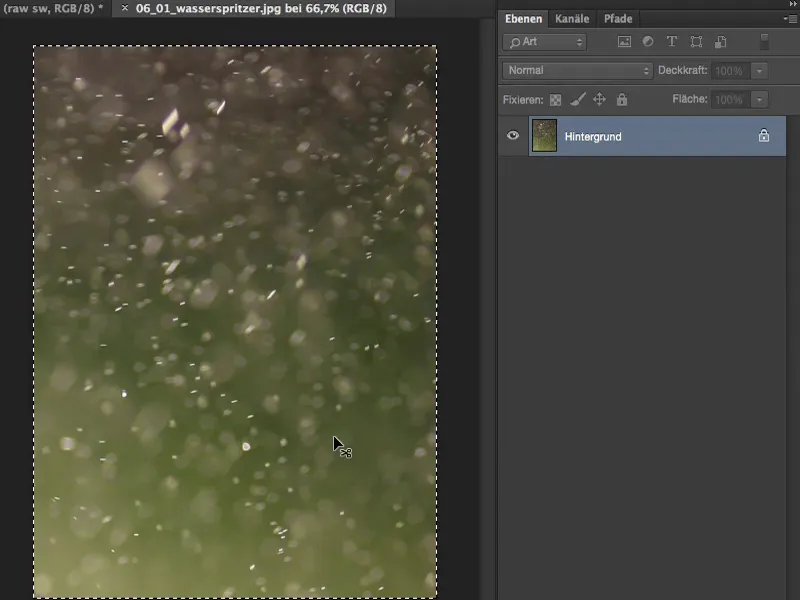
Then I insert the whole thing as a file, use Free Transform to expand it to the size of an image and confirm the whole thing with the Enter key.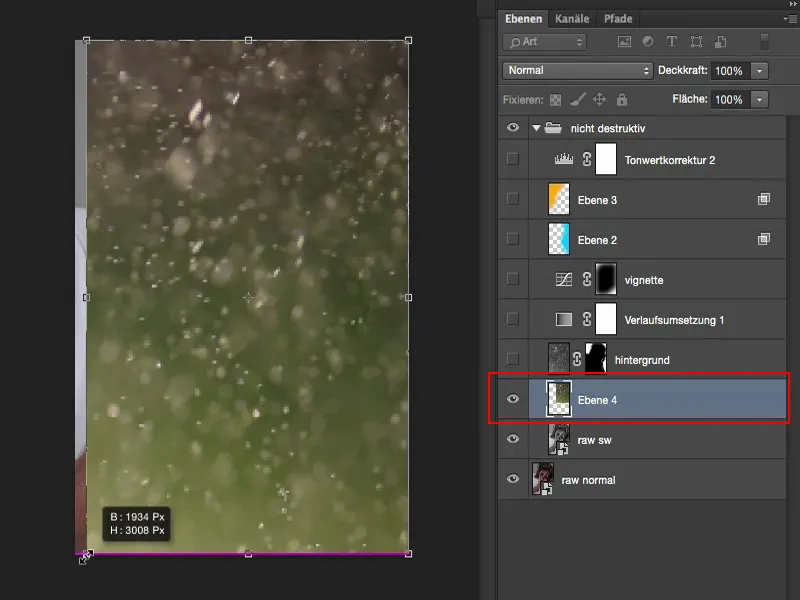
Then I go to Multiply negative. The color in the image is still there, of course.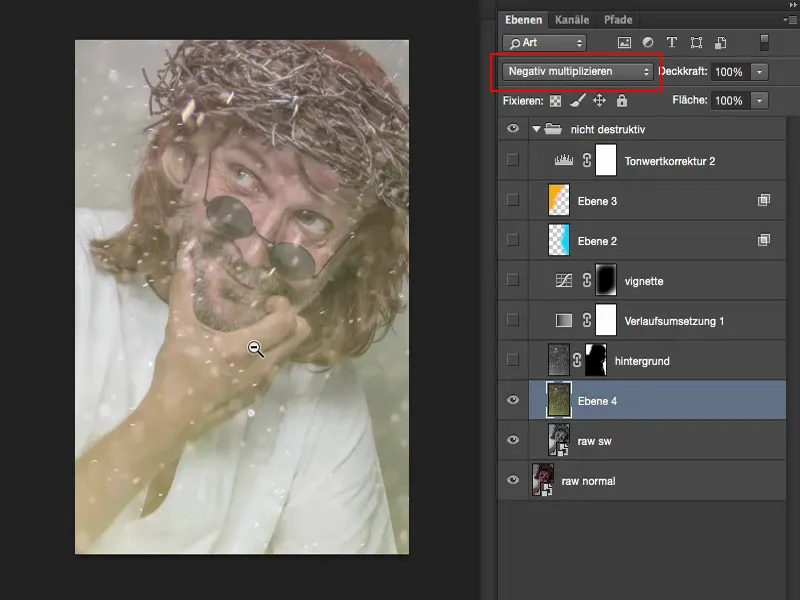
I don't like that now. So I desaturate this file viaCorrections>Reduce Saturation. Now I have a black and white image.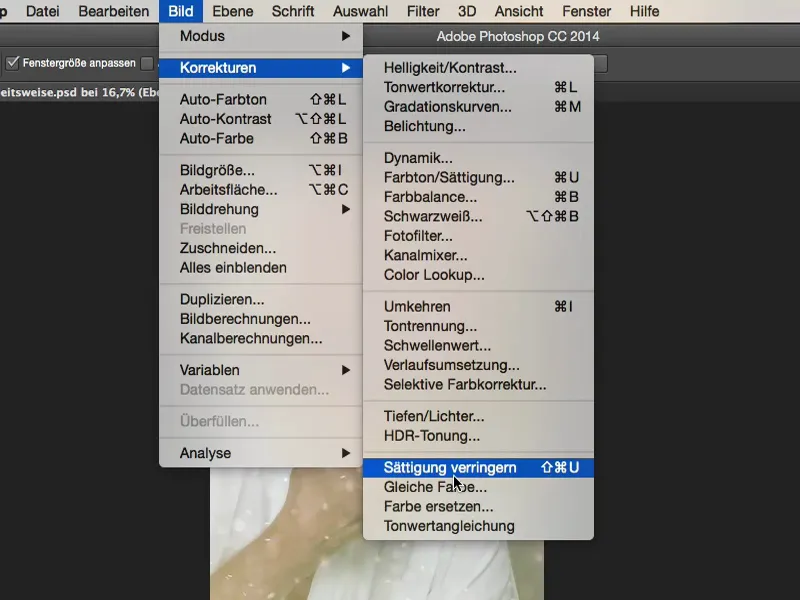
This is what it looks like in Normal mode. And all you have to do now is adjust the tonal values.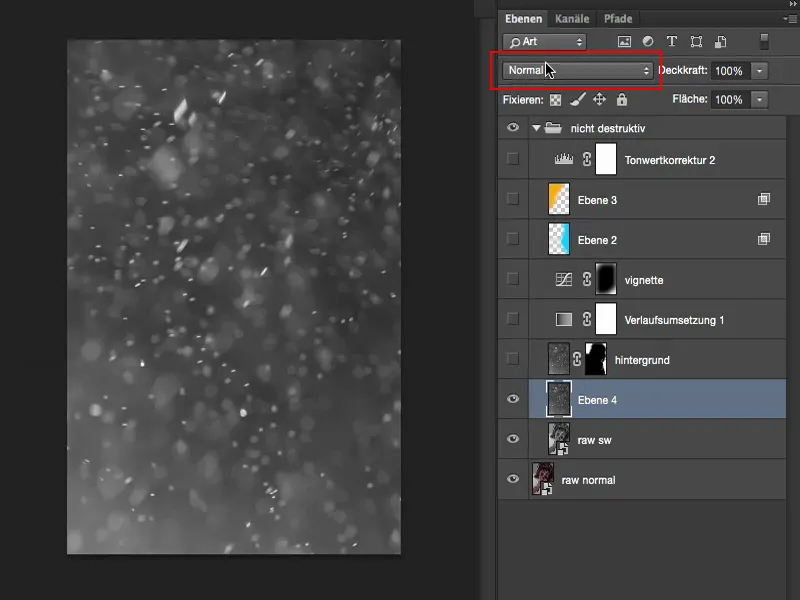
To do this, go to Image>Corrections>Tone correction. As you can see: I don't have any information in the highlights and shadows here at the moment. There's a mountain here in the middle and I have to move the whole thing there if I want to remove it. Okay, great.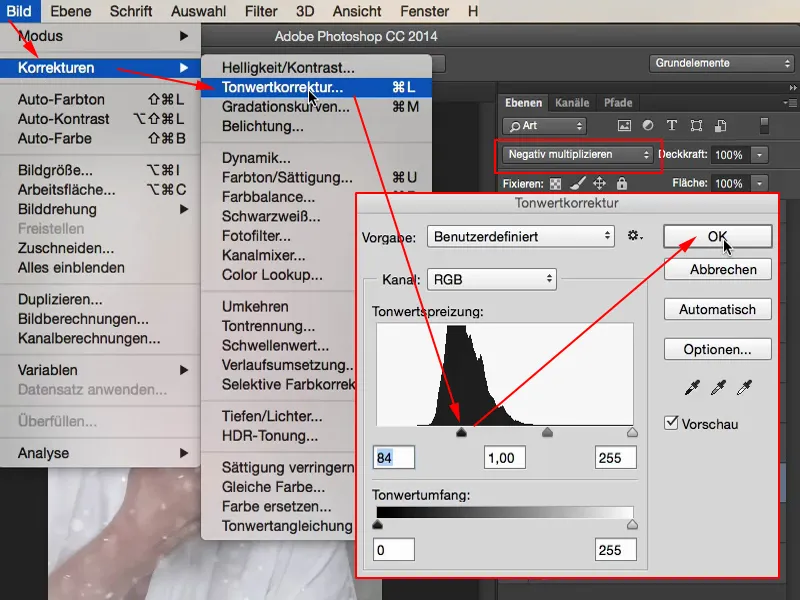
And now you can think about it: Do you want the whole thing on the model or not? What you then have to do is simply create a mask here and paint what I've already prepared here.
Then it looks like this, you have your water splashes here and the model is simply ... yes, it's not necessarily 100 percent accurate, but it's quite well removed. That's also enough to increase the density and make the picture a bit more interesting.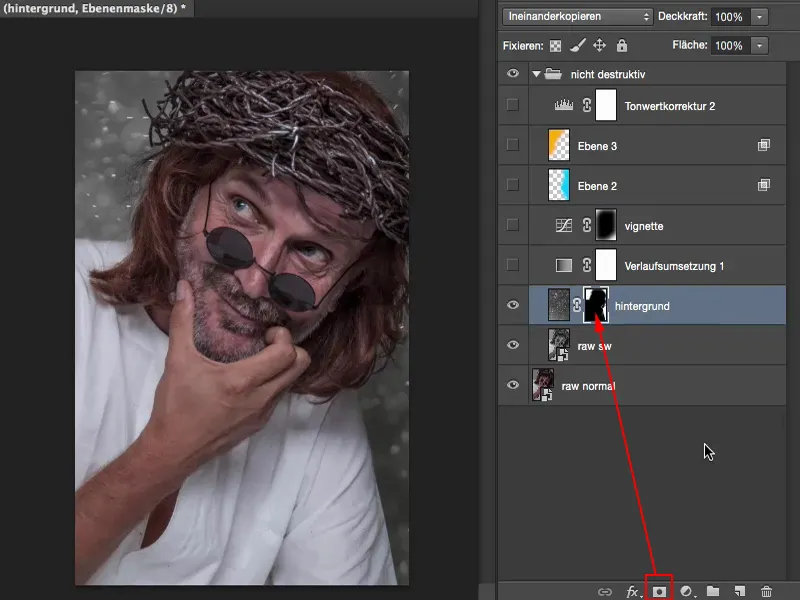
Retouching: Impurities & color
Now, for example, I can go ahead and say: Okay, I'm working non-destructively here, which means that if I want to retouch something on the skin or there are any blemishes on the clothing that bother me, such as these little crumbs (at 4), then I can now make an empty layer and call it "Retouch" (1), for example. I take a repair brush (2). I say All layers (3) here, because of course I don't just want to work on these light effects and these water splashes, I want it to work through the whole stack of layers. And now I can remove everything here in a very non-destructive way (4). I also look at the face, there's a little hair there that doesn't suit me so well. So now you can move freely on this empty plane.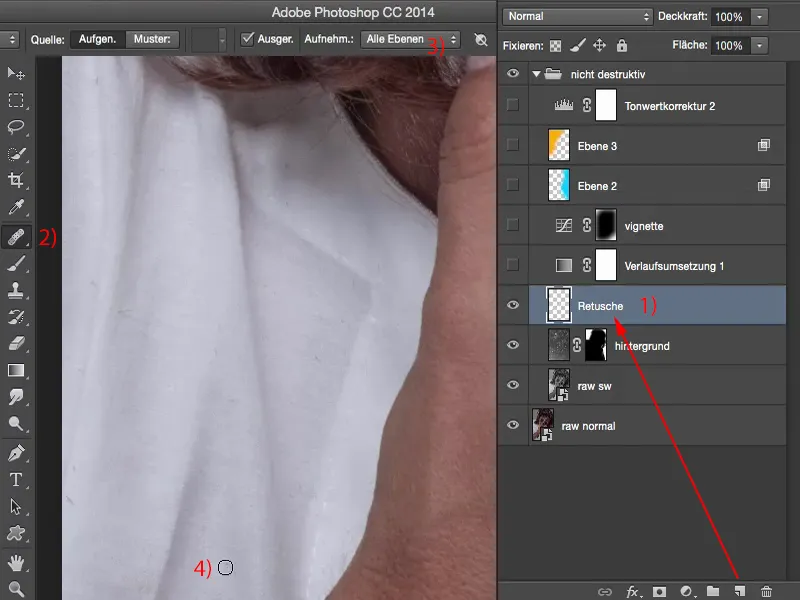
The nice thing is when you block it all out: You see, all that's happening here are these small, little things (1) that you've just retouched. This also means that your file size remains relatively small (2).
If you're constantly working with layer copies ... Yes, you can of course work like that, but it's destructive and your file size will very quickly increase from 77 MB, which is what it is here now, to 500 MB, or even more if your resolution is even higher. And very quickly you'll also notice how your computer goes to its knees. Another advantage of this non-destructive way of working is that you also save computing power. It makes a difference whether your computer has to constantly juggle back and forth with the buffer memory with a 500 MB file or whether the thing has 77 MB. Your computer hardly notices this at all.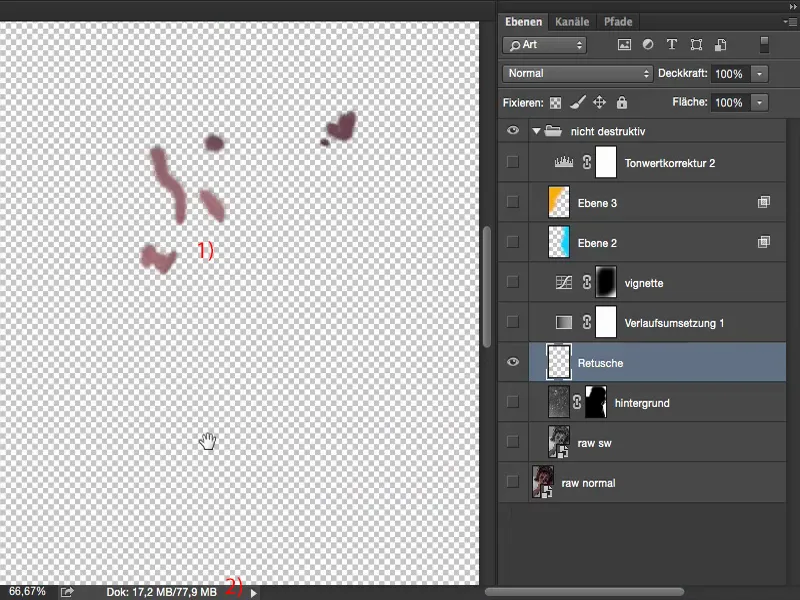
So with these empty layers, you can start retouching something at any time in between. You could also say: I need to make a color adjustment, for example on the skin: It's not so saturated here and the ankles are a bit too red - then you make color corrections here (1). Set the whole thing to Color mode (2), take the stamp (3), set the stamp to Color mode (4), say 30% here (5). You just have to activate the All layers checkbox again (6). And then you can stamp the color over it (7) and desaturate the knuckles on your hand. Of course, you can do the same with other areas of the image. You can already see how flexible this is. Our file size won't get much bigger because all that happens here is that we change the color of small dots a little.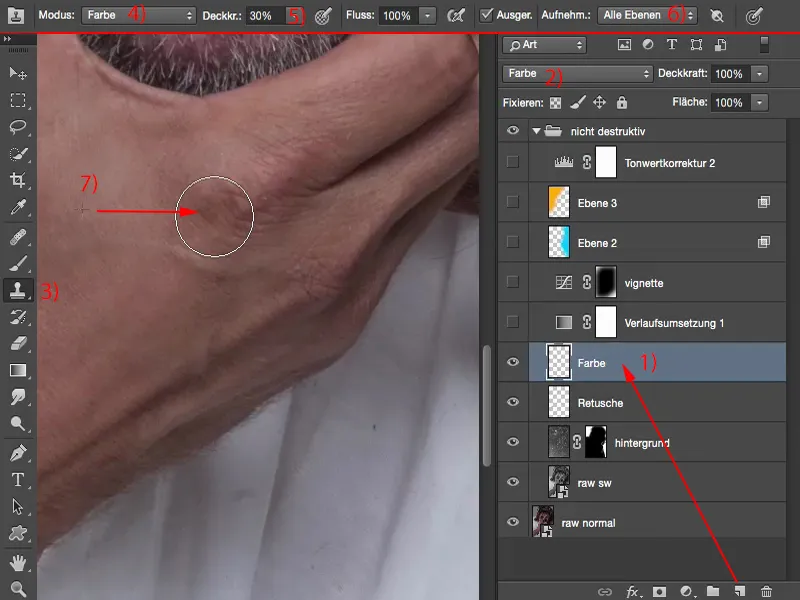
Creating a color look: gradient conversion
Now it's time for the color look: I once made a gradient conversion. It now looks like this. It's a blue or cyan-white gradient overlaid here in Invert mode (1). I didn't like it so much in Normal mode because it ruins the image in the depths. But I think it looks quite cool like this. I left the opacity at 51% (2). I can also pull it all the way up to make it a bit clearer, but then the whole thing is too cyan-saturated for me. And so a bit of skin color still comes through. And that's how I like it.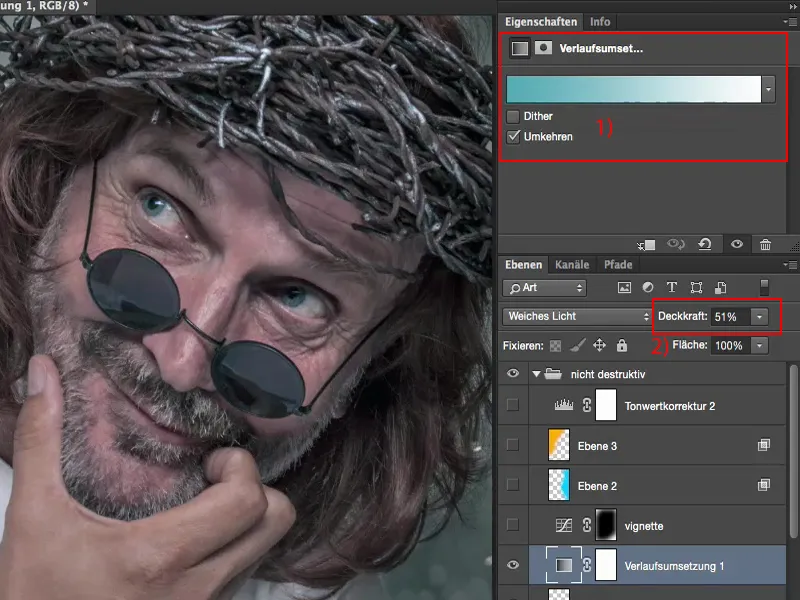
Creating a vignette
You can also say here at any time: I would like another adjustment layer. Then you can put it over here now. Or I've added a more or less strong vignette to the image here. I'll zoom out further so that you can see it a bit better. This compresses the image a little, draws the viewer into the center of the image, because everything is equally bright on the outside. I think you can also see immediately that the background has been tinkered with a bit, but if I darken it, you're distracted from it and the action takes place in the face - and that's where it belongs.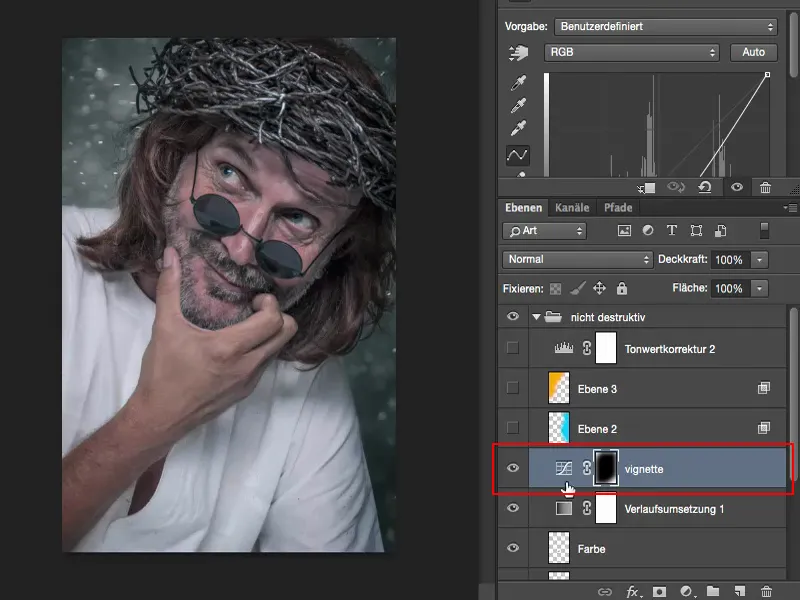
A vignette like this can be created very quickly on a gradation curve adjustment layer by simply creating a selection (1), softening it and then simply dragging the curve down (2).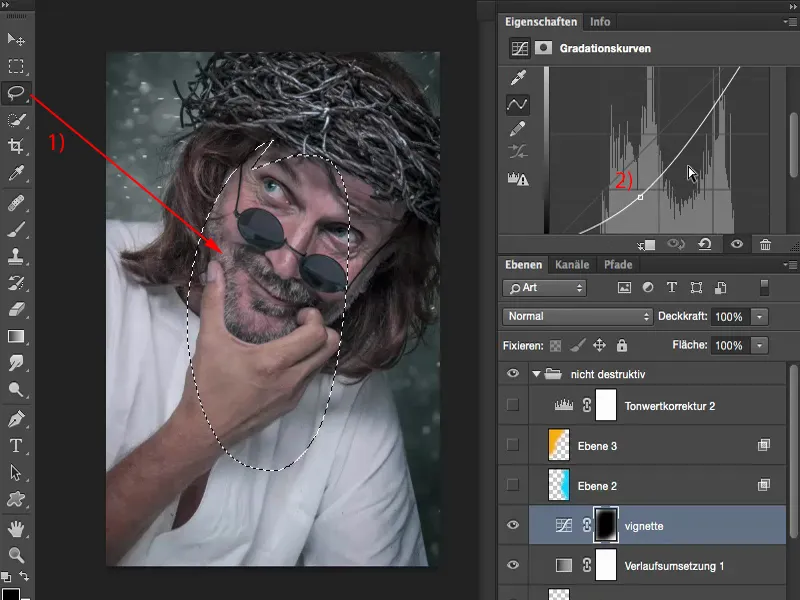
Creating light effects
Then I thought to myself: Somehow it's already quite nice, almost finished, but there's still a bit of color missing in the picture. And I thought to myself: I could imagine a blue spotlight shining in here on the right, in this area, and I would like to have a glow of light here.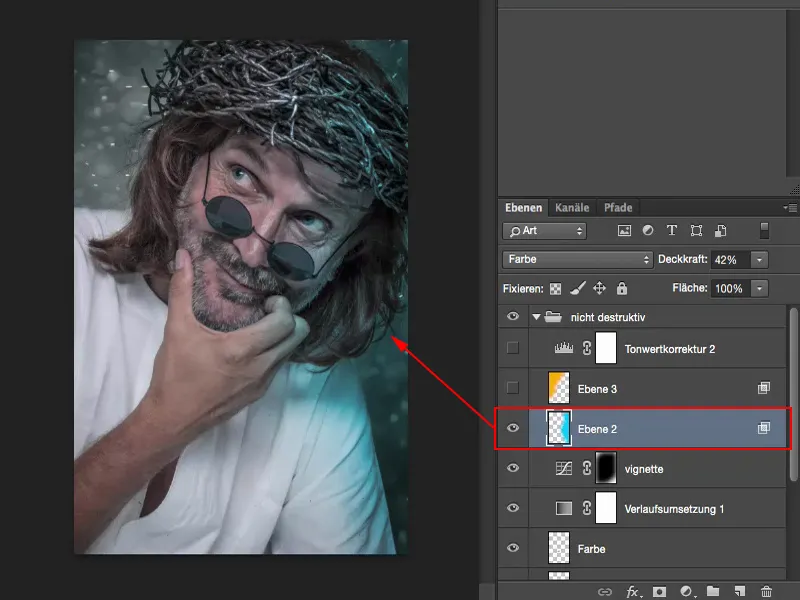
So I make an empty layer (1), take this color (2) on the brush (3) and choose a cyan blue.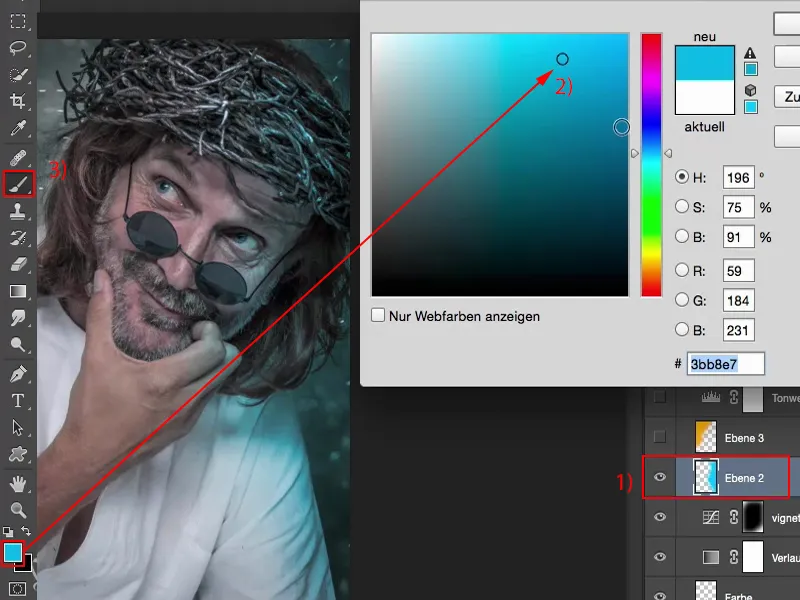
I take out the layer (1) and make an empty layer (2), take the brush (3), go to 100% opacity (4) of the color and somehow draw something like this in here. I can perhaps also paint in a few outliers (5) ...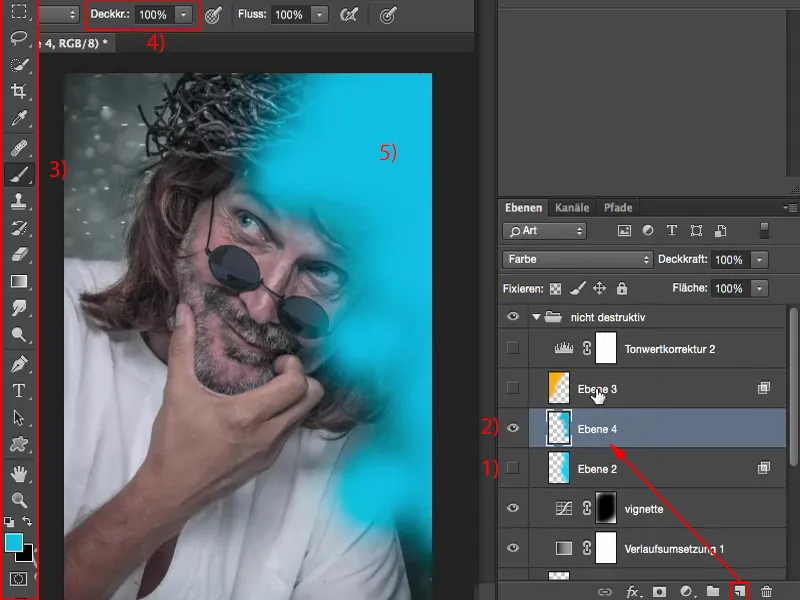
... and then I set the whole thing to Color mode. I can also set the layer to Negative Multiply mode (1). Then the whole thing becomes quite garish, neon-heavy. I then have to reduce the opacity, but in Color mode (2) it somehow looks quite cool. Now I go down a bit with the opacity.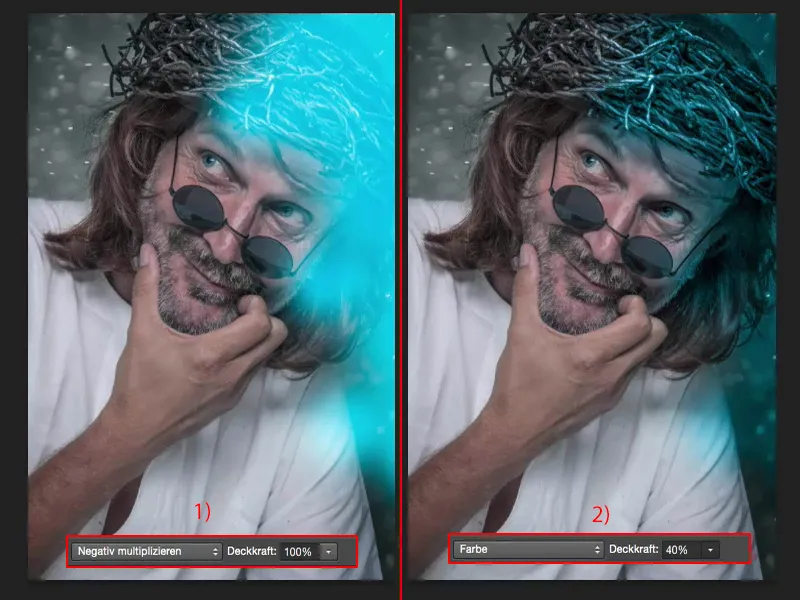
I can use Free Transform to adjust the whole thing here. If necessary, I can also bend it into the image, bend it out (1), so it's all very flexible. That's roughly how I can imagine it. Then Photoshop does a quick back calculation. That would now be this layer (2).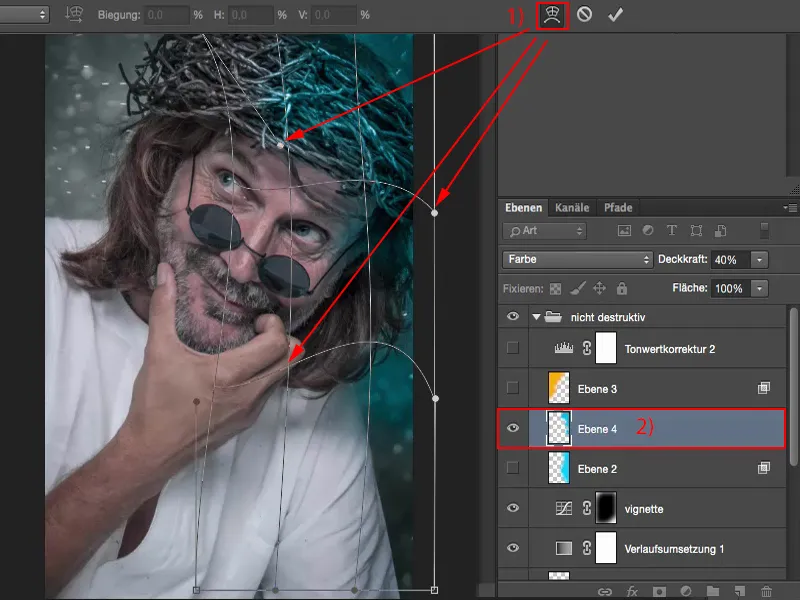
You can also combine them. You can also make two, three, several, work in different layer modes. All that happens is: you have an empty layer and a bit of color on it (1), our file size has grown a bit, but we're still under 100 MB (2), even though we've actually already done a lot. That's the advantage of working in a non-destructive way. I'll take that out again (3).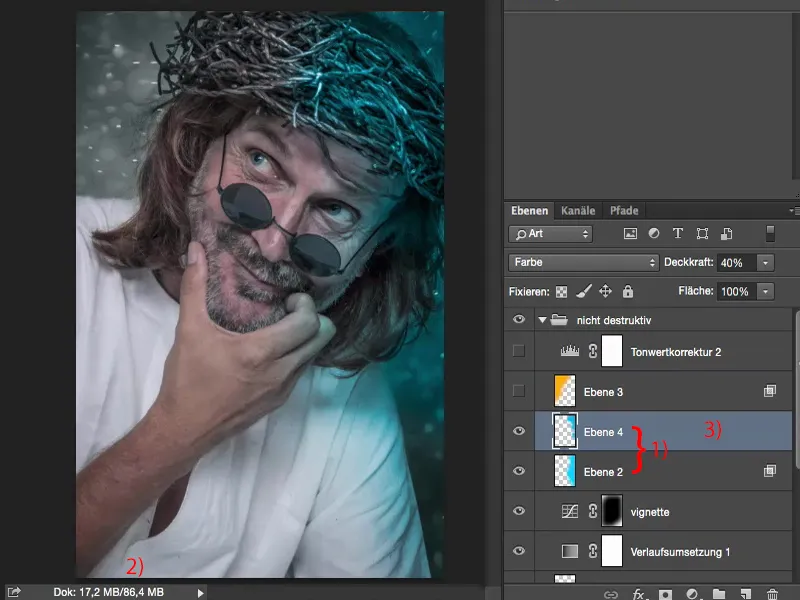
And if you notice now: I forgot to clean up the fabric on this page here, then you can just look for your retouching layer (1), which was down here in the middle of the pile, and then you can say: "Okay, lucky I didn't work destructively here." Because no matter if there are also color shifts on top and so on - you can still correct everything here at any time (2).
That's the advantage: you can access every layer at any time and have full control over it.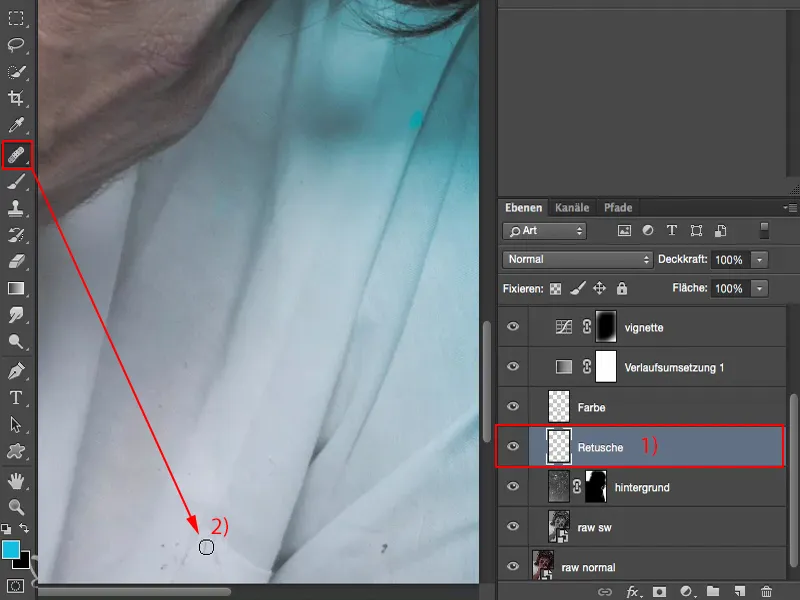
I've now done the same thing here on the other side with a yellow tone or an orange tone (1), also in Color mode (2). Now I find the picture exciting, now I say: Okay, I think I'm done.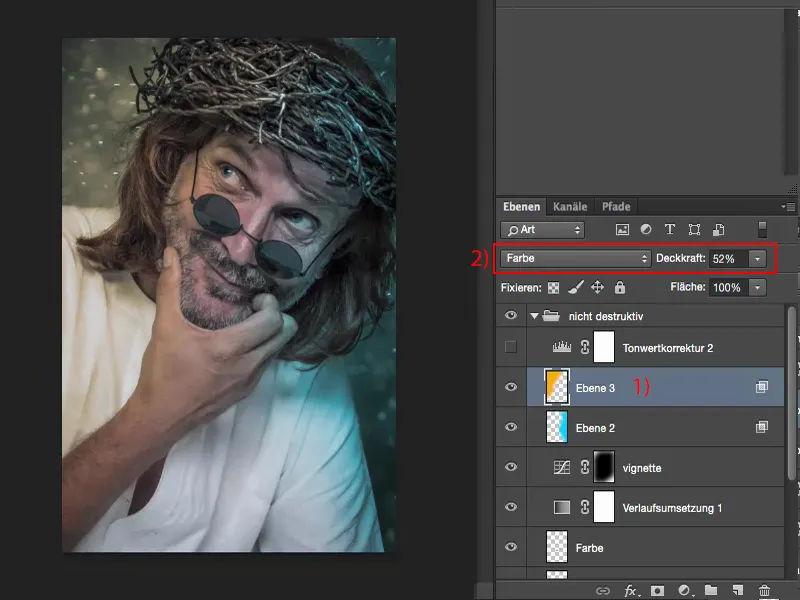
Tone value correction
I apply a tone value correction (1) and have simply moved the tone values a little towards the center (2) to create more contrast.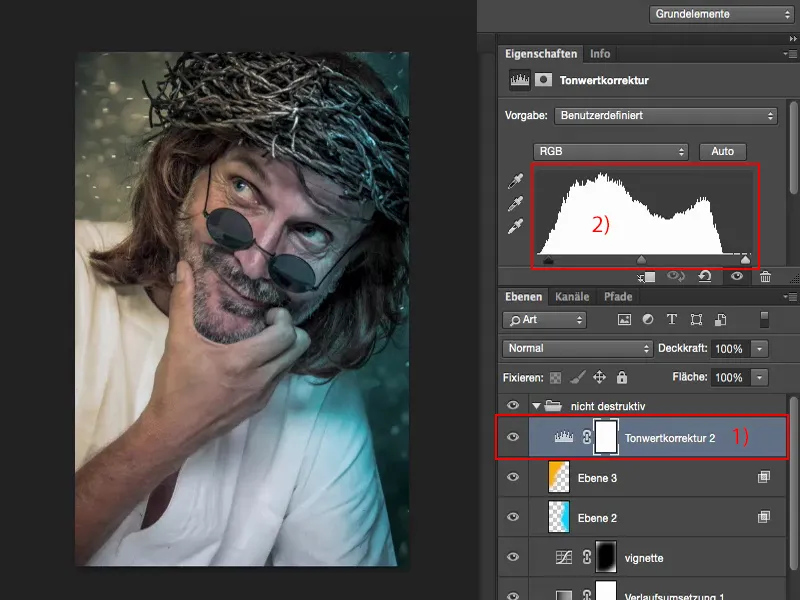
Summary: Advantages of non-destructive work
Let me save. Let's assume this is for a customer order and the customer says: "I quite like this, but can't you make it so that you have this blue glow on both sides or something?", then I say: "Yes, sure, dear customer."
I open my PSD file, Blender out this layer (1), make a new empty one (2). And then I simply paint in this glow on this side too (3), set it to Color mode , reduce the opacity a little to 20% (4), save the whole thing as a PSD, because I still want it, of course, and send a TIFF or JPG to the customer. The customer is happy, the whole thing took ten seconds and I can send it again immediately by e-mail.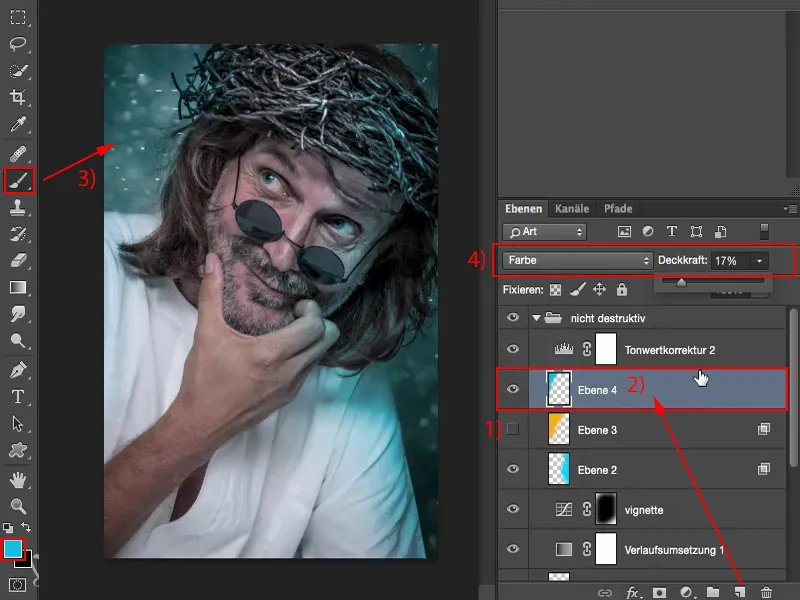
And the customer will say: "No, I'd rather have it in that shade of orange." Then all you have to do is click the two layers on and off (1) and you can send it again. Or if he doesn't like something else, he says: "Why did you remove all those crumbs? We put them on in such a makeshift way." Then you simply remove your retouch layer (2) and all the crumbs are back down here.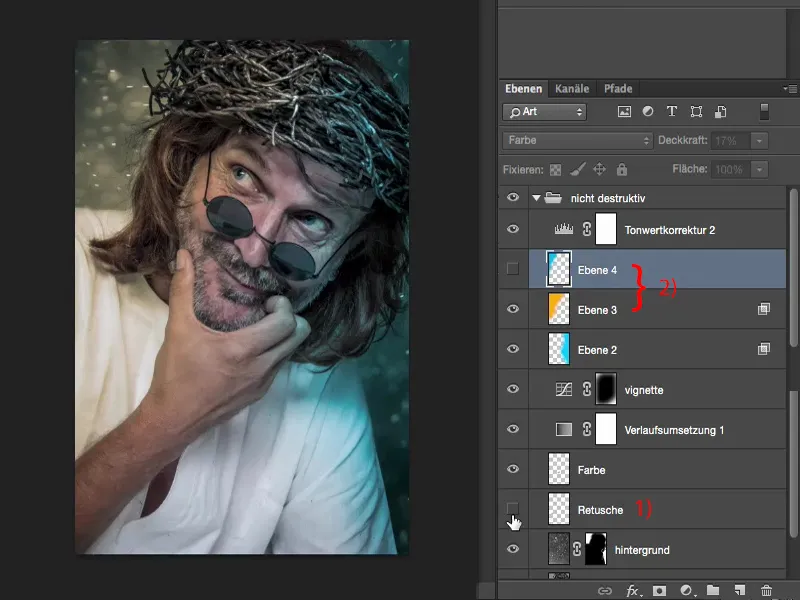
And that's how the whole stack here is structured logically, non-destructively. And that's my recommendation to you: always try to imagine: "What could happen so that I can access this layer again afterwards? And can I even do that?" If you work with smart objects, especially in the raw area, you can always go back to the raw development. You have to work with masks, you have to work with adjustment layers and you have to work on empty layers. These are the three or four main criteria if you want to set up a non-destructive workflow.