No retouching technique, I think, is more discussed and more widespread than the so-called dodge-and-burn technique, the technique of lightening and darkening, which makes image areas more striking or makes them recede.
This can be used not only in portrait photography, but also in landscape photography to emphasize image areas enormously or to make them recede a little from the viewer's field. And that's what Dodge & Burn is all about.
I'll show you five different techniques in this tutorial. This will help you understand how the whole thing works in Photoshop in terms of the algorithm, what it ultimately does, and you'll also get to know the differences between these five techniques.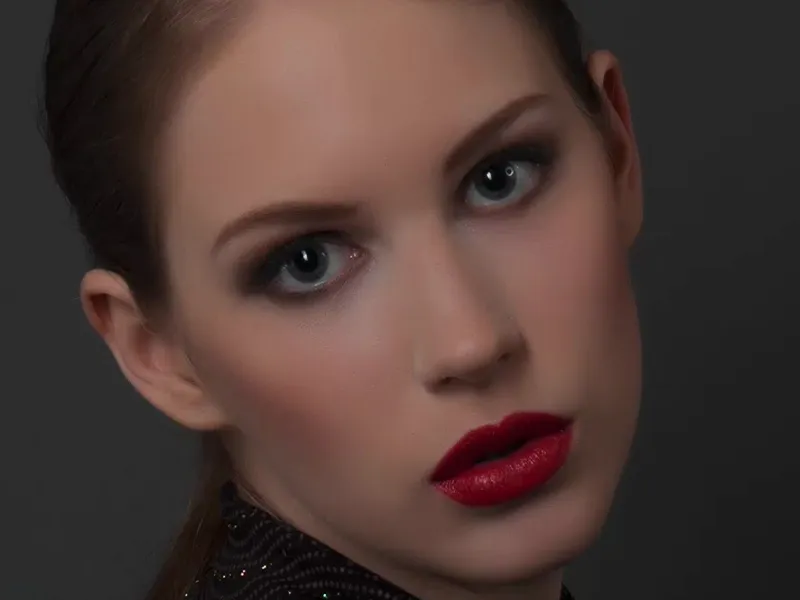
I have prepared this in this group. On the one hand, you've painted the whole thing here on a gray layer with black and white, on the other hand you've painted it with dodge and post-exposure, via a gradation curve, via a tonal value correction and destructively on a layer copy in luminance mode.
These five methods differ slightly in the way they work. Some are a little softer, some are a little more diffuse, others are a little more fairytale-like, a little more glowing. And I'm going to show you these differences now.
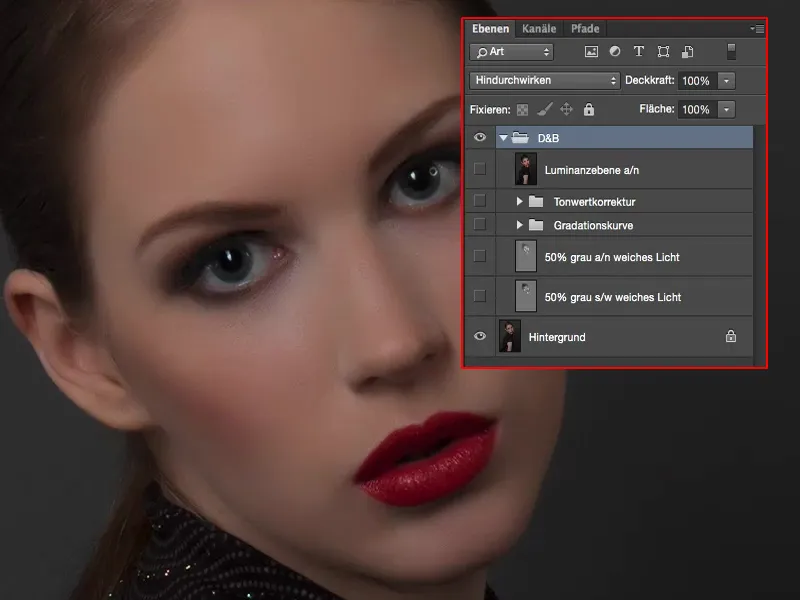
Dodge & burn, method 1: white, black brush
The very first thing you should do here for the textbook method is to create an empty layer (1). Fill this with 50% gray (3) via Edit>Fill Area... (2).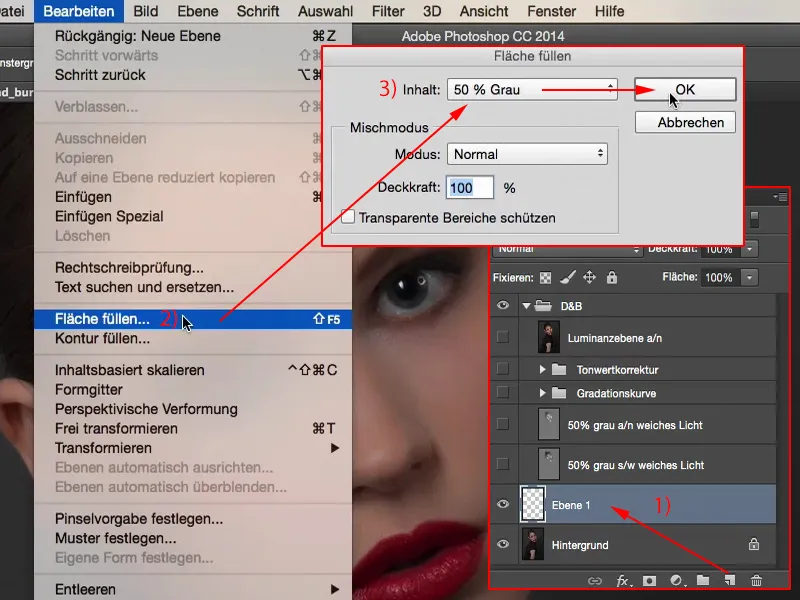
And this gray is invisible in the group of blending modes (from Copy to Hard Blend). Set the layer to Soft light.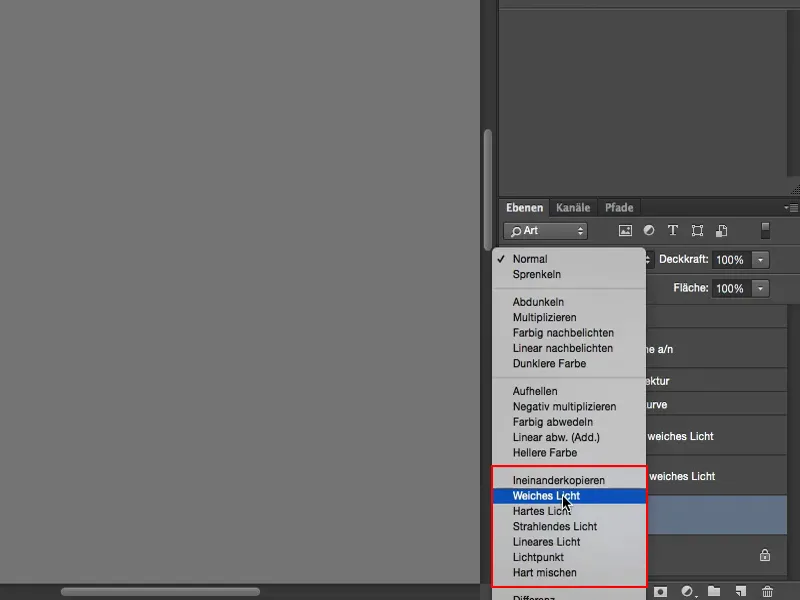
Now you can darken and lighten with black and white. Of course, reduce the opacity a little (1), in Normal mode (2) the whole thing should be done. And everything that deviates from this gray area can now be lightened and darkened.
Now we have the brush (3) in Normal mode (2) and you can see that the more often you brush over it with 9% (1), the lighter the whole thing becomes. You can now paint your way through the whole picture, lighten the bridge of the nose or emphasize a small edge of light. You can also use it to brighten the eyes.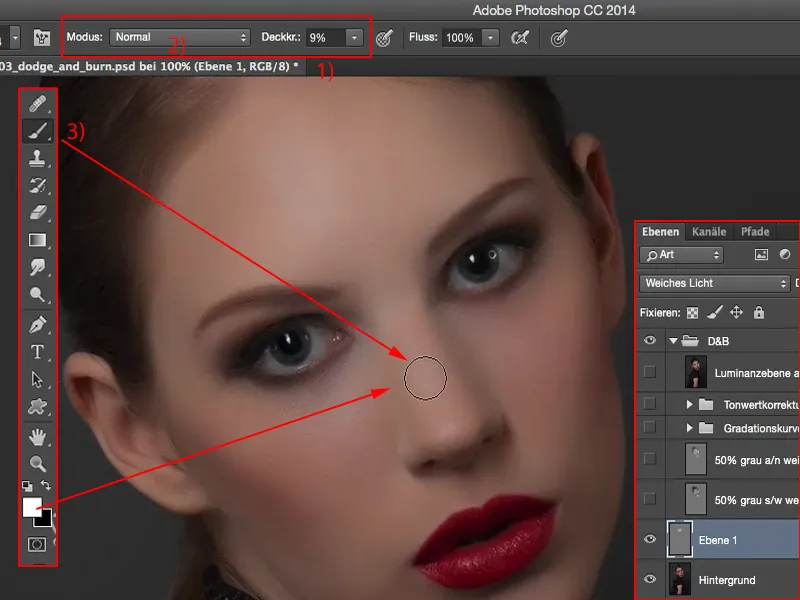
It's just important that you keep the opacity relatively low, because if you look at the before and after, you'll notice that it's almost too much. But you have the layer opacity with which you can reduce the whole thing.
And Dodge & Burn always looks a bit blotchy at first, but that settles down over time. The more images you edit with this technique, the more practice you'll get.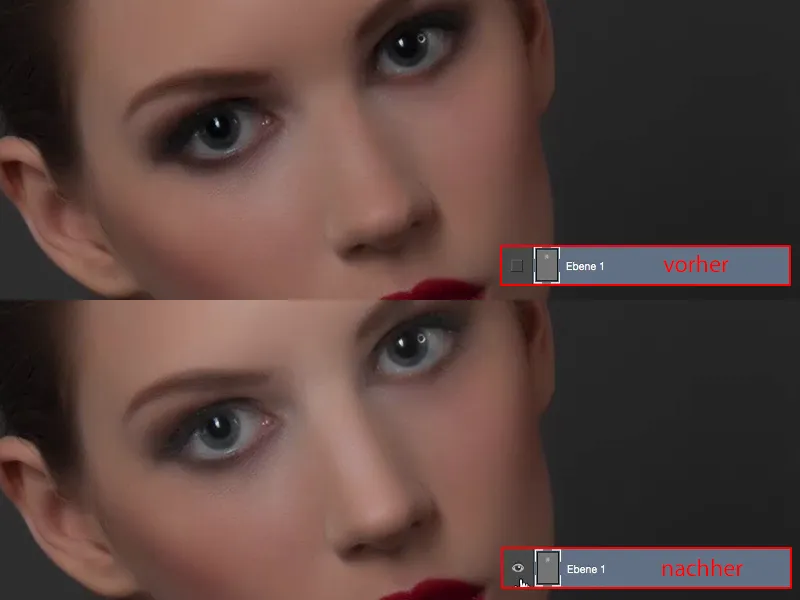
With X you can switch to black (1) and darken certain areas of the image, for example the eyebrows ... You can already see how it shapes the image here. Or on the outside of the eyes, which looks as if those smokey eyes have moved outwards a little more, and you can also use it to influence the blush on the side. You can also darken the hairline a little.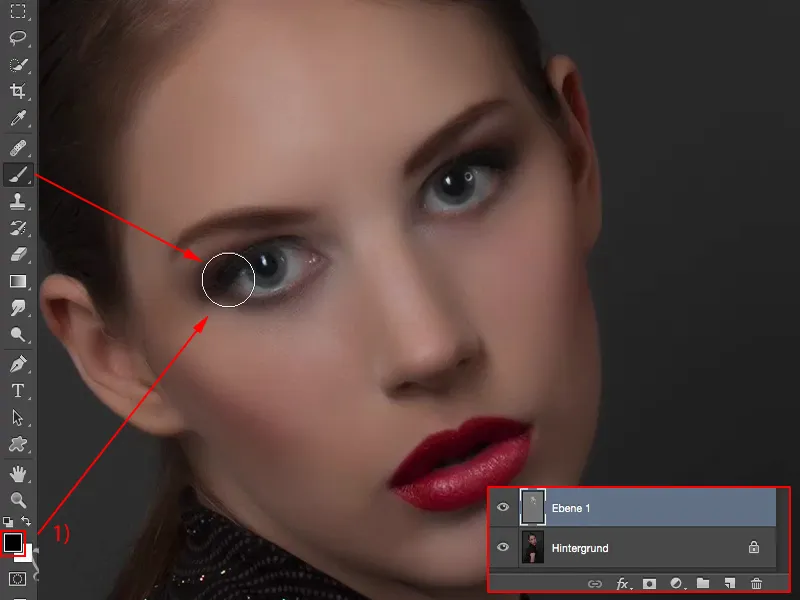
You can see this already done here on this layer (1). The opacity is set to 100 % (2). I've deliberately exaggerated a little here, but you can see how the whole thing works.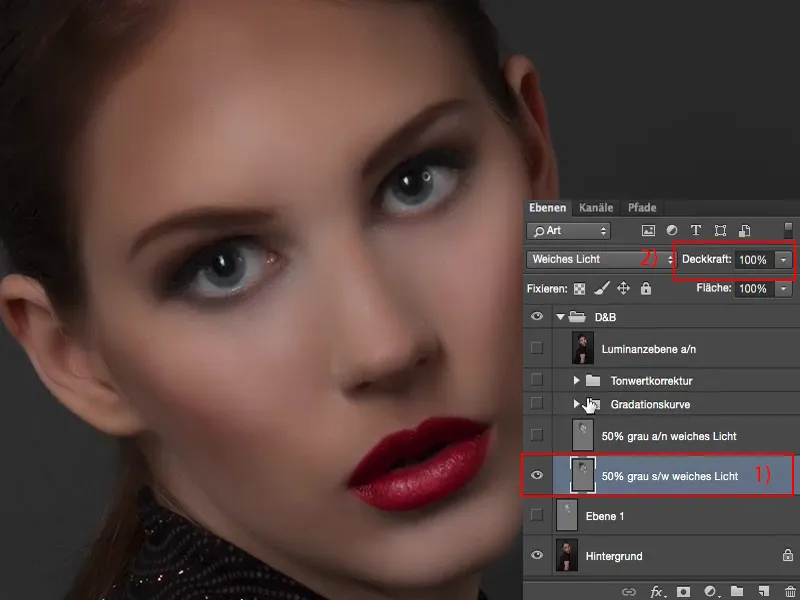
If you turn it down to 50, 60 % (1), then I would say you can leave it at that. And so the focus is really on the eyes, in the upper half of the face.
So that's what Dodge & Burn does. The method with the neutral gray layer in soft light mode, where you use a black and a white brush (hence "b/w" at 2), actually delivers a very good result.
You have to be careful with the depths, or if you darken with black, so that there is no color shift.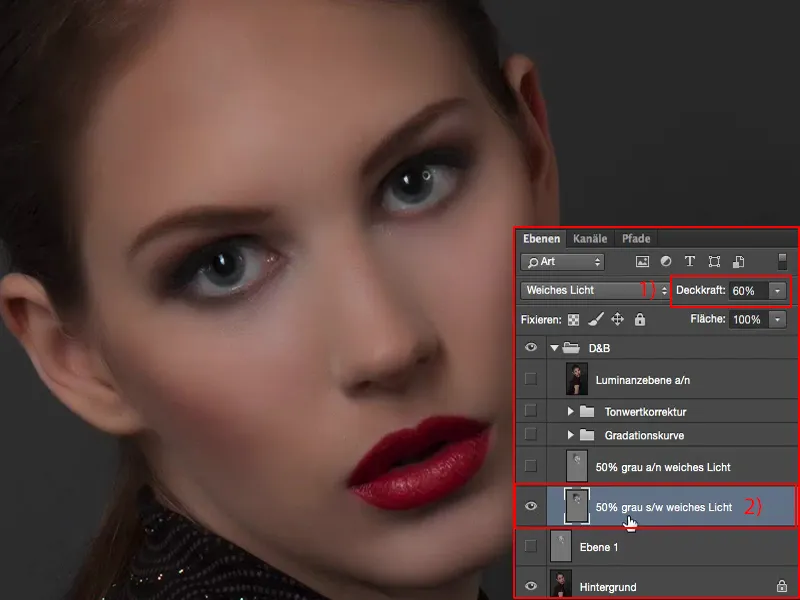
I'll go back to 100% opacity (1) above. Then you can also see how the brown tones adjust very, very slightly. It's not much, but you should know that if you use this method.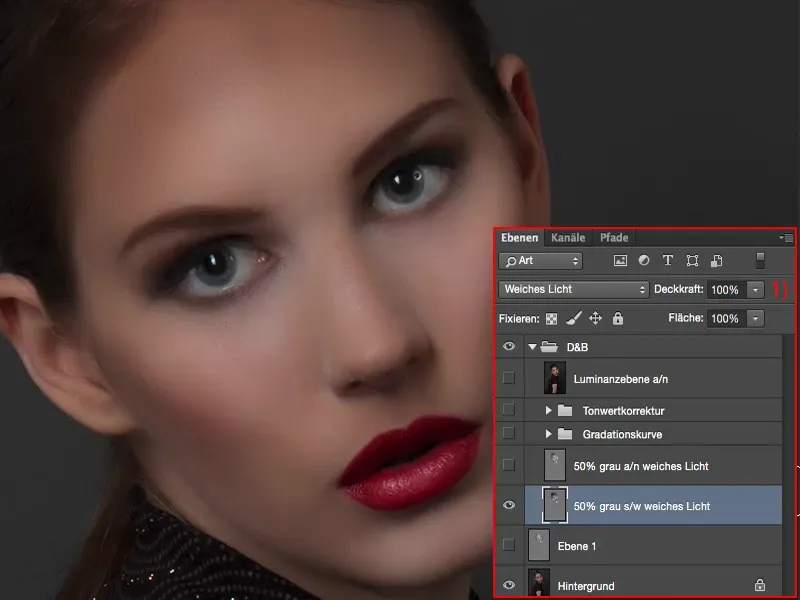
Dodge & burn, method 2: dodge, post-exposure
Then I created another gray layer here. I then worked on the gray layer (1) with Dodge and Burn, using these two tools (2). They're a bit more flexible, because if you've been using Dodge & Burn for a while, you'll see: You can work up here (3) not only on the midtones, but also on the shadows and highlights.
Of course, this doesn't help at all at first on this gray layer, because the neutral gray is the absolute average value that you can imagine in Photoshop, this RGB 128. And if you then set the dodge tool to shadows or highlights, nothing will happen at all, because this gray layer has no shadows and no highlights. This means that initially you can only work on the mid tones. However, once you have worked things out with the dodge and post-exposure tools, you can work on highlights and shadows later on.
So that's the advantage of this method, whereas with black and white brushes you can only ever change the brush opacity.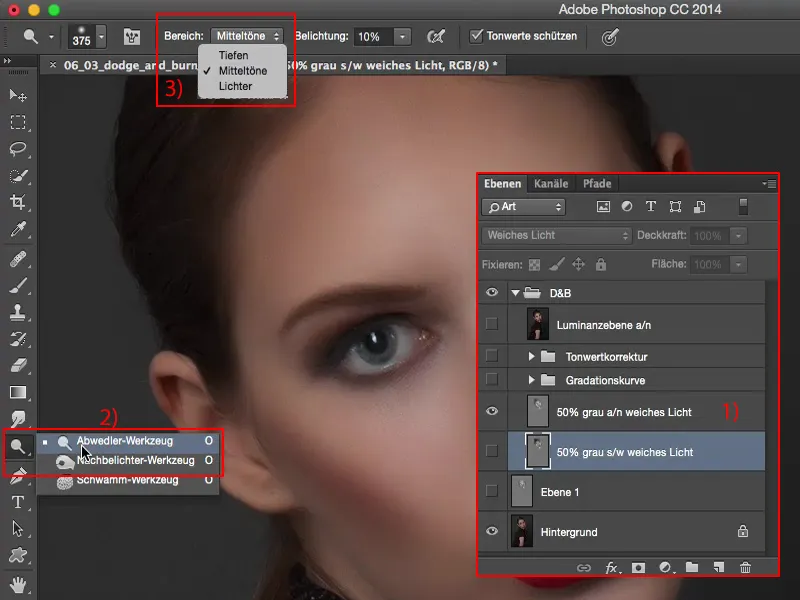
The result in direct comparison: This has a slight effect on the highlights (1), because the dodge (2) is somewhat more aggressive than if you paint on this layer with a white brush. This results in the highlights and midtones appearing a little brighter and also a little shinier. I would therefore recommend this method (2) over the method with a black and white brush (1). The result looks similar, but the shiny areas or how it is calculated with the centers, I think, comes out a bit better here.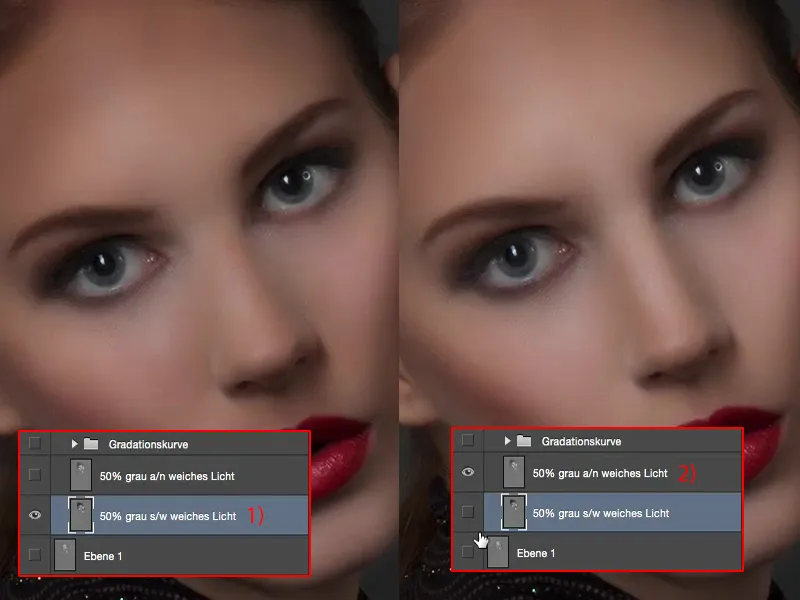
Dodge & Burn, method 3: Gradation curves
As a next example, I've made two gradation cur ves for you here (1). I'll do this again live for you and delete this layer again (2).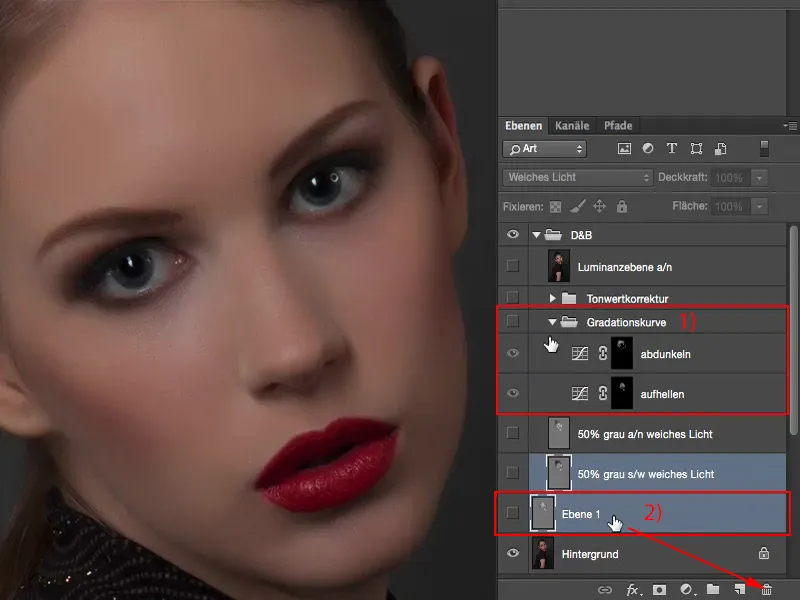
To do this, we first need the Corrections panel(1). And then I'll create two gradation curves here (2). I'll use the first curve to lighten (3).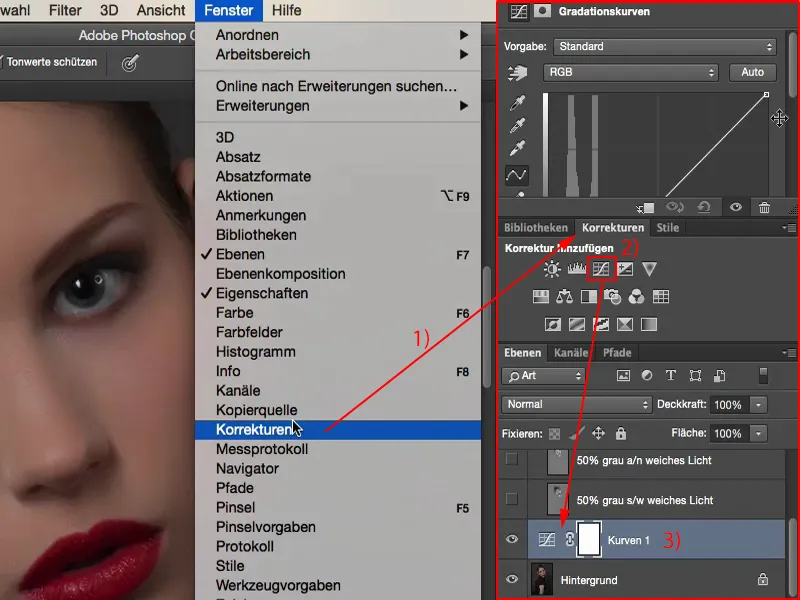
I pull it so far up (1) that everything is almost completely white that everything breaks off here. I do this so drastically because I simply like to have more air here.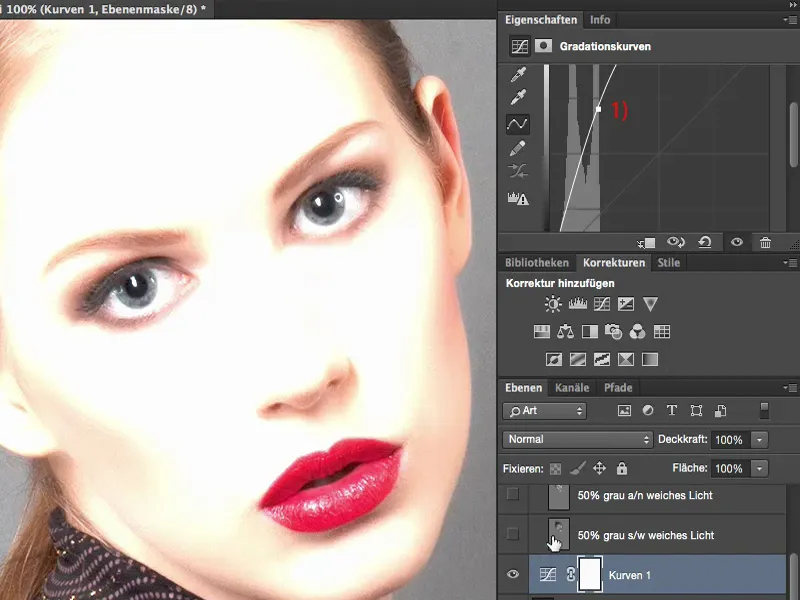
If I do this just a little bit (1), then that's the maximum value I could lighten by.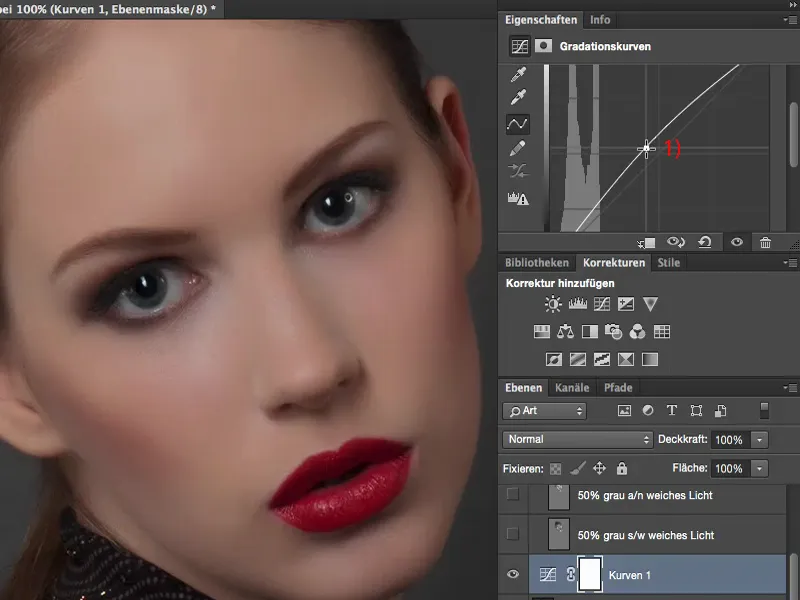
But if I need this value (1) at any point in the image, then I'm lost, I have to tighten the curve - and that's not so nice. That's why I'm really going for an extreme value here.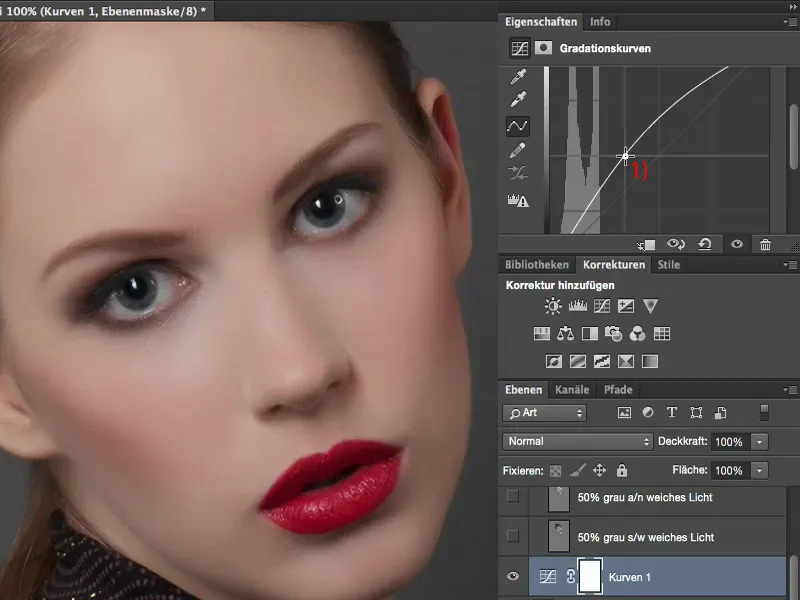
I immediately invert the mask (1) with Cmd + I or Ctrl + I (2). Now I have hidden this information behind it (3).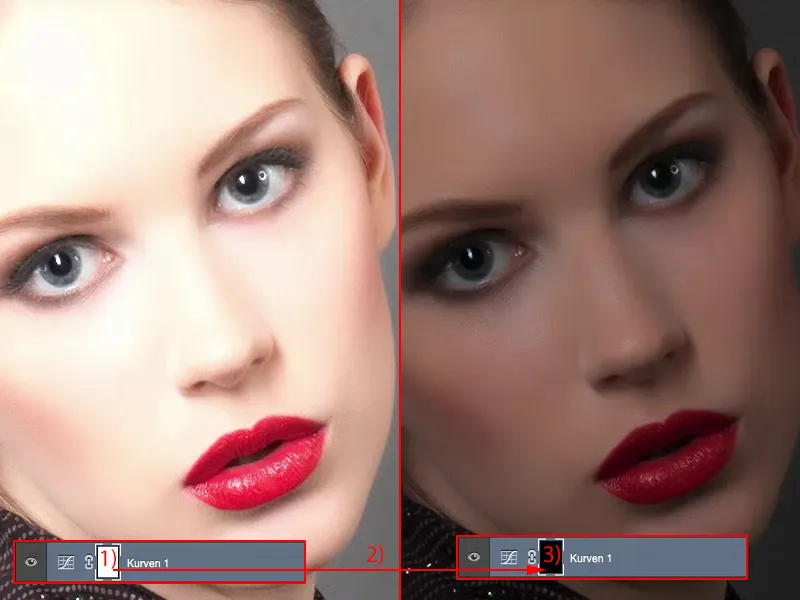
Next, I'll create a second gradation curve (1). I will now darken this curve quite a bit (2) so that I can hardly see anything.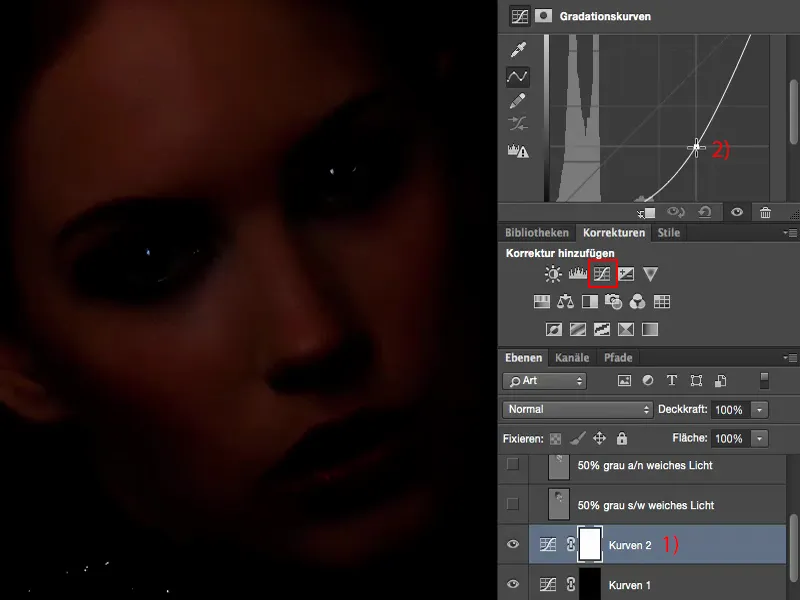
Now I also have enough air when darkening. I also invert this curve (1). I rename the two layers to "darken" and "lighten" (2).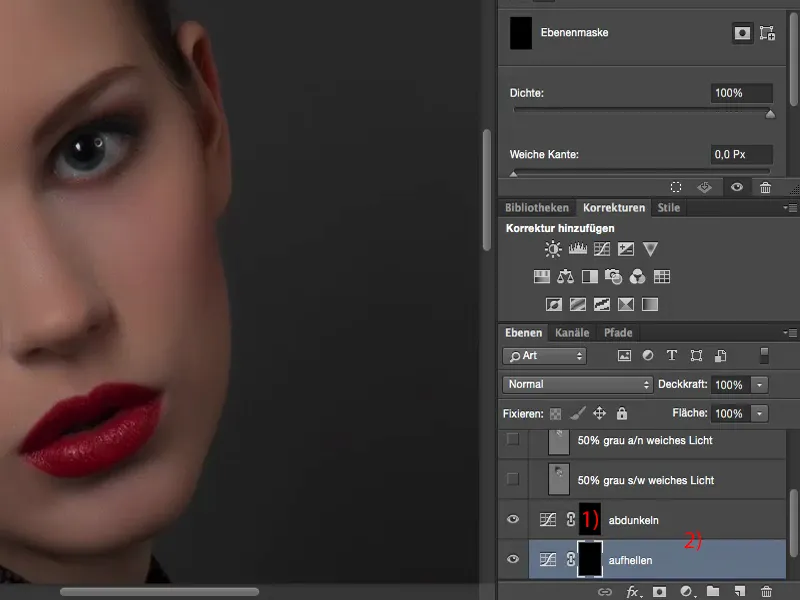
What you need now is the brush tool(1). I have to go to the mask here (2). Then I set the opacity back to a low value, around 8 to 10 % (3). I no longer have to change tools, I no longer have to change opacity, I no longer have to change modes, I no longer have to switch back and forth between midtones, shadows and highlights.
All you have to do now, and that's why I actually really, really like this method, is: you have to switch between these two masks (4). That means you can lighten (2), brighten, brighten, brighten ... the eyes ... I'm going to do this quickly and not exactly, so that you quickly have a change effect in the image.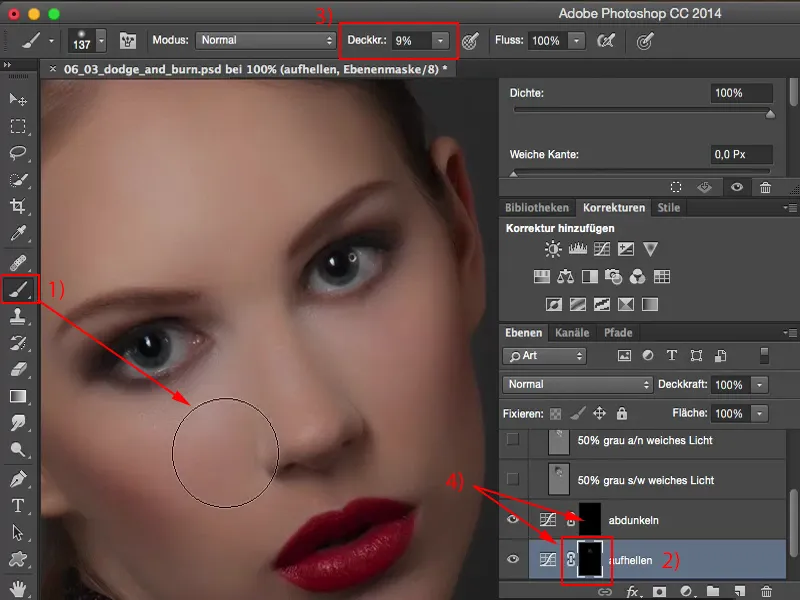
And now I want to darken - and all I have to do is click on this mask (1). I can already darken the image here, paint the hairline a little darker, on the eyebrows, above the eyes and so on. As you can see, the whole thing works very quickly.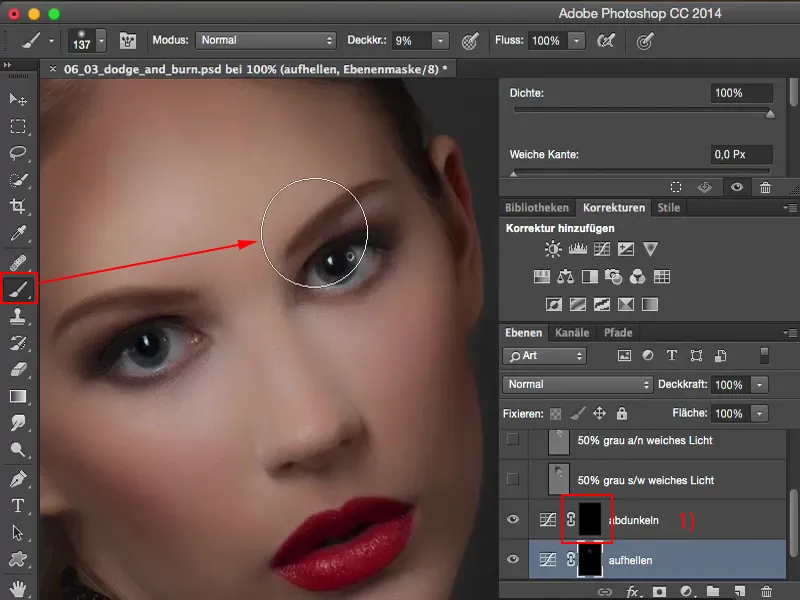
Normally I would have to change the foreground and background color (1) when I work on this grey layer in soft light with the brush or with Dodge and Burn (2). I may also need to switch modes at the top: Midtones, Shadows, Highlights (3), and I can also adjust the opacity (4).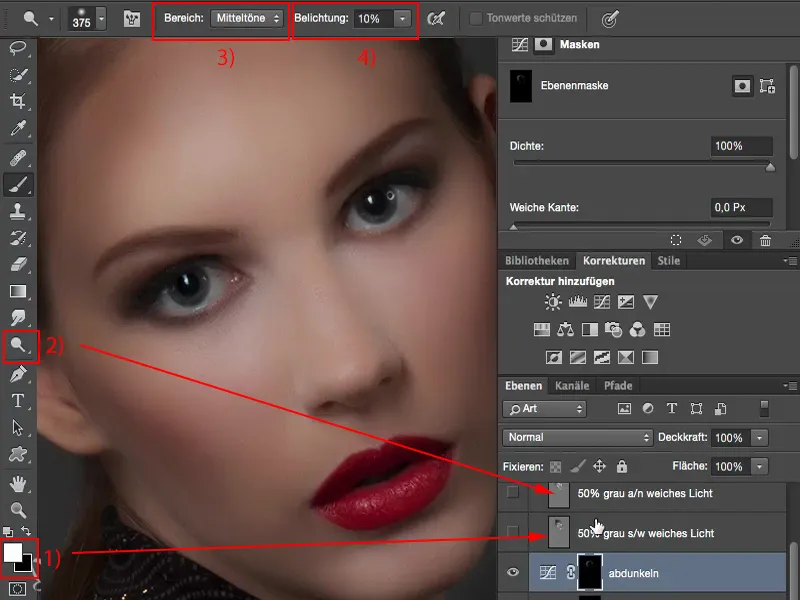
All of this is kept a little simpler here. However, I have to do a bit of preparatory work. I have to create these curves (1), but this also works very well via an action. Then I am very flexible here, have created these two layers immediately with a click of the mouse and can start painting straight away. I think the result is a bit milky, but it also depends a bit on the image, because these two methods - soft light with dodge and post-exposure and soft light on a gray layer with black and white (2) - have this RGB 128 value as a starting point. What I am now changing directly here, however, are basically the tonal values that are stored behind the gradation curve (1), which are brightened or darkened. The whole thing is also very practical, because I don't get such a strong color shift as when I work with the grey layers (2) here, because I change the brightness of the original pixels. I would therefore prefer this method (1) to the method with soft light on a gray layer (2). But the whole thing is a matter of taste and it's also whining on a high level, because I'm sure that if you look at a finished picture, you won't see the difference here. Nobody will be able to say: "This is made with gradation curves and this is made with a gray layer in soft light mode." But for you to work, you should definitely get to know and try out all the methods ... Then I'll take these two out again (1).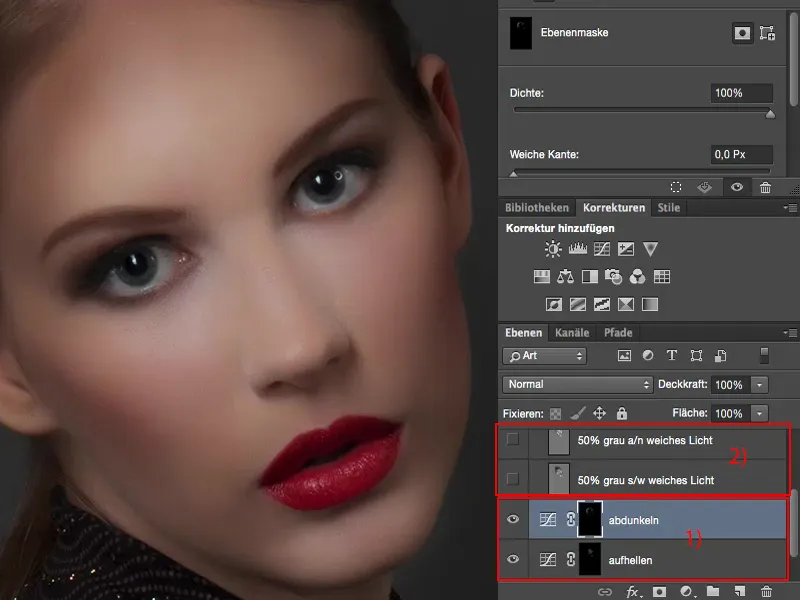
Dodge & burn, method 4: tonal value correction
What you can also do, of course, is to use tone correction. It's basically the same technique. You make a tonal value correction twice. Set one to relatively bright (see slider in the diagram) ...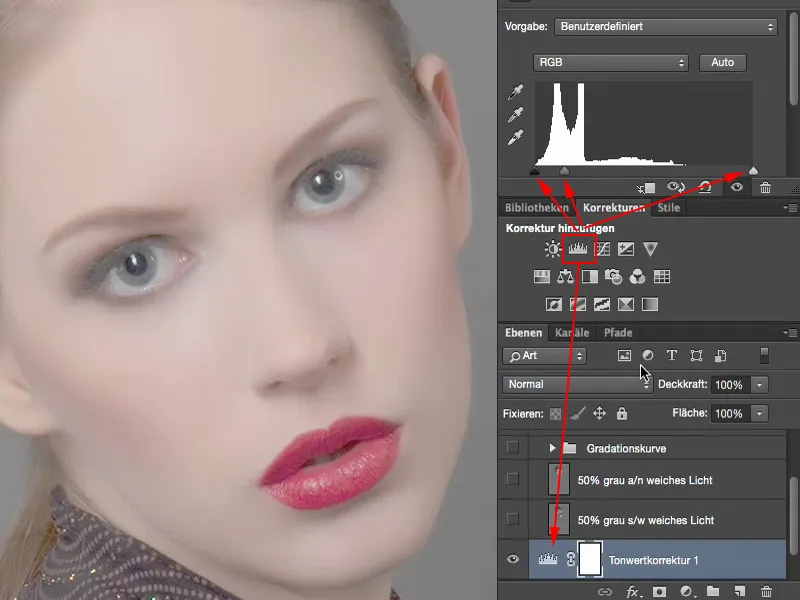
... and of course you pull the second one down extremely.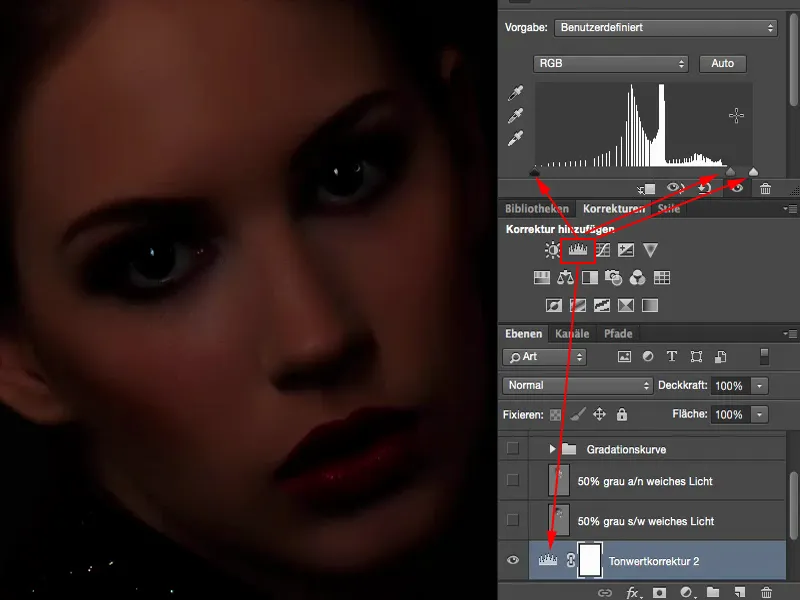
Invert both again (1). And then you can lighten (3) again with the brush (2) and darken (4) on this layer. So the same effect, actually almost the same result. I think that in the depths, maybe only in this picture now, it depends a bit on the fact that everything works a bit faster, but I attribute that more to my file now, where the tone value correction works a bit differently than when I pull down the centers in the gradation curve. So you can do that too.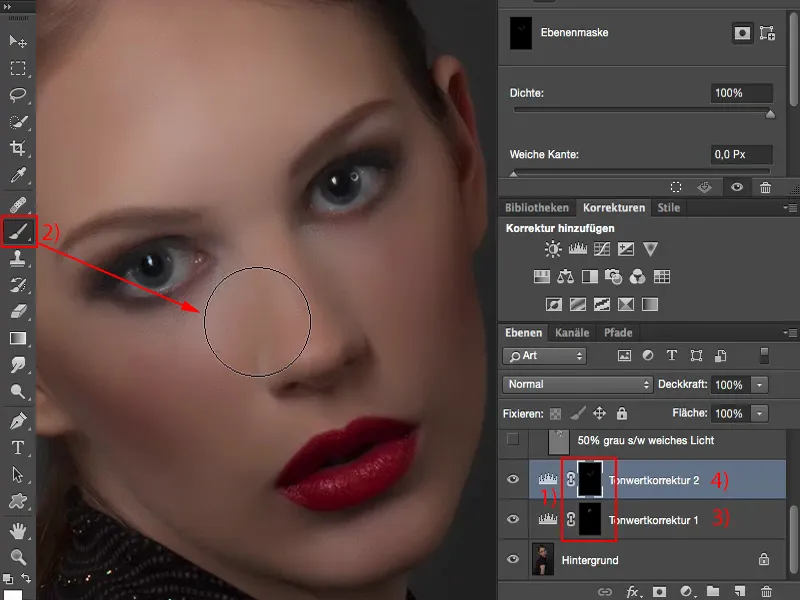
In principle, you can even use the Exposure (1) or Brightness-Contrast adjustment layer(2) for this. You can try out everything that makes you light and dark in order to work with adjustment layers.
Another advantage of the adjustment layers (3) is that you have no pixels on these layers compared to the gray layer. This means that your file will be a bit smaller if you work with adjustment layers than if you have one, two or three different gray layers in the image.
I'll take the whole thing out again (4).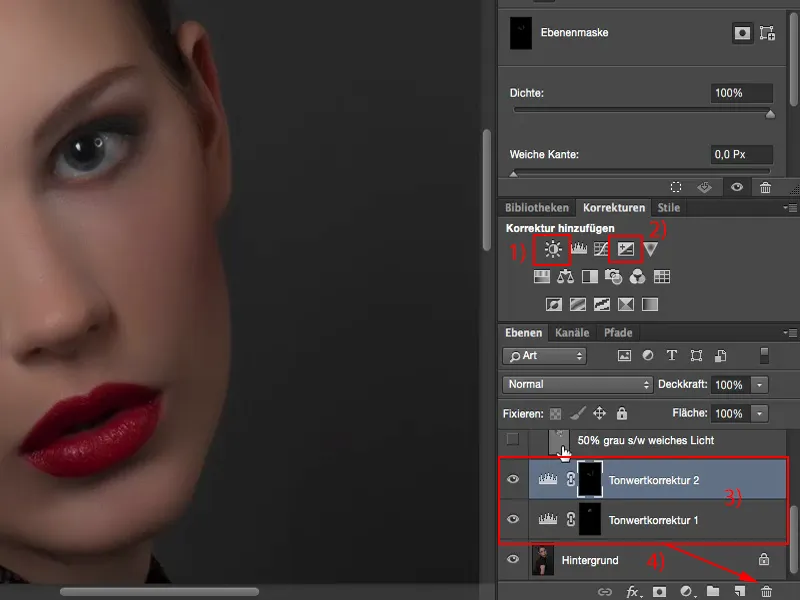
Dodge & burn, method 5: copy plus dodge and post-exposure
The last - destructive method ... Destructive because you need a pixel layer here. So I make a background copy (1). You can work directly on the pixels on the copy with the post-exposure and dodge (2). I'll do that and I'll go up with the value (3) so that you can see straight away what works quite well here and what doesn't. Let's brighten up drastically here ...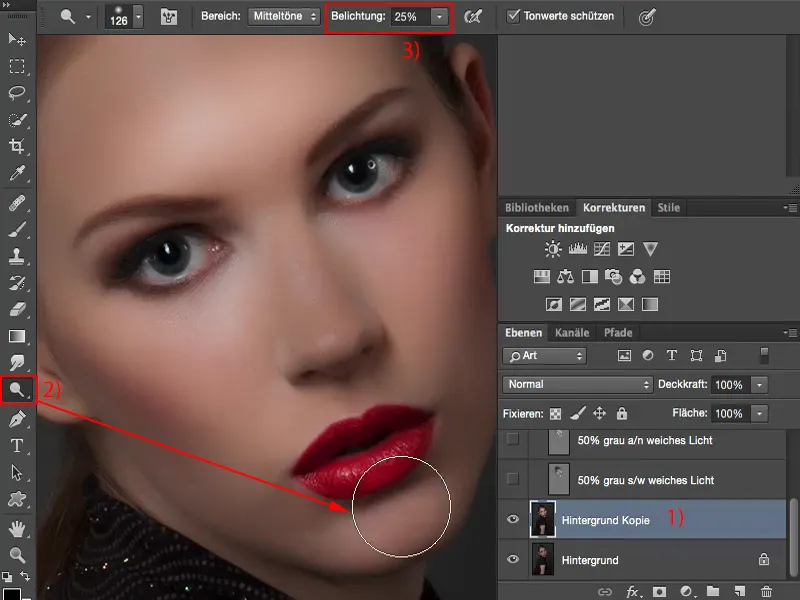
... and darken (1) just as drastically. And especially when darkening, you can see that the colors change a lot.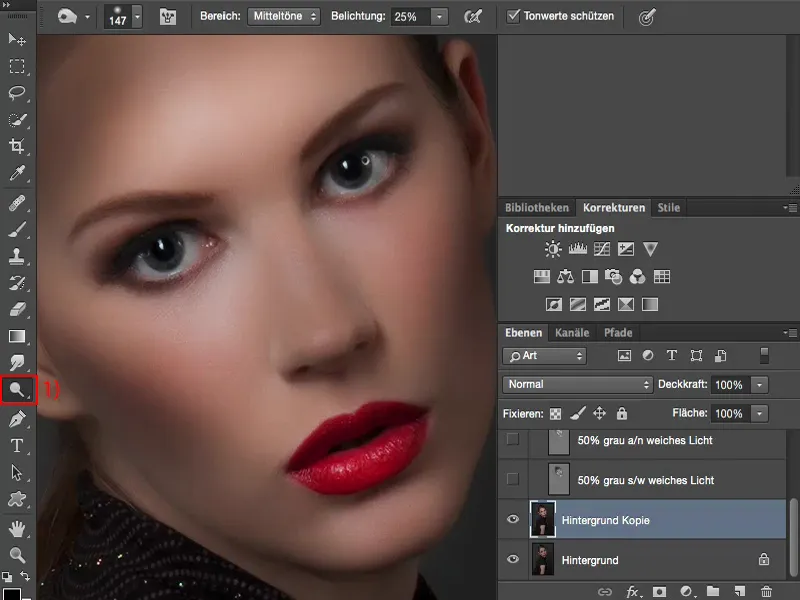
If you don't want this and you would like to have the original skin color again, because everything is grayed out so strangely here, then there is a little trick: You have to set the layer mode to luminance (1). Now you have the skin color. It's a bit too much up there, of course.
And you can work very nicely with it. The only disadvantage of this method is that the whole thing is really destructive. You make a layer copy (2), so you double your file size right from the start. And if you do this at the end of the layers, then of course you have to be careful here, because you can't change anything underneath (3). You may have set the whole thing to Luminance mode, but if you have made a photomontage underneath - you want to replace the background, for example - then it becomes a little more difficult.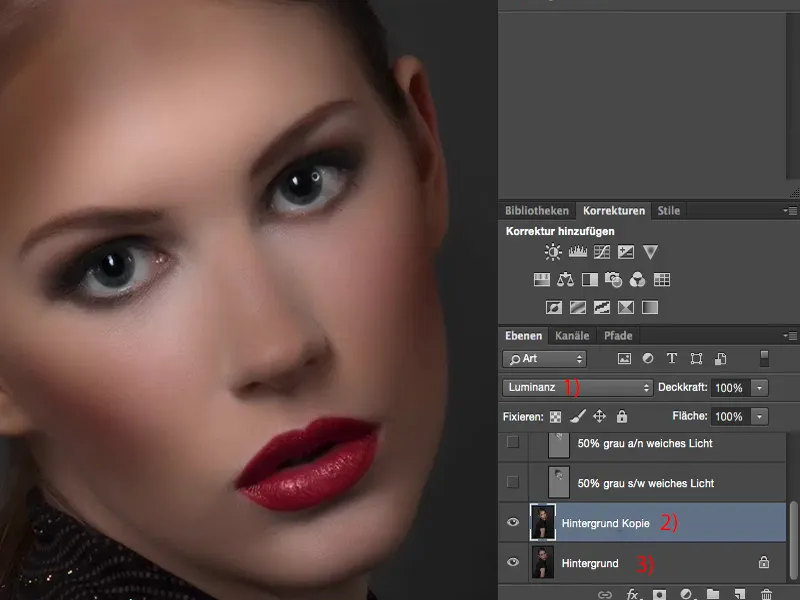
Of course, you can also adjust the opacity of the whole thing, as always between 50 % and 60 % looks good, even if you have exaggerated a lot here.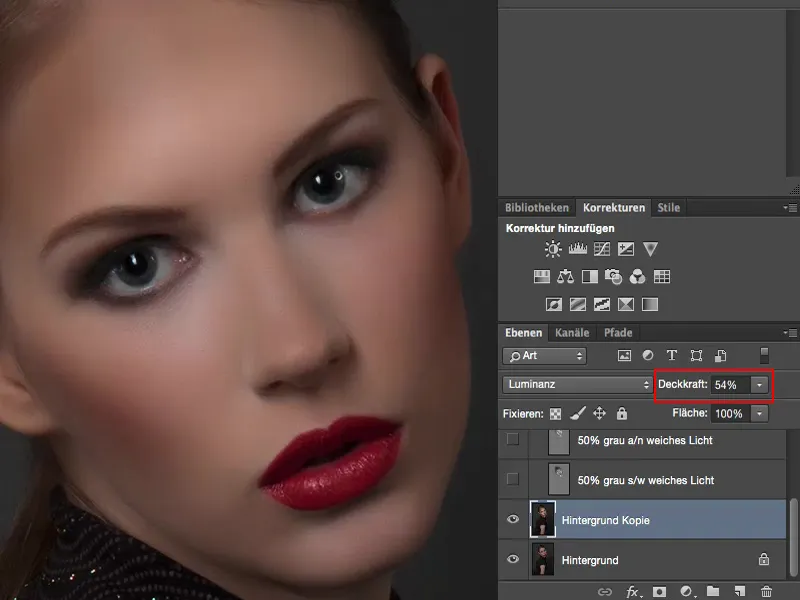
Summary
So those are my thoughts, the five ways I want to show you how you can use Dodge & Burn. Which one you choose now is entirely up to you. Maybe at the very end of your retouching work you'll make a summarized layer like this and do a little Dodge & Burn here again, even if it's only in the iris.
You can use it very well for this, because you won't damage very much. So these are small things. If you do it right at the beginning, you can leave it. If you then continue to work non-destructively, you only have one layer on which you can touch up, adjust the opacity, and then you can also use this background copy.
If you want to work completely non-destructively, you should definitely either work with a gray layer with the dodge, post-exposure or with the black, white brush - or you can opt for an adjustment layer that provides light and dark on a hidden mask, which you can then brush on.
