Clipping motifs from busy backgrounds is one of the most challenging tasks in image editing. In this guide, I will show you how to effectively use the brush tool in Photoshop Elements to accurately clip a majestic animal like a lion. We will go through various techniques and tips that will help you achieve optimal results.
Key Findings
- The combination of selection tools and the Edge Refinement tool is crucial for successful clipping.
- The brush tool allows you to work on details precisely, especially with fine hair structures.
- Working with layer masks allows you to work more flexibly on the clipping and make changes.
Step-by-Step Guide
Step 1: Select Motif
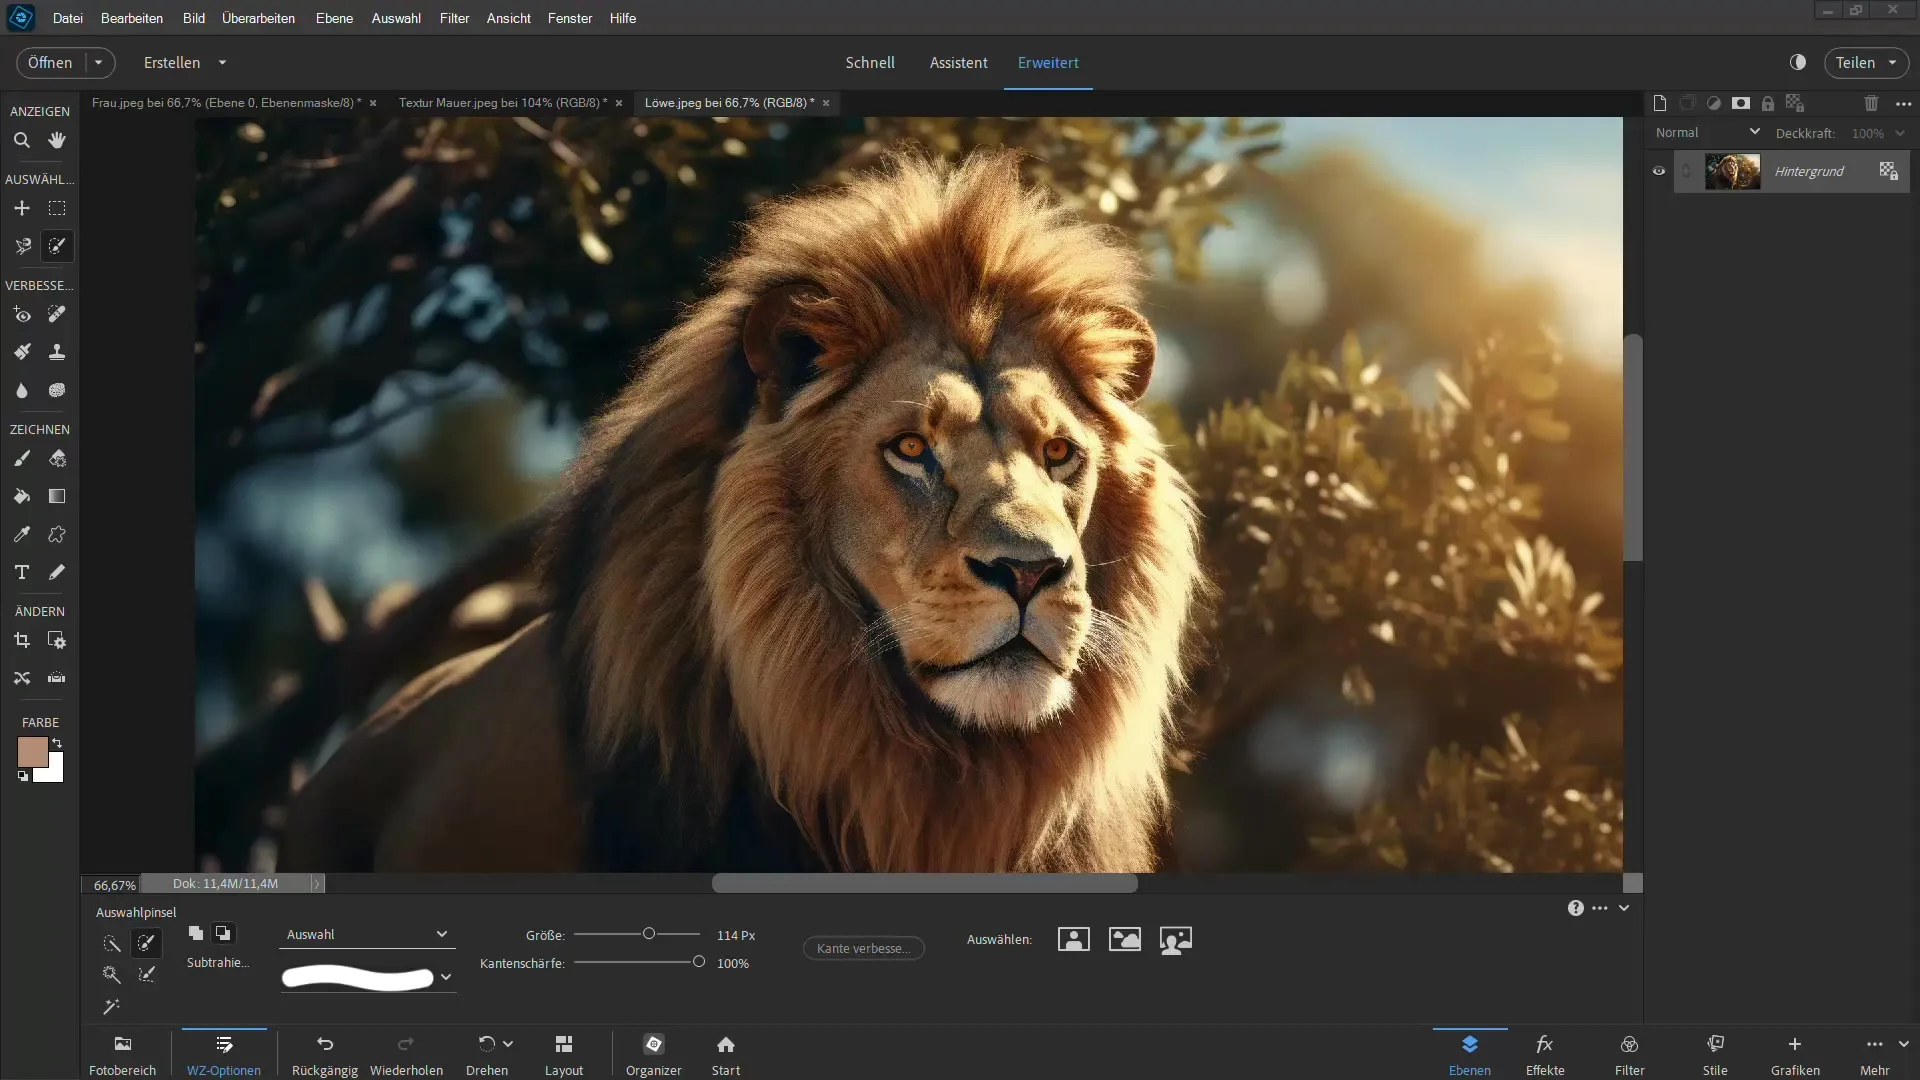
First, you need to select the motif you want to clip. You can use the selection tool to click directly on the motif and activate the "Select motif" function. Make sure to also pay attention to the busy background.
Step 2: Refine Edge
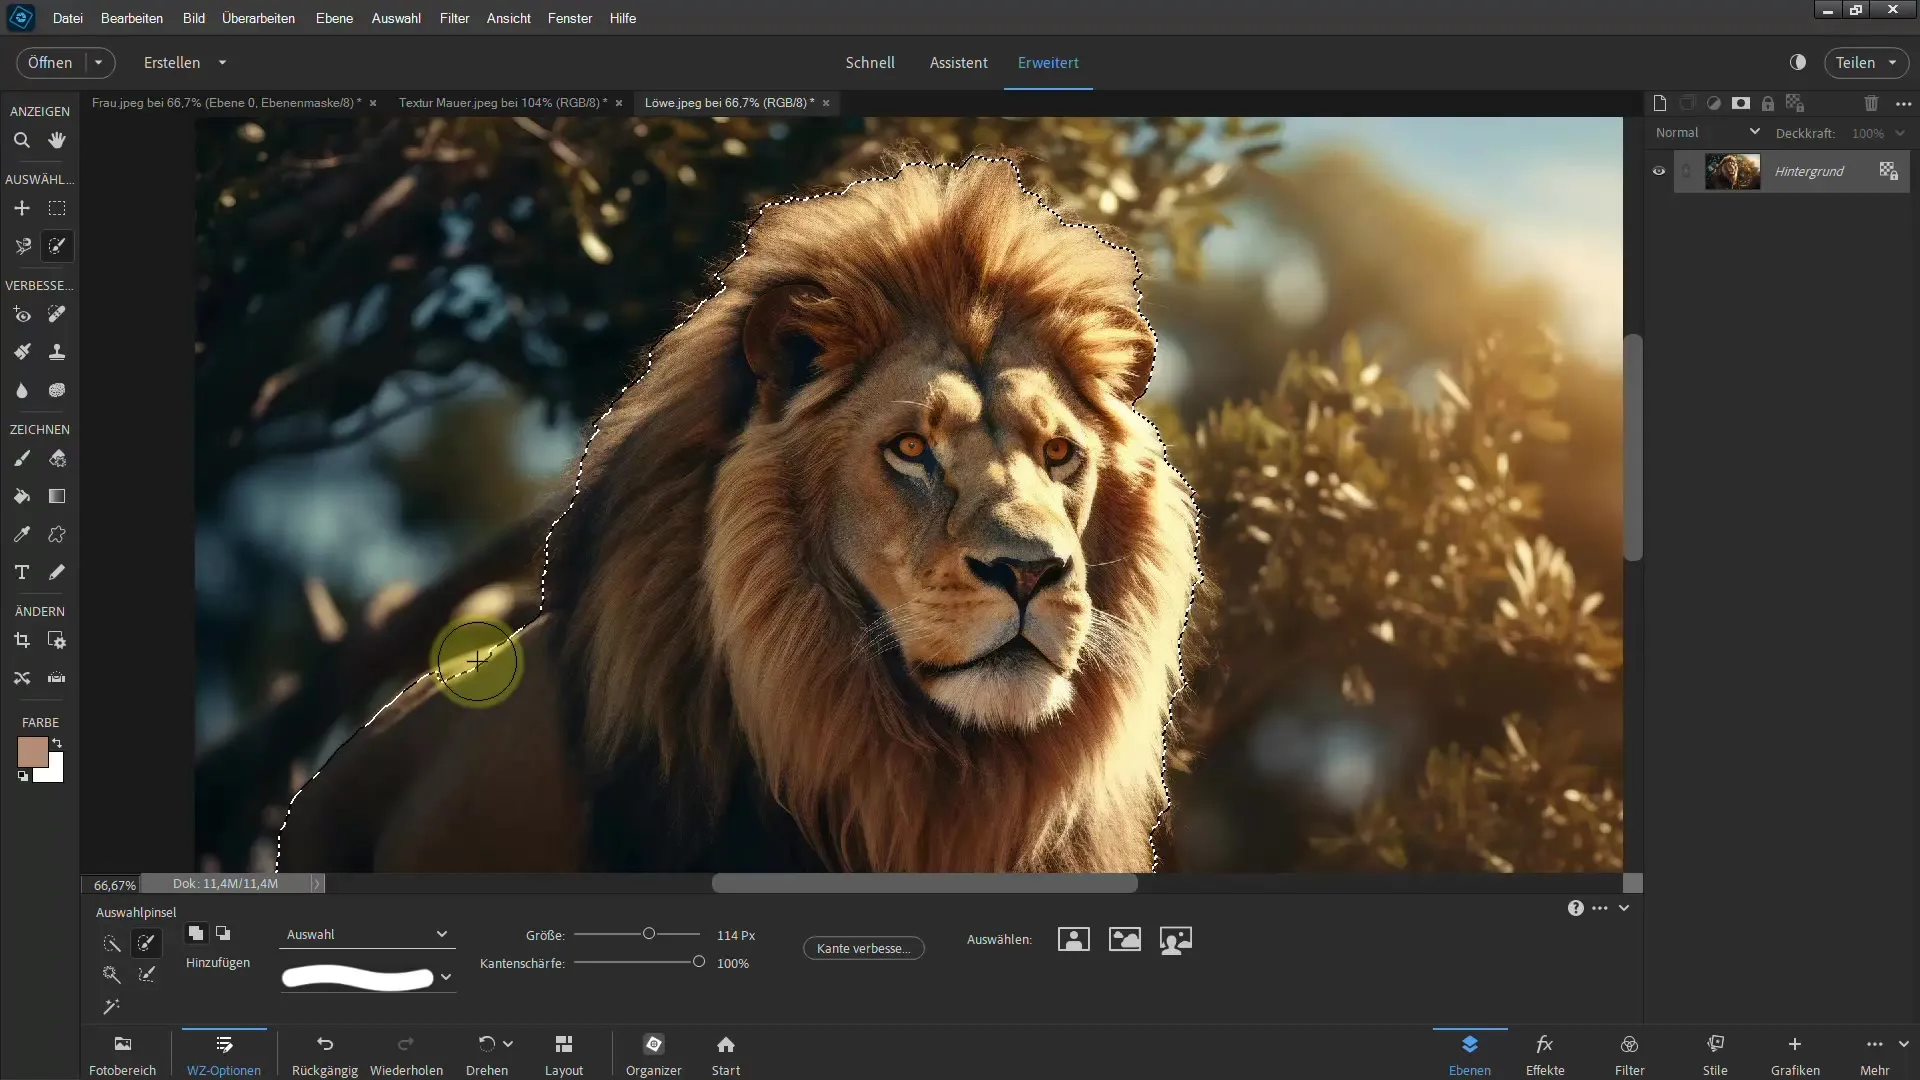
Using the "Refine Edge" function, you can optimize the selection of your motif, especially in areas where there are hairs or other small details. Click on the "Refine Edge" button to open the settings and edit the edge of the motif precisely.
Step 3: Customize Brush Tool
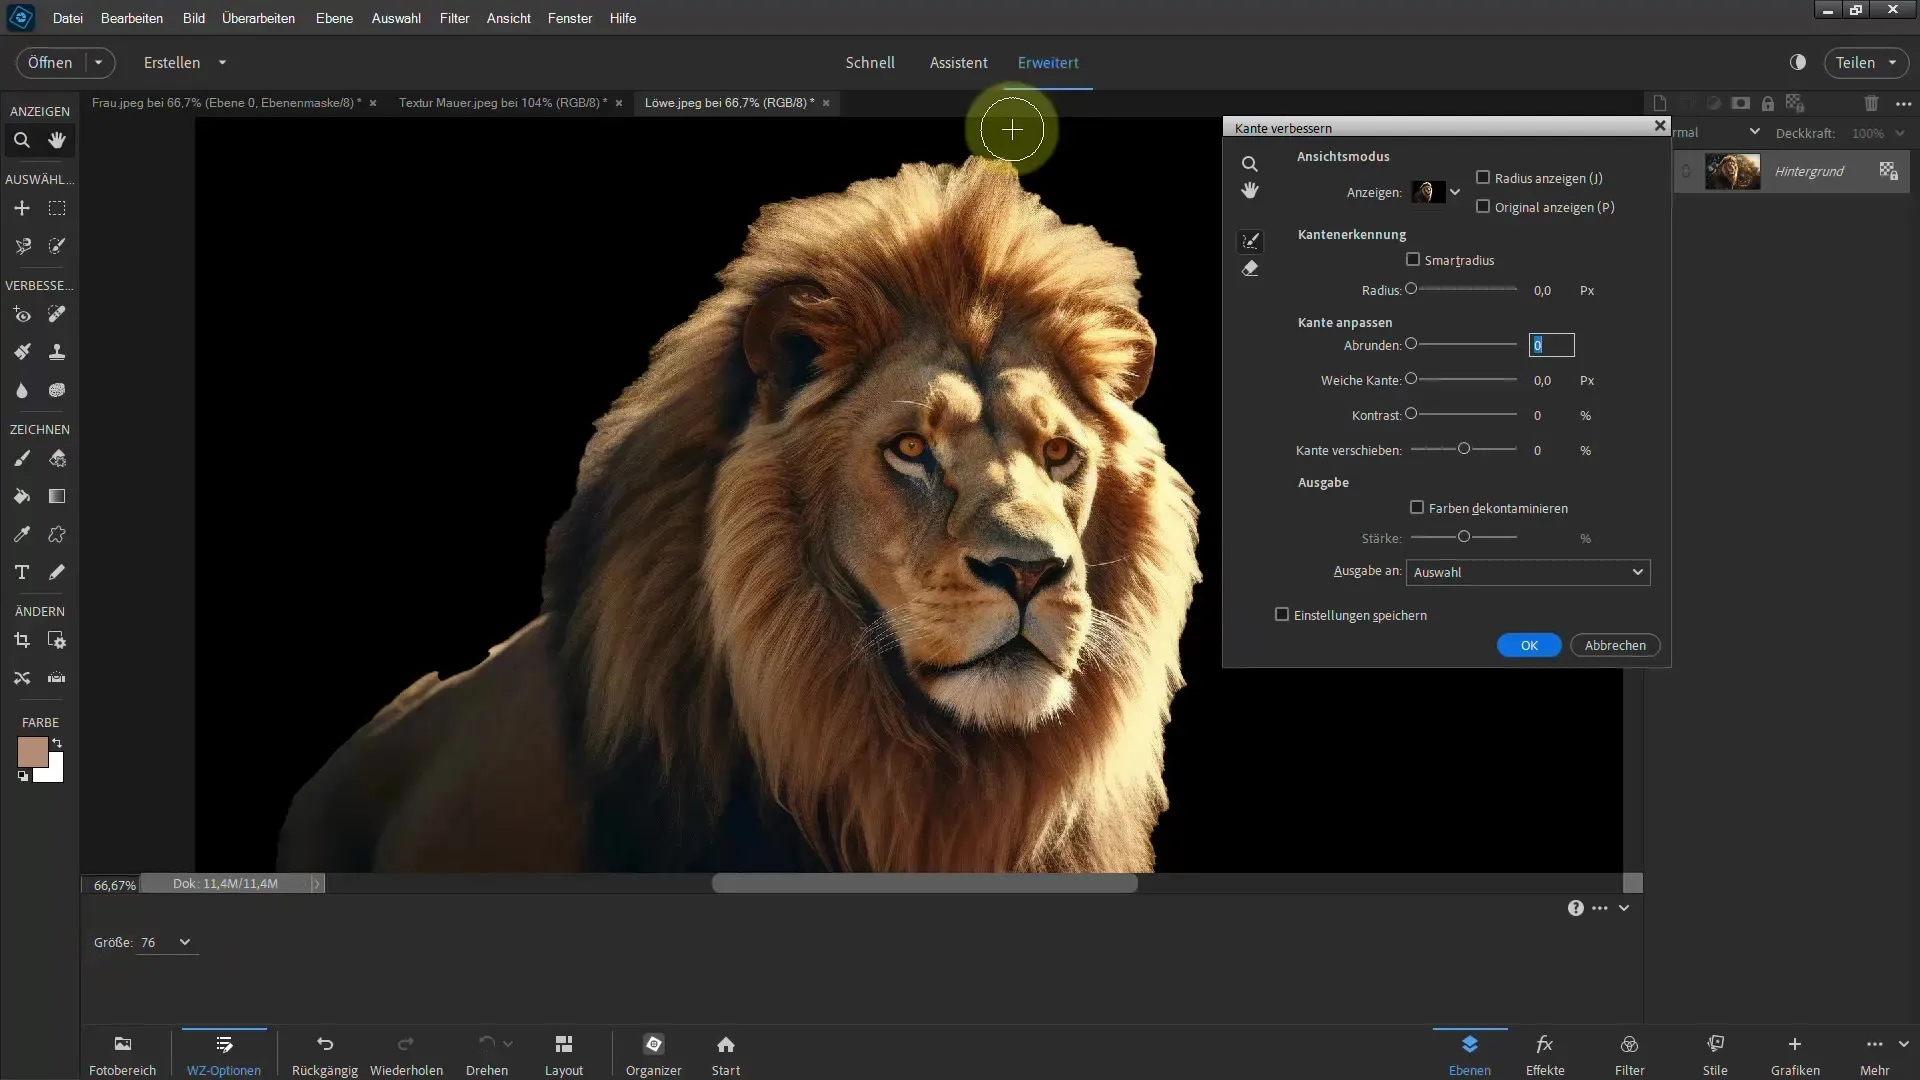
Expand the selection around the lion's hair by using the brush tool. Make sure the brush size is suitable for the fine structures. You can adjust the brush size using the brush options in the menu.
Step 4: Clip Hair
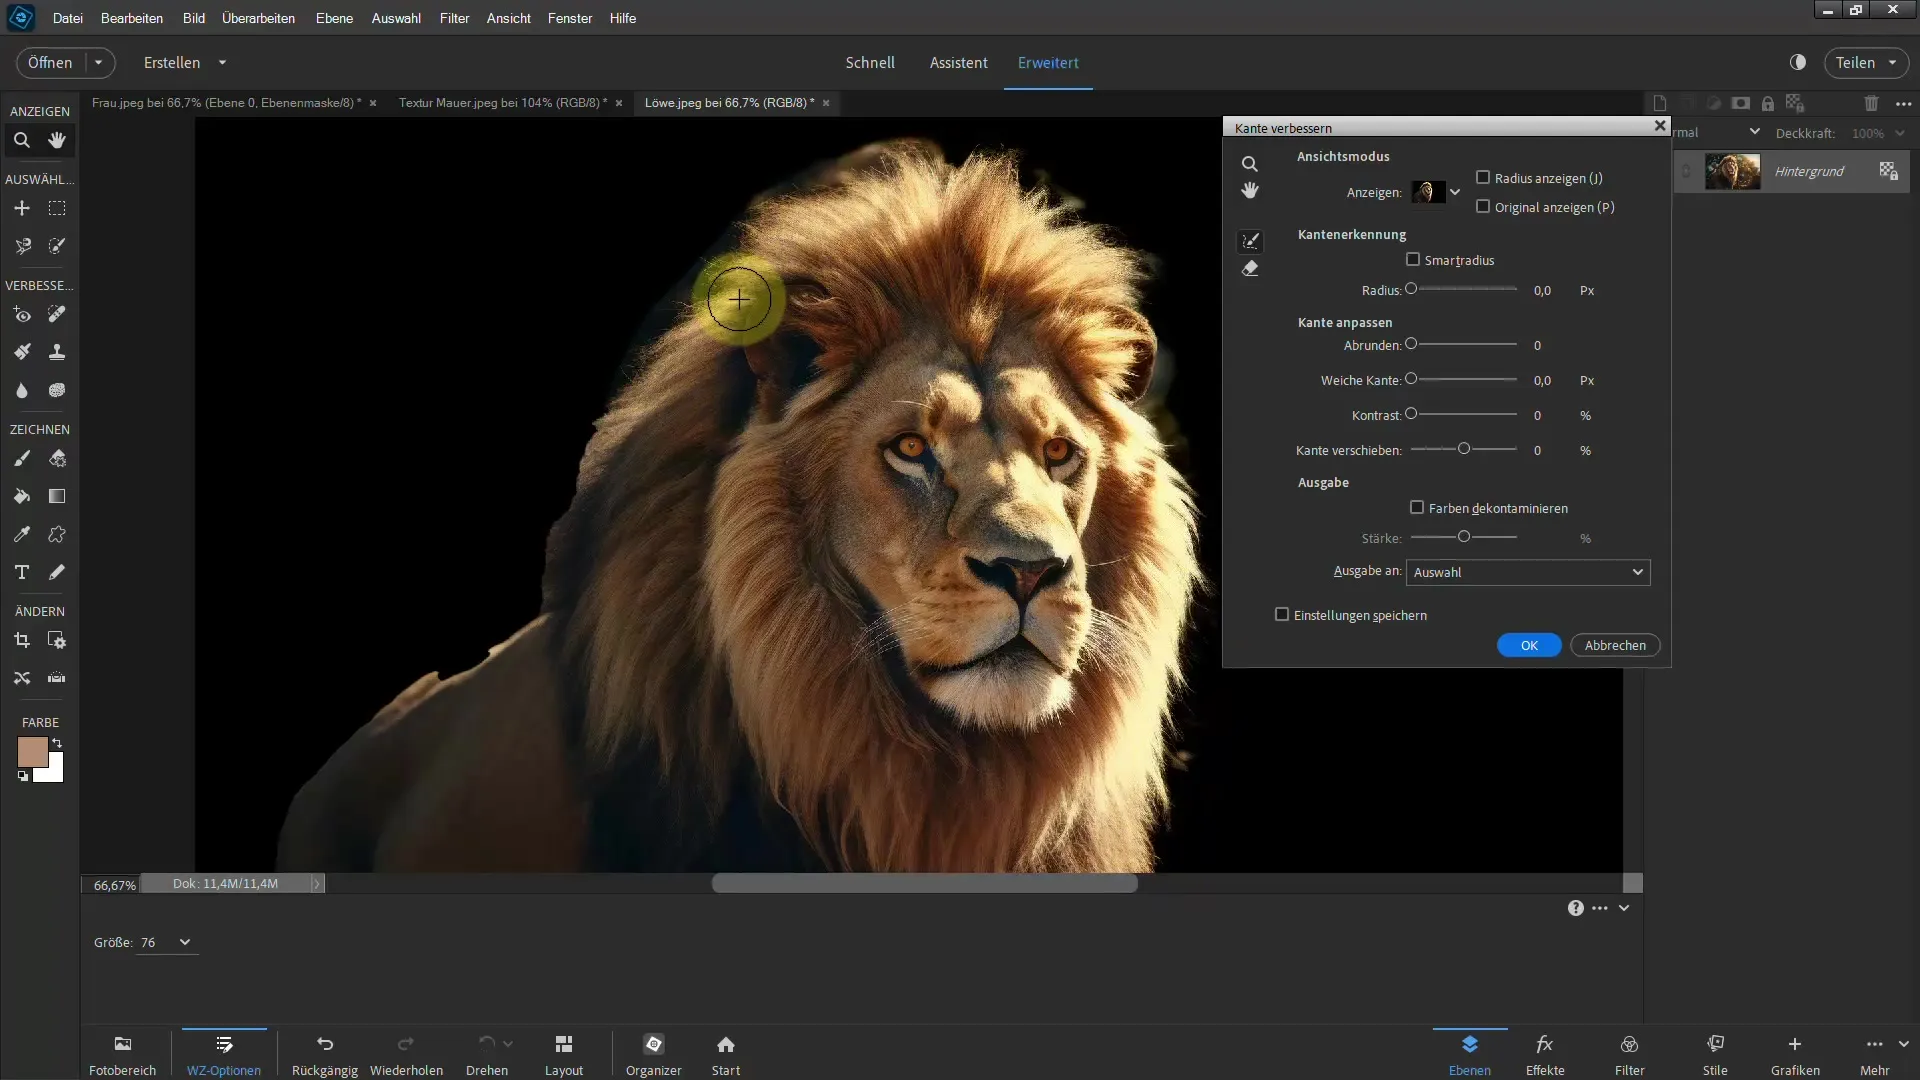
Here, it is important to be patient. Use the brush tool to go over the areas where the hair should be clipped. This helps Photoshop recognize which pixels to clip.
Step 5: Enhance Detail Accuracy
To edit the exact edge of the hair, you can use the "Smart Radius" option to further sharpen the details. Experiment with these settings to achieve the best result.
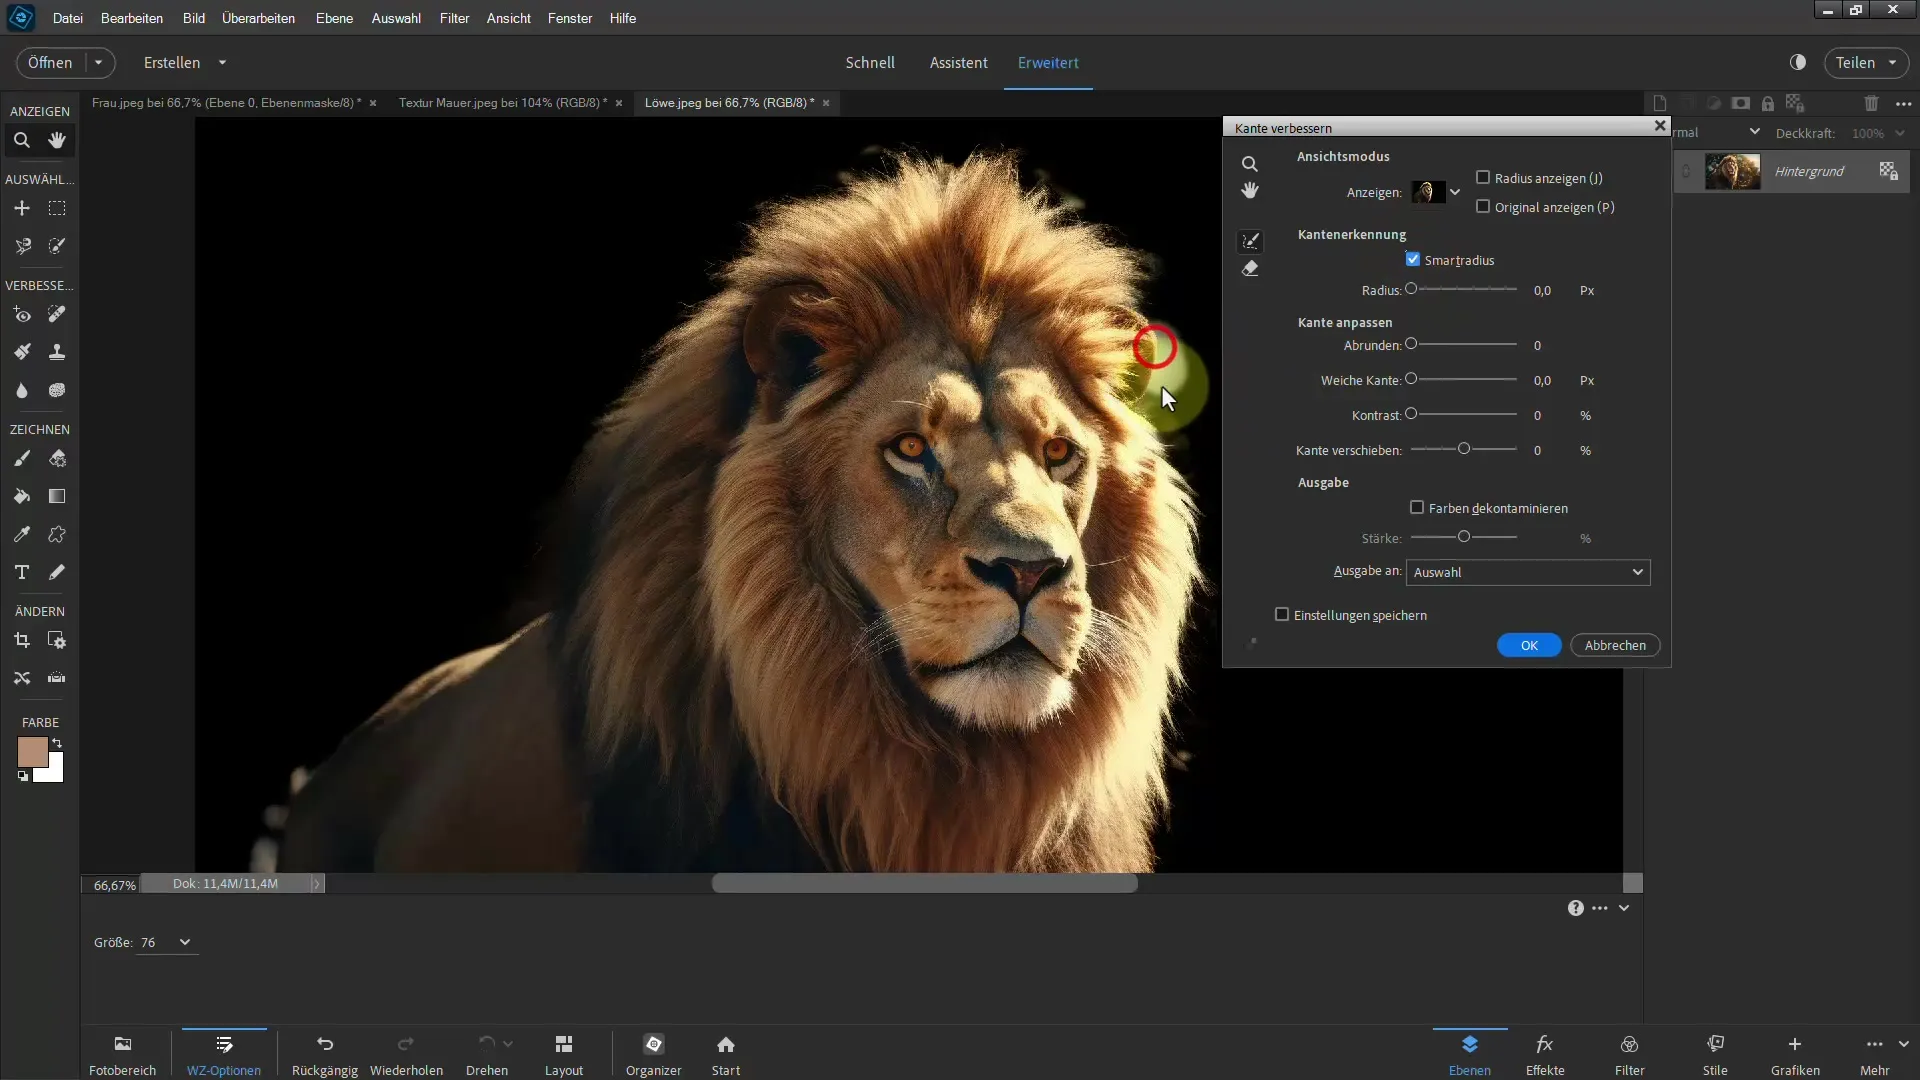
Step 6: Correct Errors
You may come across areas where the motif is not perfectly clipped. Use the erase tool to remove unwanted areas. Be cautious not to lose any important details in the process.
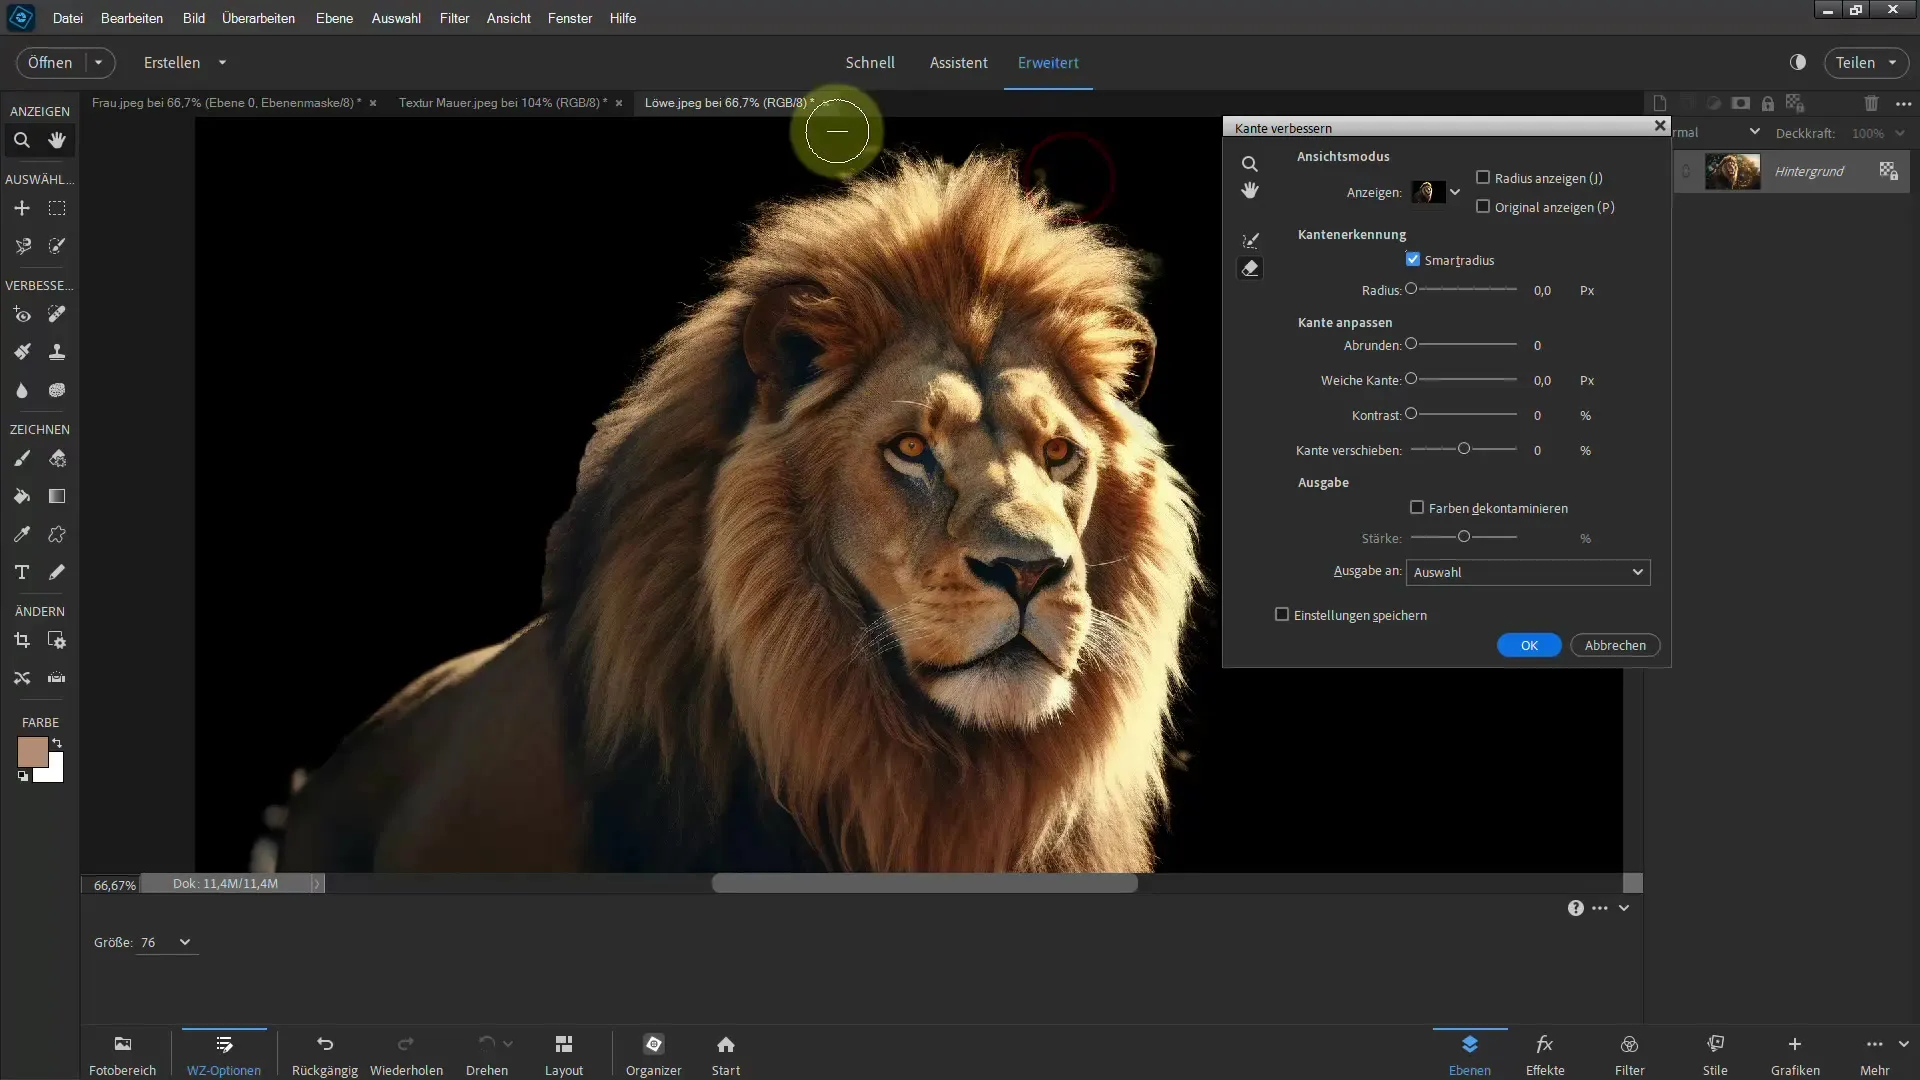
Step 7: Use Layer Mask
Now it's time to create a layer mask. This allows you to replace the background with a new layer. Create the mask and fill the background layer with a solid color, such as black, to enhance contrast.
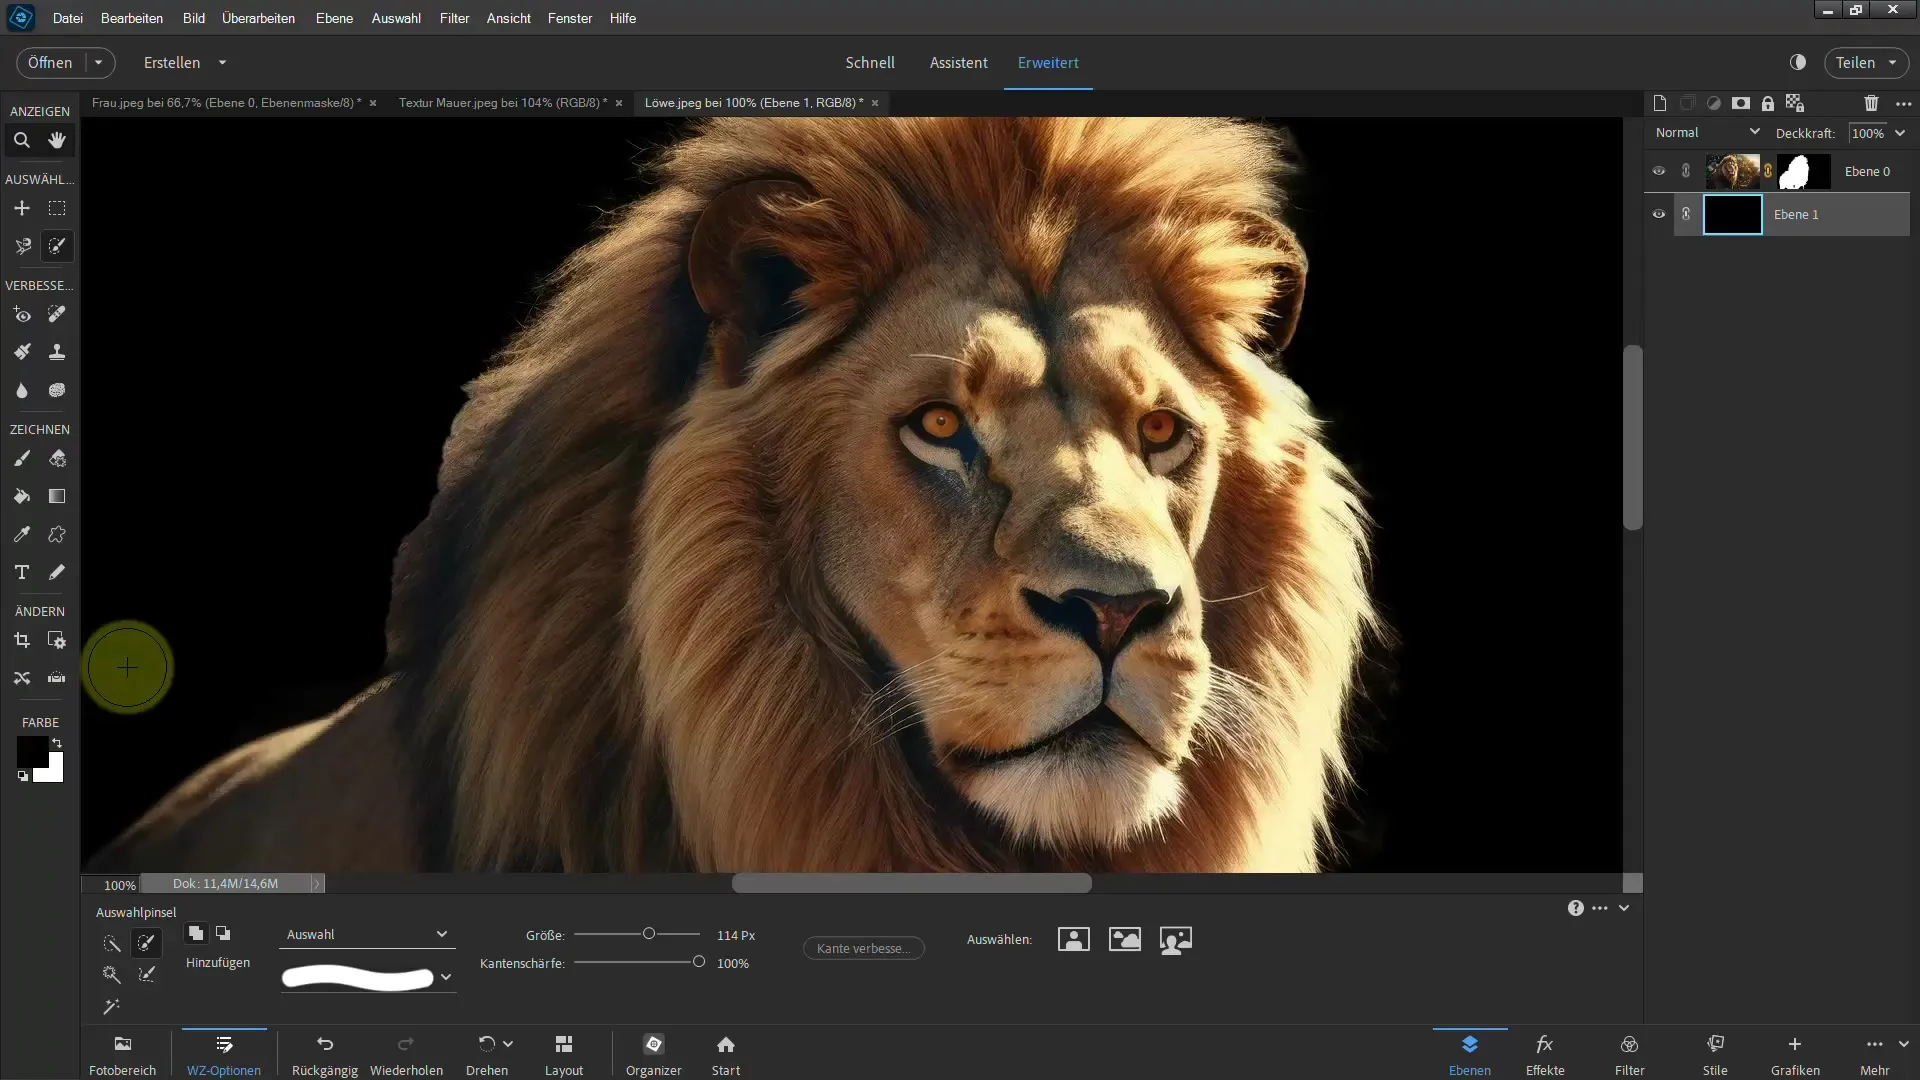
Step 8: Work with Brush
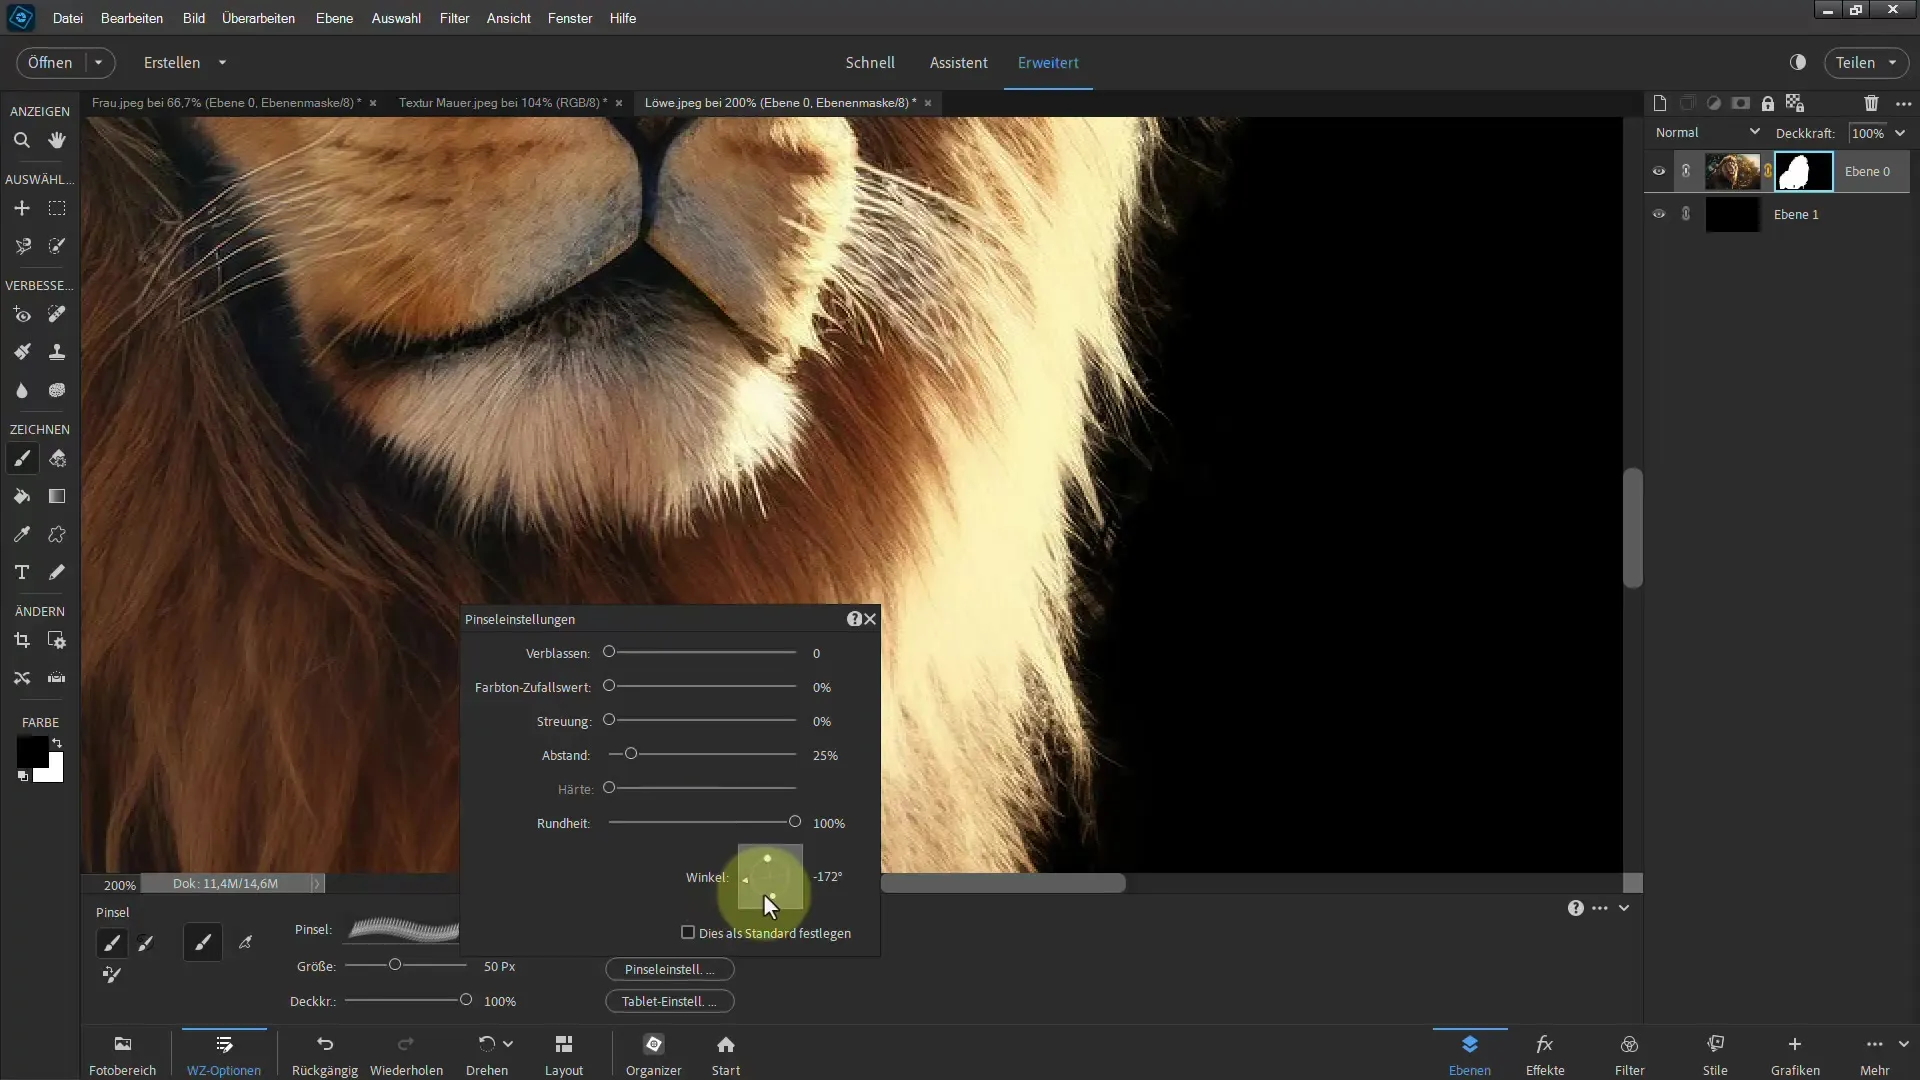
To further optimize the motif, you can paint directly on the layer mask with the brush. Make sure to adjust the brush opacity to allow for smooth transitions.
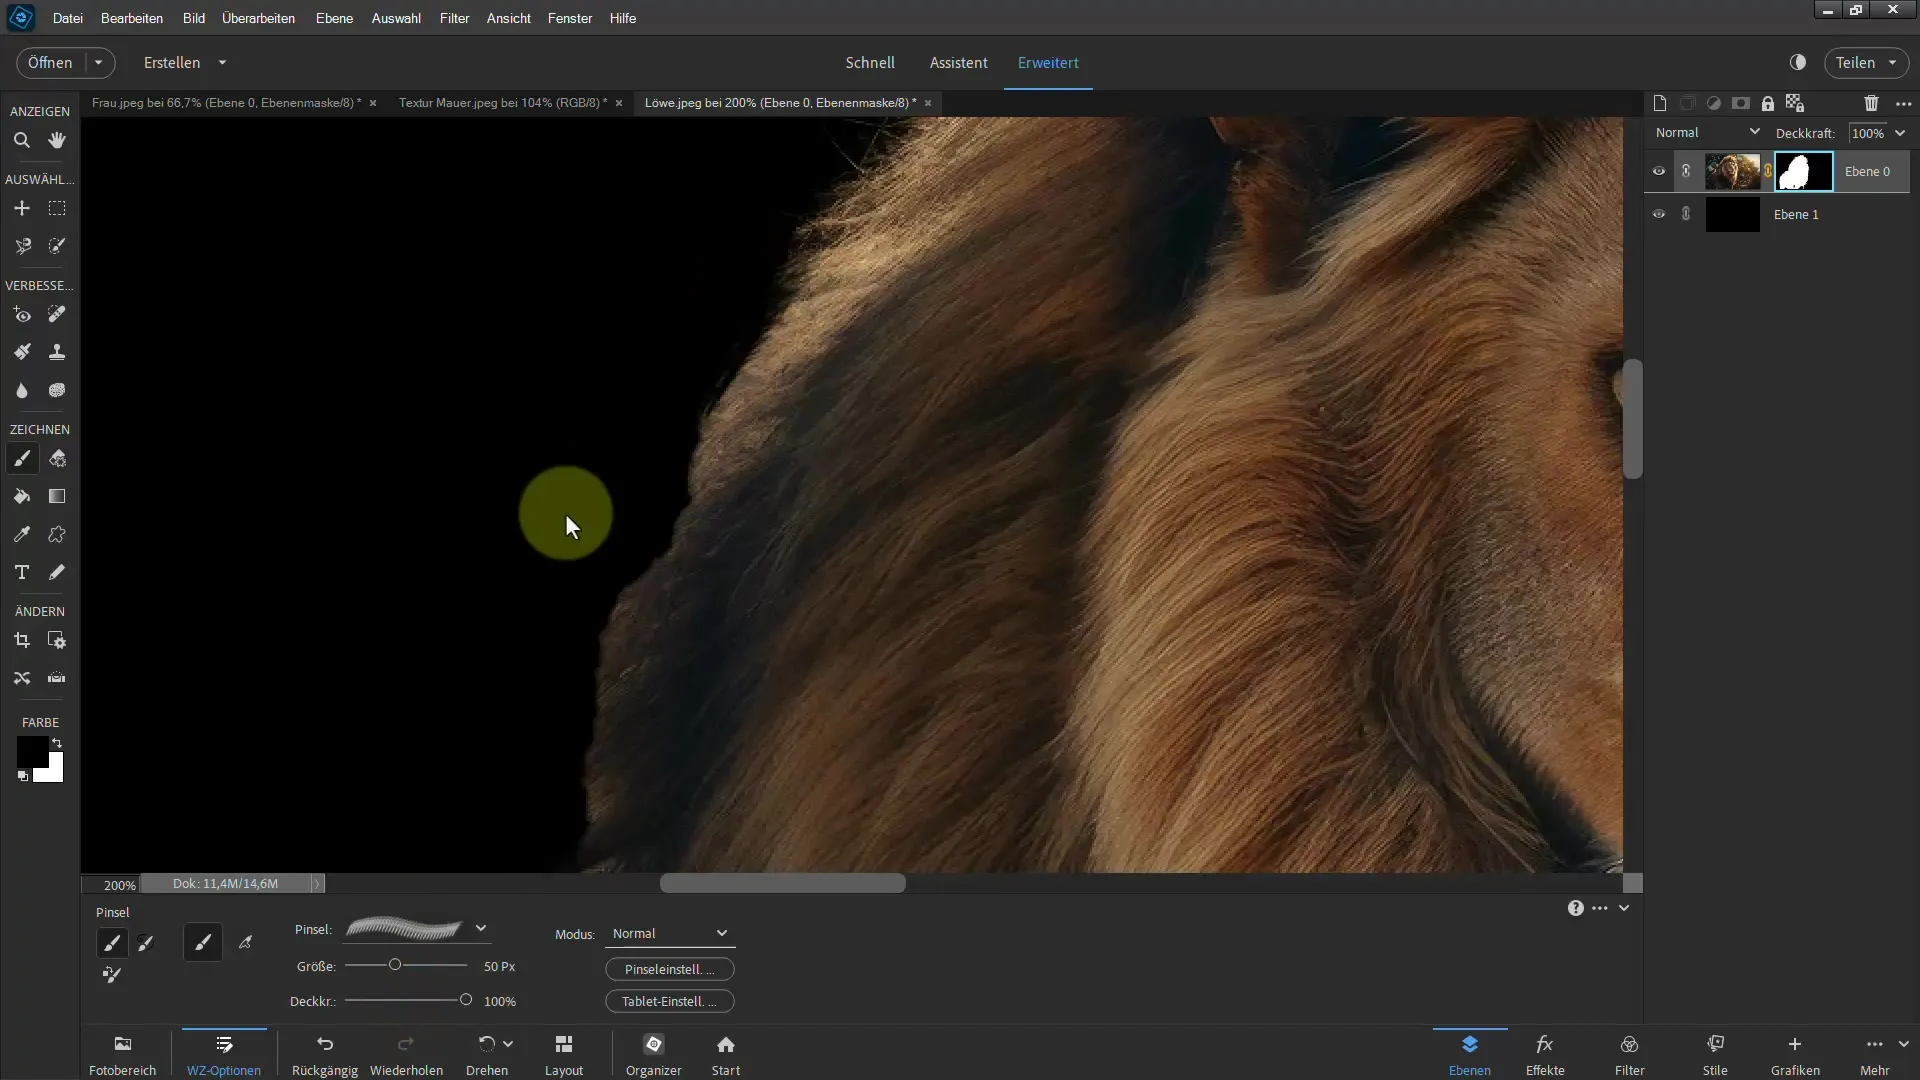
Step 9: Make Adjustments
You can rotate the brush tip and adjust the size to achieve the best results. It's important to take your time to simulate the fine details of the hair properly.
Step 10: Adding final touches
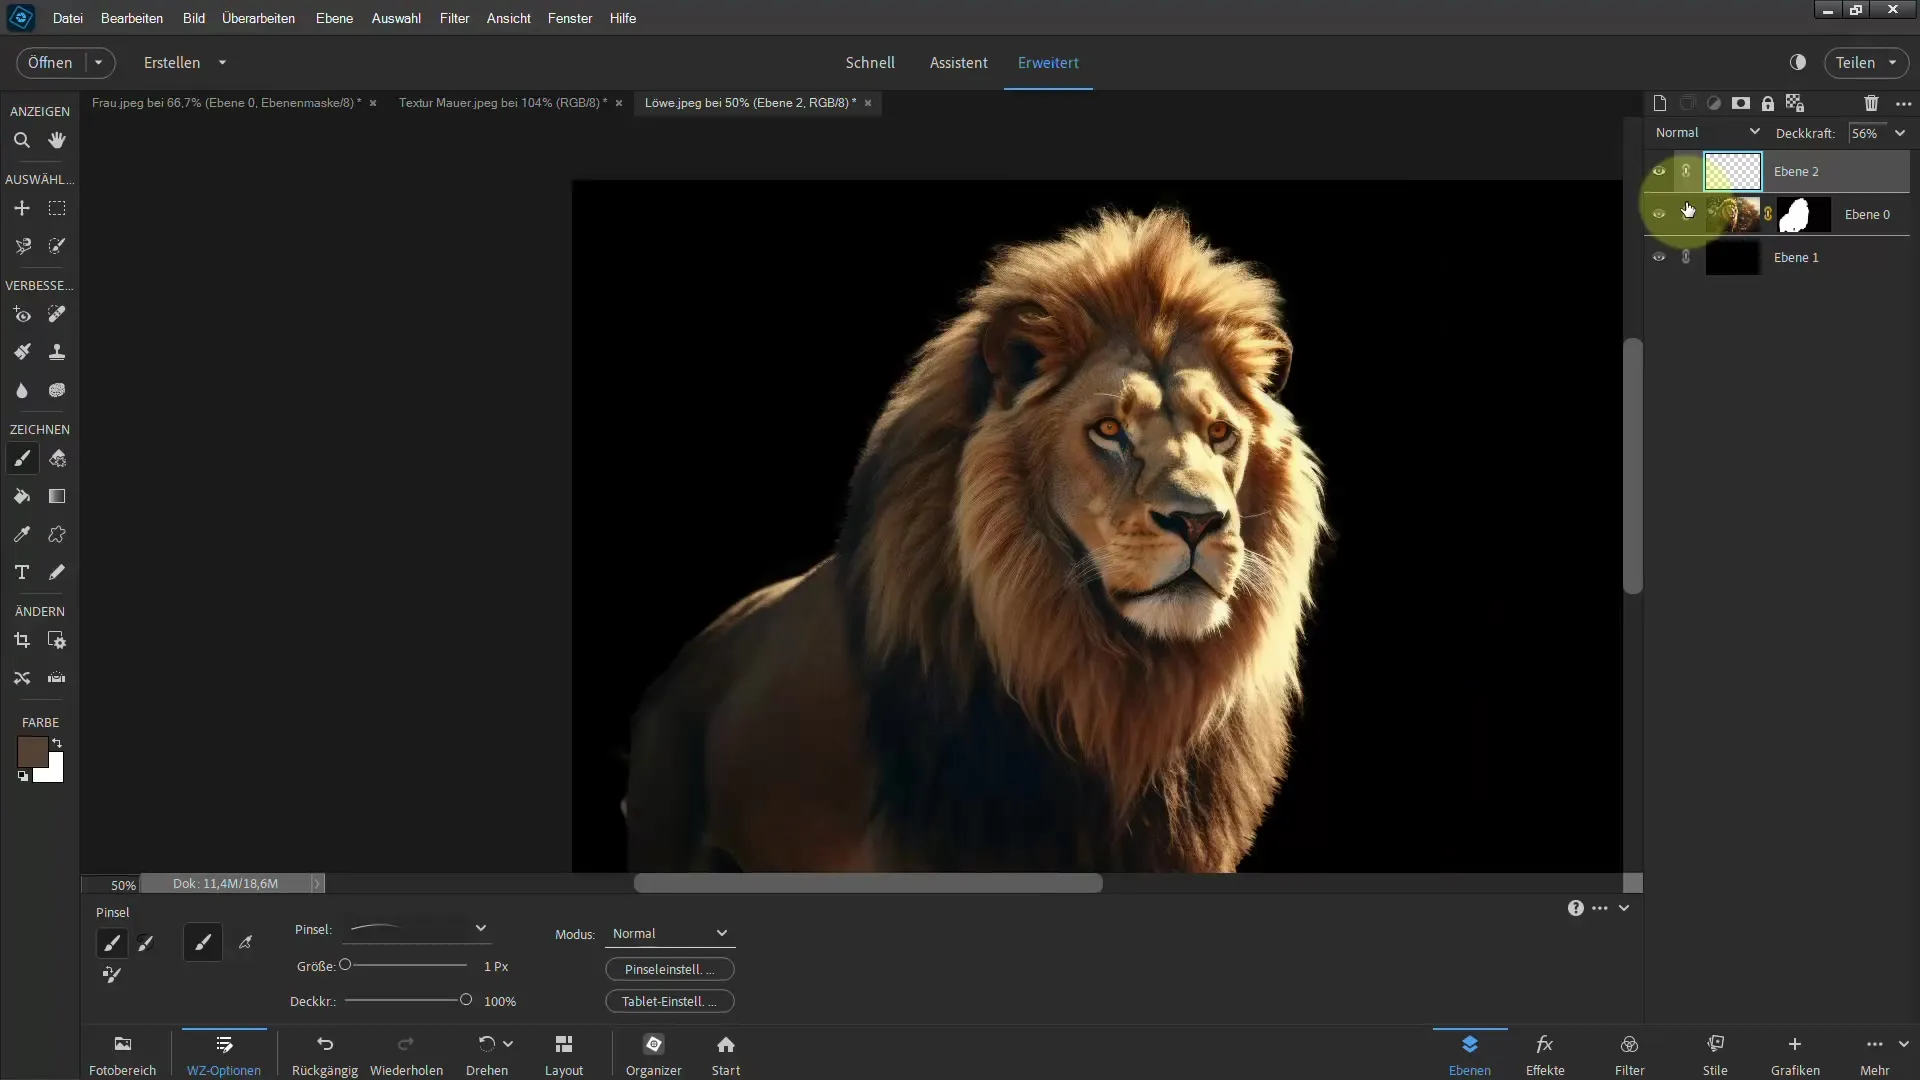
If you are satisfied with the result, check the entire composition and make any necessary adjustments. Make sure everything looks harmonious and the edges do not appear too sharp.
Summary
In this tutorial, you have learned how to cut out a subject from a busy background using the brush tool in Photoshop Elements. We have gone through the different steps, from selecting the subject to fine-tuning the final details with the brush and layer masks. You have seen how crucial the attention to detail is to achieve an appealing and realistic result.
Frequently Asked Questions
How can I best select the subject?You can use the selection tool or the "Select Subject" function.
What to do if the selection is not perfect?Use the Refine Edge tool and the brush tool to optimize the edge.
How can I improve the quality of hair when cutting out?Use the brush tool and adjust the brush size to accurately cut out fine details.
Can I work with a layer mask?Yes, working with layer masks allows you to make changes and adjustments in the cut-out.


