In this guide, I will show you how to effectively remove color fringes in Photoshop Elements. Especially when cutting out complex objects like hair or objects against colored backgrounds, unwanted color fringes can easily occur. I will guide you step by step through the process to eliminate these and make your images look more professional.
Key Insights
- Color fringes often occur due to reflections from the background on the object.
- Photoshop Elements provides tools to remove these color fringes without damaging the original image.
- With various selection tools and masks, you can work precisely and optimize the result.
Step-by-Step Guide
To remove color fringes, start by cutting out the object. This is done in several steps:
Object Selection
First, you need to select your object. Start with the subject selection tool. Click on "Selection" and choose "Subject." The program will try to automatically detect and select the main subject. You can then refine the selection if necessary using the brush tool or another tool.

Selection Refinement
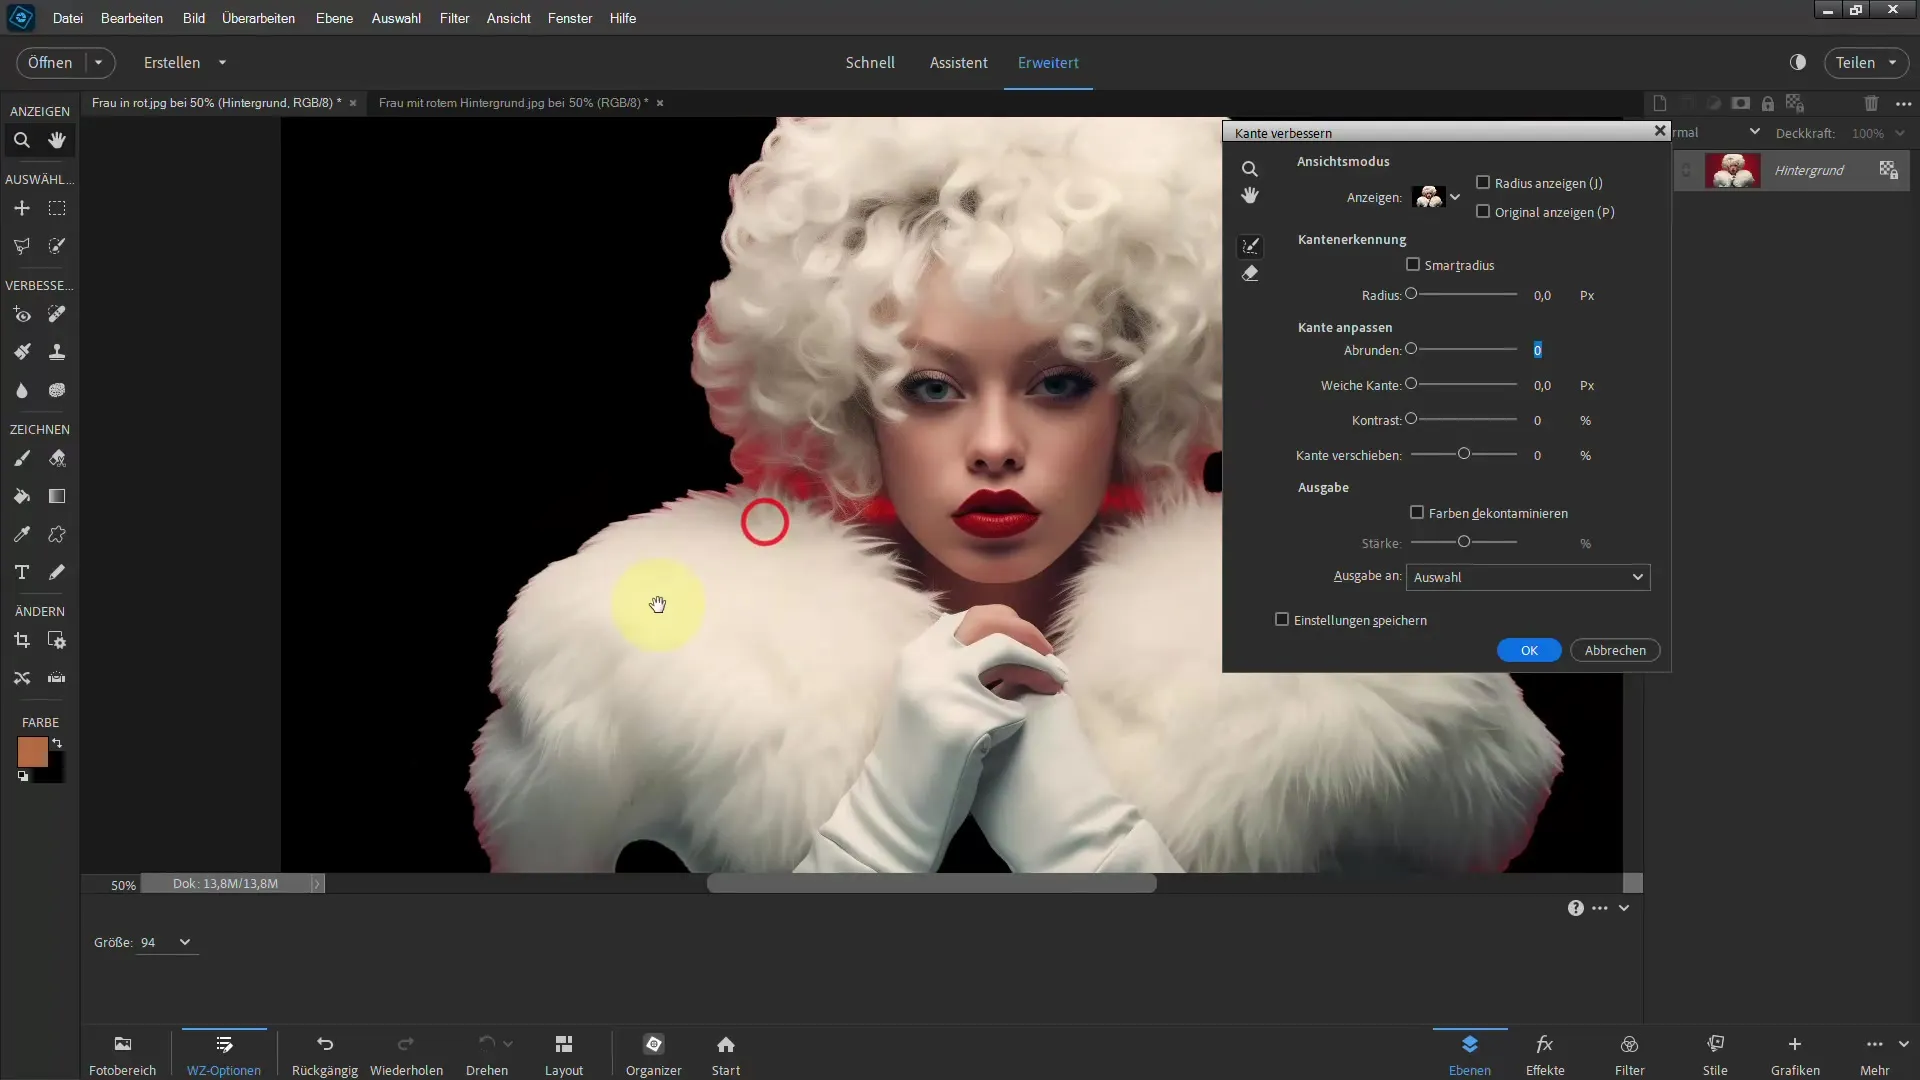
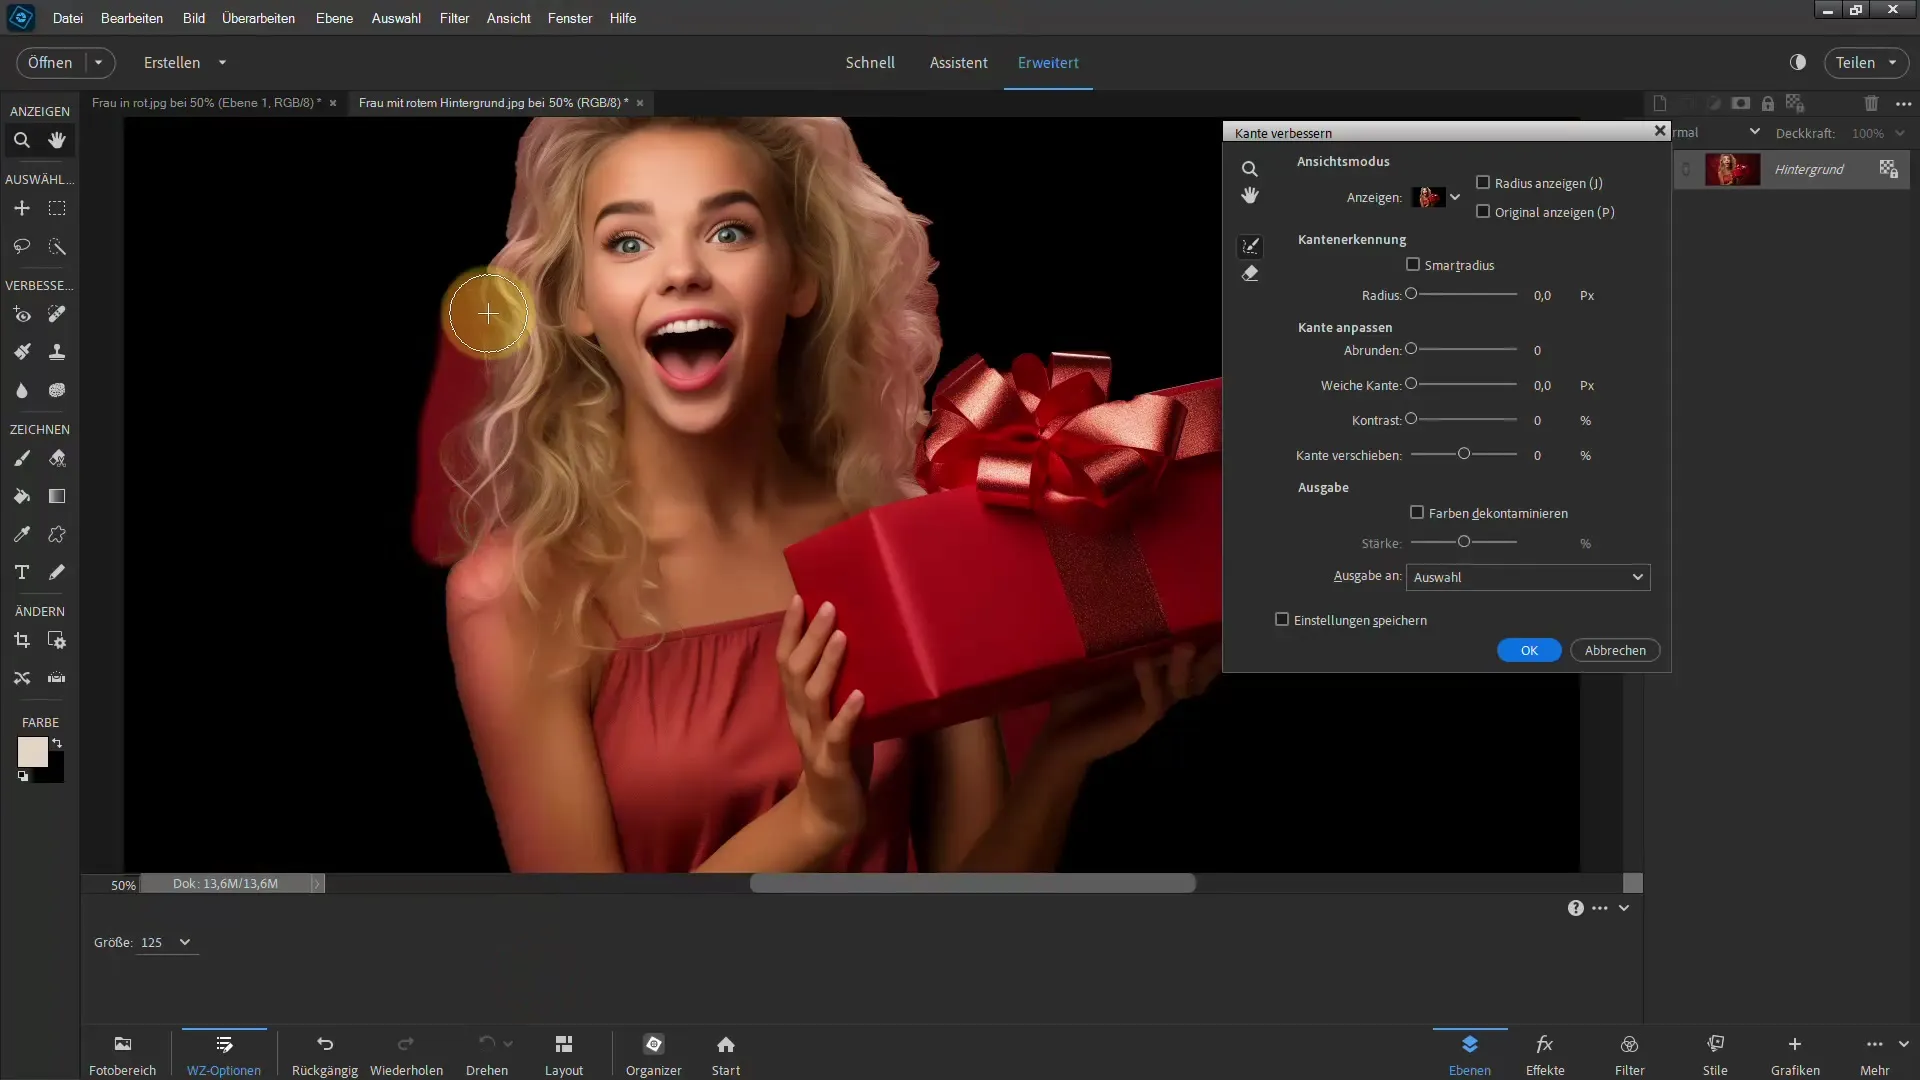
After selecting the subject, zoom in on the hair edges. Often, you will see color fringes here, where the red from your background is visible. Use the "Refine Edge" tool to refine the edge of the selection. Choose a larger brush size and slowly go over the edges so that Photoshop can better detect the edges and adjust the selection accordingly.
Color Decontamination
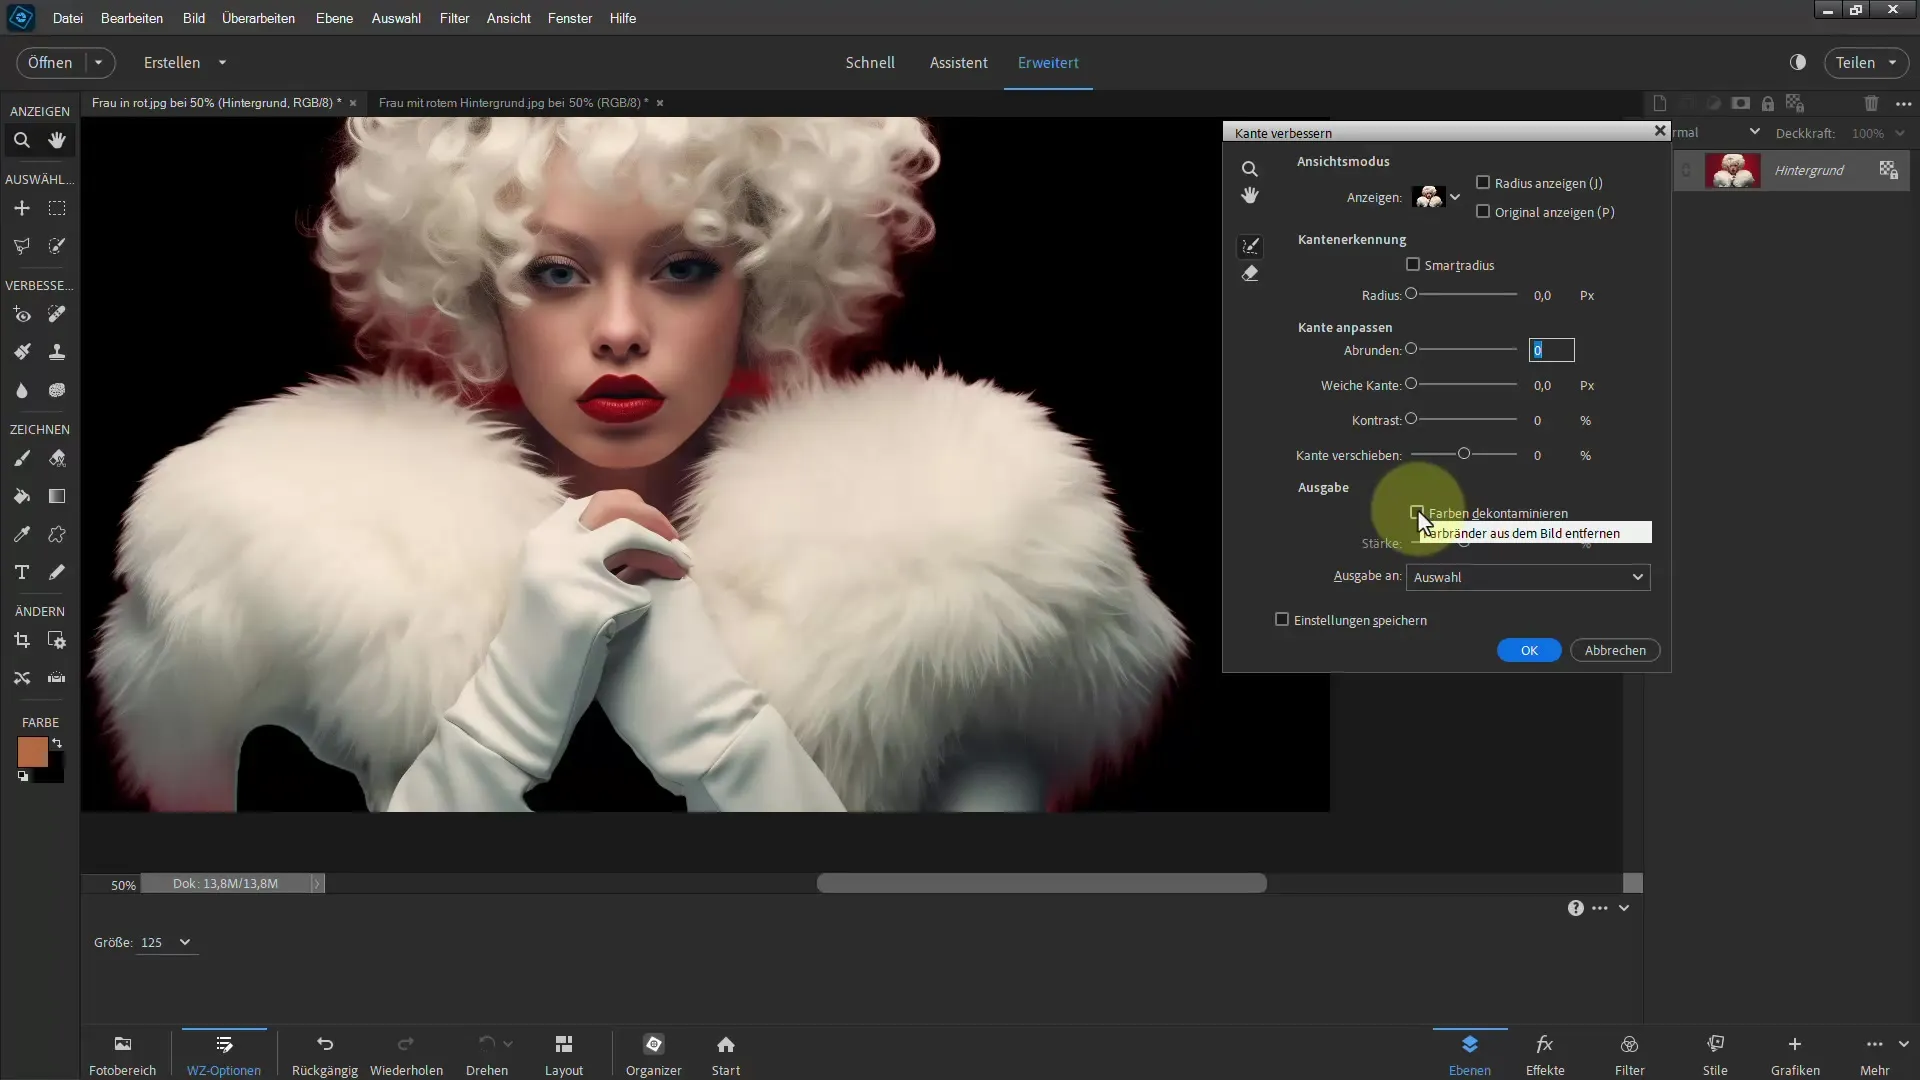
Now you want to remove the color fringes. Go to the "Decontaminate Colors" option. Check the box for non-destructive editing so that the changes are not applied directly to the image but saved as a mask.
Mask Optimization
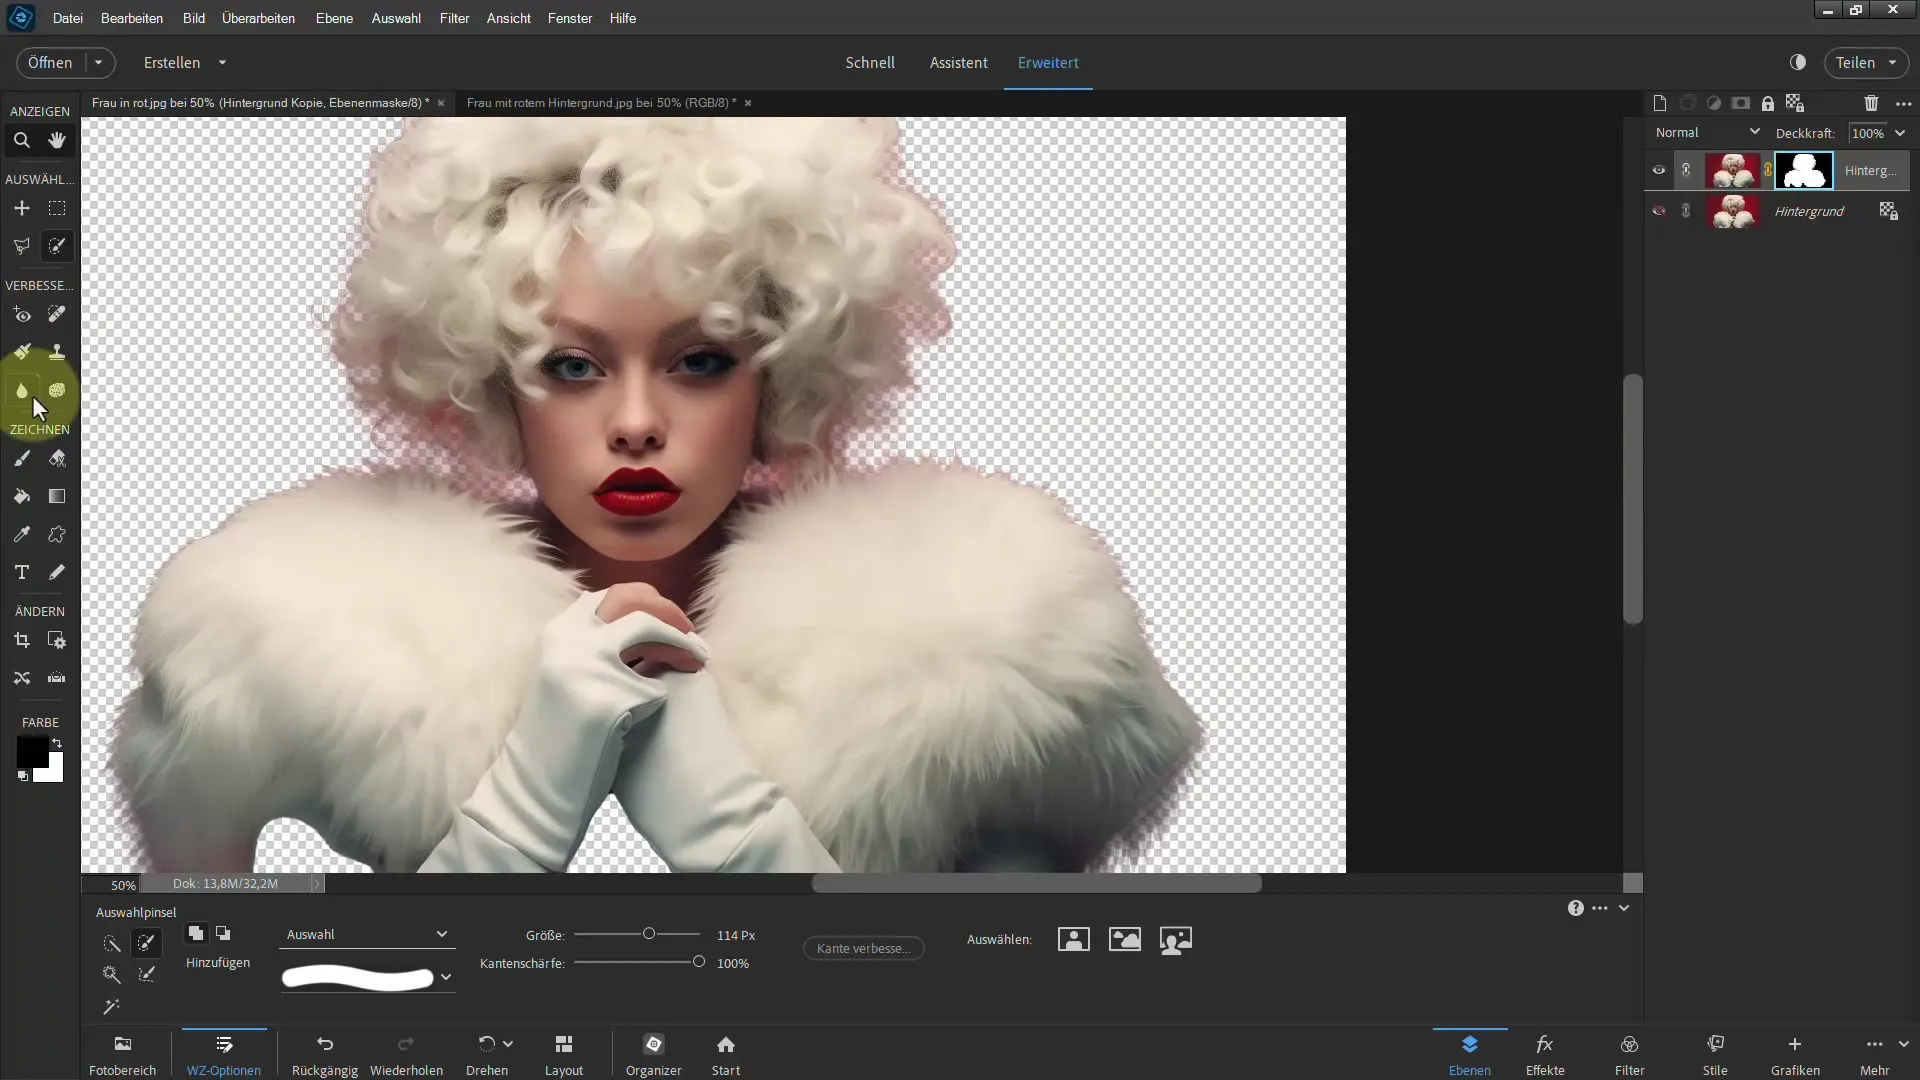
Examine the result closely. While the red in the hair may be reduced, some color edges may still remain. In such cases, you need to further optimize the mask. Select the brush tool and set the foreground color to white to restore the disappeared areas. Paint where you think the mask was not set perfectly.
Create a New Layer
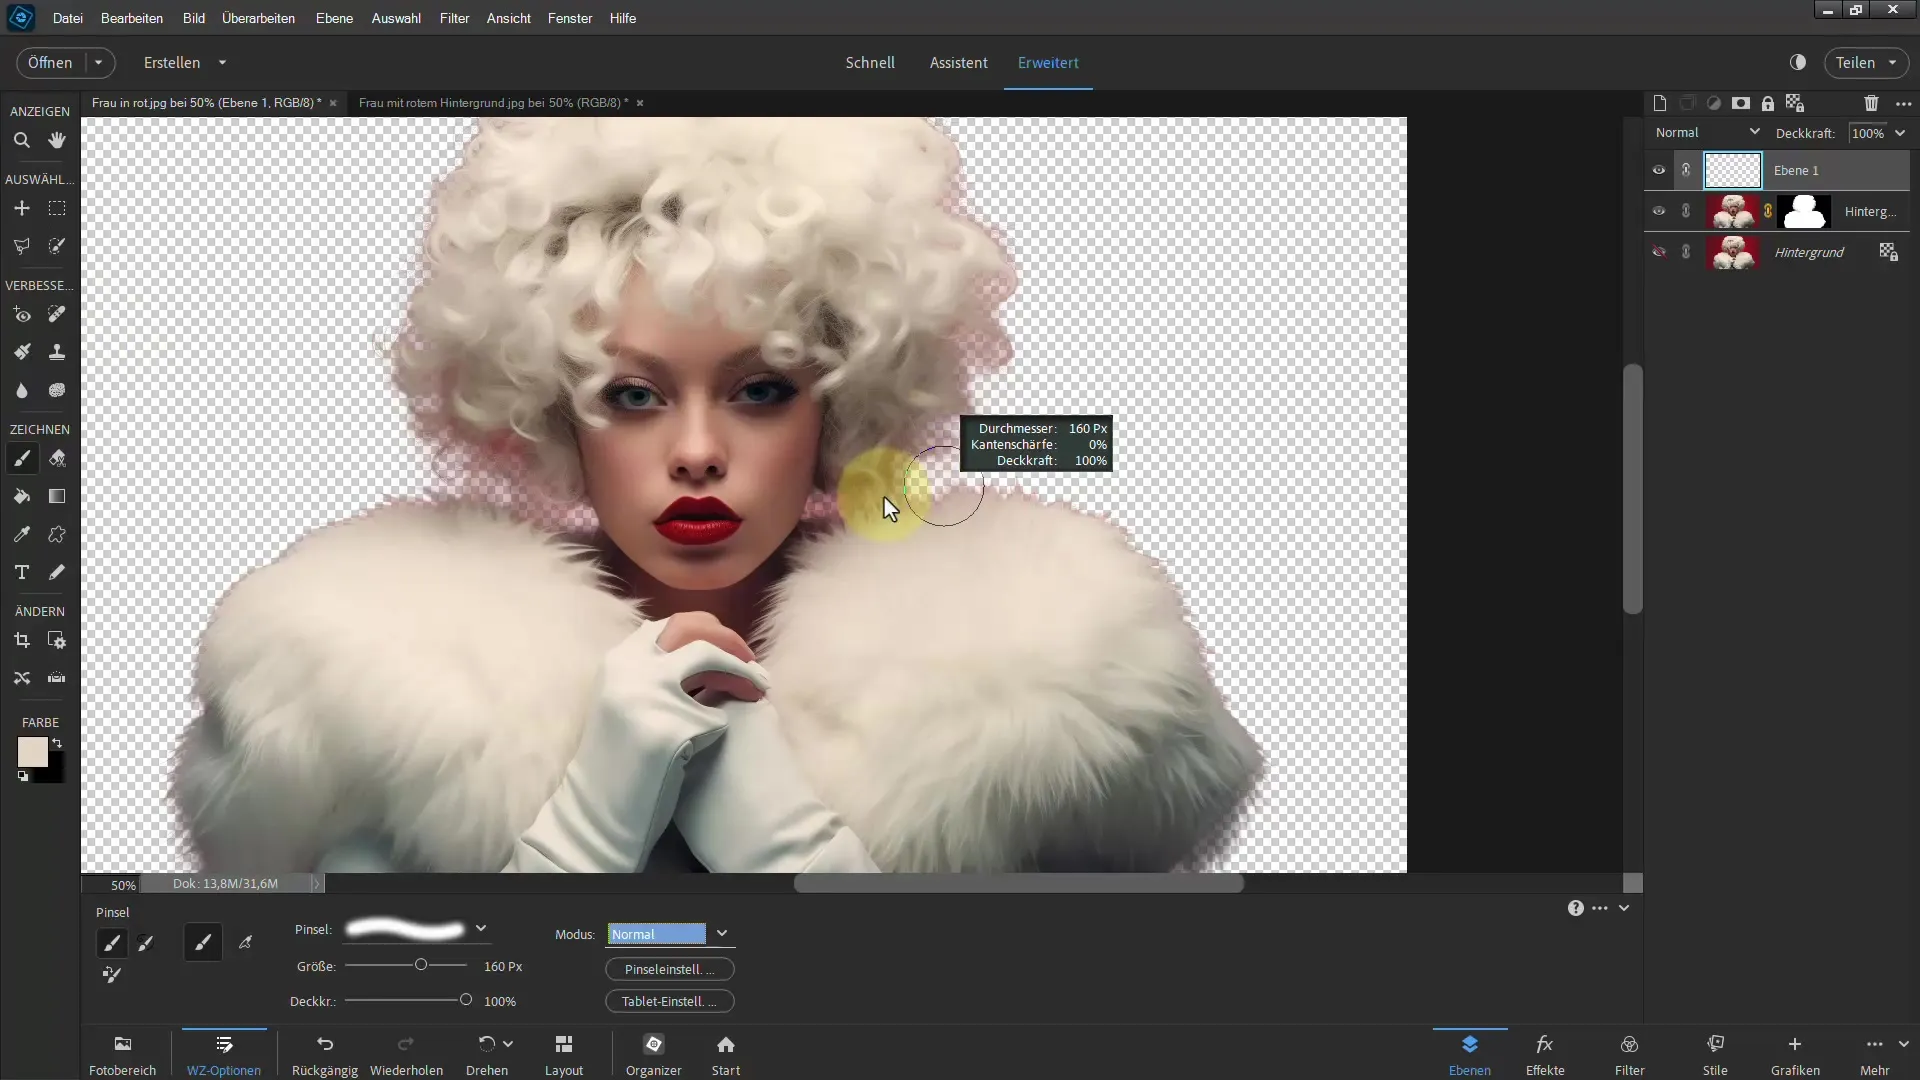
Once you are satisfied with the selection, create a new layer. Choose white as the foreground color again. Paint over the areas where red is still visible. Adjust the brush size to work precisely.
Mode Change
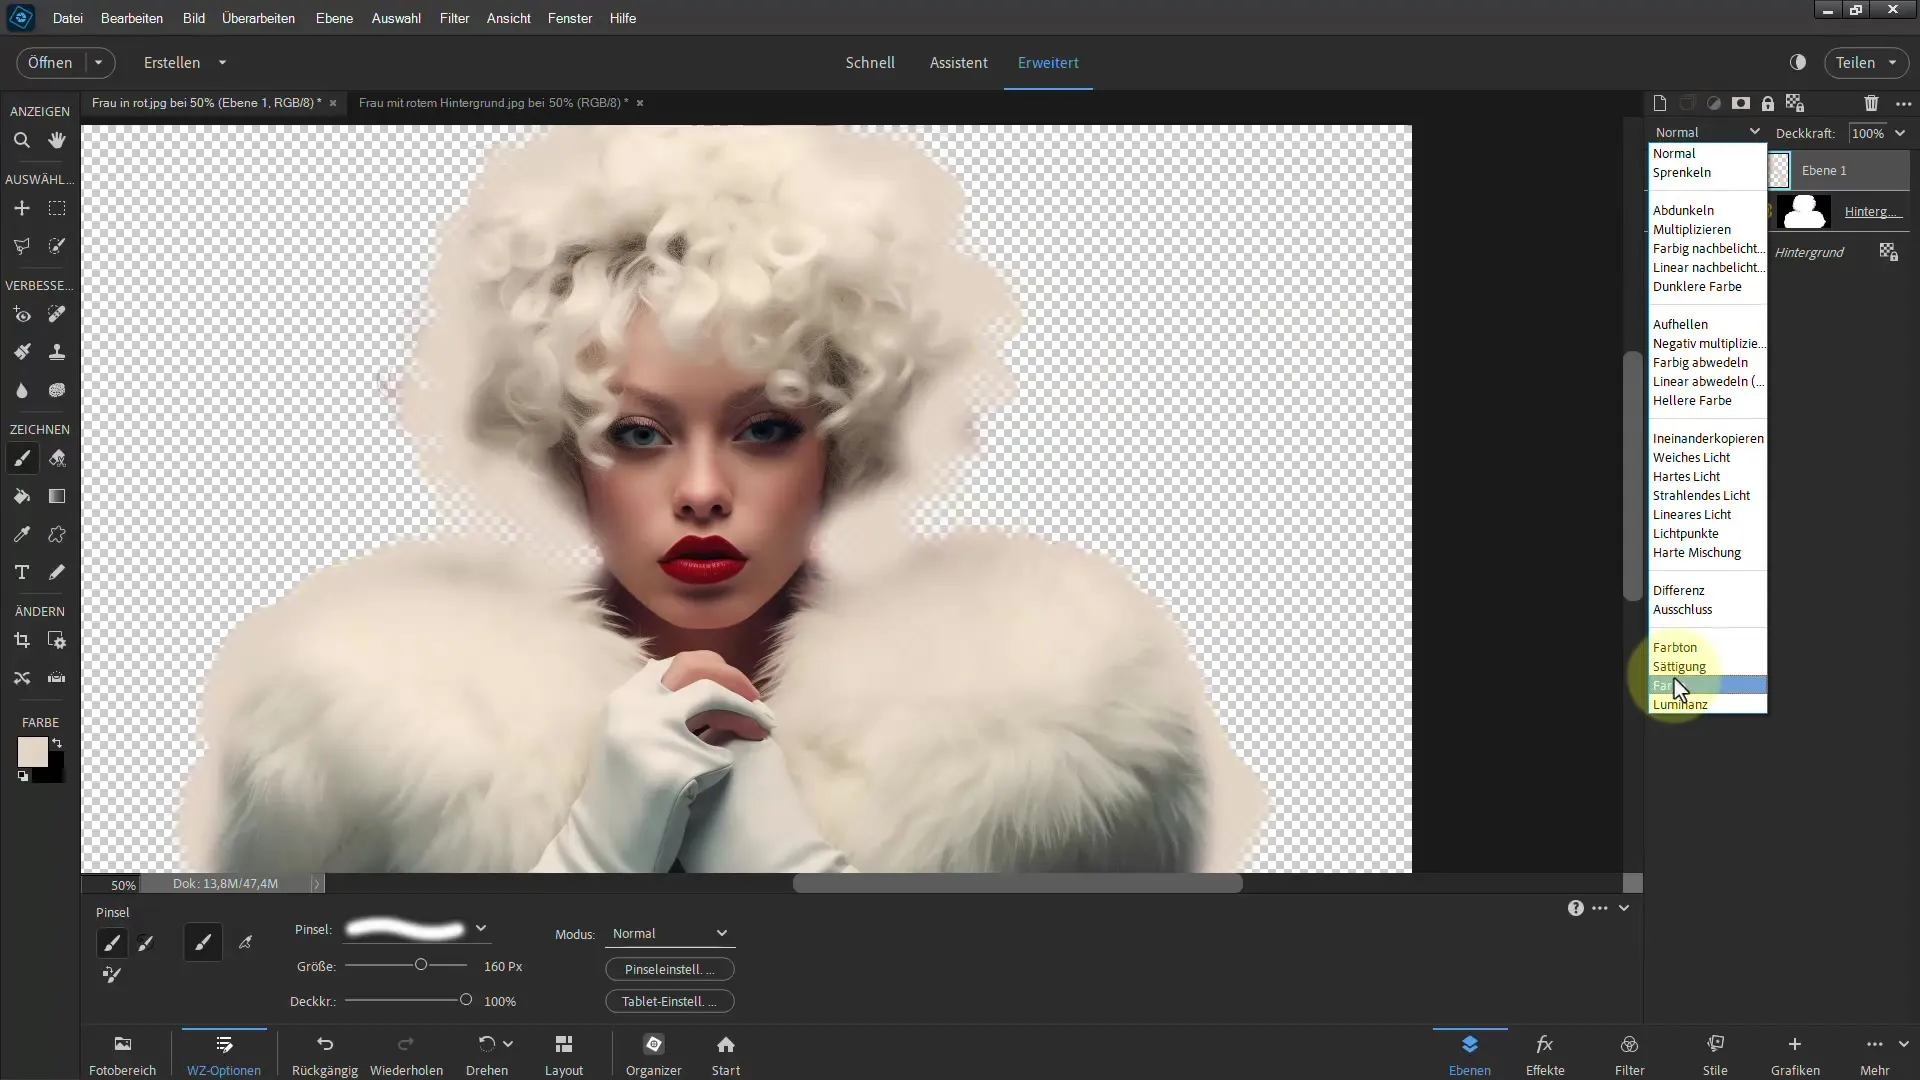
Now, you want to ensure that the color is only applied to the bottom layer. Hold down the Alt key and click on the bottom layer to select it. Now change the mode to "Color," and this step should remove the unwanted color tones. Check the result to ensure all red tones have been removed.
Another Example
To demonstrate the versatility of this technique, let's look at another image with a complex background. In this case, the red from the gift and the background could make cutting out difficult. Repeat the steps as before, starting again with subject selection.

Using Quick Selection Tools
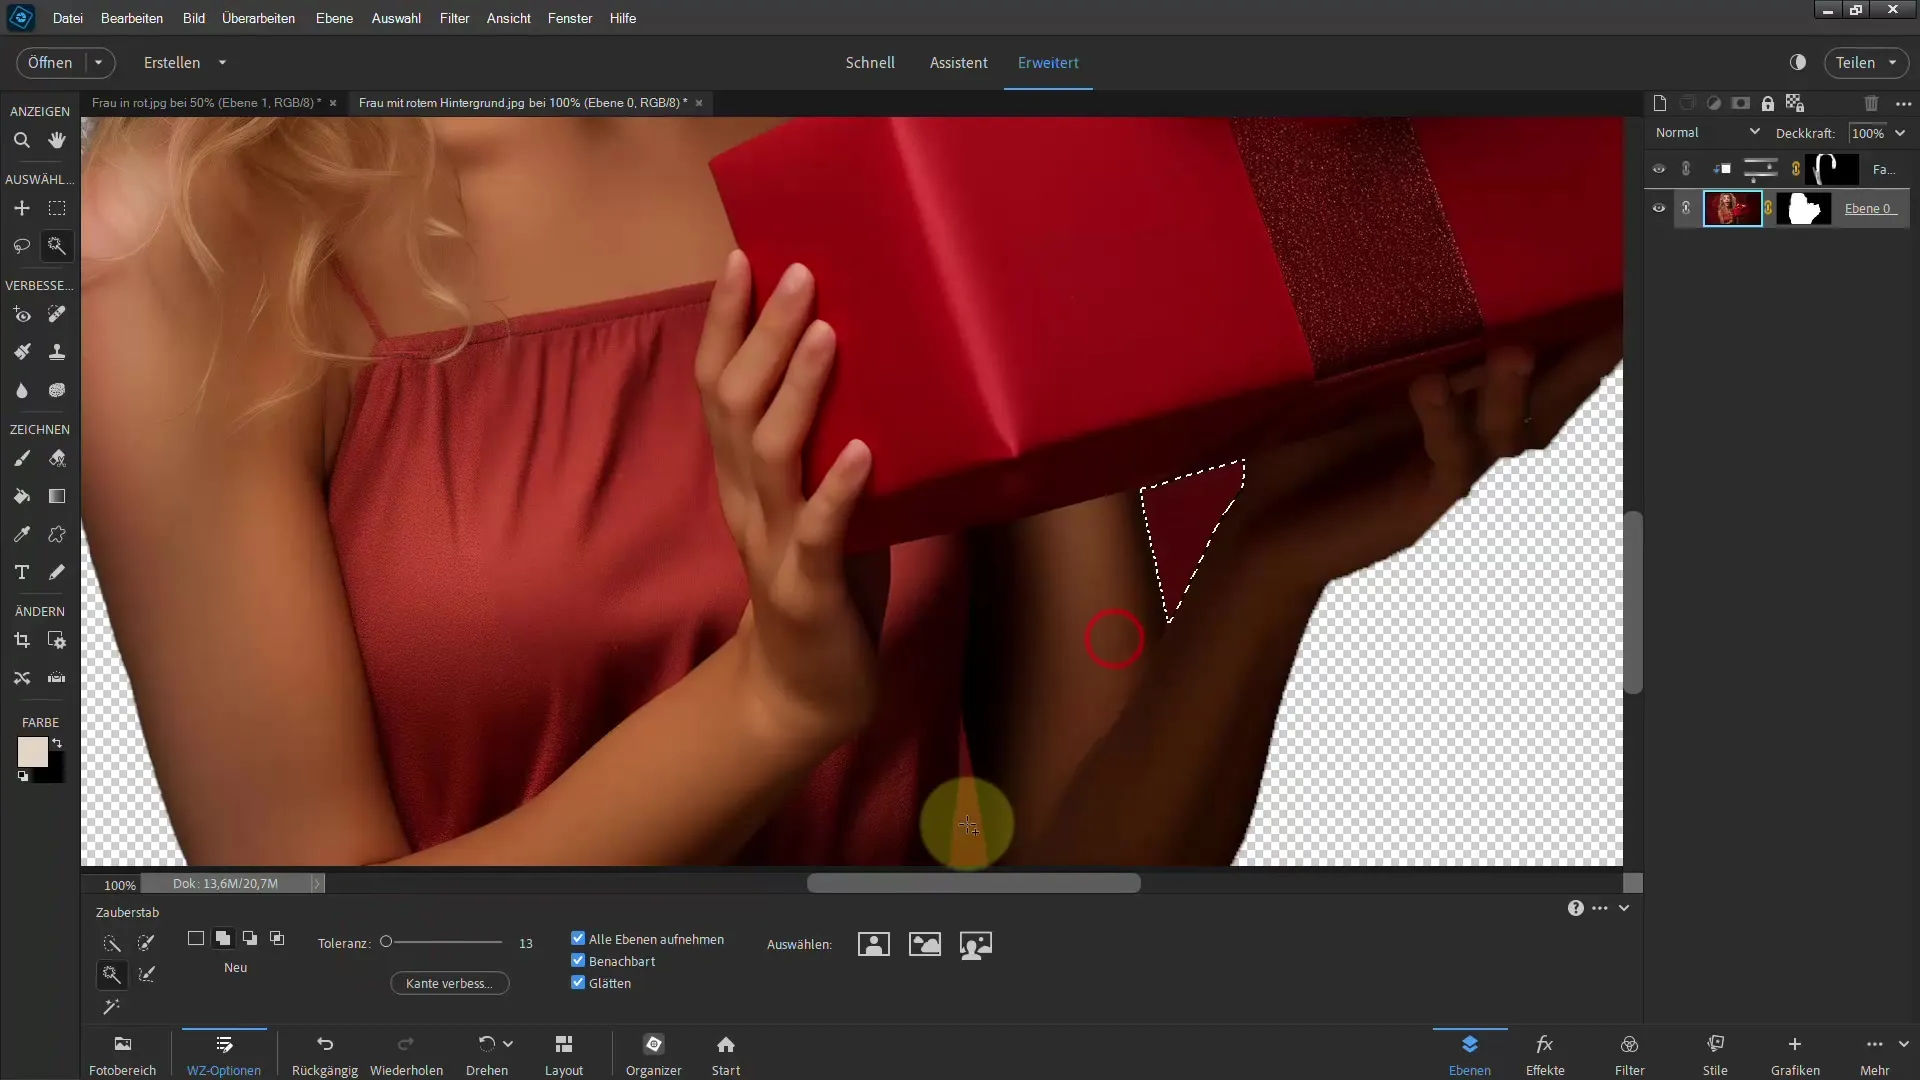
Use the Quick Selection Tool for precise work. This tool helps you refine the selection and ensure that you do not accidentally choose the background. Avoid working too broadly to keep the selection precise.

Improving Edge after Selection
Click on "Improve Edge" to optimize the selection. Here you can easily refine the hair and make sure no edges are overlooked. Press the space bar to move the image if necessary.
Adjusting Hue and Saturation
Another step would be to apply an adjustment layer for hue and saturation. This way, you can optimize the skin and hair tones. Make sure to invert the mask so the adjustments only apply when you paint in bright areas.

Final Review and Adjustments
Now take a close look at your image. Use reduced opacity to go over some areas to refine the result. Adjustments may need to be made repeatedly to achieve the best result.
Summary
Removing color fringes in Photoshop Elements can be simple when you know the right tools and techniques. By using the correct selection tool, improving edges, and decontaminating colors, you can achieve professional results. Remember to work non-destructively and make corrections consistently for the best results. With some practice and patience, you'll achieve excellent results.
Frequently Asked Questions
How can I ensure color fringes are removed?Use the color selection tool and decontaminate the colors at the edges.
What should I do if the red color is not completely removed?Adjust the settings in the mask and use the brush for refinements.
Can I easily remove other color tones as well?Yes, the same techniques apply to other color tones; make sure to adjust the mask accordingly.


