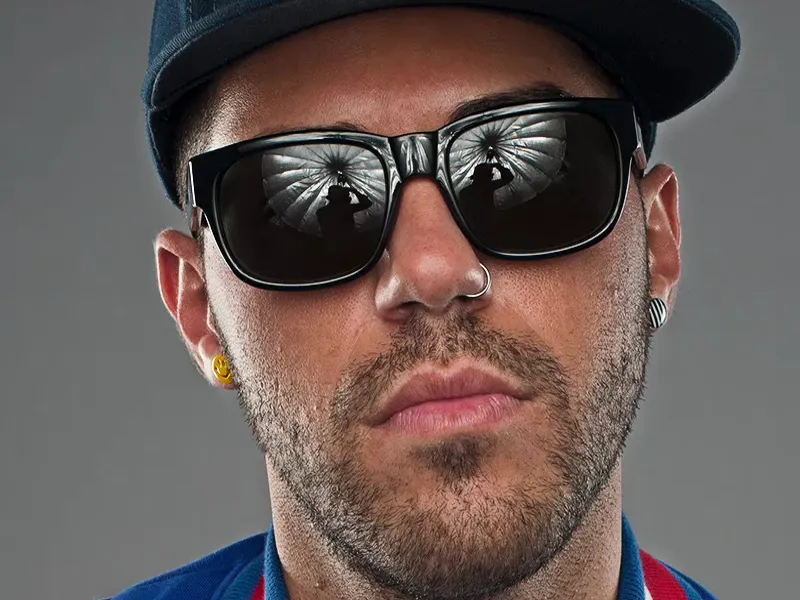
There are two very cool calculation dialogs in Photoshop. They are hidden here under Image>Image Calculations... and Channel Calculations ... They are a bit similar. Channel calculations are one step more advanced than image calculations. And now I'll show you what you can do with them.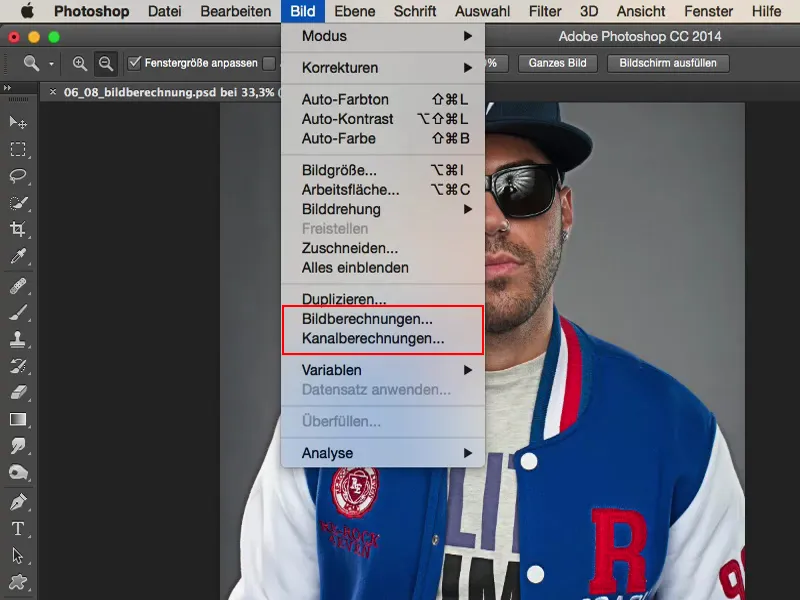
Introduction: Before and after comparison
A brief foretaste: We have here the image of the German rapper Siggi. That's the man's name, he makes cool music, looks cool and is perfect for this look. Here you can see what the picture looked like before, nice and sharp, detailed - not yet retouched, but it looks pretty cool out of the camera.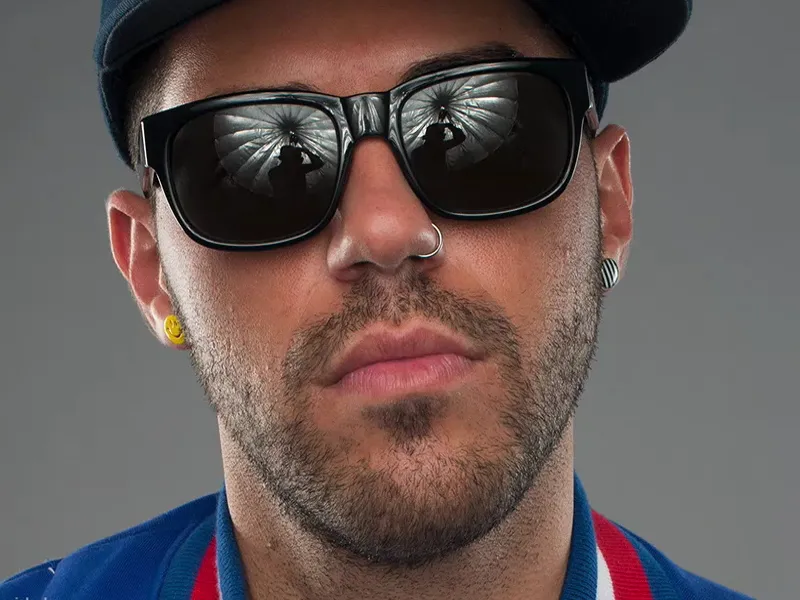
And when I work with image and channel calculations here, I get this micro-contrast look really, really well. And I think it suits him enormously well. Of course, the whiskers, all the pores, all the details come out really, really well. So you can do that with stories like this. But where are they hidden?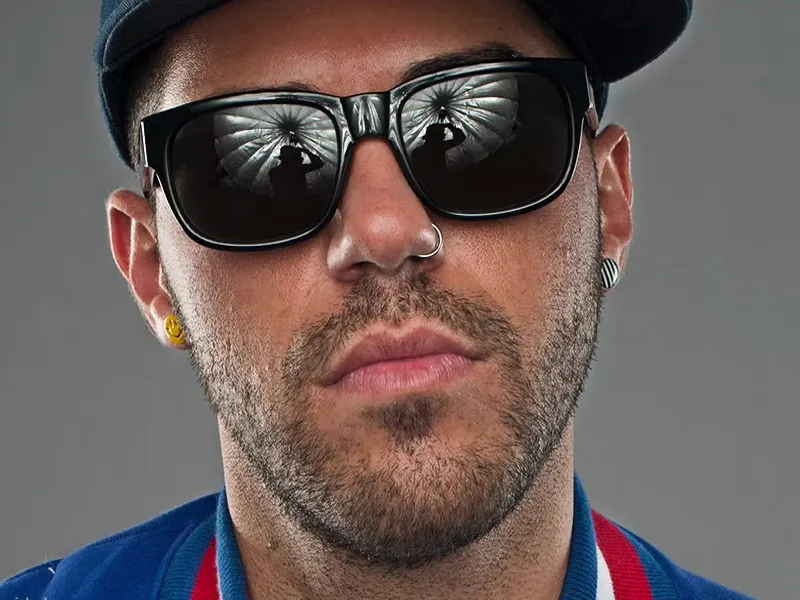
Image calculations in Photoshop
As I said, you can find this under Image>Image Calculations... and Image>Channel Calculations...
Let's start the first dialog (Image Calculations): First of all, you have your source image (1) as the source, which in this case is our file name. Nothing else is available. Only what you have opened in Photoshop in various tabs is available here.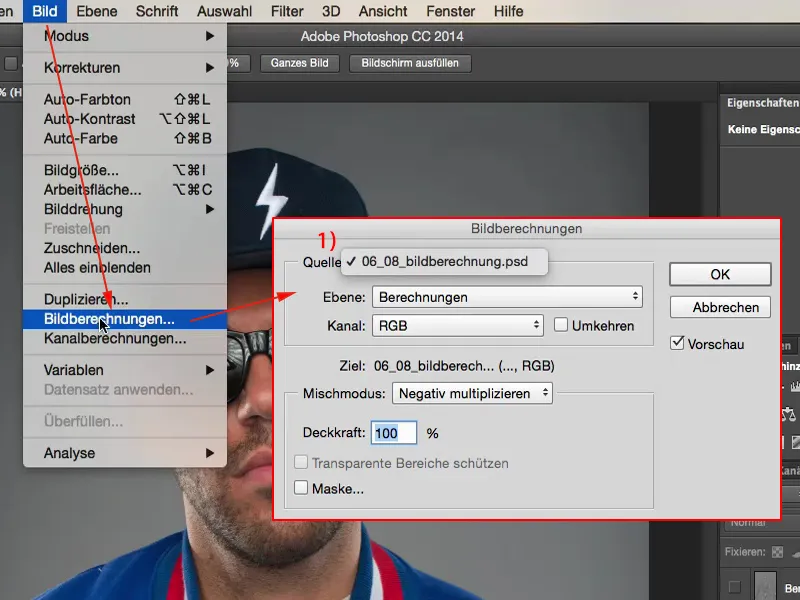
Then you have the layer calculation style (1) or you select the layer (2) that you want to select. I now have the "Calculations" layer and the "Background" layer in my layer stack (3). I can now select something from these two. I'll go to the "Background" layer (4) and it will be displayed here too.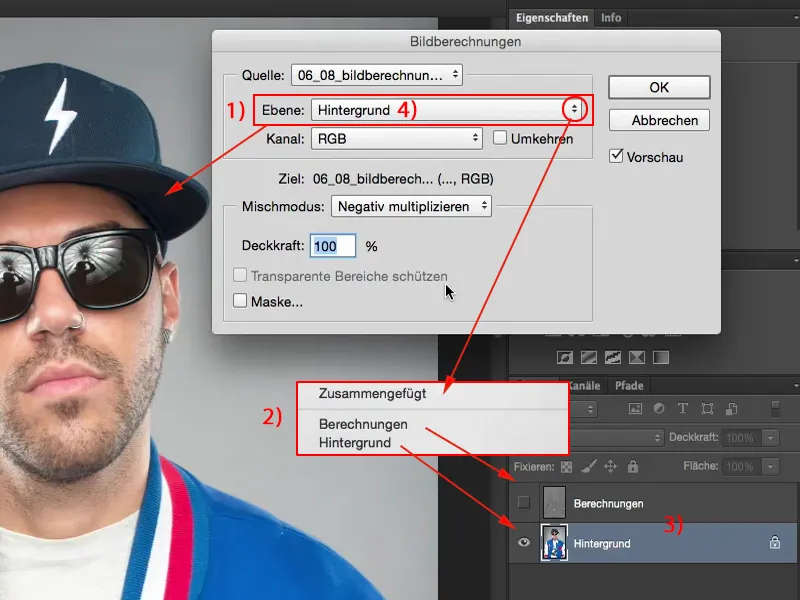
You have different channels (1) to choose from. Red, green, blue, the RGB channels(2).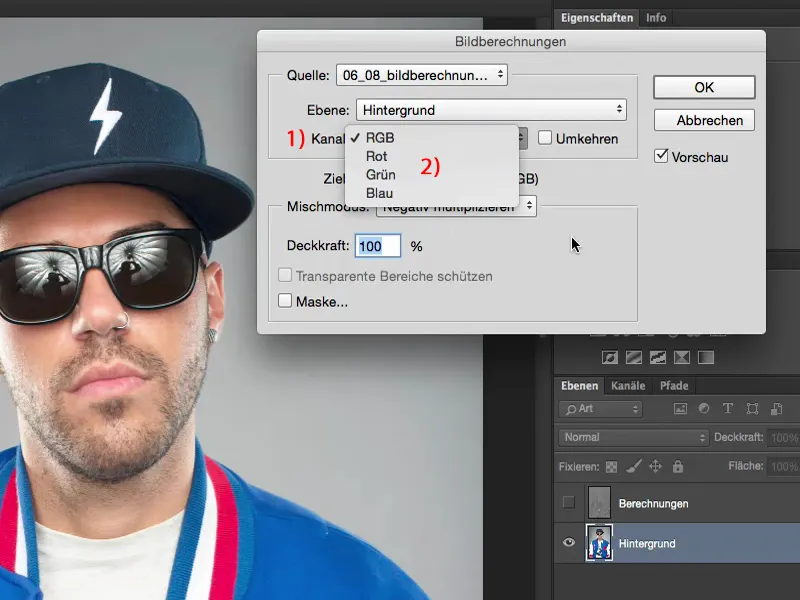
You have an opacity (1). You can also invert the channels (2) to get a pretty, colorful negative image.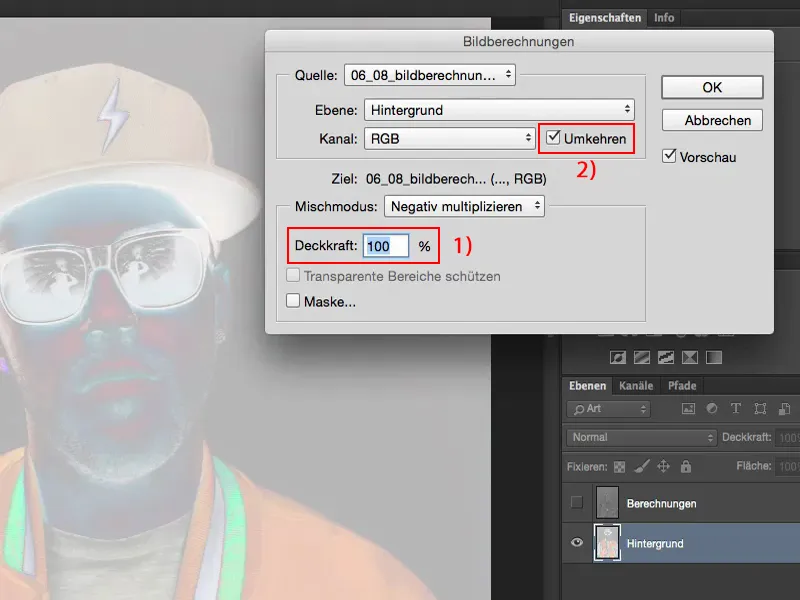
And you have the complete range of layer modes here (1). And this is really, really useful, because if you wanted to offset the image with itself in Soft Light mode (2), for example, it would look like this.
It would look exactly the same if you were to make a layer copy and then set it to Soft light - that's what the image calculation makes visible here.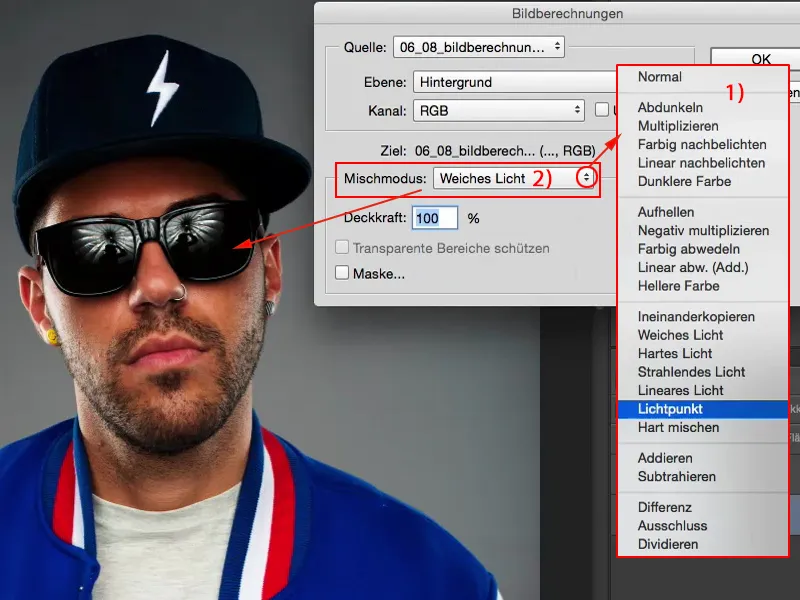
The image calculation is no different than if you do this in the RGB channel on a standard layer in the file you have opened. It shows you: What happens when you change the layer mode?
But the nice thing is - and I'll make a quick copy (1) so I can show you better - if you now have Soft Light (2) here, for example: The whole thing looks saturated, too dark, the colors are shifted a bit. That's not a hit. Maybe you only need certain areas of the image or you want to change a layer mode afterwards. The image calculation works quasi destructively on this layer, you have no more adjustment options if you have not converted this into a smart object beforehand, for example.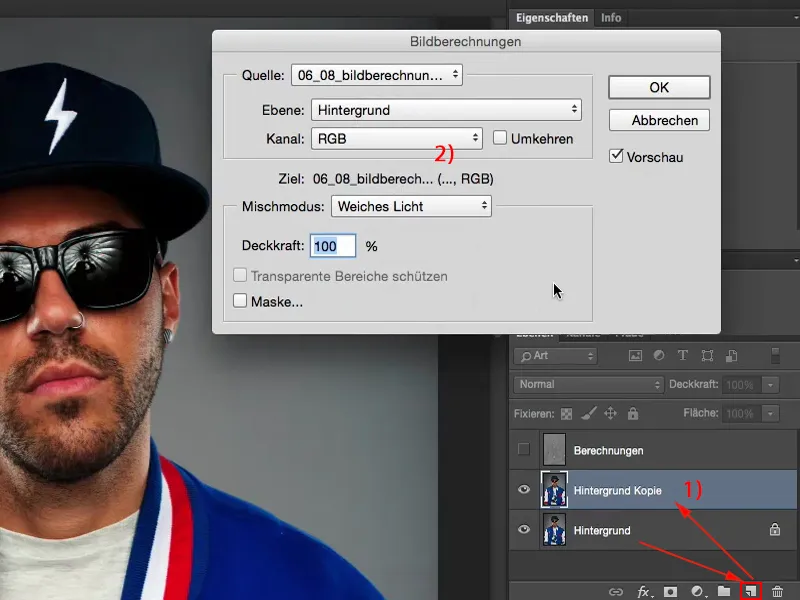
But: The layer mode, and this is the kicker, is set to Normal mode (1). This means that I have actually already applied the Soft light layer mode (2) here.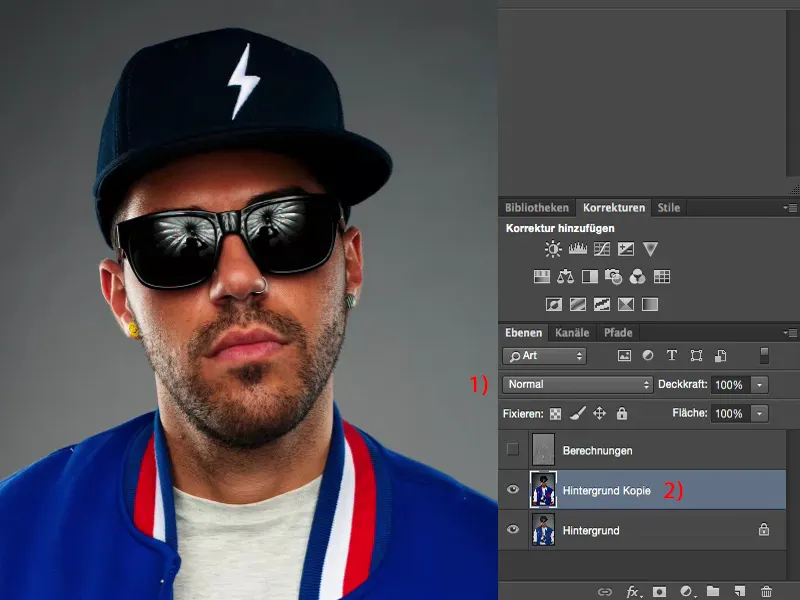
I can now go here and say: No, I would like to multiply this with Negative (1) in the image, with an opacity of 50% (2), because I would like to brighten up the image a little with this look here. And I think the picture looks really good this way.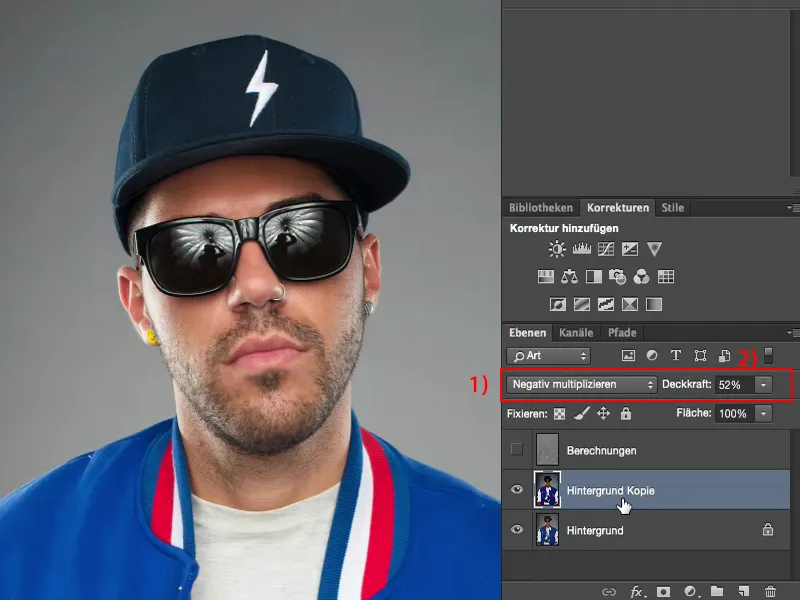
So by simply copying a layer, you have basically created a virtual one that is hidden in the image calculation - and by multiplying the negative you have created something completely new. Of course, you can also set the layer copy to the multiply negative mode, but you'll notice that it's twice as bright as this one, because it actually contains soft light. So this is a very, very cool thing.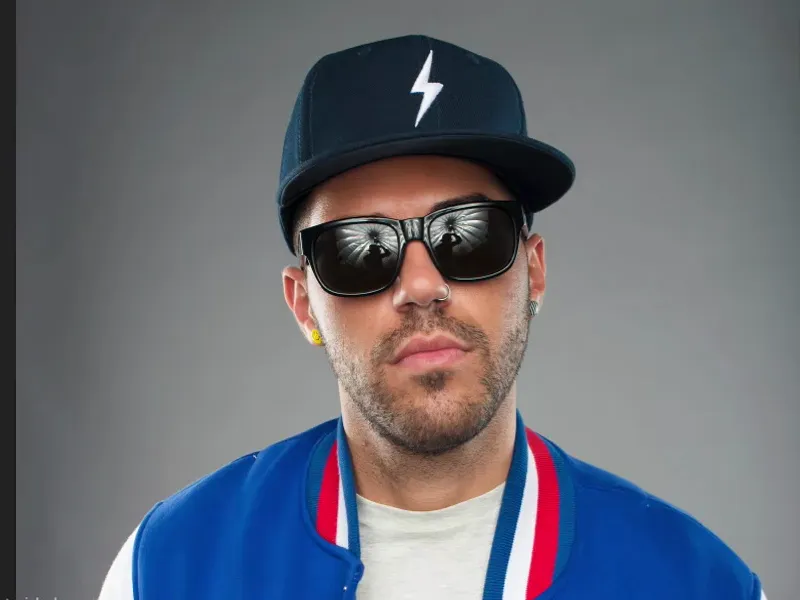
Channel calculations in Photoshop
Let me put this back to Normal mode (2). You can also see the difference Soft Light. And then I come to the next point, namely the channel calculations (1).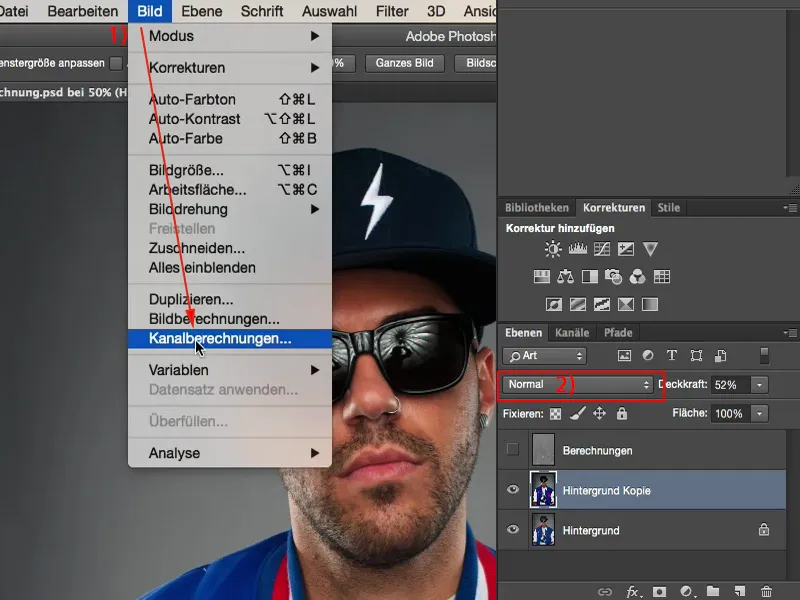
The whole thing is basically blown up by another file, another layer. We are working here on the same file (1) - I only have one open - but now I also have the option of offsetting two layers (2) against each other.
I can now not only say: Here, please offset the background copy (3) with the background image (4) to a certain extent, I can also offset the channels (5) here and determine the blend mode (6), i.e. the layer mode. And depending on which layer mode I select here, I also get different setting options here (7).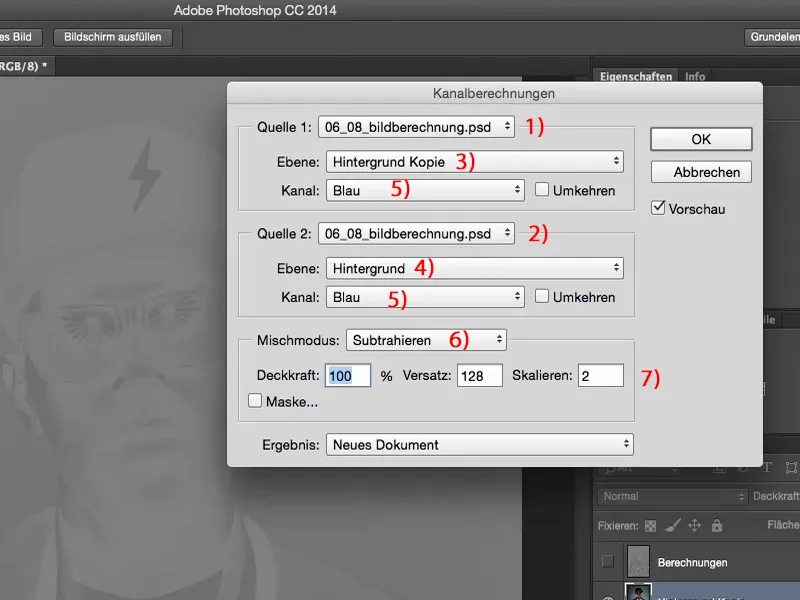
Then I set this back to gray (1) and this back to gray (2). And from this I can create a really super cool black and white conversion of my image if I want to.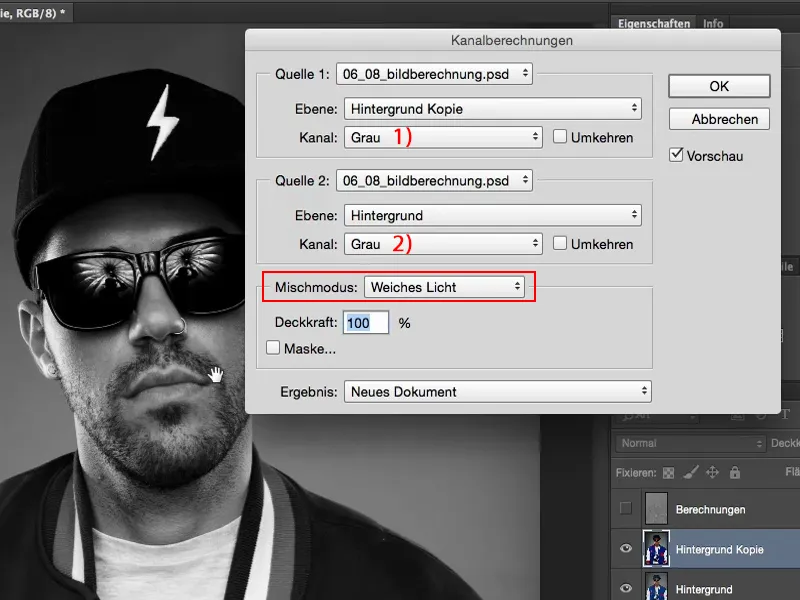
As you can see, the channel calculations really have it all. So no matter what you do here (1), you can generate so much basic material as a New Document, as a New Channel or as a Selection (2) that the possibilities here are almost endless.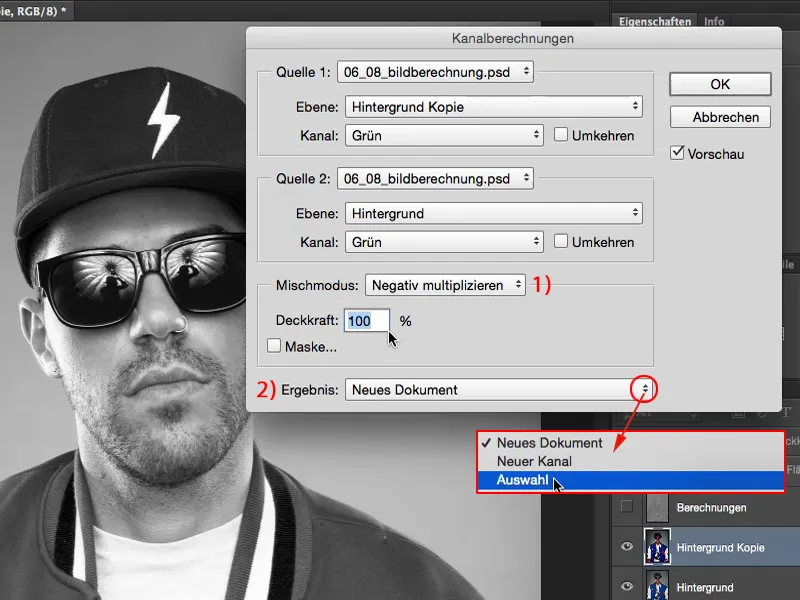
Microcontrasts with image and channel calculations
I will now show you the specific application for micro contrasts where you can or even have to use image and channel calculations.
I'll delete this copy and also the calculation layer.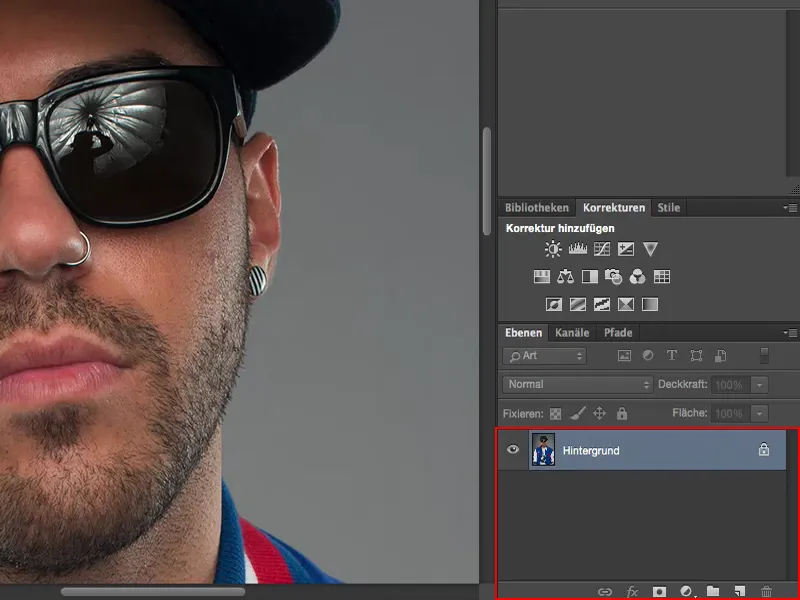
Let's start from scratch. I'll zoom to a 100 percent view of the face and make a copy of the layer. I set this layer copy to Soft Light mode to increase the contrast.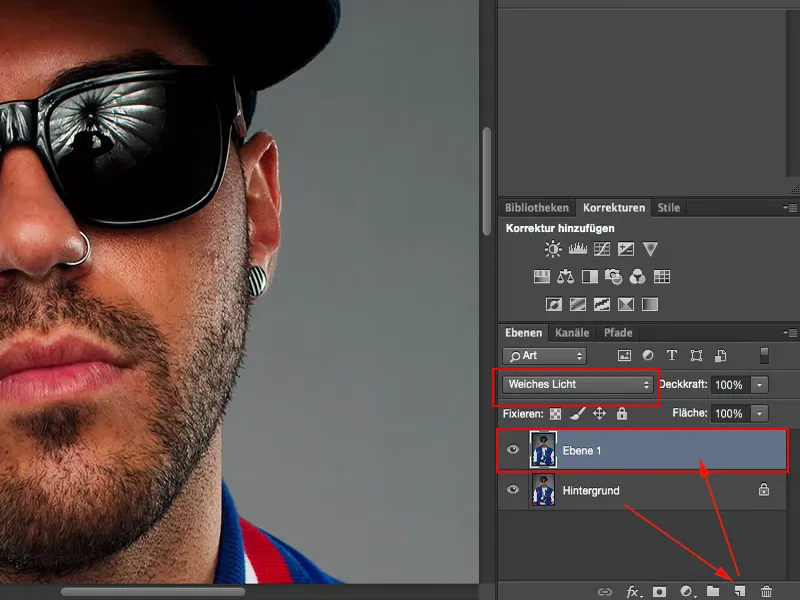
And I want to make the whole thing a bit more glowing. To do this, I use the Gaussian blur at a value of 10 pixels.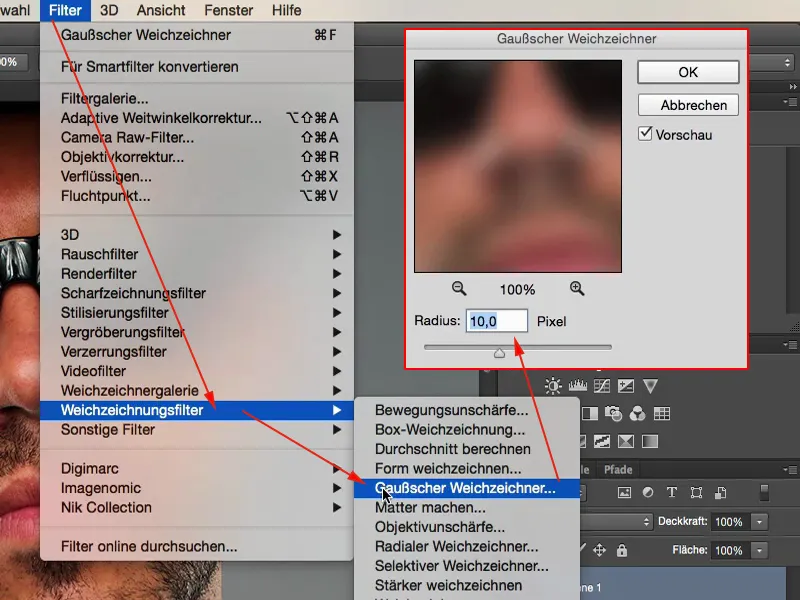
Now this has that glow effect. That's quite nice, but the color shift isn't that great, of course, and the micro details are still a long way off. So we're not quite there yet.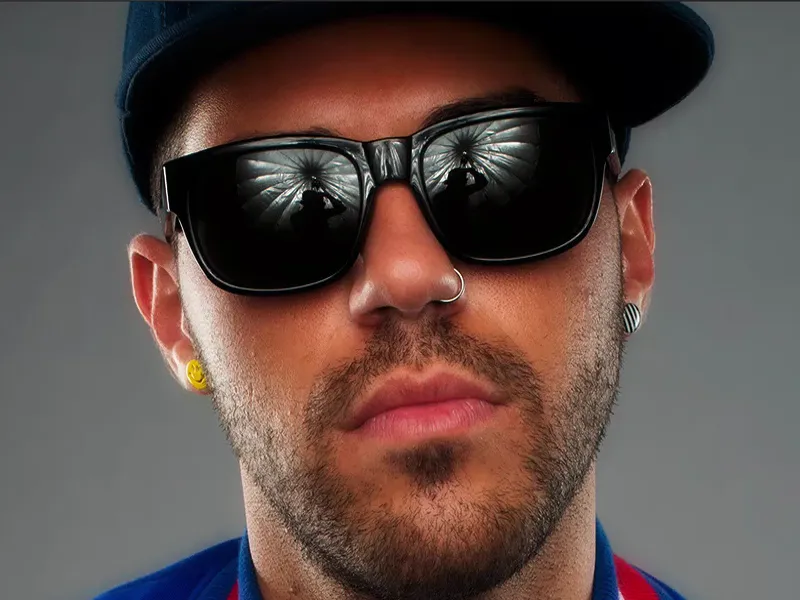
If that's not enough, let's increase the contrast even more by selecting Image calculations (1). Here we go to "Layer 1" (2), RGB (3), Soft light (4) and let it calculate itself again so that the whole thing pops a little more.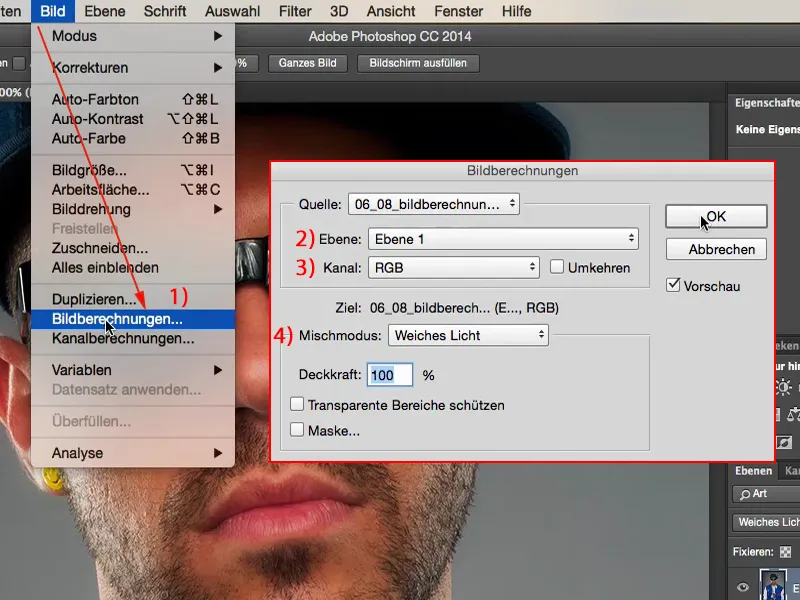
Next comes the channel calculations (1). This is what it looks like when it's finished. I'm just going to deliberately set something different. Photoshop always remembers these stories. So up here at source 1 you need your "Layer 1" (2). This is the layer that is blurred, where the contrast has been increased, where the image calculation has already been run and which is in soft light mode. In other words: This layer (3) is scrap. But it is only junk because we now have to make the difference between these two layers (4) visible here. And everything that distinguishes these two - that's the scoop - is the structure, all the fine details.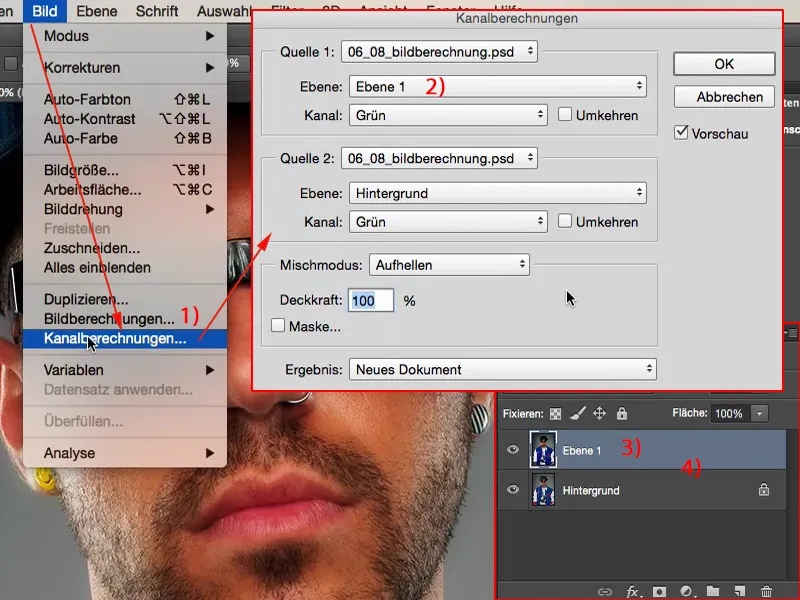
And we can now get to them, just as we do with frequency separation, by setting the mode to subtract. So I'm just going to go to the blue channel (1), which is the one with the most contrast in this image. Here I need the "Background" layer (2), which is checked here, and then the Subtract layer mode (3). Offset 128, Scale 2, exactly the same settings (4) as for the frequency separation. The result is that everything that is not a structure here is set to the value 128 RGB. This means that all other areas are dropped. The whole thing is of little use to me as a new channel, it is of even less use to me as a selection, so I create a new document (5) here.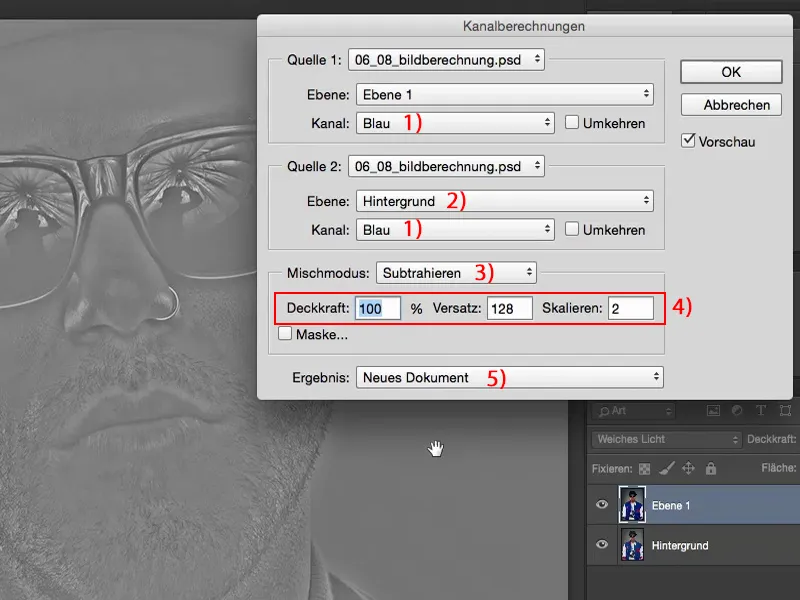
Then I have my document here. I can copy it using Ctrl + A, cut it out, whatever. I can also simply drag it into the other file.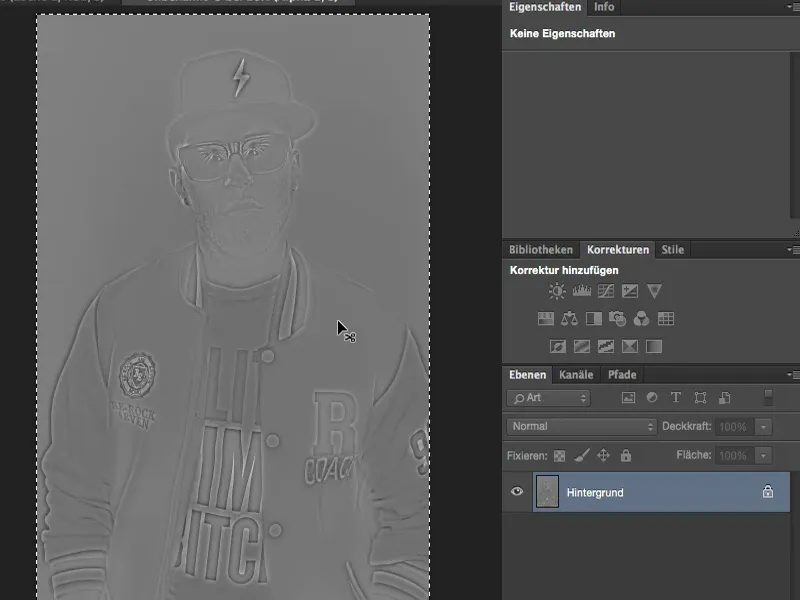
Then I have that and insert it here (1). The layer is also pure black and white, because I've subtracted the blue channel twice. And all I have to do now is simply hide this layer (2), throw it away, it's garbage. I only need it to carry out this channel and image calculation.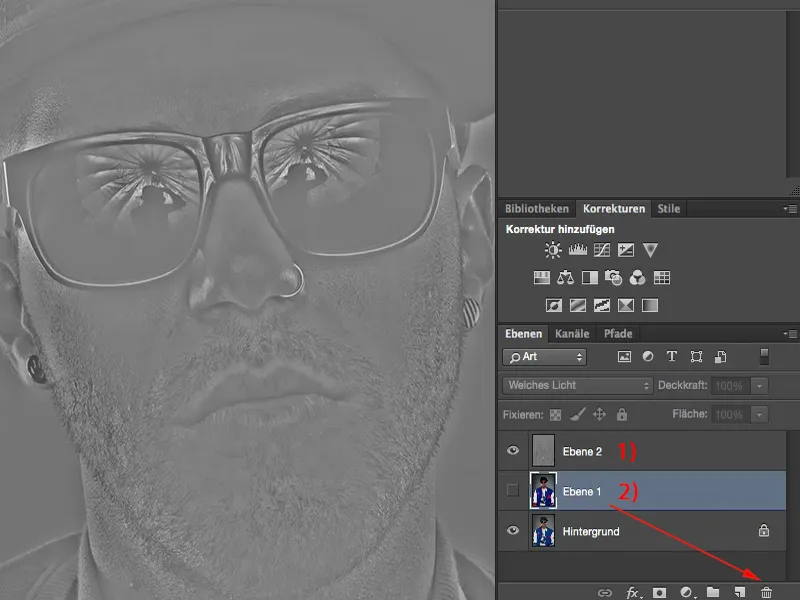
And then you've got this wow effect here by simply setting it to Copy one into the other (1). You have to be a bit careful at the edges: Sometimes there are these halos, these unsightly seams. But not really in this case - from a Gaussian blur of 5 to 10 pixels you are relatively safe here. With a lot of effort, you can see a slight glow here, but if you have to, you can use a mask to apply it specifically where you need it.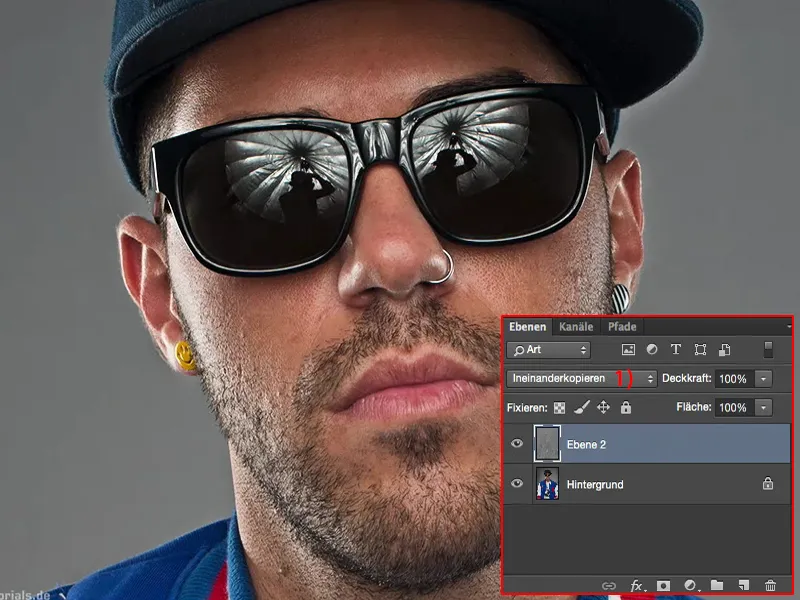
The effect is a little less visible with soft light (1).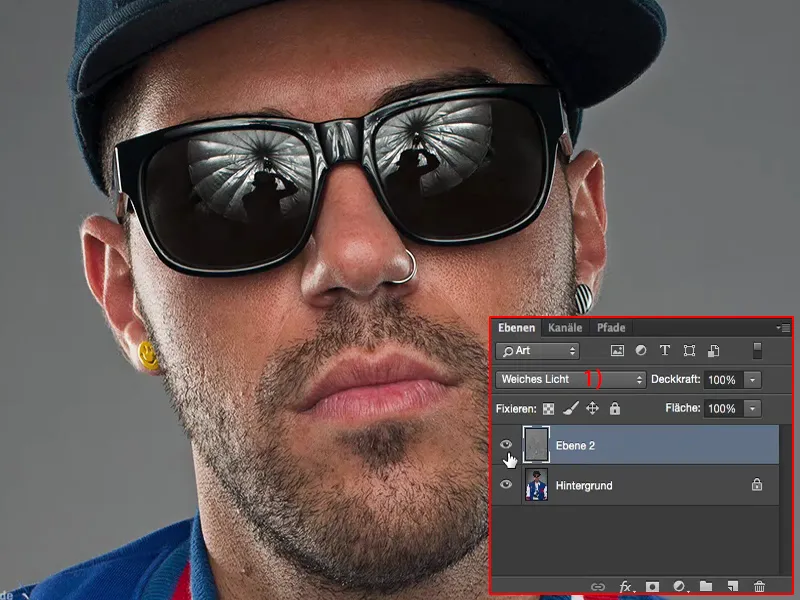
Summary
Copying into each other is the layer mode of the first hour here. And no matter which image I retouch, I swear I always add a bit of these micro details at the end. The whole thing is destructive, maybe you could tinker with it a bit with a lot of effort ... I usually either do it right at the beginning of the picture - if it's not a photomontage, but if it's really just an upper body close-up like here, a portrait like this - or in a composing I might do it again at the end and brush on these micro details very specifically.
Image and channel calculations combined: super, super powerful, really invites you to experiment. I'm sure that if you take half an hour and play around with the layer modes, you'll come up with the first effects on your own. This is definitely one that you can apply to all your images when it comes to a certain image look, a style.