Welcome to this detailed guide to color editing in Lightroom Classic CC, specifically in relation to the HSL module (Hue, Saturation, Lightness), which controls hue, saturation, and brightness. In this tutorial, I will show you how to control each individual color channel and thus adjust the colors in your images precisely. Understanding hue, saturation, and luminance is the key to getting the most out of your images in Lightroom.
Key Takeaways
- The HSL module allows for targeted editing of individual color ranges.
- Hue affects the color itself, while saturation and luminance control their intensity and brightness.
- With targeted adjustments in HSL, you can achieve dramatic effects that significantly alter the overall impression of your photos.
Step-by-Step Guide
Understanding the Basics of HSL
To effectively use the HSL module, it is important to first understand the terms hue, saturation, and luminance. These three components form the basis of color editing. Hue refers to the actual color, saturation describes how intense this color is, and luminance indicates how light or dark the color appears.

Color Editing in the HSL Module
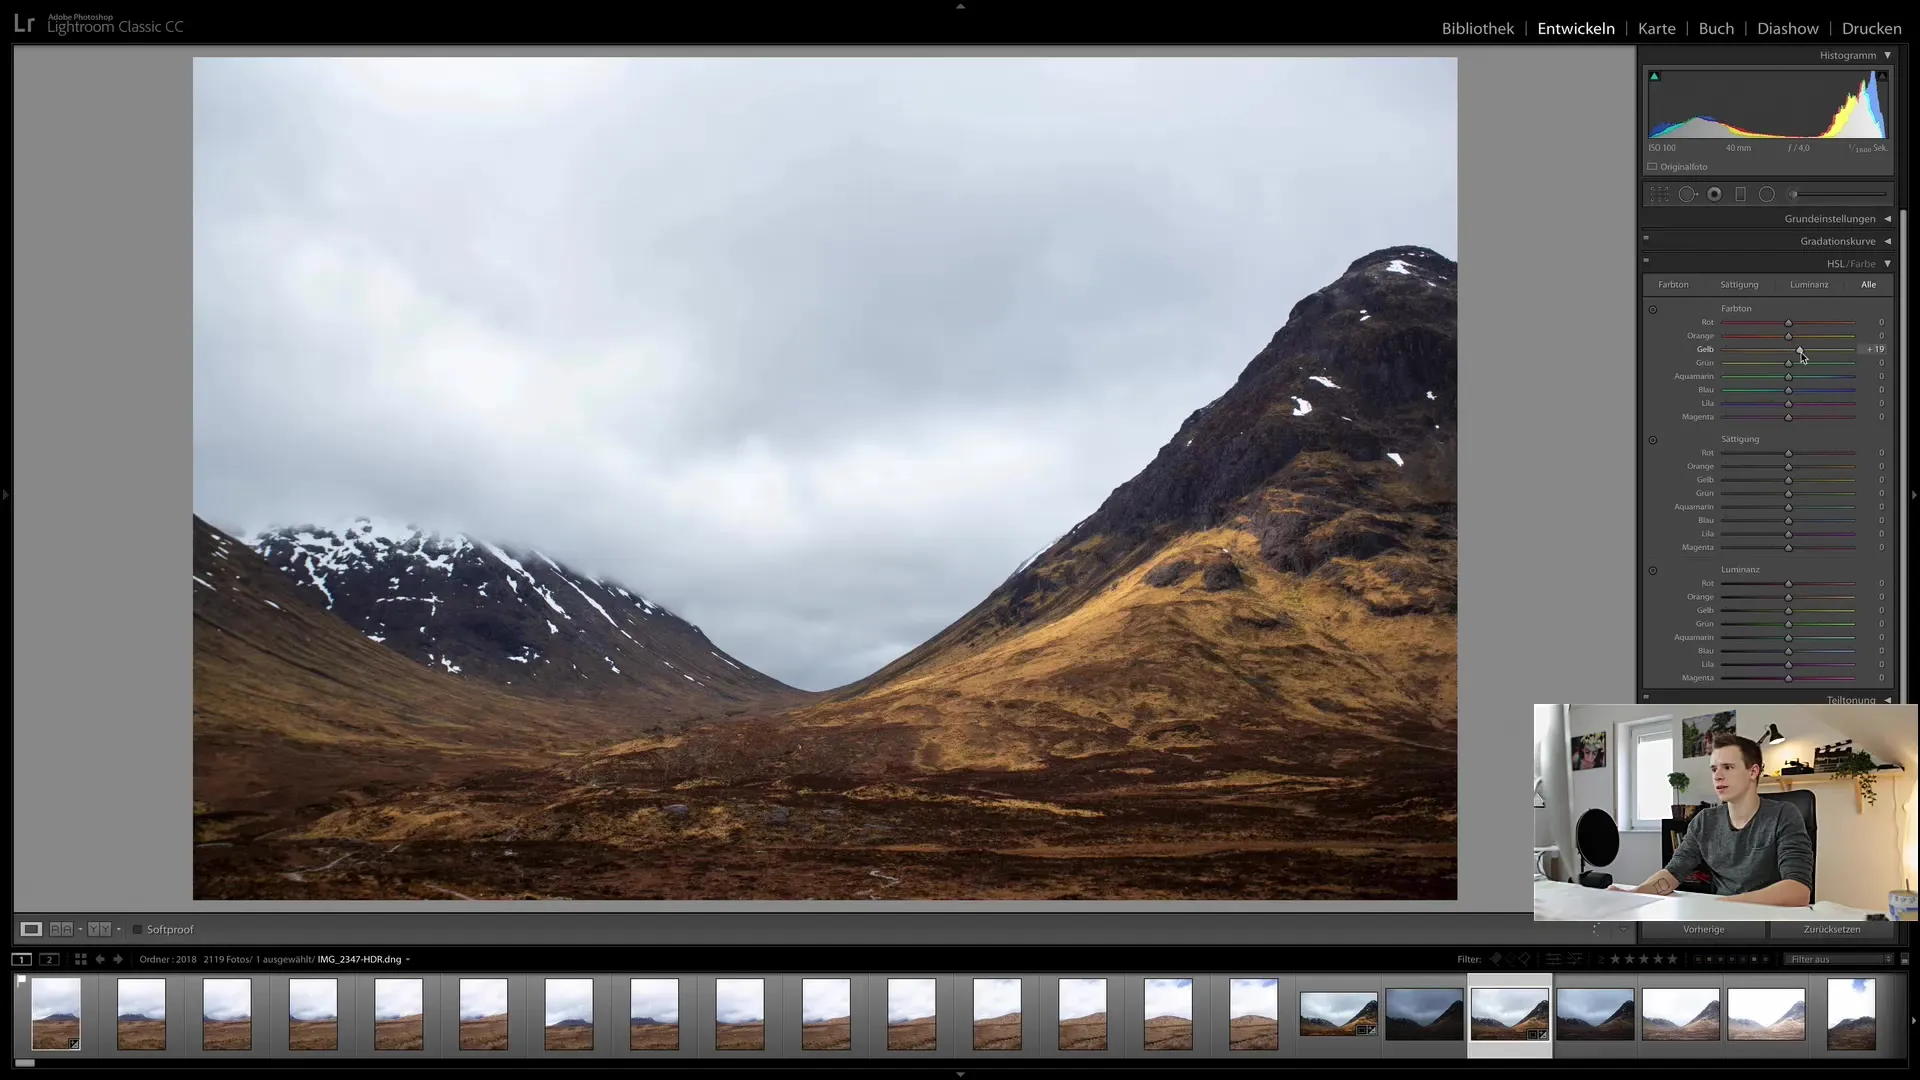
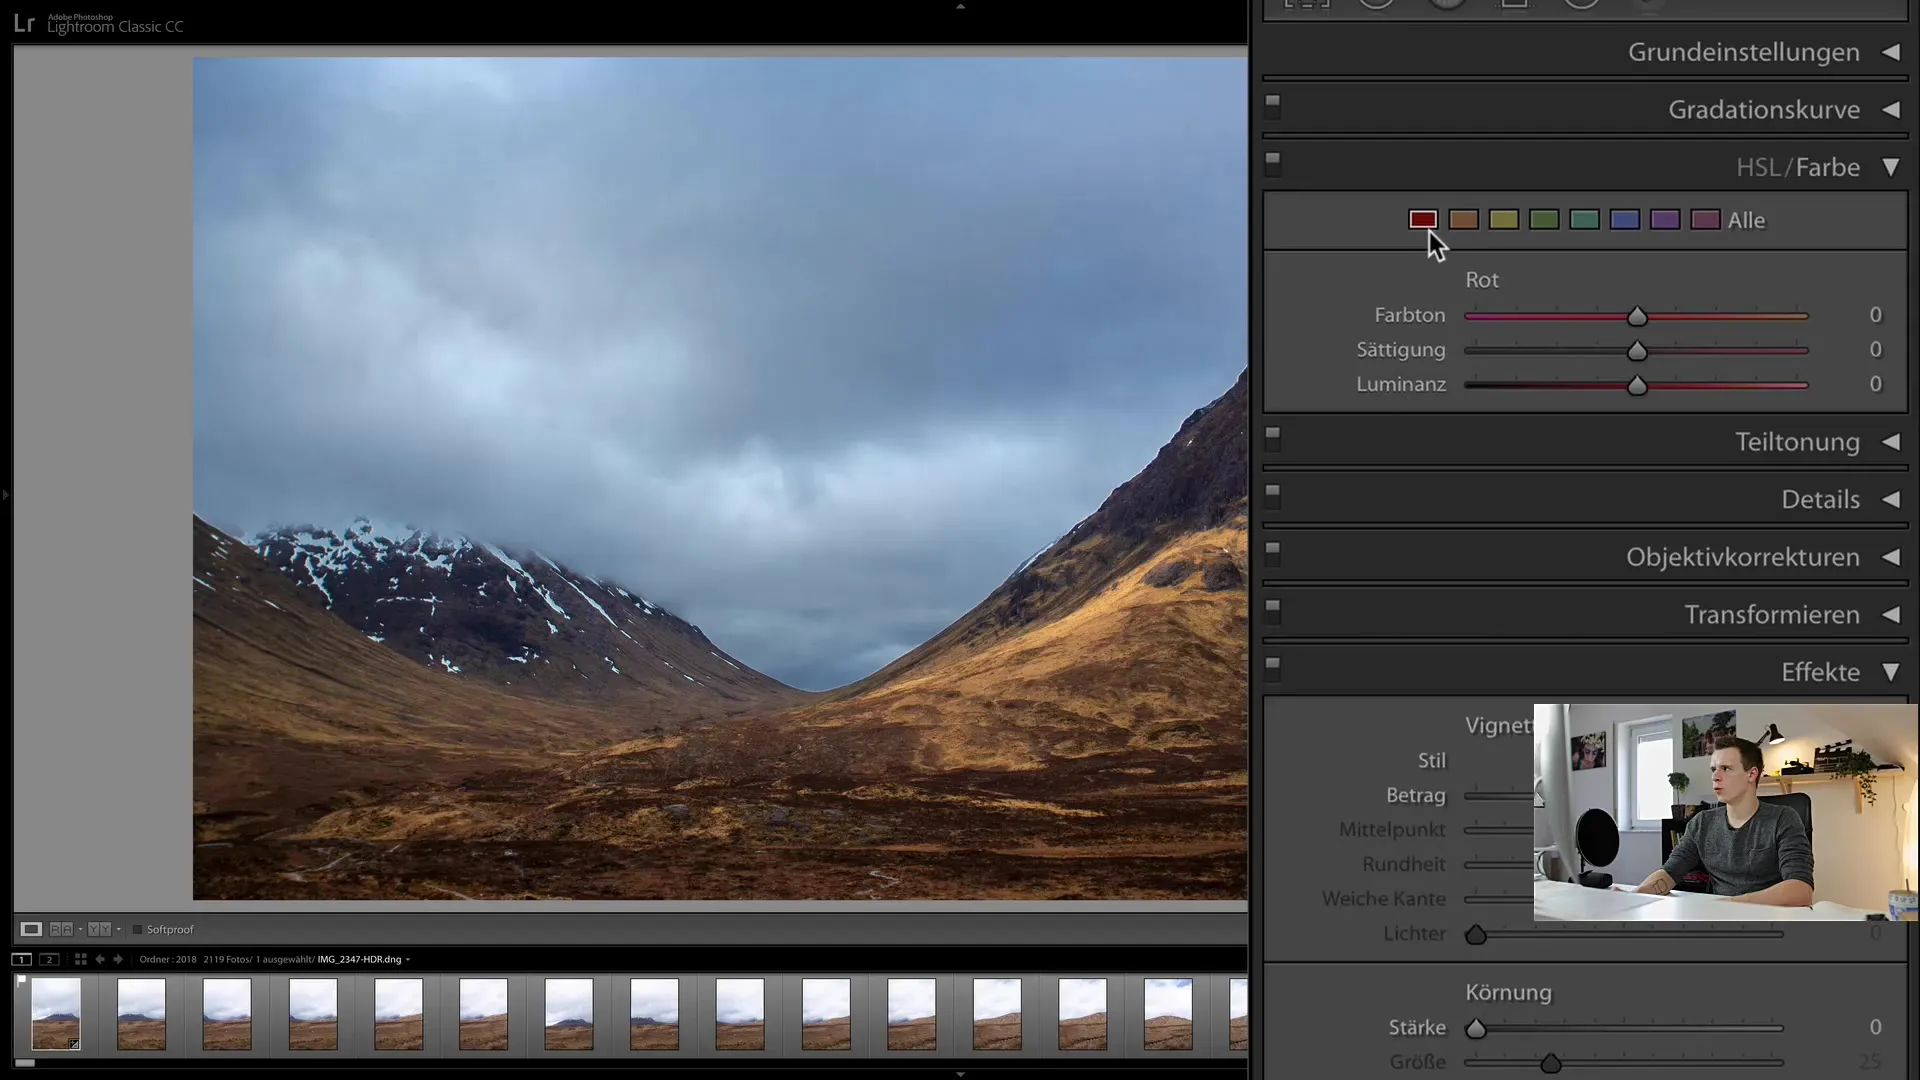
Switch to Lightroom and open the HSL module. Here you can adjust the different color channels independently. Start with the hue slider. By sliding the slider to the right or left, you change the color in the image.

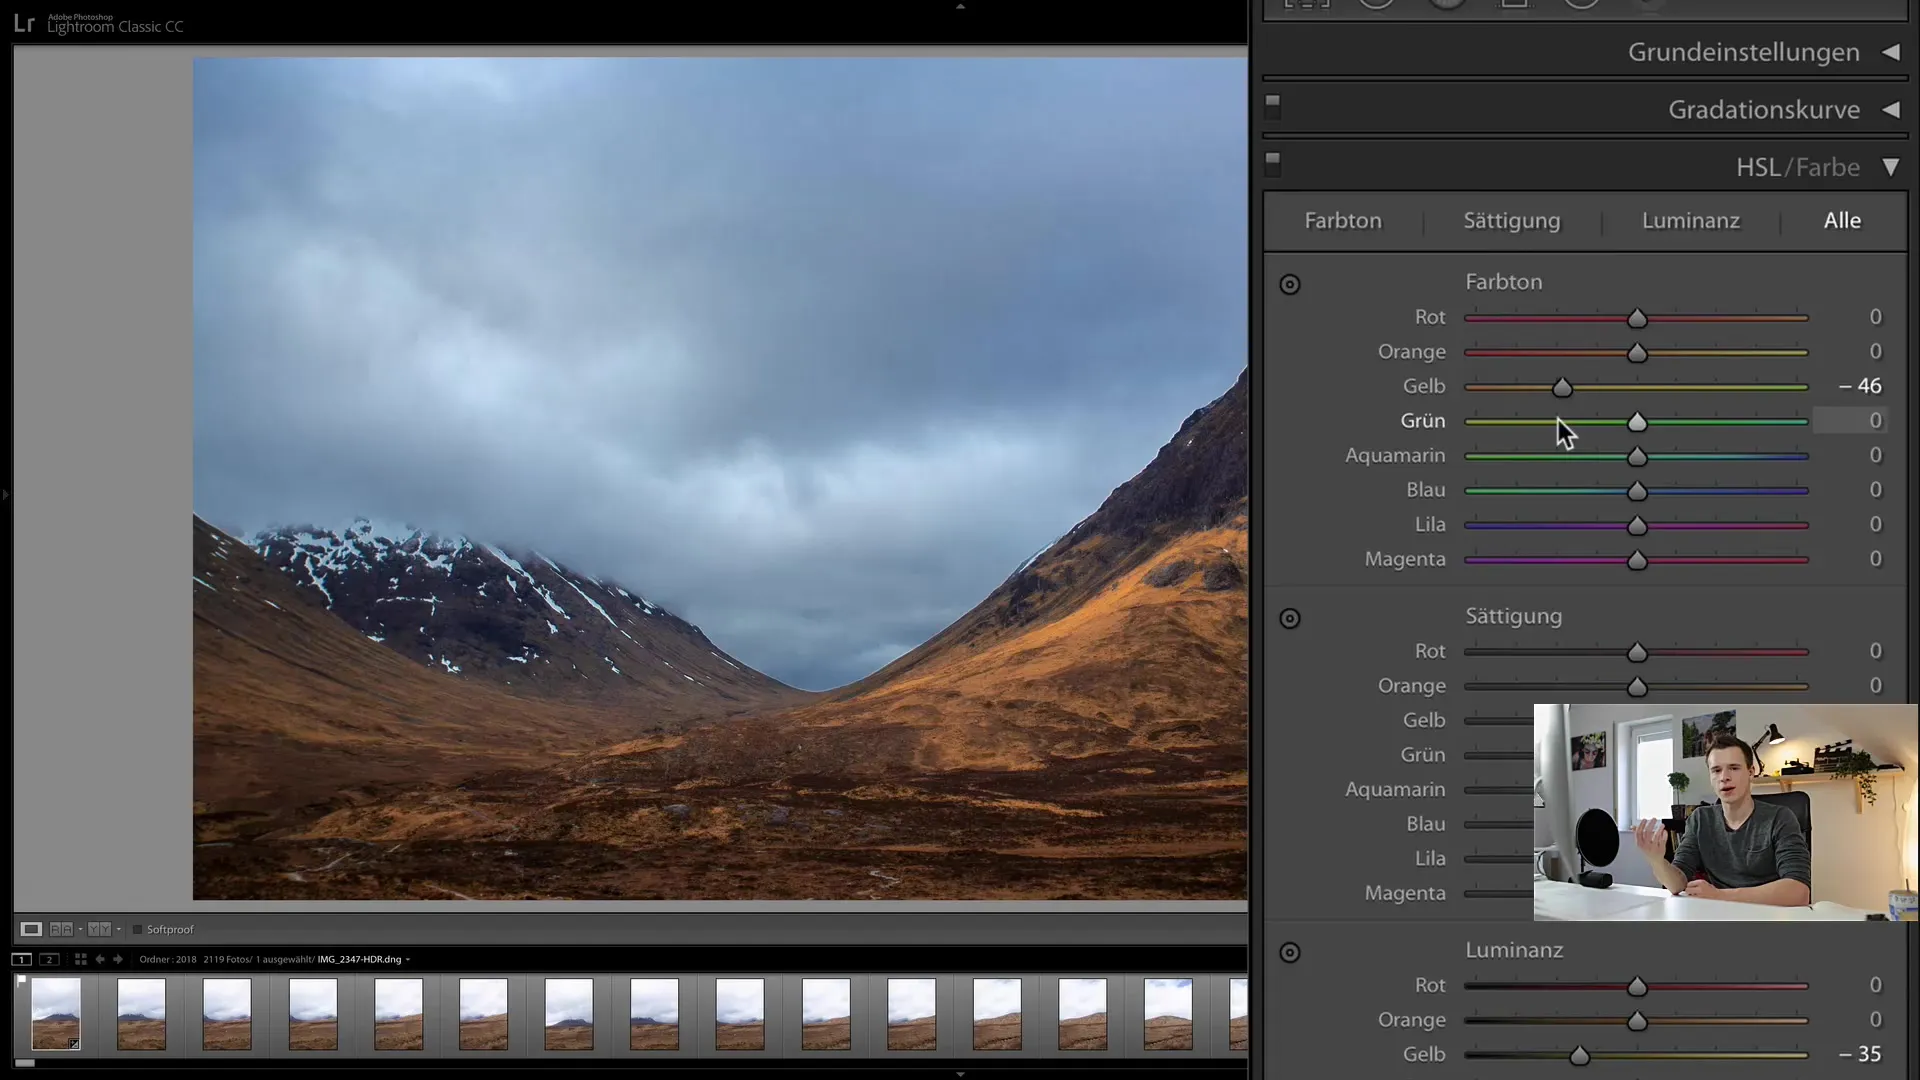
You can see how the colors in the image change as you adjust the different sliders for yellow, green, blue, and other colors. For example, if you move the yellow slider to the right, the yellow in the image will become slightly greener.
Adjusting Saturation
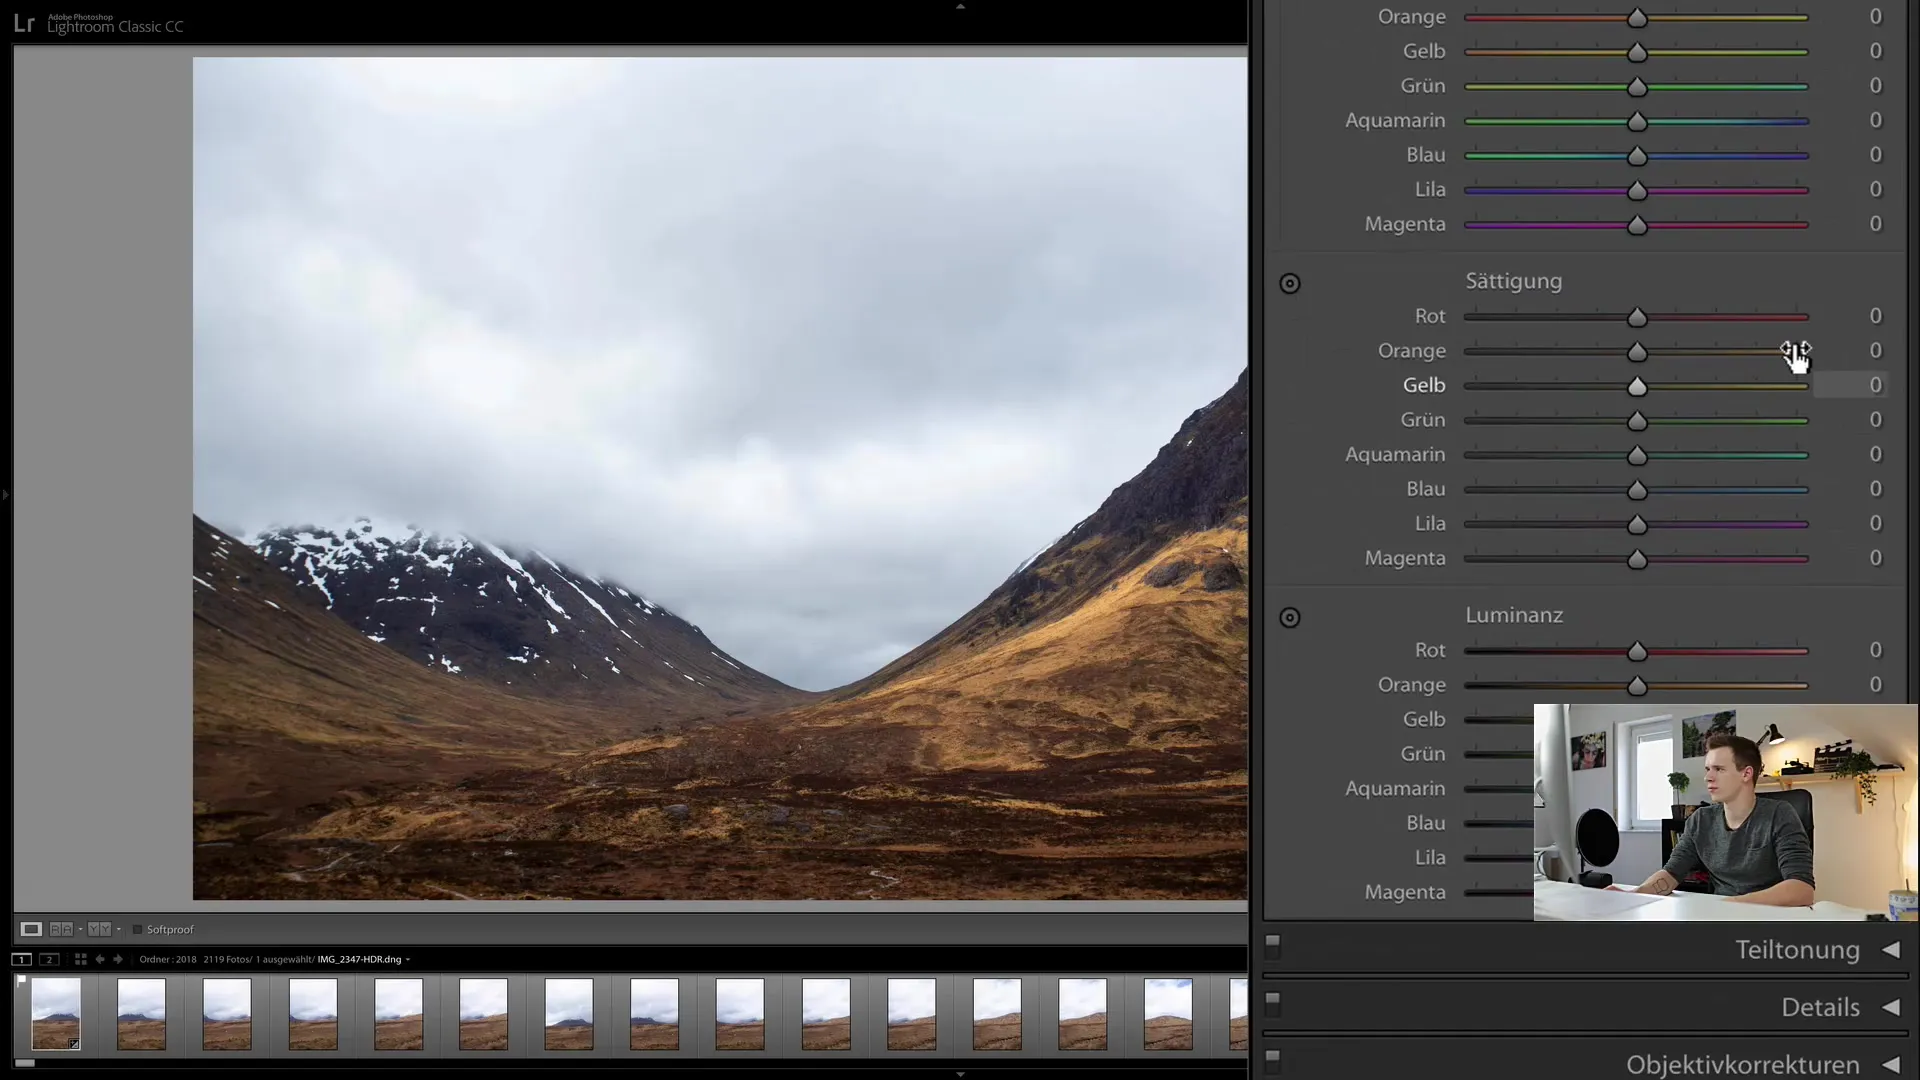
The next step is to modify the saturation of the colors. By moving the saturation slider to the right, you add more color. If you move the slider to the left, the colors become less intense. You can use this technique to highlight or reduce certain color ranges.
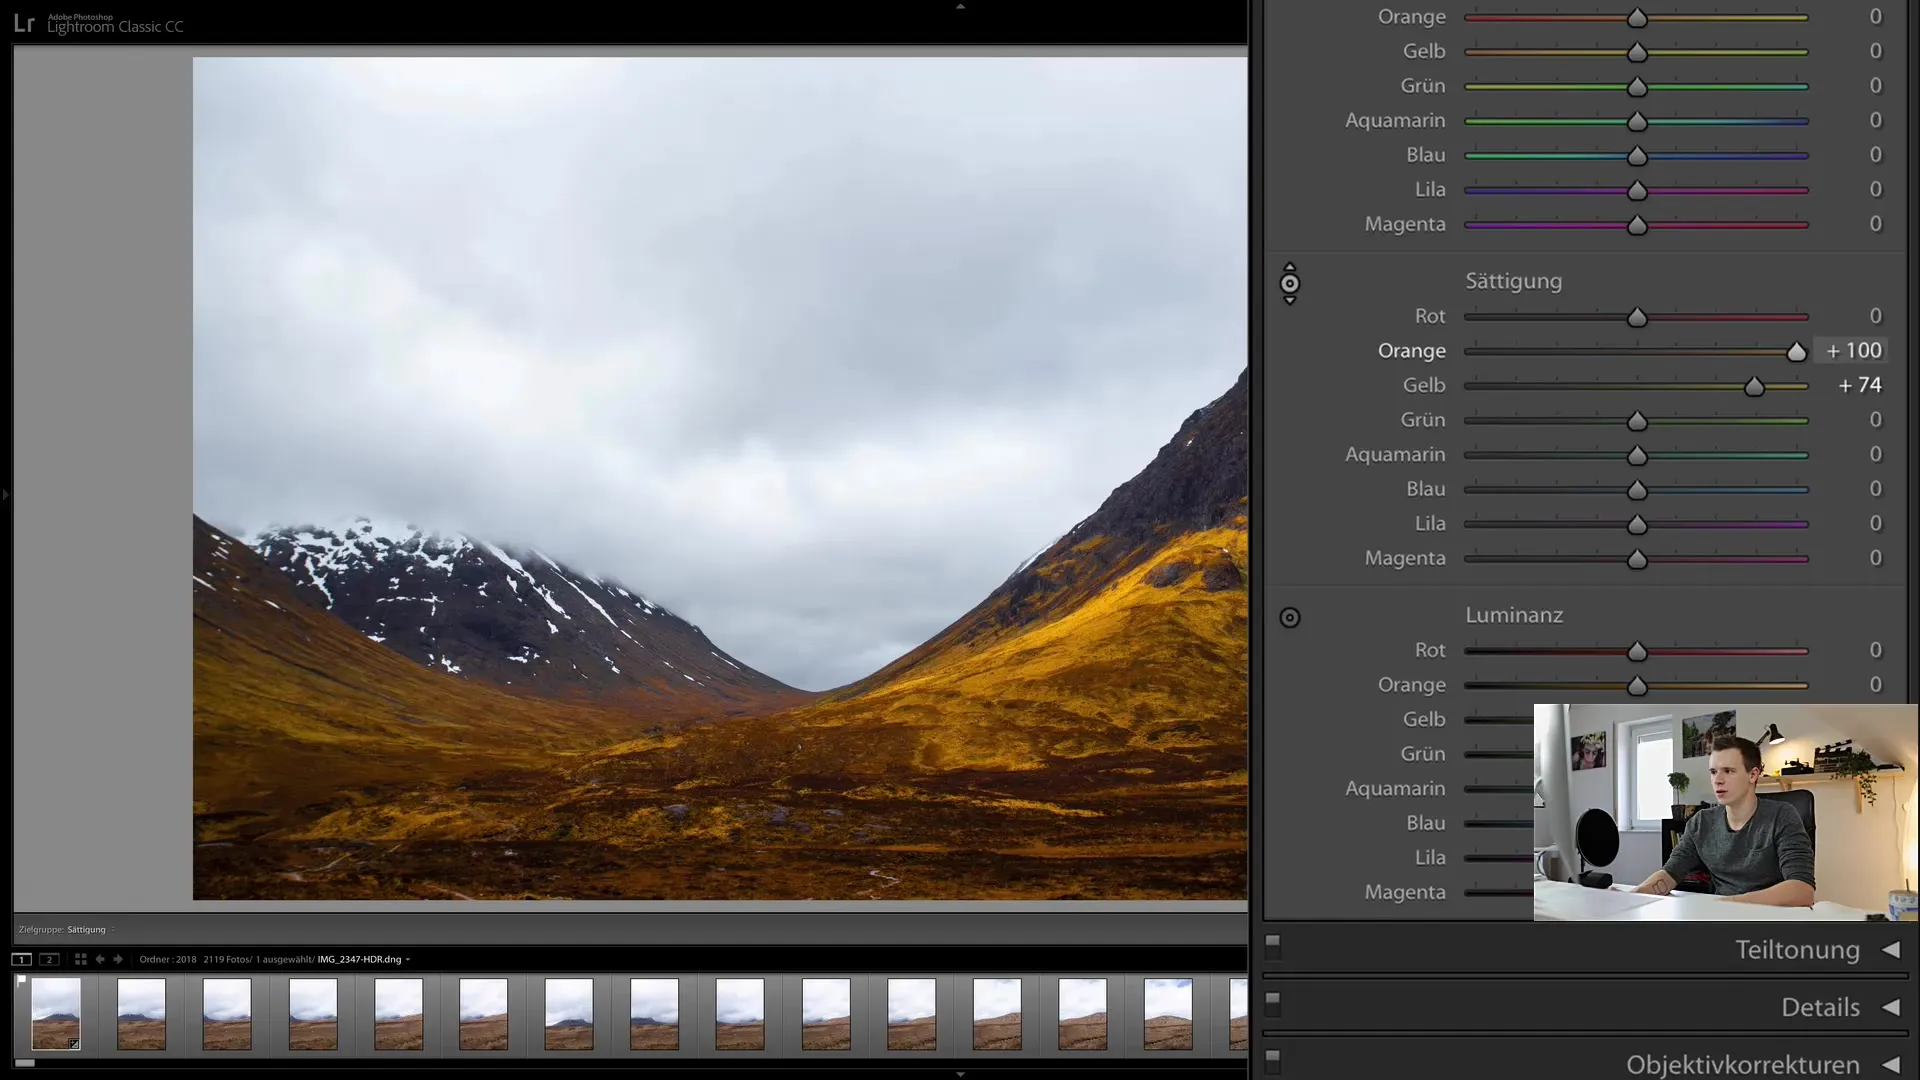
For example, if you want to enhance the orange in your image, move the corresponding slider to the right. You will quickly see the colors become more vibrant.
Adjusting Luminance
Finally, you can adjust the luminance of each color. When you lower the luminance for, say, yellow tones, that hue becomes darker. Controlling the brightness and darkness of a color can often enhance the dramatic effect in your image.
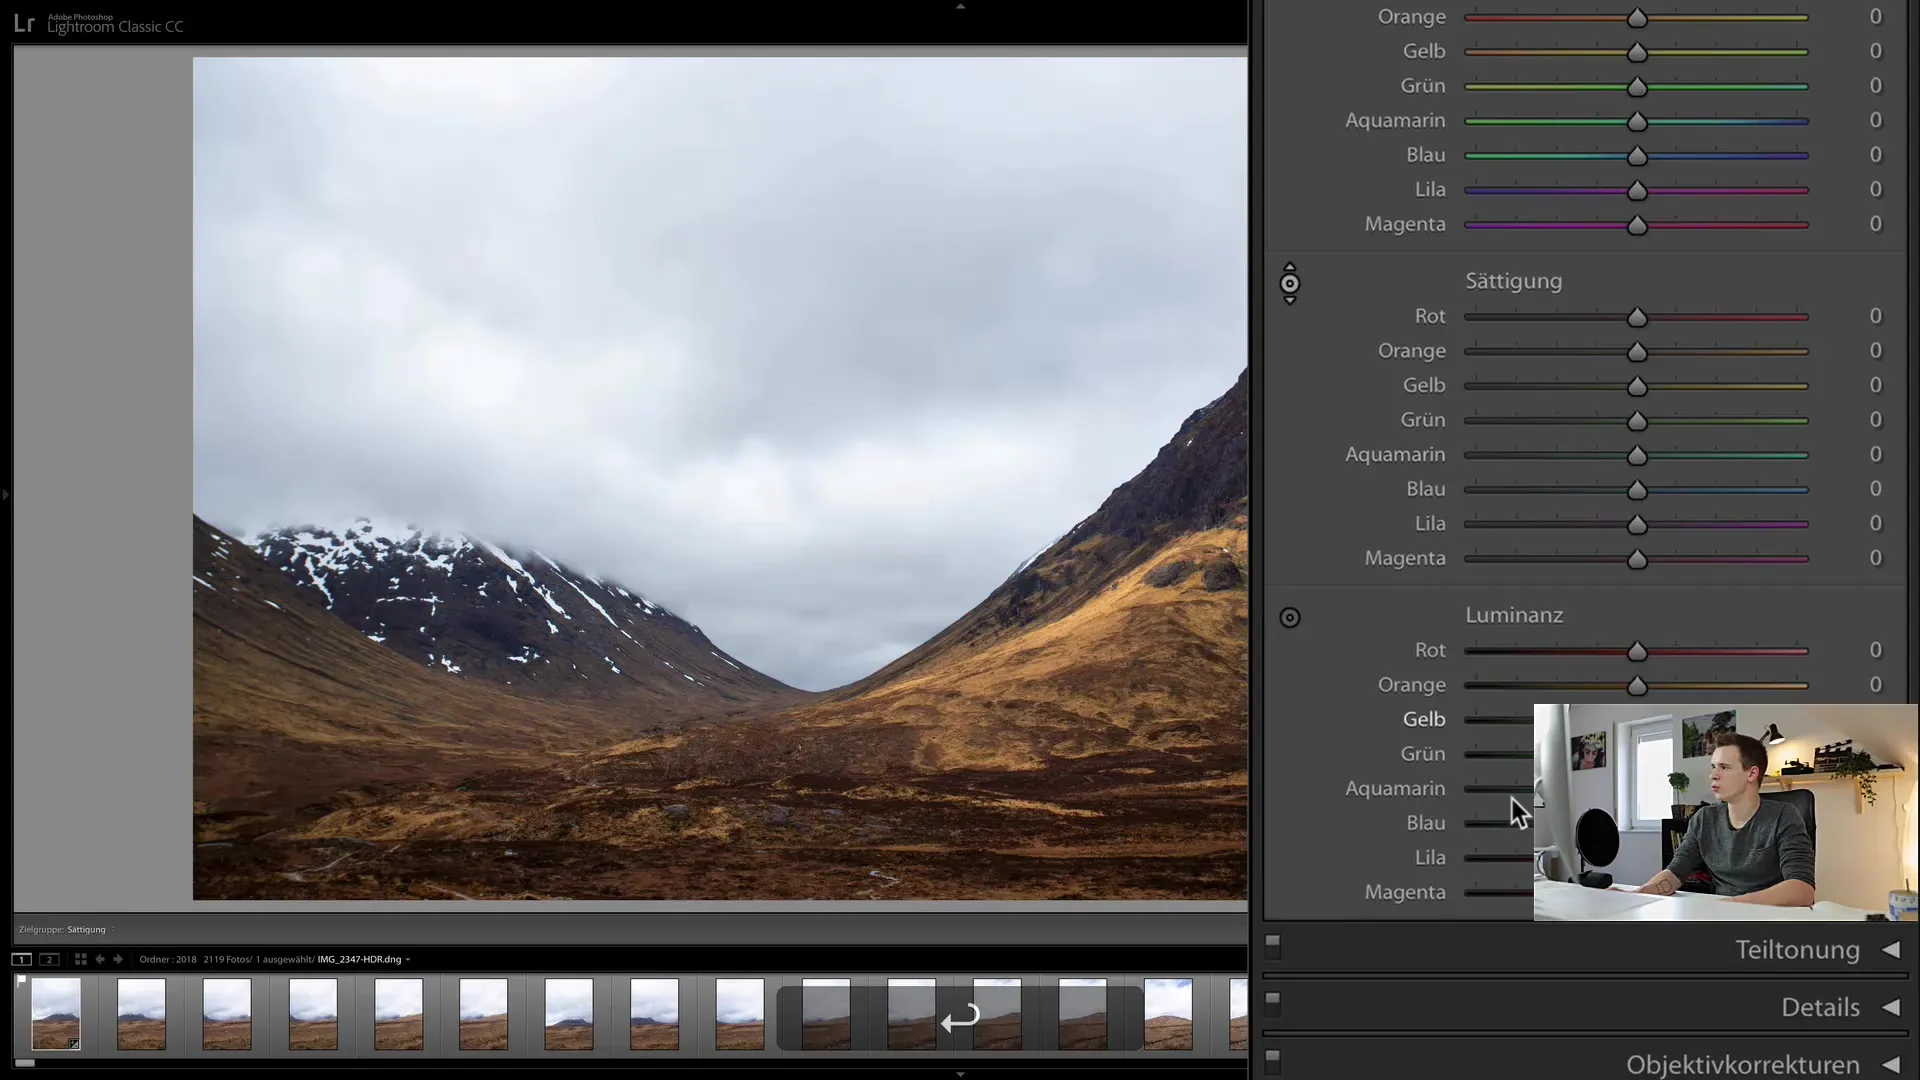
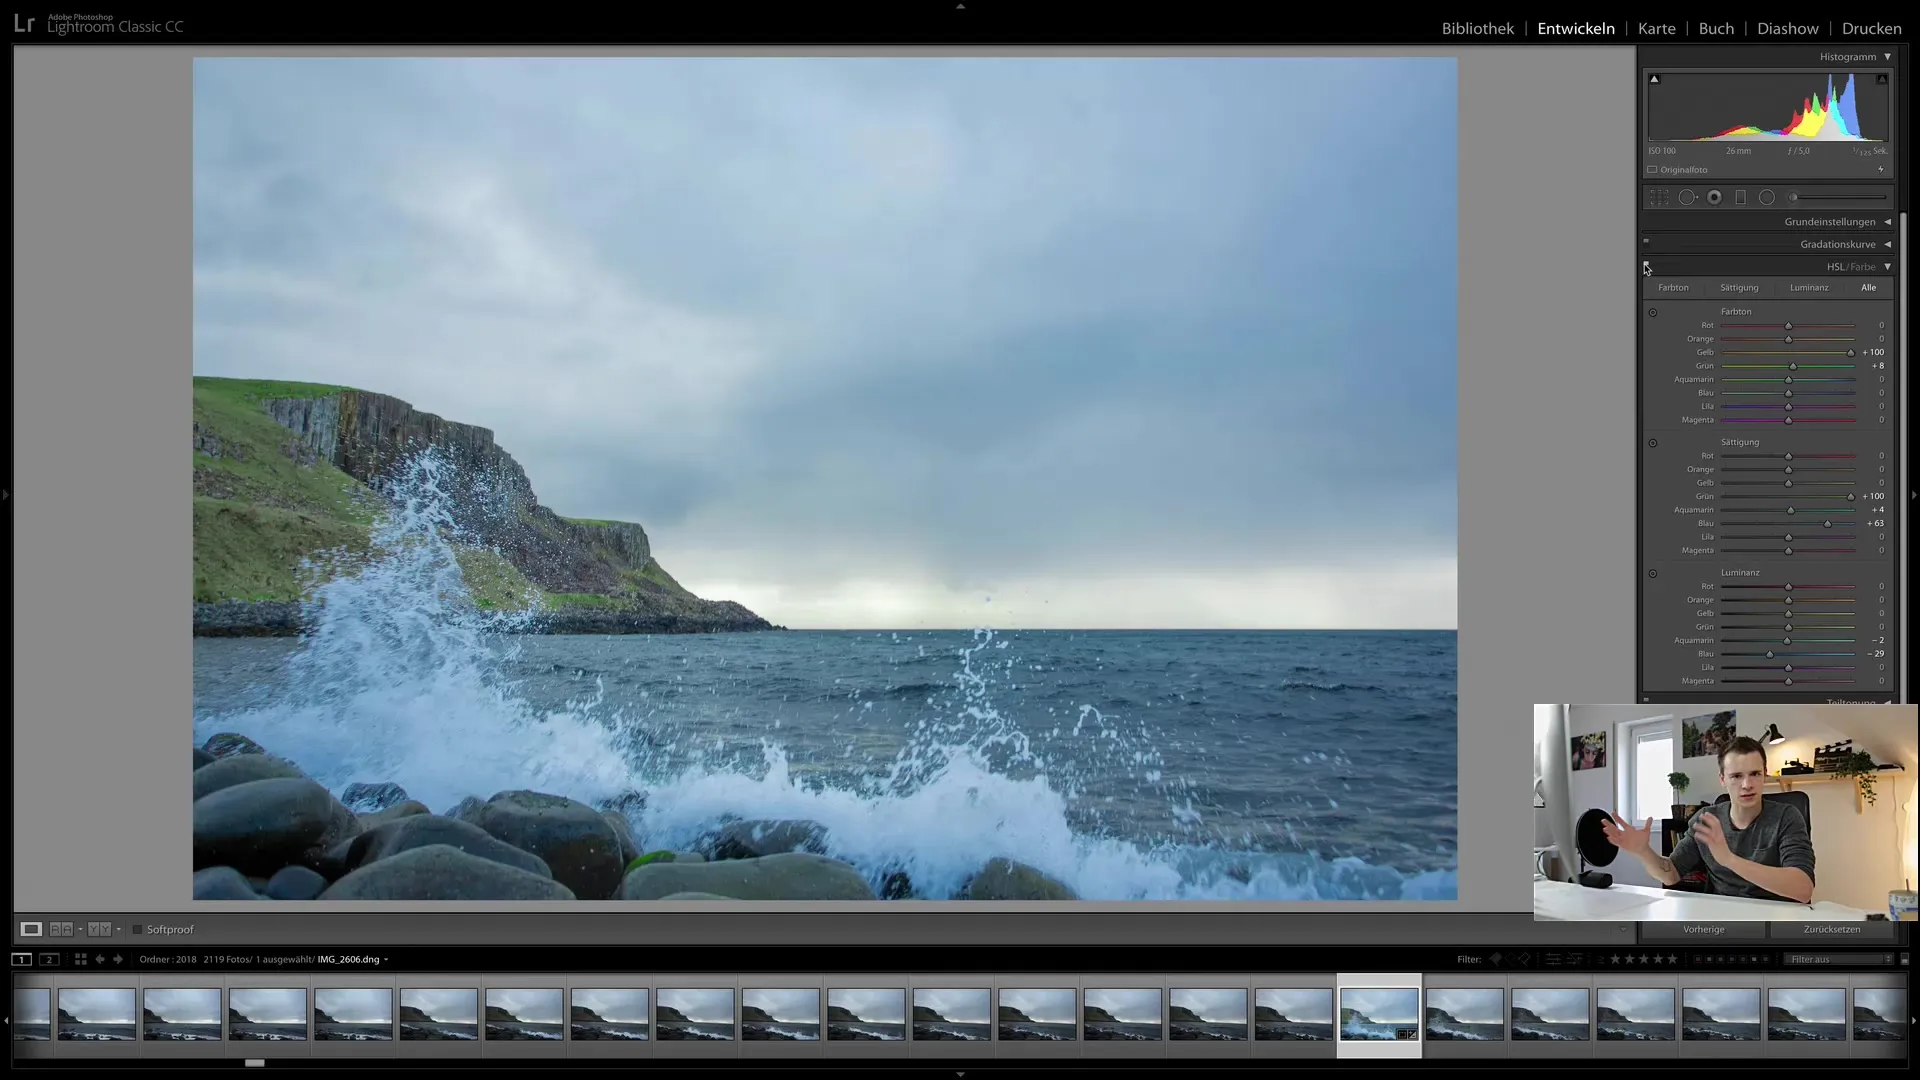
By adjusting the luminance, you can also influence the impact of other colors in the image. For example, if you significantly darken the blue tones, the sky in your image becomes more dramatic.

Selecting Color Channels Specifically
Another useful tool within the HSL module is the ability to hover over a color channel and select that color directly. The selection tool allows you to specifically determine which color tones you want to adjust, without affecting other areas of the image.

As you hover with the selection tool over different areas in your image, the respective color channels are highlighted in gray. This allows you to quickly see which areas of the image would be affected by an adjustment.
Combined color and brightness adjustment
The interaction between HSL and the other editing tools in Lightroom is particularly effective. Experiment with the hue, saturation, and luminance sliders to achieve the desired creative effects.
For example, if you have a sky in an image that doesn't show enough blue, you can increase the saturation for the blue hue and adjust the brightness at the same time to make the sky more vibrant.
Practical application and experimentation
The more you experiment with the HSL sliders, the better you will be able to control the colors in your images and develop your very own style. Play with the different settings and observe how your image changes. Use the opportunities provided by the HSL module to optimize your images.
Summary
The HSL module is a powerful tool in Lightroom that gives you control over each individual color channel. By adjusting the hue, saturation, and luminance sliders, you can achieve dramatic effects and give your images a personal touch. Experiment with different settings to find the perfect color palette for your photos.
Frequently Asked Questions
What is the difference between hue, saturation, and luminance?Hue defines the color itself, saturation the intensity, and luminance the brightness or darkness of the color.
How can I adjust the brightness of a hue?You can adjust the brightness of a hue by moving the luminance slider up for more brightness or down for more darkness.
Can I change only a specific hue in the image?Yes, you can selectively change a hue by using the selection tool in the HSL module and hovering over the respective hue.
Is there an easy way to start with HSL?Simply start by adjusting a hue slider and observe how the colors in your image change. Experiment step by step.
How important is the HSL module for color editing?The HSL module is crucial for precise color editing in Lightroom, allowing you to perfectly control color nuances.


