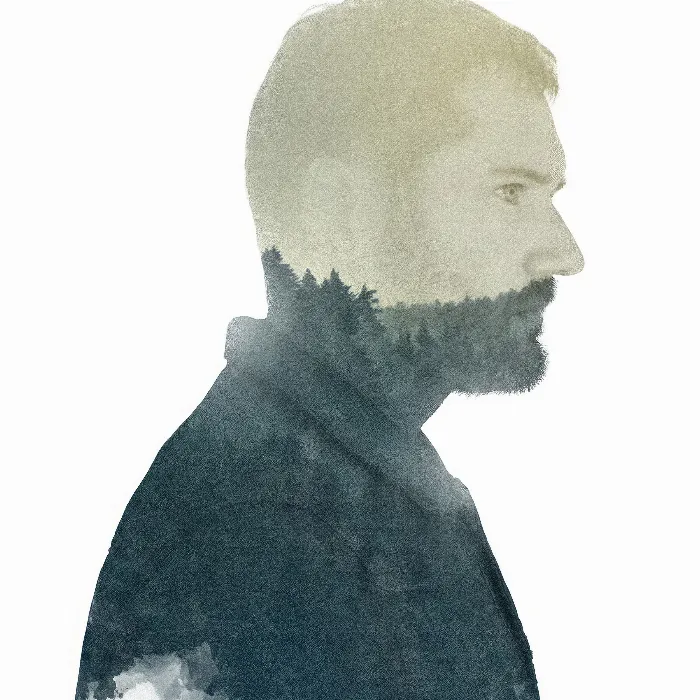
You have a portrait and want to develop it into an outstanding creative character portrait using Photoshop? Image editing doesn't start in Photoshop itself, but rather with a good source file. The first step in this process is developing the raw file, which allows you to lay the foundation for your creative work. In this guide, I will show you how to get a lot out of a JPEG file, such as the example image "Gabor JPG".
Main insights
- Converting JPEG to an editable format is possible.
- Fundamentally neutral images are excellent as source material.
- Simplistic black-and-white representations can provide clarity to the image.
- Important controls like exposure, highlights, shadows, and sharpness are crucial for image editing.
Step-by-Step Guide
First, open Photoshop and load the image "Gabor JPG" into the program. You can simply drag the image into Photoshop. If you are unsure whether you have loaded the image correctly, check if it is displayed in the layer.
Since the image is in JPEG format, you may be surprised at how well you can work with this file. The image was photographed under suboptimal conditions, as the camera settings were not optimized for high-quality captures. However, it has a neutral exposure and is displayed without strong light or shadow influences, which makes your work easier.
Next, create a duplicate layer to protect the original image. Right-click on the original layer, select "Duplicate Layer," and name it, for example, "RAW". This allows you to always revert to the unaltered original file while you edit the duplicates.
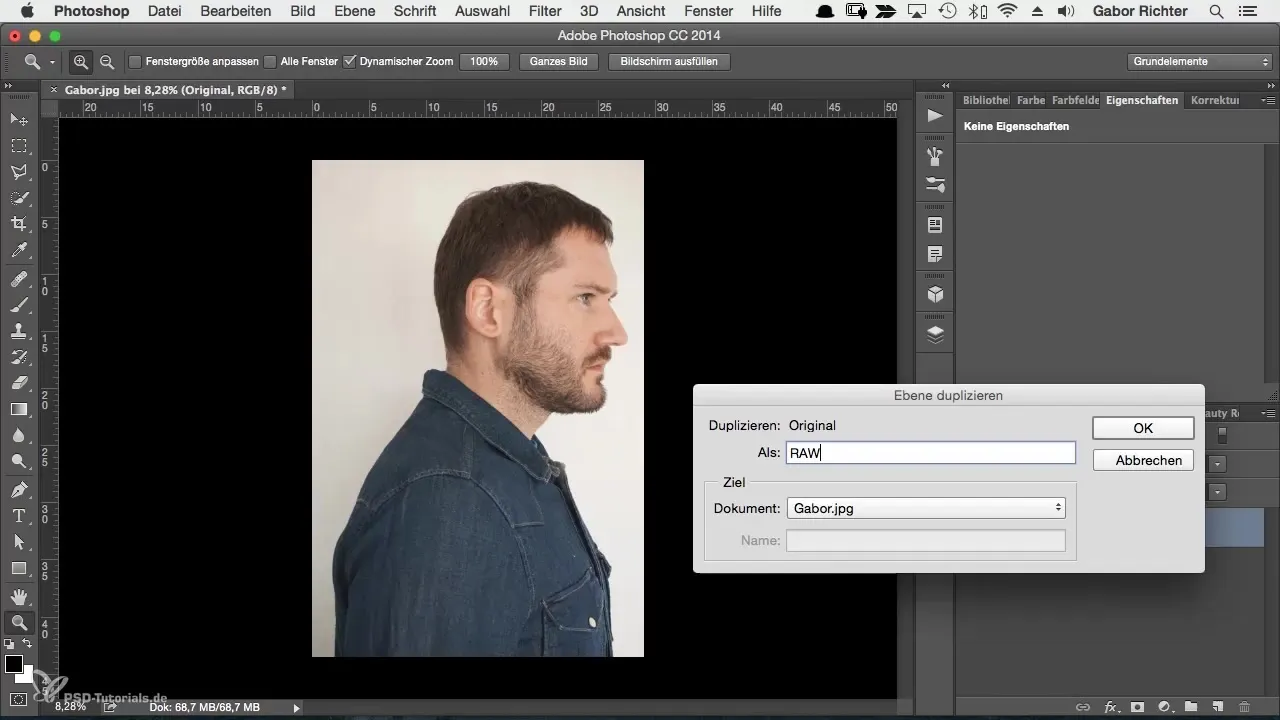
Now convert the duplicated layer into a smart object to utilize editing flexibility. Right-click on the newly created layer and select "Convert to Smart Object". Once you've done this, you can access the presets via Filters and the Camera RAW Filter.
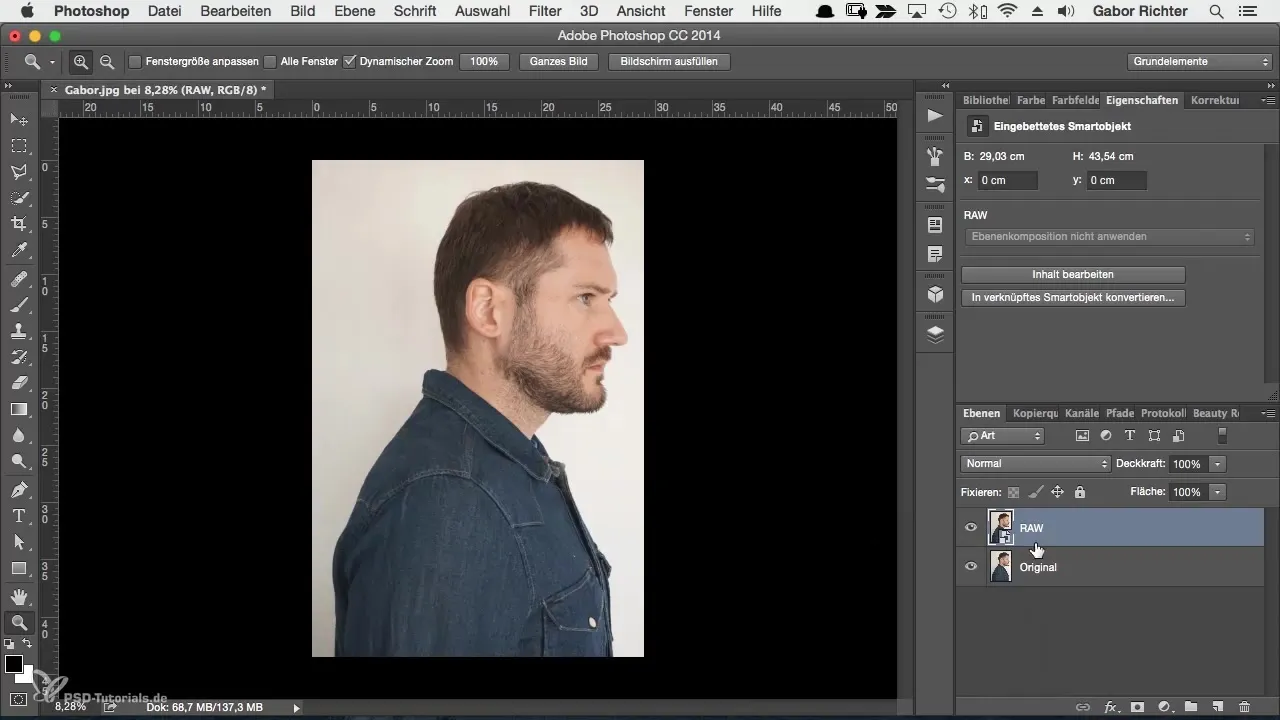
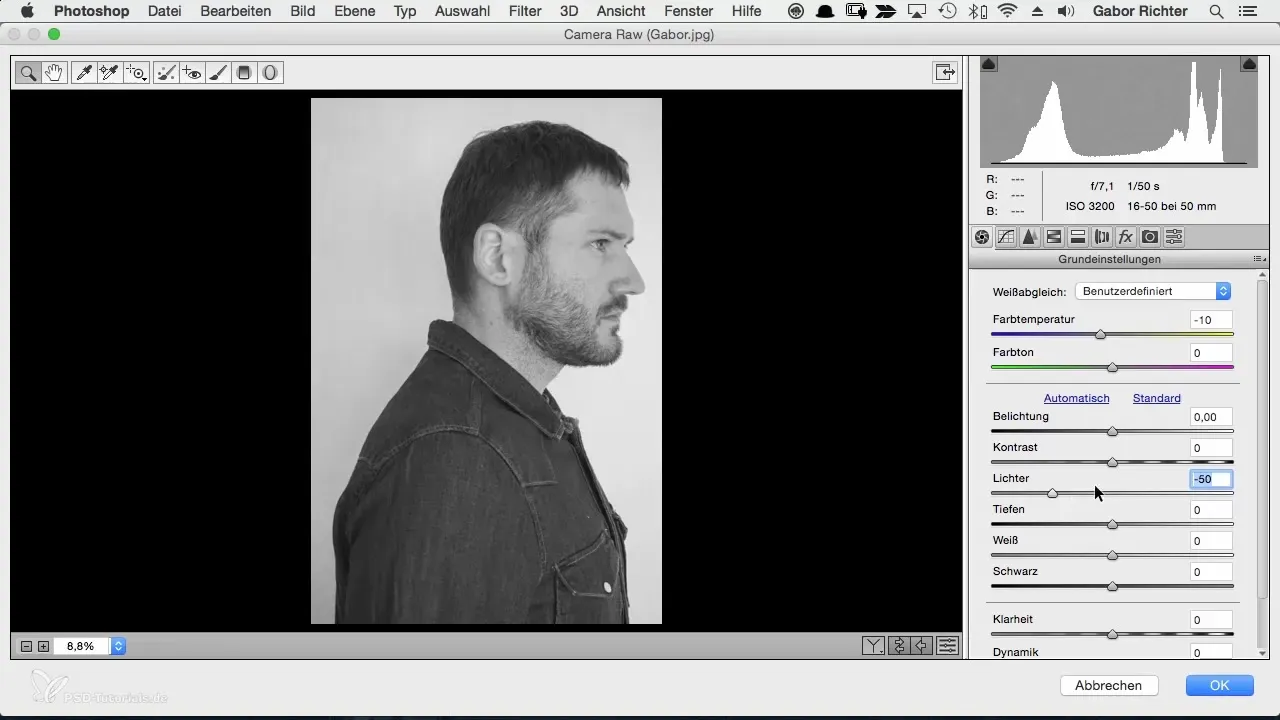
Next, focus on converting the image to black and white. The reason for this is that a black-and-white representation gives the image a much calmer and more harmonious composition. To do this, reduce the saturation to zero. This removes the colors and allows you to approach further design more clearly.
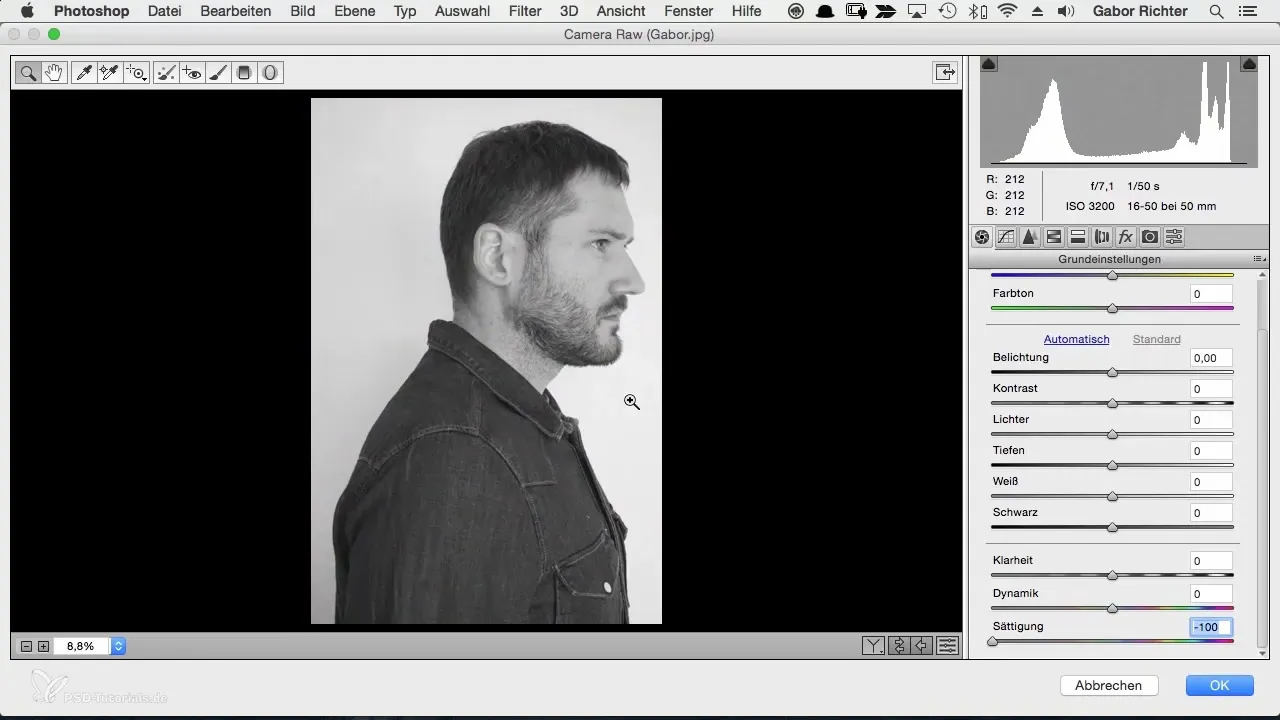
Check the color temperature – the background should have a neutral white tone. This is especially important, even if you plan to remove the background later. Make sure there is no color cast and adjust the color temperature until the background appears as neutral as possible.
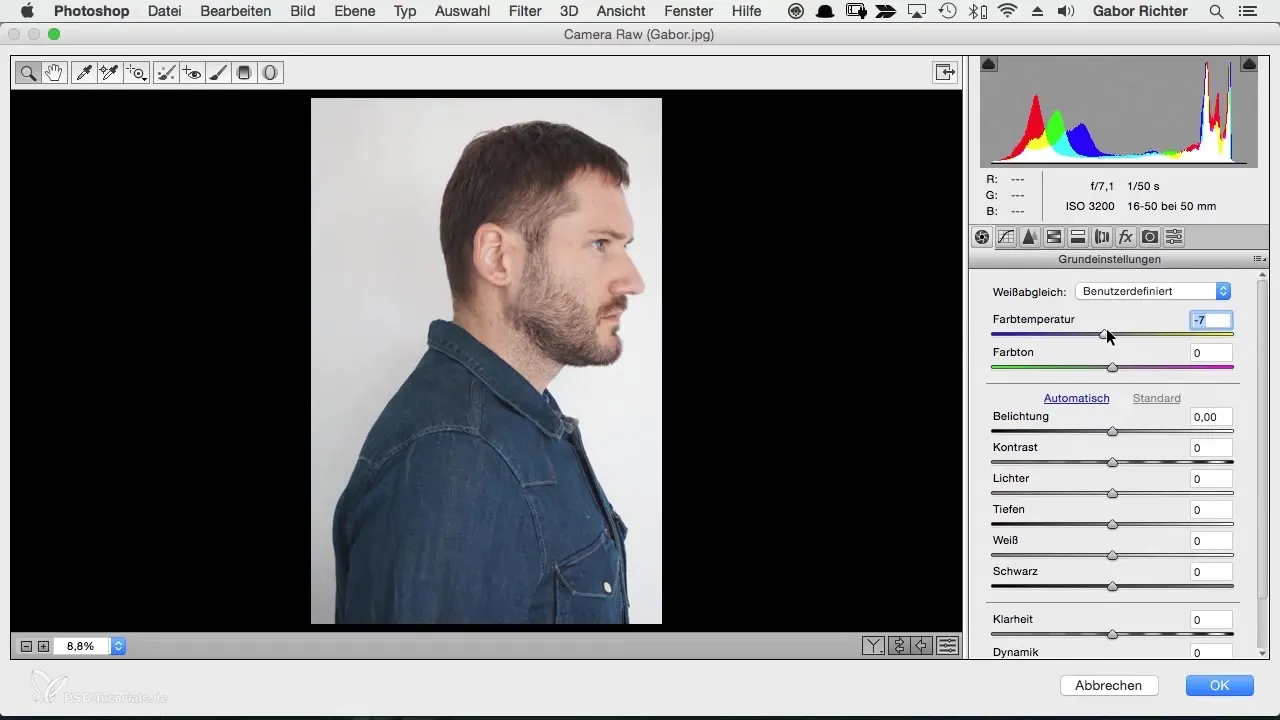
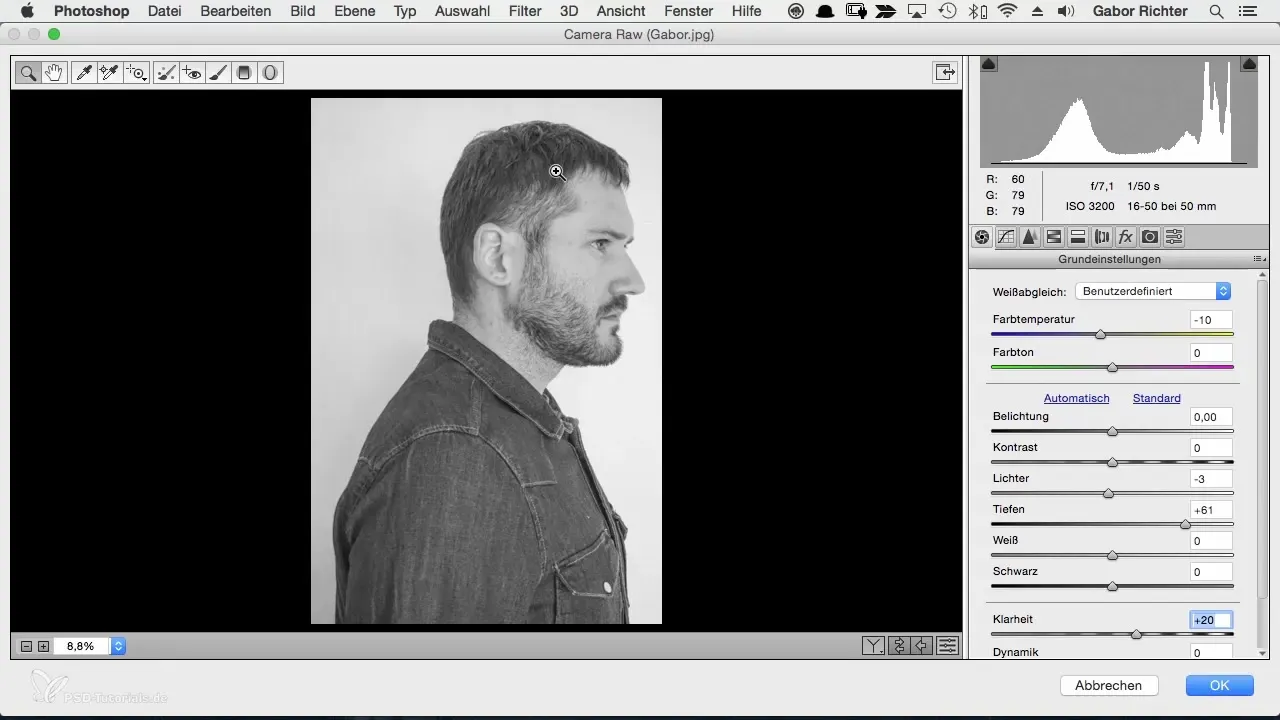
Next, refine the exposure and shadows to enhance details in the image. Move the highlights slider to gain more detail in the brighter areas, and the shadows slider to make the image appear more structured overall - this will help reveal more nuances, such as stubble or strands of hair.
Use the clarity slider to enhance contrasts in the image. A value of +20 gives the image more contour and structure. However, be careful not to have a picture that is too high in contrast, so play with the values to find the right balance. Reduce the blacks to about +40 to keep the details as neutral as possible and obtain a harmonious image.
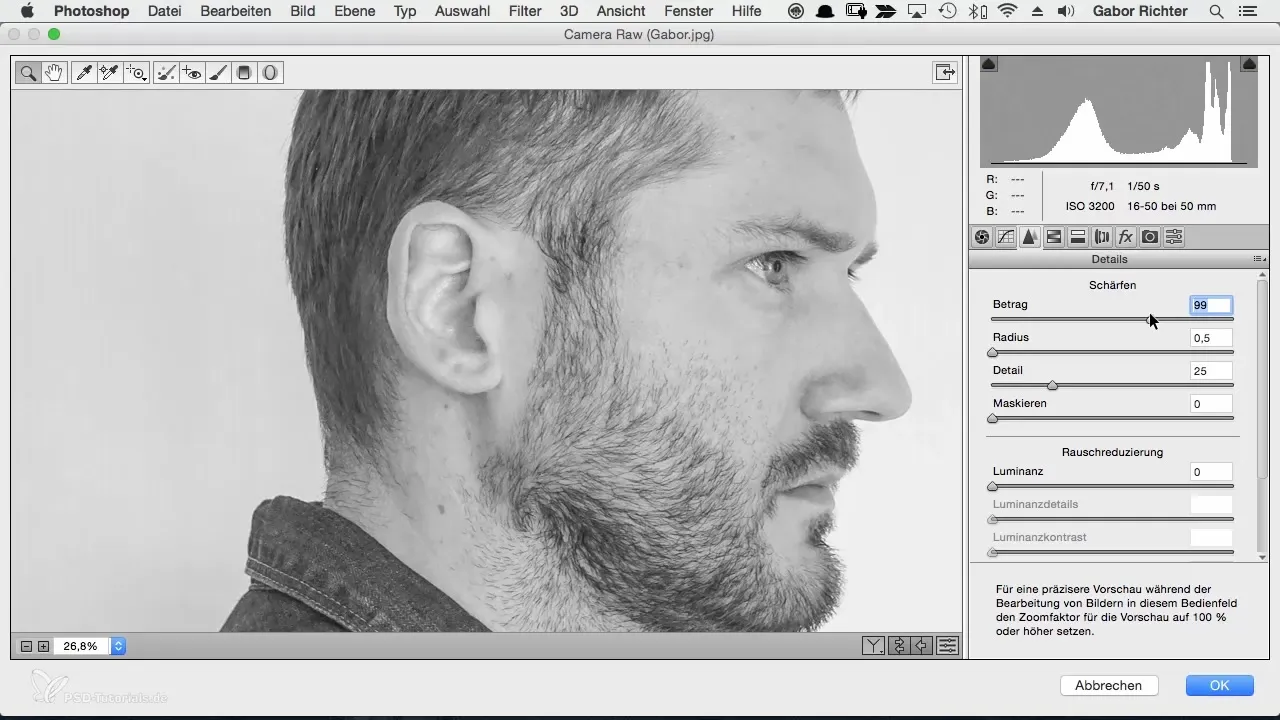
Now comes the step for sharpening. Go to the third tab in the Camera RAW Filter and set the radius to 0.5. At this point, you should be careful with the amount and start at around 70. Test sharpness both individually and in the overall picture to ensure that it looks natural and not too pixelated.
Finally, you have the opportunity to view your image in the overall view and only need to click on the hand. This view makes it easier to perform the final editing. If you are not satisfied with the sharpness or other settings, you can always reopen the Camera RAW Filter by double-clicking on the Smart Object. This way, you can make changes without having to re-edit the entire image.
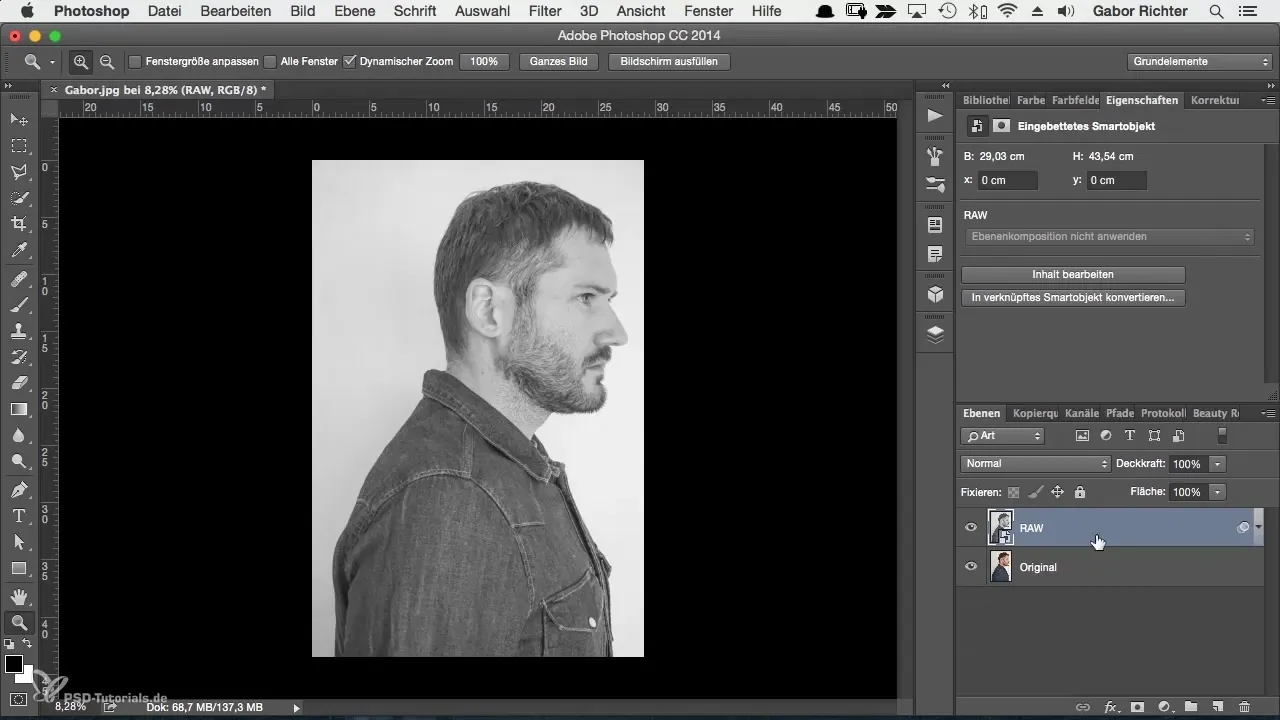
With these steps, you have optimized the image sufficiently to proceed with further creative processes. If you have an image that is relatively flat and less contrasty, you are ready to begin the next steps in your editing.
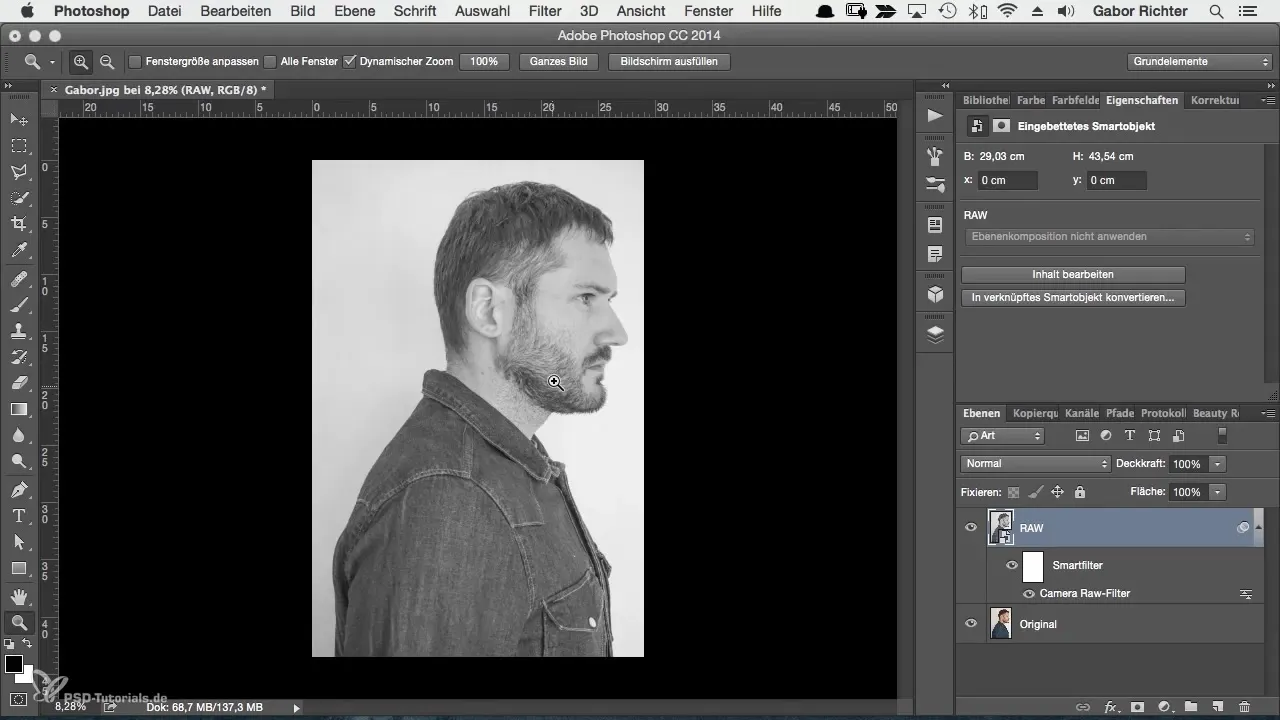
Summary
The first image development is the crucial step to give your portrait the desired look. By creating a duplicate layer, adjusting to black and white, and the targeted use of controls for exposure, shadows, clarity, and sharpness, you set the optimal conditions for creative editing.
Frequently Asked Questions
How can I convert a JPEG image into an editable file?You can duplicate the JPEG image in Photoshop and convert it to a smart object to make it editable.
Why should I convert the image to black and white?A black-and-white representation helps to unify the image and avoid visual clutter caused by colors.
What clarity and sharpness value is optimal?Start with a clarity value of +20 and a sharpness value of around 70, but adjust these values to your image.
How can I change my settings at any time?Use the double-click on the smart object to return to the Camera RAW Filter at any time and make adjustments.
