Welcome to this comprehensive tutorial on the ability to transform and straighten photos in Lightroom Classic CC. You will learn how to improve the symmetry of your images using the Transform dialog. Often, photos are not perfectly aligned, whether due to an inaccurate camera angle or on-site conditions. However, with the right tools in Lightroom, you can easily correct these issues and enhance the expressiveness of your images.
Key Insights
- The Transform dialog in Lightroom allows you to precisely align images and correct perspective distortions.
- Using guides makes it easier to align the image accurately.
- You can further adjust the perspective to achieve a more natural result while ensuring the image looks realistic.
Step-by-Step Guide
Step 1: Import Your Image
Start by importing the image you want to straighten and transform in Lightroom. Choose an image that is not perfectly symmetrical and may have perspective distortion.

Step 2: Open the Transform Dialog
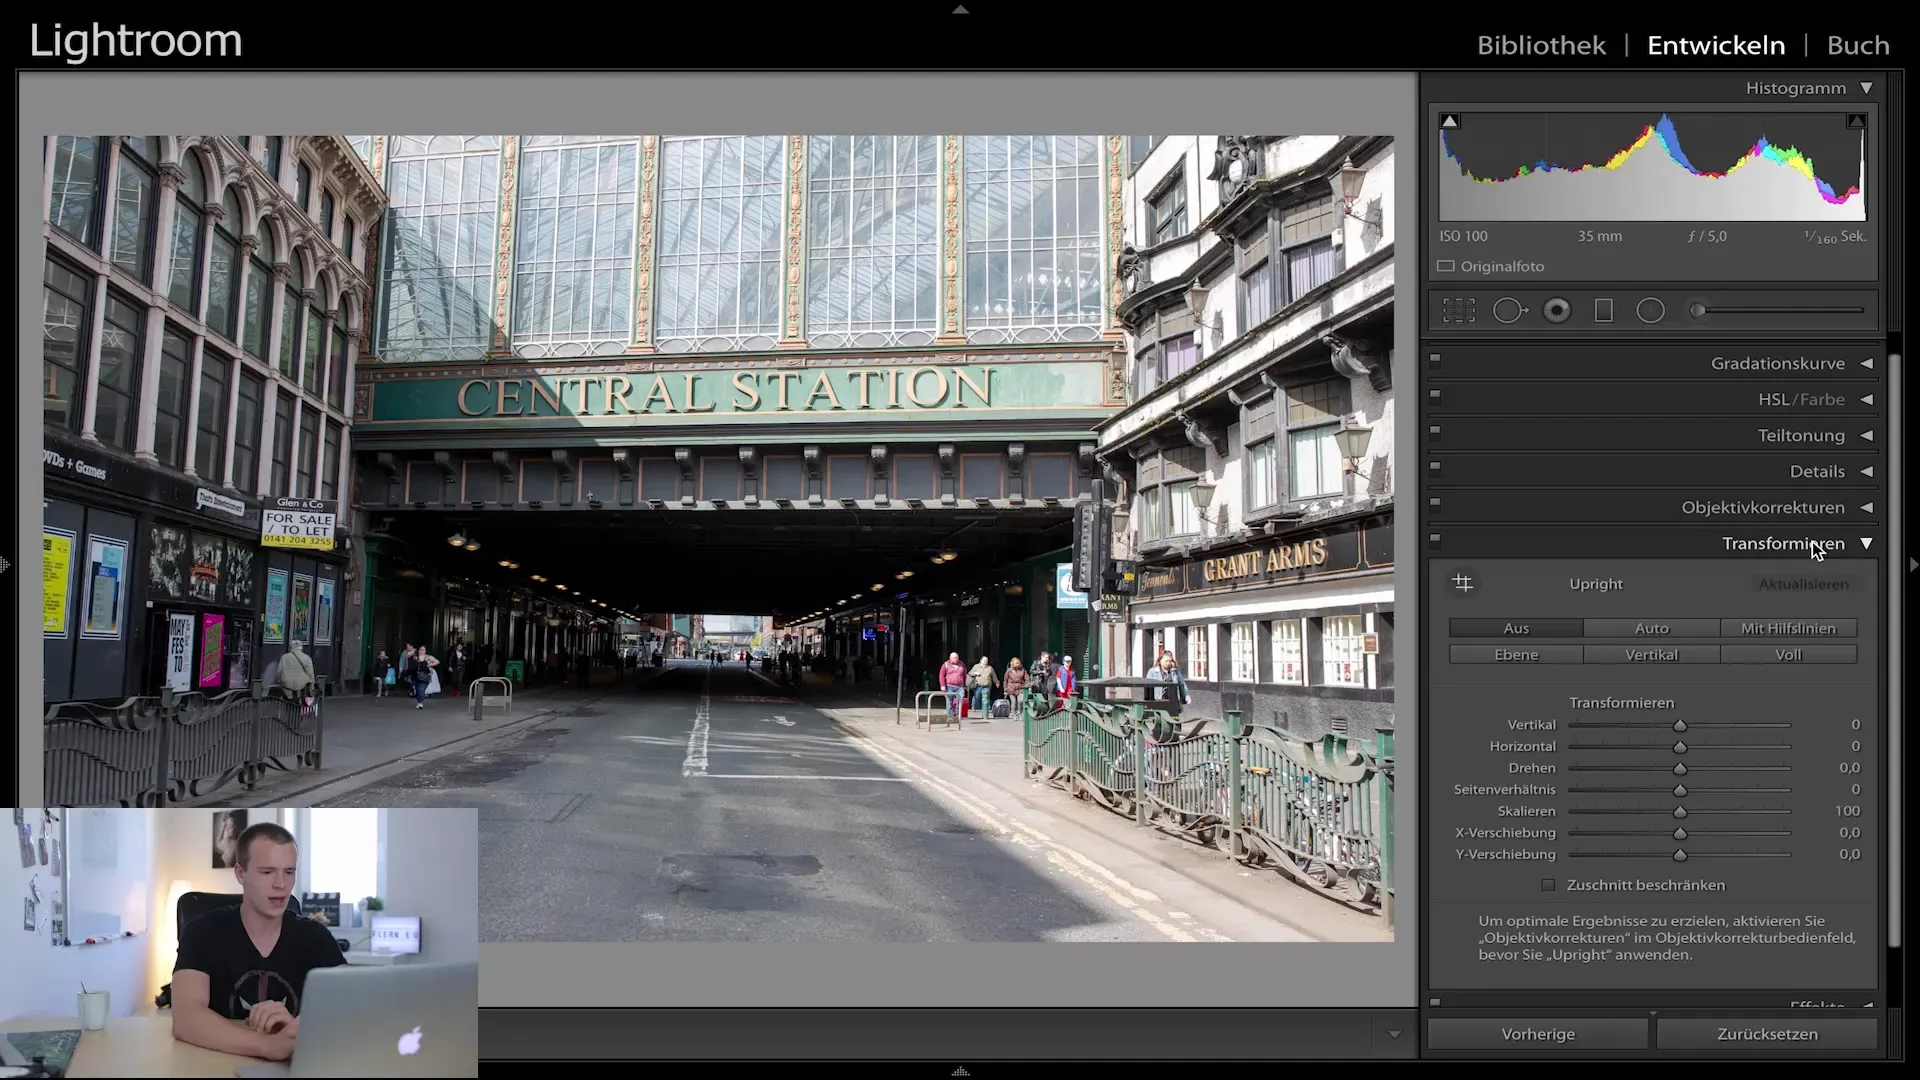
Once your image is selected, you will find the Transform dialog in the Develop module of Lightroom. This dialog offers you various tools to straighten and adjust your image to the desired symmetry.
Step 3: Choose the Guides Option
In the Transform dialog, instead of automatic alignment, you can choose the Guides option. This function allows you to identify and apply lines in the image along with the loupe to accurately align the image.
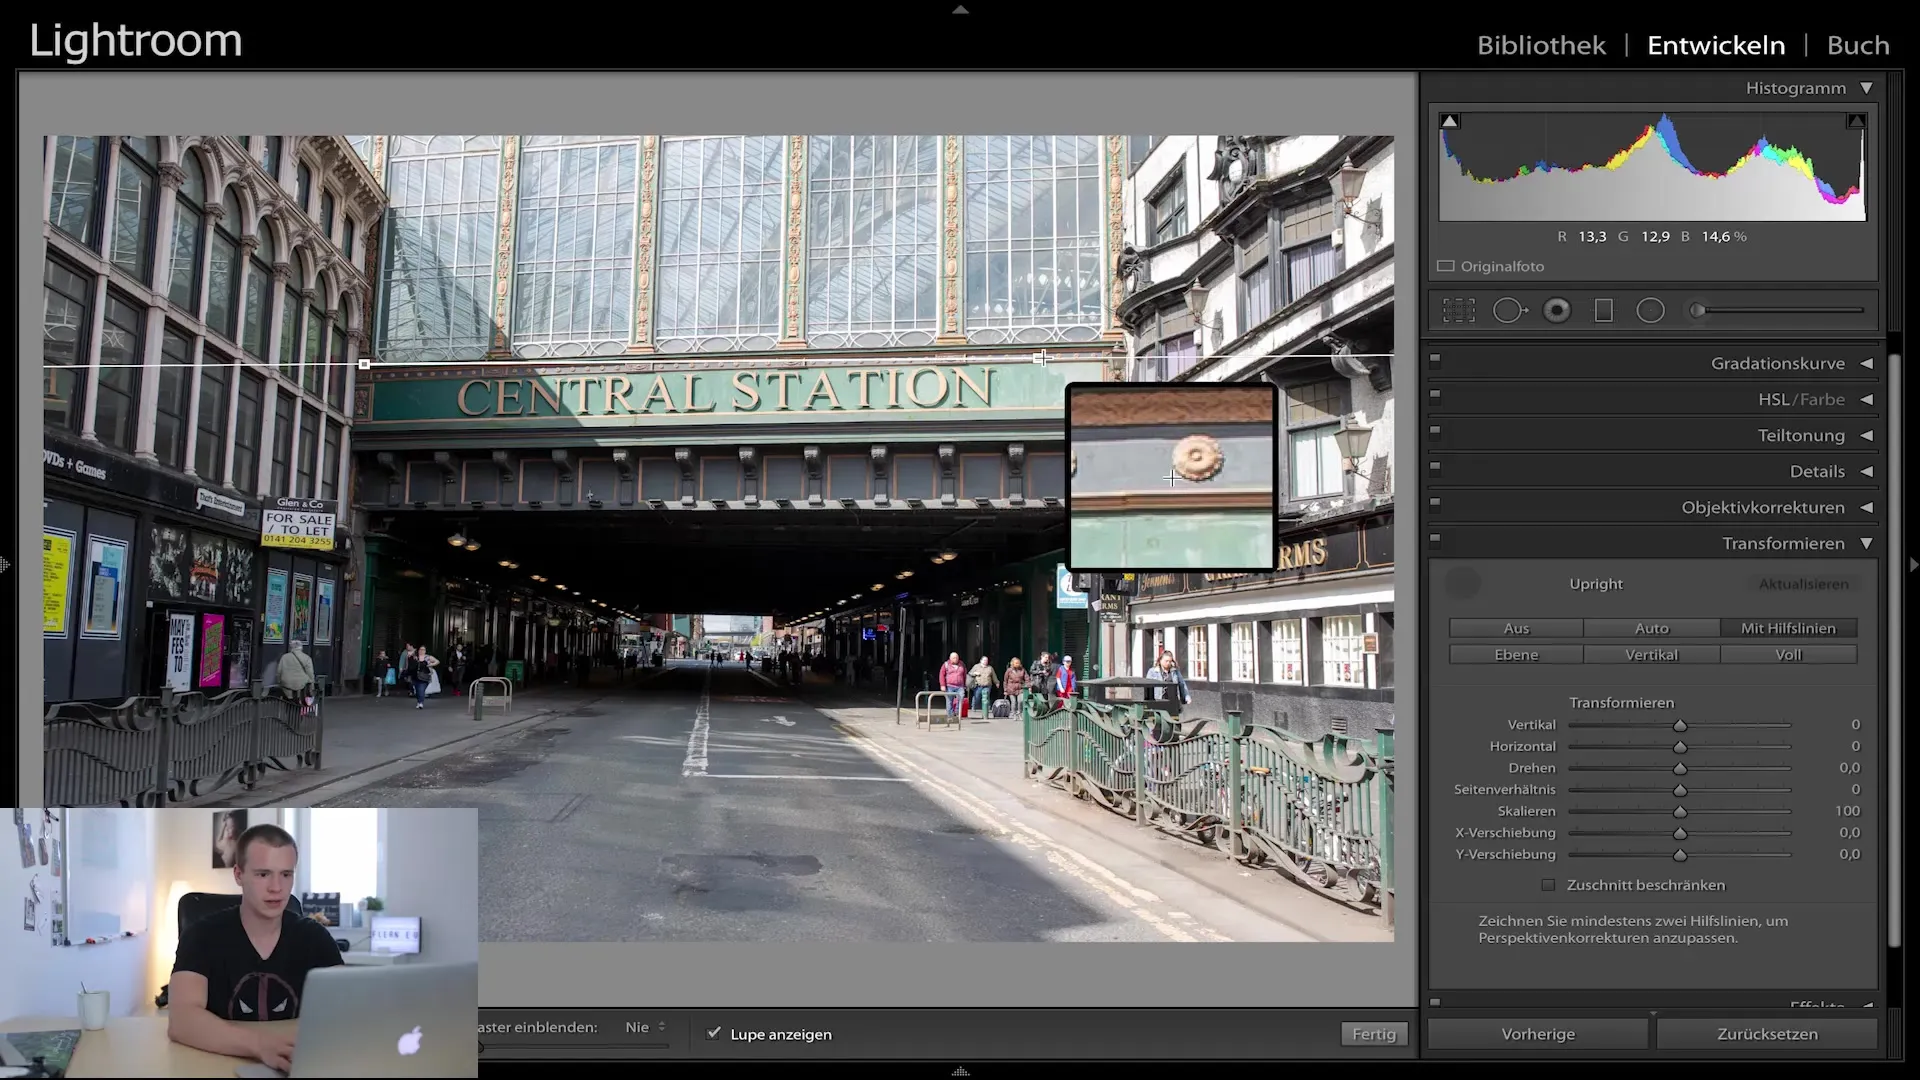
Step 4: Place the First Guide
To place a guide, locate a point of contrast in the image, such as a line you want to use as a reference. Click on this point once and drag the guide in the direction where you want to make the correction. In our example, you will drag the line to the first prominent point in the image.
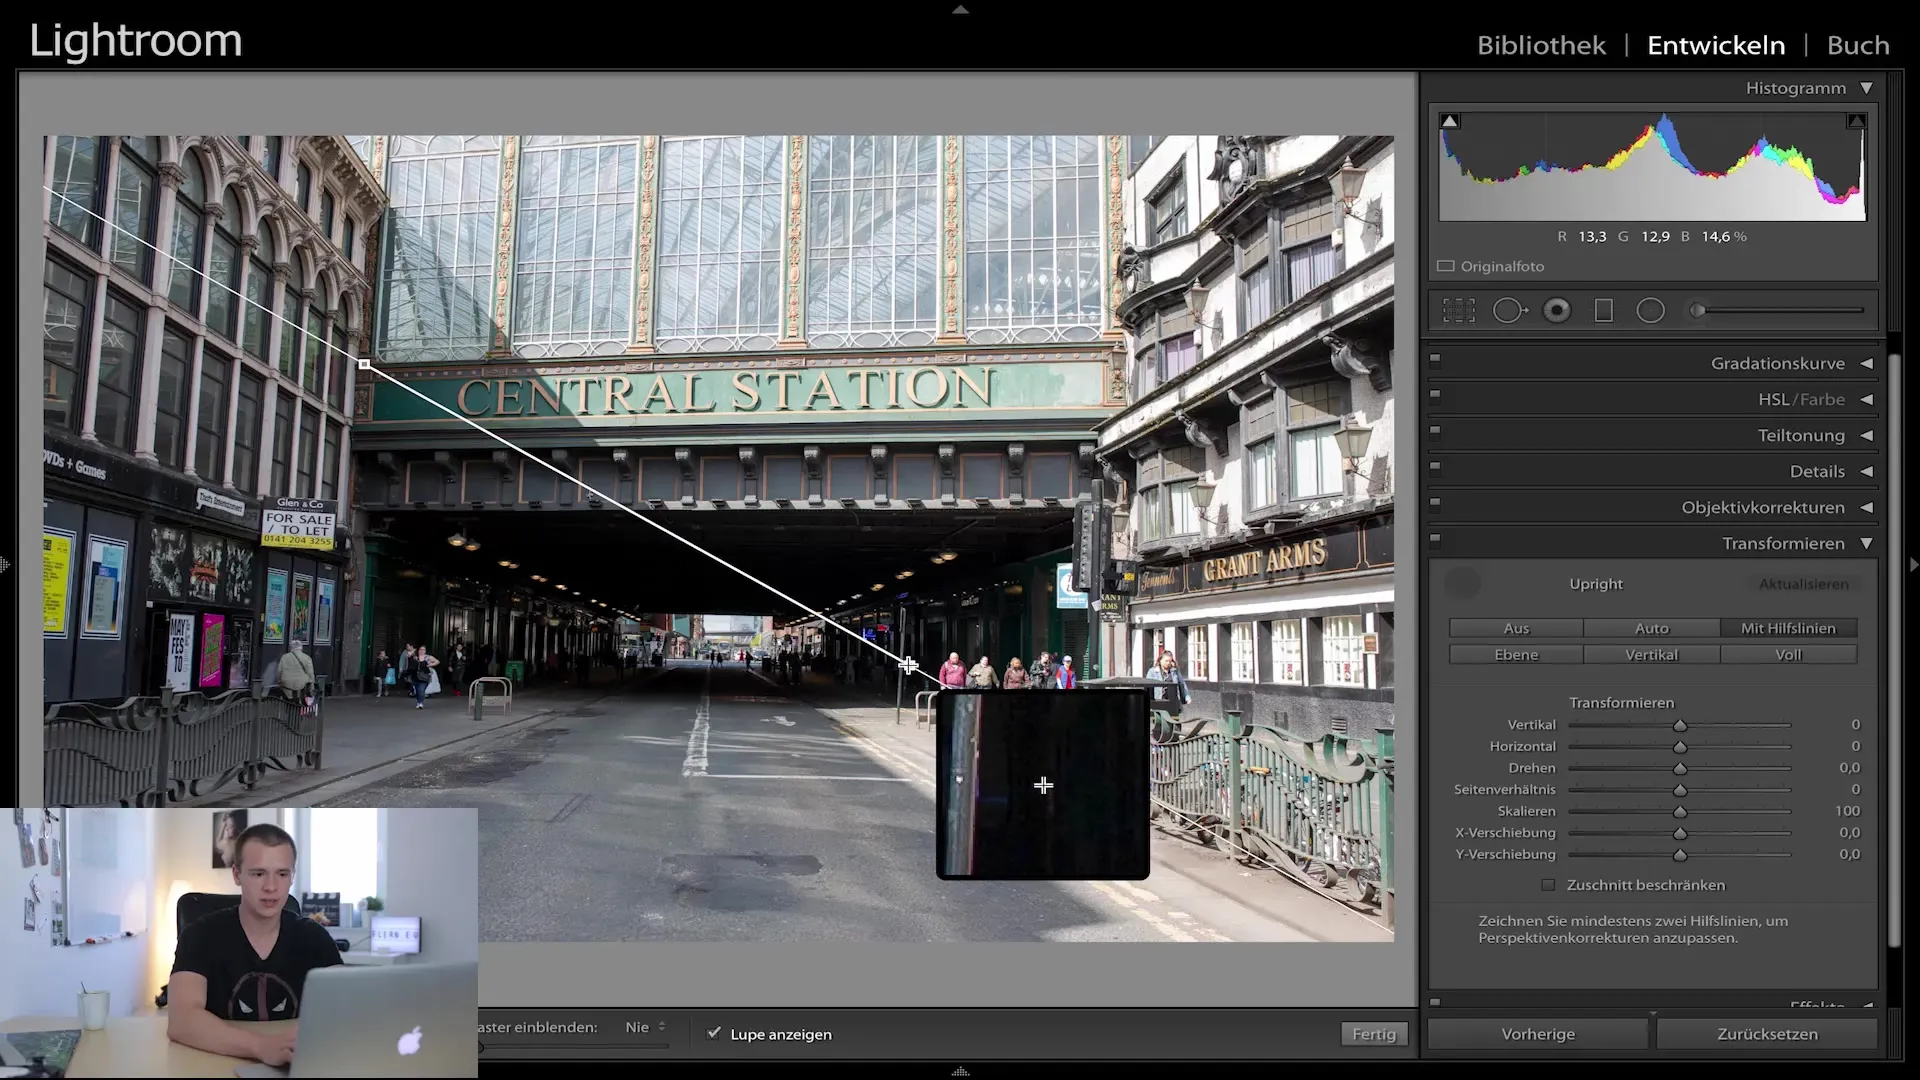
Step 5: Place the Second Guide
To make the alignment more precise, place a second guide. This should be in another area of your image, preferably on another straight line or another prominent point. The more guides you set, the more accurate the correction will be.
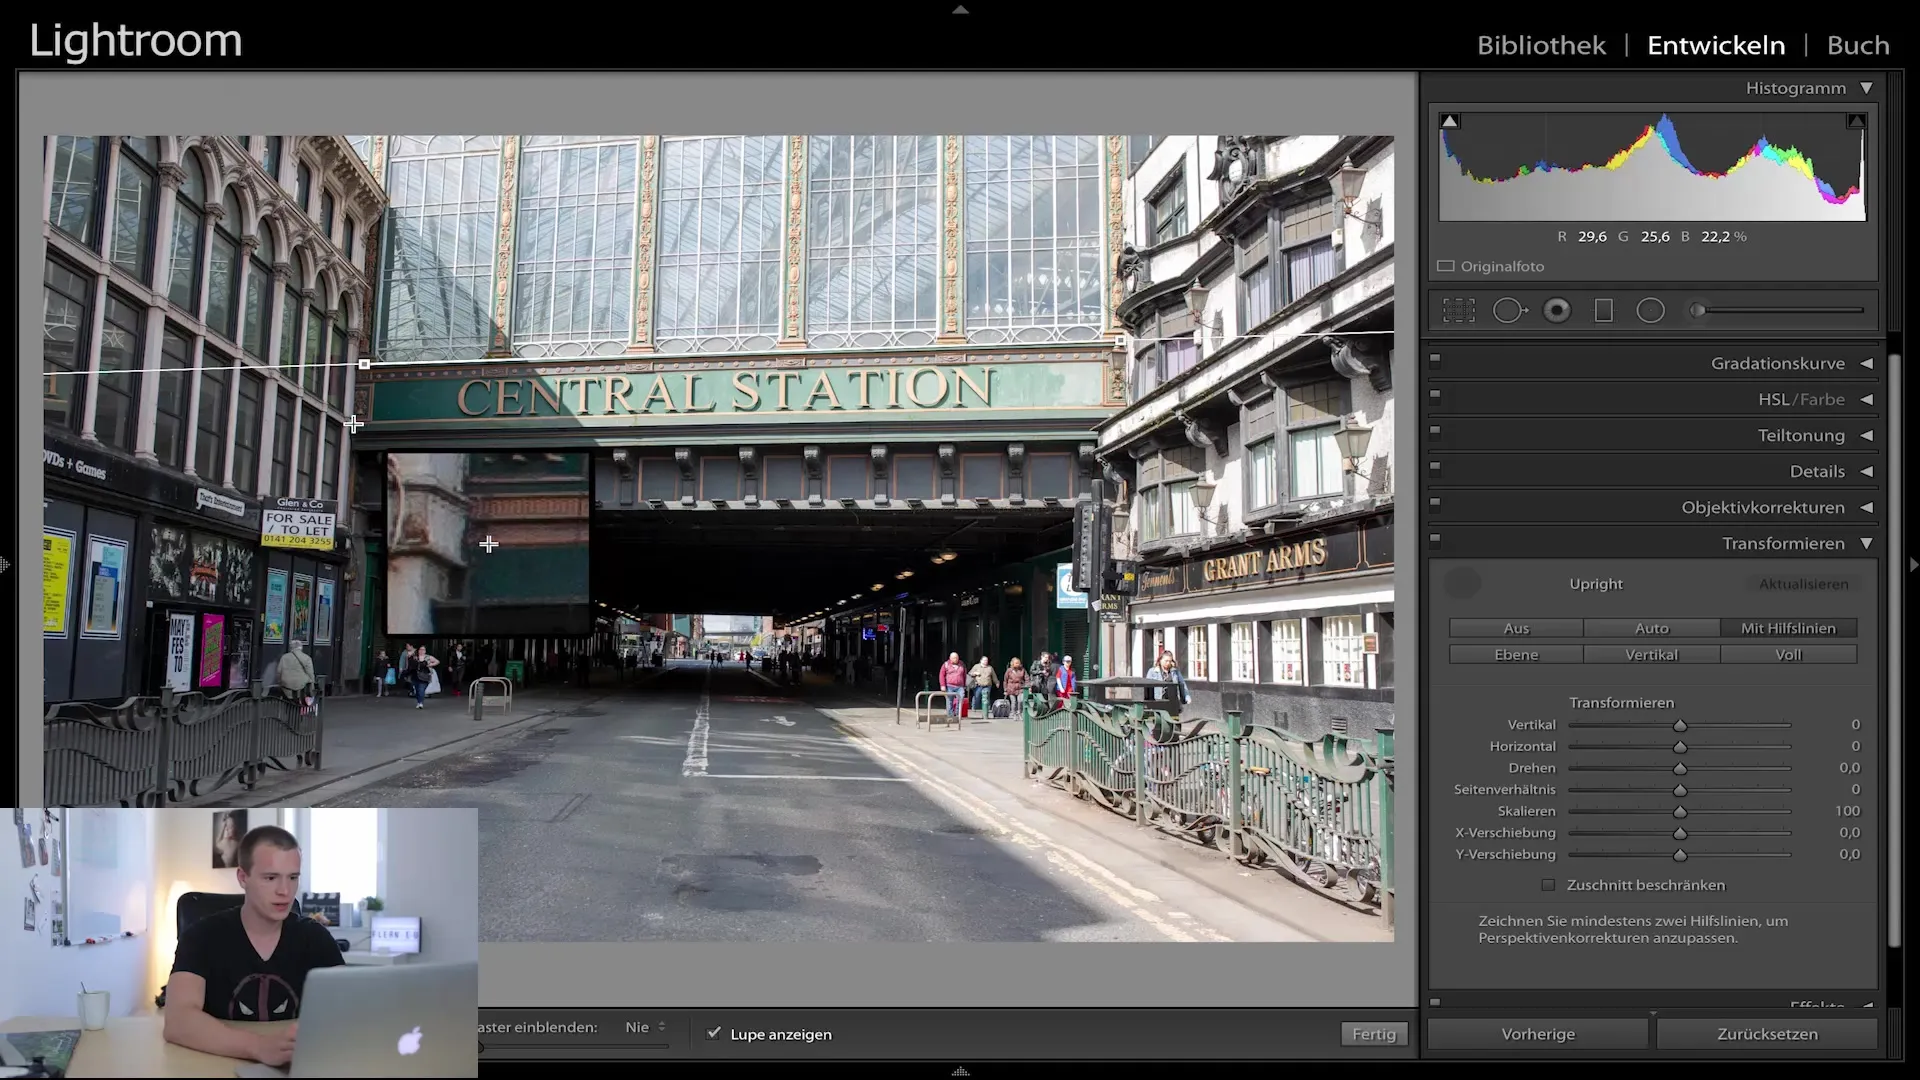
Step 6: Straighten the Image
Once you have placed both guides in the image, release the mouse. Lightroom will now automatically attempt to align the image symmetrically based on the guides you have set. You will see that the image looks much more formal and straightened.
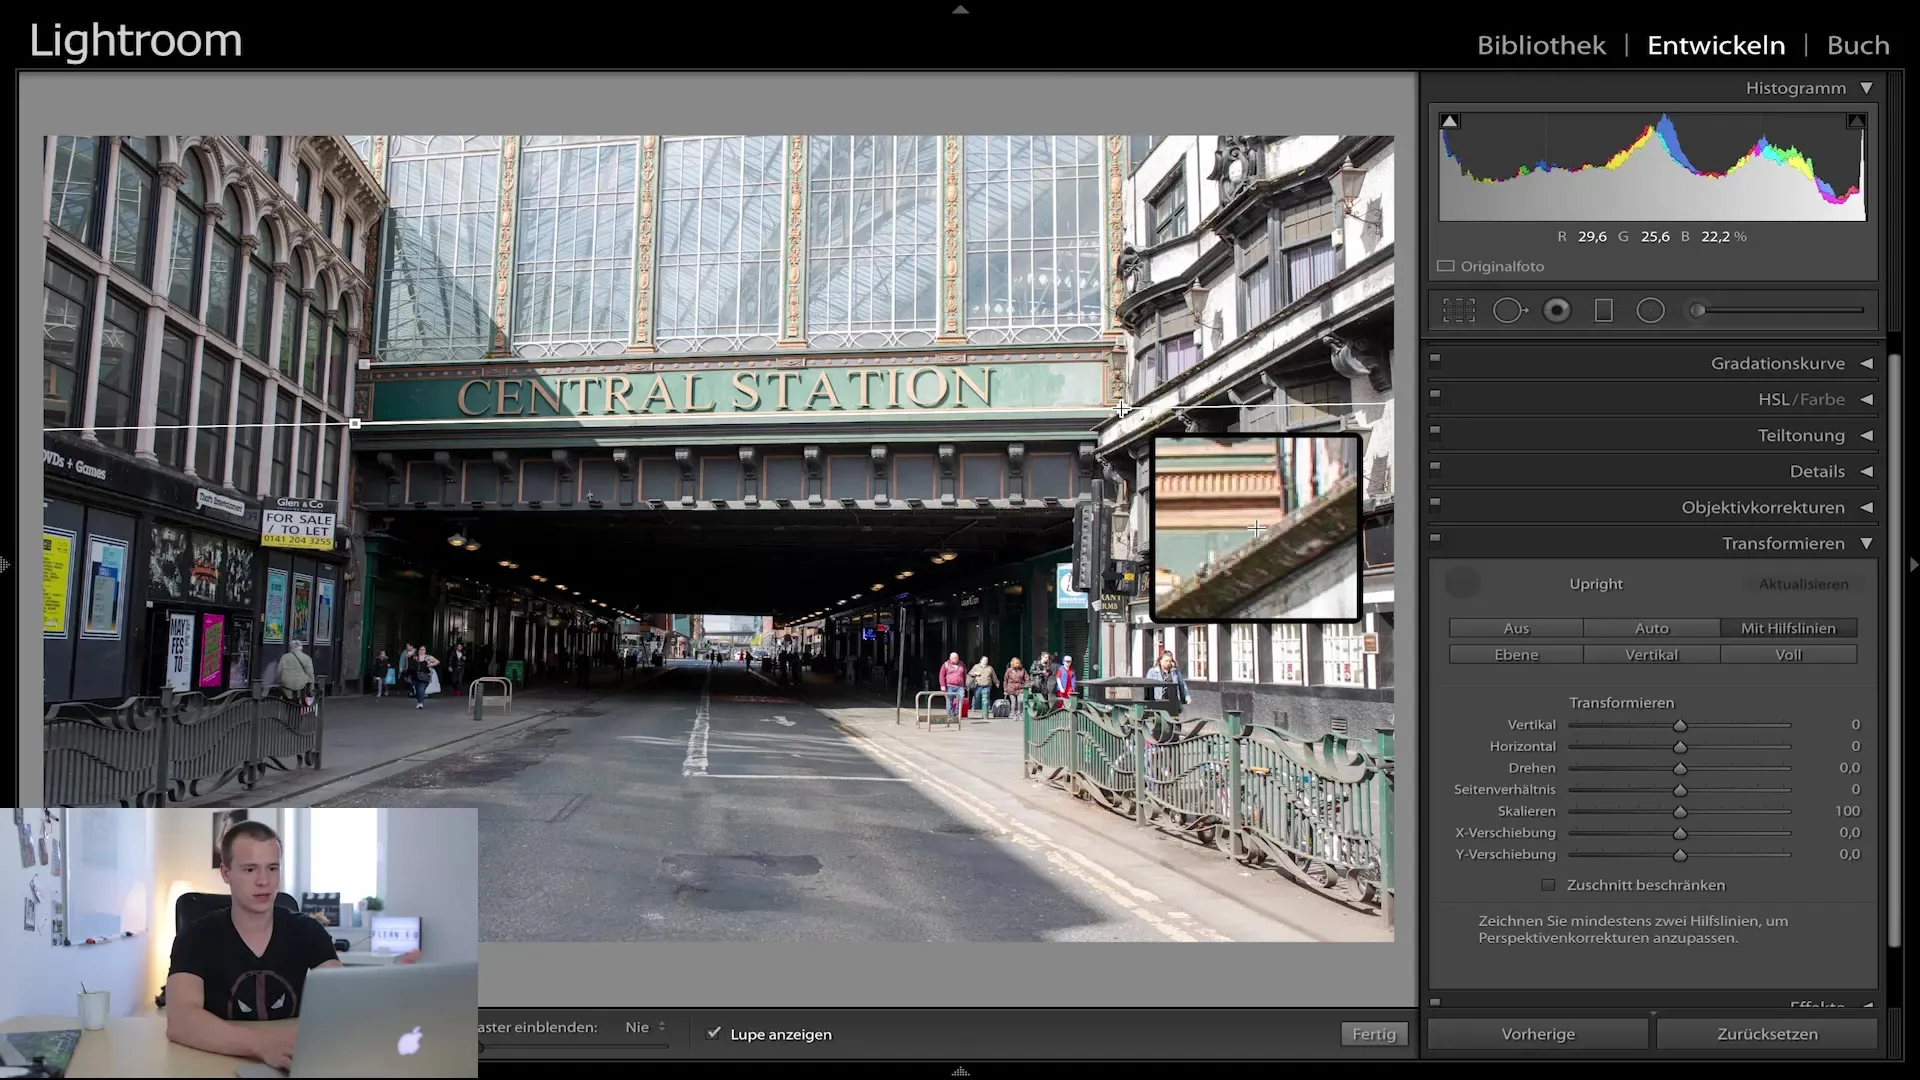
Step 7: Make Additional Adjustments
Now you can make further adjustments to the image. Use additional guides to correct any skewed lines on the sides of the image. Again, the more precisely you set the guides, the better the end result will be.
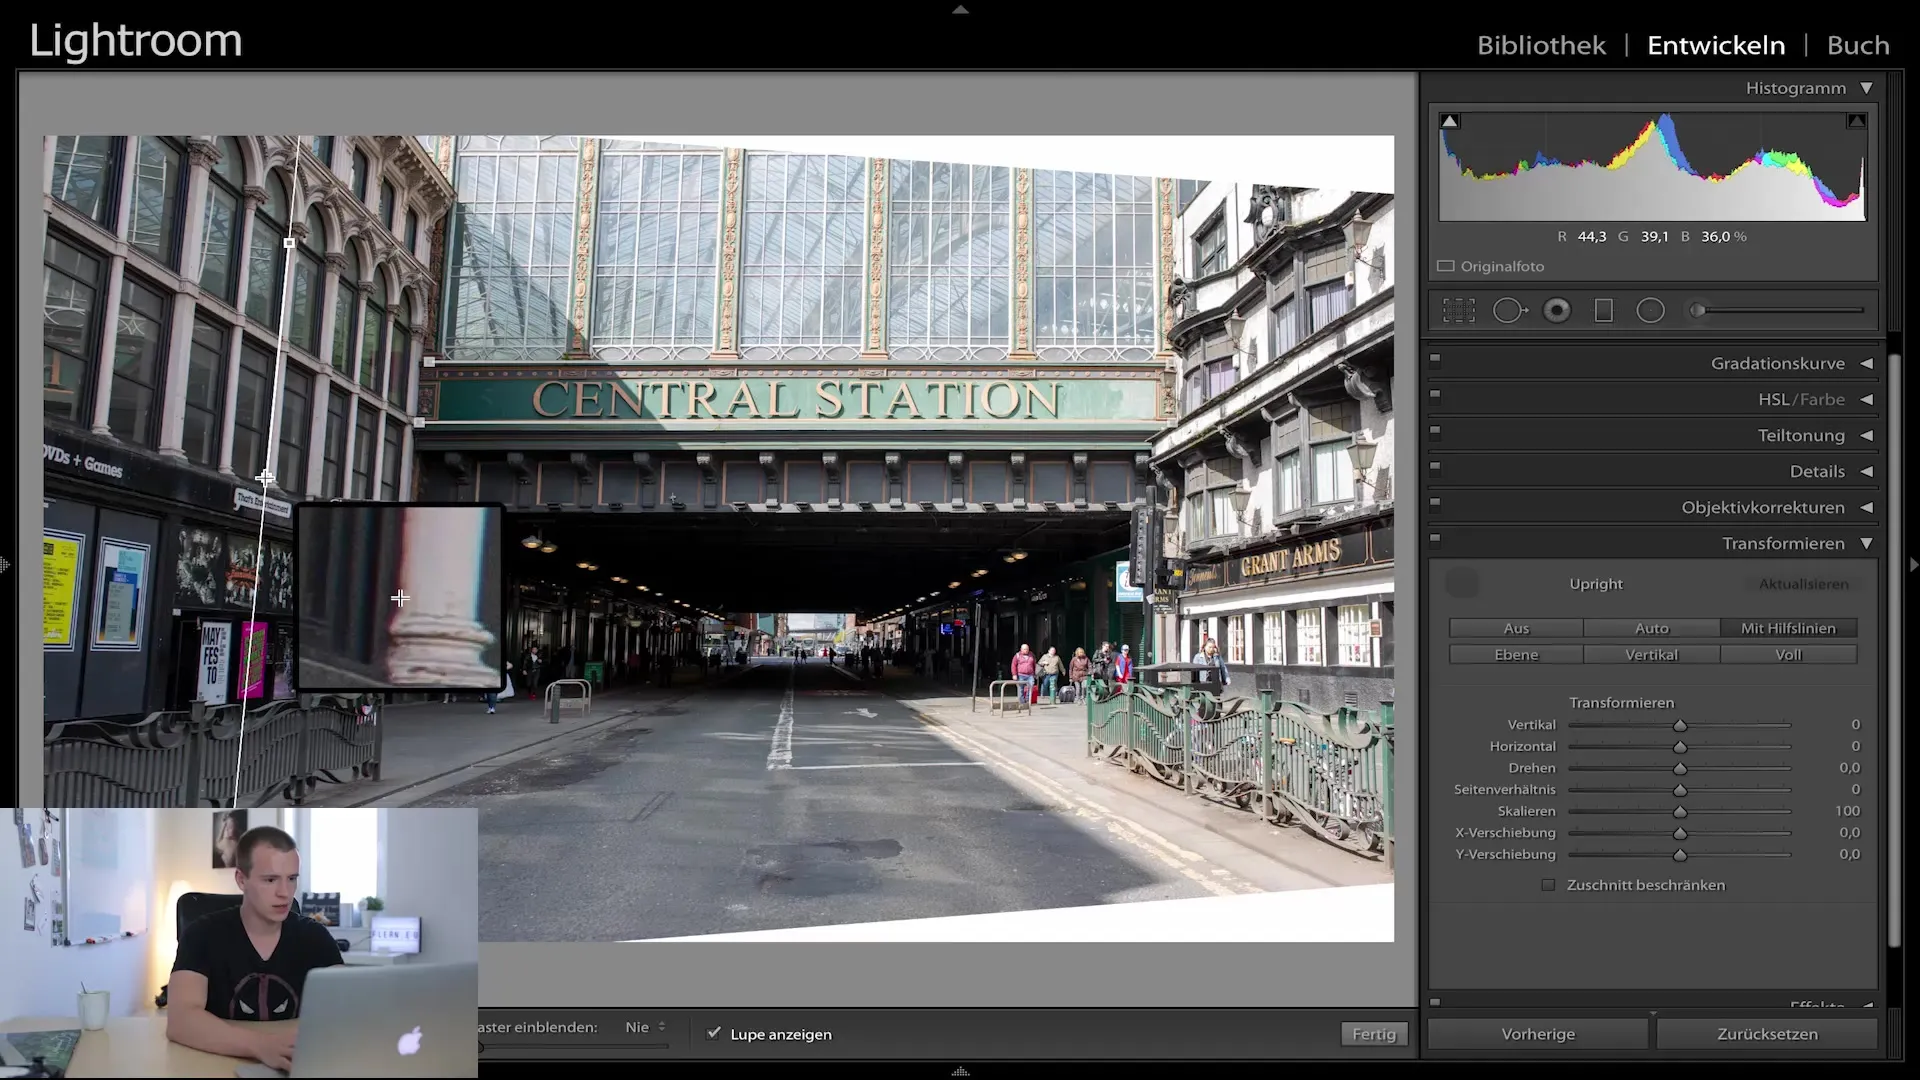
Step 8: Adjust Perspective
An important function of the Transform dialog is the ability to adjust the perspective of the image. Using the various sliders, you can, for example, tilt the image vertically or horizontally, further optimizing the composition of your image.
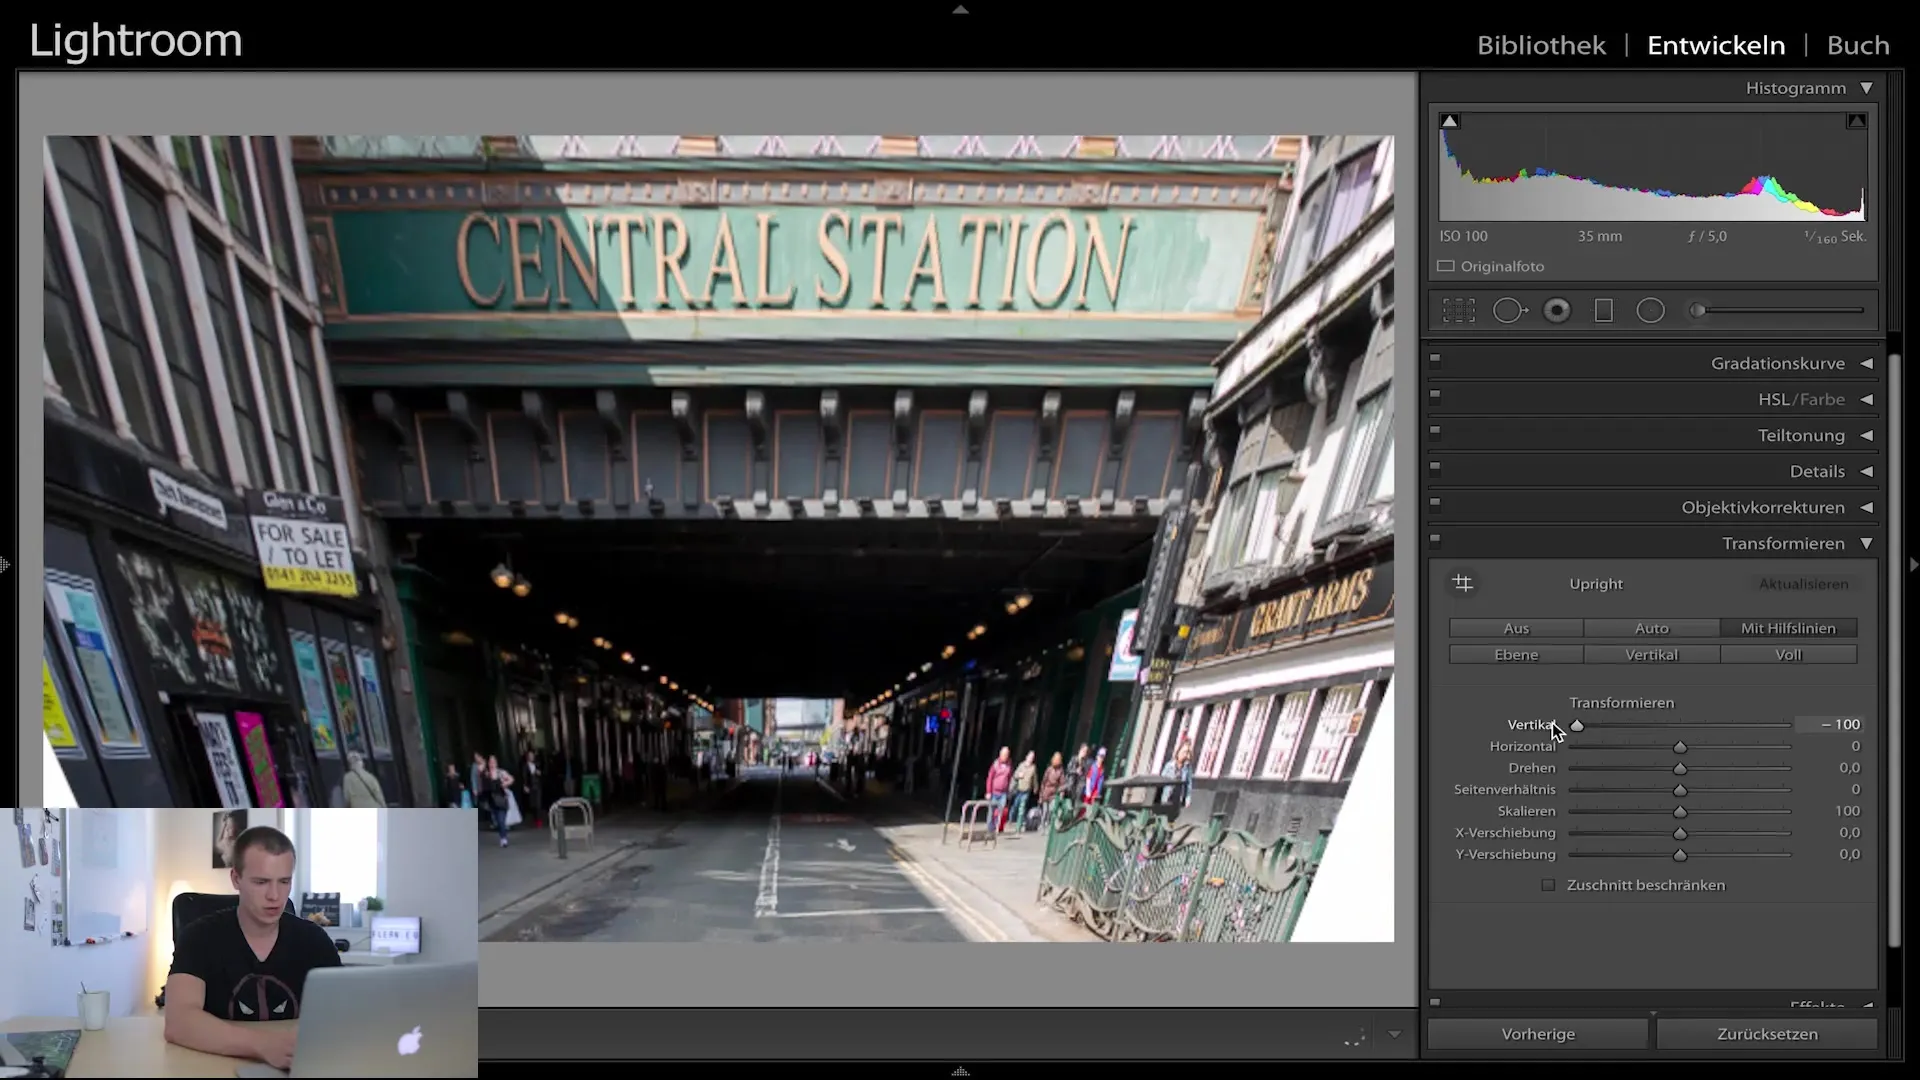
Step 9: Crop the Image
Once you are satisfied with the alignment and perspective, you can crop the image accordingly. Ensure that the edges of the image look good and no white corners are created as a result of rotating the image. You can enable the "Constrain Cropping" function to automatically crop so that the image has no white corners.
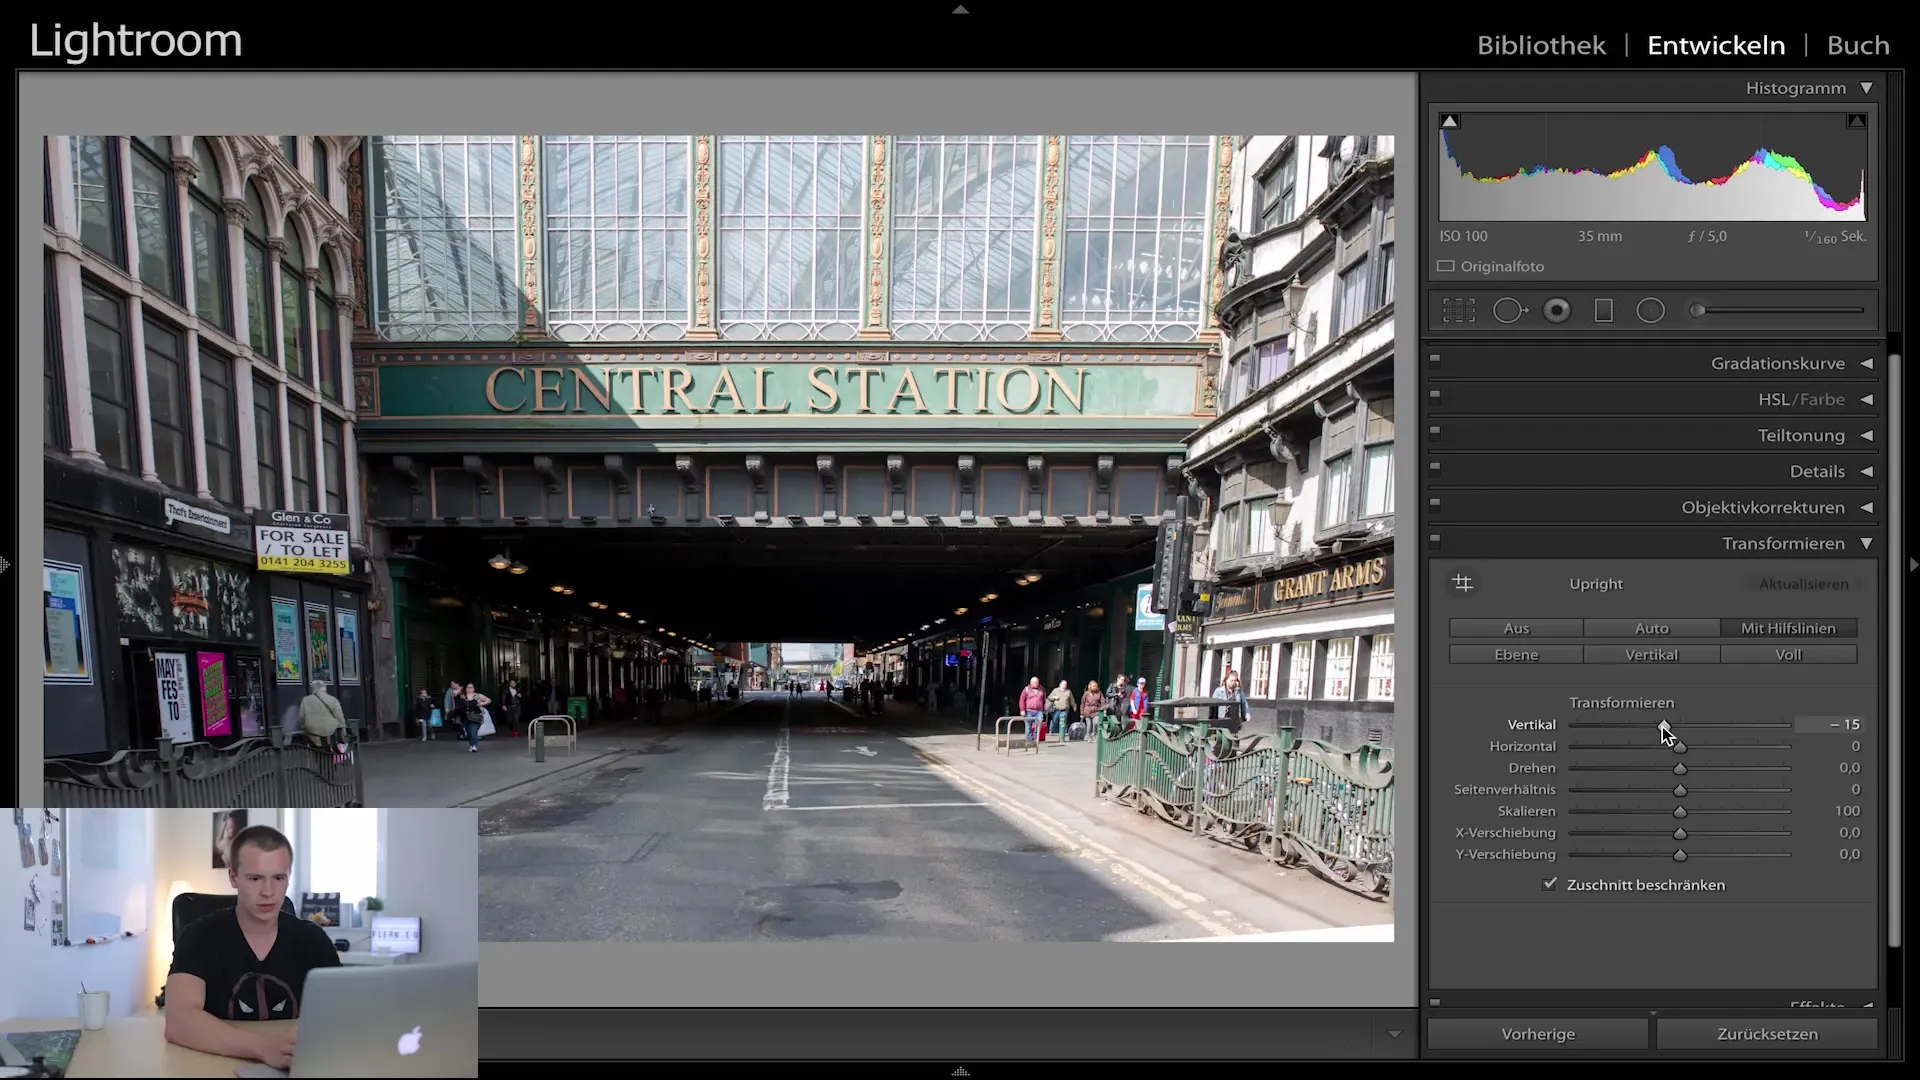
Step 10: Final Adjustments and Export
Once all adjustments have been made and you are satisfied with the final result, you can export your image. Make sure to select the desired format and export options so that your image is saved in the quality and size you want.

Summary
In this tutorial, you have learned how to use the Transform dialog in Lightroom Classic CC to straighten asymmetric images and correct perspective distortions. With guidelines and precise adjustments, you can achieve impressive results that make your photos look more professional.
Frequently Asked Questions
How does the Transform dialog work in Lightroom?The Transform dialog allows you to align images with guidelines and correct perspective distortions.
Can I set multiple guidelines?Yes, you can set as many guidelines as you want to optimize the alignment of your image.
What happens to my image when I change the perspective?Changing the perspective can make the image look unrealistic. It is important to make adjustments carefully.


