With Lightroom, you not only have a powerful catalog and development feature at your disposal for your images, but also the ability to use metadata. This metadata is crucial when it comes to organizing and managing your images efficiently. If you regularly work with the same keywords and categories, you can save a lot of time and improve the overview of your collection. In this guide, I will show you how to efficiently embed metadata with presets in Lightroom.
Main Insights
- Using metadata significantly reduces the time spent on image organization.
- You can add images with the desired metadata during import.
- Creating and using presets optimizes the process.
Step-by-Step Guide
Step 1: Import Your Images
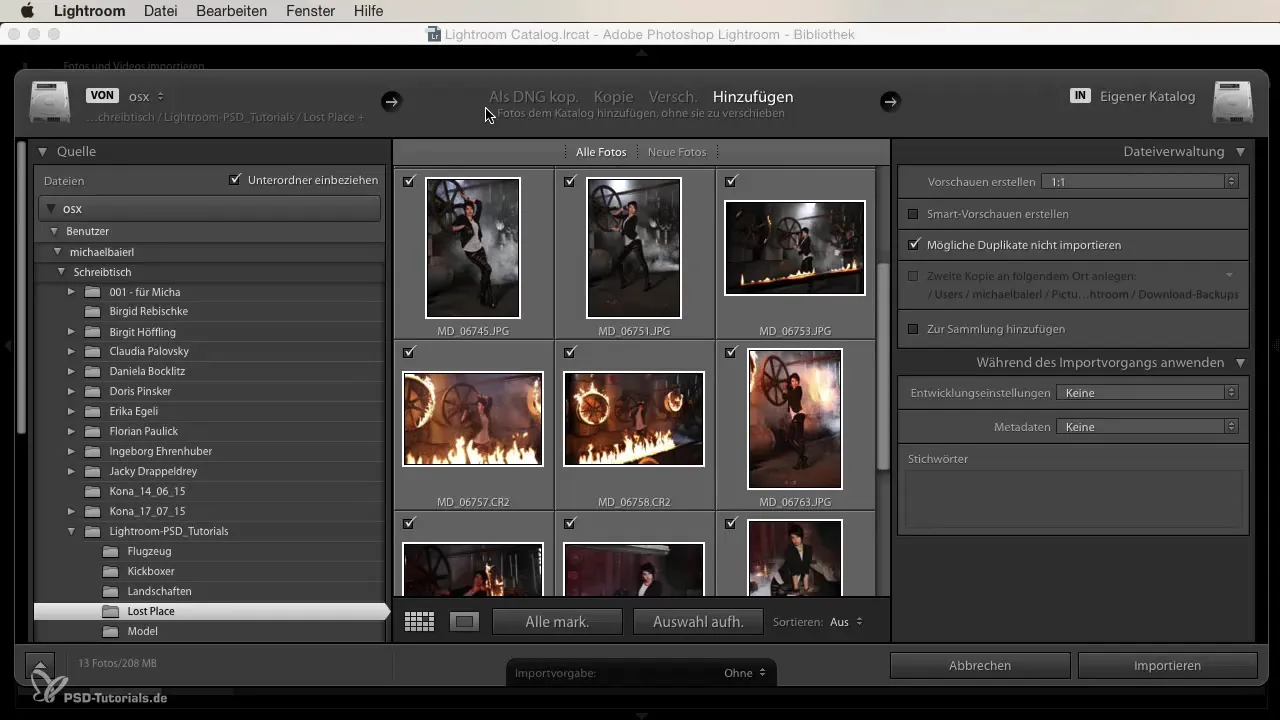
Start by importing your images into Lightroom. You need to select the folder where your images are located. This is the first step to applying metadata during import. To do this, select the desired folder and click the "Import" button.
Step 2: Apply Metadata During Import
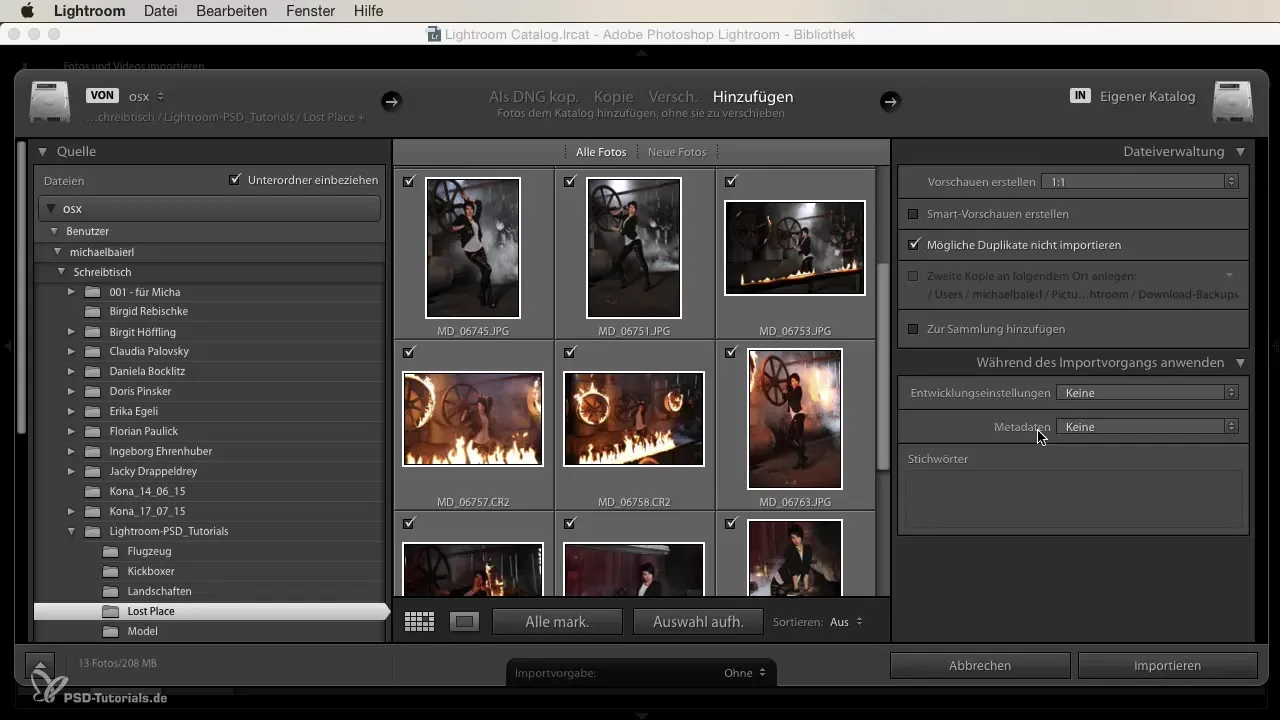
In the import view, you will see the option to adjust "Development Settings" on the right side. Among these options, you will find the item "Metadata." The default setting is usually set to "None." Here, you can select the already existing presets or create a new preset.
Step 3: Create a New Metadata Preset
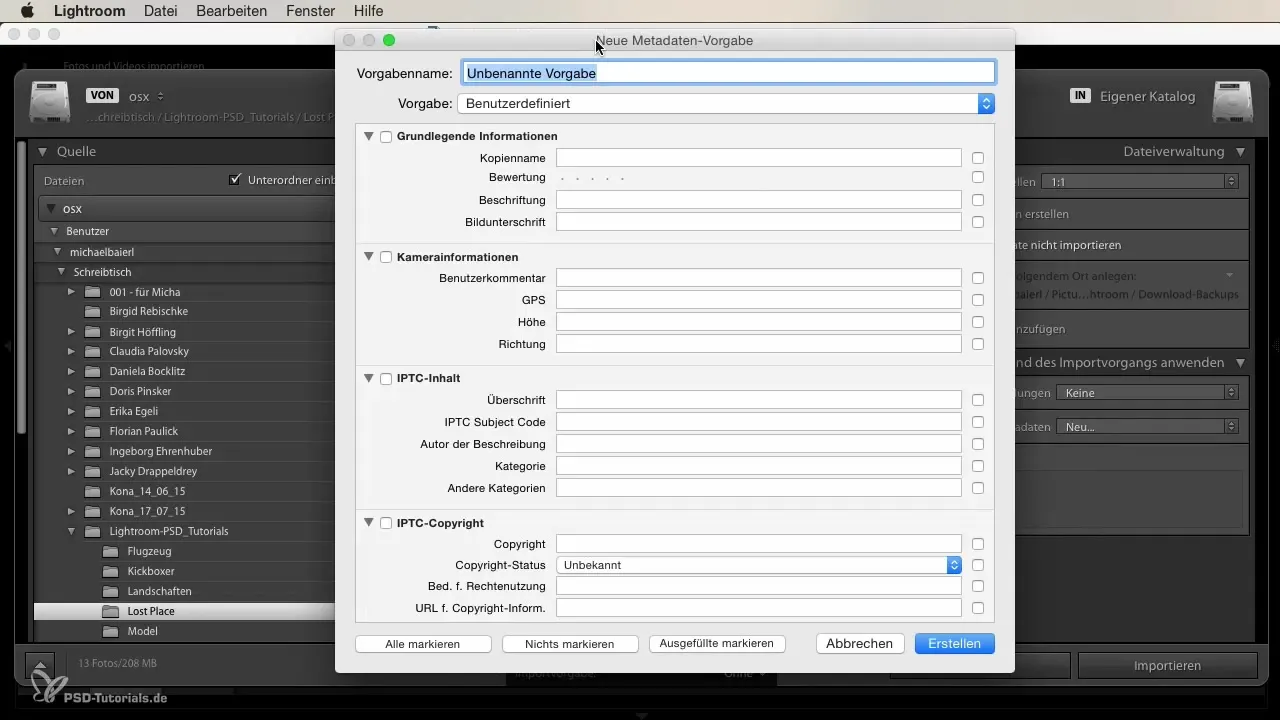
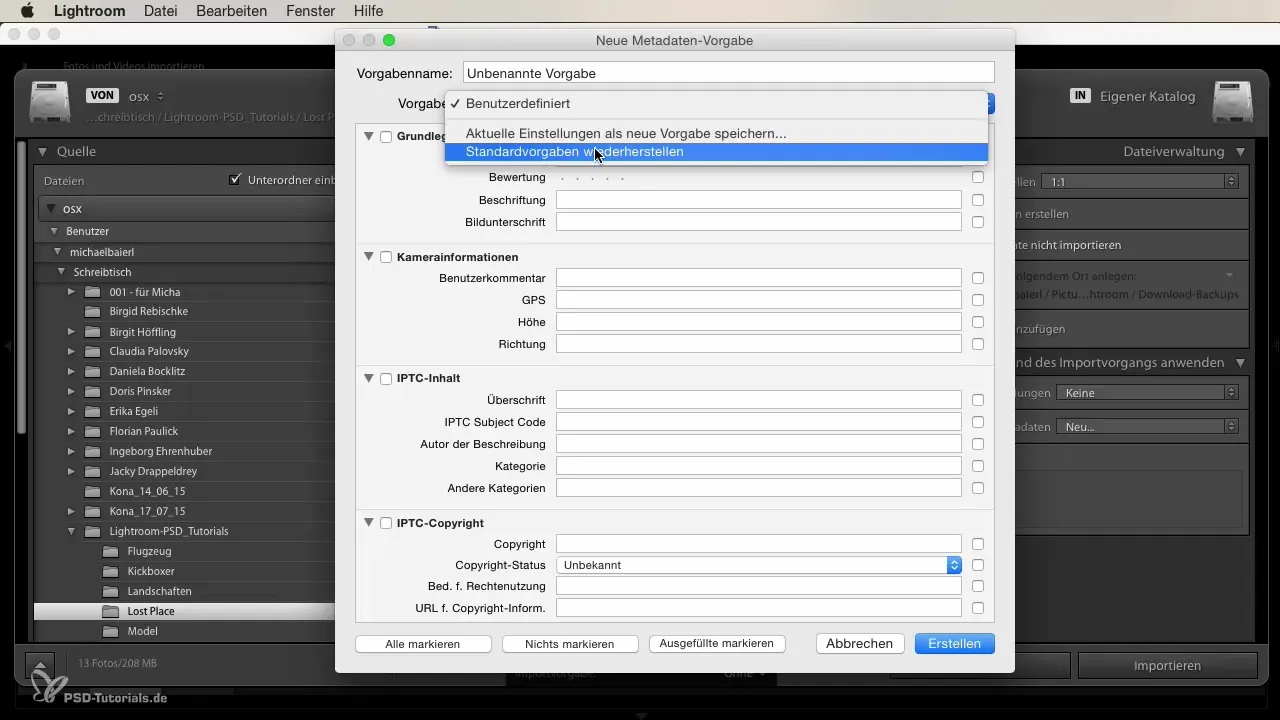
To create a new metadata preset, click on the option to add a new preset. A new window will open where you can enter the key information for your preset. Start by naming your metadata, e.g., “xomis Metadata Landscapes.” This way, you won't forget what type of images this preset is intended for.
Step 4: Fill Out Metadata Fields
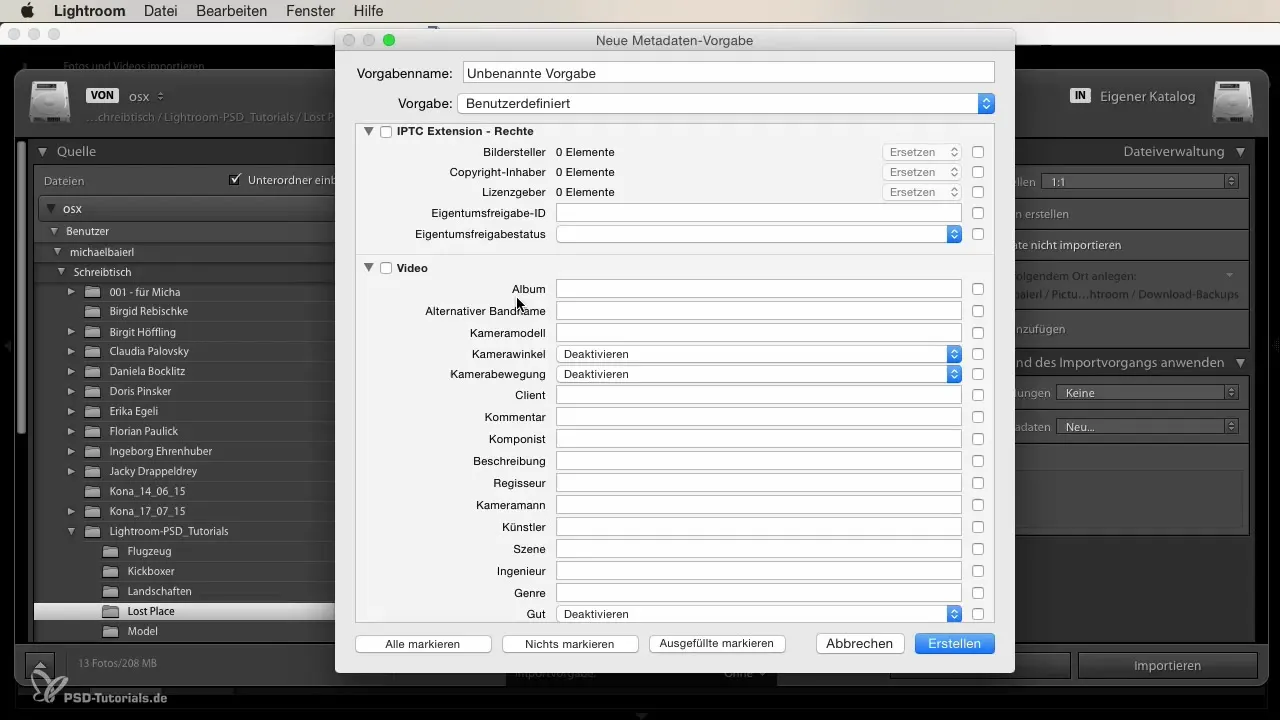
In the next step, you can fill out various metadata fields. You have the option to provide information on camera movements, directors, artists, and much more. These areas offer comprehensive options to ensure that all necessary information is recorded. Be sure to carefully fill out everything that is important for your organization.
Step 5: Save and Restore Presets
Once you are satisfied with filling out the metadata fields, you can save the settings as a new preset. If you made an error while creating the preset, there is an option to revert to the default presets. This can be particularly helpful if you are unsure or want to undo your changes.
Step 6: Import Images and Apply Metadata
After you have created your preset, you can now import the images. Select the desired images or folders and choose the newly created preset from the list. Then confirm the import process. This will ensure that all images are automatically assigned the specified metadata.
Step 7: Organize and Sort
Once the images are assigned metadata, you can benefit from the advantages of efficient sorting. Use the various categories and keywords to easily find and manage your images. Scroll through your library and see how quickly you can find the images you need.
Summary
In this guide, you have learned how to manage metadata in Lightroom to optimize your workflow. You have learned how to add metadata when importing images, how to create presets, and why this represents a significant time savings for organizing your images.
Frequently Asked Questions
How do I import images into Lightroom?Select the folder with your images and click "Import."
Can I add metadata after import?Yes, you can manually add metadata after import.
What are metadata presets?These are predefined information that gets added automatically during import.
Can I edit a metadata preset?Yes, you can edit existing presets or add new ones.
What happens if I make a mistake while creating a preset?You can reset the presets to the default values.


