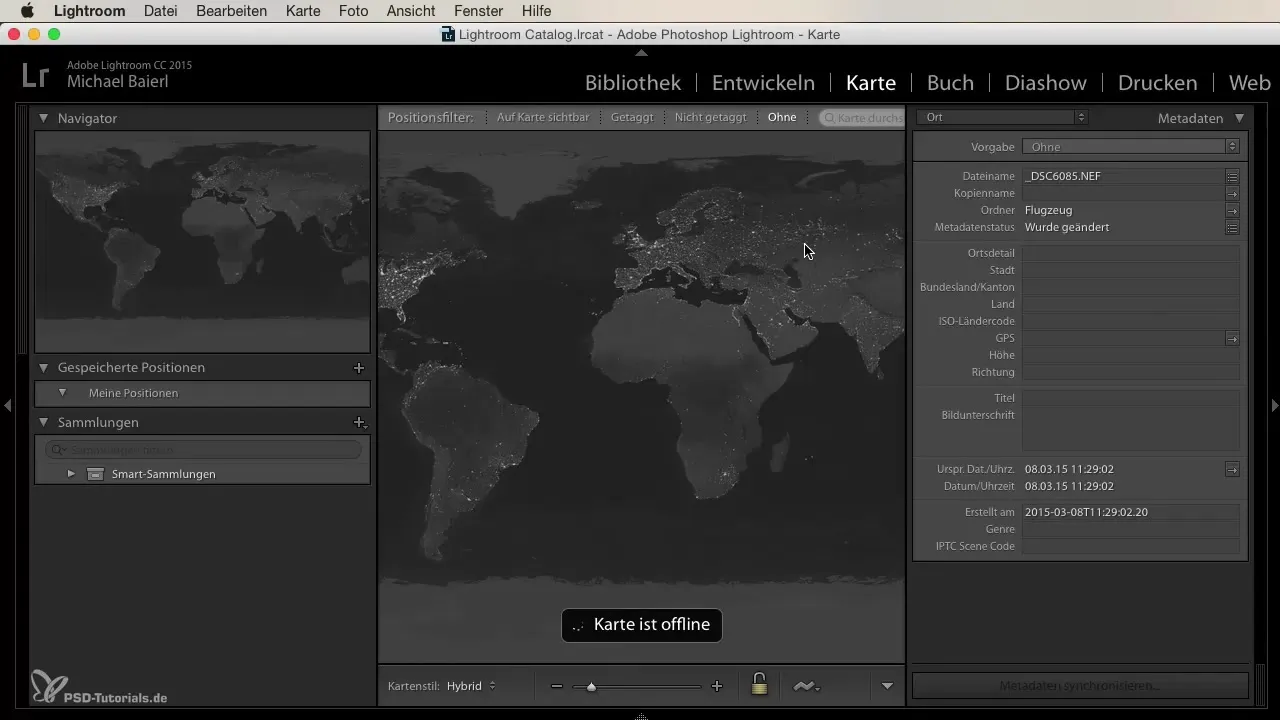
Photography is more than just capturing a moment – it is also a way to map your experiences. With the map feature in Lightroom, you can visualize your photographic endeavors on a world map. In the future, you will not only be able to find the location of your shoots, but also access your capture data specifically.
Key insights
- The map feature in Lightroom allows a visual arrangement of your capture data.
- GPS data is automatically recorded if your camera has a GPS receiver.
- You can use the map to sort your shoots by various criteria.
- Different map views are available to explore your adventures even more closely.
Step-by-step guide
Activating the map feature
To use the map feature in Lightroom, you first need to ensure that you have activated the map module. This is done in the module switch, where it is possible to use all features of Lightroom. Once you are in the map module, you can utilize your capture data.

Capturing GPS data
The basics of the map feature are based on GPS data captured by your camera. If you have a camera with a GPS receiver, this data is automatically saved. Even if you don't own a GPS-enabled camera, you can still learn about the feature, though you may not have specific data to present.
Displaying your shoots
A major advantage of the map feature is that you can display your shoots on the map. This allows you to quickly see where you have already photographed and which places you are still missing. If you enjoy exploring new locations, this is a great way to plan your next adventures.
Filtering by locations
The map feature allows you to filter by specific locations. Suppose you have photographed in Munich and want to see all your shoots in that location. You can easily use this function to organize the data and obtain all relevant information at a glance.
Sharing GPS data
An interesting aspect of the map feature is the ability to share GPS data. Do you have a friend who is also interested in photography? You can send him the GPS coordinates of a location, enabling him to find it easily. This makes photography together enjoyable, and you can explore interesting places.
Utilizing sorting options
You can also sort your shots by various criteria, such as elevation or direction. This feature is particularly useful if you want to view your shoots from a different perspective or are looking for specific challenges, such as elevation differences.
Adjusting the map view
The user interface of Lightroom allows you to choose between different map styles — be it a road map, a satellite view, or a terrain map. Use these different styles to select your desired view and explore your surroundings more effectively.
Offline map view
When working outside the internet, you can still use the map view. Even without an active internet connection, you can explore and edit your captures in the usual way. This is extremely convenient when traveling to remote locations where no connection is available.
Summary
In this guide, you have learned how to effectively use the map feature in Lightroom to visually represent and efficiently organize your photographic experiences. The simple handling allows you to quickly access the desired information and plan your next steps in photography.
Frequently asked questions
How do I use the map feature in Lightroom?You activate the map module in Lightroom to display and sort your capture data.
Do I need a GPS receiver to use the map feature?Yes, to capture GPS data, you need a camera with a GPS receiver.
Can I share my GPS data with others?Yes, you can simply share the GPS coordinates with friends.
How can I filter my shoots on the map?You can sort by various filter criteria such as location, elevation, and direction.
What map views are available to me?You can switch between road maps, satellite views, and terrain maps.


