Creating print versions of your images can be a challenging yet very rewarding process. If you want to experience your photographs not just on the screen but also in physical form, you are in the right place. In this guide, I will show you the important steps to effectively print your images in Lightroom.
Key takeaways
- You can print single images or contact sheets.
- The print settings are crucial for the quality of your prints.
- You have the option to use watermarks and your own templates.
- Colors and media types can be customized to your needs.
Step-by-step guide to printing in Lightroom
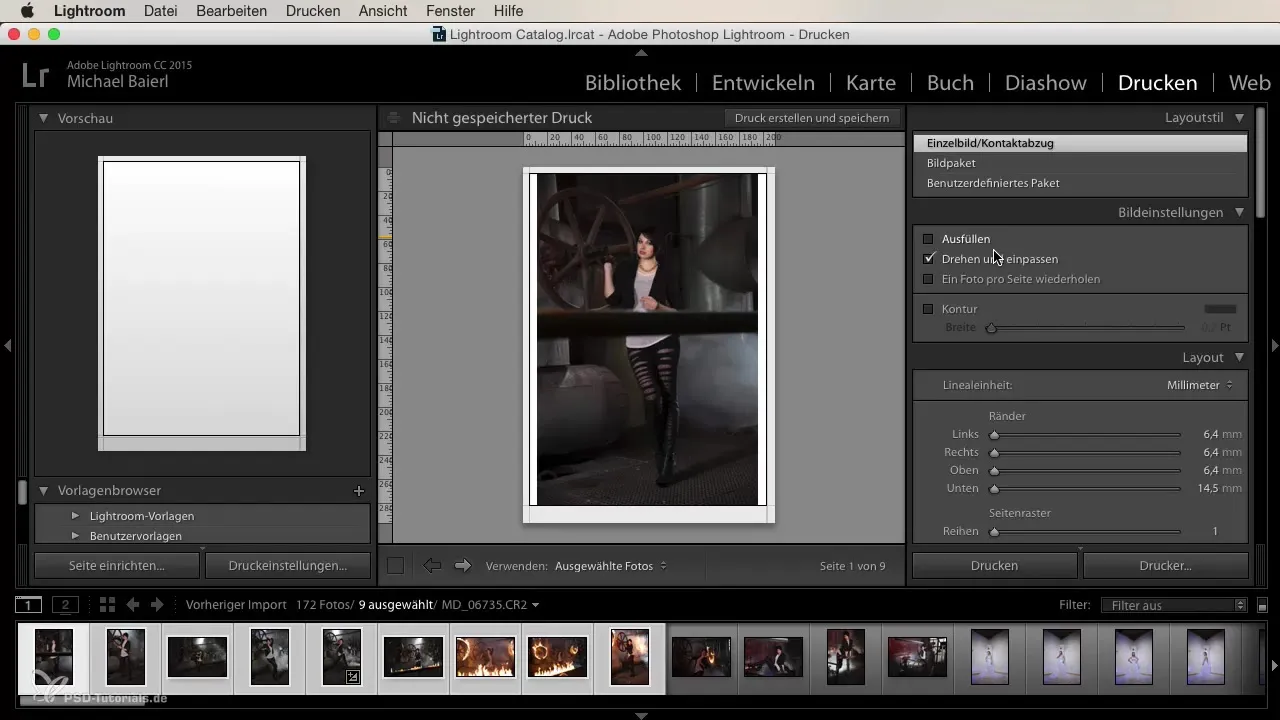
1. First select the correct print module
Open Lightroom and navigate to the print module. Here you will find various options to print your images. You can choose between single image printing and contact sheet.
2. Select images for printing
To select images, mark the number of images you want to print in the filmstrip below. It is important that you choose the right photos to achieve the best results.
3. Specify the print format in detail
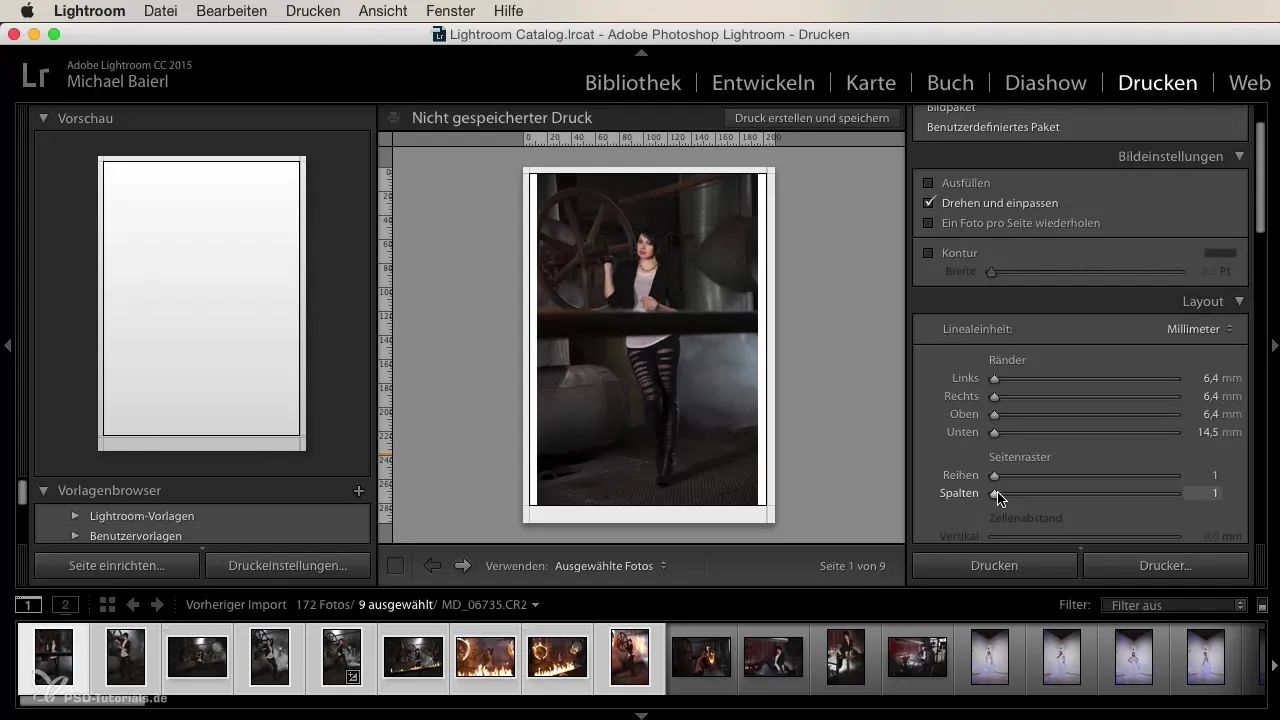
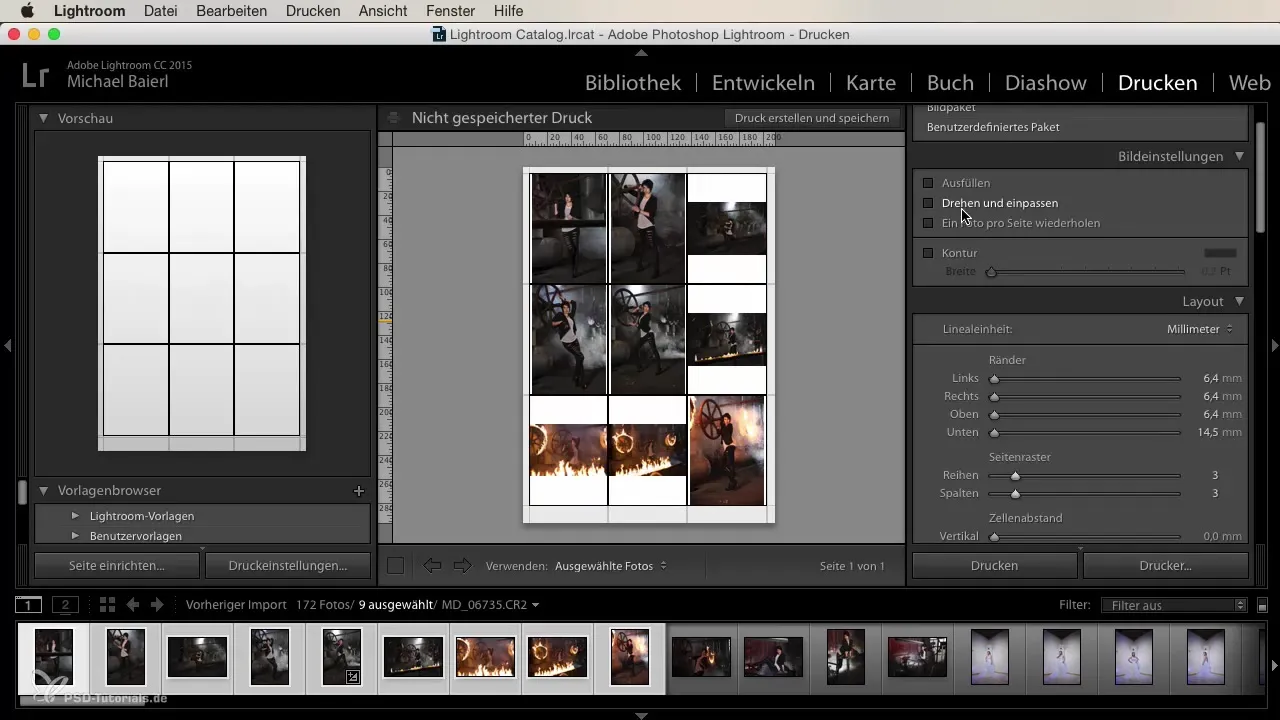
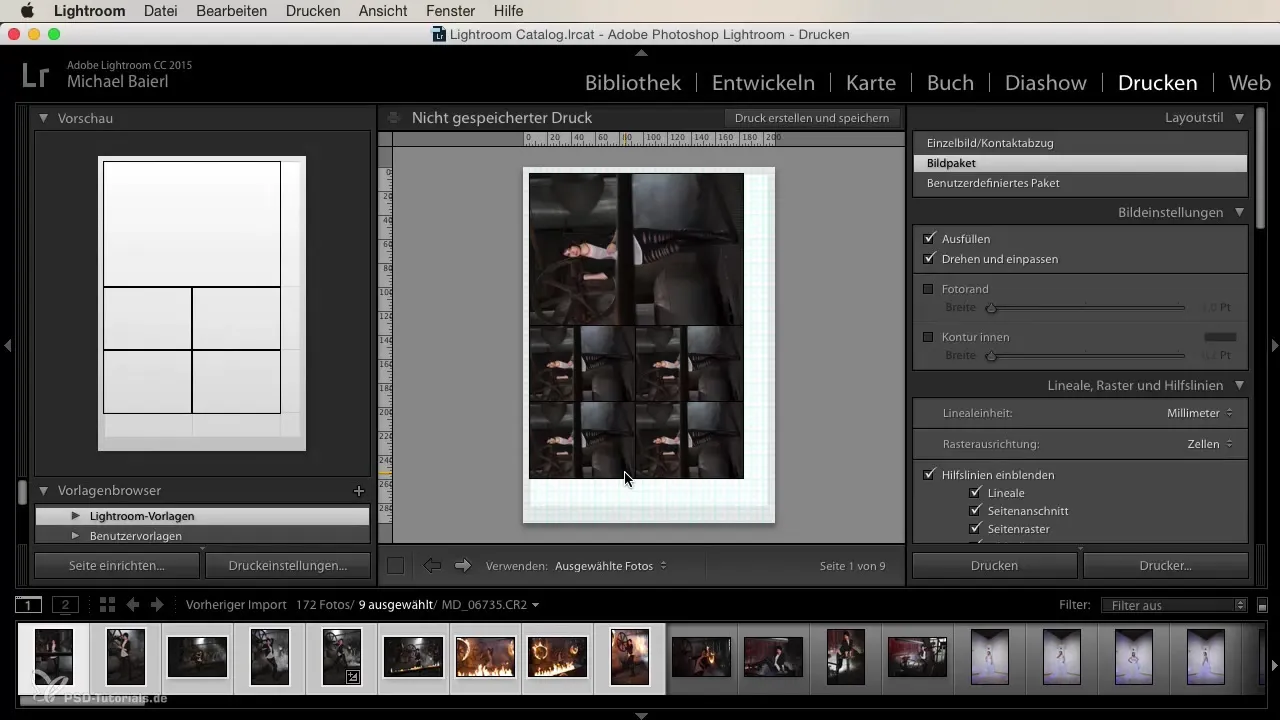
If you want to print a single image, you need to adjust the page settings. Set the page layout to a suitable ratio. For a contact sheet, you can increase the grid, for example to 3 x 3, to display multiple images.
4. Pay attention to size adjustment
When creating the prints, ensure that the images are well arranged in portrait or landscape format. Lightroom automatically adjusts the image sizes to avoid gaps in the print.
5. Adjust the print settings
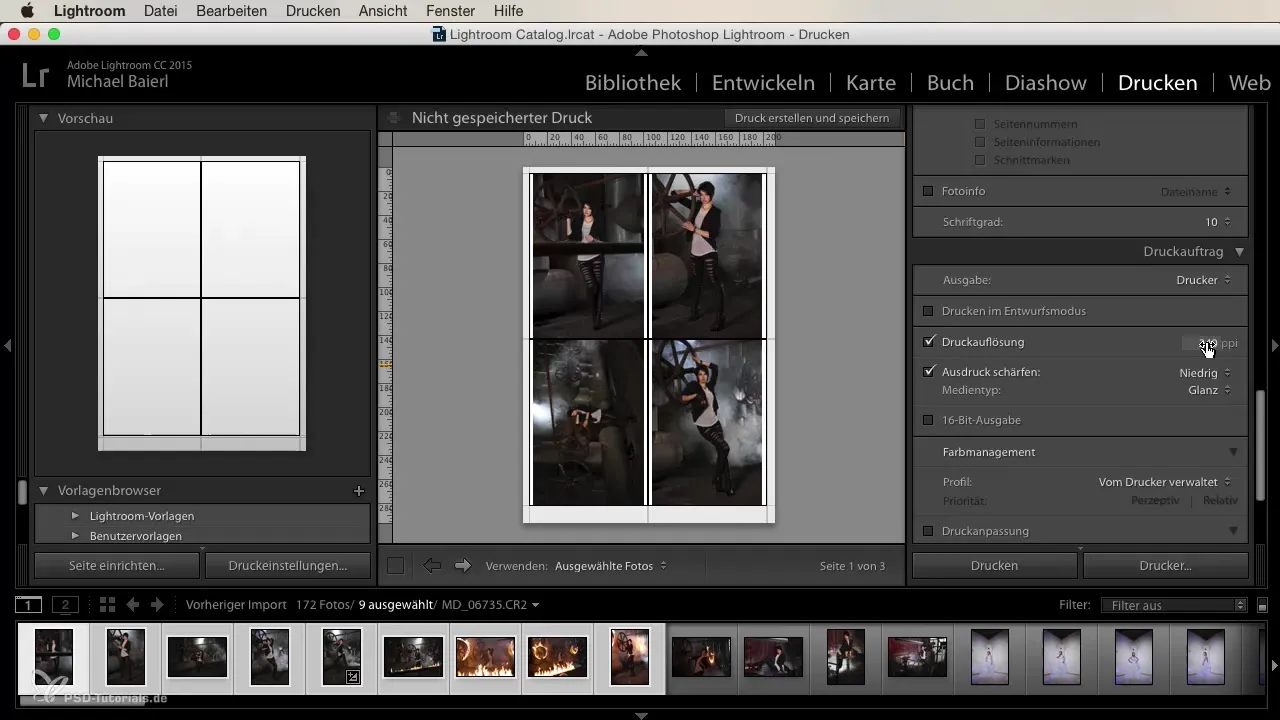
Make sure your print settings are correct. Here you can adjust the print resolution, which is set to 240 ppi by default. For large prints, you should increase this to 360 ppi.
6. Add a watermark
When printing your images, you can add a watermark. This makes it immediately visible that the images come from you. You can customize the font and size as per your preferences.
7. Set media type and color management
Define the media type, whether you want to print on matte or glossy paper. Make sure to configure the color management accordingly to achieve optimal printing results.
8. Use templates
Various print templates are available to you in Lightroom. These templates allow you to choose specific dimensions for your print, such as 4 x 6 or 5 x 7 inches.
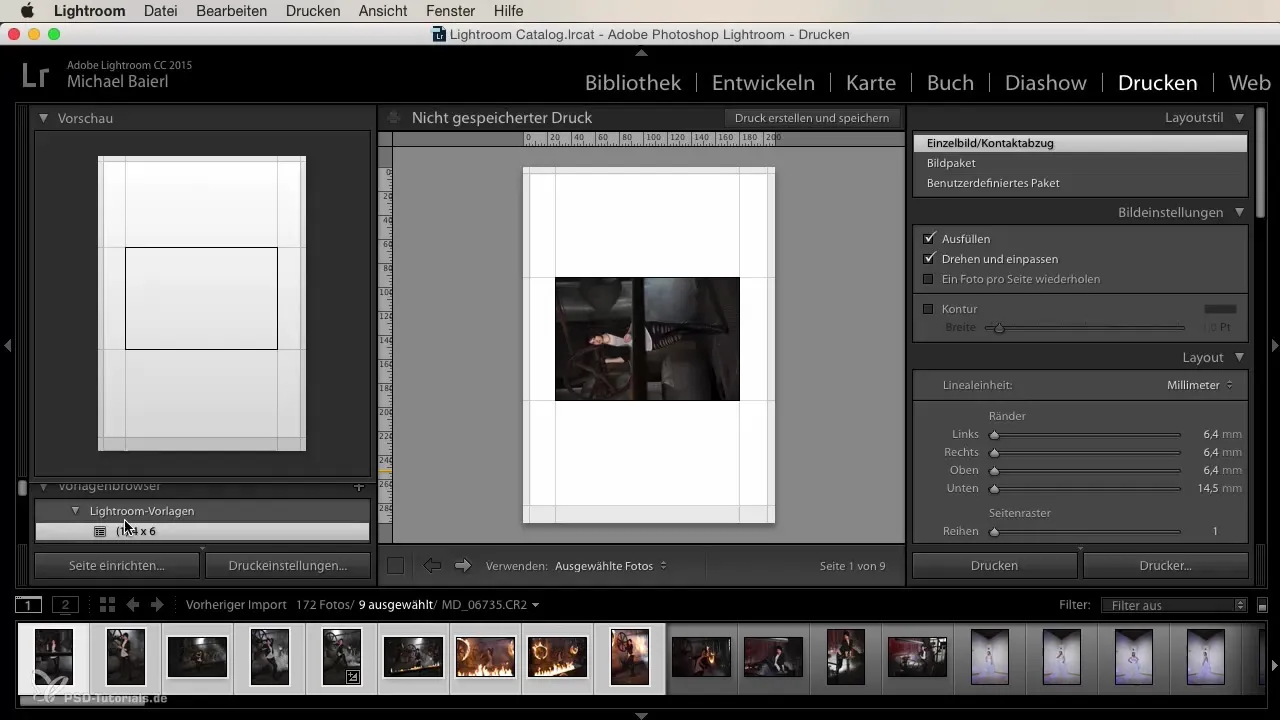
9. Check print preview
Before sending the print job, take a look at the print preview. Here you can ensure that everything looks as you intended.
Summary
Printing your photographs in Lightroom requires some initial settings, but these can be implemented quite easily. By properly utilizing the various options and settings in the print module, you can create high-quality prints that make your work truly stand out.
Frequently Asked Questions
How do I print a single image in Lightroom?Select the single image, set the page settings, and make sure the print resolution is appropriately set.
Can I print multiple images at the same time?Yes, you can increase the number of images and adjust the grid to print multiple images in contact sheet format.
How can I add a watermark to my prints?Add the watermark in the print settings and adjust the font and size accordingly.
What is the optimal print resolution?For large prints, we recommend a resolution of 360 ppi, while 240 ppi is sufficient for smaller prints.
How do I find the right print templates in Lightroom?Navigate to the templates in the print module to select and customize different formats.
