With the right technique, you can efficiently remove unwanted elements from your photos. A particularly useful tool in Adobe Lightroom is the Spot Repair Tool, which allows you to easily eliminate small disturbances like sensor spots or skin blemishes. This guide will walk you through the steps to make the best use of the Spot Repair Tool.
Key insights
- The Spot Repair Tool is excellent for removing sensor spots and other unwanted elements from your images.
- You can adjust the size and softness of the repair brush to achieve optimal results.
- Lightroom automatically selects healthy areas for repair, making the process efficient and straightforward.
- With the undo function, you can delete changes at any time.
Step-by-step guide to using the Spot Repair Tool
Selecting the tool
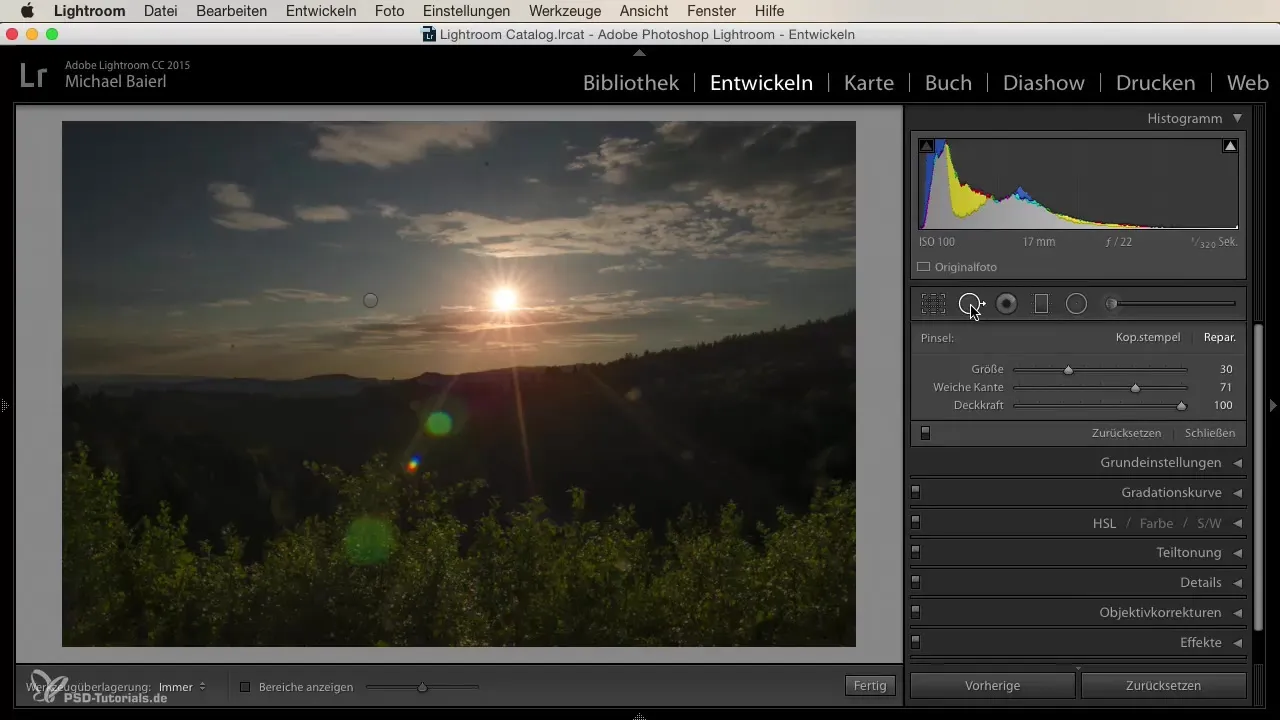
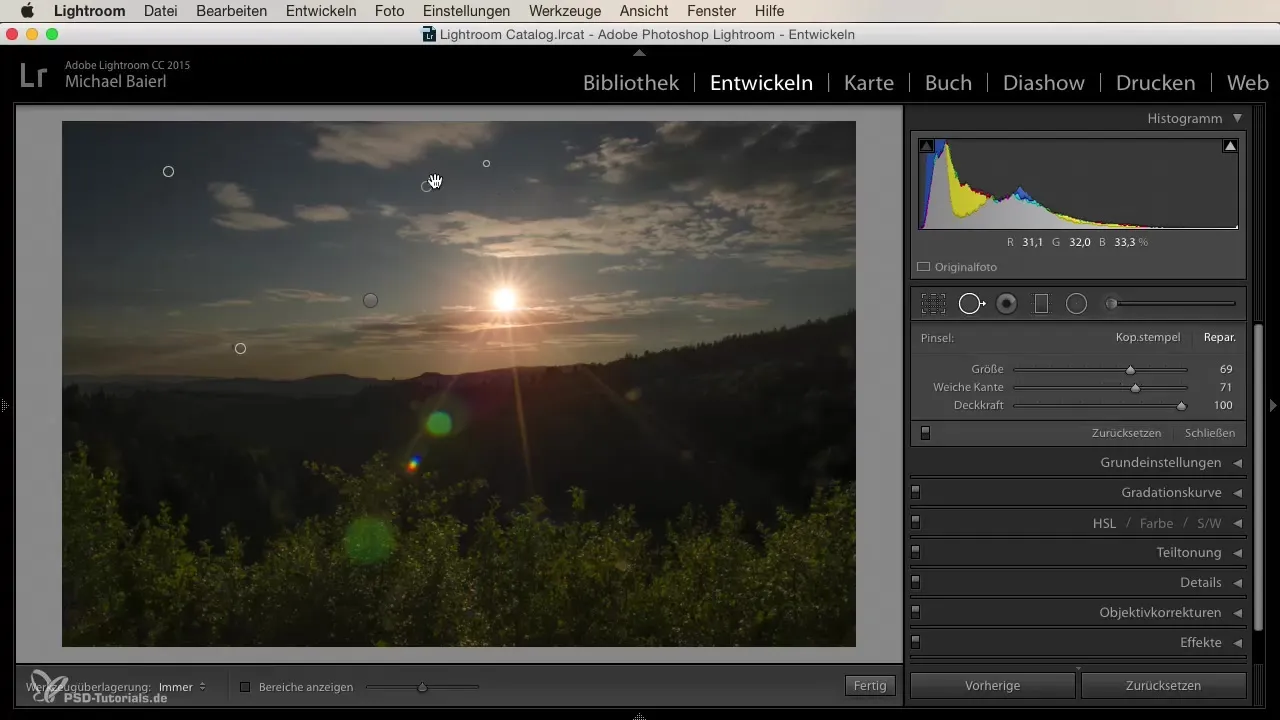
First, open Lightroom and load the image you want to edit. To select the Spot Repair Tool, look for the icon of the repair brush in the toolbar, which looks like a small circle with an arrow. Click on it to activate the tool.
Adjusting brush parameters
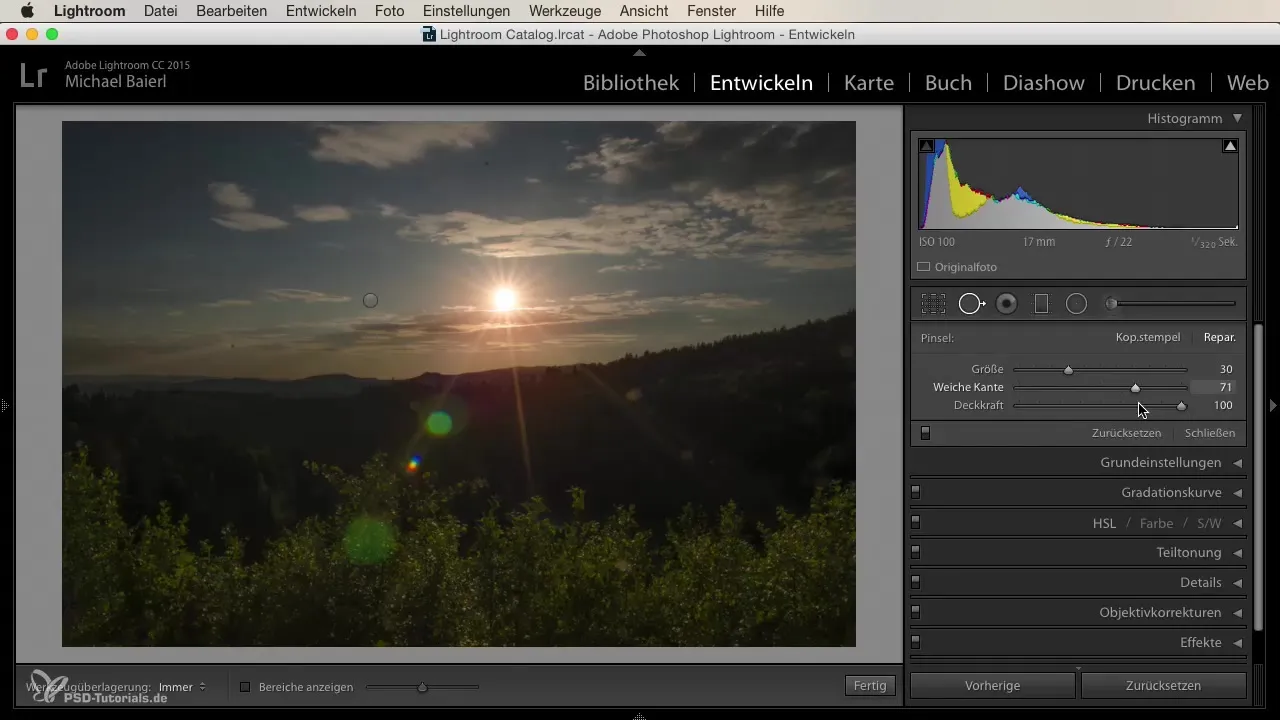
Before you start with the retouching, I recommend optimizing the brush parameters. You can adjust the size of the brush and the softness of the edges through the controls. A softer edge is often better for avoiding harsh transitions.
Performing the repair
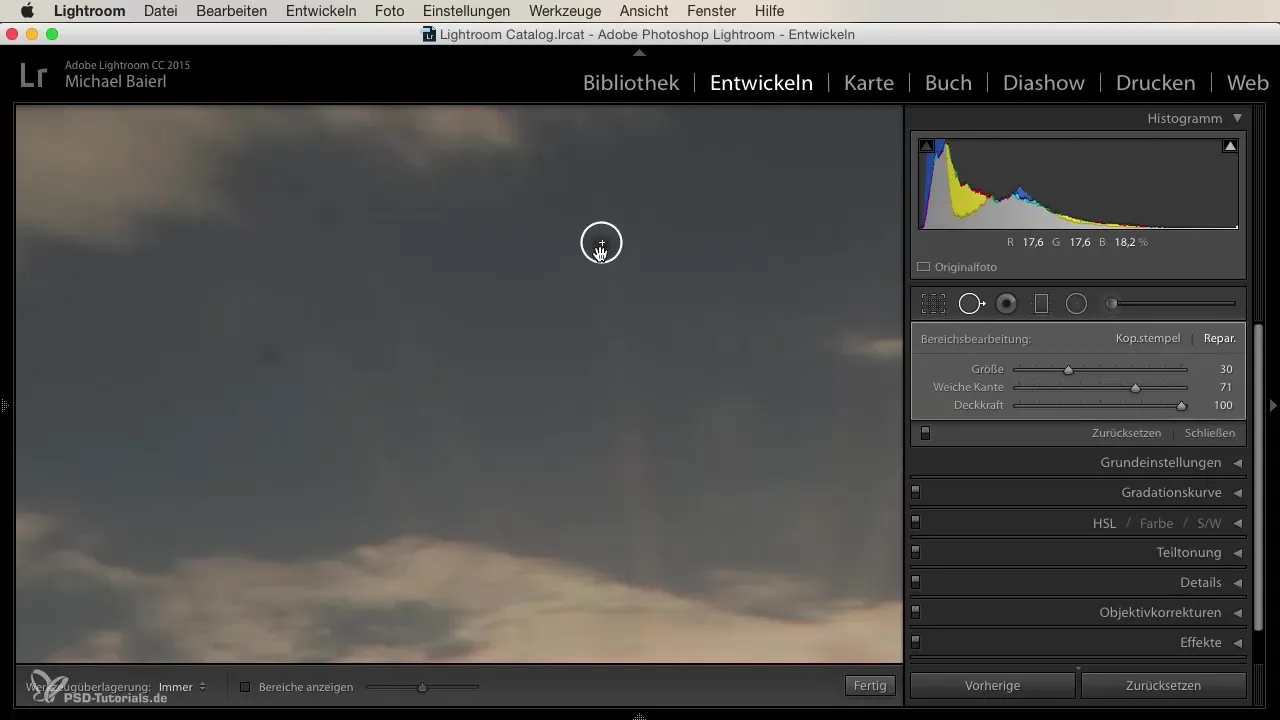
Once you have adjusted the settings, zoom in on the area of your image that needs editing for a better view. When you are close enough, simply click on the unwanted spot—such as a sensor spot. Lightroom will automatically select a healthy spot to replace the blemish. You should see the sensor spot being removed instantly.
Additional corrections
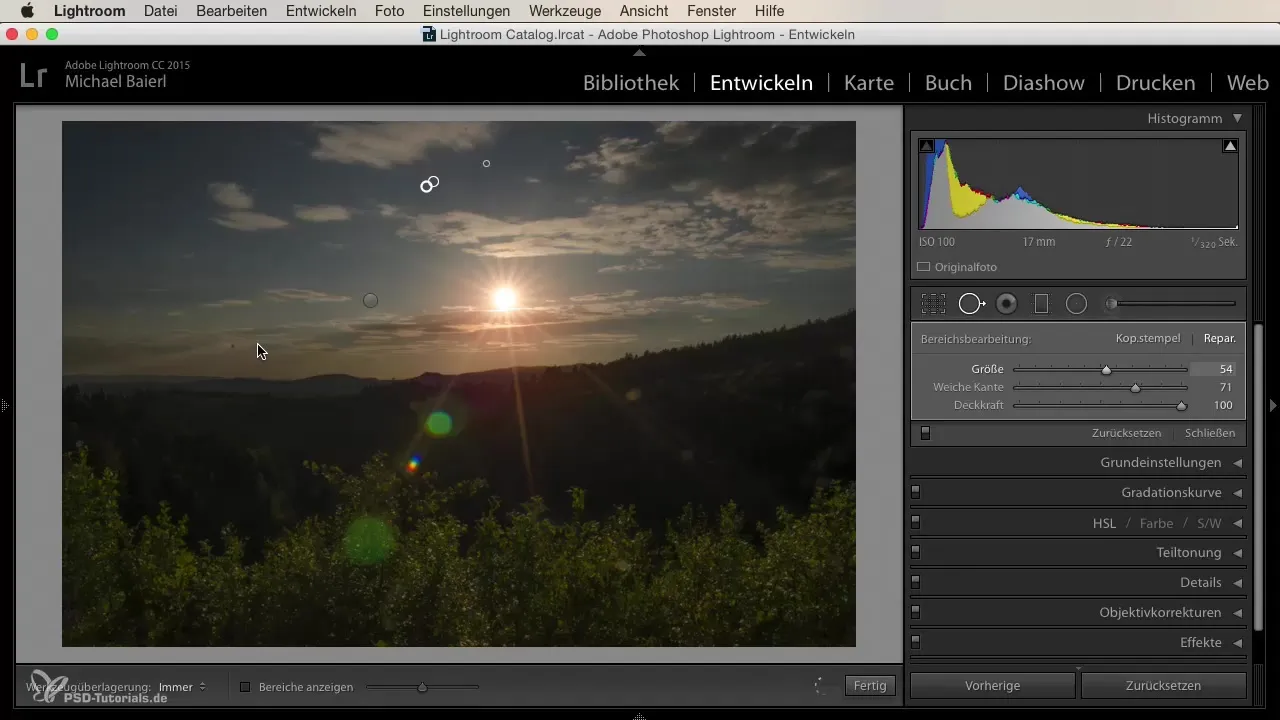
If you see more disturbances in the image after the first click, you can adjust the size of the brush and click again. Make sure that the selection points are placed as inconspicuously as possible. For example, if you want to remove a few smaller skin blemishes, you can adjust the brush to the appropriate size.
Editing difficult areas
If you discover larger areas like cloud spots or other structural blemishes, you can still use the tool effectively. Just click on the desired area, and Lightroom will handle the selection. The result often appears very natural.
Undoing mistakes
If you make a mistake while editing, there’s no need to worry. You can use the delete key on your keyboard to remove the last changes made. This way, you can eliminate any spot corrections or adjustments you didn’t like.
Completing the retouching
Finally, check your image for any remaining unwanted elements. If necessary, use the Spot Repair Tool to remove them. If you are satisfied with the result, you can finish the retouching and save your image.
Summary
Applying the Spot Repair Tool in Lightroom is a simple yet effective way to optimize your images. With just a few clicks, you can remove disturbances and bring your photos to new light.
Frequently Asked Questions
How do I select the Spot Repair Tool?You can find it in the toolbar as a small circle icon with an arrow.
Can I adjust the size of the repair brush?Yes, you can easily adjust the size and softness of the brush in the brush parameters.
How does the automatic selection of healthy areas work?Lightroom analyzes the image and automatically looks for healthy areas to replace the disturbance.
What do I do if I made a mistake?You can immediately undo the last changes with the Backspace key.
Do I need special training in image editing to use this tool?Not necessarily. The Spot Repair Tool is user-friendly and suitable for beginners as well.
