Working with images in Lightroom opens up countless possibilities for photo editing. A particularly powerful tool in your arsenal is the radial gradient. With it, you can selectively highlight or shade areas within an image – ideal for guiding the viewer's gaze. This guide shows you how to effectively use the radial gradient to lighten up your photos and make them more visually appealing.
Key Insights
- The radial gradient is ideal for highlighting or darkening specific areas of an image.
- You can adjust settings such as exposure, color temperature, and more specifically within and outside the circular selection.
- You have the option to create multiple radial gradients and apply them to different areas of your image.
Step-by-Step Guide to Applying the Radial Gradient
Step 1: Choosing the Radial Gradient
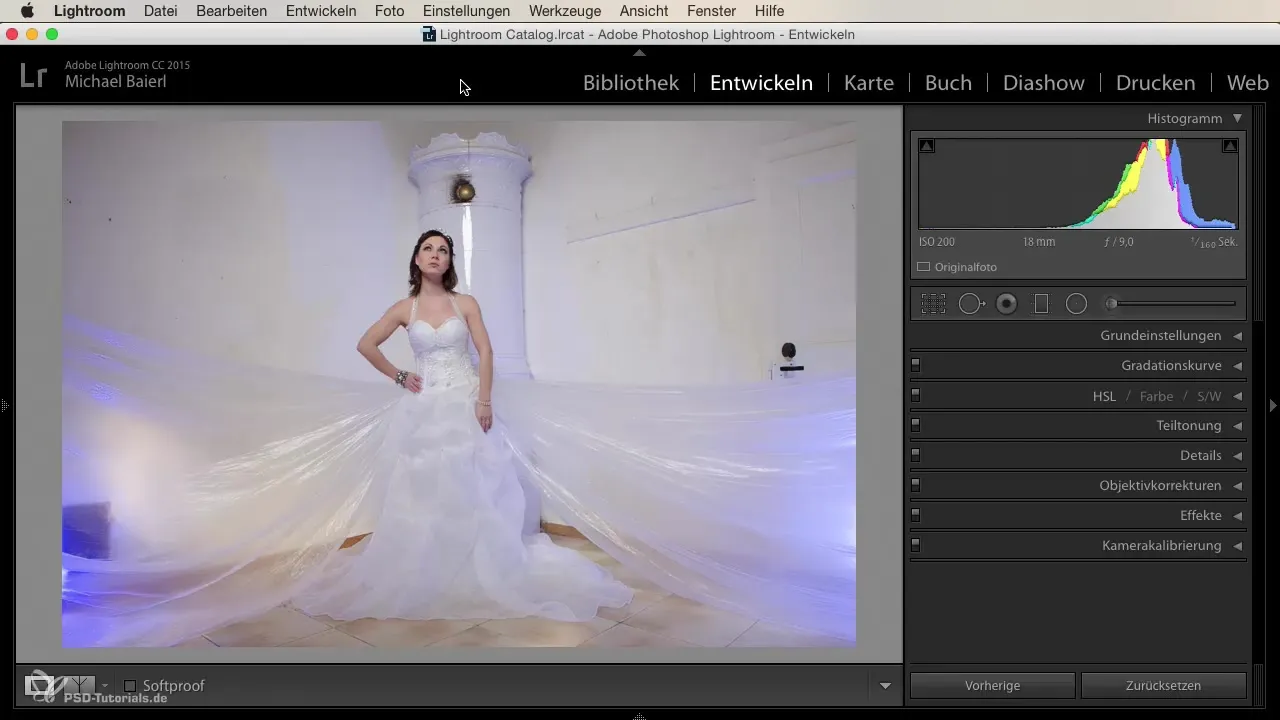
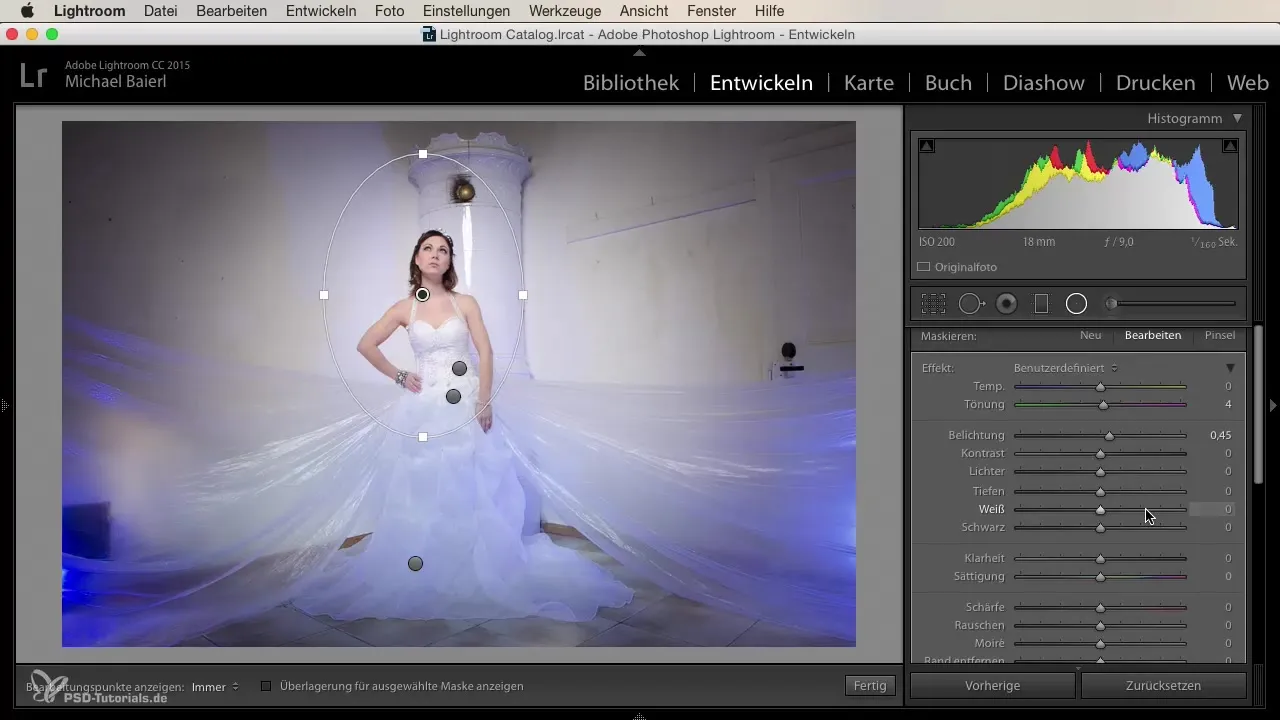
Start by selecting the radial gradient tool in Lightroom. You will find the icon with the circle in the toolbar. Click on it to activate the radial gradient. Now you can click anywhere in your image and draw a round or elliptical gradient.
Step 2: Adjusting the Basic Parameters
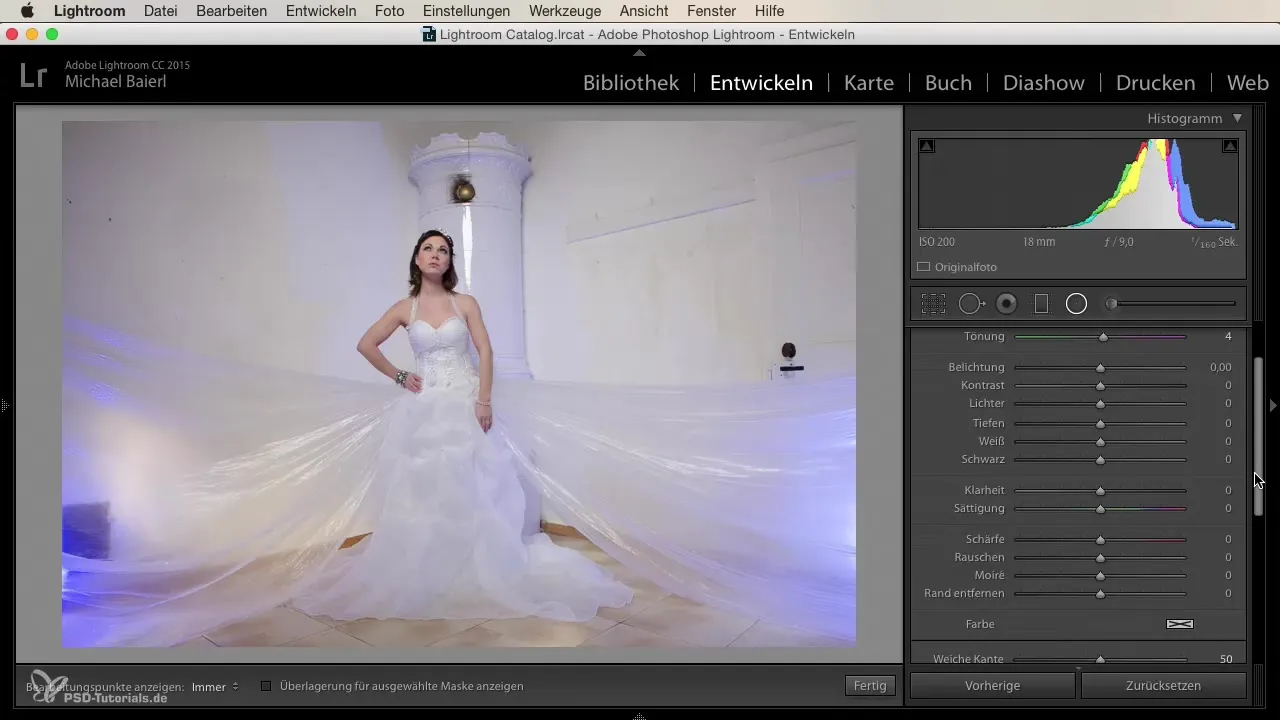
Once you have created the radial gradient, various editing options will appear on the right side. Here, depending on your wish, you can adjust the color temperature, exposure, highlights, shadows, and more. For example: You can increase or decrease the exposure and see how the image changes.
Step 3: Working with Mask Inversion
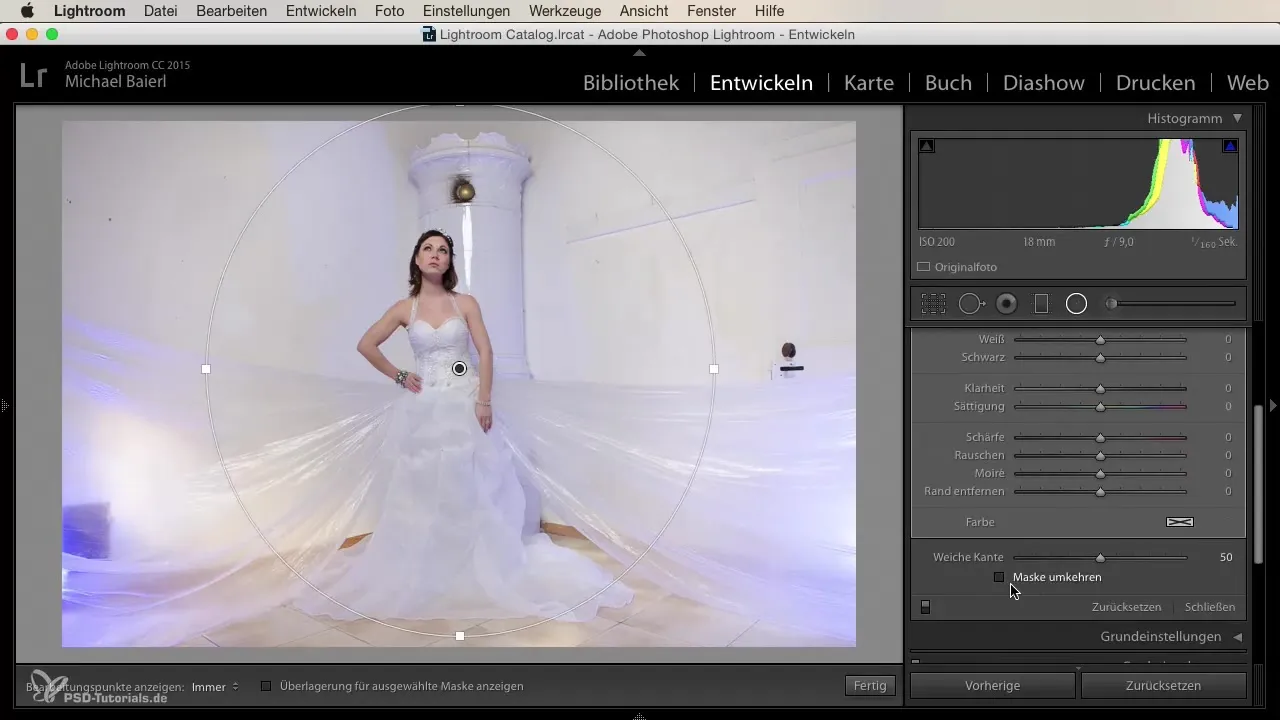
With the "Invert Mask" function, you can determine whether the adjustments will affect the inner or outer area of the radial gradient. For example, if you invert the mask, you can darken the outer area while keeping the central subject well-lit.
Step 4: Creating Multiple Radial Gradients
Lightroom allows you to create as many radial gradients as you like. To create a new gradient, click on "New". You will notice that Lightroom saves your previous gradients and shows you how they affect the image.
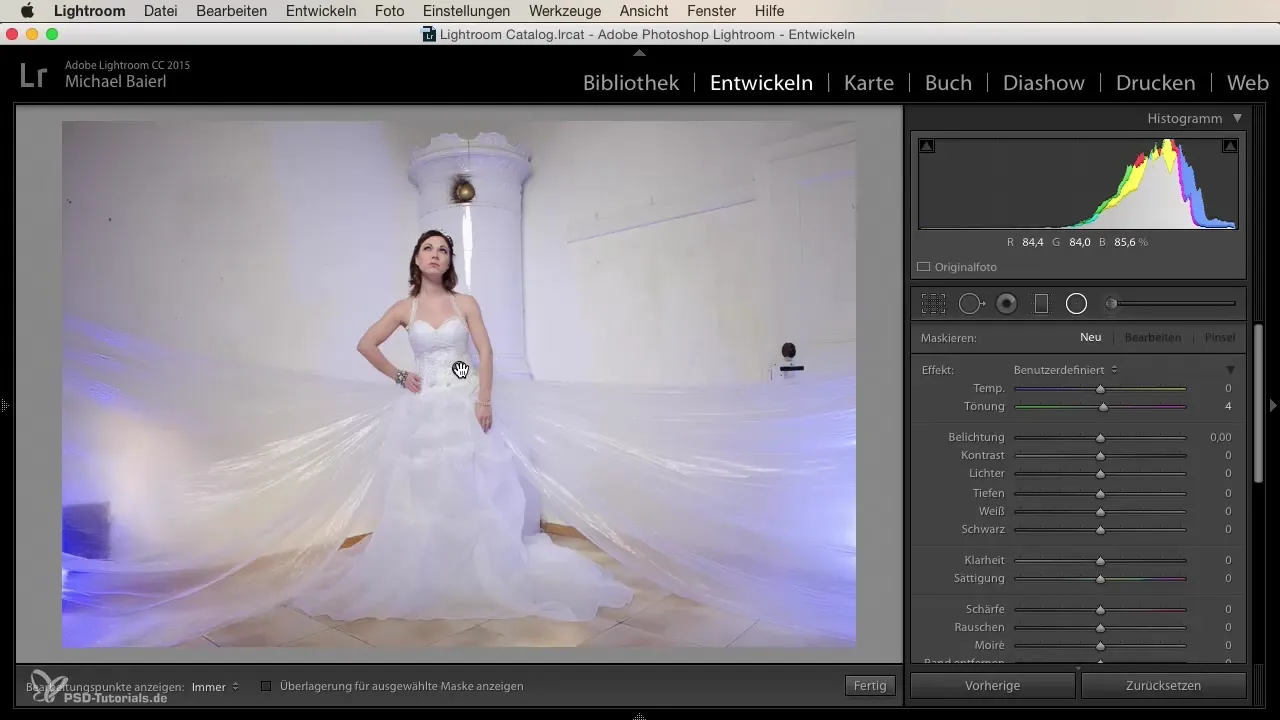
Step 5: Making Color Changes
If you want to change the color within the radial gradient, you can do this via the color temperature setting. For example, set the hue to blue to create a cool mood. Make sure that the mask is set correctly so that the desired color only appears in the intended area.
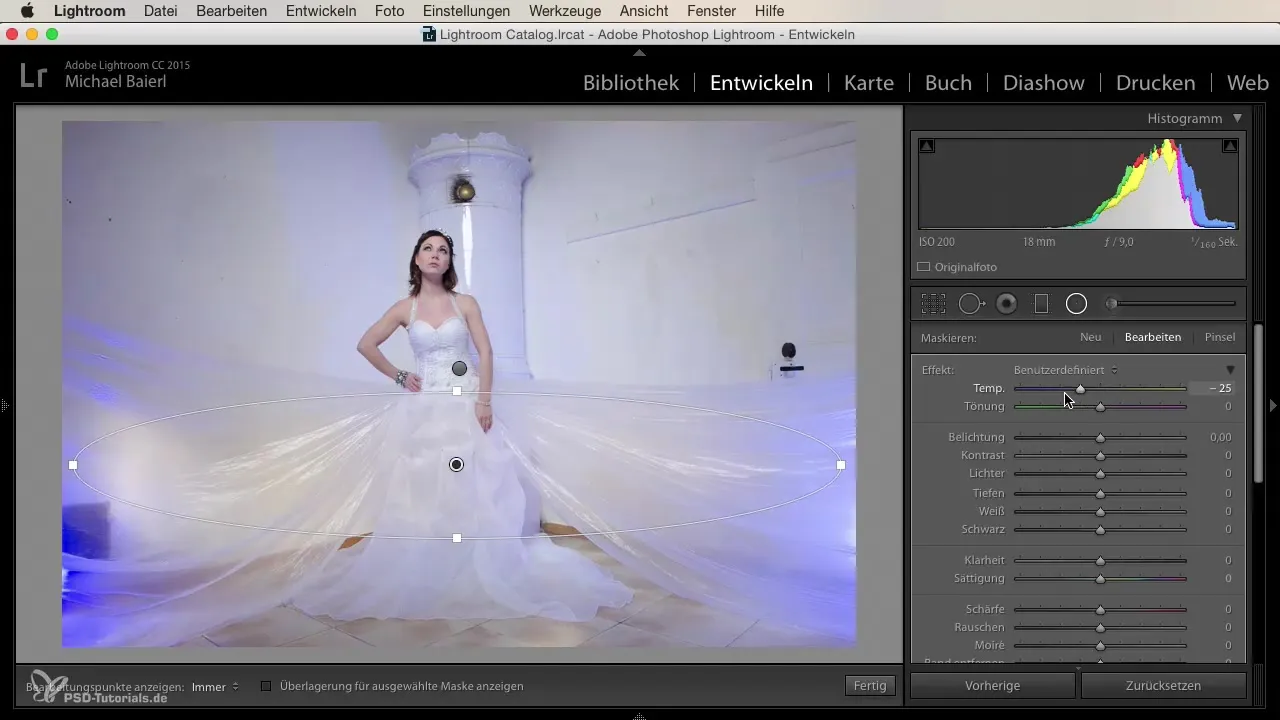
Step 6: Positioning and Fine Tuning
You have the freedom to move the gradient as you wish. You can bring it into the image from the top, bottom, or sides. Position the radial gradient so that it effectively enhances your main subject. It is important to experiment with adjustments so that the light and color effects appear natural.
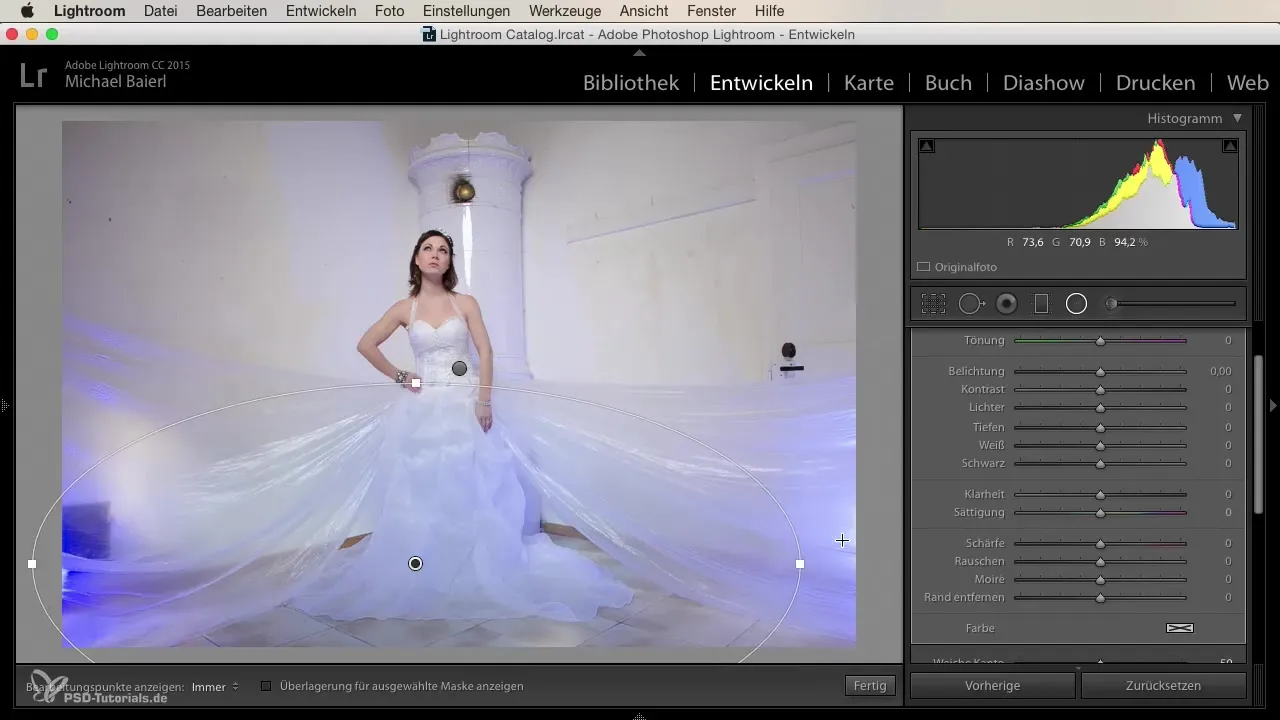
Step 7: Adding Additional Gradients
To further refine the image, add additional radial gradients. For example, you can create a central gradient that illuminates the main subject while lowering the exposure in the outer area. Such effects can give your image a dramatic touch.
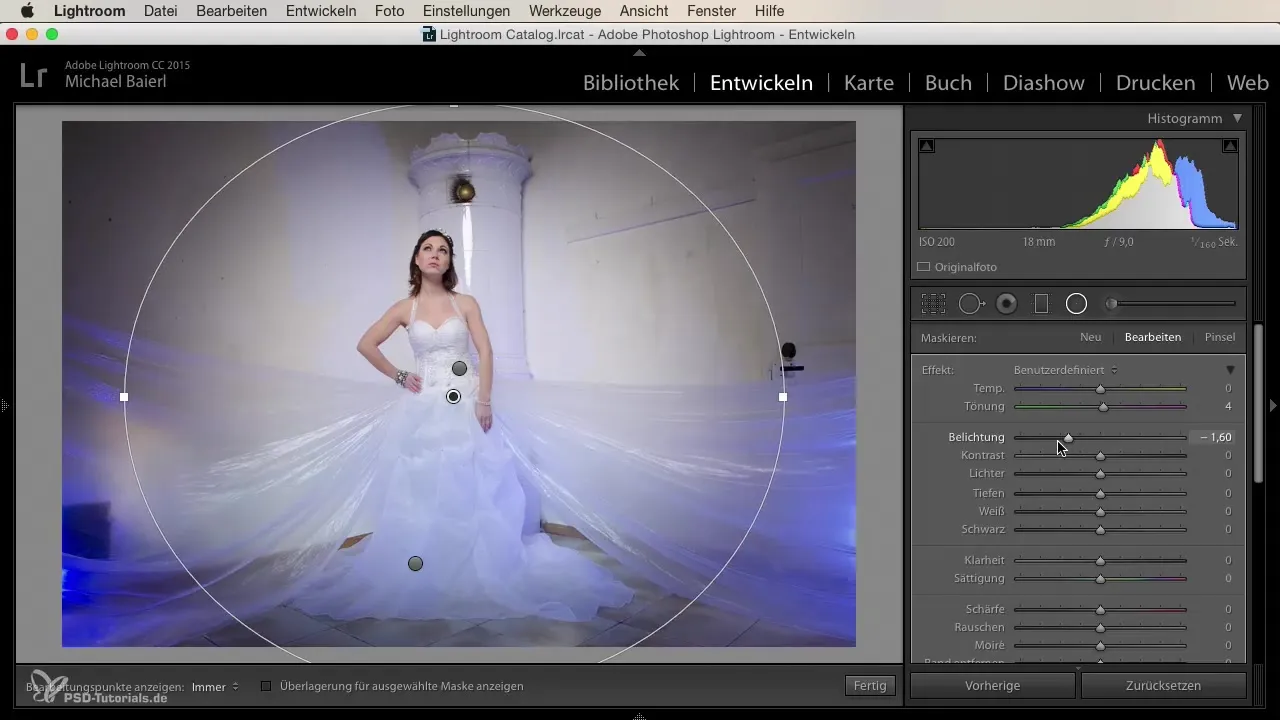
Step 8: Reviewing the Final Look
Take a final look at your image and check the effect of the radial gradients. Play with the settings until you are satisfied with the result. A subtle, fine effect can often make a much greater impression than an exaggerated adjustment.
Summary
Working with radial gradients in Lightroom offers a great opportunity to add depth and tension to your images. You can adjust both lighting and hues within targeted areas, significantly enhancing the visual composition of your photos.
Frequently Asked Questions
How do I create a radial gradient in Lightroom?Click on the radial gradient icon in the toolbar and drag a circle or oval onto the image.
Can I invert the masks?Yes, you can invert the mask to make adjustments either in the inner or outer area of the radial gradient.
How many radial gradients can I create?There is no limit; you can create as many radial gradients as you need.
How can I adjust the color?Use the color temperature setting in the editing area of the radial gradient to apply the desired color.
What should I pay attention to when positioning?Make sure that the position of the radial gradient emphasizes the right area of your image to achieve a balanced result.
