You have edited your pictures, cataloged them, and made the perfect settings in Lightroom. But what comes next? The final step is to unleash your masterful works into the world, and that happens with Exporting. In this guide, you will learn everything you need to know about the necessary export settings to get the most out of your images.
Key insights
- The export is the crucial step to save your pictures as actual files.
- Folder structure and file names play a critical role in the clarity of your exports.
- The choice of file format and quality has a significant impact on the final result of your images.
Step-by-Step Guide
Exporting Images in Lightroom
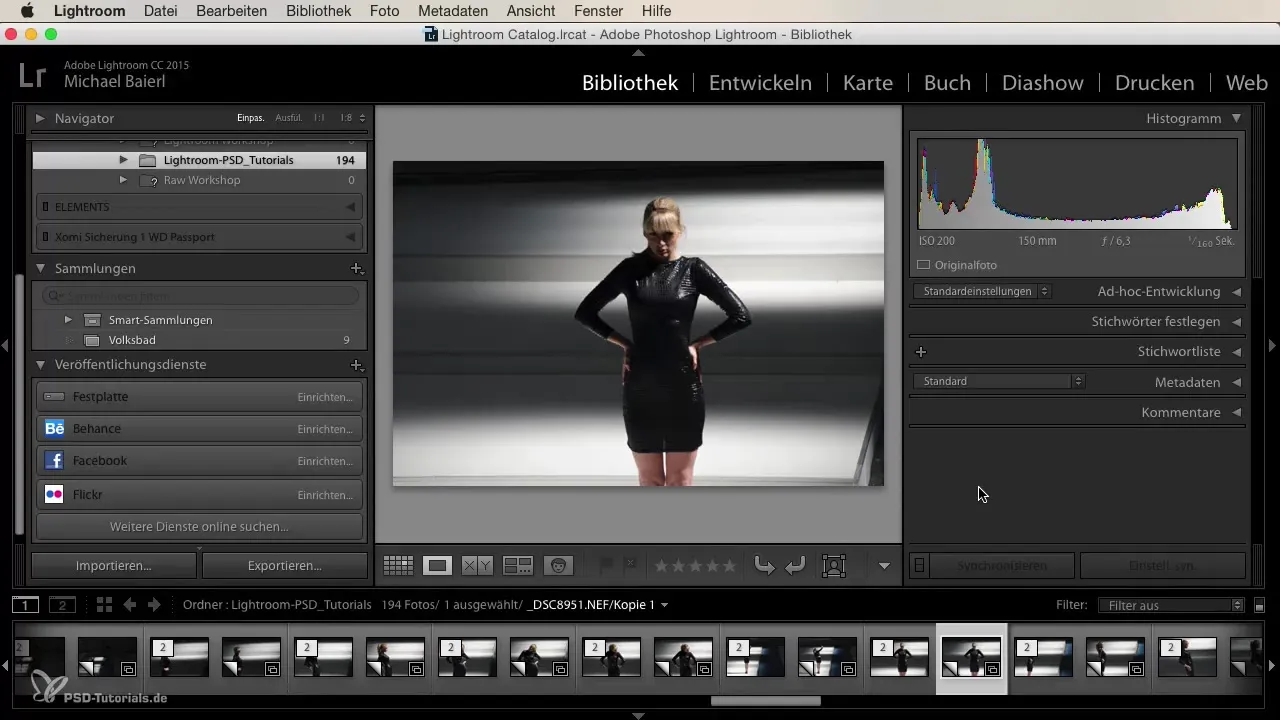
The export process begins by clicking the export button, which is located right next to the import button in Lightroom. This opens a comprehensive dialog that offers you numerous options to customize the output of your images.
Selecting the Destination Folder
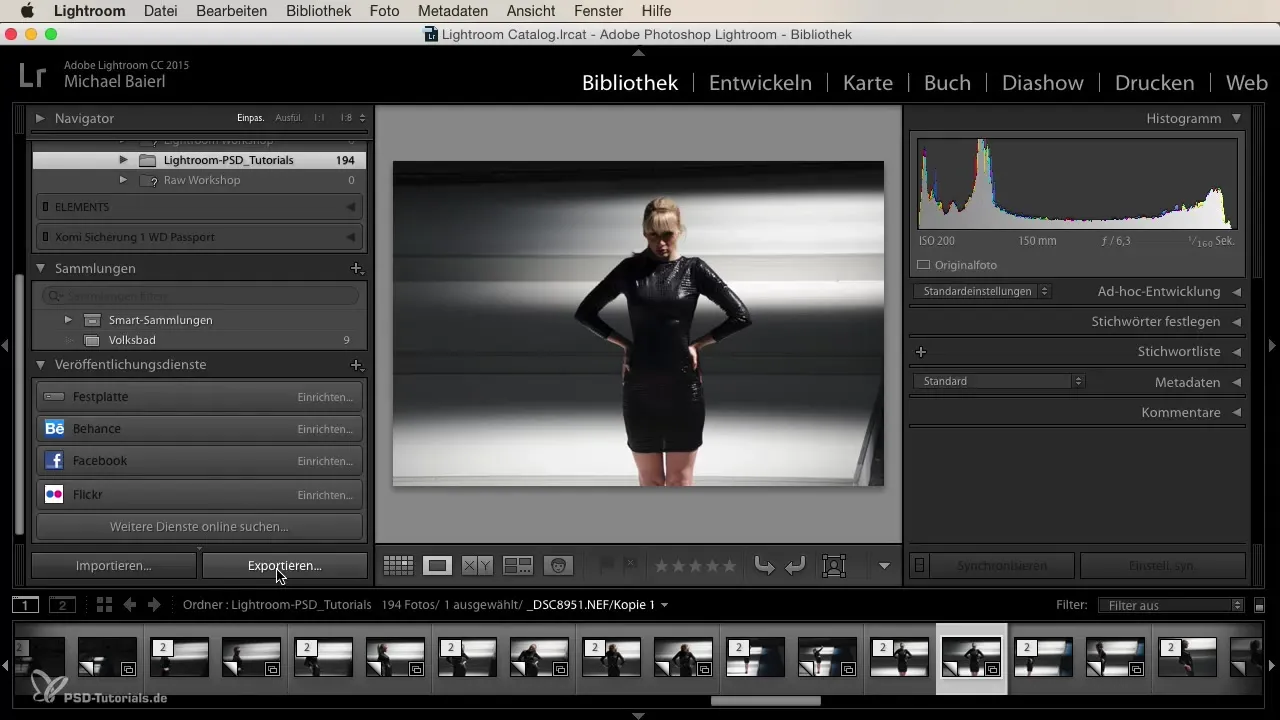
First, you should determine where your exported images will be stored. The option to save them in the same folder as the original image may seem tempting, but I recommend creating a new folder for better organization. You can then sort the images by specific projects or sessions, making it easier to find them later.
Naming the Exported Files
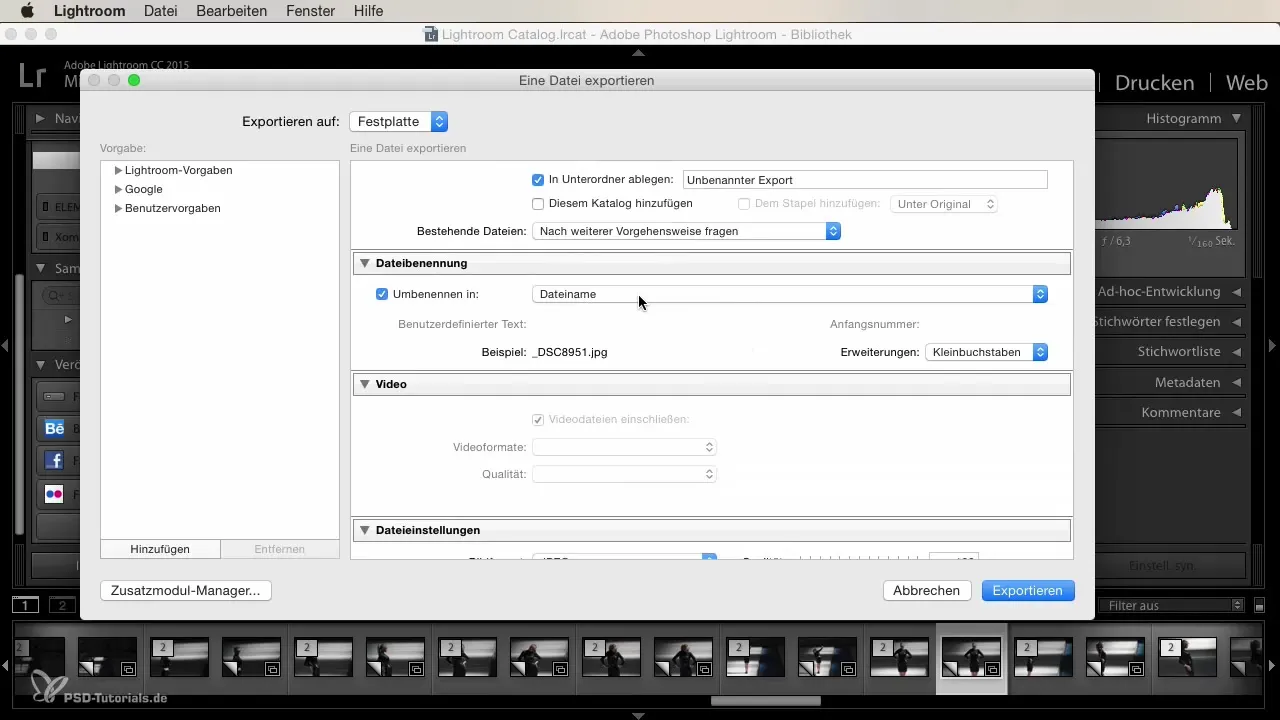
When exporting, it's important to personalize the file name. Instead of relying on the default designation, such as "DSC 8951," you can add the date or a custom text. This way, you have an immediate reference to the content and can find your images more easily. For example: "2023-10-01_Shooting_XY_Anna_Sommer".
Selecting the File Format and Quality
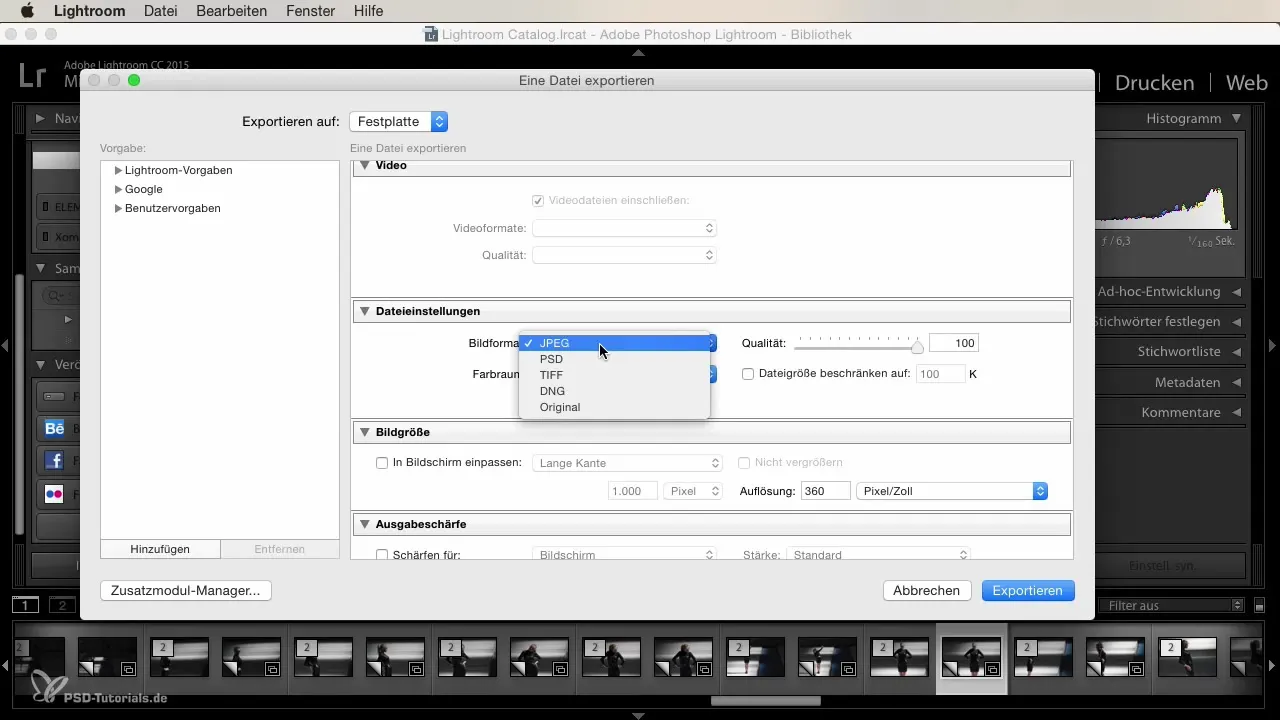
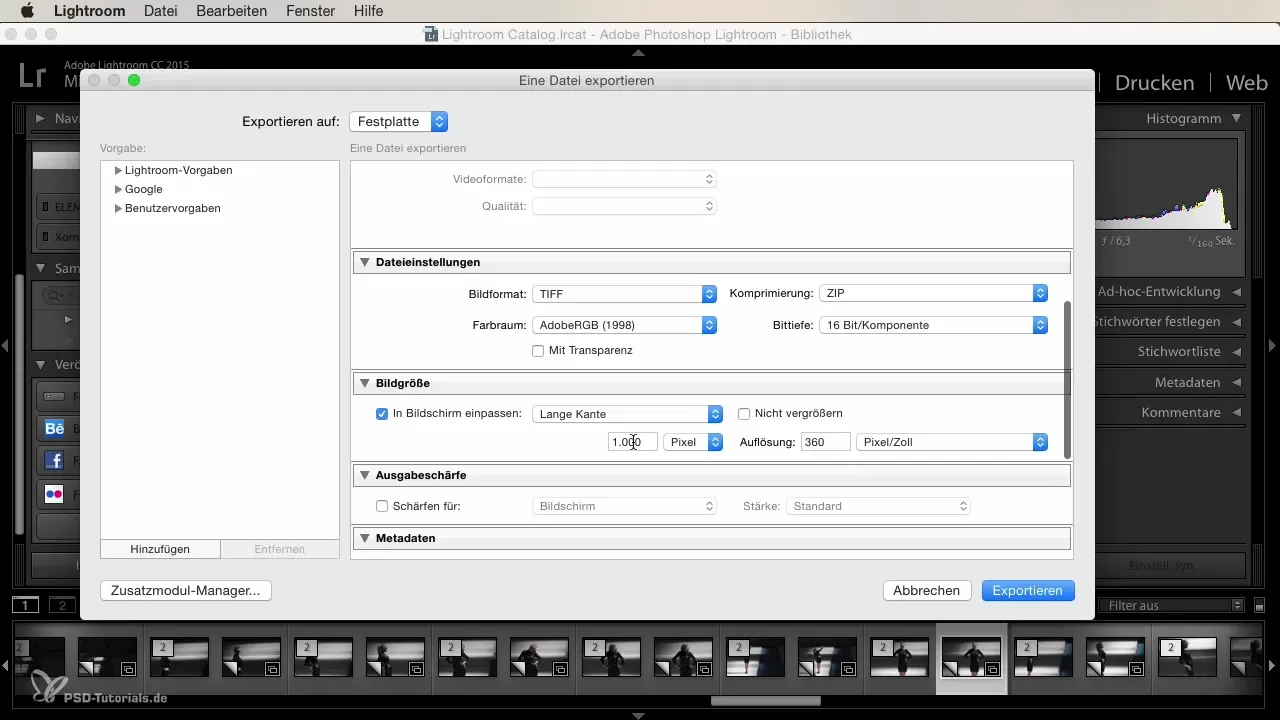
The next essential element of your export settings is the file format. I recommend avoiding JPEGs if you want to get the most out of your exports. TIF or DNG files are often the better choice as they provide higher quality. Make sure to set the quality to 100% to ensure that your images are exported in the best quality.
Adjusting Image Size and Resolution
Here you can set the image size and DPI (dots per inch). For online use, a long edge of 1000 pixels is often sufficient, with the resolution reduced to 72 DPI. This prepares your images optimally for websites or social media.
Filtering and Exporting the Images
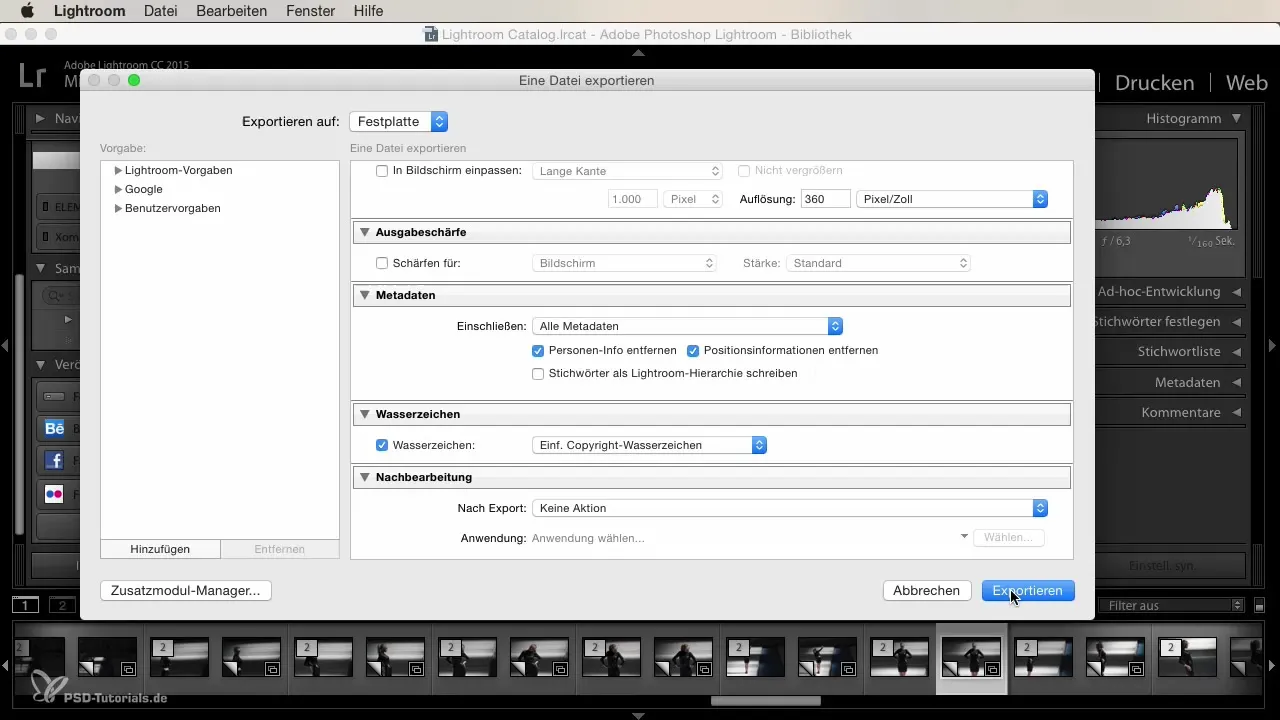
Before you finally initiate the export, review all settings again and ensure that everything meets your requirements. Once you are sure that all is entered correctly, you can click on “Export.” Depending on the number of photos, this process may take some time. It will be the first time that your development settings are transformed into physical image files.
Summary
In this guide, you have learned the required steps and important settings for exporting images in Lightroom. From choosing the destination folder to the file format and image size, you can now professionally export your images and optimally prepare them for various uses.
Frequently Asked Questions
How do I choose the right destination directory for export?It's advisable to use special folders for projects or sessions to maintain clarity.
Which file format should I choose for export?TIF or DNG is preferred, as they offer higher image quality compared to JPEG.
How can I better name my exported files?Use relevant information like the date and specific project labels to make them more distinct.
What is the best image size for social media?A long edge of 1000 pixels with 72 DPI is ideal for web use.
How long does it take to export my images?The duration of the export depends on the number of images and the complexity of the settings.


