Wedding photos are something truly special. They capture the most emotional and beautiful moments of a day that many want to remember forever. An appealing image look for these special occasions can significantly enhance the impression of wedding photos. In this guide, I will show you how to create a contemporary wedding look in Adobe Lightroom that is both elegant and customizable. Just follow the steps to make your images shine.
Key Insights
- A wedding look should be modern, appealing, and adaptable.
- Color corrections are crucial to minimize distracting elements.
- With HSL and split toning, you can give your images a personal touch.
Step-by-Step Guide
To create a wedding look, start by selecting a suitable image. For the first step, it is important to choose an image where the bride or the bridal couple is clearly visible. The image could, for example, show a back view of the bride, highlighting the details well.
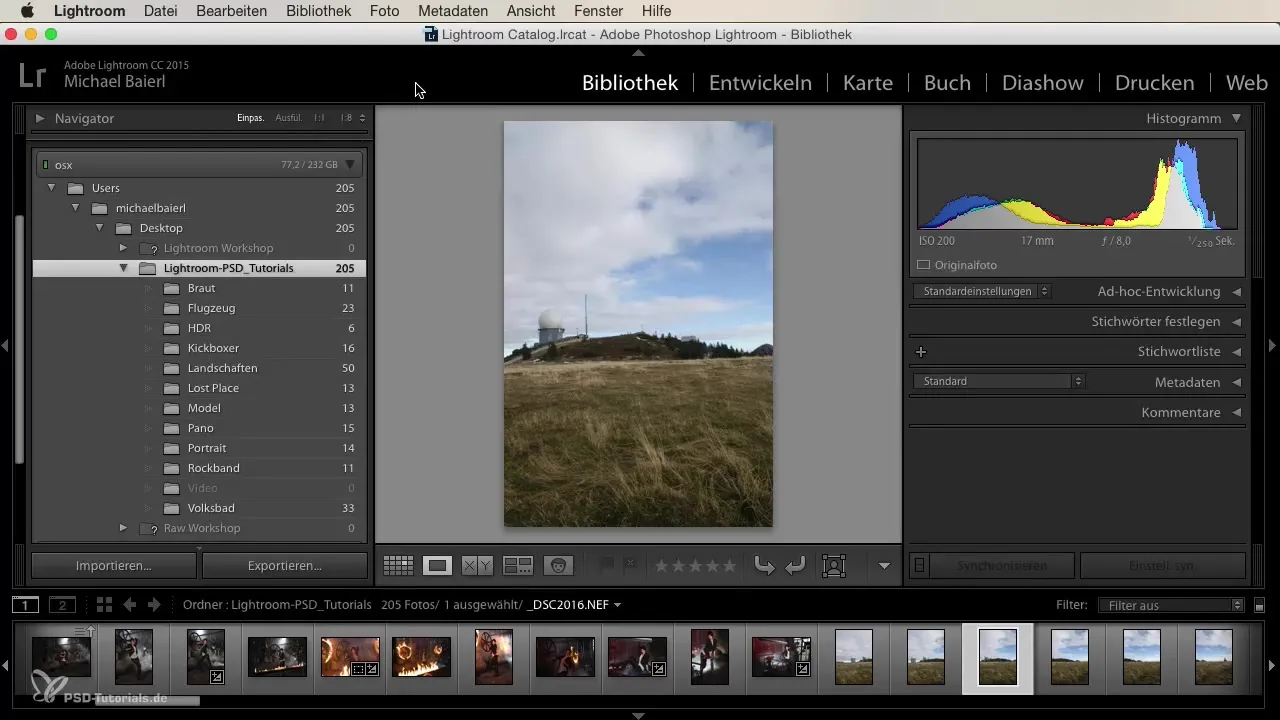
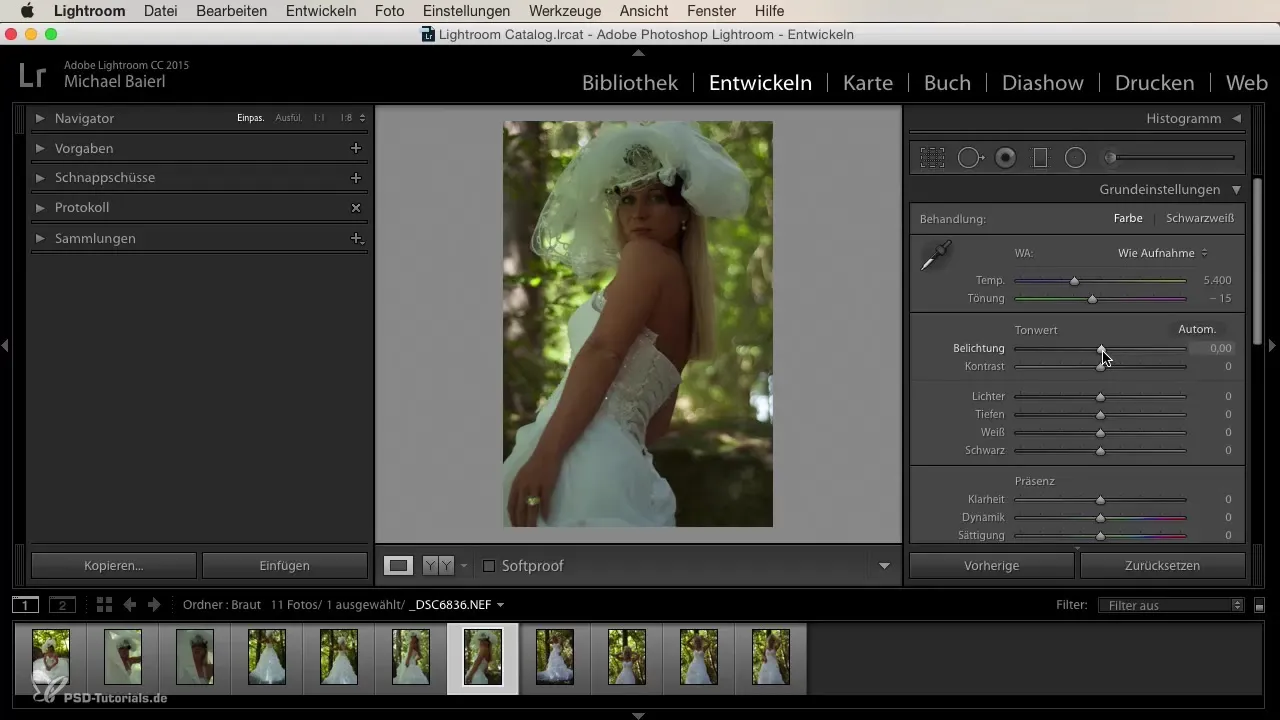
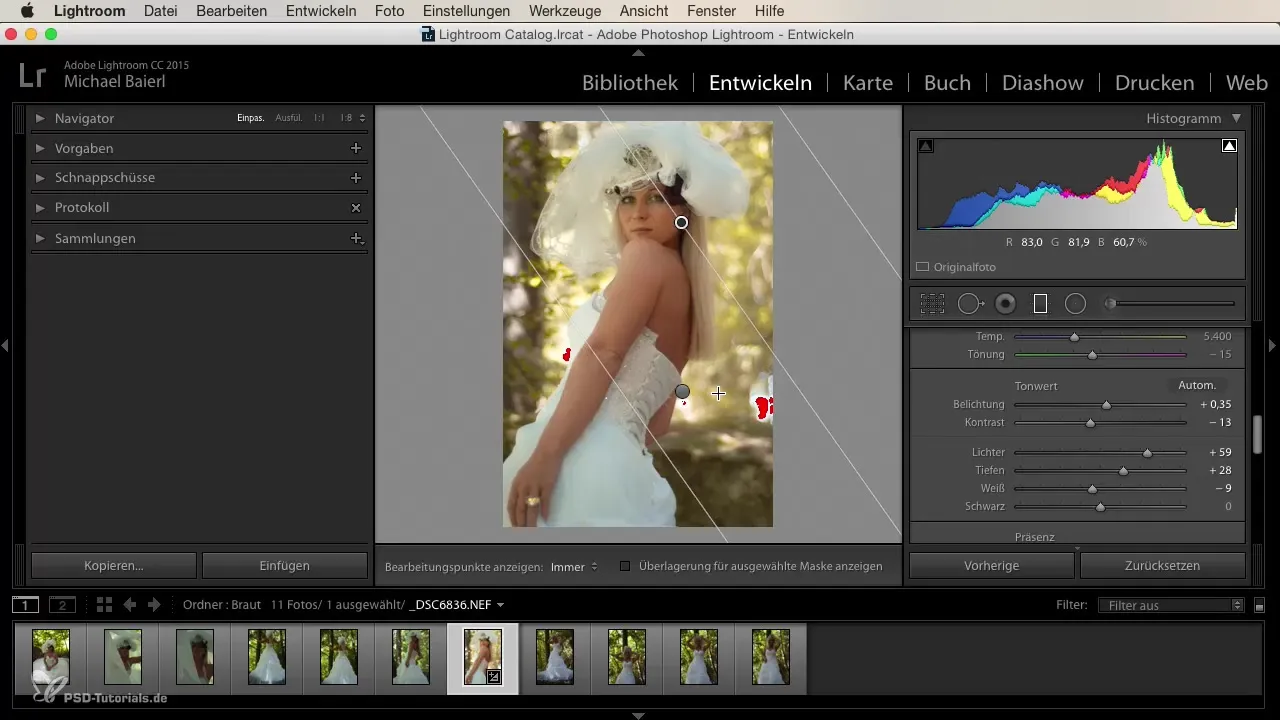
Once you have selected your image, the next step is basic correction. Switch to the Develop module in Lightroom. Here you should adjust the exposure of the image. A slight increase in exposure can already show a big effect here. At the same time, you can lift the shadows a little to make more details visible in the darker areas.
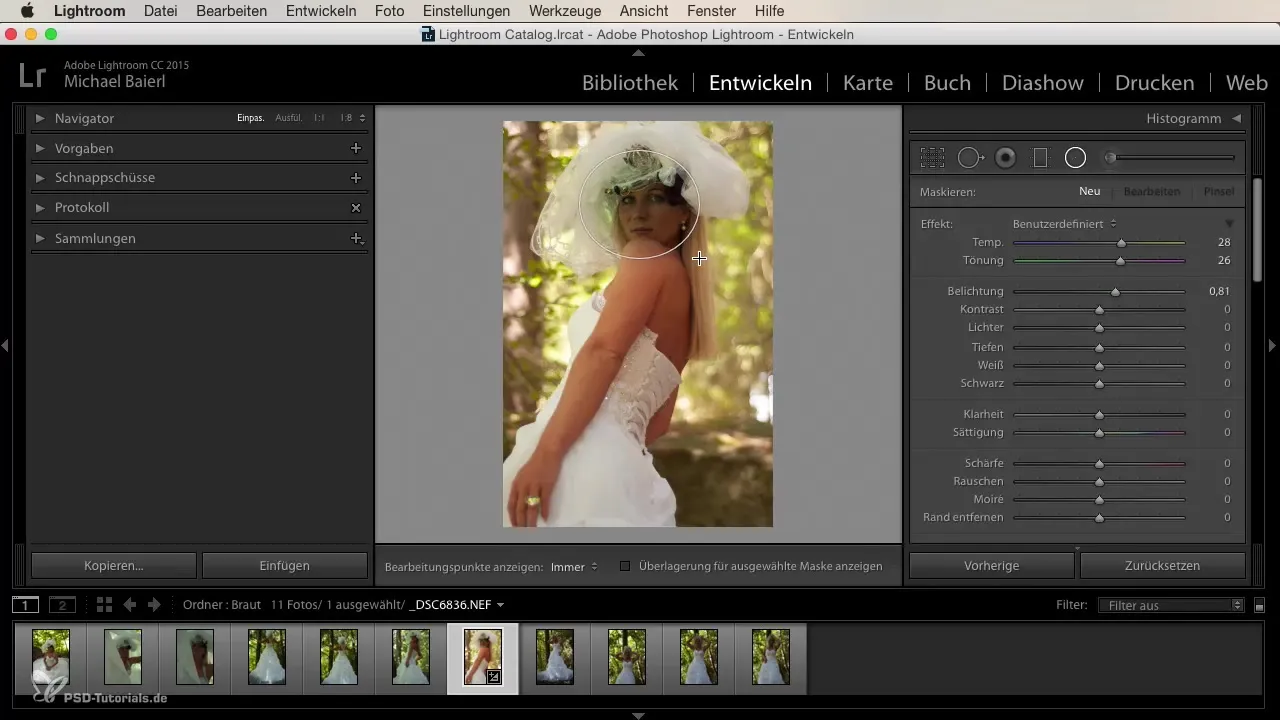
Check the bride's face. If it appears too dark, you can use a radial gradient to increase brightness in the facial area. Drag the gradient over the face to highlight it without affecting other areas of the image.
To optimize the final look, check the basic settings. You want the image to retain a lot of clarity but not appear too harsh. Reduce the clarity a bit to achieve a soft, romantic effect.
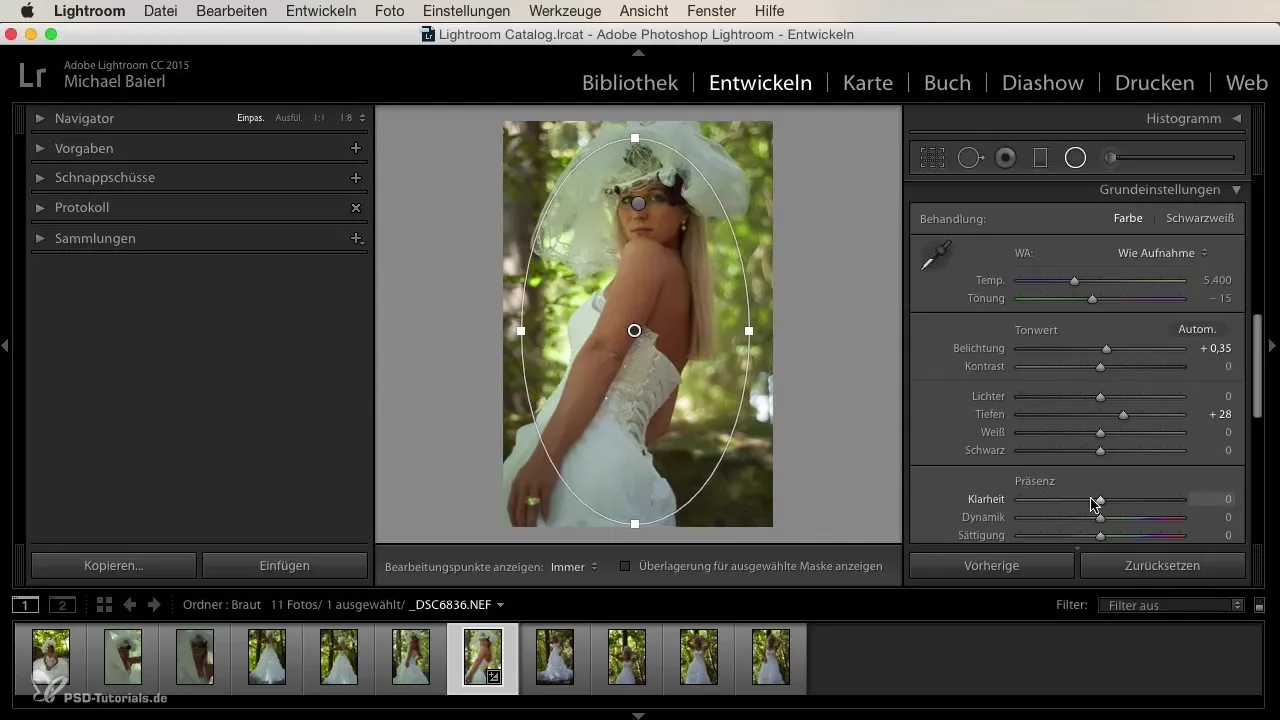
Go ahead and reduce the contrast to achieve a more even light distribution. At this point, you can lift the highlights so that the white areas of the image shine and adjust the whites to a pleasing level.
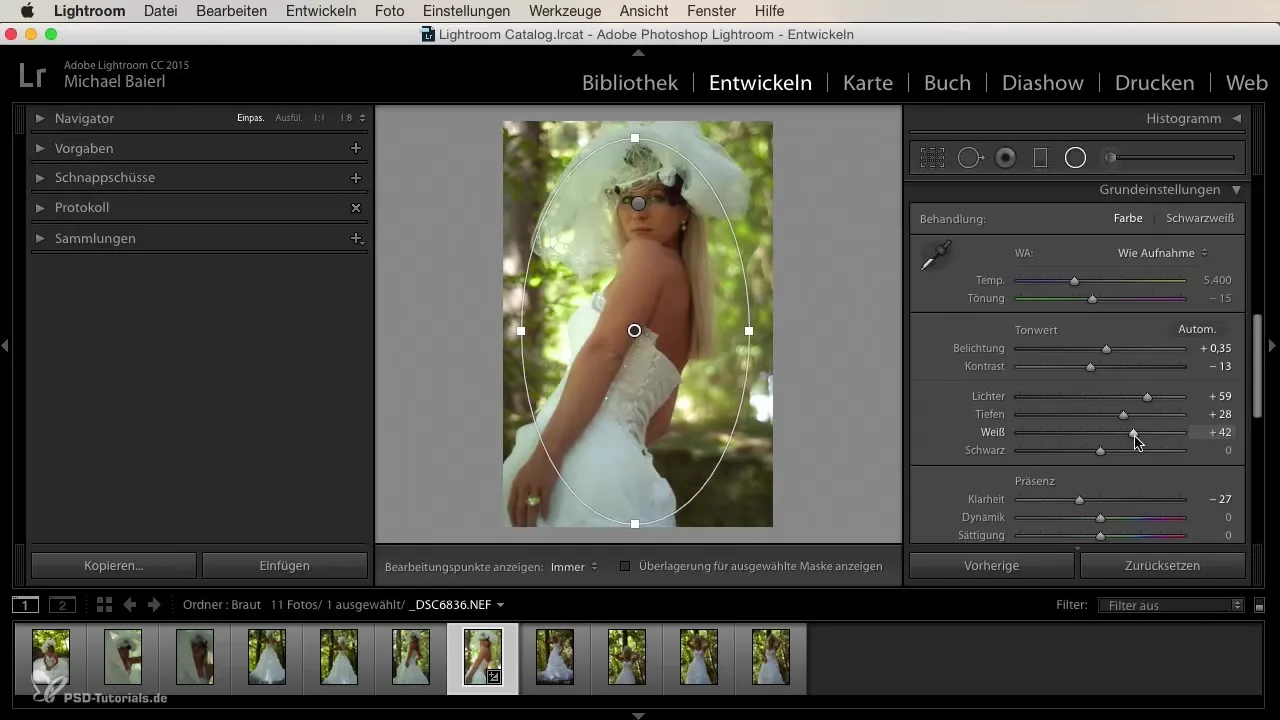
Additionally, you should brighten the image further to create a light and fresh look. Also, check the white balance. Here you can add a little more light to the side to maximize the bright, radiant effect.
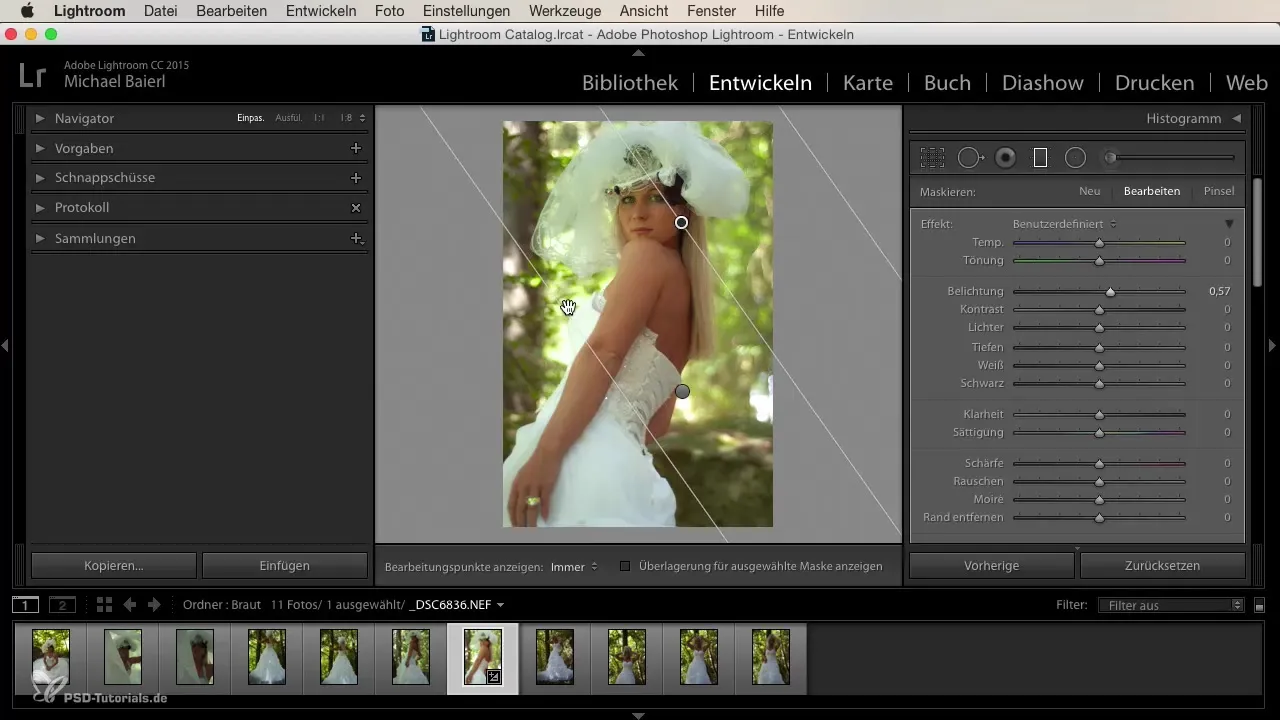
Now it’s time to edit the colors. Go to the HSL adjustments (Hue, Saturation, Luminance). Start with the greens that often appear too dominant in wedding images. Move the green hue slider to the left to create the impression of brown and earth tones, which appear more effective and elegant.
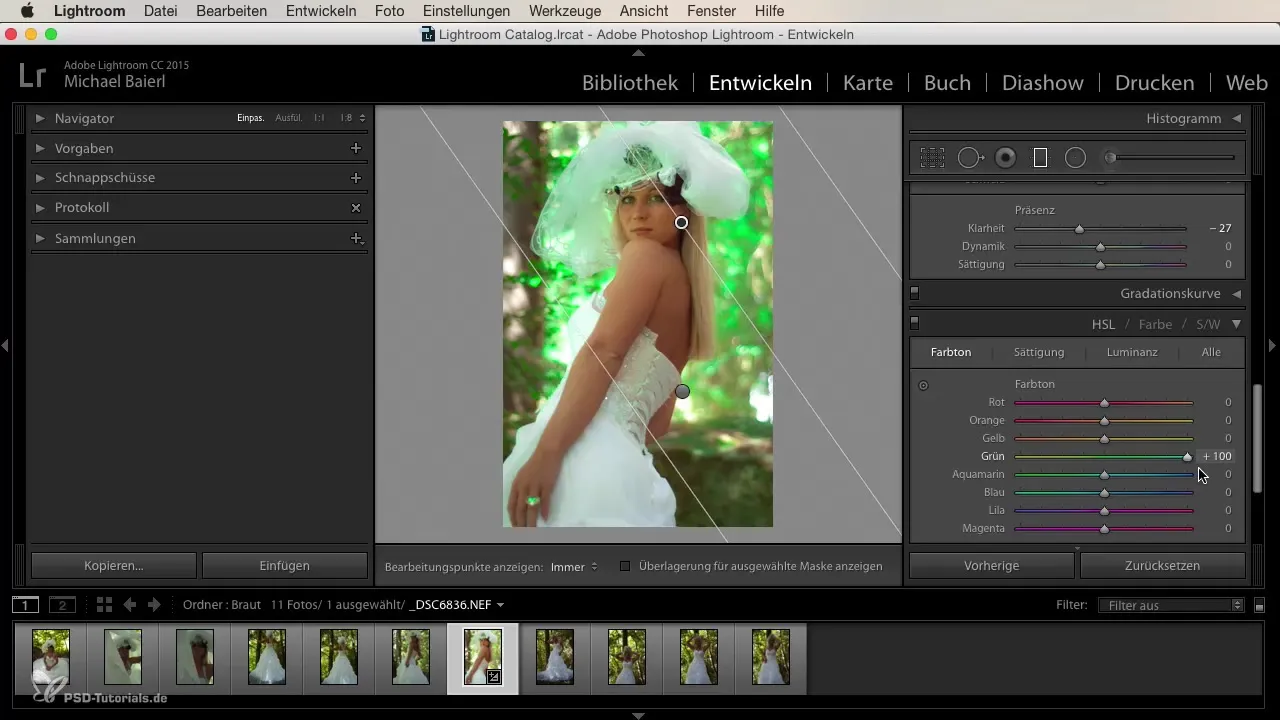
Make sure to also adjust the saturation of the green tones. Remove excessive saturation to achieve a more harmonious color palette. Optionally, you can move the yellow and orange sliders to the right to create an autumnal, romantic mood.
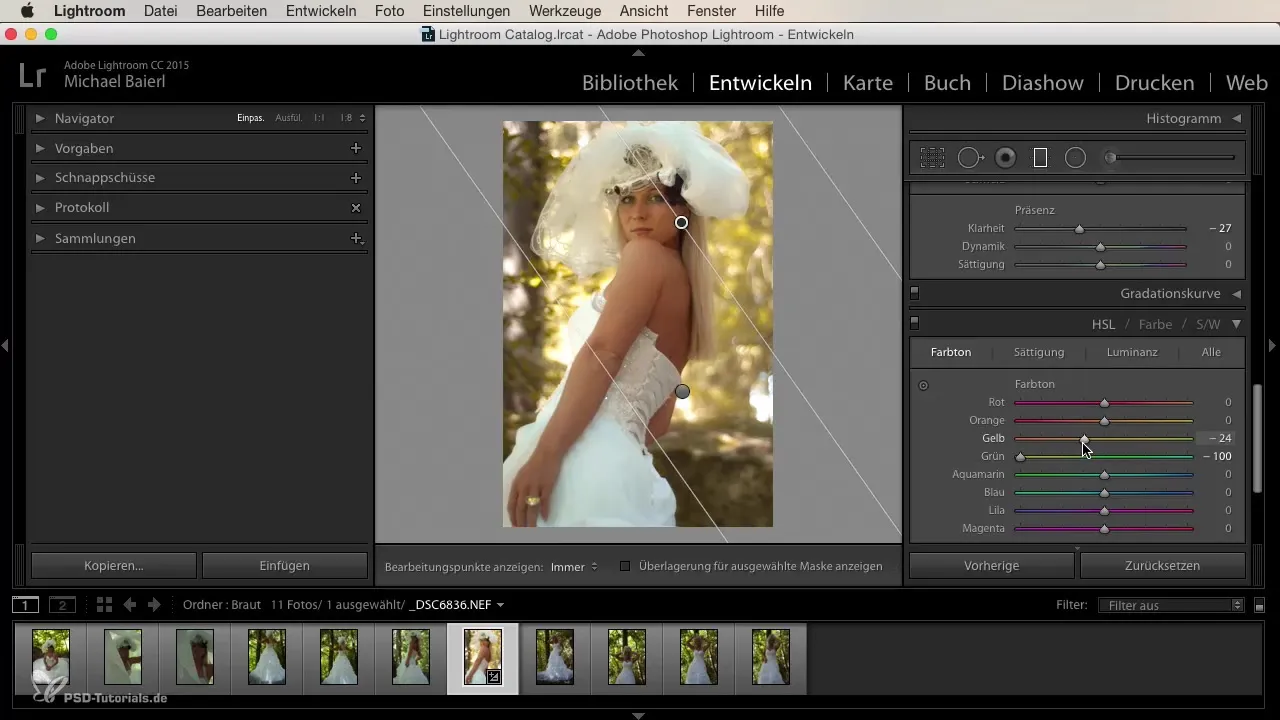
Then check the luminance of the green values. Here you can experiment to preserve the bride’s drawing. If you pull the slider down, the contrast is reduced, and the entire image appears more vibrant.
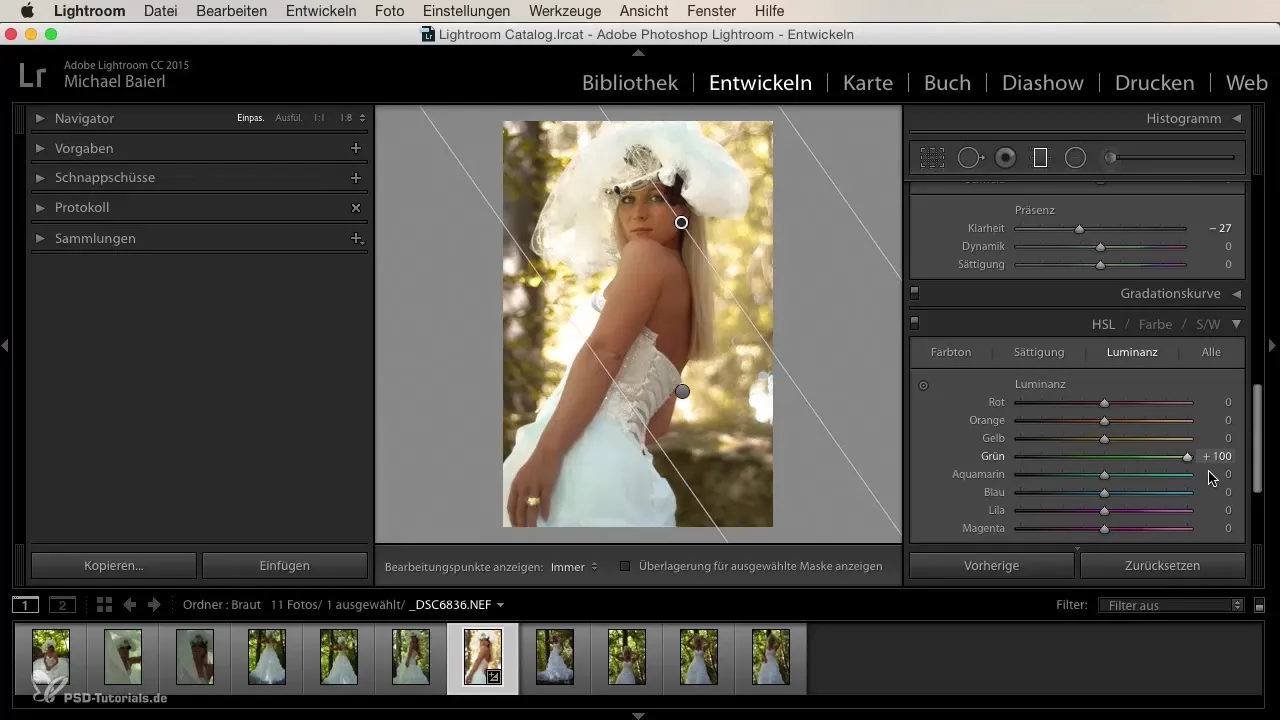
Finally, it is important to ensure that the details in critical areas of the image remain intact, especially in the bride's chest area. Check the histogram to avoid cutting off important details in the brighter areas.
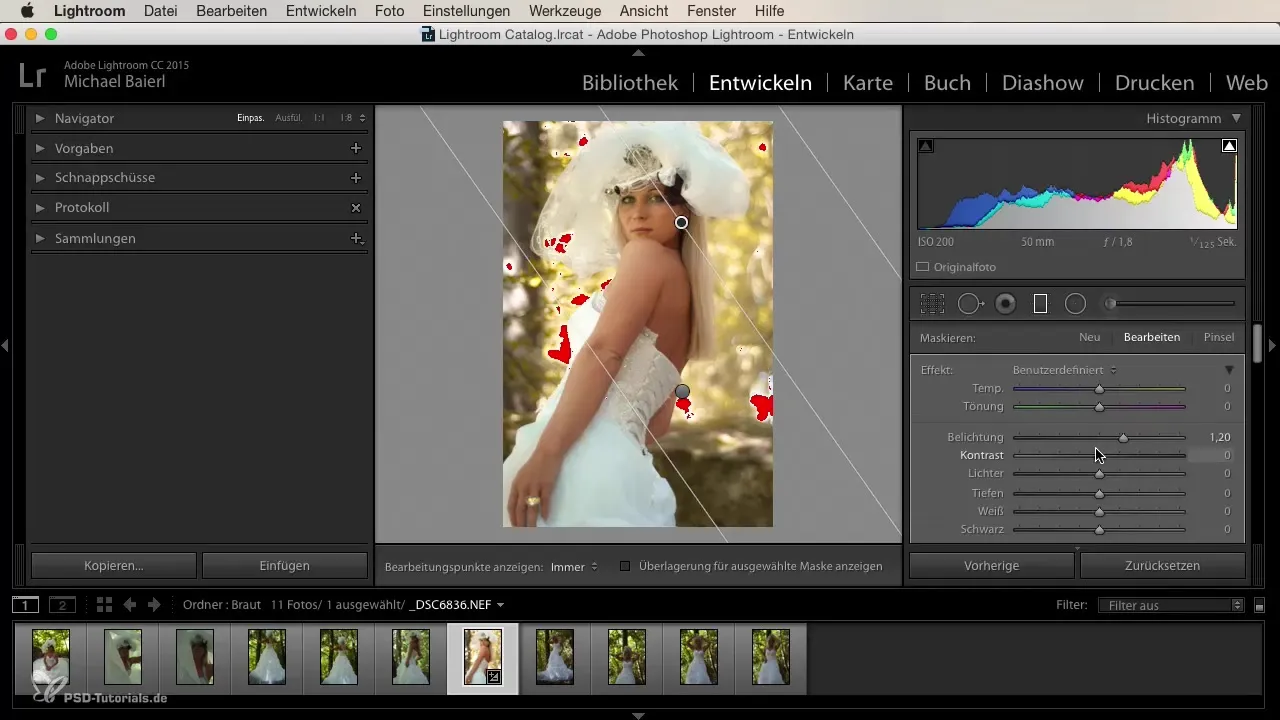
To complete the look, you can use the brush tool to selectively choose areas and edit them according to your preferences. Here you can decide how much you want to emphasize or downplay.
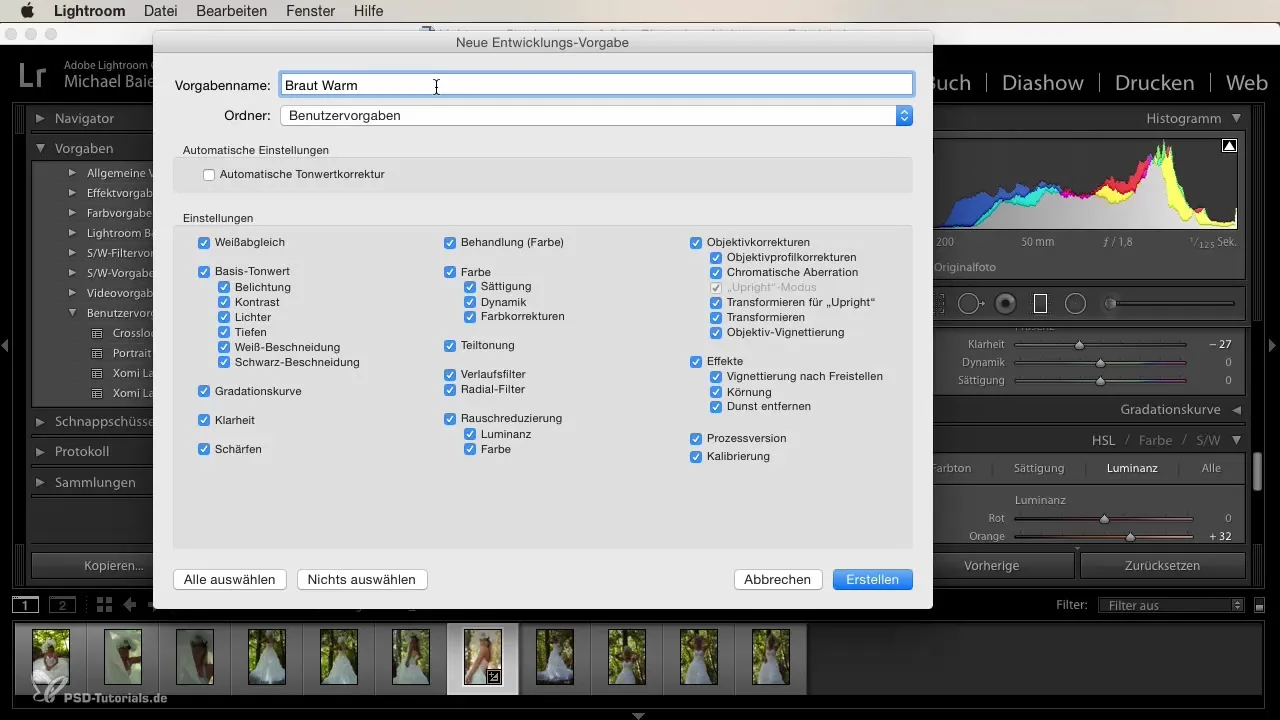
Do you want to use this wedding look for future projects? Save your edited image as a preset in Lightroom. Give it a concise name, such as “Bride Warm Without Green,” and create more pleasant and harmonious wedding edits.
Summary
An effective wedding look gives your images a contemporary aesthetic and ensures that the emotions of the big day are wonderfully showcased. Through color corrections and targeted adjustments, you will achieve bright, appealing photos that are sure to impress.
Frequently Asked Questions
What is the first step in creating a wedding look in Lightroom?The first step is to choose a suitable image where the bride or bridal couple is clearly visible.
How can I adjust the exposure in the image?You adjust exposure in the Develop module and lift shadows to make more details visible.
What is HSL in Lightroom?HSL stands for Hue, Saturation, and Luminance. With these settings, you can fine-tune the color representation in your image.
Can I save my edits?Yes, you can save your edits as a preset in Lightroom to reuse the look for future images.
How can I avoid cutting off important details?Check the histogram to ensure that the brightness settings do not affect important details in the image.
