To create order in your projects in Cinema 4D and optimize post-processing in Photoshop, it is crucial to create separate alpha channels for different objects. This guide will show you how to assign a unique render tag for each element in your scene, thereby preparing the alpha channels. This way, you can isolate your objects without having to perform complicated post-processing.
Main insights
- Each object in your scene requires its own render tag.
- The render IDs must be correctly linked in the render settings.
- This way, you get clean alpha channels for editing your objects in Photoshop.
Step-by-step guide
To efficiently prepare the alpha channels, please follow these steps:
The first step is to move your physical sky into the light folder. This helps create order in the object manager. Simply click on the light folder to close it. This keeps the focus on the objects for which you want to create the alpha channels.
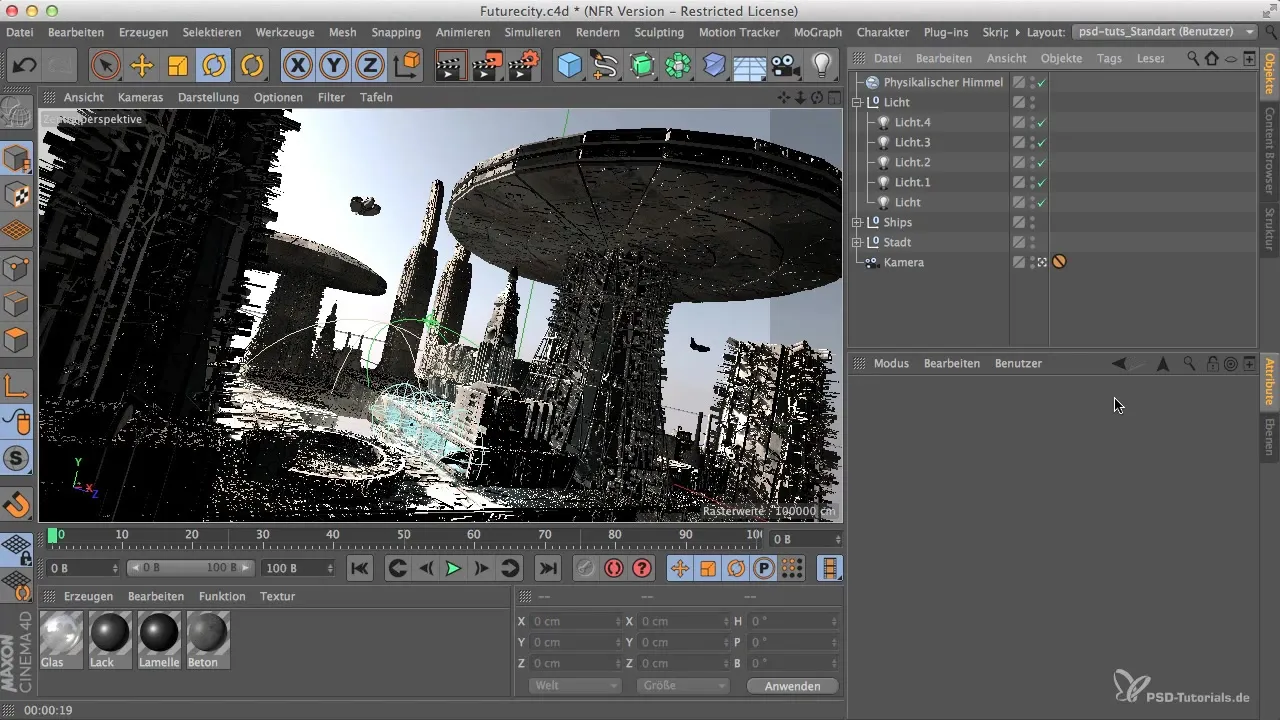
Now you will sequentially assign the render tags to the various elements you have created in your scene. Unique tags are required for each building and object. The goal is for each object, like skyscrapers and church towers, to allow for individual isolation.
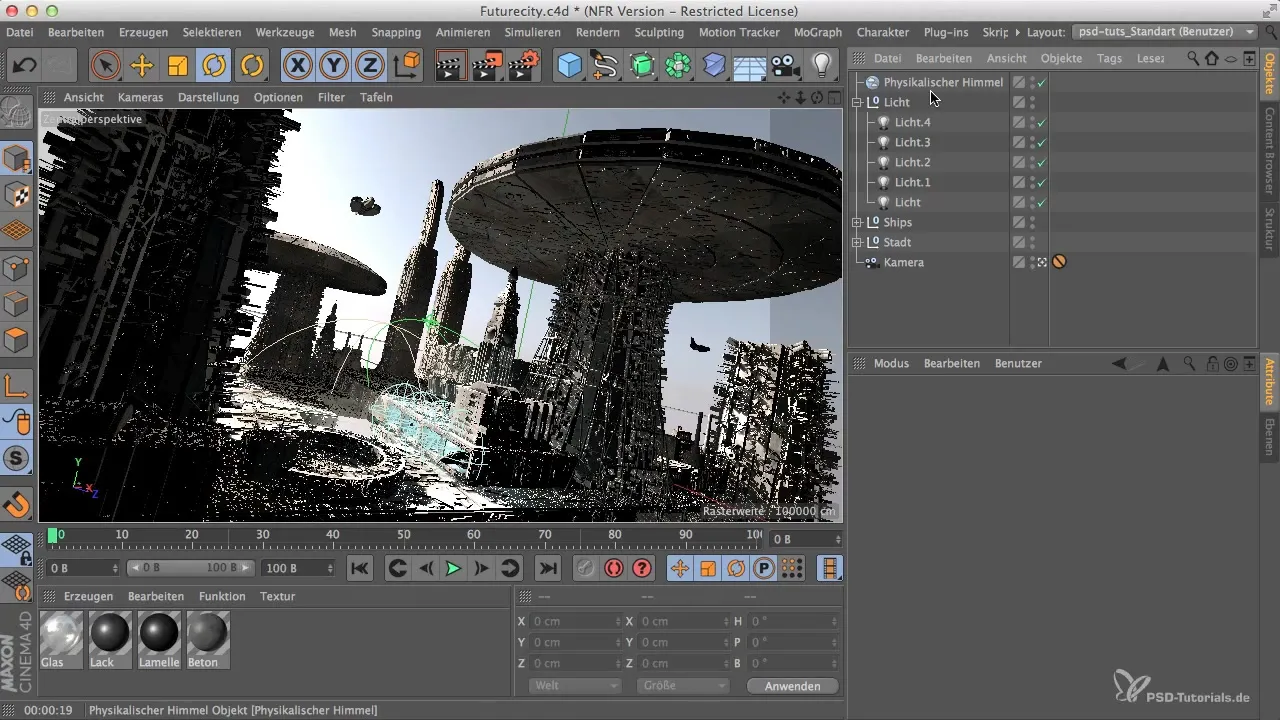
To start in the object manager, first click on your base object that was created at the bottom of your scene. Select the base and specifically prepare it as an alpha channel. Now navigate to the corresponding tags. Ensure that you create enough space for a clear view of the available options.
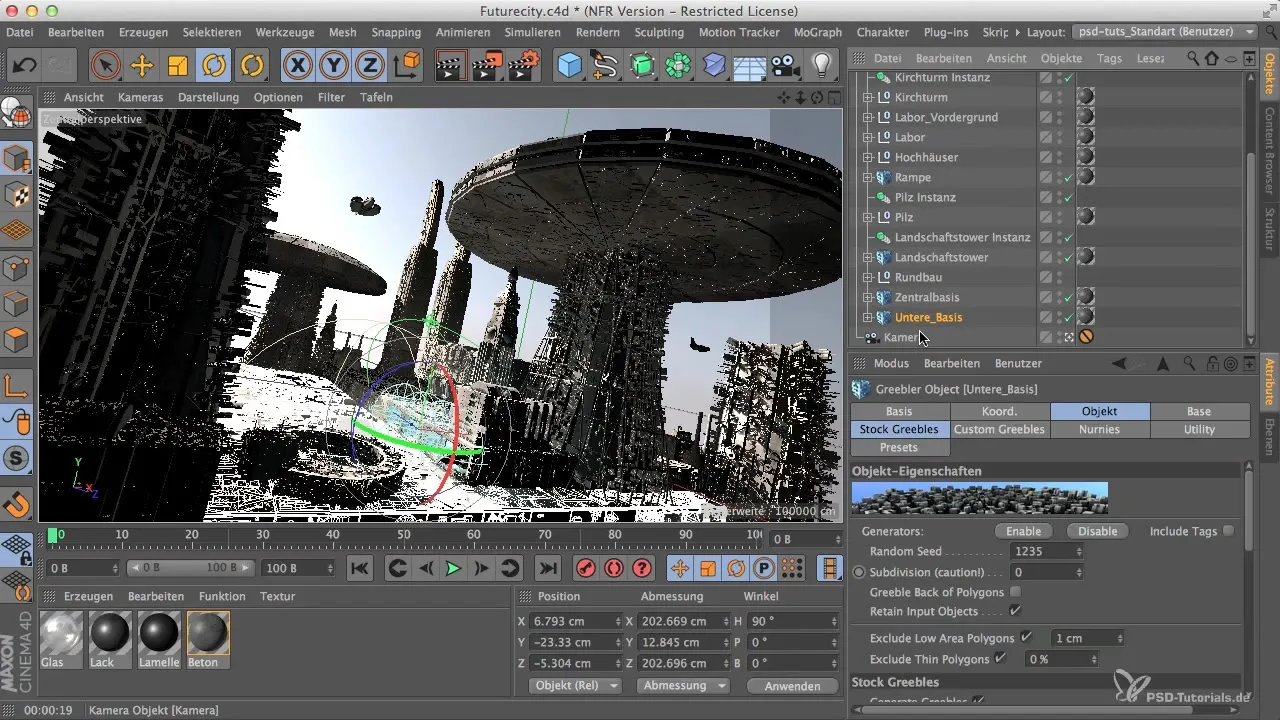
In the list of tags, look for the render tag. Depending on which language you are using, it will be referred to as "Composition Tag" if you are using the English version. Click on the render tag and activate the channel in the attribute manager. Start with channel 1 for your base element.
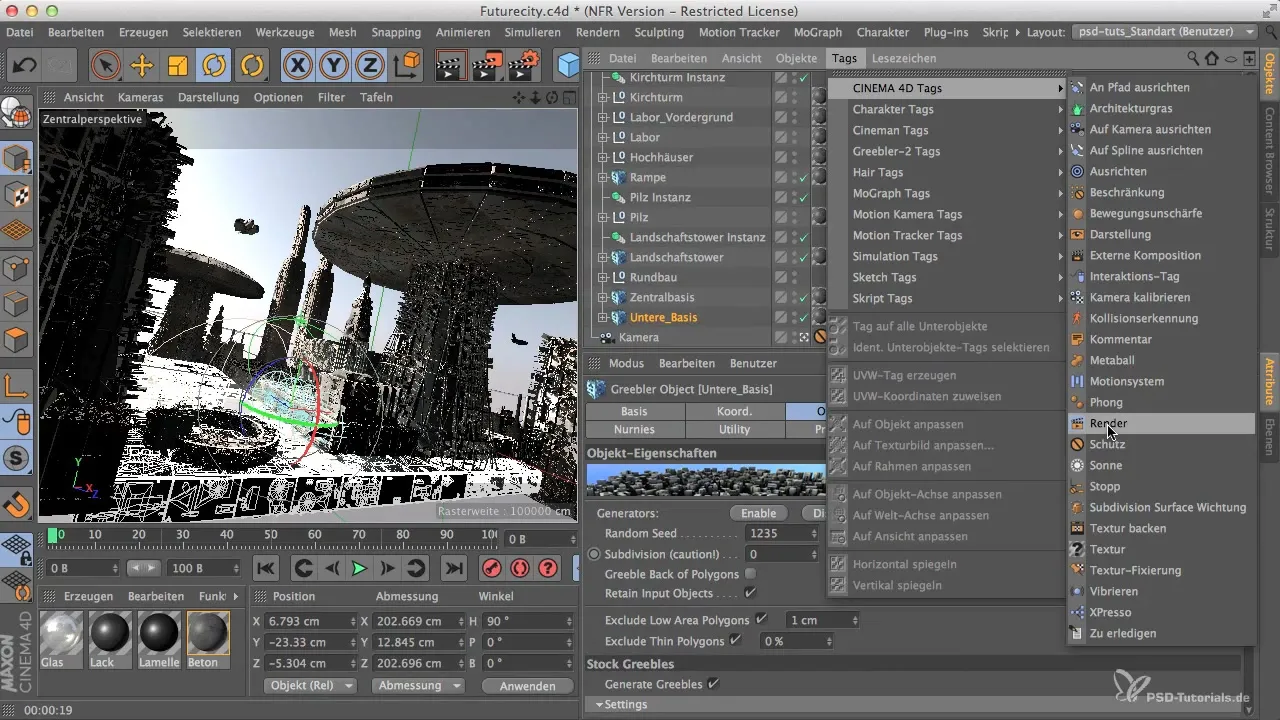
After activating the first channel, you can copy this tag multiple times to label the other objects. This will help you avoid forgetting the channels for each element.
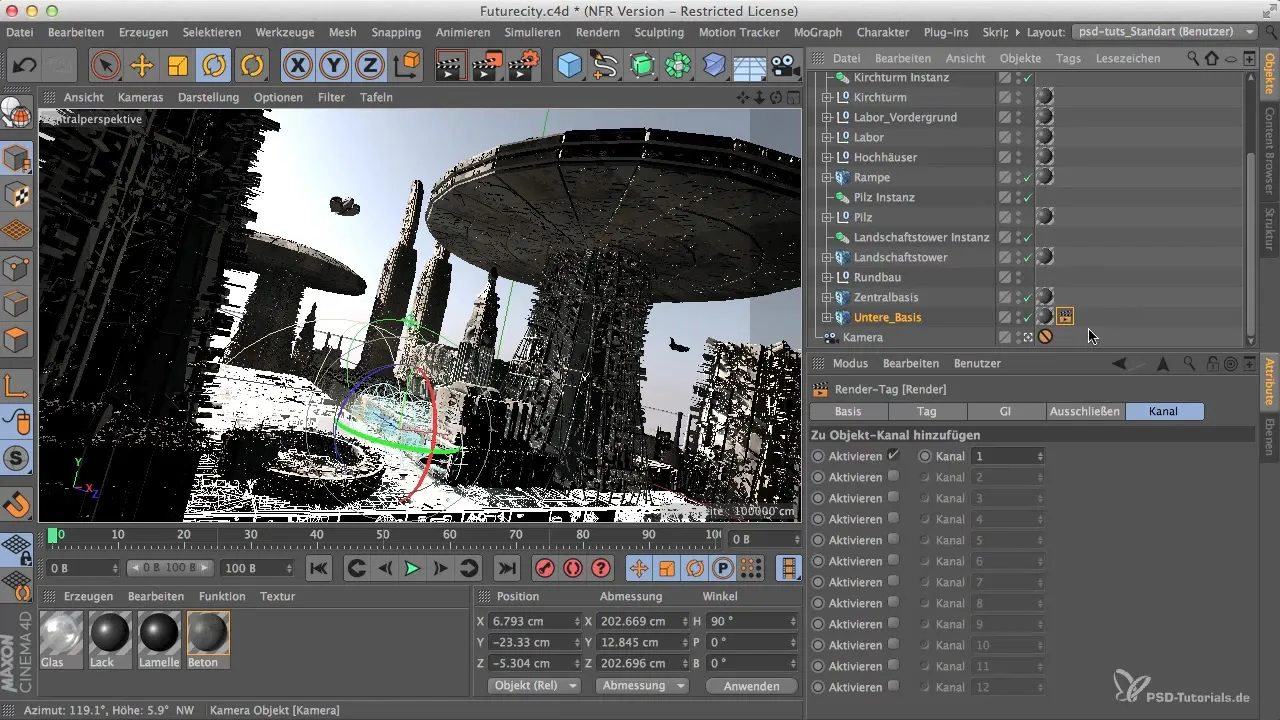
Now you have successfully assigned the first channel, but the remaining channels are not correctly distributed yet. To prevent this for the different objects, it is important to assign each channel individually for each object. Work your way from channel 1 to channel 16. You can click each tag individually and manually adjust the corresponding channel.

It is possible to assign more channels than you actually need. This functionality offers greater flexibility in case you want to add more elements to your scene. The main thing is that the assignment of the channels is correct, so that later the information about the renderers can be retrieved properly.
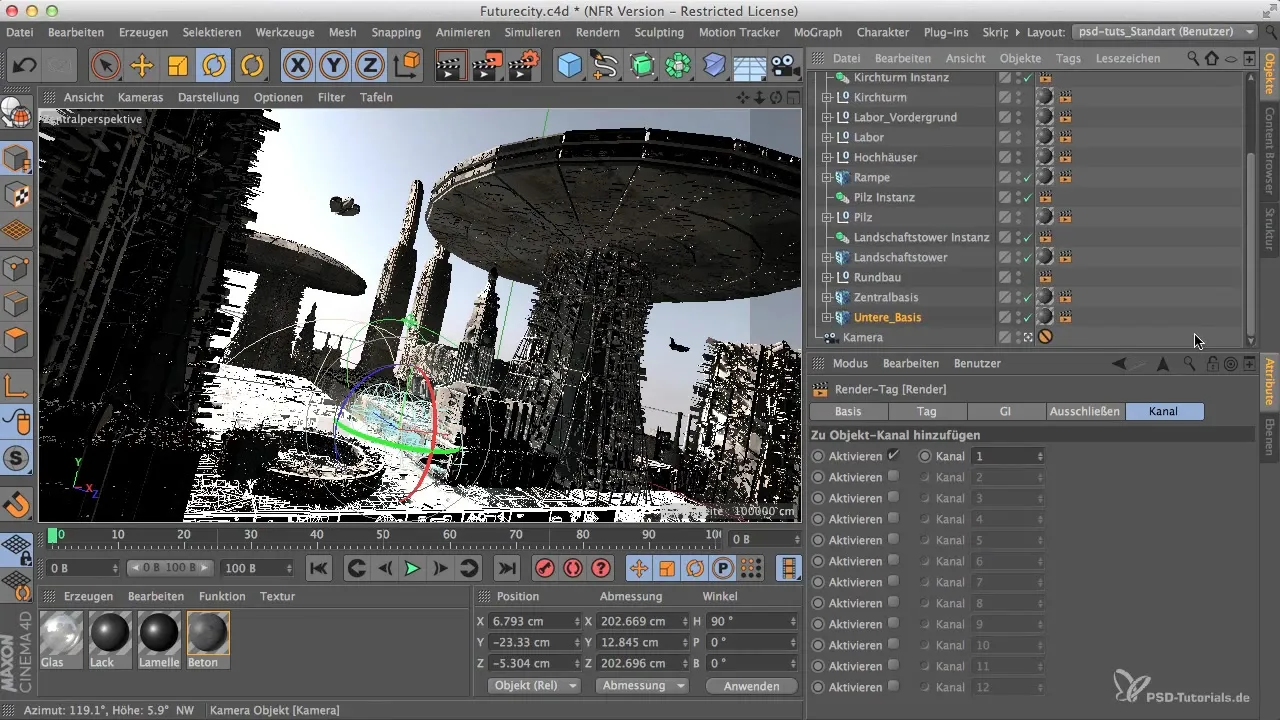
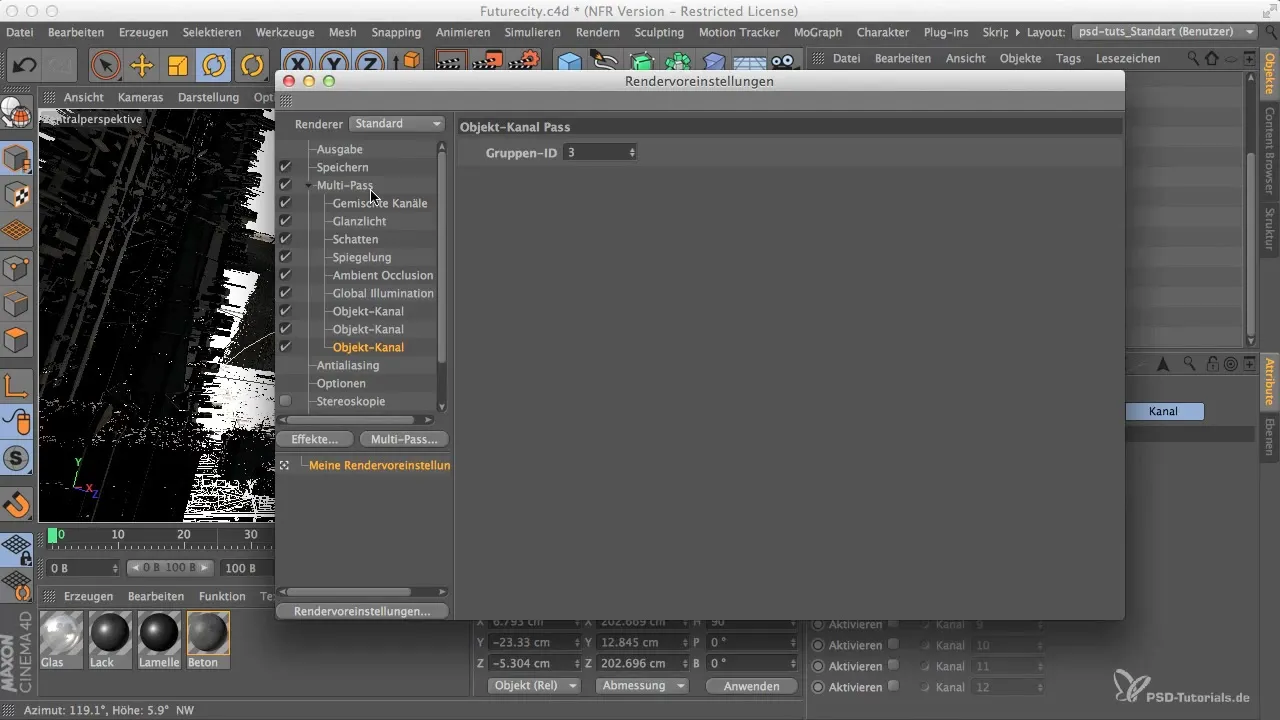
Technically, you should find the channels in the multipass renderer and ensure that you assign the corresponding group ID in the renderer for each tag. To do this, open the render settings and navigate to the multipass tab. Here you can specify how many object channels there are in total and ensure that they correspond to the channels in the object manager.
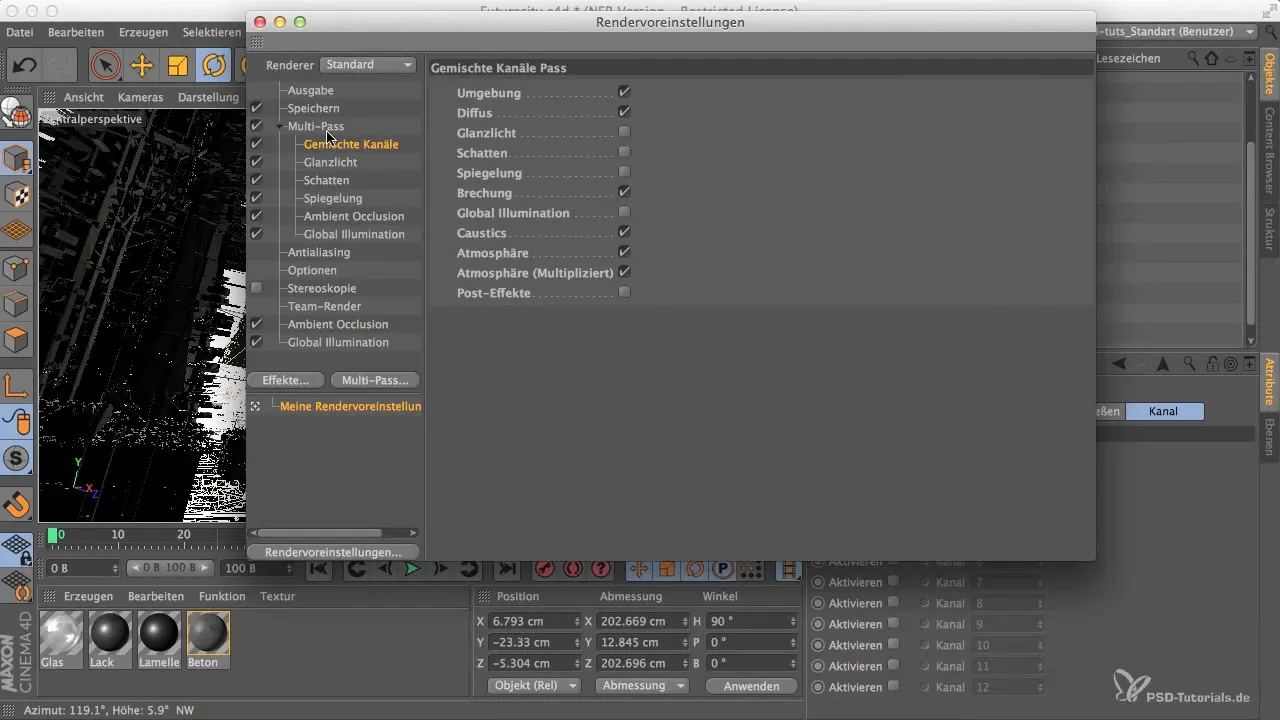
In general, you have 16 channels at your disposal that you should allocate accordingly. Check that you reconcile the number in the multipass renderer and make the corresponding settings. This way, you have everything configured correctly and can proceed to render preparations after editing.
Summary
The step-by-step guide shows you how to quickly and easily create individual alpha channels for each object in your scene. This significantly improves your workflows in Photoshop and allows for easy post-processing of the individual elements.
Frequently Asked Questions
What is the difference between render tags and composition tags?Render tags are specific to Cinema 4D, while composition tags are used in the English version.
How can I ensure that all channels are assigned correctly?Make sure that you use the same channel IDs in the multipass renderer as in the object manager.
How many alpha channels can I create in Cinema 4D?In Cinema 4D, you can create and assign a maximum of 16 alpha channels.
Why is it important to create separate alpha channels for each object?Separate alpha channels allow for more efficient post-processing of objects in Photoshop and reduce the time needed for isolation.


