In this tutorial, you will learn how to effectively use the Graduated Filter in Lightroom Classic CC to edit specific areas of your photos. The Graduated Filter tool allows you to make adjustments that only affect selected parts of the image. This way, you can direct the viewer's attention and optimize the overall image without the need for excessive editing techniques.
Key Takeaways
The Graduated Filter is a powerful tool for making specific adjustments to your images. You can use it to modify exposure, add colors, and highlight or darken areas selectively. This tool offers the flexibility you need to take your photos to the next level.
Step-by-Step Guide
First, open the image you want to edit in Lightroom. In our example, we will be using a photo of a waterfall from Scotland.
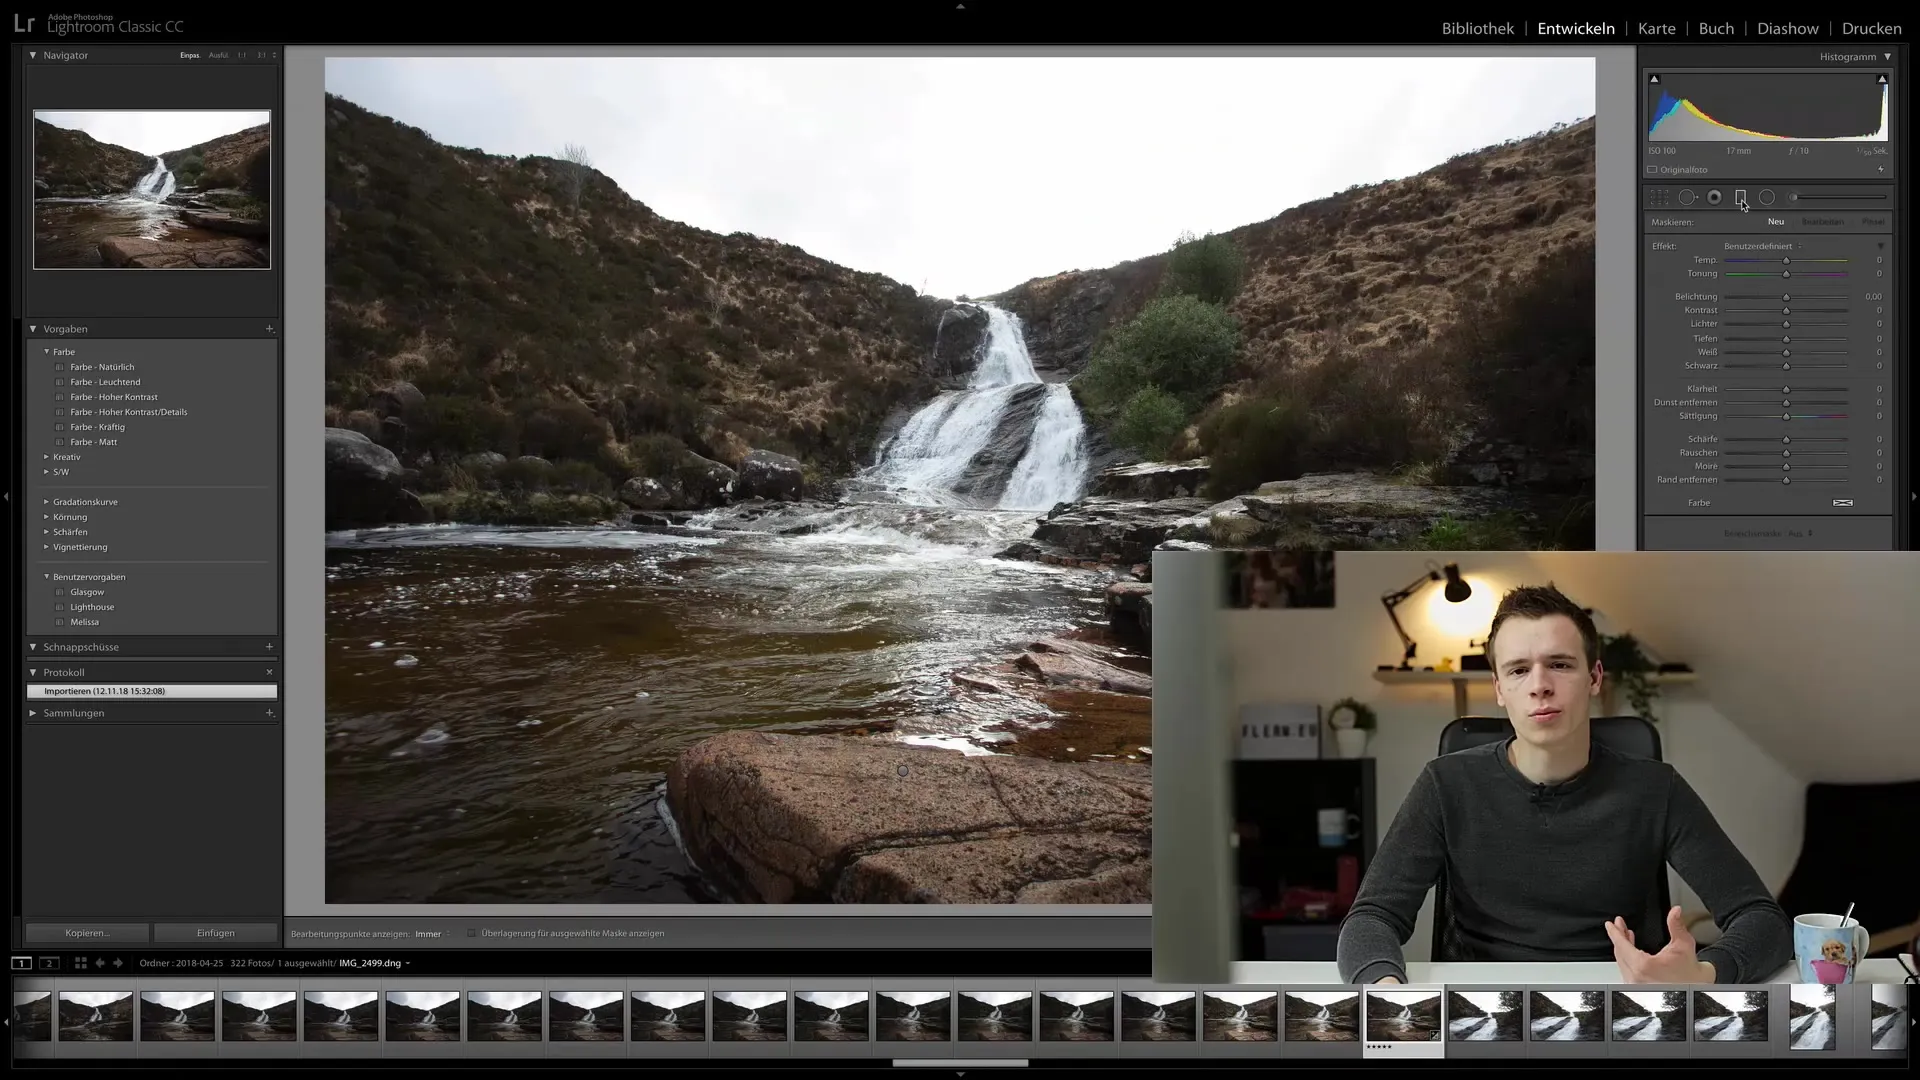
Start by selecting the Graduated Filter. You can find the tool in the right sidebar, often represented by a gradient symbol. Click on it to activate.
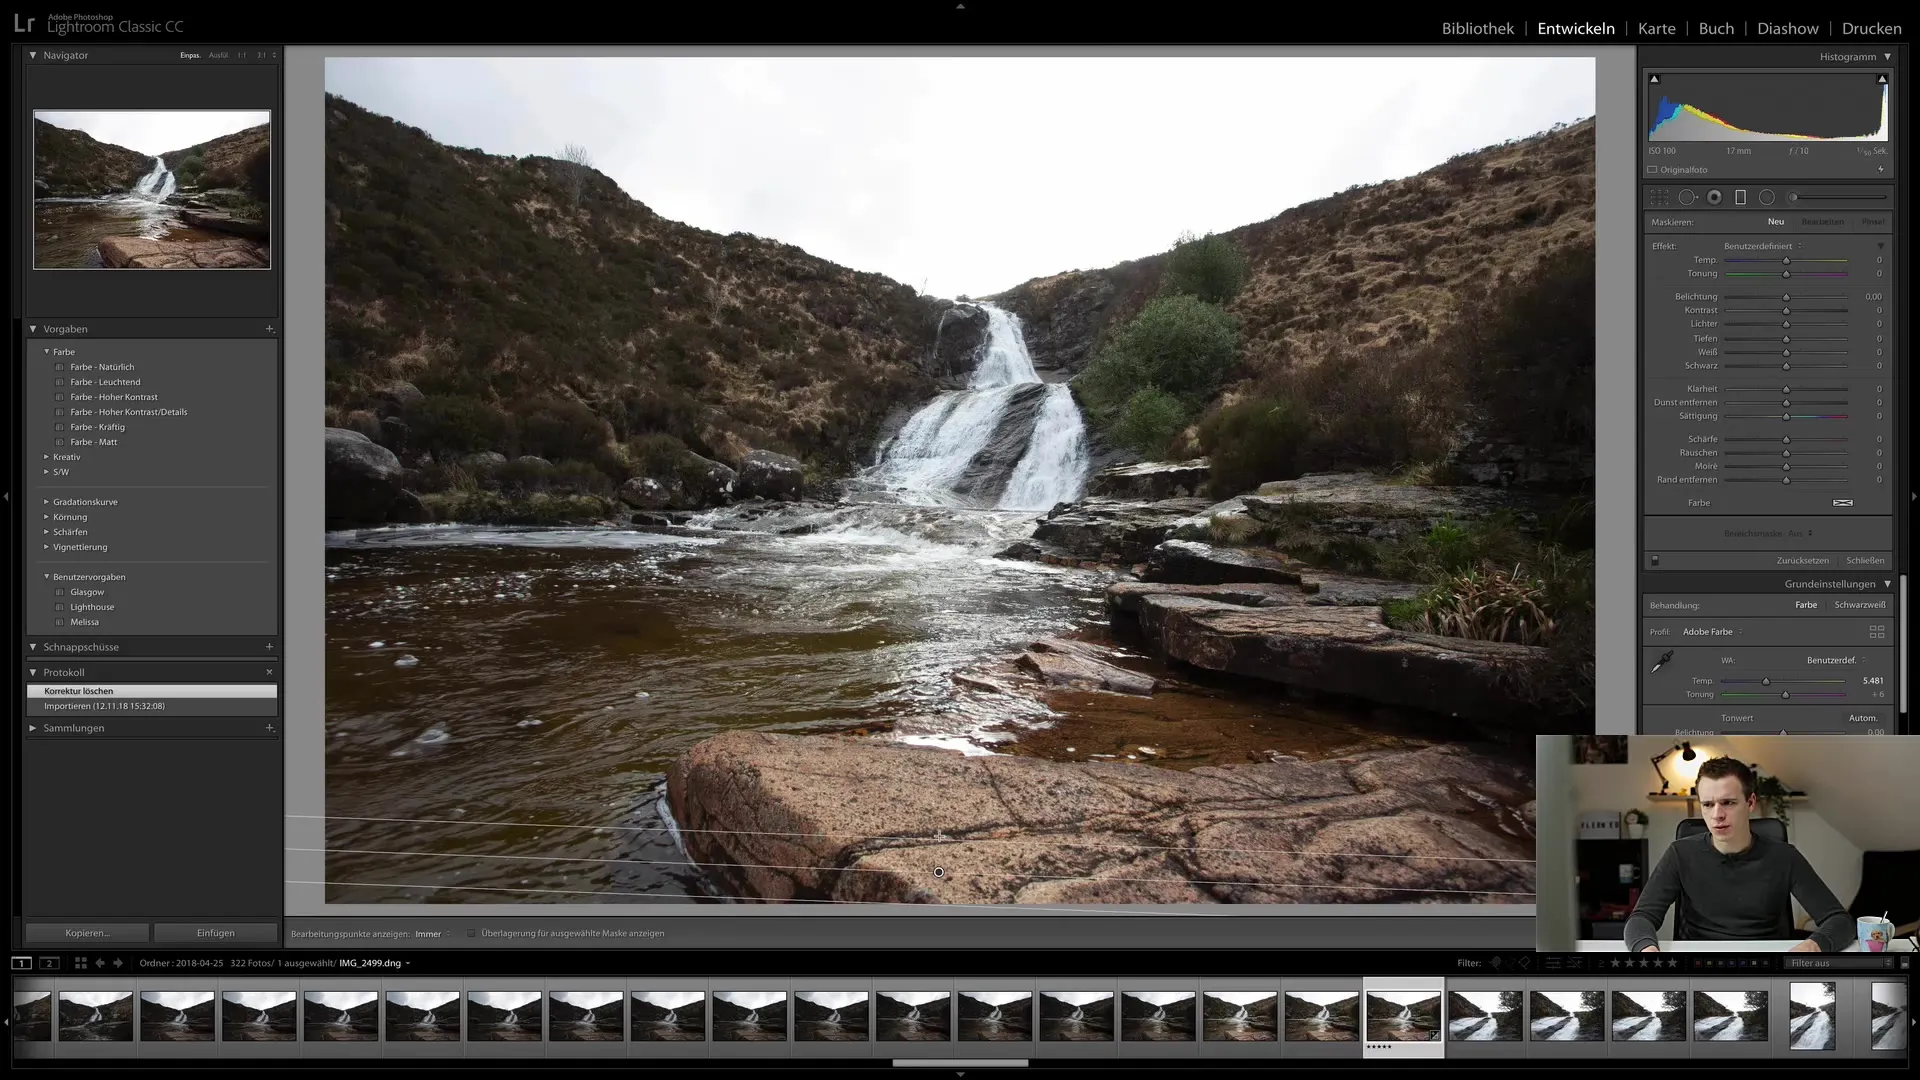
Now, you will see that your cursor changes to a crosshair. Click and drag from one point in your image upwards to create a gradient. Initially, you won't notice any changes as no settings have been applied yet.
To see where the gradient has been placed, it's helpful to decrease the exposure. Move the exposure slider down so you can clearly see the effect of the gradient on your image. This extreme adjustment helps you see the gradient clearly.
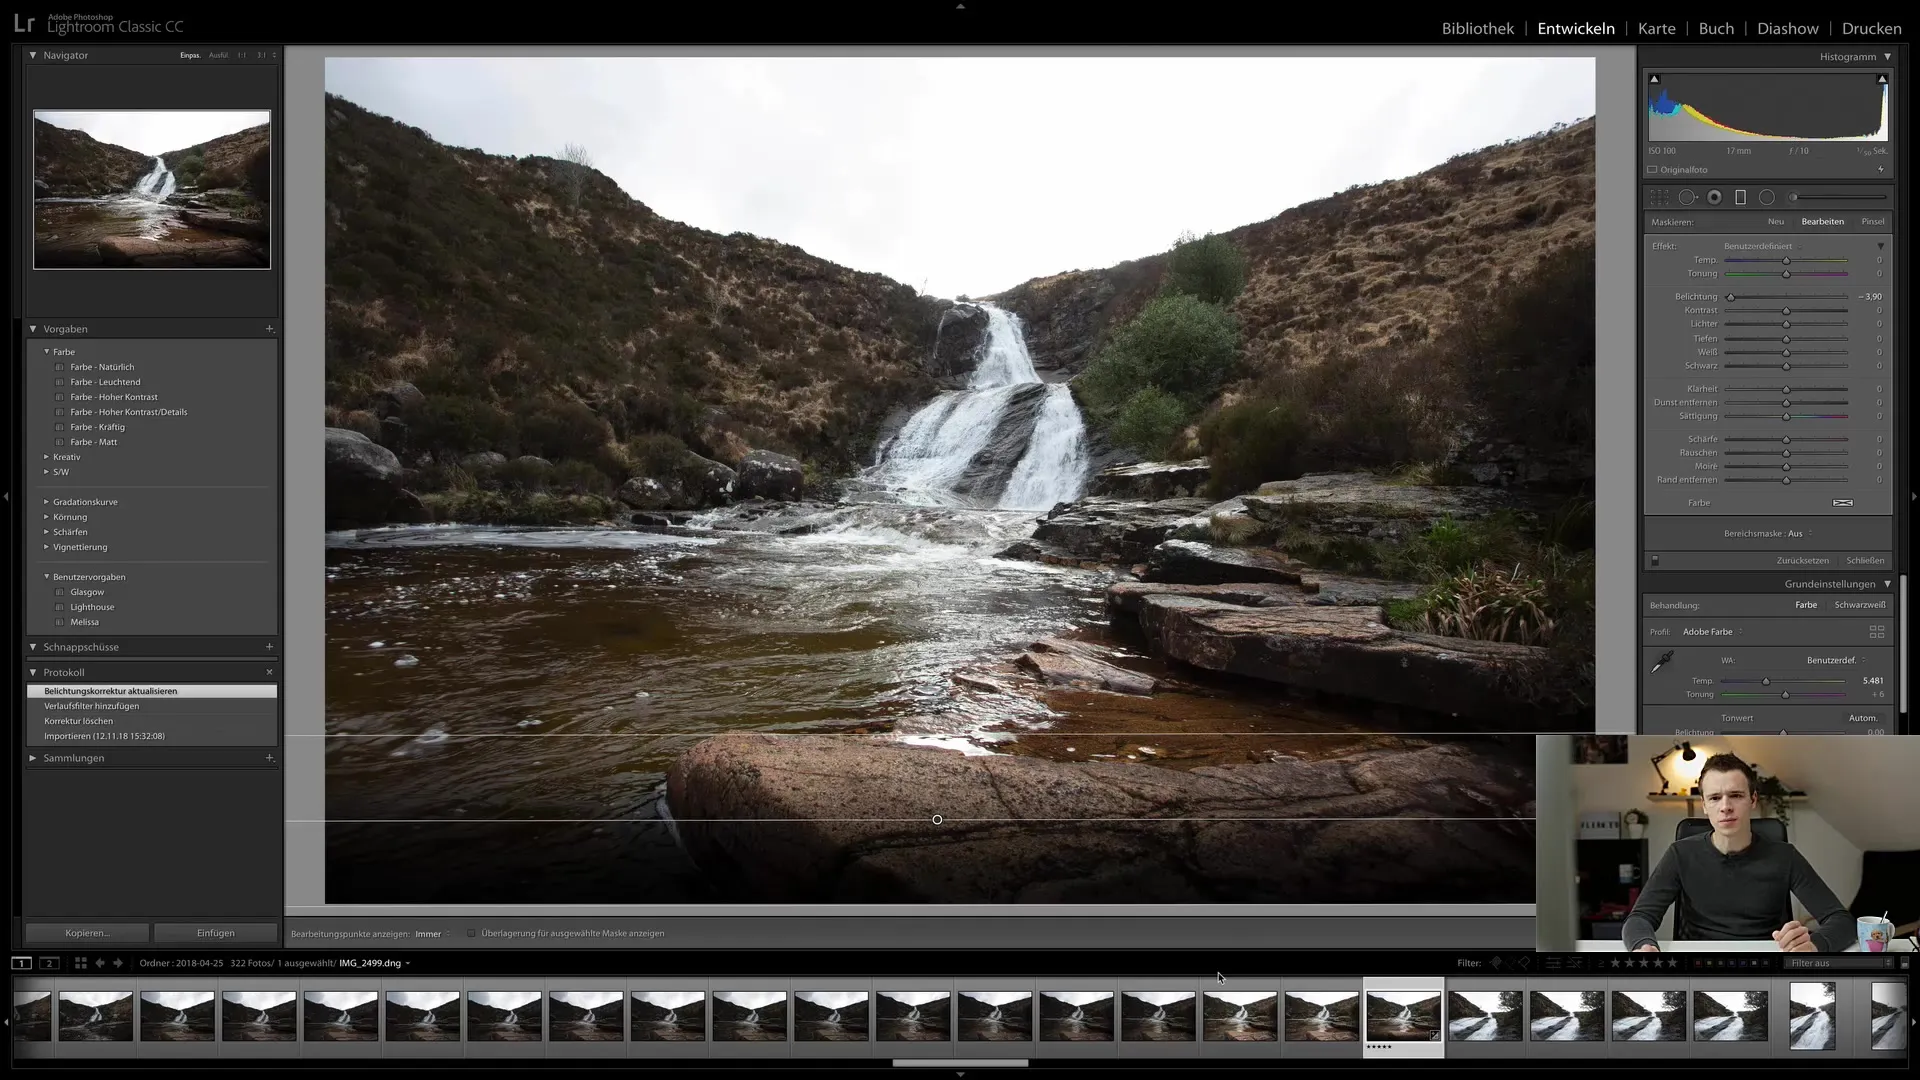
You can also enable the "Show Overlay for Selected Mask" option to see how the gradient affects different areas of the image. You will notice that everything below the gradient darkens, while the upper area is less affected by it.
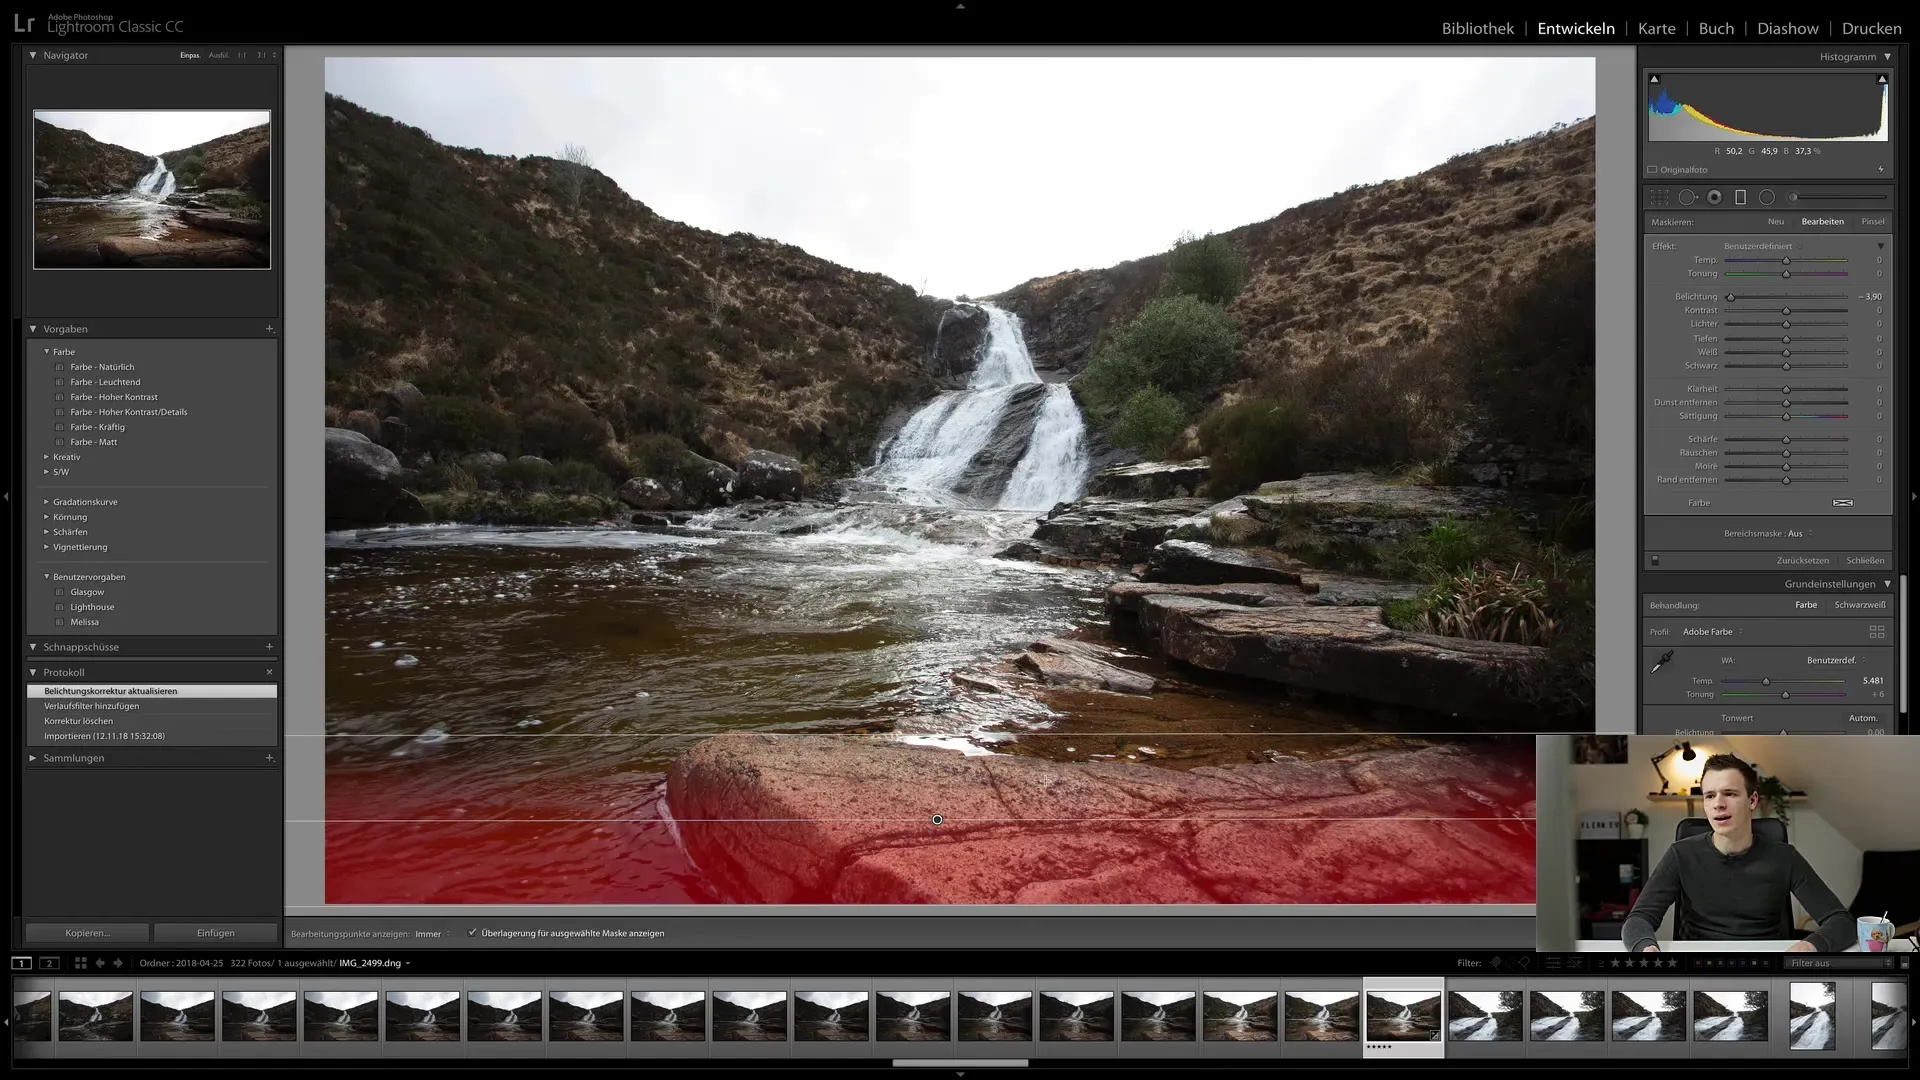
With the outer lines of the Graduated Filter, you can adjust the strength of the effect. Move the lines up or down to make the gradient softer or harder. This is particularly useful when you want to create a natural transition.
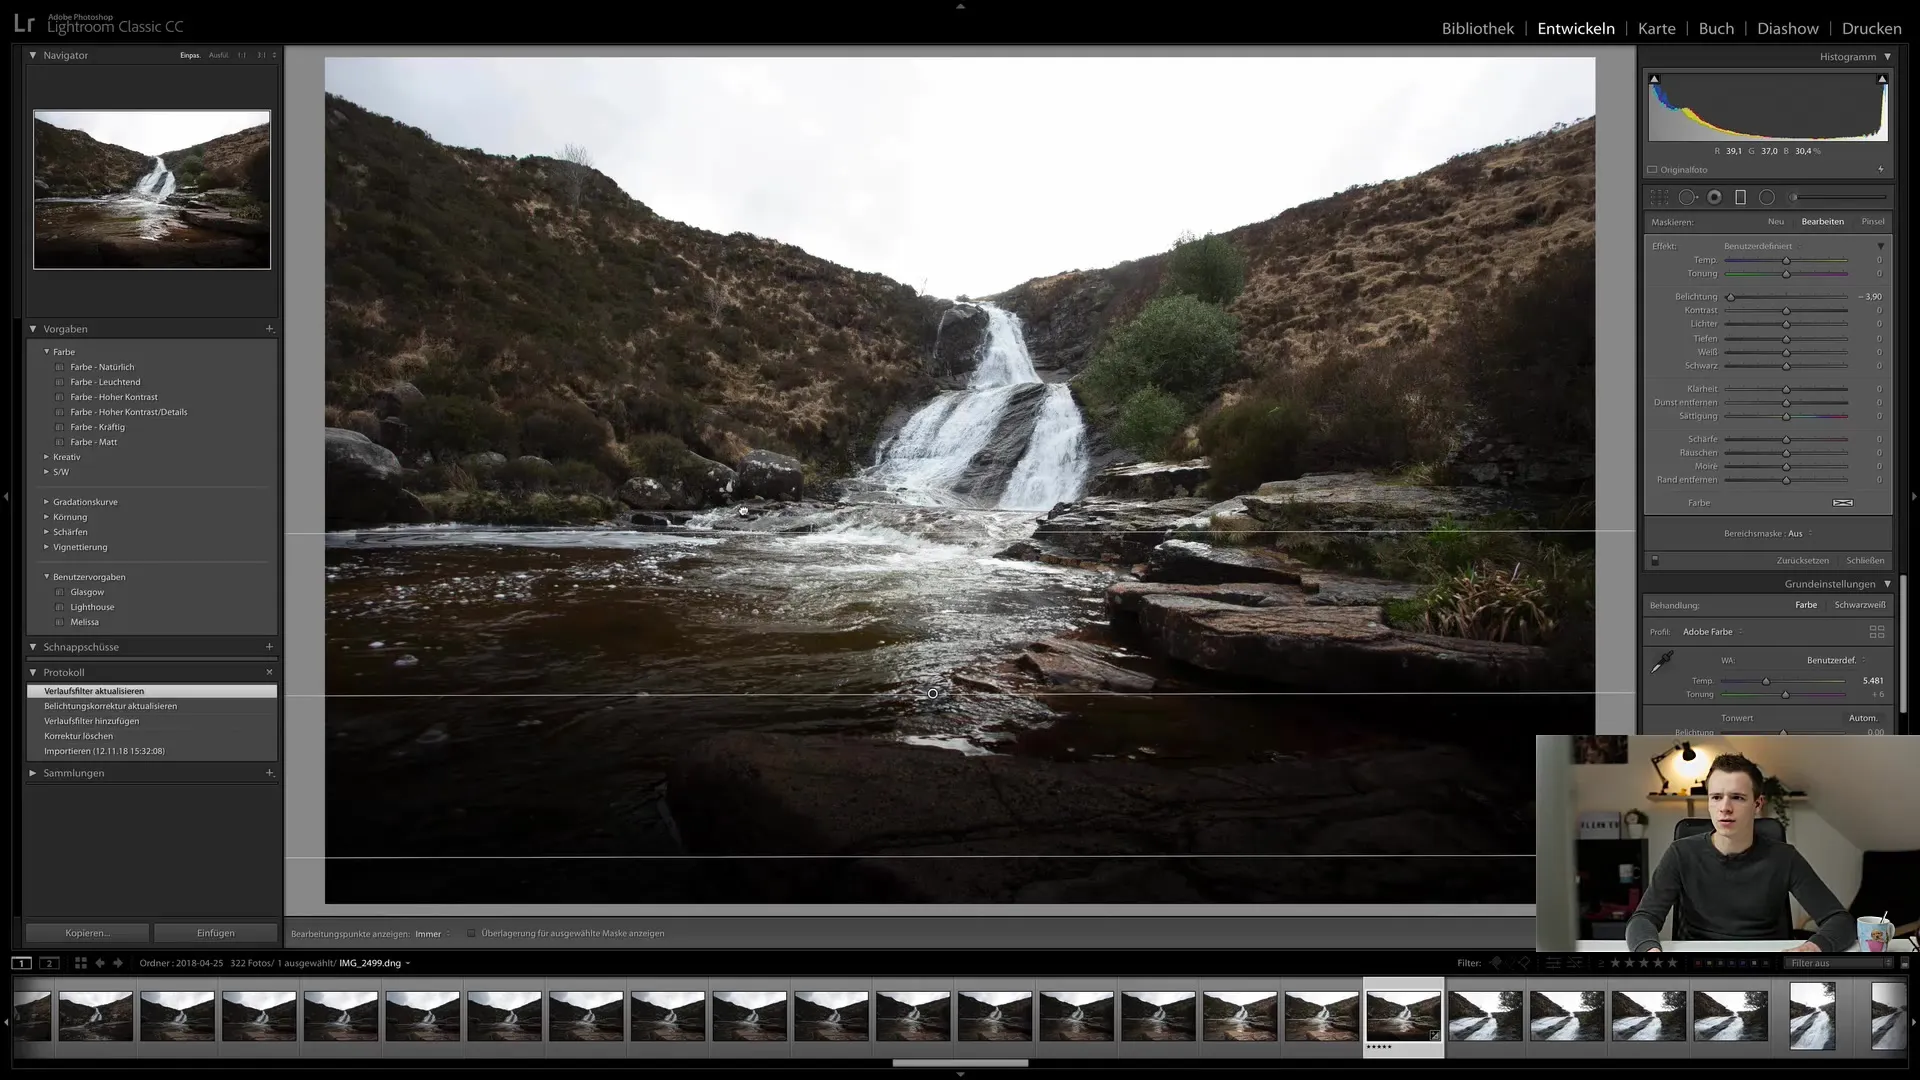
If you want to change the position of the gradient, you can simply move it. Watch how the lower part darkens while the upper part remains unaffected.
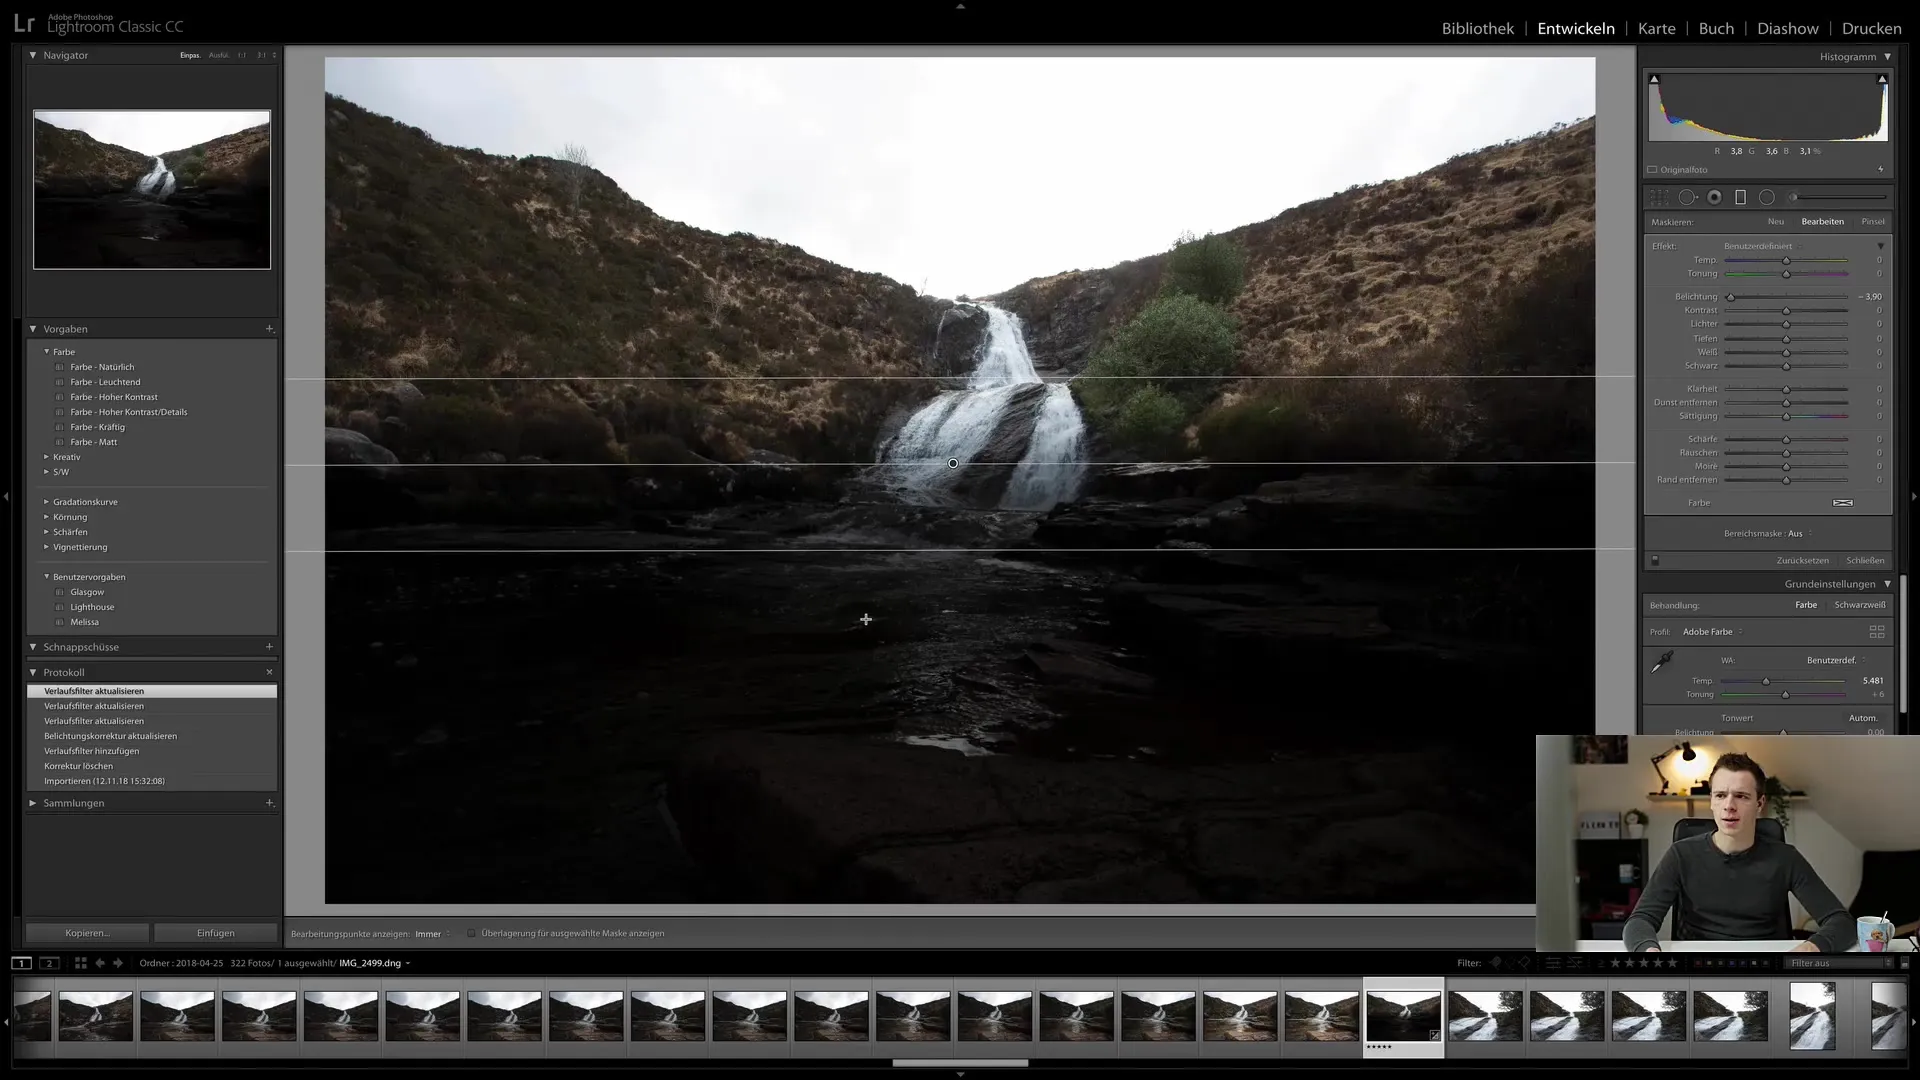
Another important feature is the ability to rotate the gradient. Position your cursor on the middle line and drag it left or right to rotate the gradient. This option gives you more control over the filter's effect in your image.
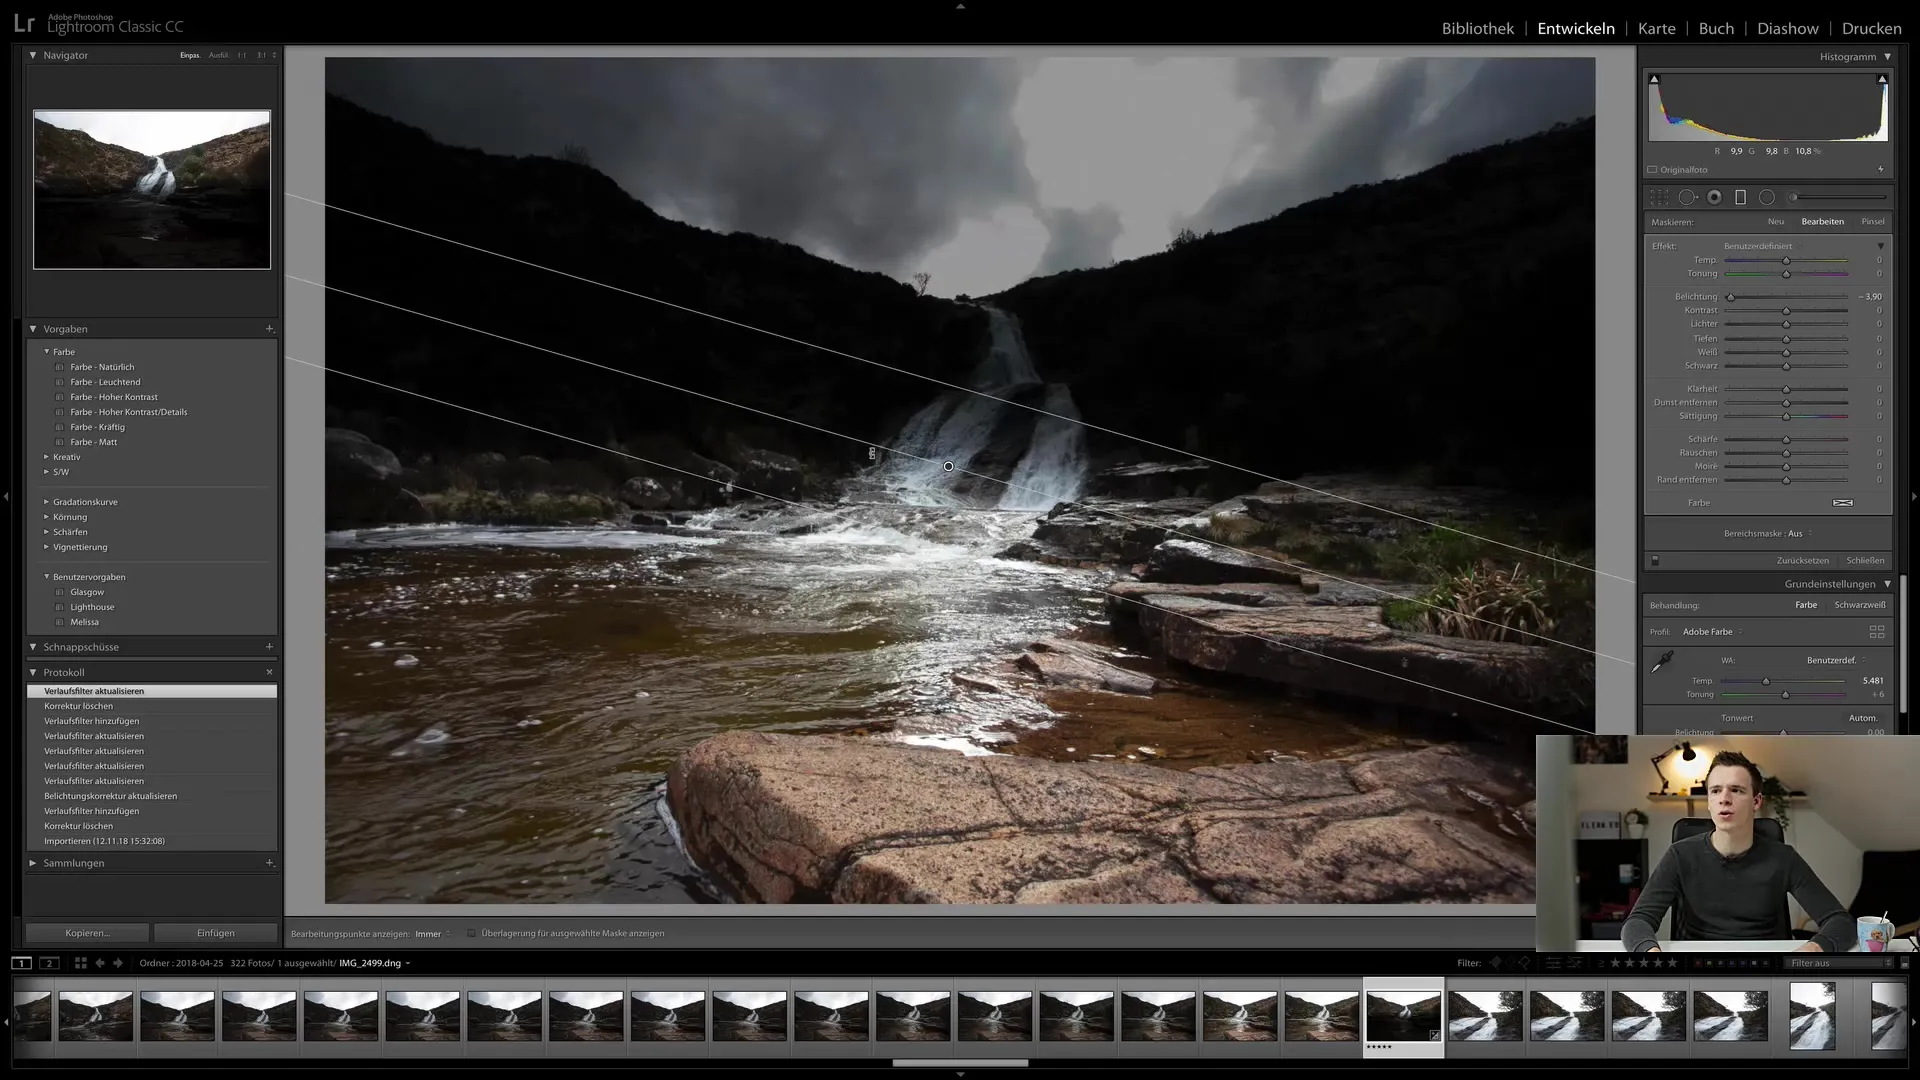
To darken the lower part of the image, move the gradient slightly higher, like this. Of course, you can further refine the intensity of the adjustment by using various sliders for exposure, highlights, contrast, and more.
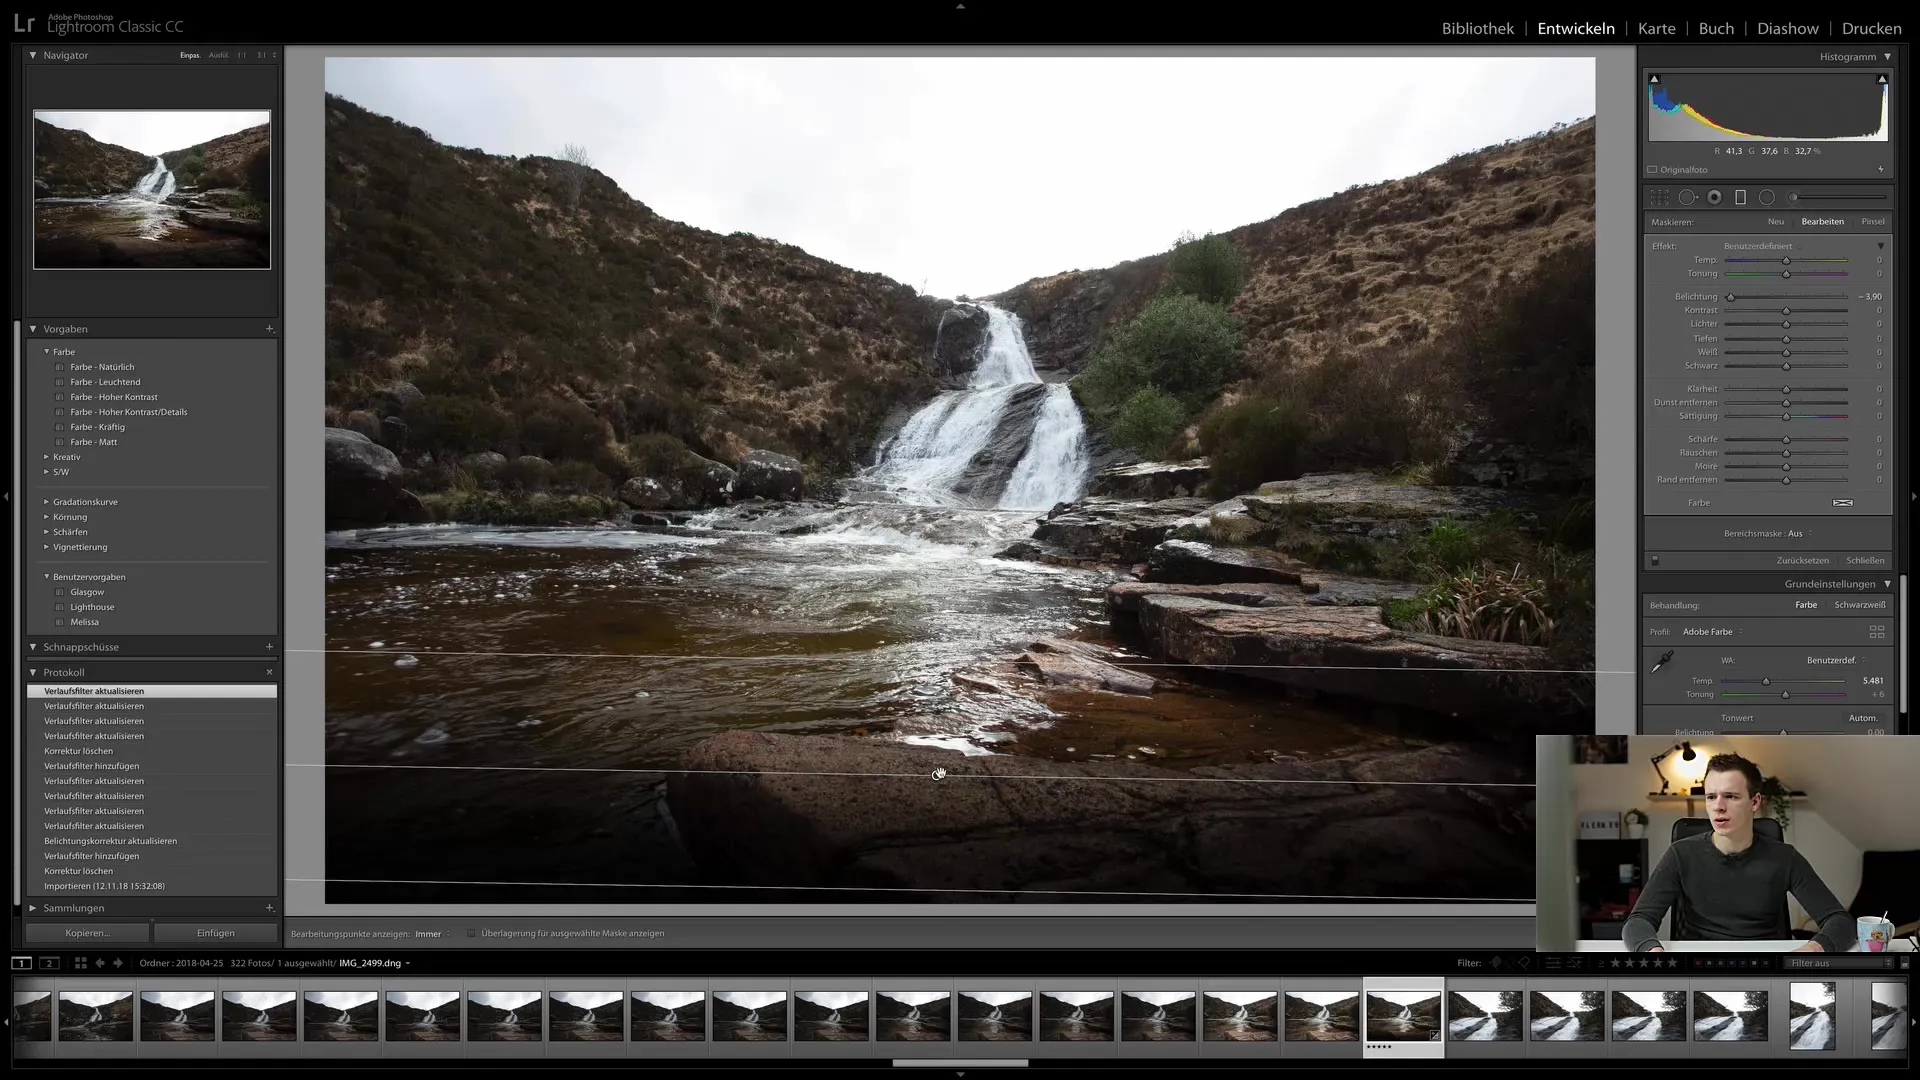
An interesting function of the Graduated Filter is the use of Luminance Masks. With this technique, you can selectively influence specific brightness ranges, giving you additional control over the editing process.
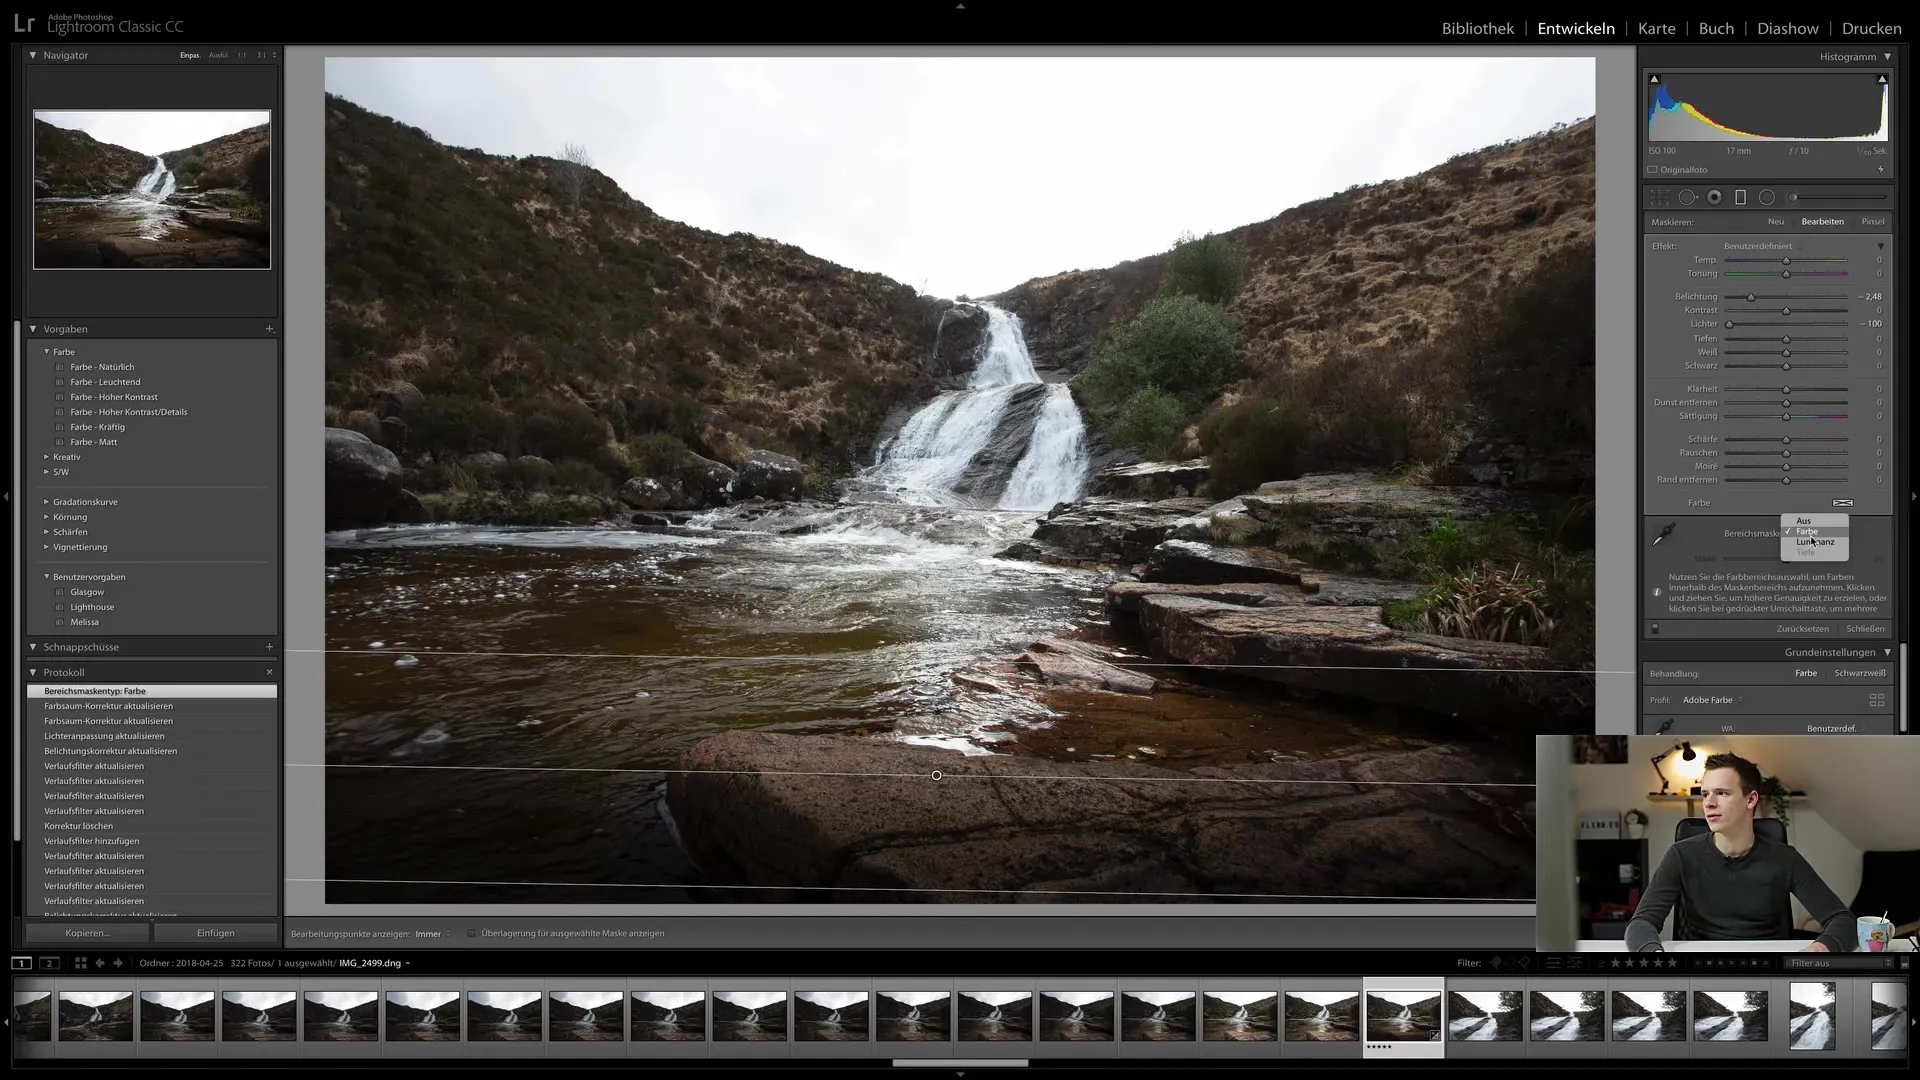
For finer adjustments, you can also use the Color Filter function to highlight or change specific colors in the image. This can be especially useful when you want to adjust the mood of your image.
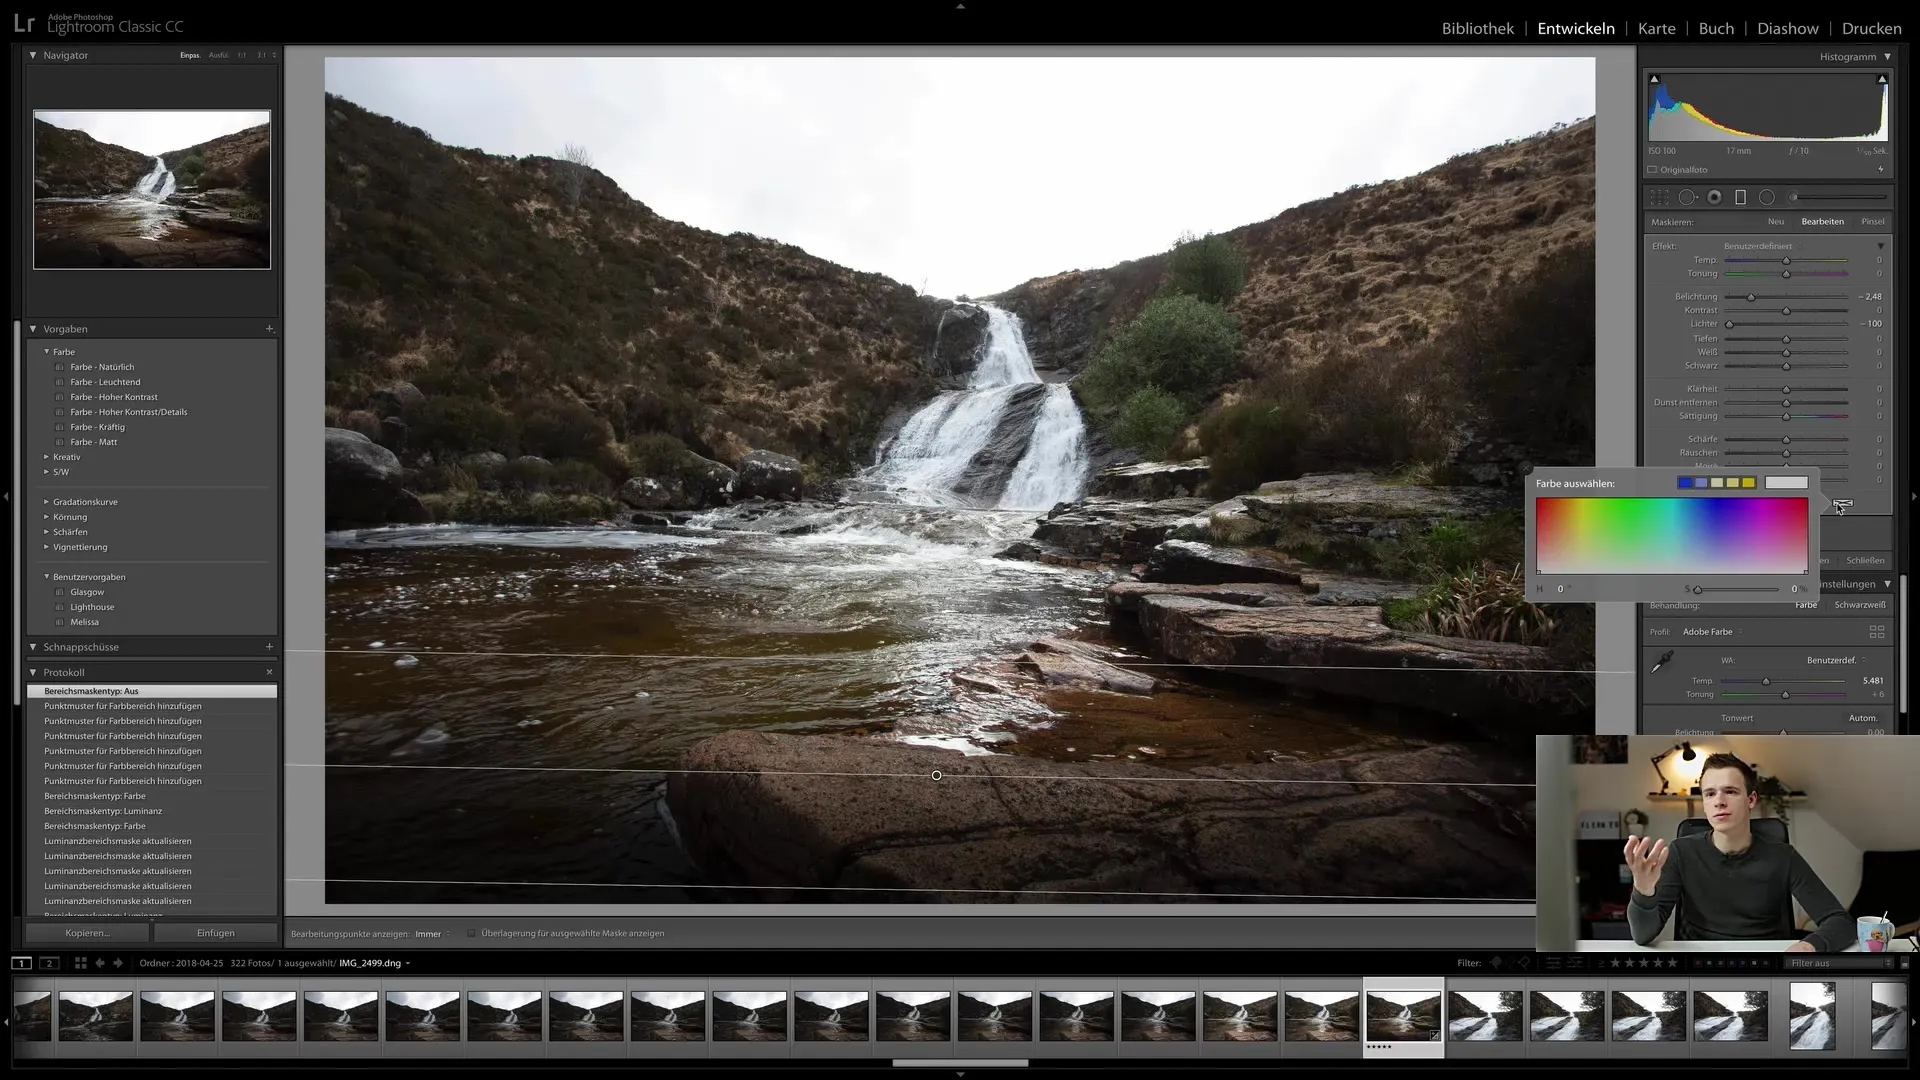
To reset all previously made color adjustments, simply click on the white box in the Gradient Filter settings. This will remove all adjustments at once.
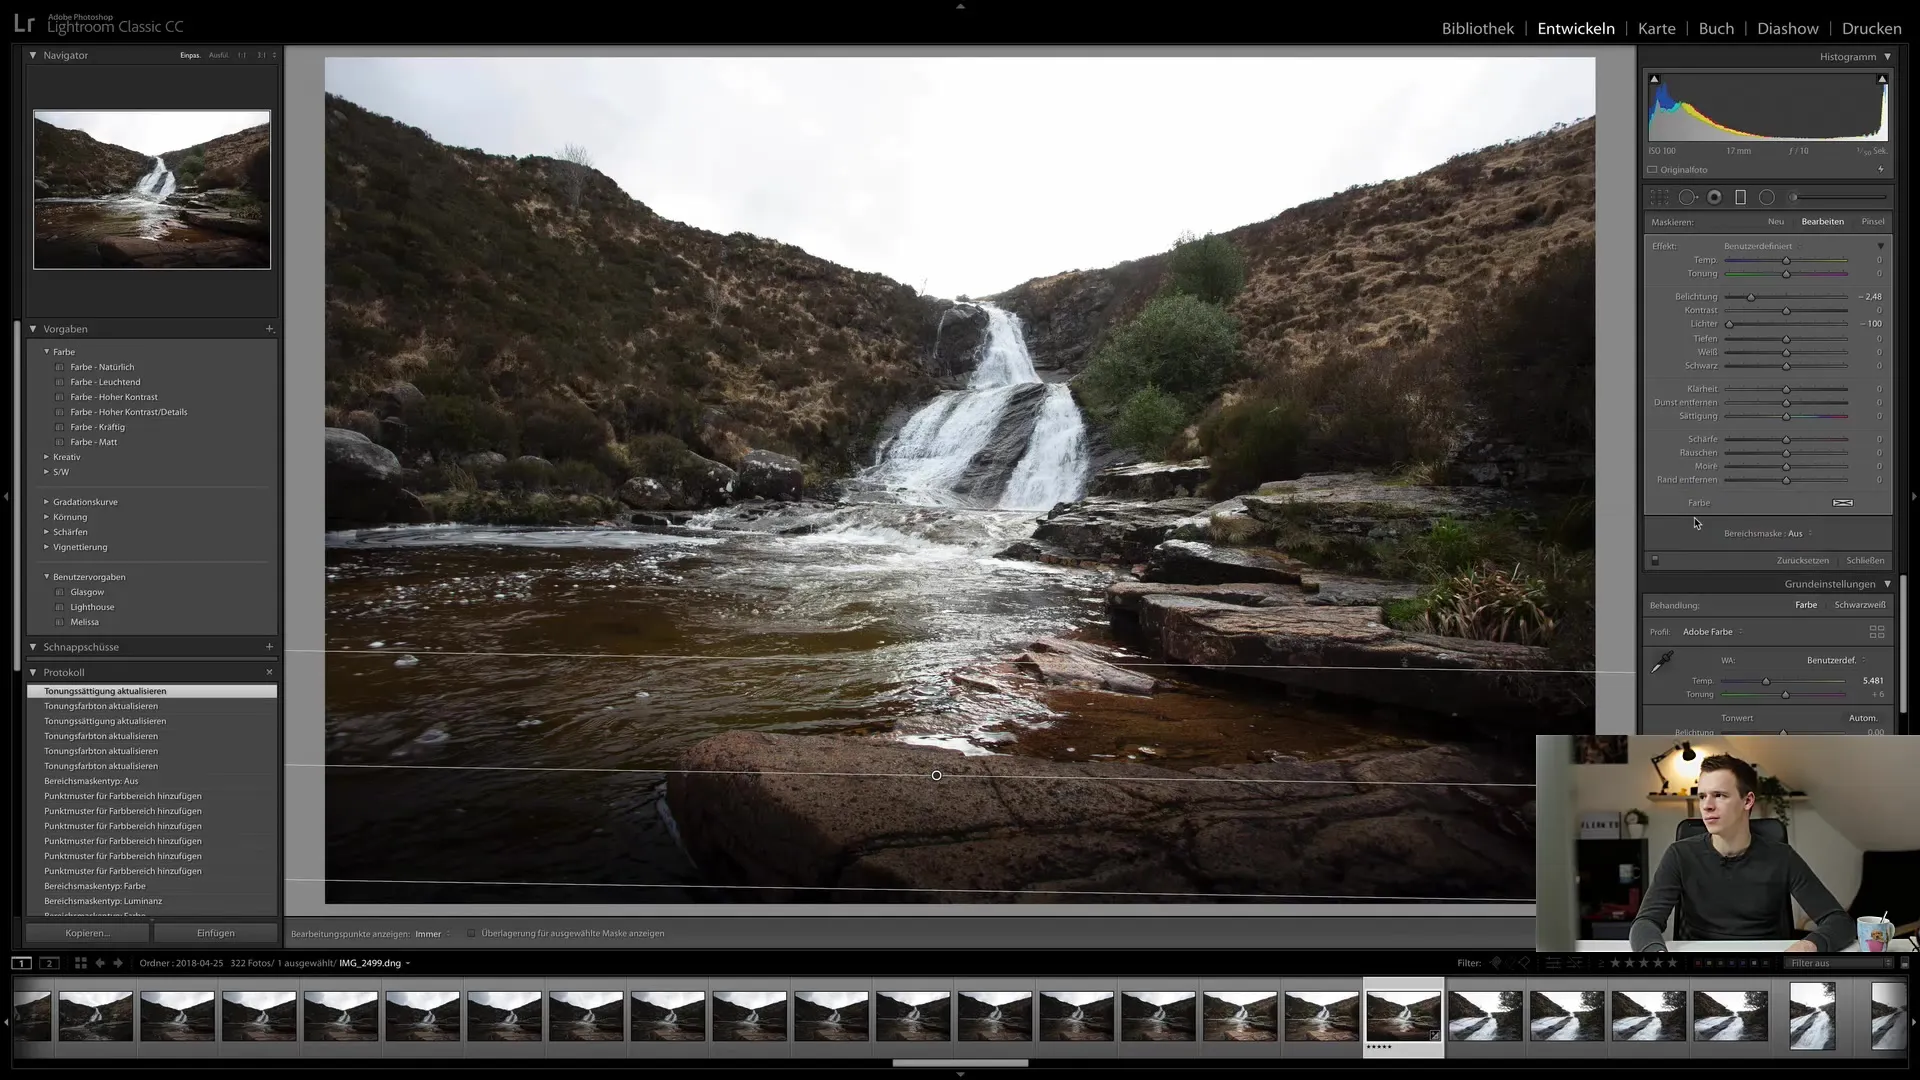
Editing gradient settings works similar to editing retouch points. You can add new filters or remove existing ones anytime by pressing the Backspace key while in editing mode.
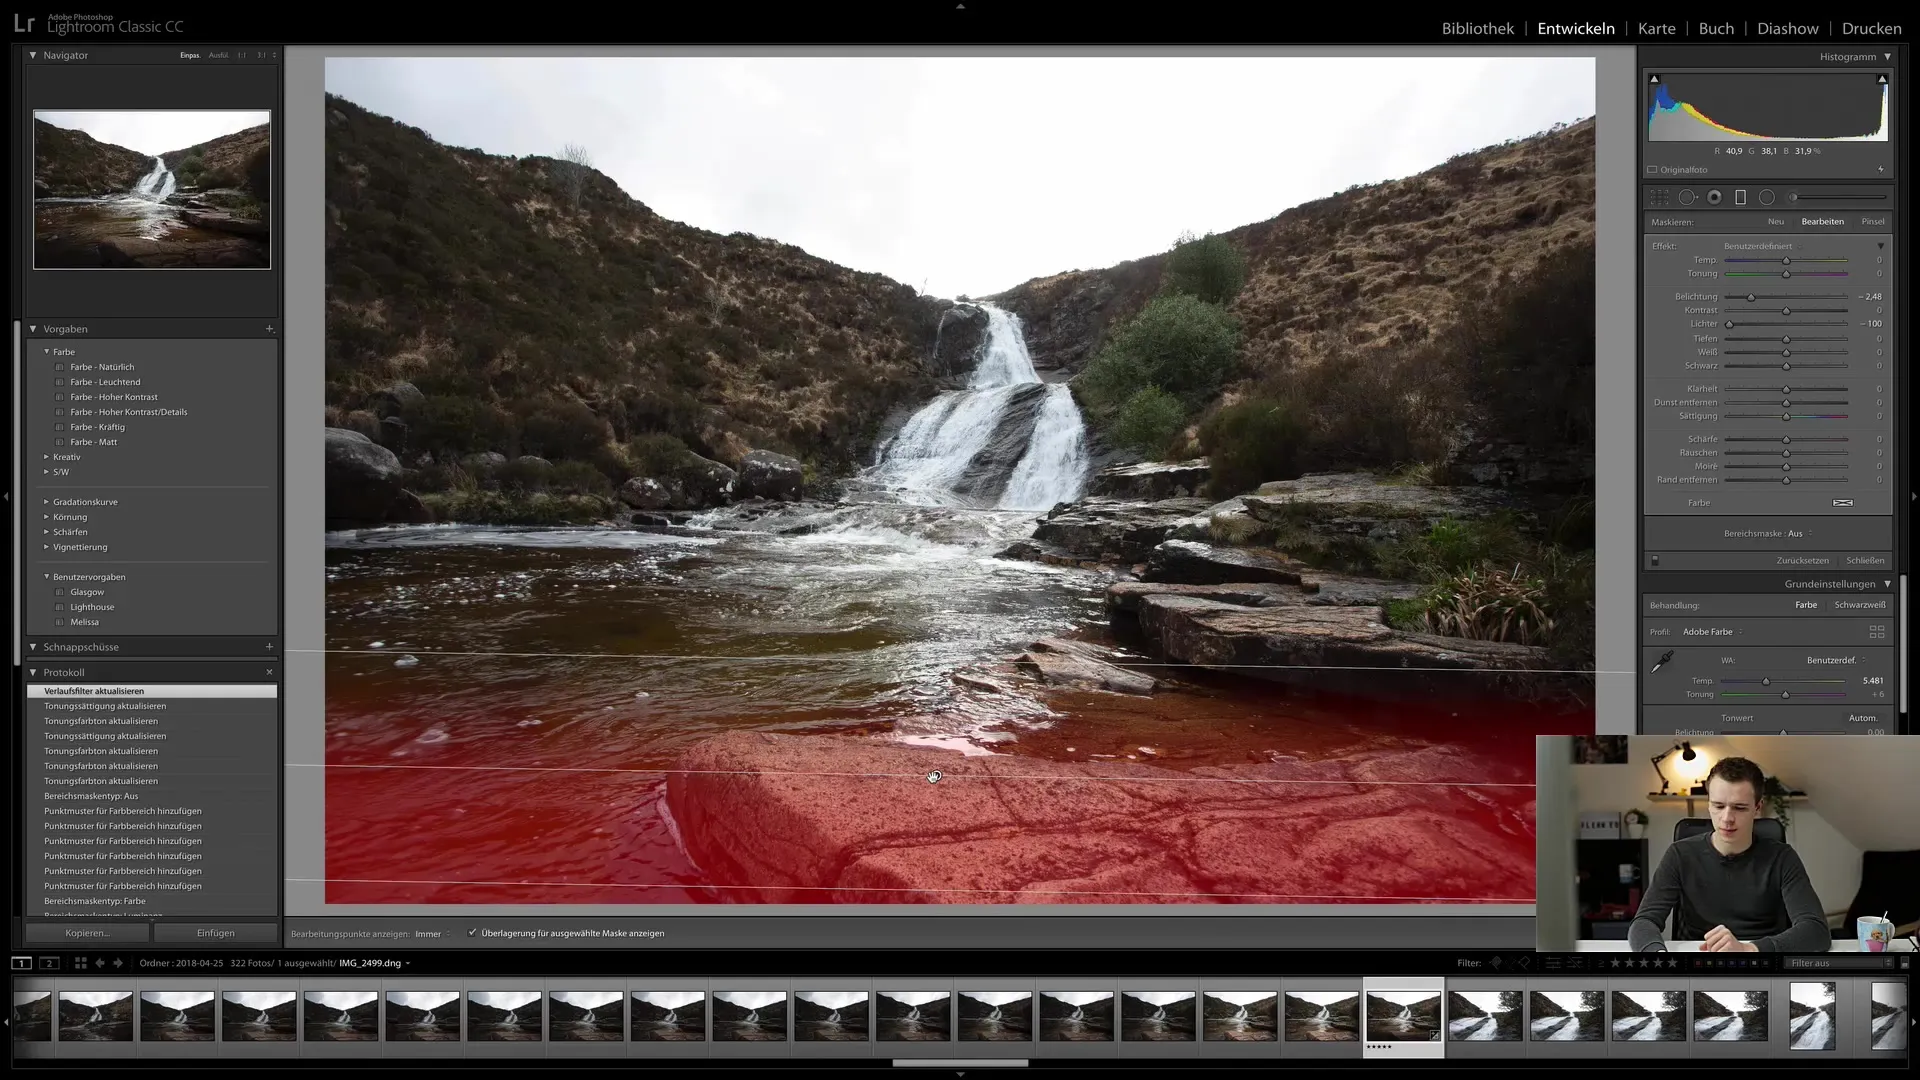
You have the freedom to add as many gradient filters as you like. However, be cautious as too many overlapping filters can make the image editing appear somewhat chaotic.
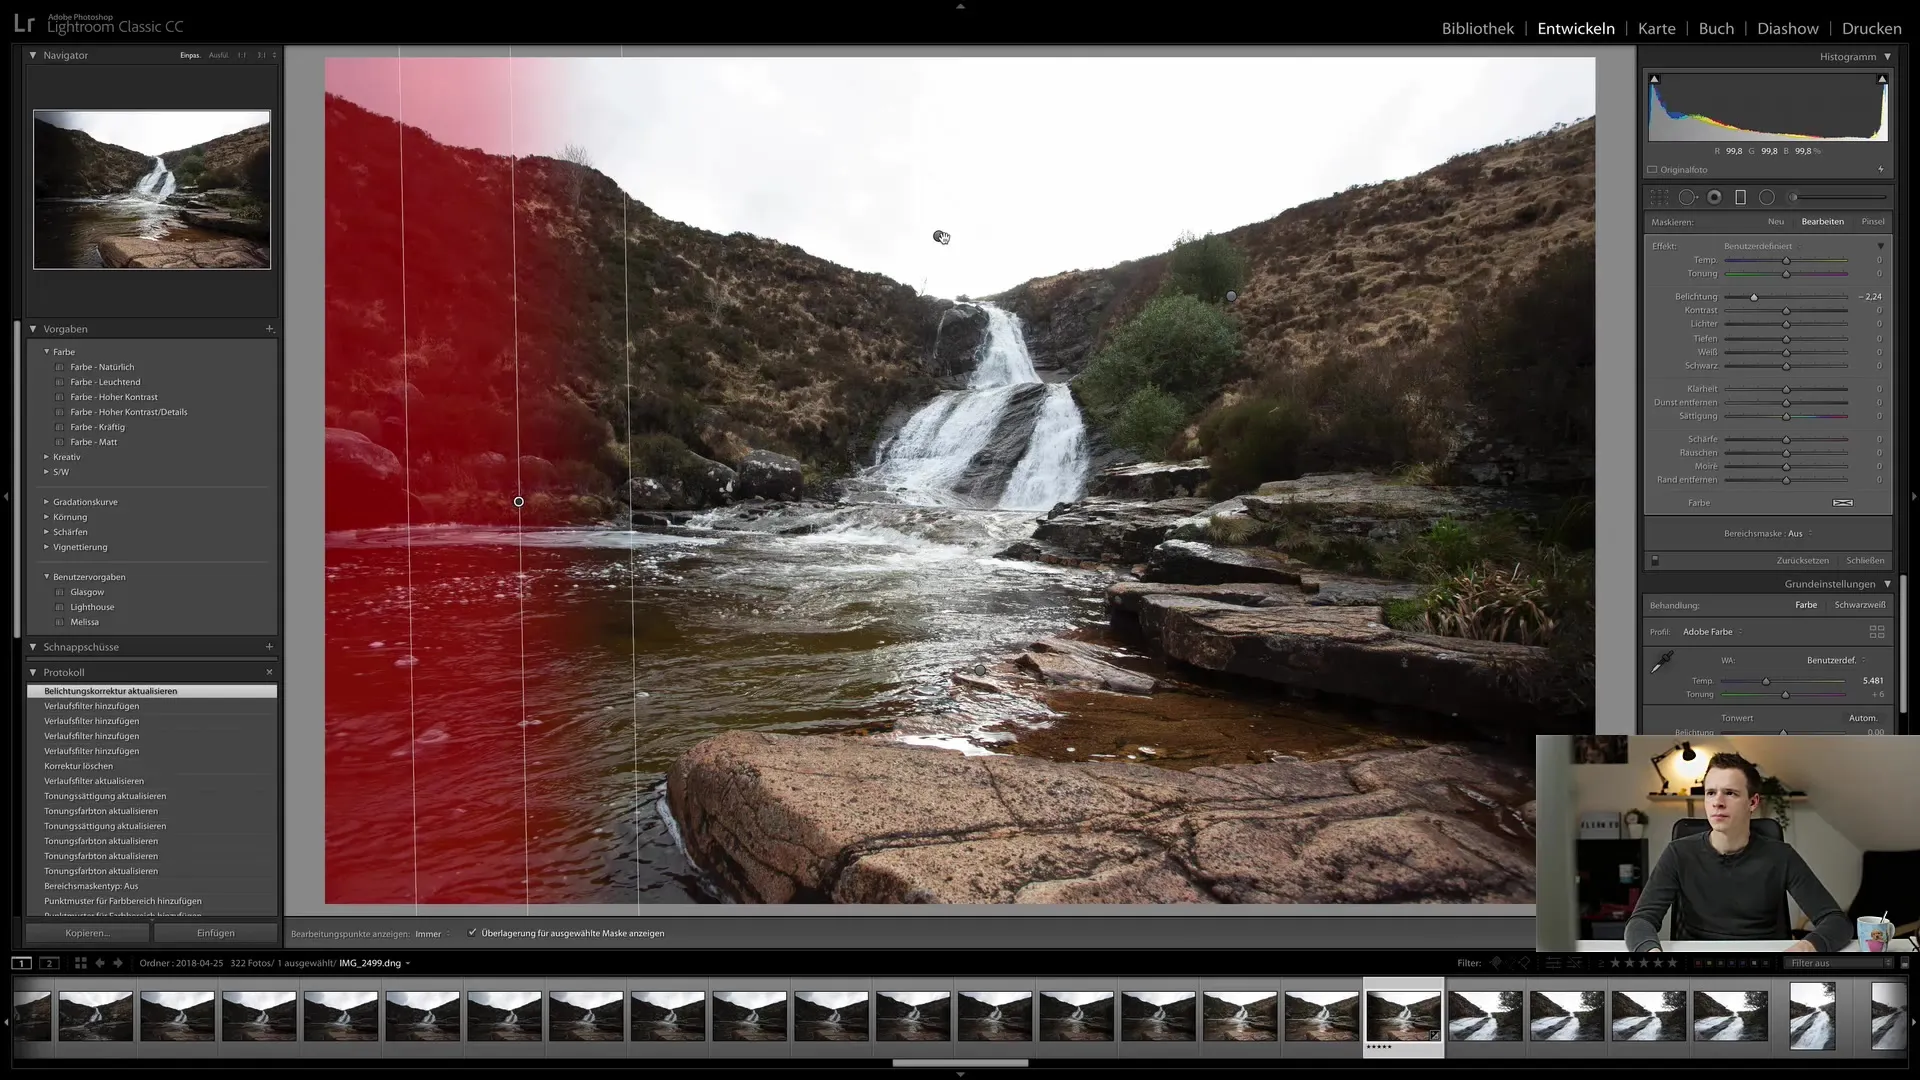
For starters, I recommend handling the number of used filters with care and working step-by-step to achieve the best results. Experiment with different settings and find the style that suits you best.
In the next lesson, we will explore the same concept with the Radial Filter and discover how it can provide additional options to your workflow.
In this guide, you have learned the basics of the Gradient Filter in Lightroom Classic CC. You can make important adjustments to your images, refocus, and create your photos with individual effects.
Frequently Asked Questions
How do I apply the gradient filter in Lightroom?Activate the Gradient tool, drag a gradient onto the image, and adjust the desired settings.
Can I apply multiple gradient filters to one image?Yes, you can add multiple filters and adjust them individually as long as you keep an overview.
What can I do if I am not satisfied with the gradient filter settings?Click on the white box in the gradient filter area to reset all adjustments.
Can I use luminance masks with the gradient filter?Yes, you can influence specific brightness ranges by using the luminance mask function.
How do I revert to a previous setting?You can use the Backspace key to remove the last set filters.


