The Radial Filter in Lightroom Classic CC is a powerful tool for making local adjustments to your images. It works similarly to the Graduated Filter, but it offers the possibility of making adjustments in a circular or elliptical shape. This opens up new creative perspectives in image editing. In this guide, you will learn step by step how to effectively use the Radial Filter to optimize your images and create the desired atmosphere.
Main Insights
- The Radial Filter allows circular adjustments in the image.
- You can selectively change brightness, sharpness, and saturation.
- By using the filter's invert function, you can highlight the center of the image.
- It is important to soften the transitions to achieve natural results.
Step-by-Step Guide
To use the Radial Filter, follow these steps:
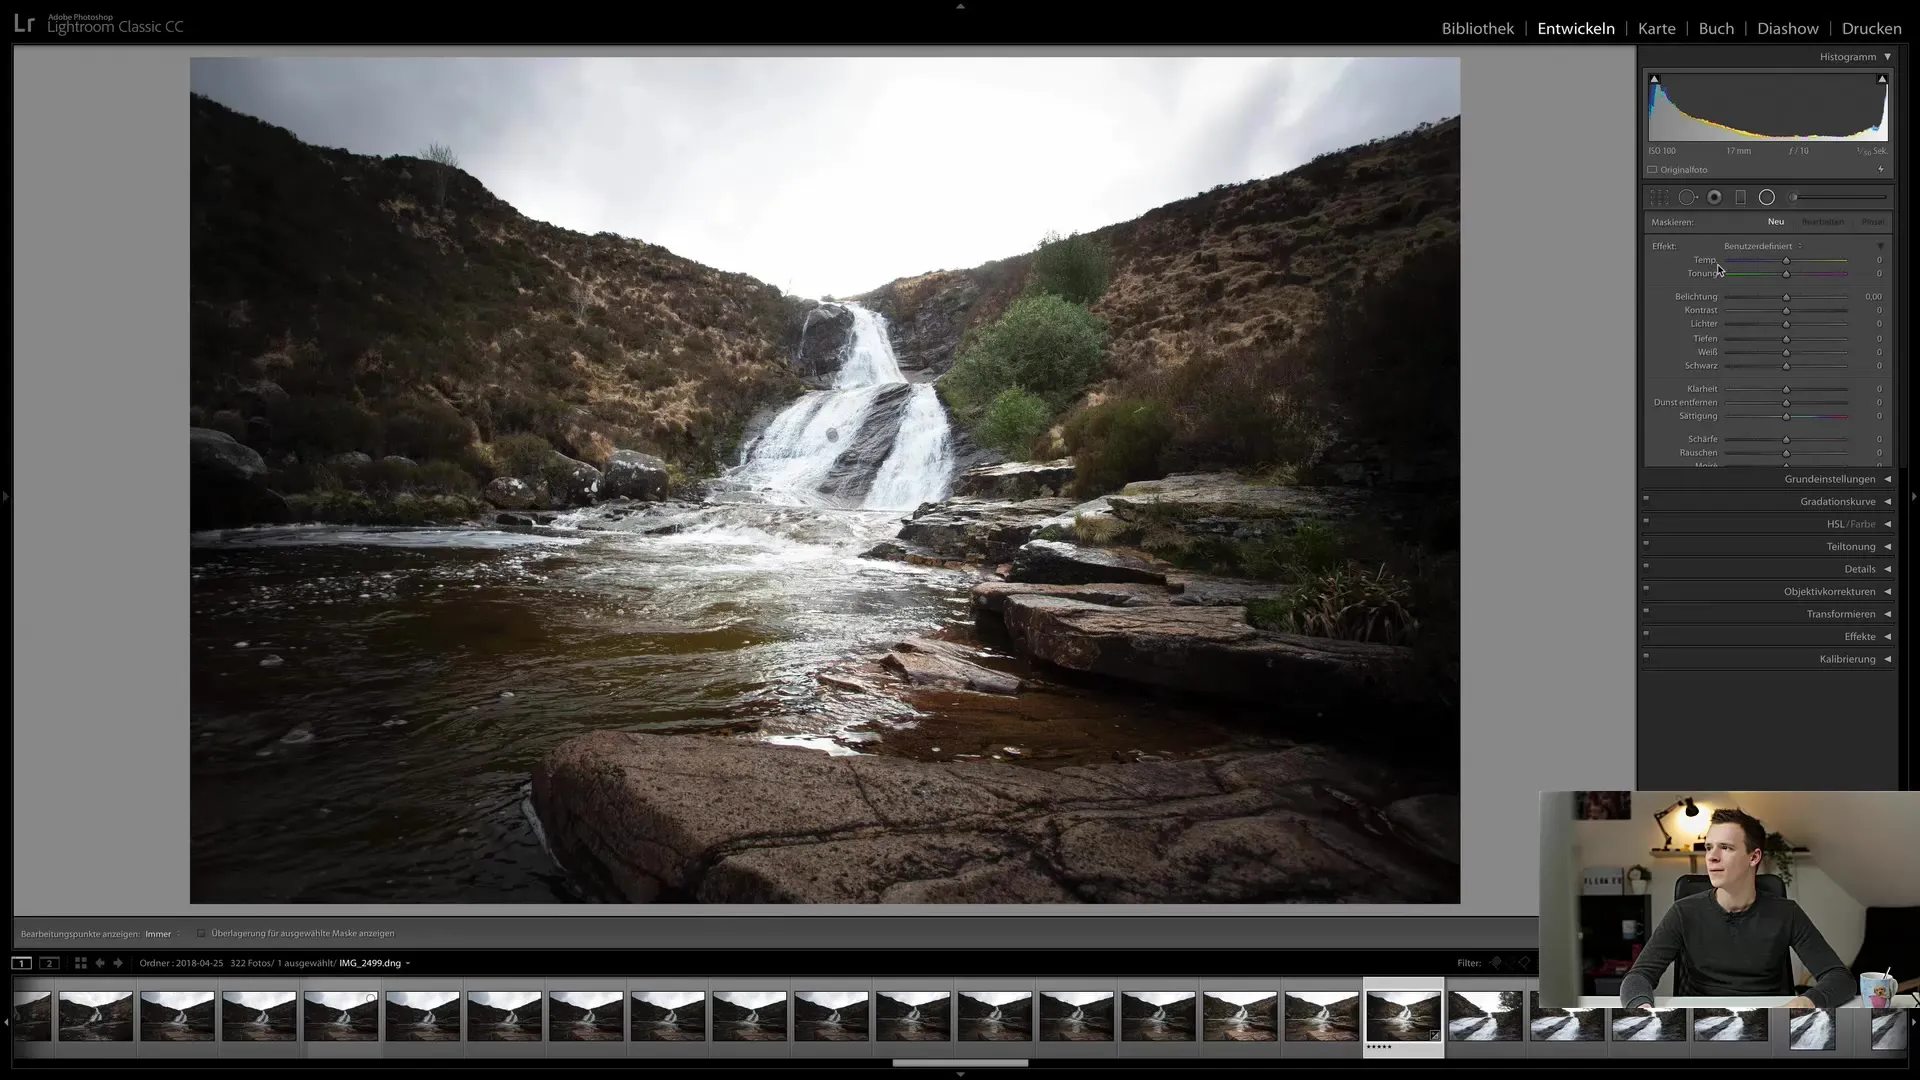
First, open Lightroom Classic CC and load the photo you want to edit. Then select the Radial Filter tool from the toolbar. You can do this by clicking on the Radial Filter icon or using the keyboard shortcut "Shift + M".

Once the tool is active, click at the point in the image where the gradient should start, and then drag the mouse to create a circle or ellipse. The Radial Filter will now create a gradient from its center outward.
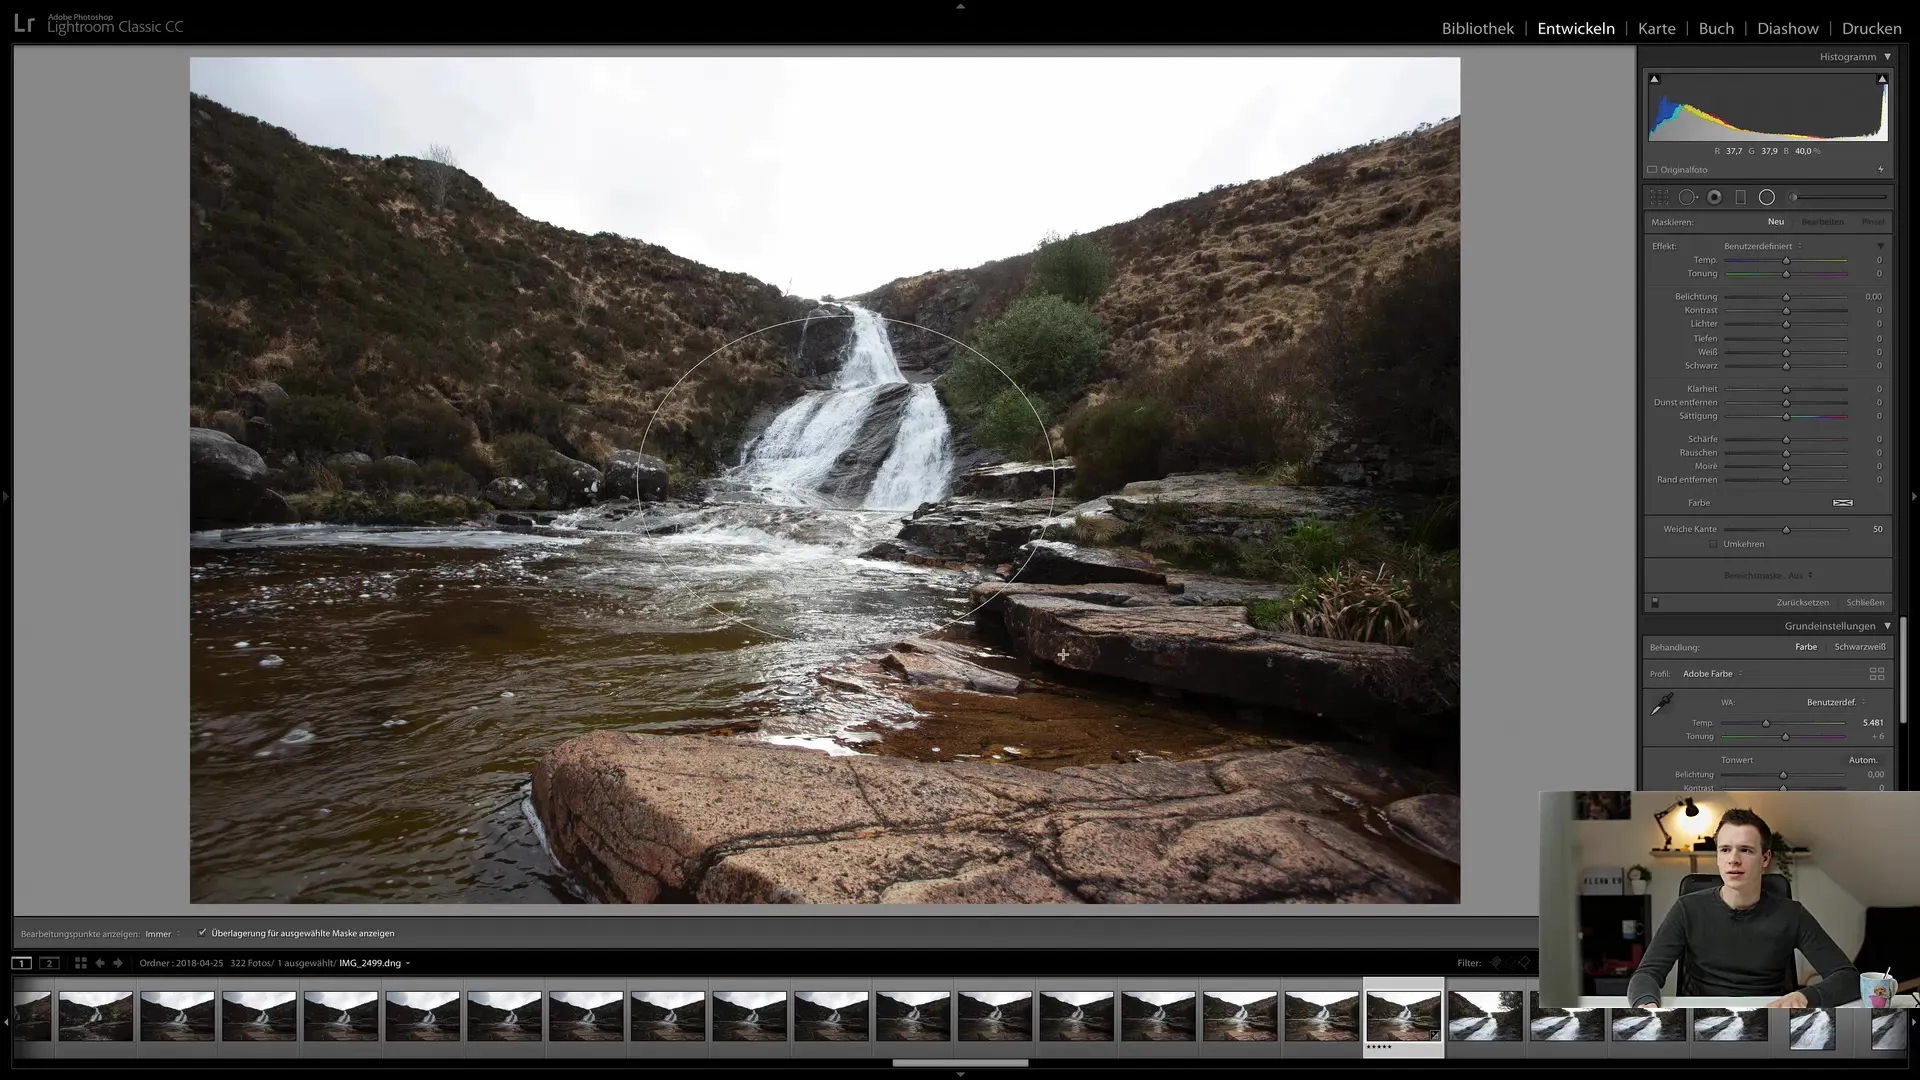
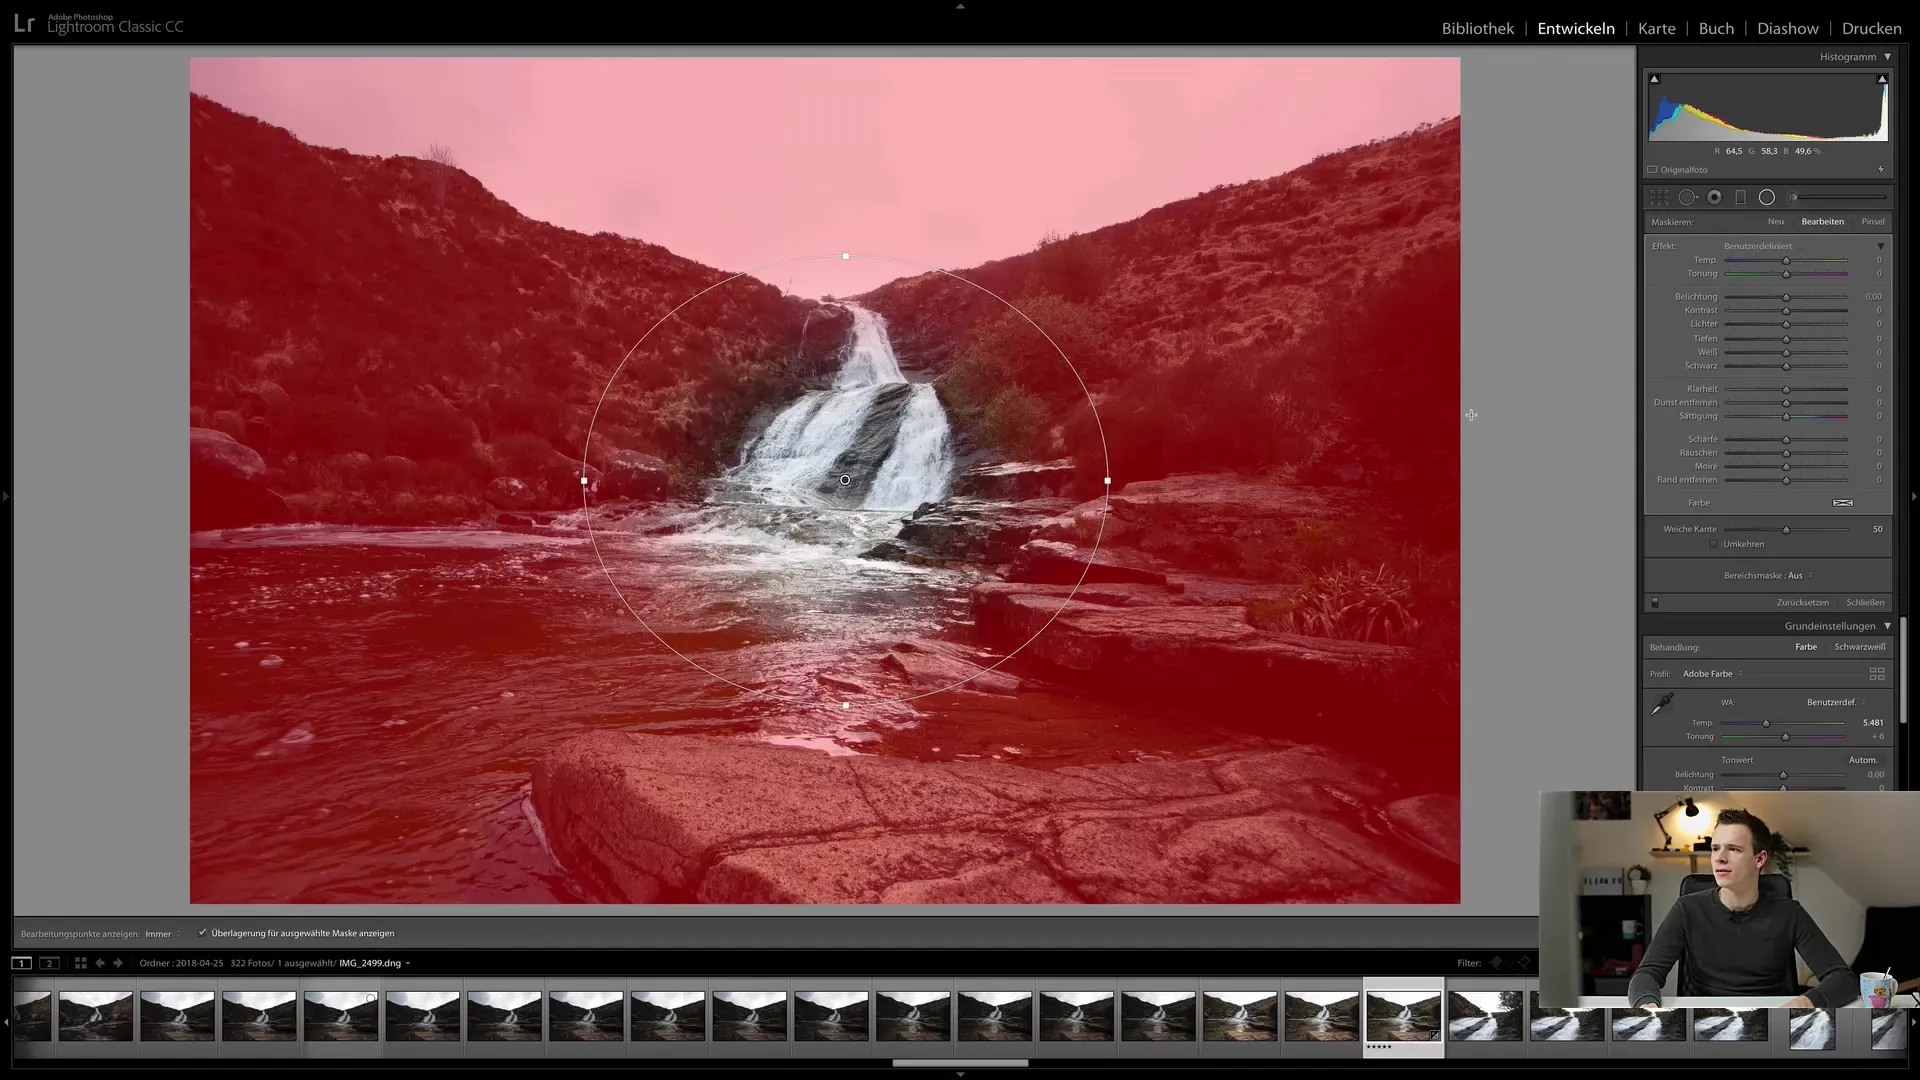
To display the overlay of the selected mask, click on the respective option at the bottom of the user interface. This helps you visualize which area of the image is affected by your adjustments. The red area indicates where the changes will take effect.
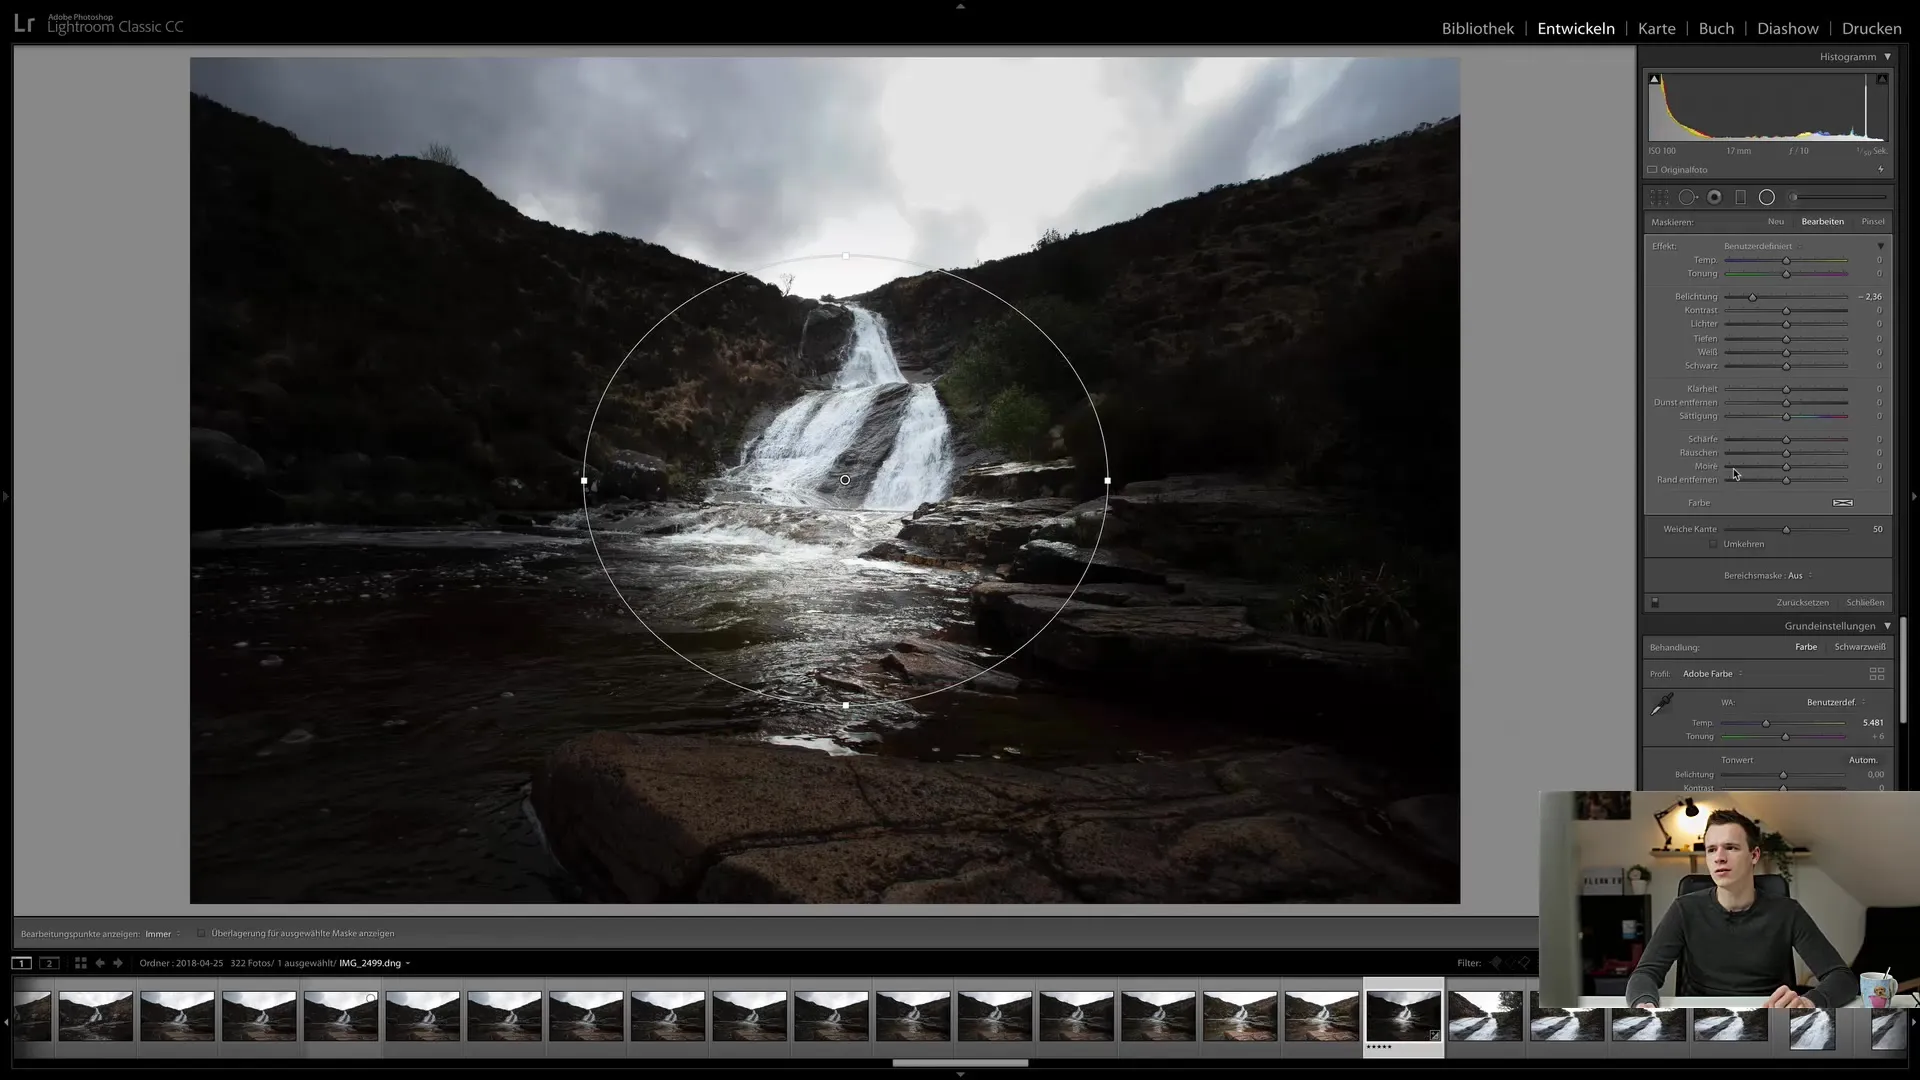
Now you can make targeted adjustments. For example, it's possible to reduce brightness in the outer area to create a vignette. Simply click on the exposure slider and drag it down to achieve the desired effect.
You can also increase clarity to enhance the outer area. However, note that the saturation and clarity sliders only affect the external area of the filter. To demonstrate this, go back and reset the changes if you are not satisfied.
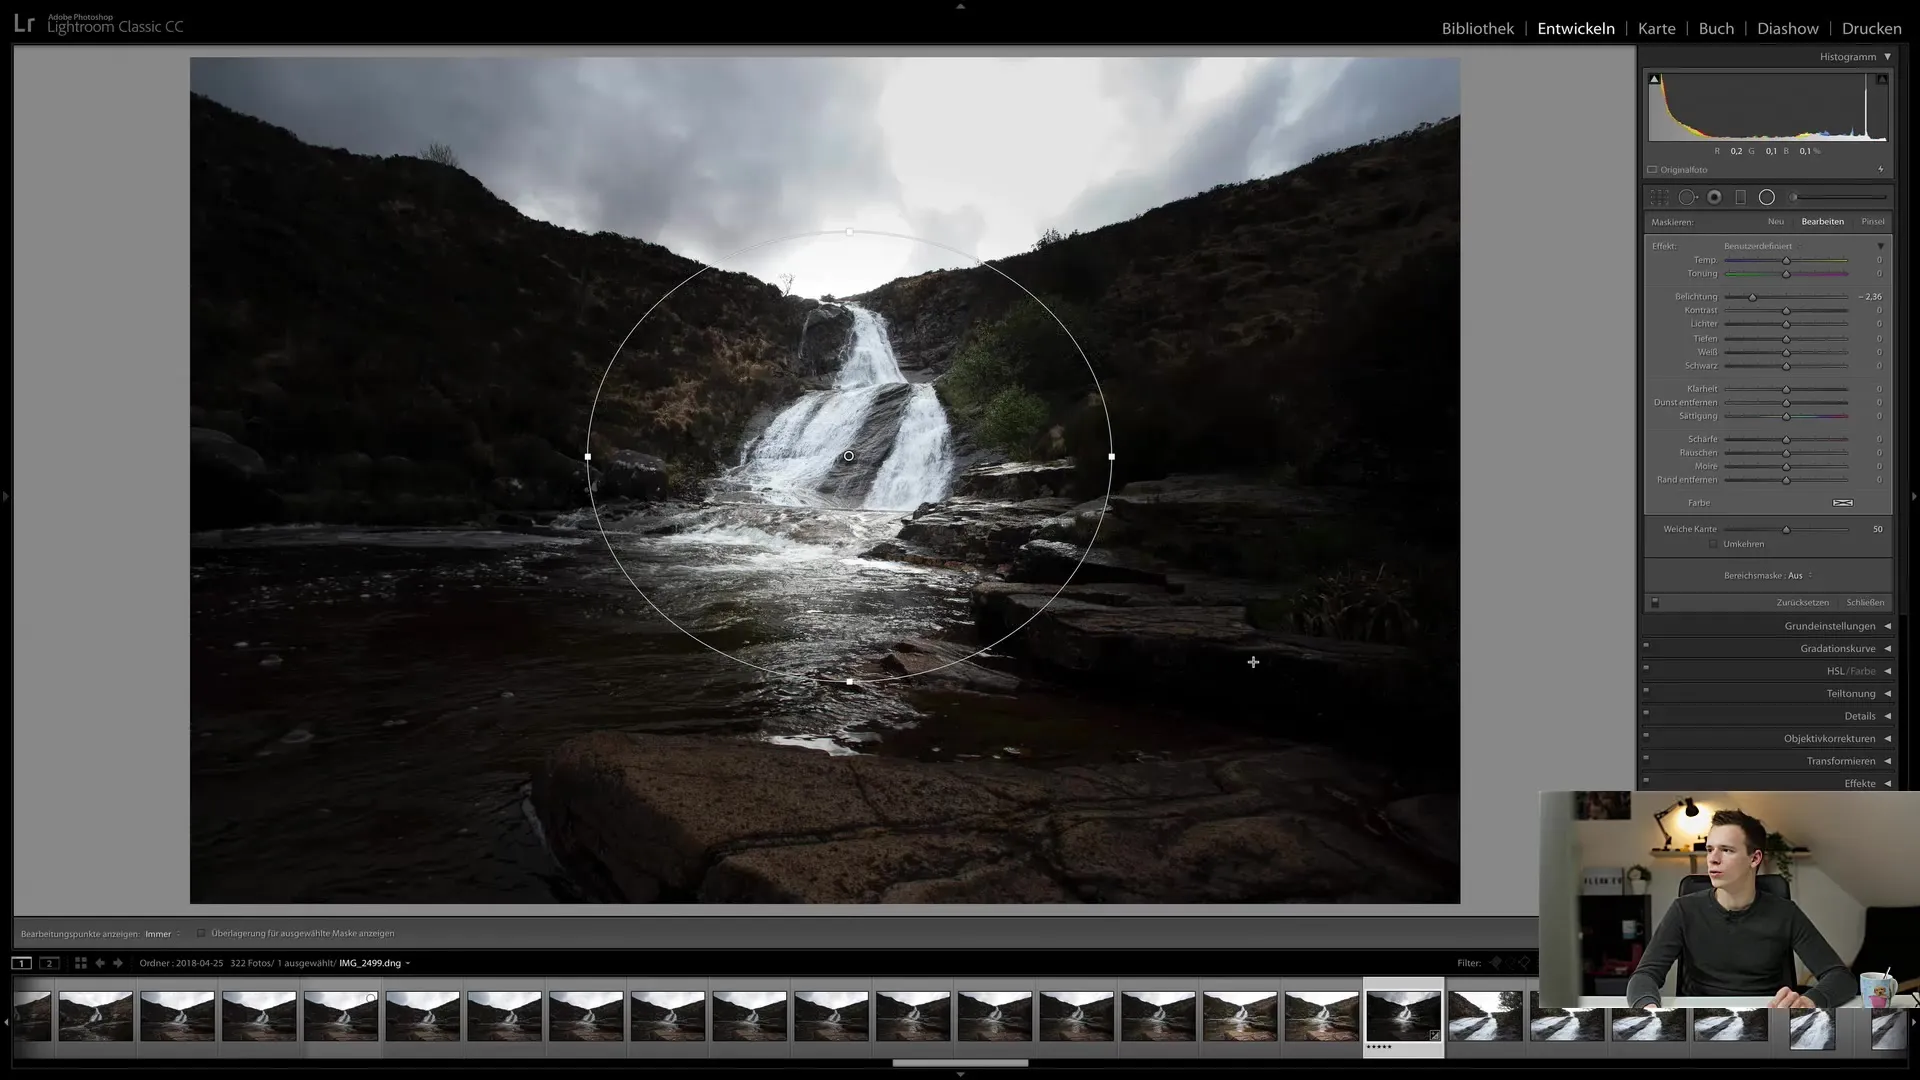
If you are not satisfied with the selected area, you can adjust the ellipse. It is not necessary to create a perfect circle; you can adjust the ellipse according to the image and your preference. Move the ellipse or drag it to a different position to achieve the desired effect in the specific area you want to adjust.
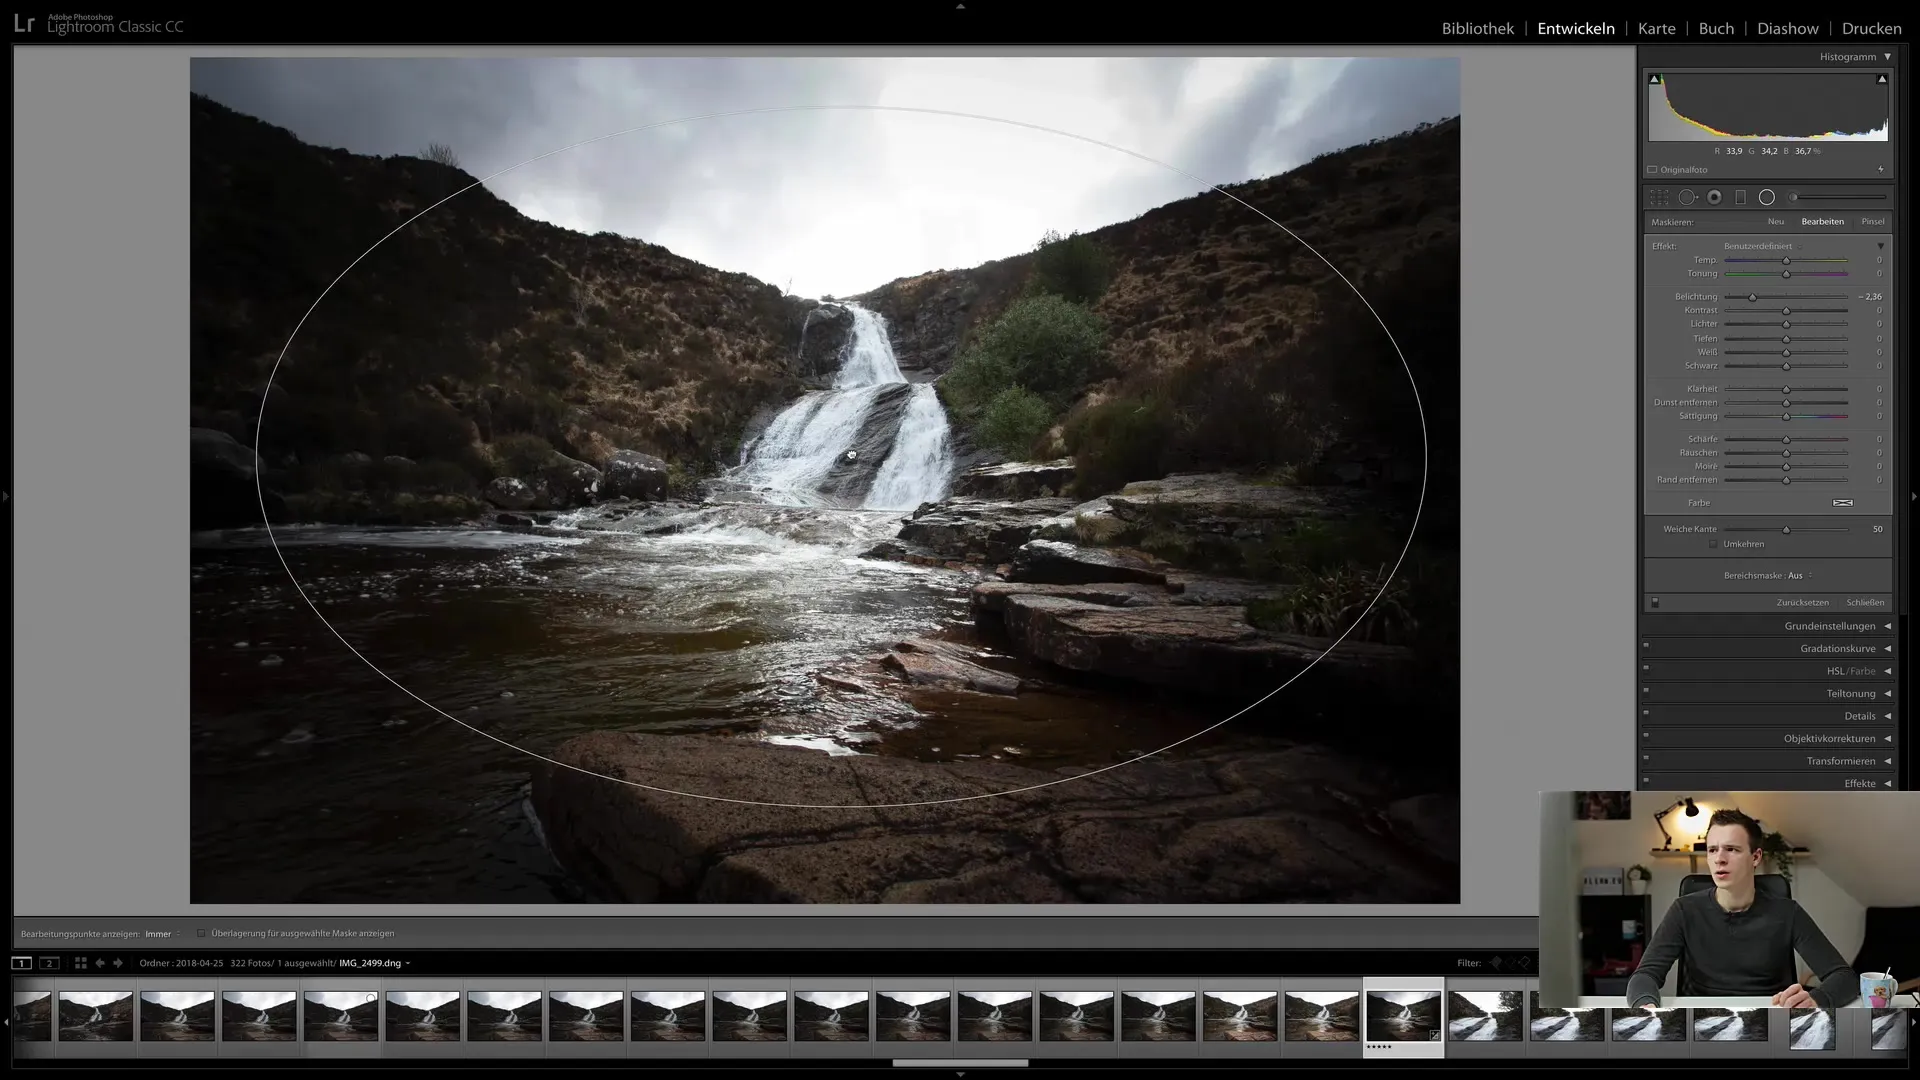
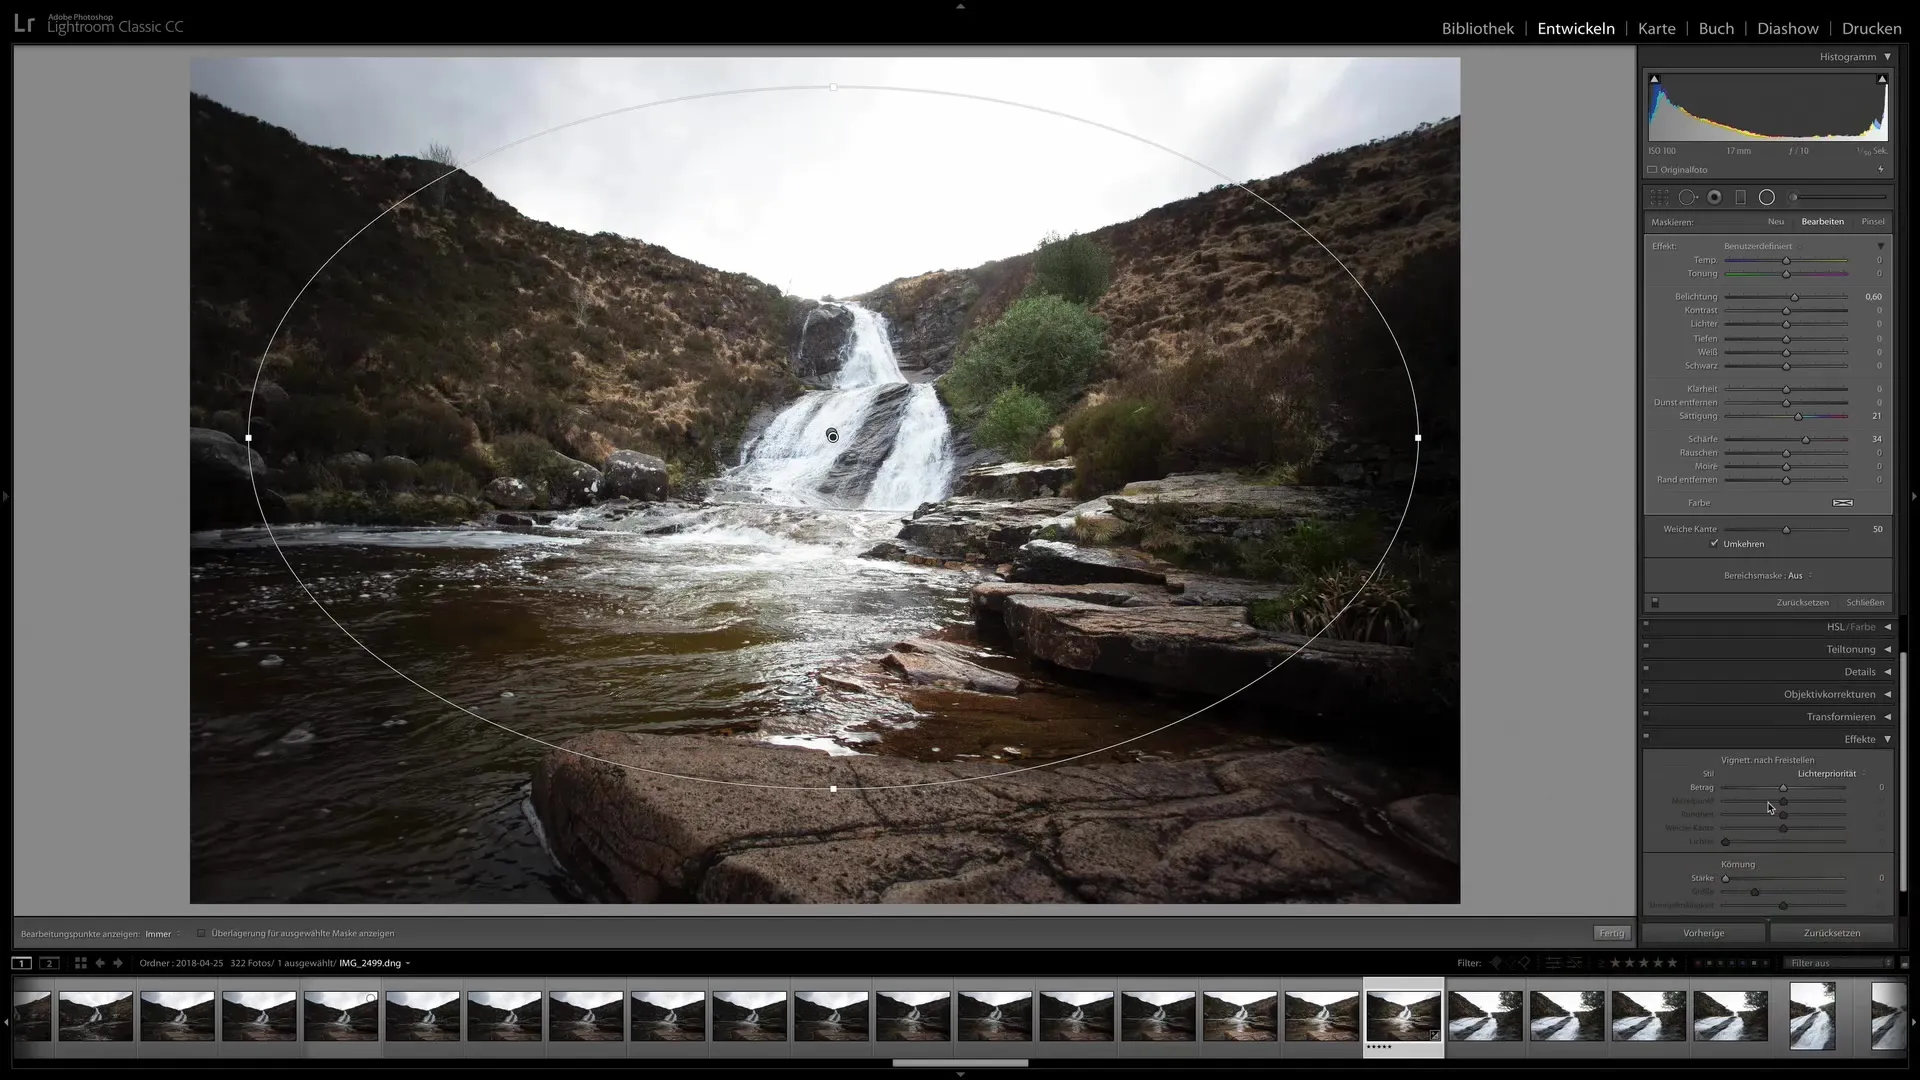
Vibrant images often require more than just a vignette. Use the sharpness sliders to optimize the image. Here you can reduce sharpness to create a soft but not blurry effect that enhances the overall harmony of the image. Play with the feather slider to smooth out the transitions.
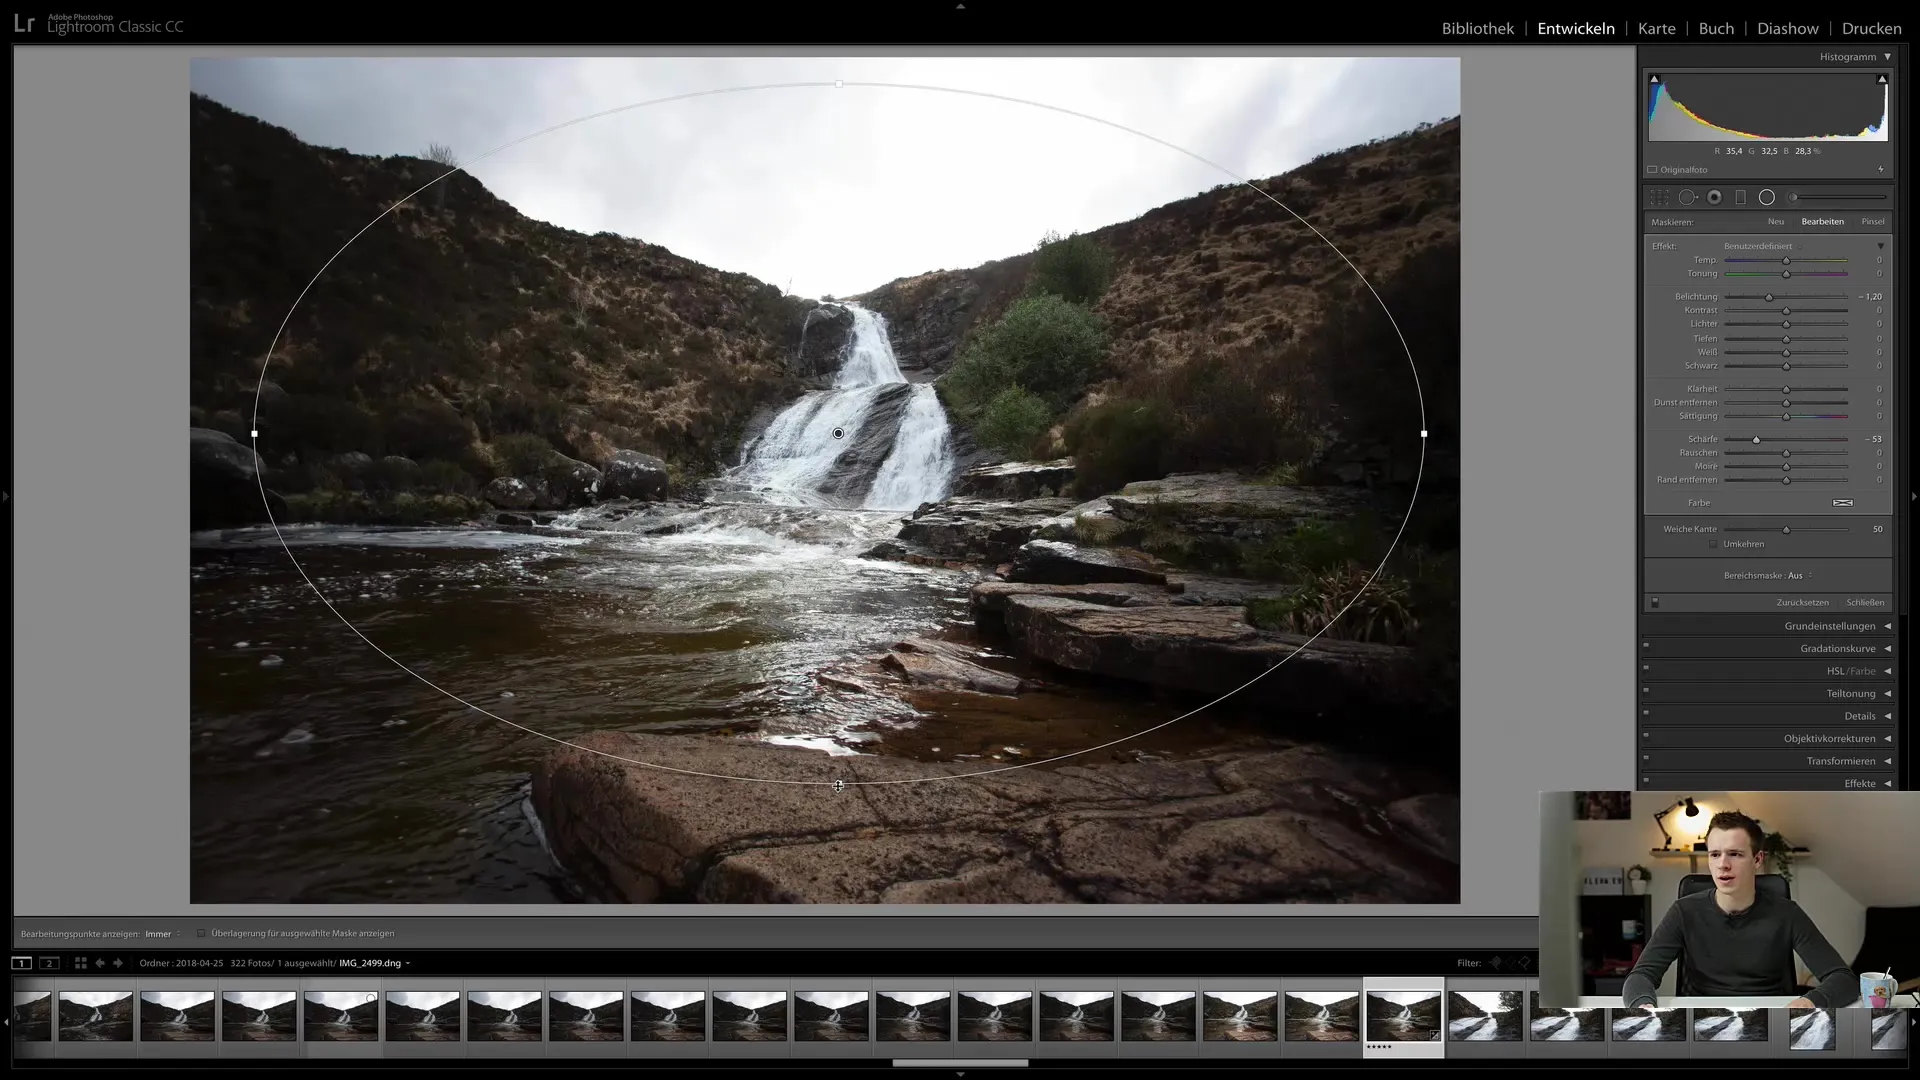
The feather slider is crucial to avoid harsh lines. Make sure the transitions between edited and untouched areas of the image are soft. A value around 50 is often ideal to ensure a harmonious blend.
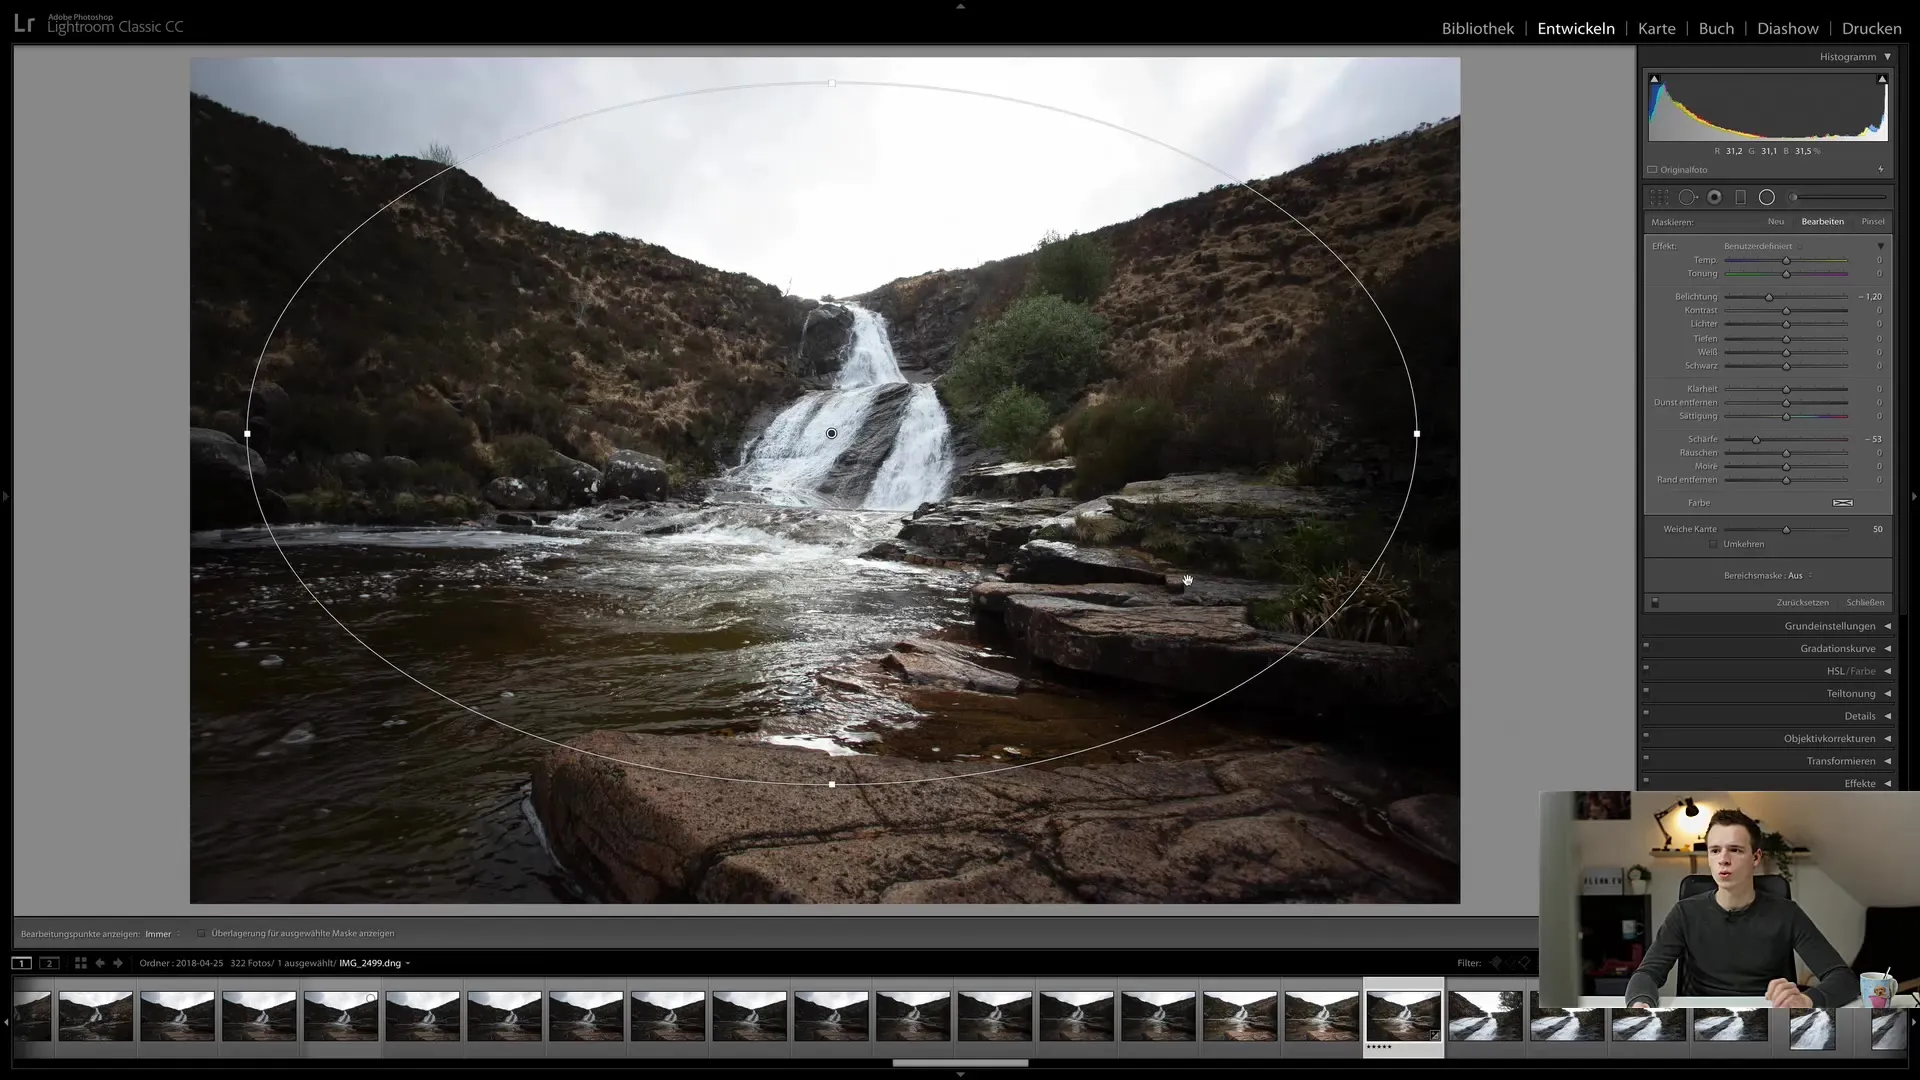
If you want to reverse the vignette, you can do so as well. Right-click on the Radial Filter and choose "Duplicate". This creates an identical filter that you can easily adjust. Drag the new point slightly to the side to maintain control over both filters.
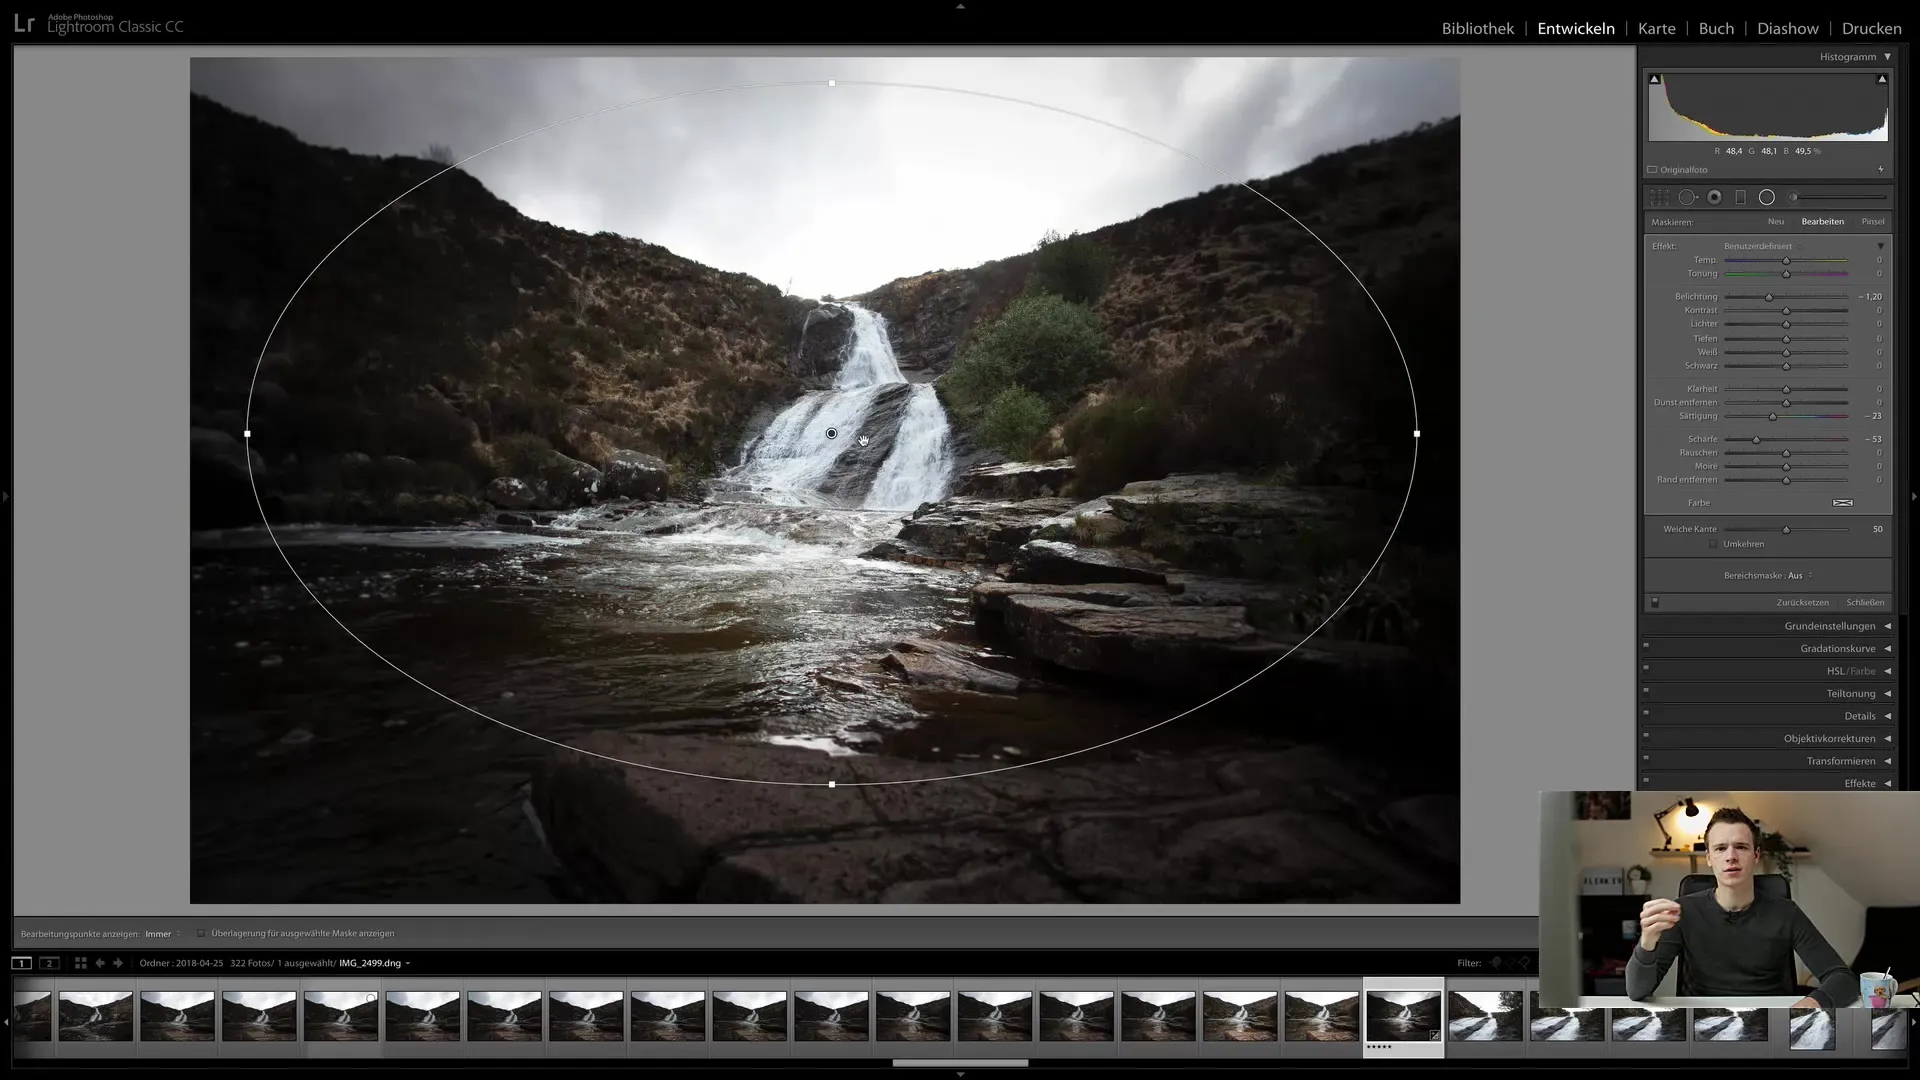
To use this vignette in the center of the image, go back to the exposure control. Here you can use the inverse function to increase the exposure inside and leave the outer area untouched. This highlights the focus on the center of the image and creates an interesting composition.
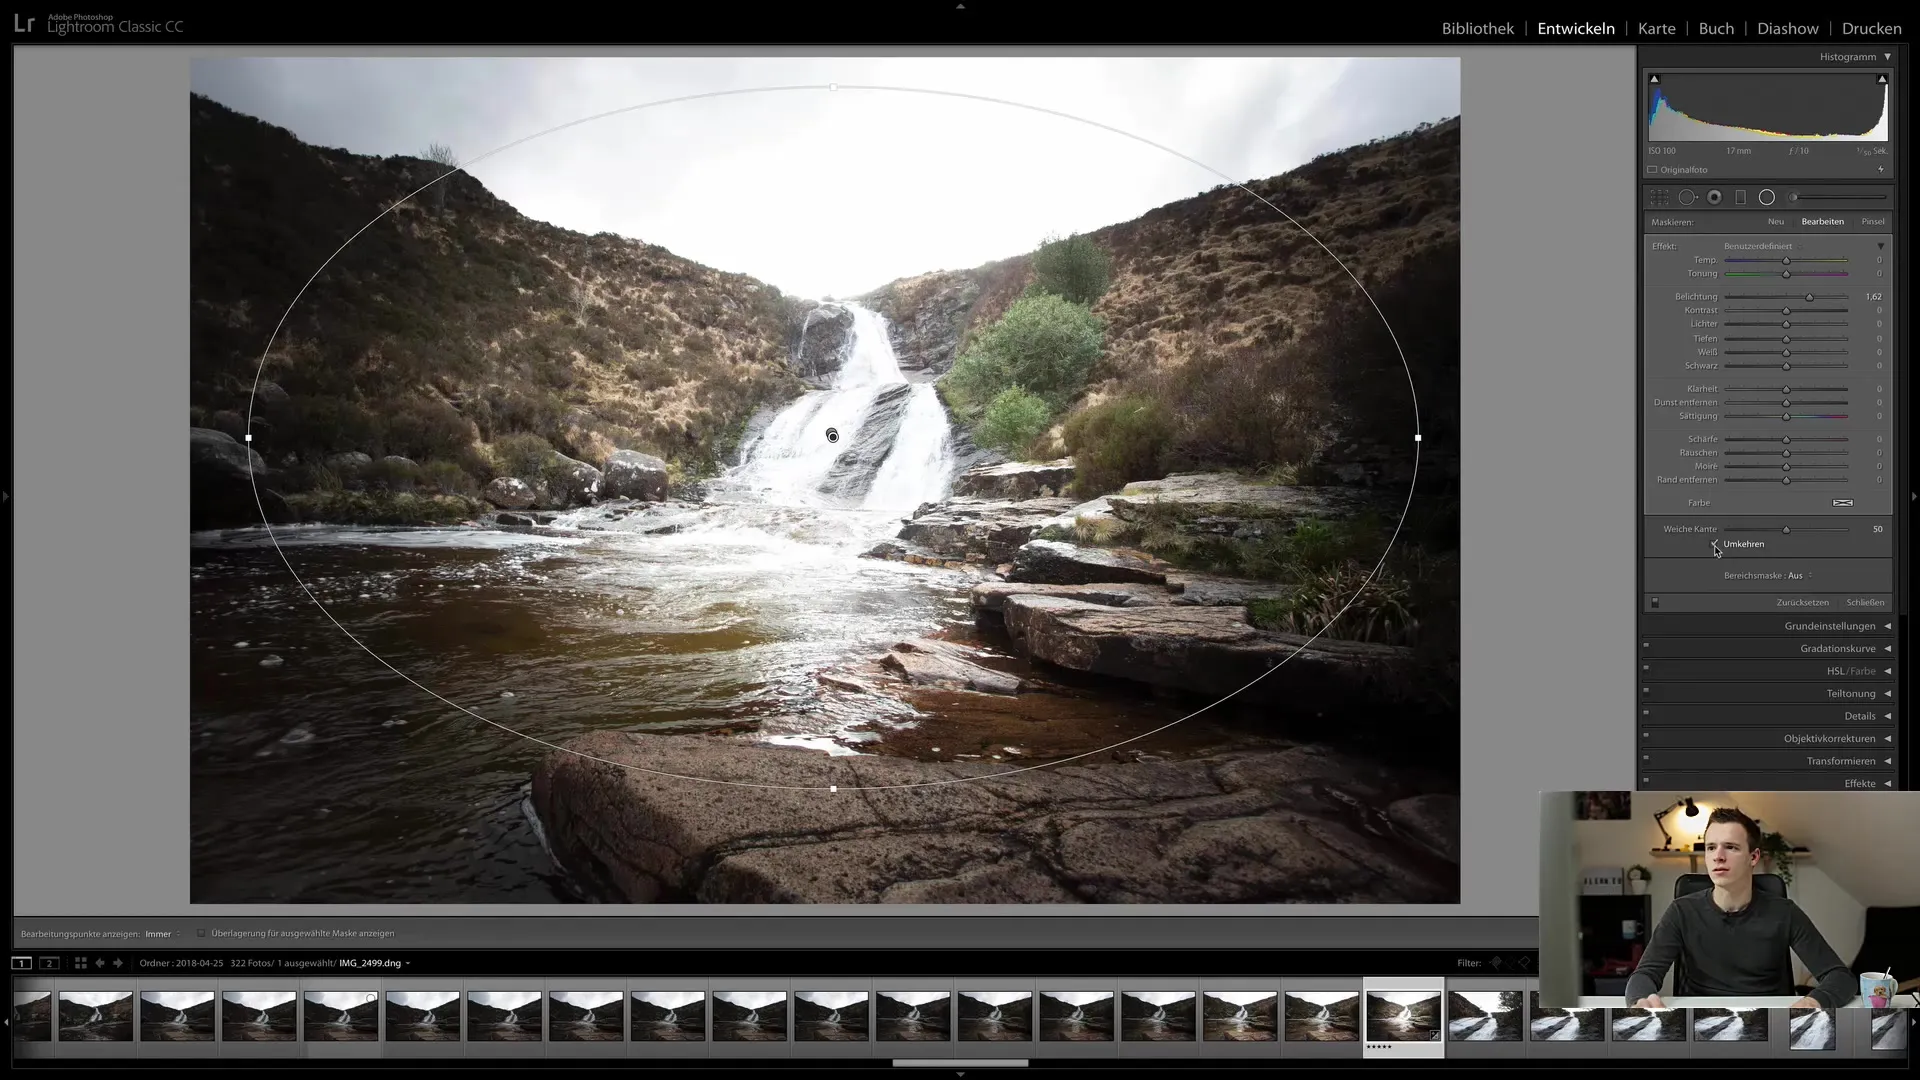
Now you have the opportunity to fine-tune the exposure to further emphasize the center. The process is simple; you can also use the arrow keys to make more precise adjustments. This is especially helpful for controlling and optimizing fine details.
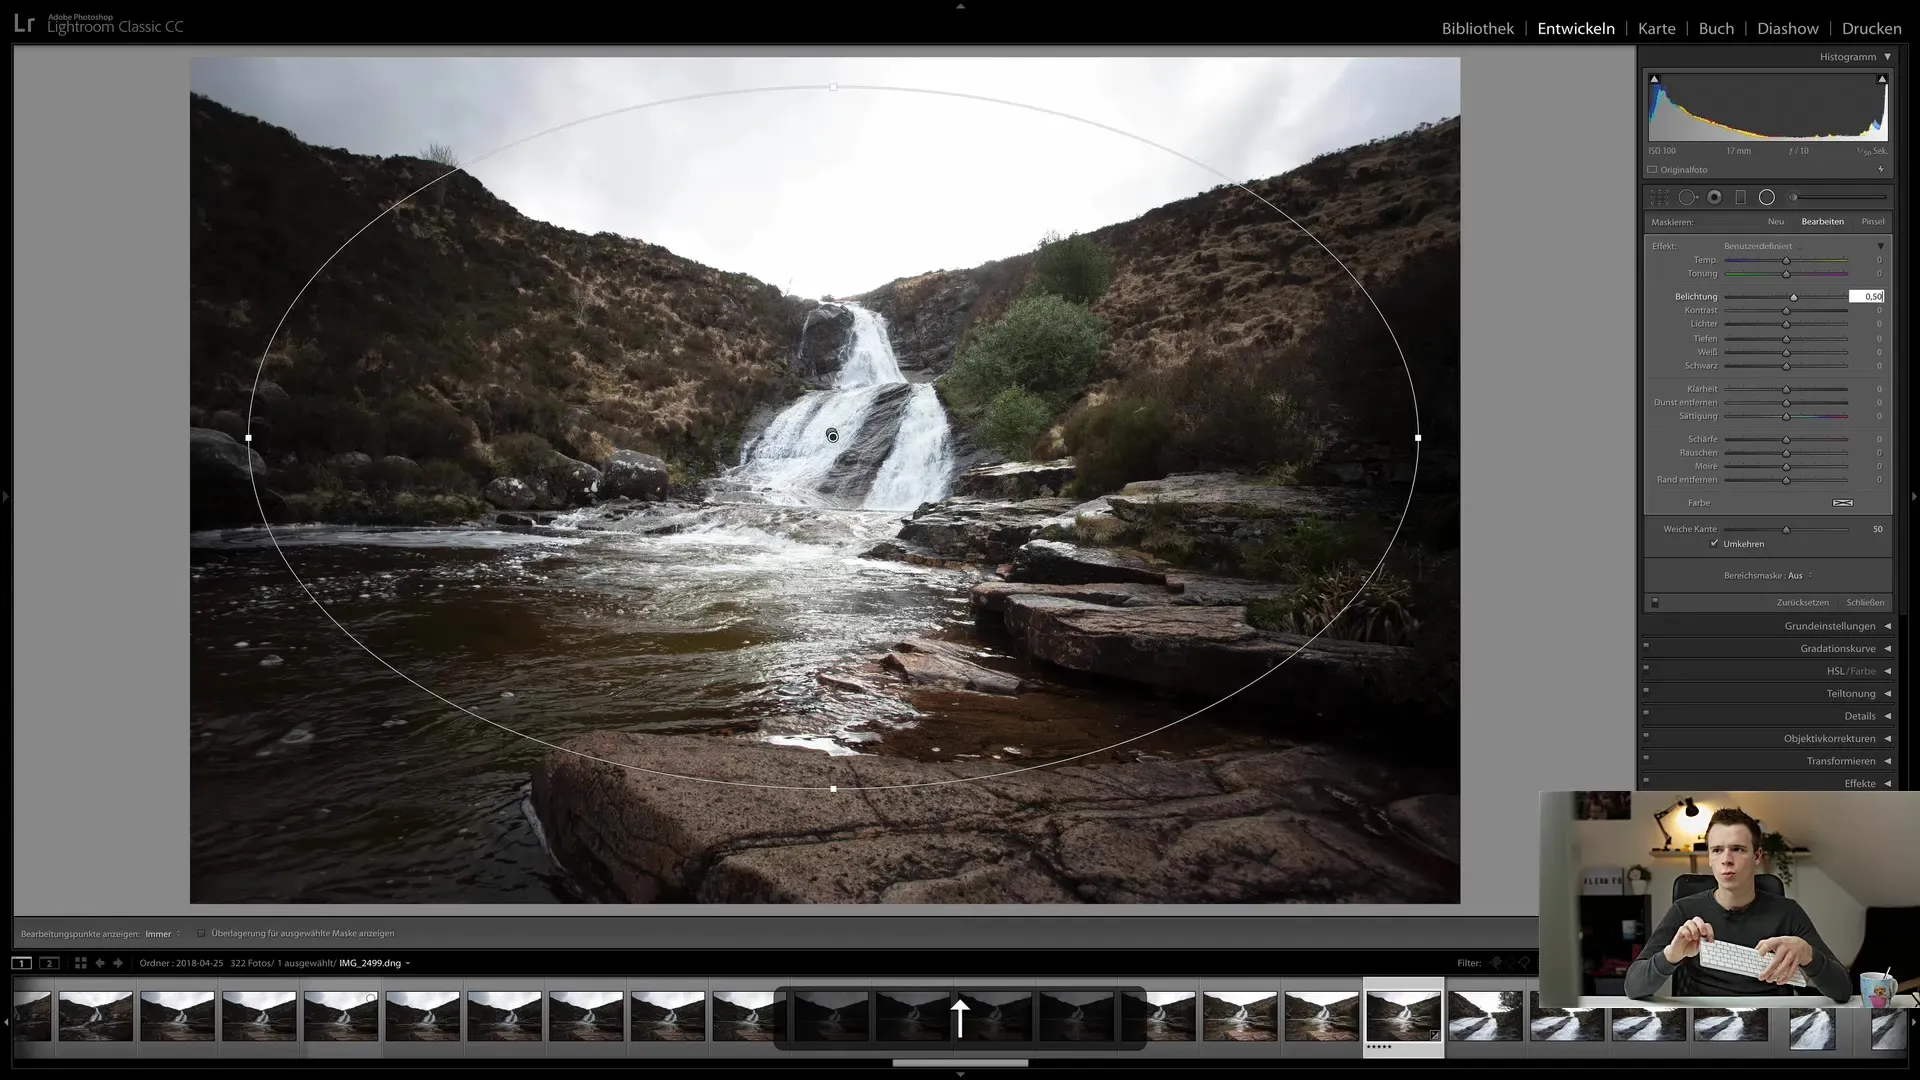
The radial filter offers you extremely precise control over your vignette and sharpness adjustments. Use the various sliders to change sharpness, saturation, and hues to customize your image.
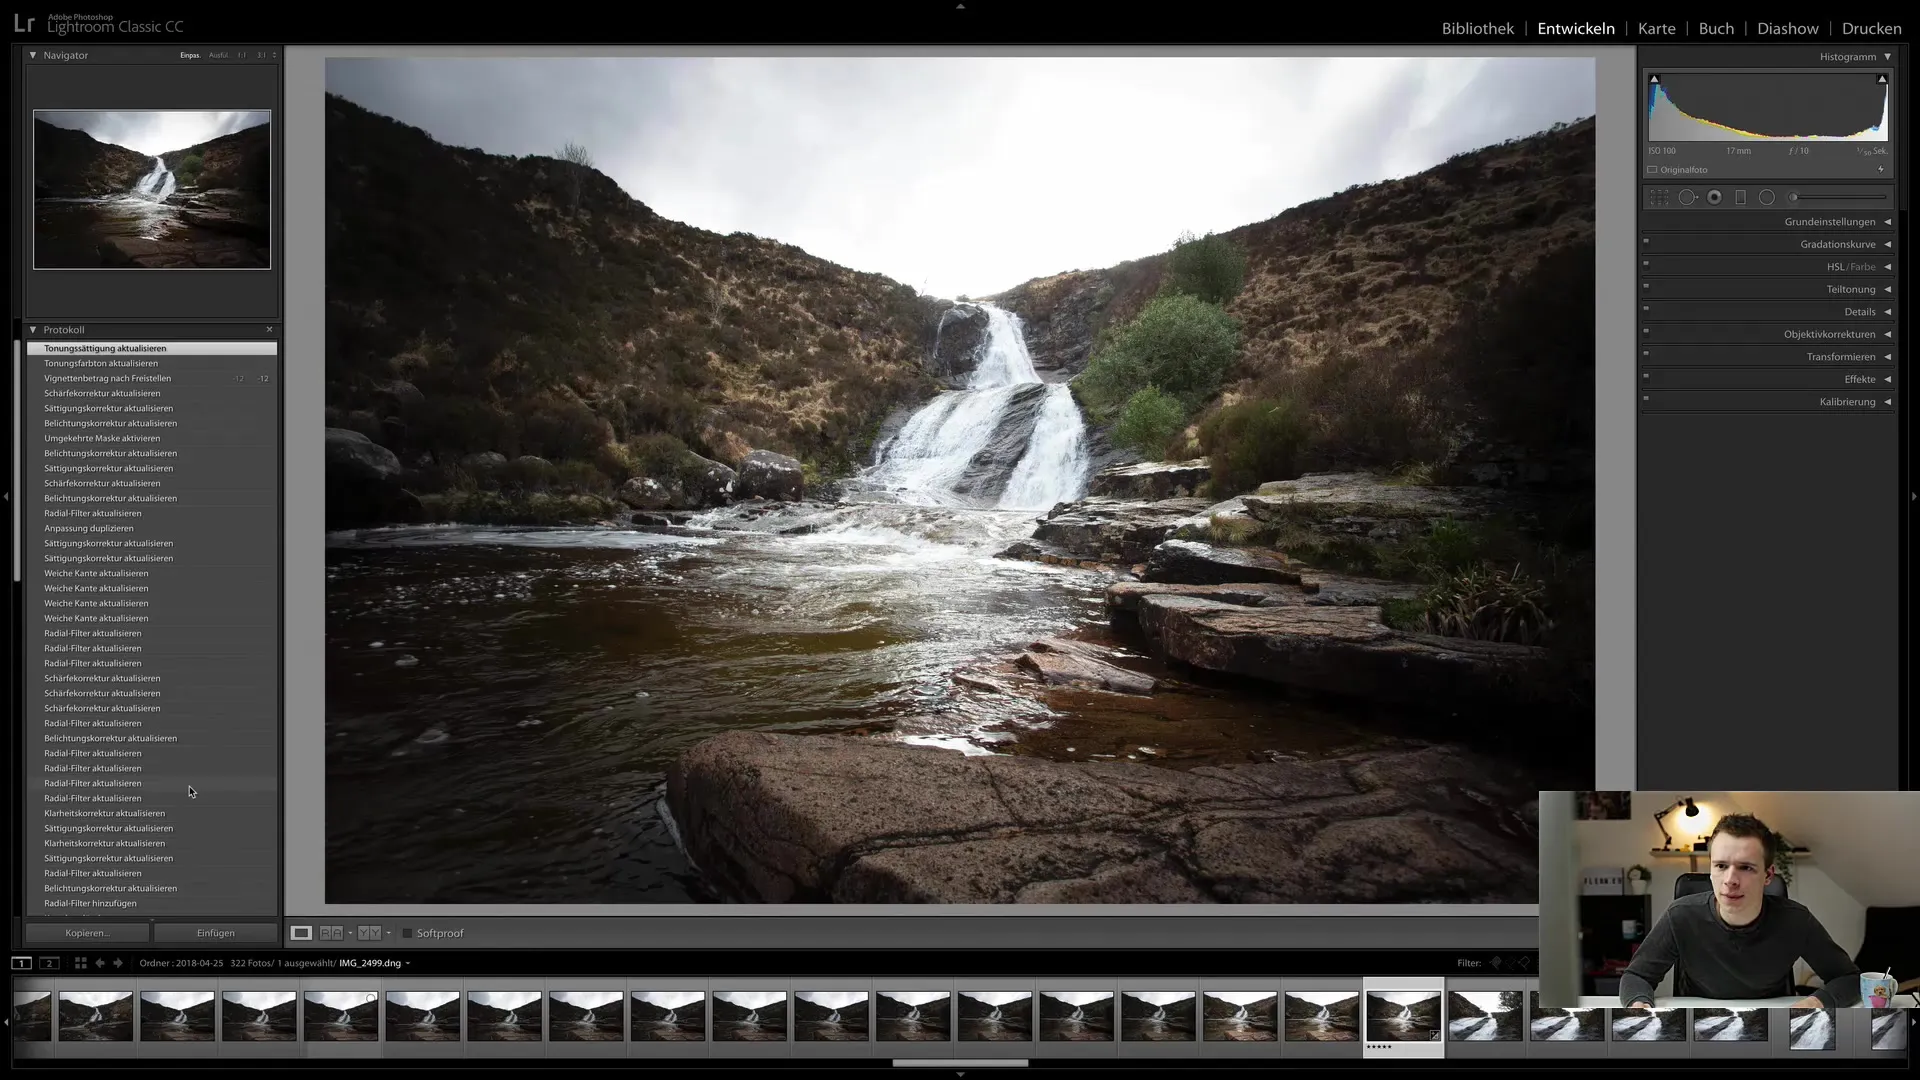
To compare between the edited and untreated image, go to the history to see the different stages. The result should make the image more interesting and direct the gaze towards the center of the image.
It is important to develop a good sense of the strength of the effect. Although the radial filter has some limitations, there are endless possibilities to be creative with your images.
Summary - Radial Filter in Lightroom Classic CC: A Detailed Guide
The radial filter in Lightroom Classic CC is an essential tool for photographers and image editors. With its help, you can make targeted adjustments to emphasize and optimize specific areas of your image. Through experience and experimenting with the sliders, you will be able to realize your creative visions.
FAQ
How do I activate the radial filter in Lightroom Classic CC?Click on the radial filter icon in the toolbar or use the combination "Shift + M".
How can I see the overlay of the radial filter?Click on the "Show Overlay of selected mask" option in the lower control interface.
Can I adjust the ellipse of the radial filter?Yes, you can move or reshape the ellipse to adjust the desired area.
How can I reverse the vignette?Right-click on the radial filter point and select "Duplicate" to adjust the vignette.
Is it possible to change the sharpness locally?Yes, you can use the sharpness sliders in the radial filter to make targeted sharpness adjustments.


