The Correction Brush in Lightroom Classic CC is an extremely powerful tool that allows you to make targeted adjustments to your photos. While you perform general image editing with the regular editing tools, the correction brush enables you to select and edit specific areas precisely. In this tutorial, I will show you how to make the most of the correction brush tool to develop your images according to your preferences.
Main Takeaways
- The correction brush allows precise adjustments in specific areas of an image.
- With the automatic masking function, you can select edges precisely.
- You can create multiple editing points to independently work on different areas of the image.
- Pay attention to the edges and masking to achieve precise results.
Step-by-Step Guide
To optimize the correction brush in Lightroom, follow these steps.

Start by selecting an area of your image that you want to edit. If the radial filter or graduated filter is not sufficient, open the correction brush to make even more precise adjustments.
To adjust the brush, you can use the scroll wheel to change the brush size. Hold down the Shift key while adjusting the brush size to make the edges softer or harder.
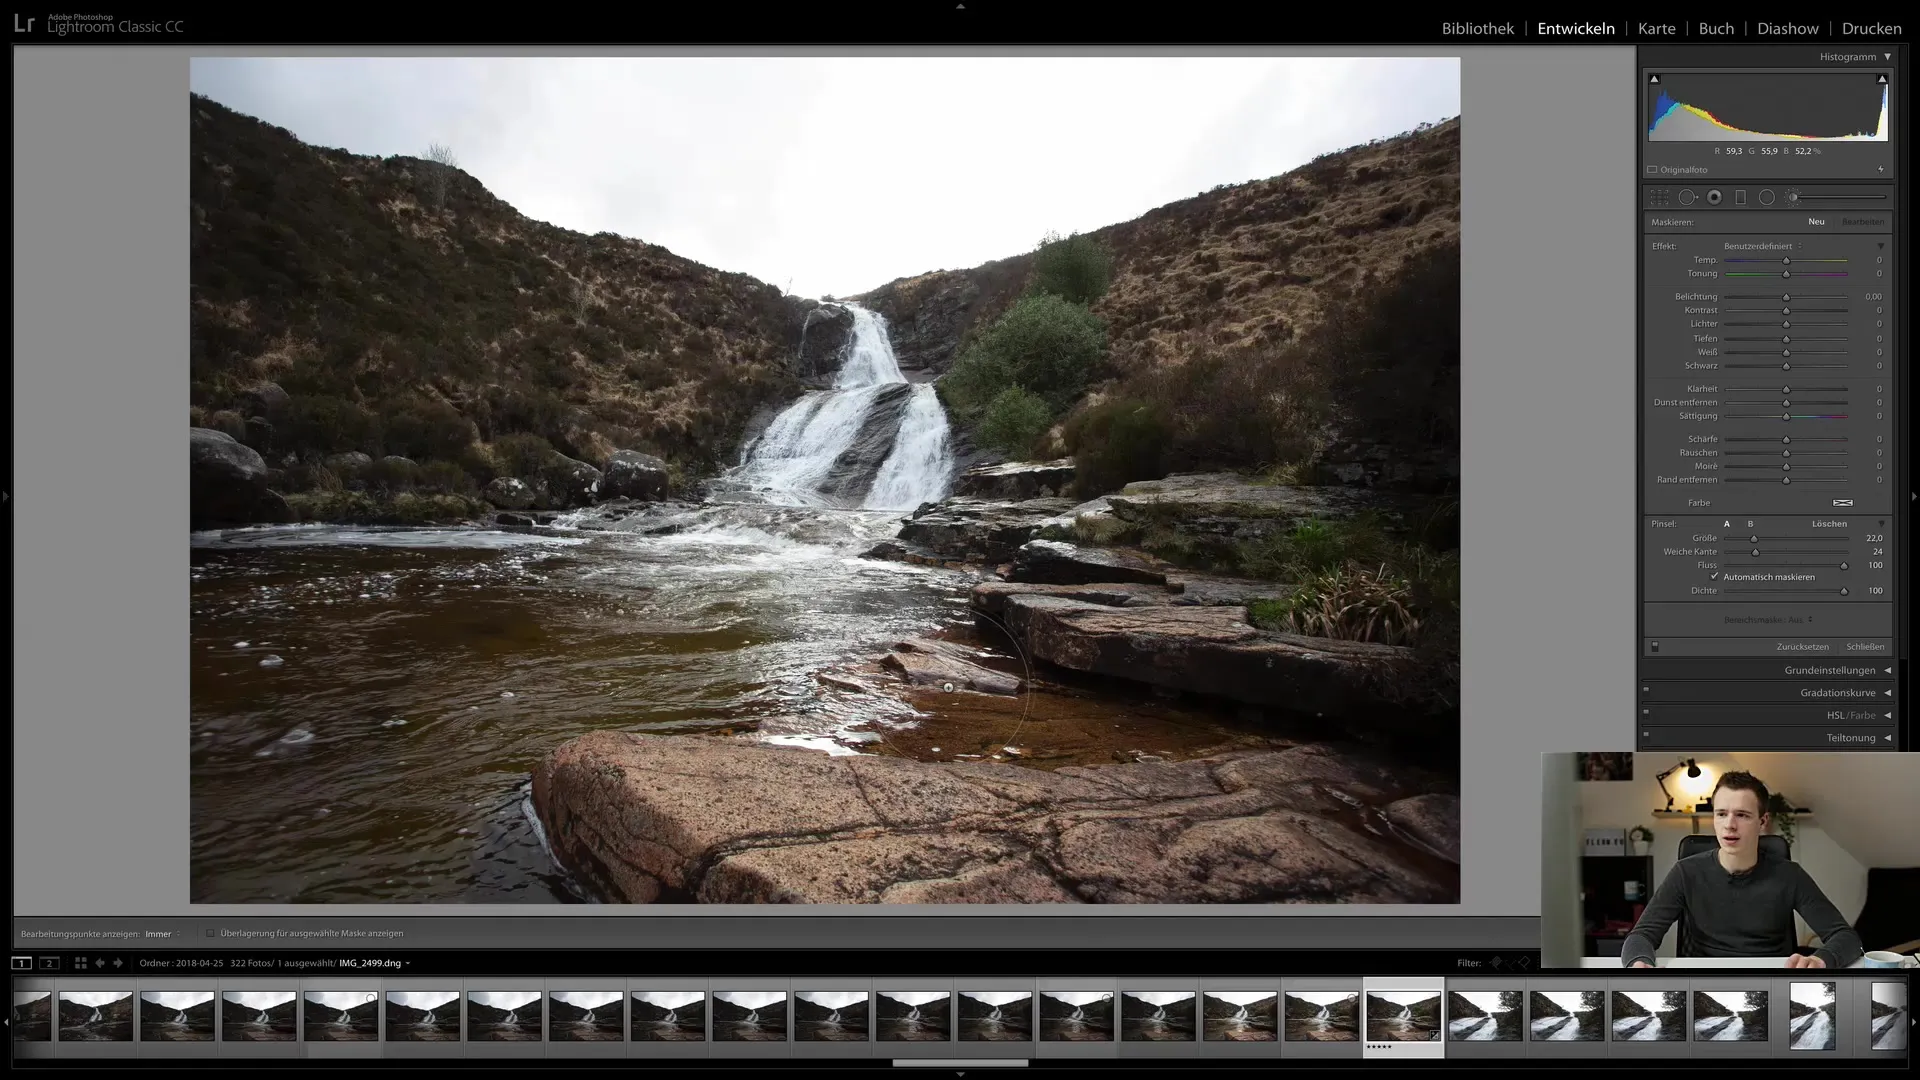
The brush also has presets that allow you to quickly apply different editing styles. Experiment with the various options to find the ones that best suit your specific requirements.
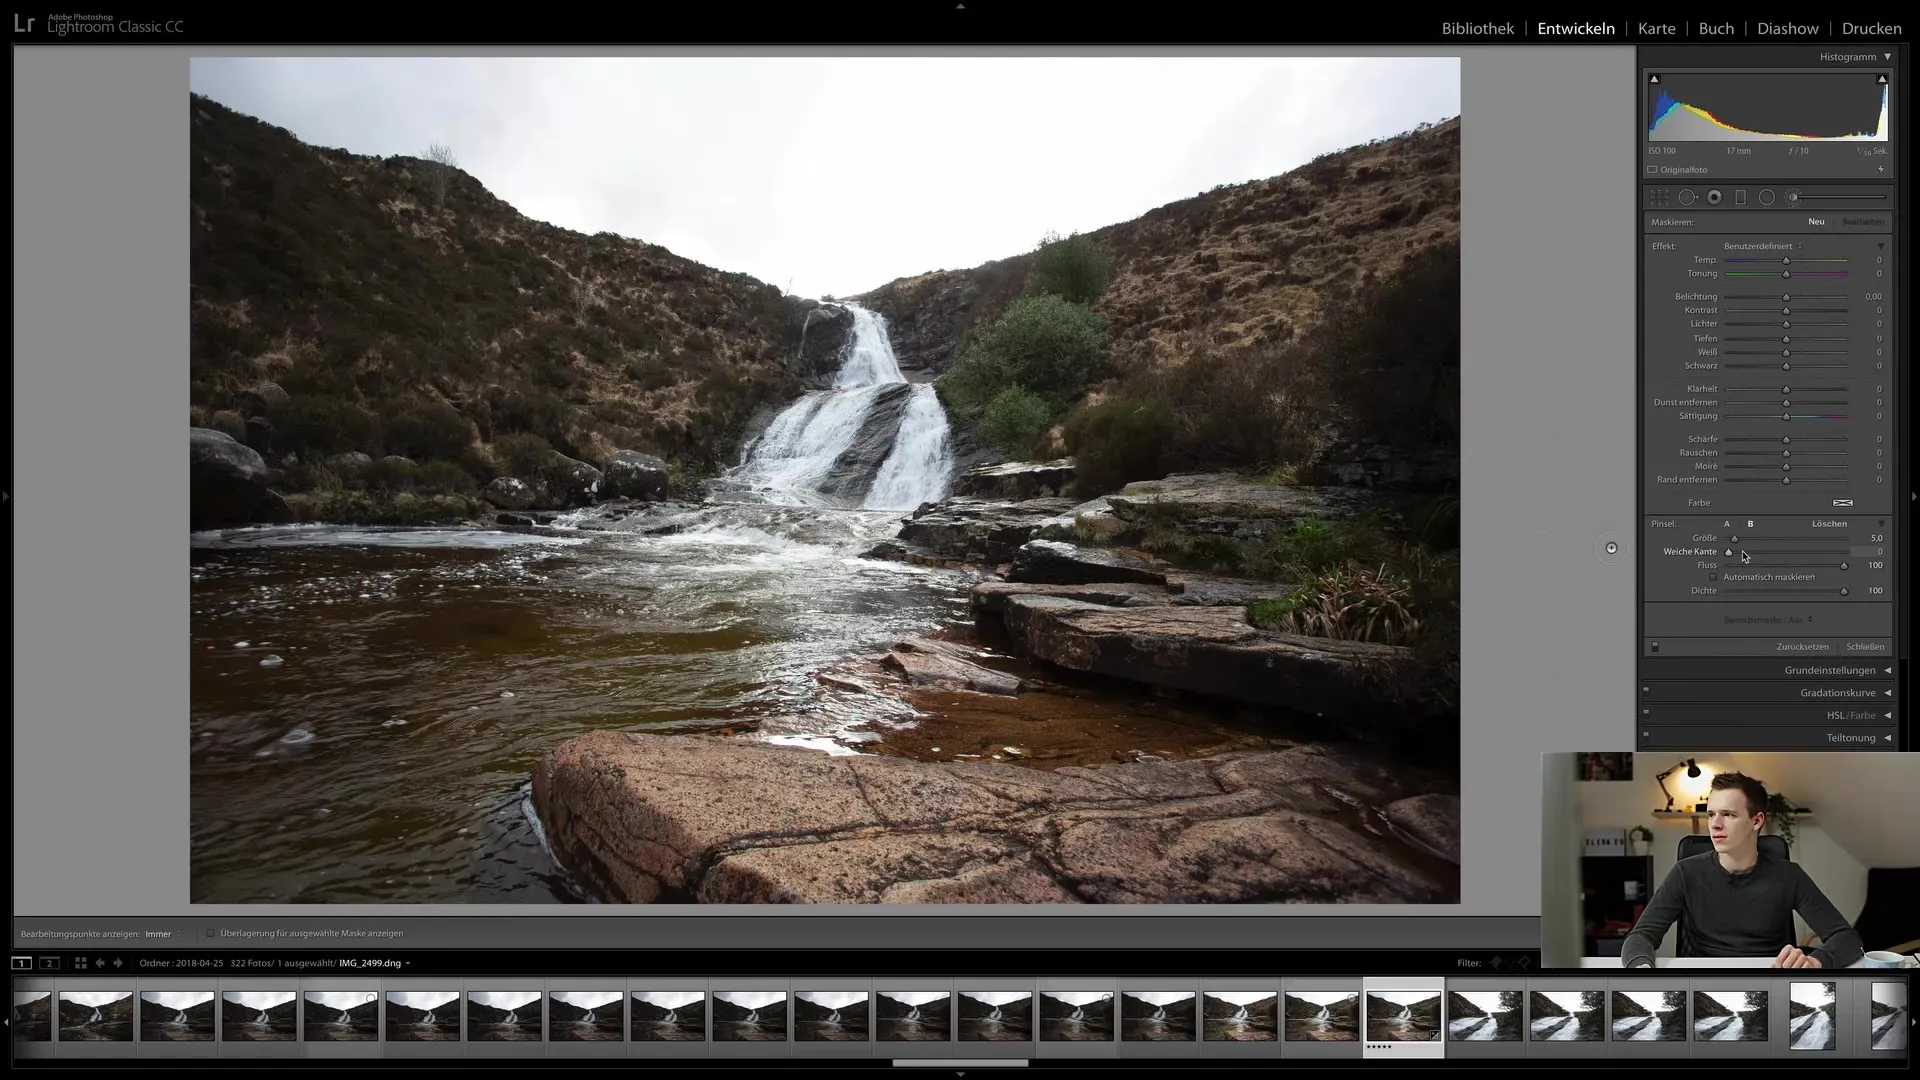
One of the best features of the correction brush is the automatic masking function. Activate this to affect only the desired areas while leaving adjacent areas untouched.
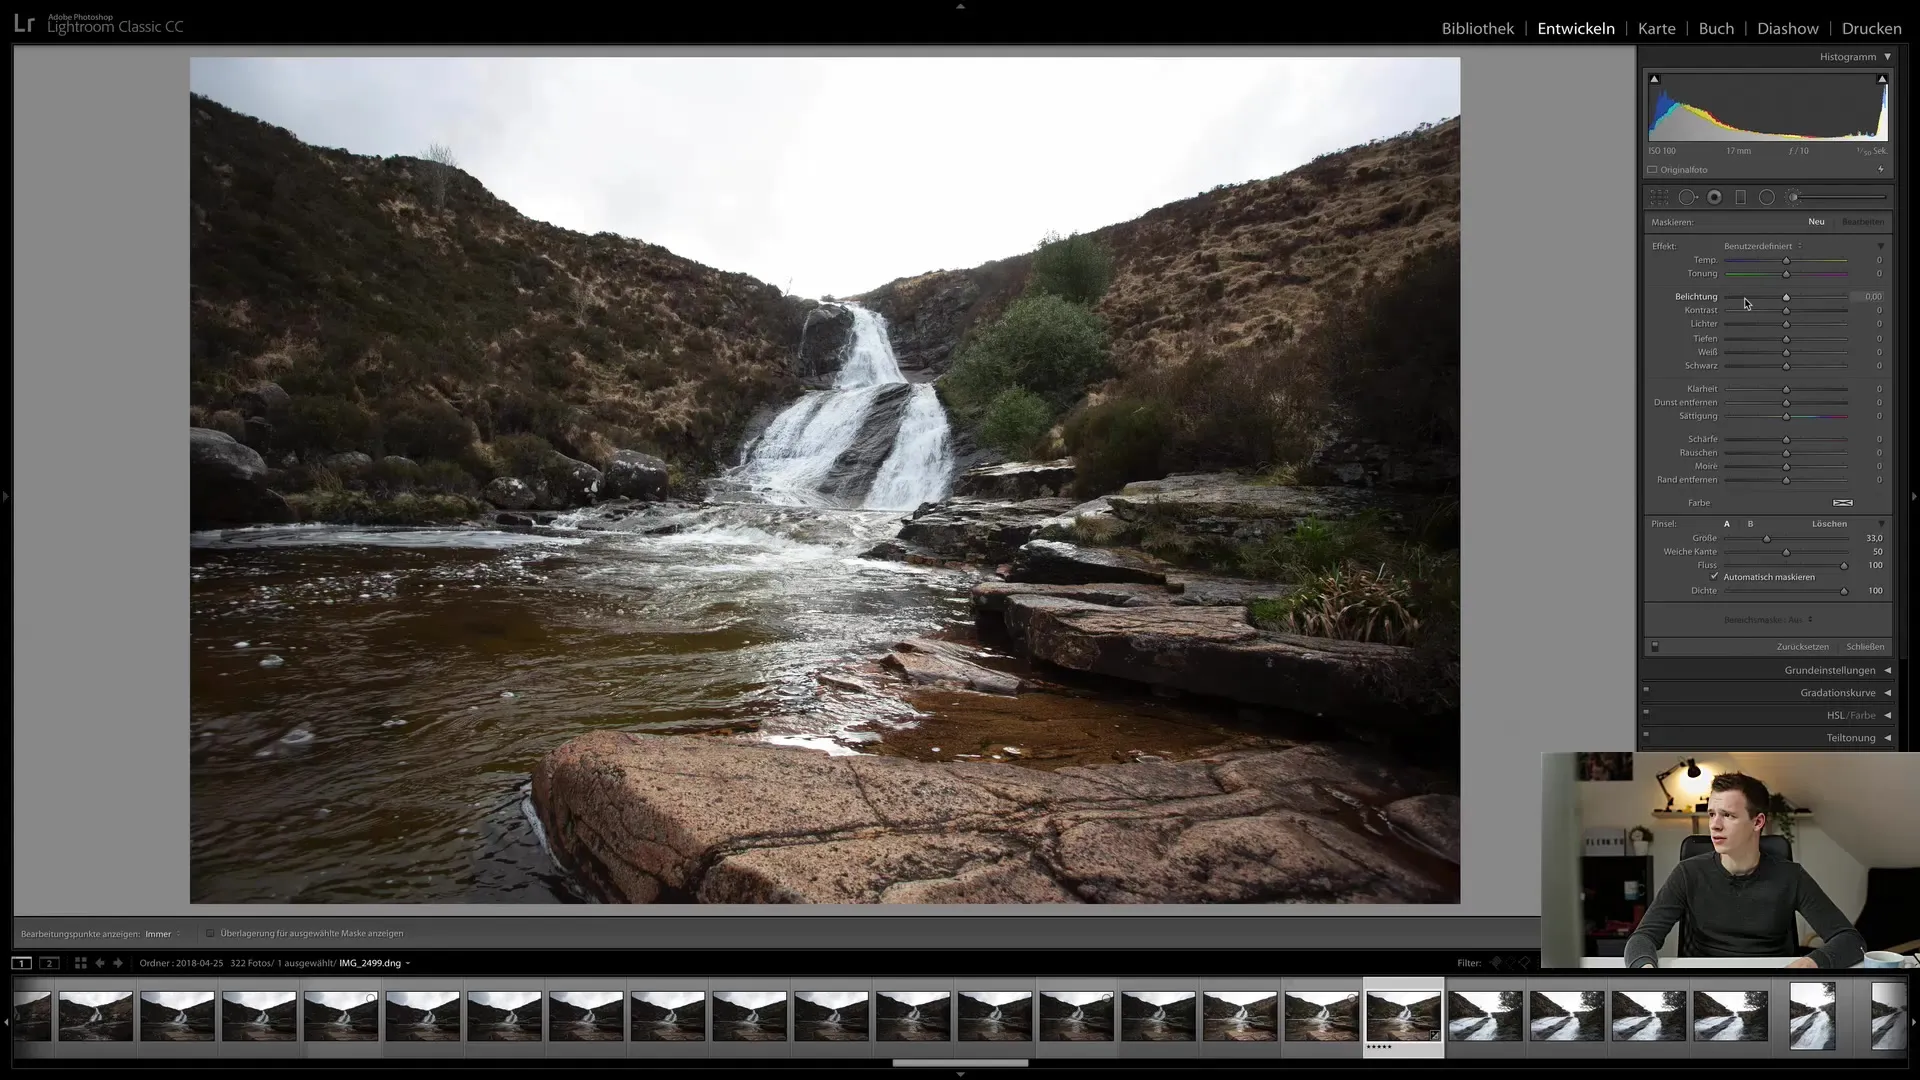
To see where you have painted with the correction brush, you can activate the overlay mask. This will show you in red the areas affected by the brush as you edit.
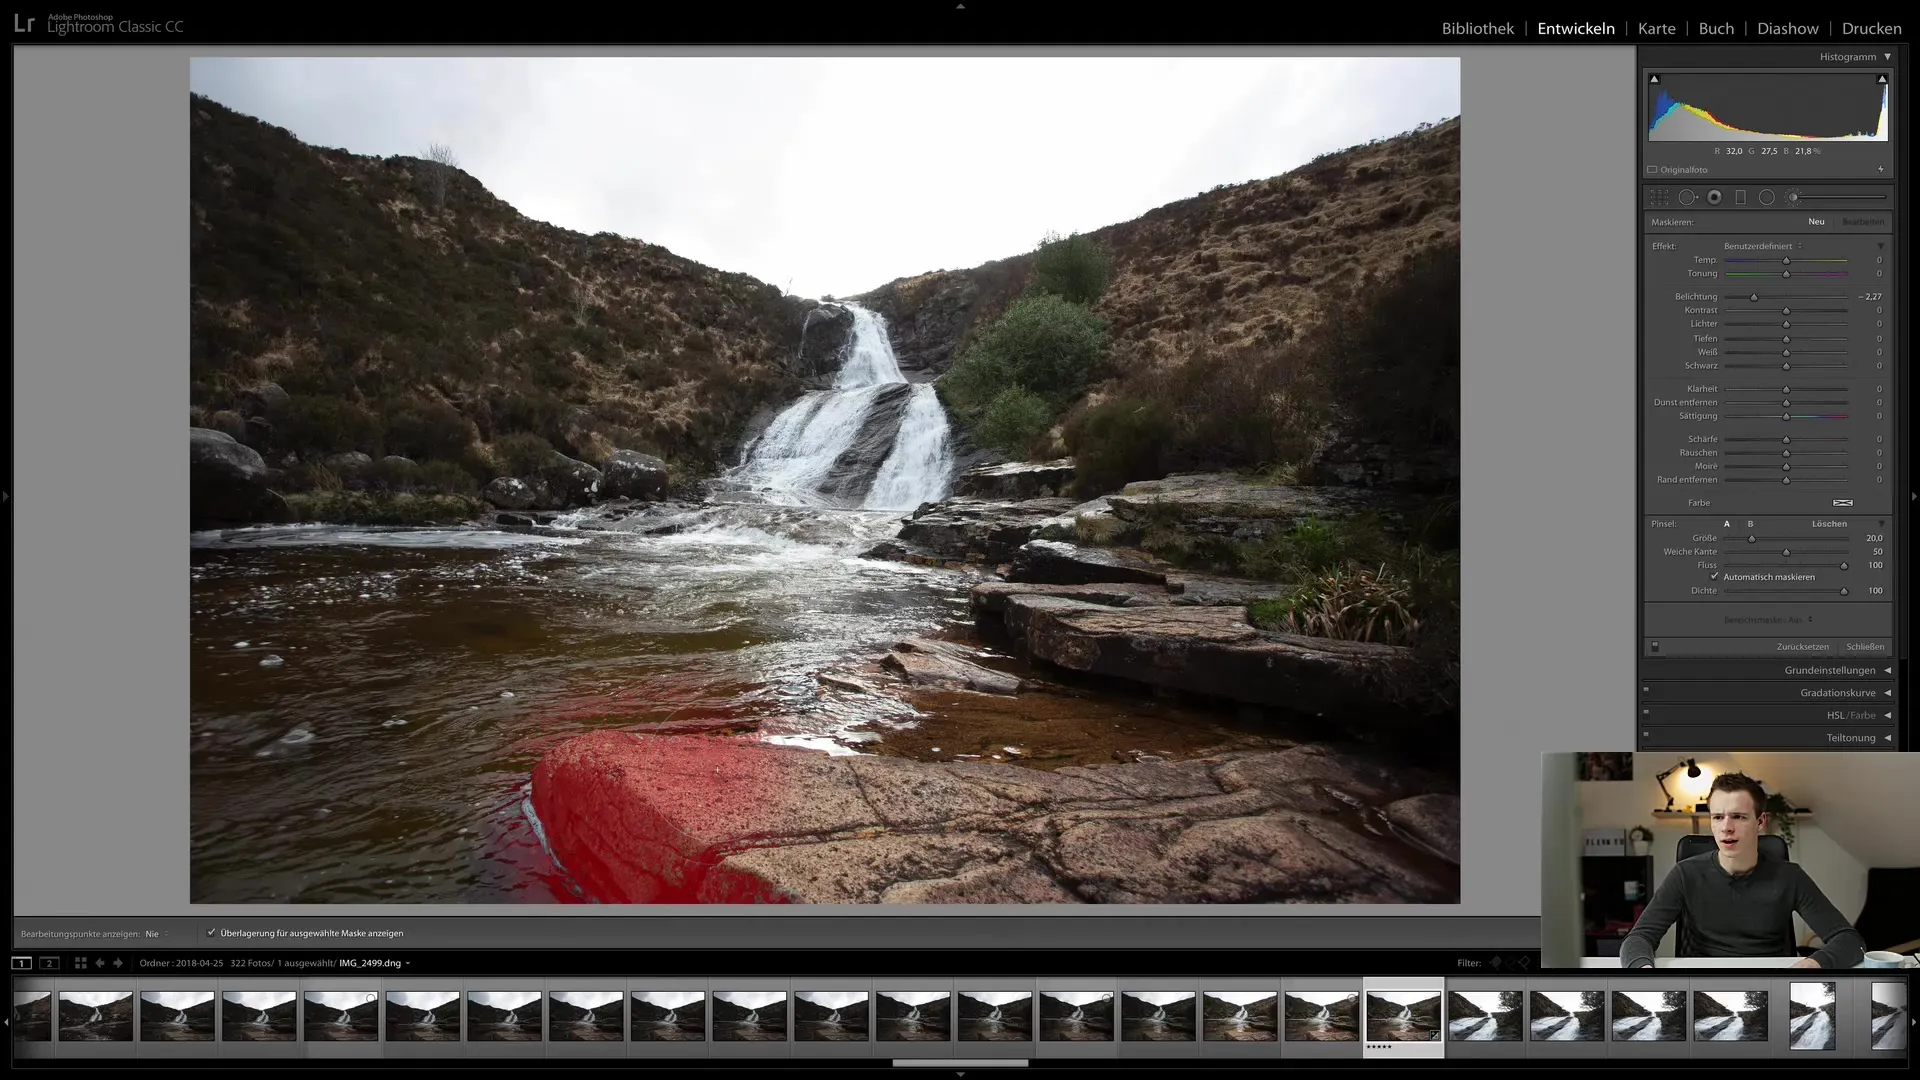
When working with the automatic masking function, pay attention to the edges of your image. Clear contrast between areas leads to better results when using the correction brush.
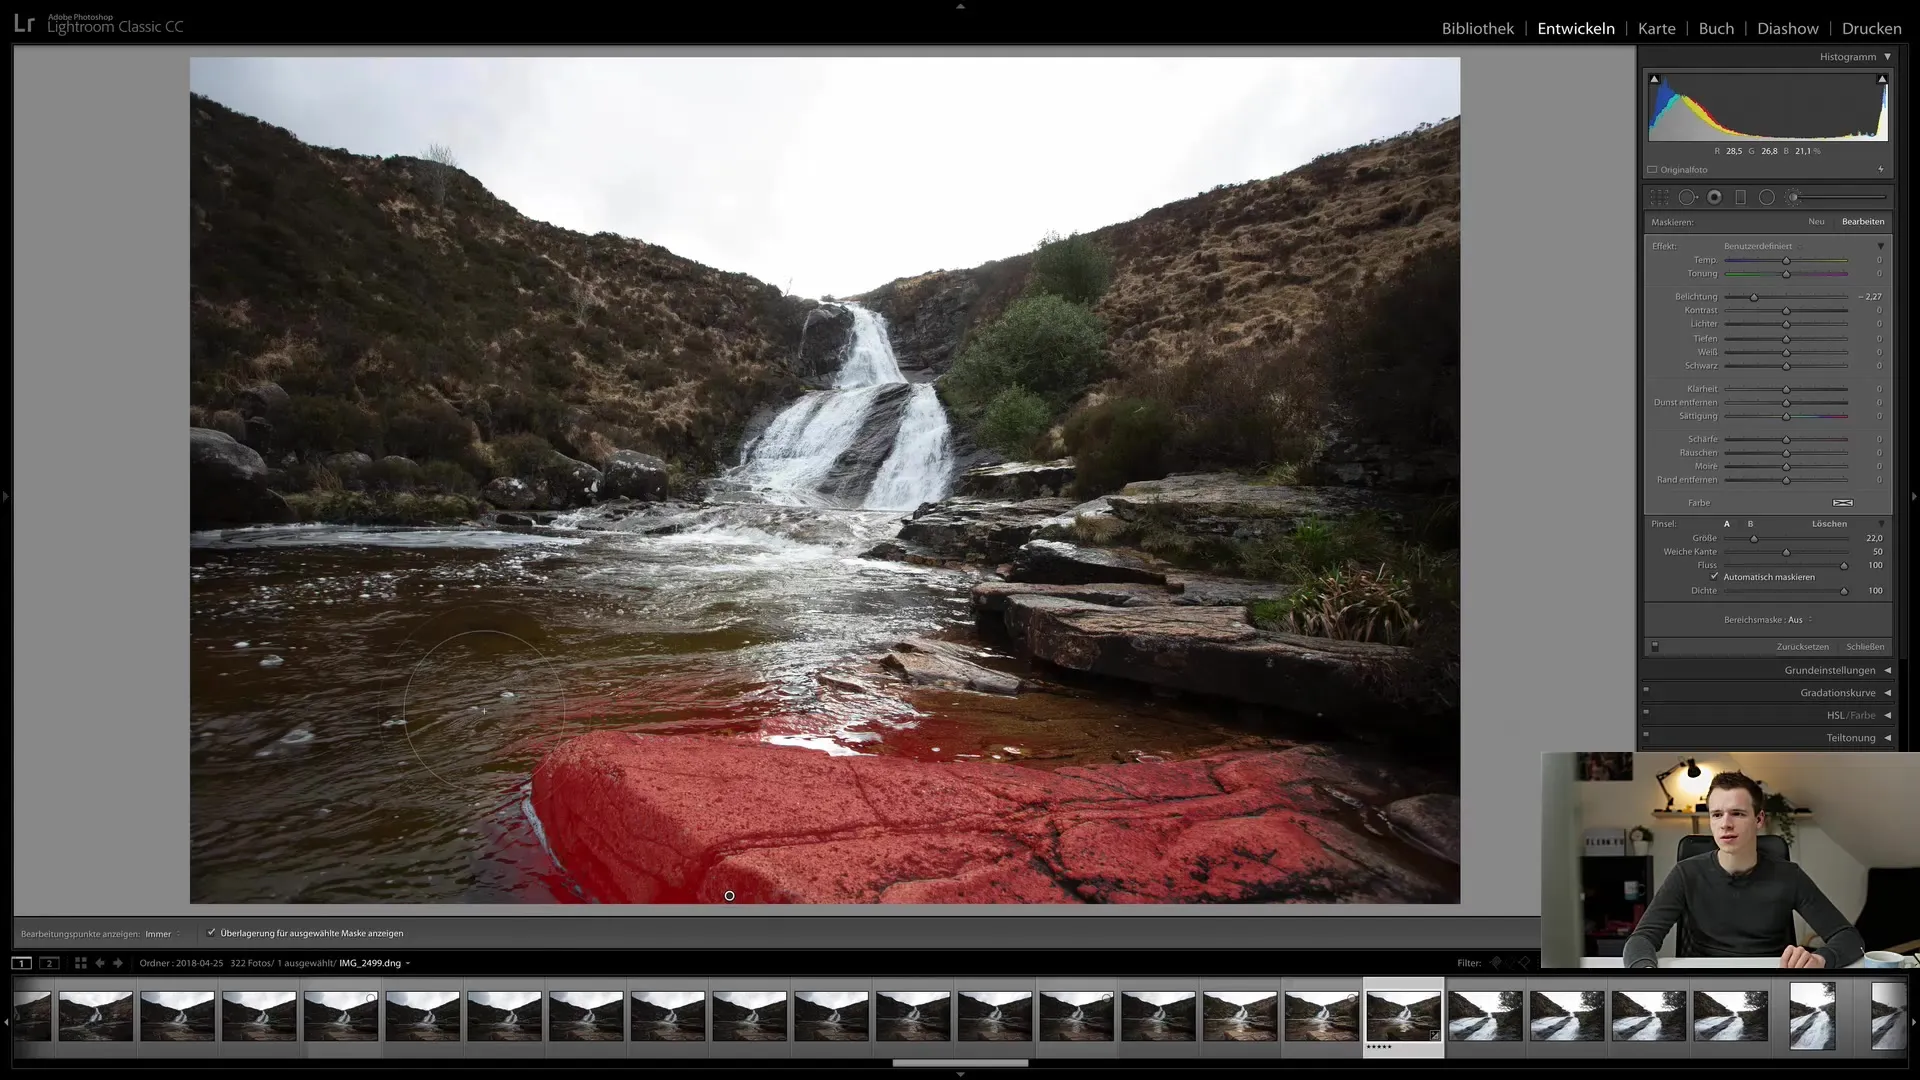
If you have created a mask that isn't perfect, you can hold down the Alt key and paint over the areas you want to remove with the brush with a minus symbol.
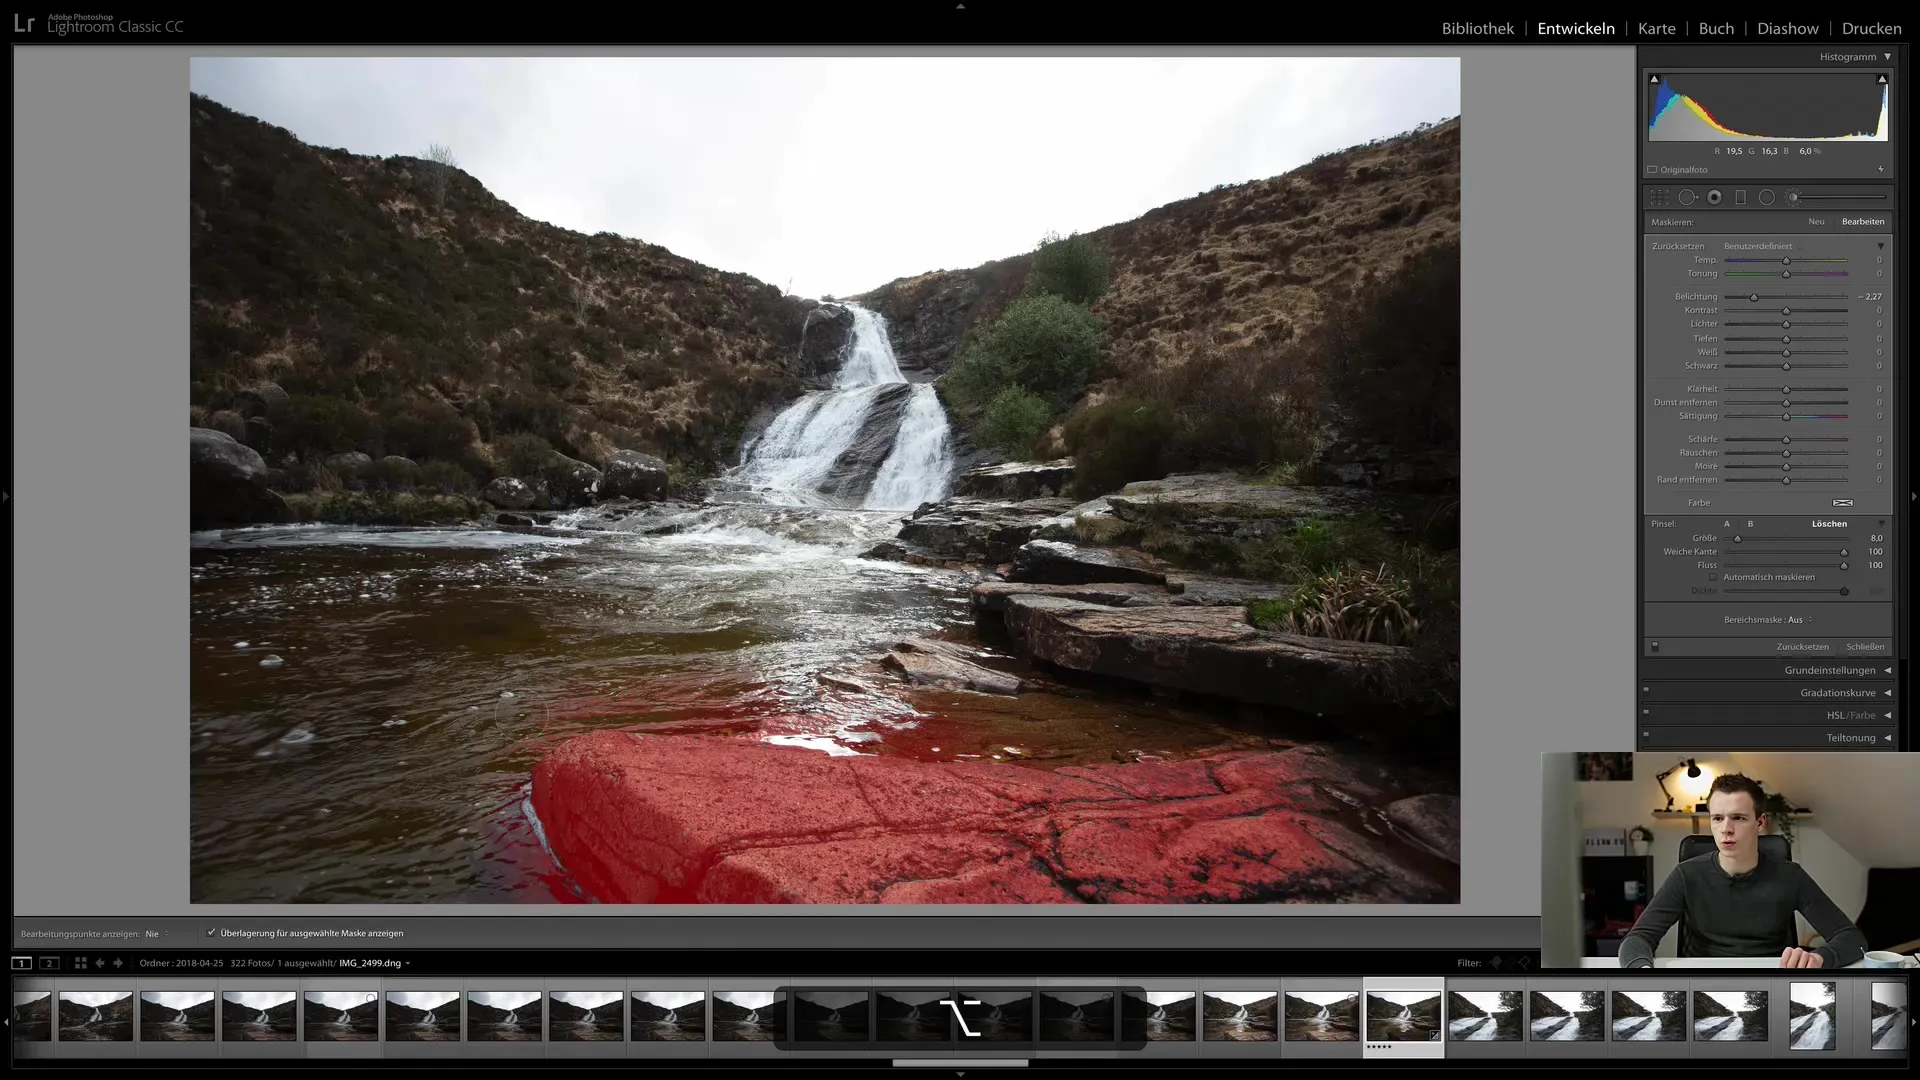
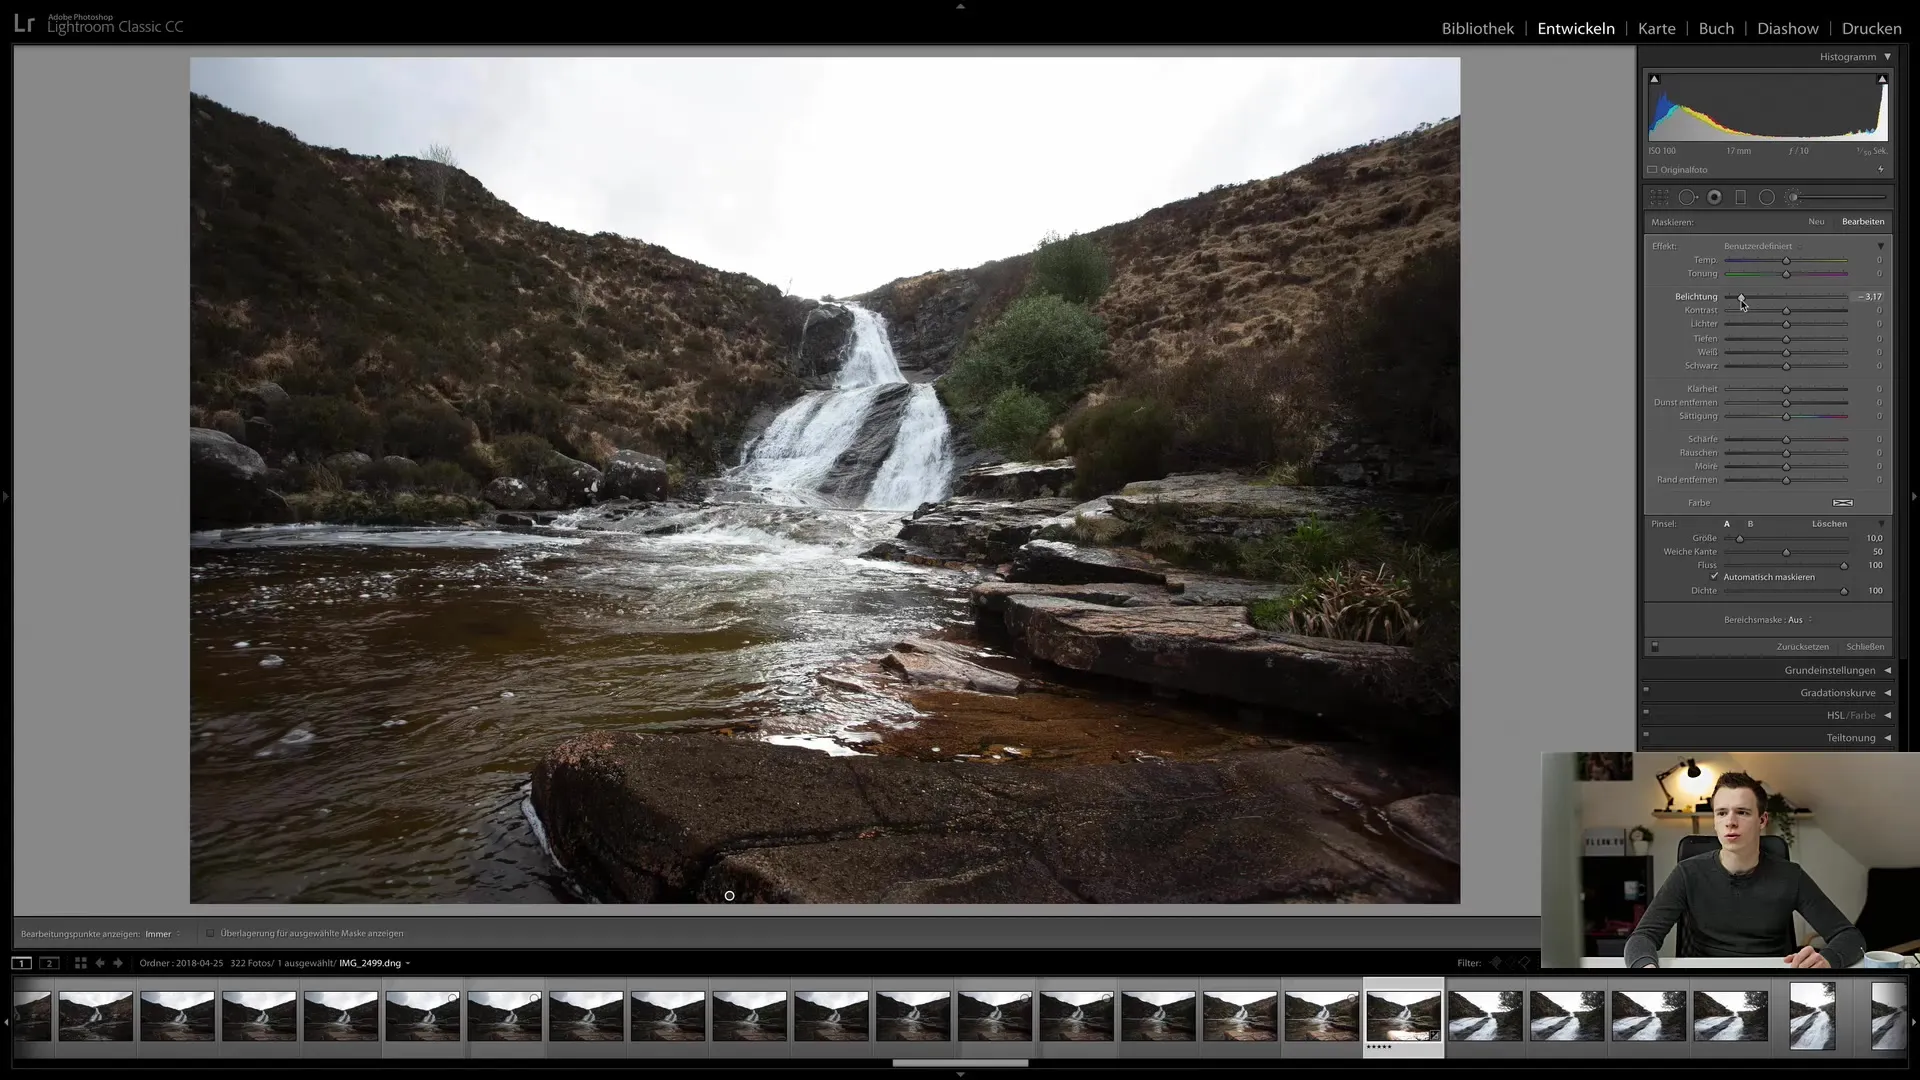
Now you can edit the desired area. An interesting option is to increase or decrease the exposure to achieve special effects. Experiment with the sliders to realize your adjustment vision.
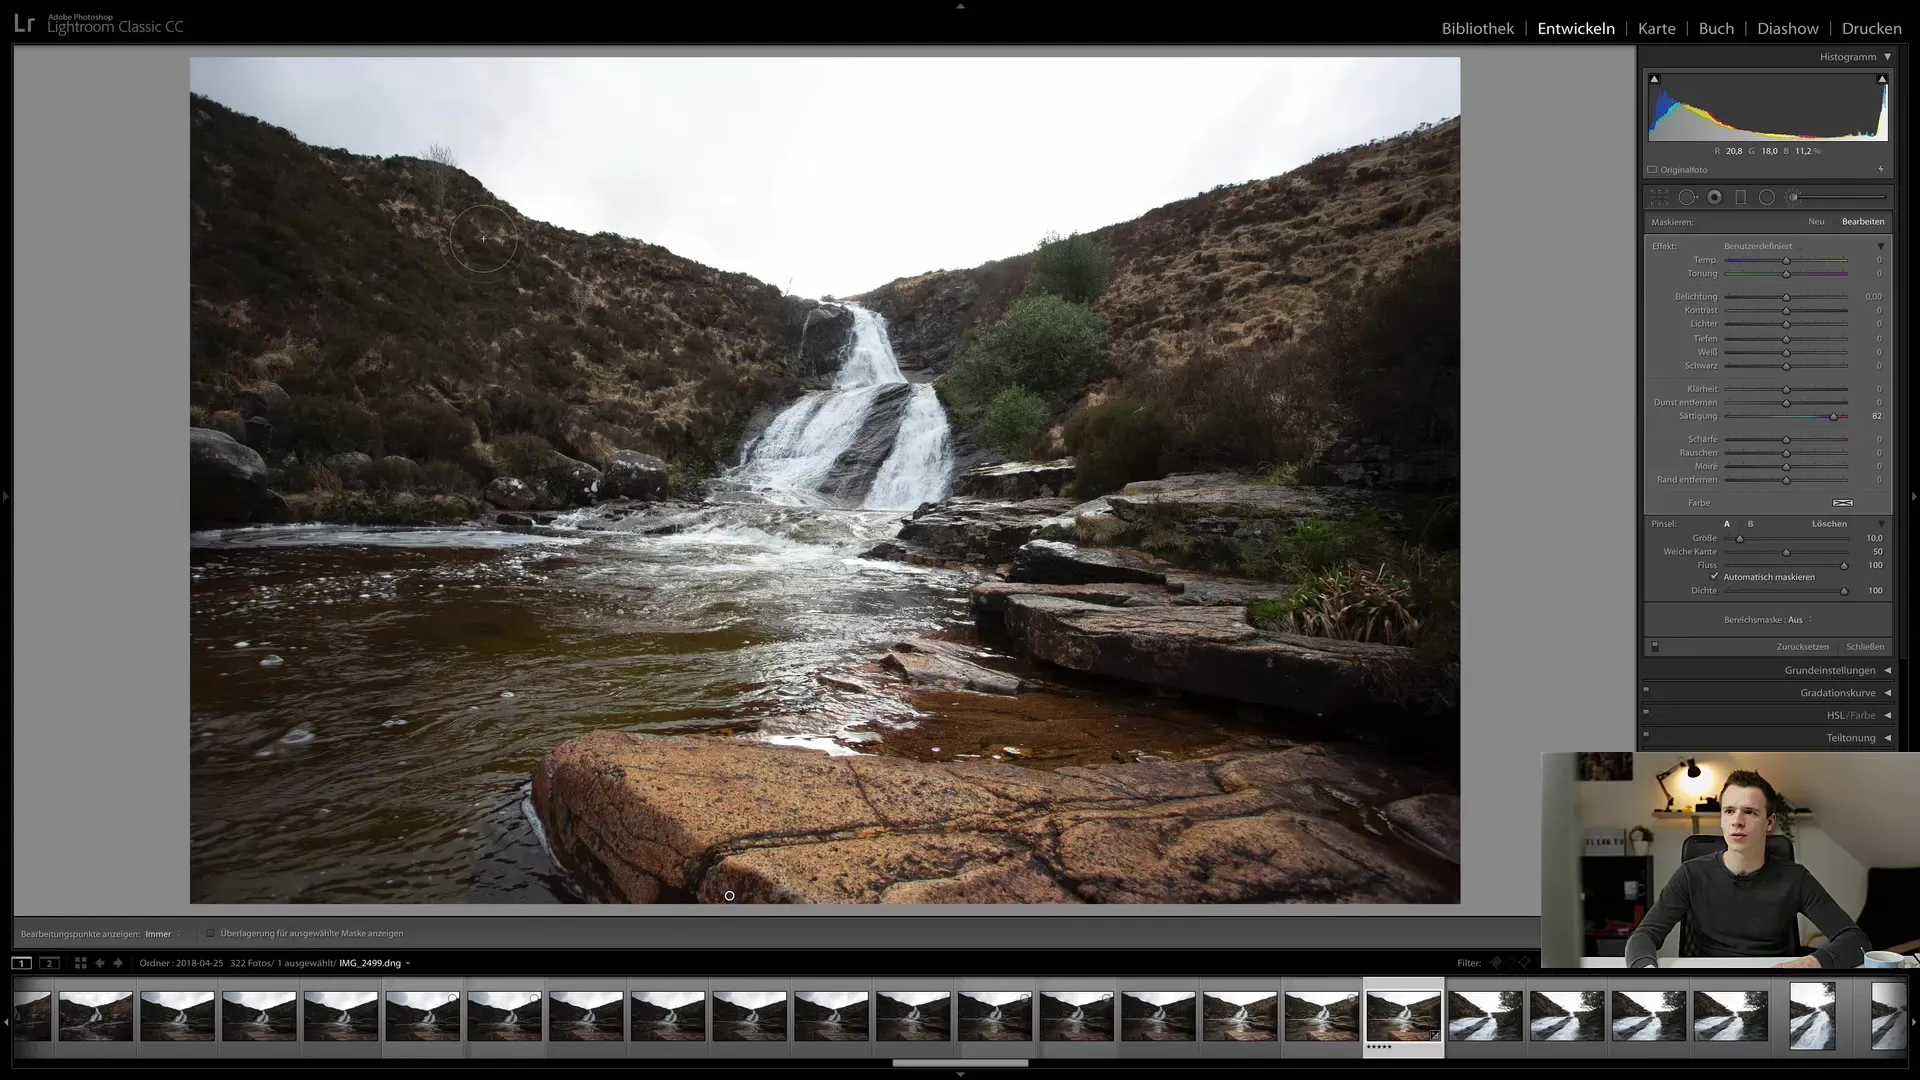
The correction brush is not limited to brightness. You can also adjust saturation and other parameters to optimize the image effect.
If you want to edit multiple areas, it is useful to create new points. When painting in different areas, you can create a new correction brush with the "New" option. This allows you to work on each area independently.
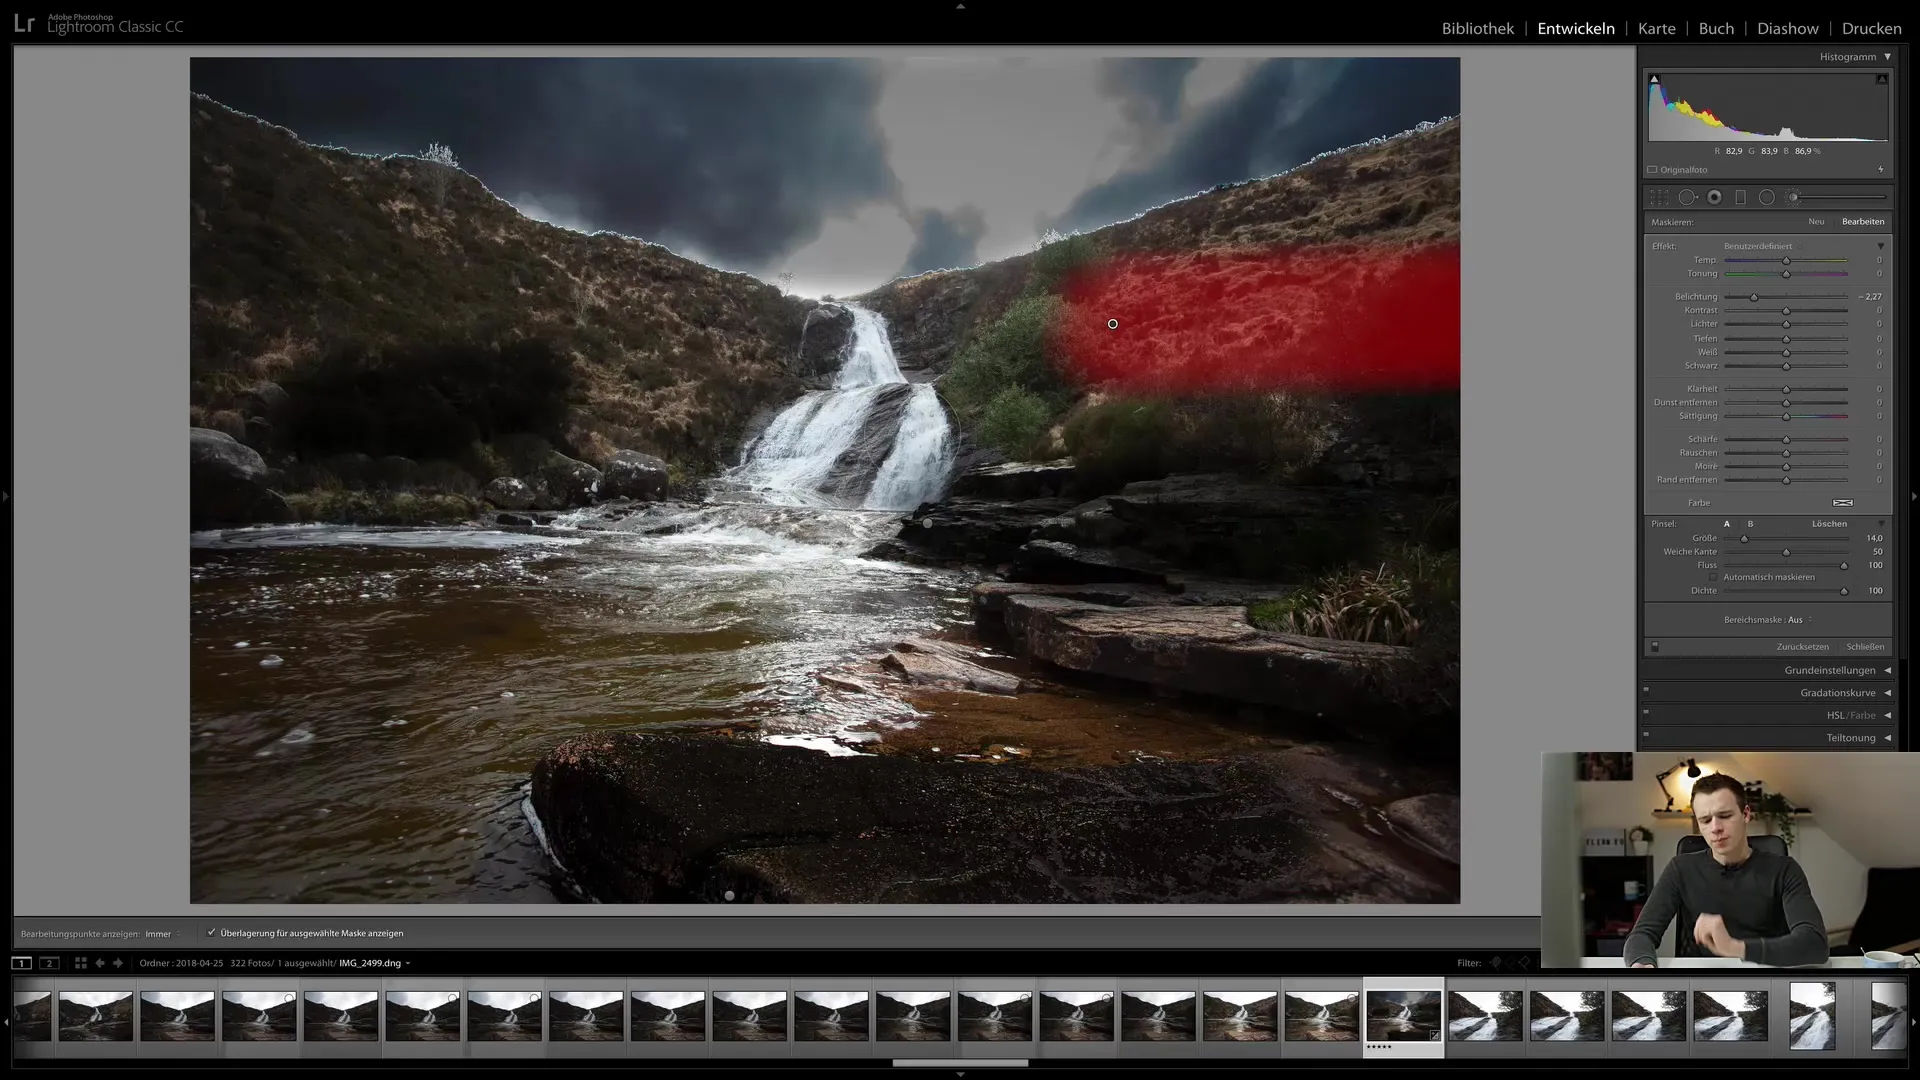
Be sure to keep an eye on the precise edges when working with different image areas. For example, if you want to darken the sky, make sure you do not inadvertently affect the surrounding areas.
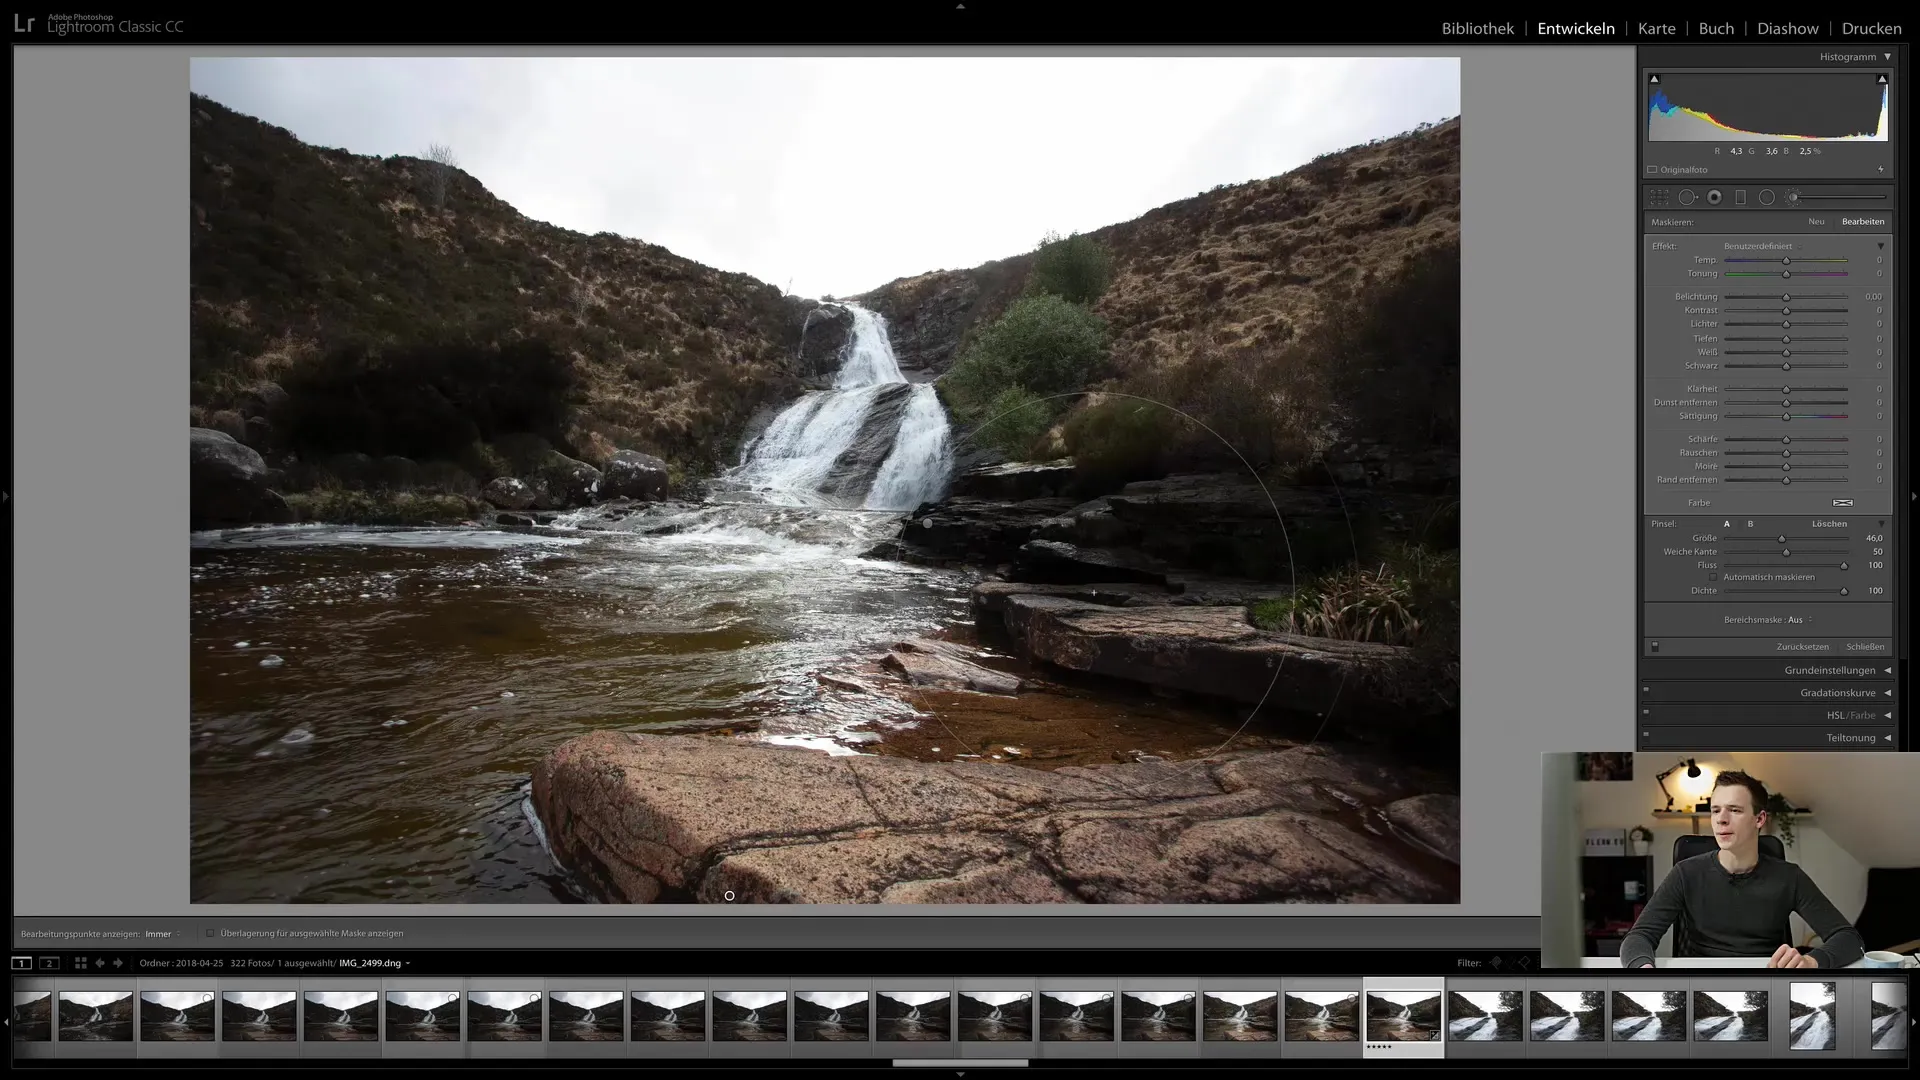
It can be advisable to keep the editing of the sky and other areas separate to achieve a cleaner result. Take the opportunity to edit the contours of the elements in your image precisely.
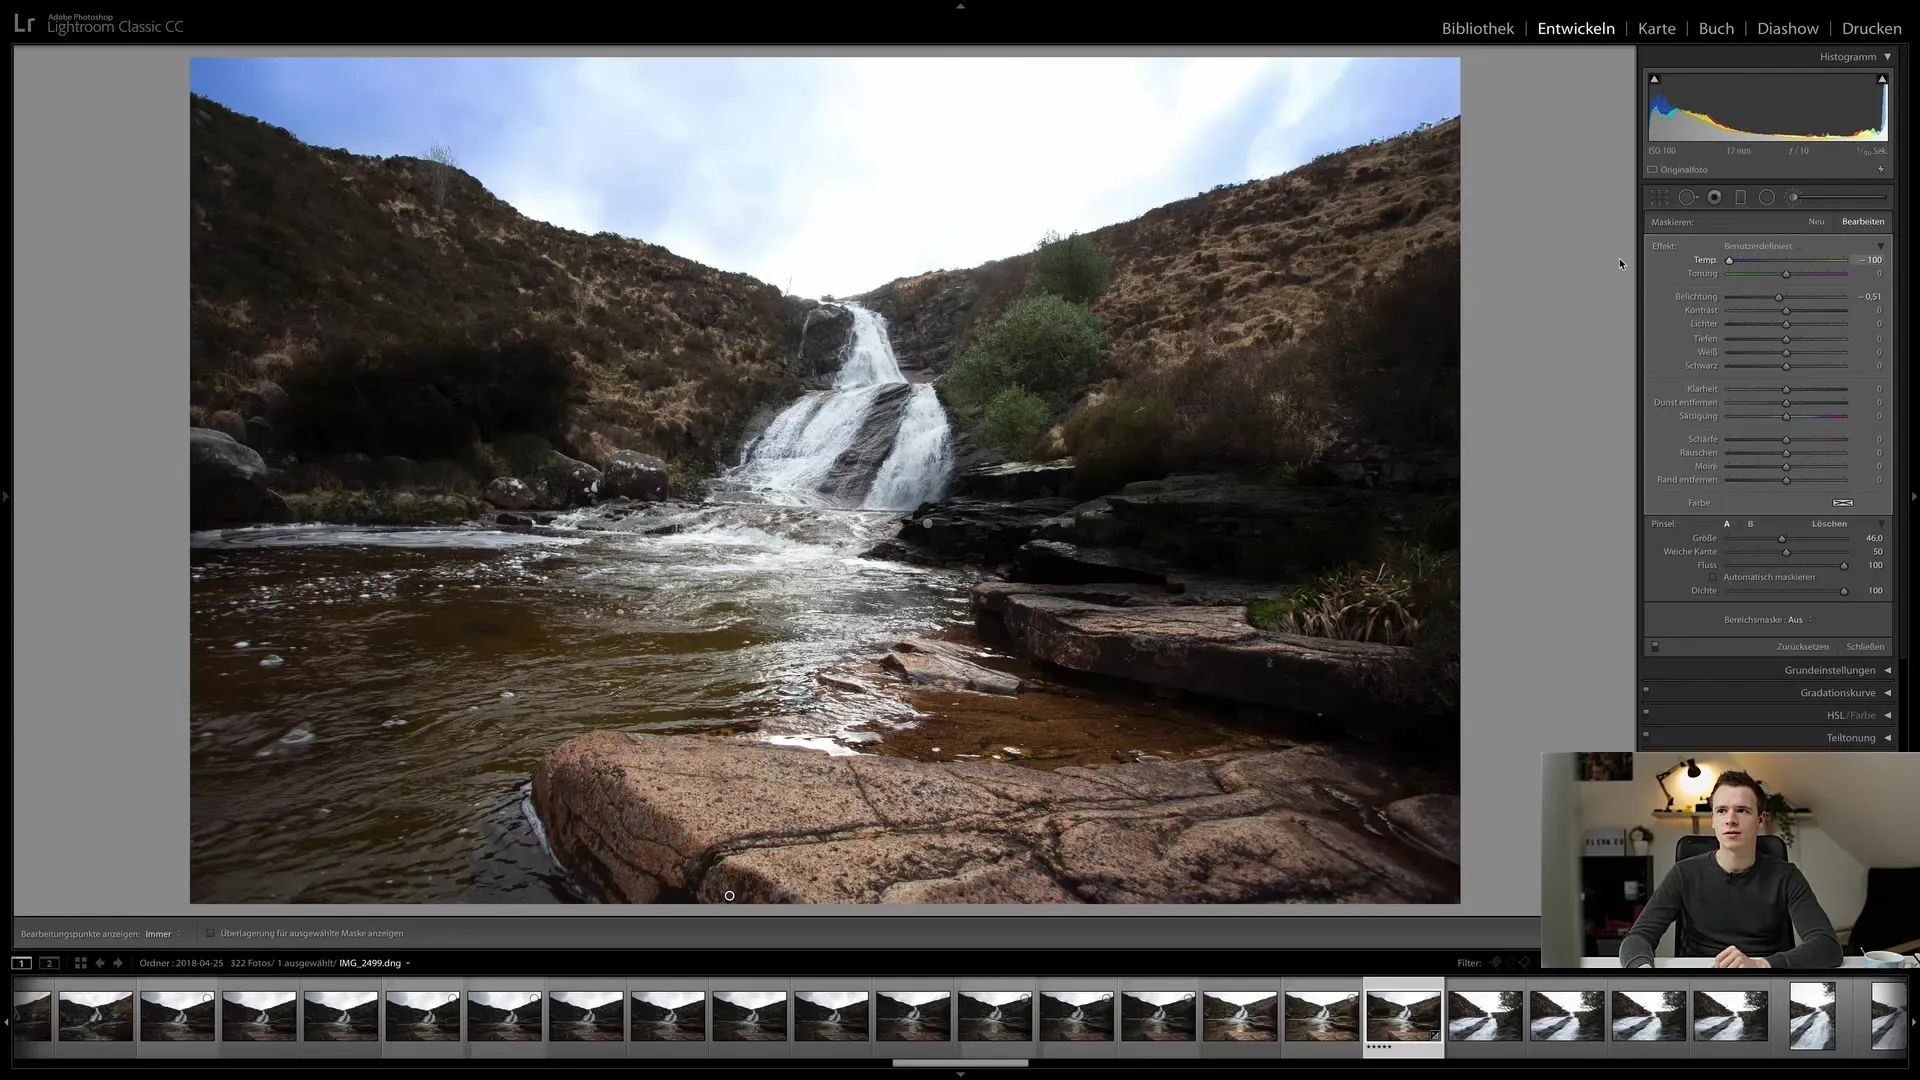
Finally, you can also optimize colors in the image, for example by adjusting the white balance slider to give a specific color nuance to the sky.
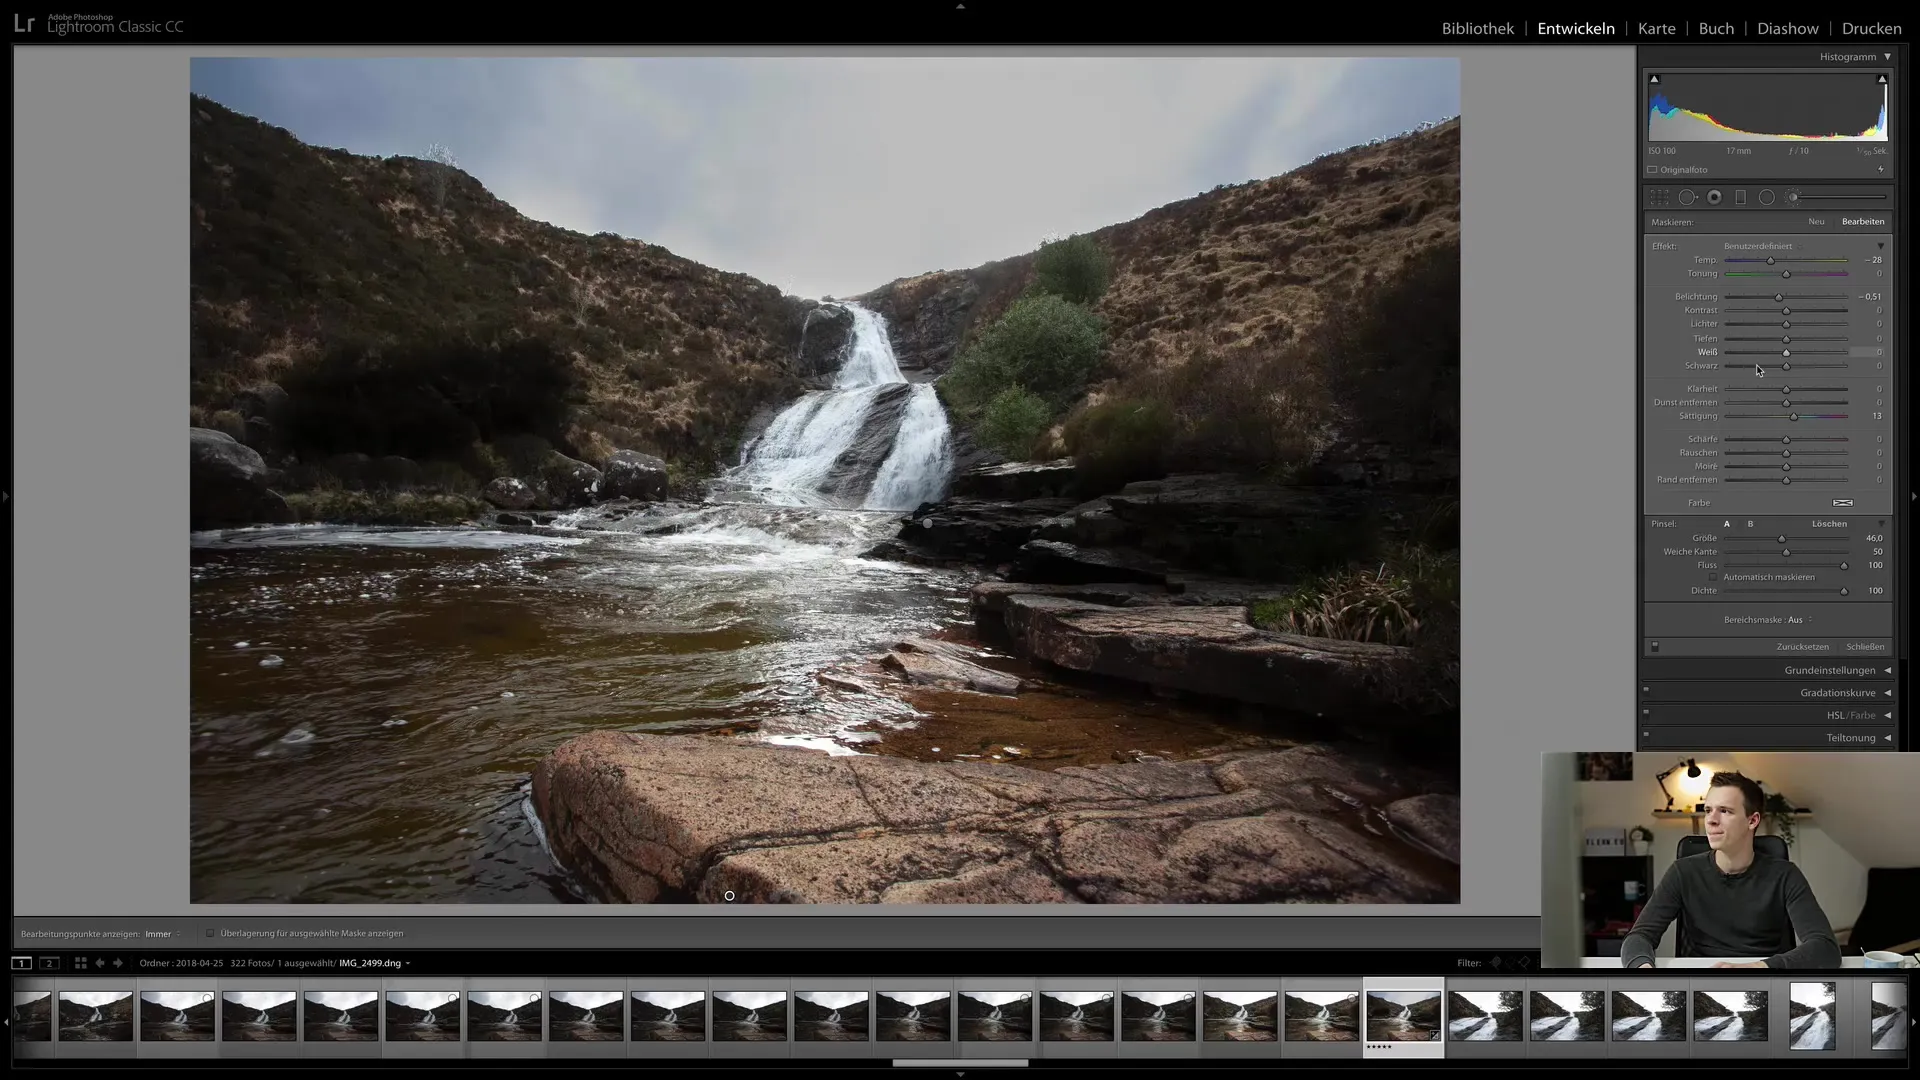
Use the correction brush to perfectly match your images to your vision. This tool offers you the opportunity to express your creativity and make targeted changes that can significantly improve the overall picture.

Summary
The correction brush in Lightroom Classic CC allows you to make precise adjustments to specific areas of an image and take image editing to a new level. With the tips in this guide, you can ensure that you make the most of this powerful tool.
Frequently Asked Questions
What is the correction brush in Lightroom?The correction brush is a tool in Lightroom that allows you to edit specific areas of an image precisely.
How can I influence the edges when painting with the correction brush?To soften the edges, hold down the Shift key and adjust the brush size.
How does the automatic masking function work?This function allows you to edit only the desired areas of the image by leaving adjacent areas untouched.
Can I edit multiple areas in the same image?Yes, you can do this by creating new editing points and adjusting different areas independently.
Can I also regulate colors with the correction brush?Yes, you can adjust saturation, temperature, and other color values specifically for the edited area.


