Main Findings:
- HDR allows the combination of multiple exposures.
- With Lightroom, you can easily merge the exposures.
- Image editing tools help optimize and adjust the photo.
Step-by-Step Guide to HDR Image Editing
1. HDR Photo Capture
Before you start editing in Lightroom, it is important to correctly create your HDR shots. Ideally, take multiple photos with different exposures: a normal, an underexposed, and an overexposed shot. Ensure that the camera position remains constant. In my example, I took five shots. Visualization for the shooting process can be seen here:
2. Import the Images into Lightroom
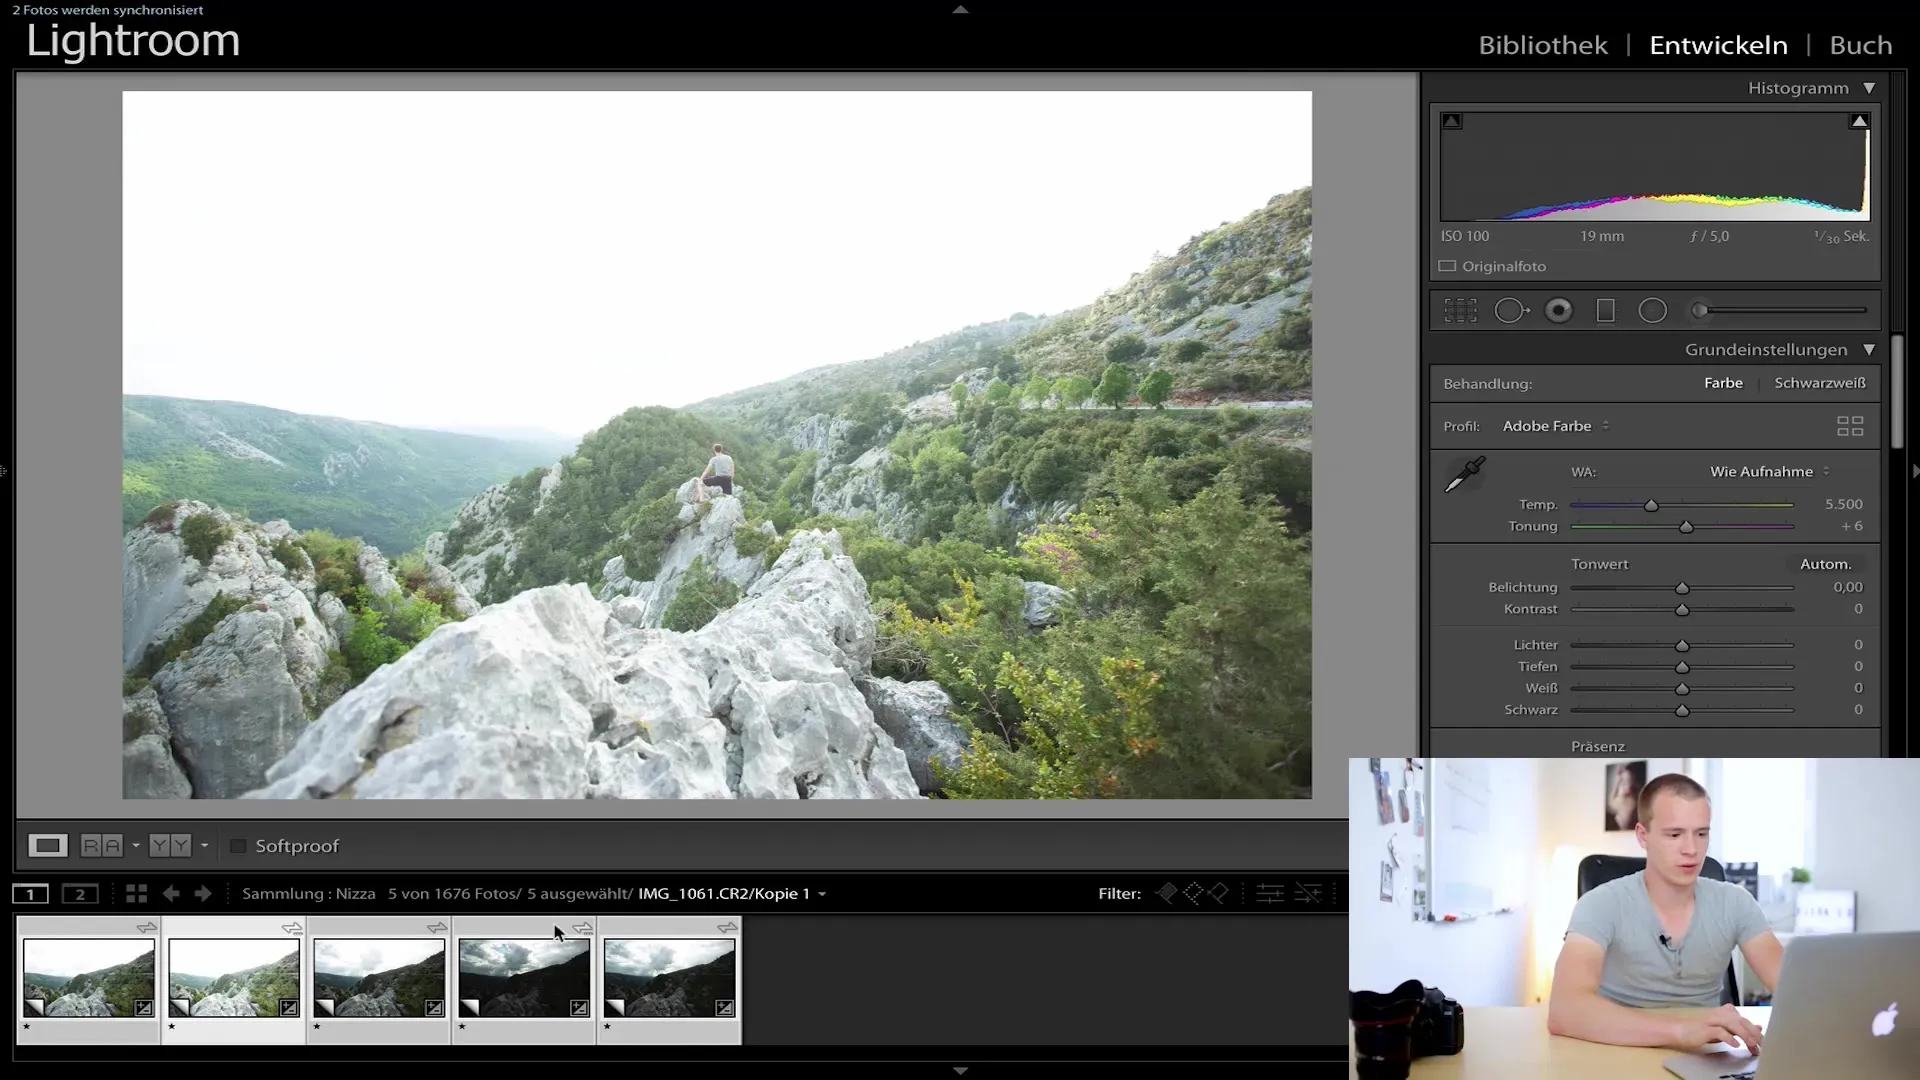
Open Adobe Lightroom and import the captured HDR photos into the catalog. Make sure you have all exposure settings correct for the images and use RAW files to achieve maximum detail and quality. This is how it looks in my catalog:
3. Select Images for Merging
Select all the images you want to use for your HDR image. In my case, those are the five different exposures I took earlier. It is important that all images show the same scene from the same angle.
4. Merge the HDR Images
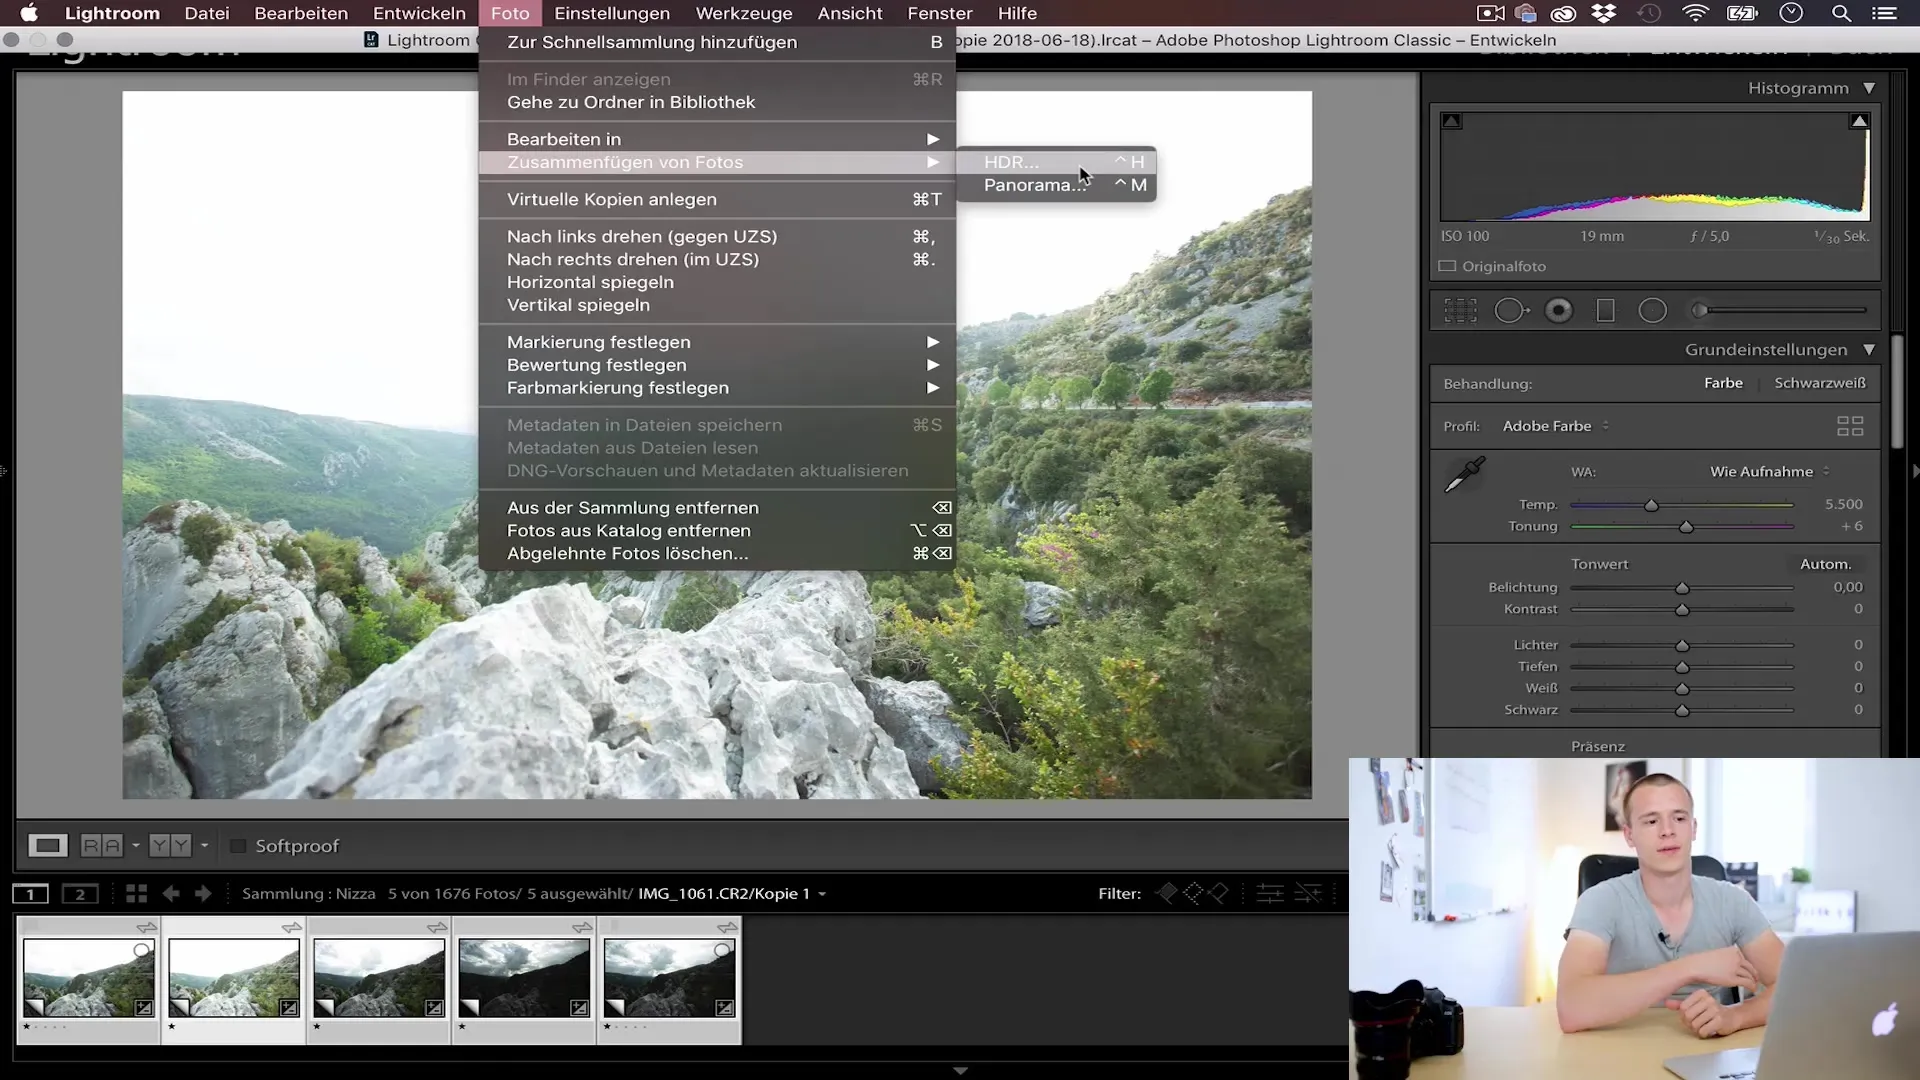
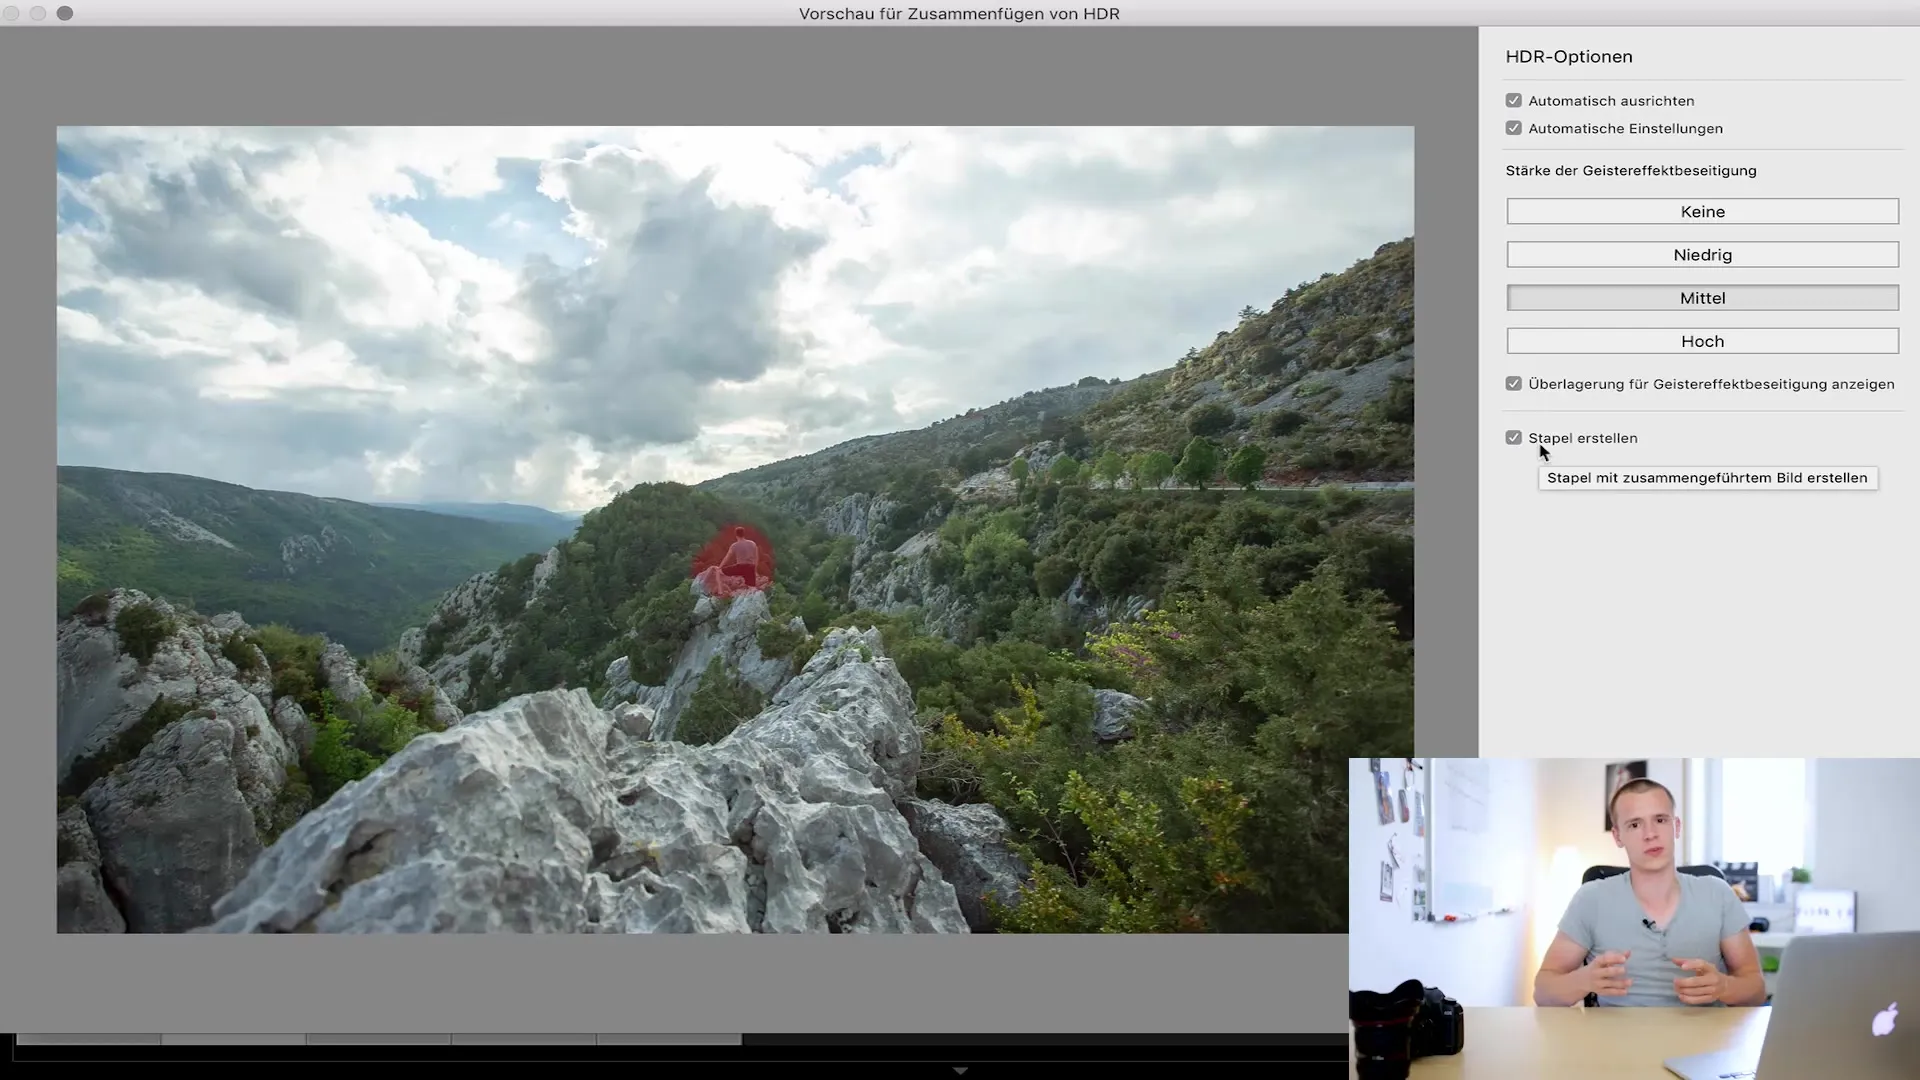
To merge the selected images, press the "Ctrl + H" key combination or go to the "Photo" menu and select "Merge" → "HDR". Lightroom will now start processing your shots. Make sure to eliminate any ghosting effects, which can occur if objects moved between exposures.
5. Check for Ghosting Effects
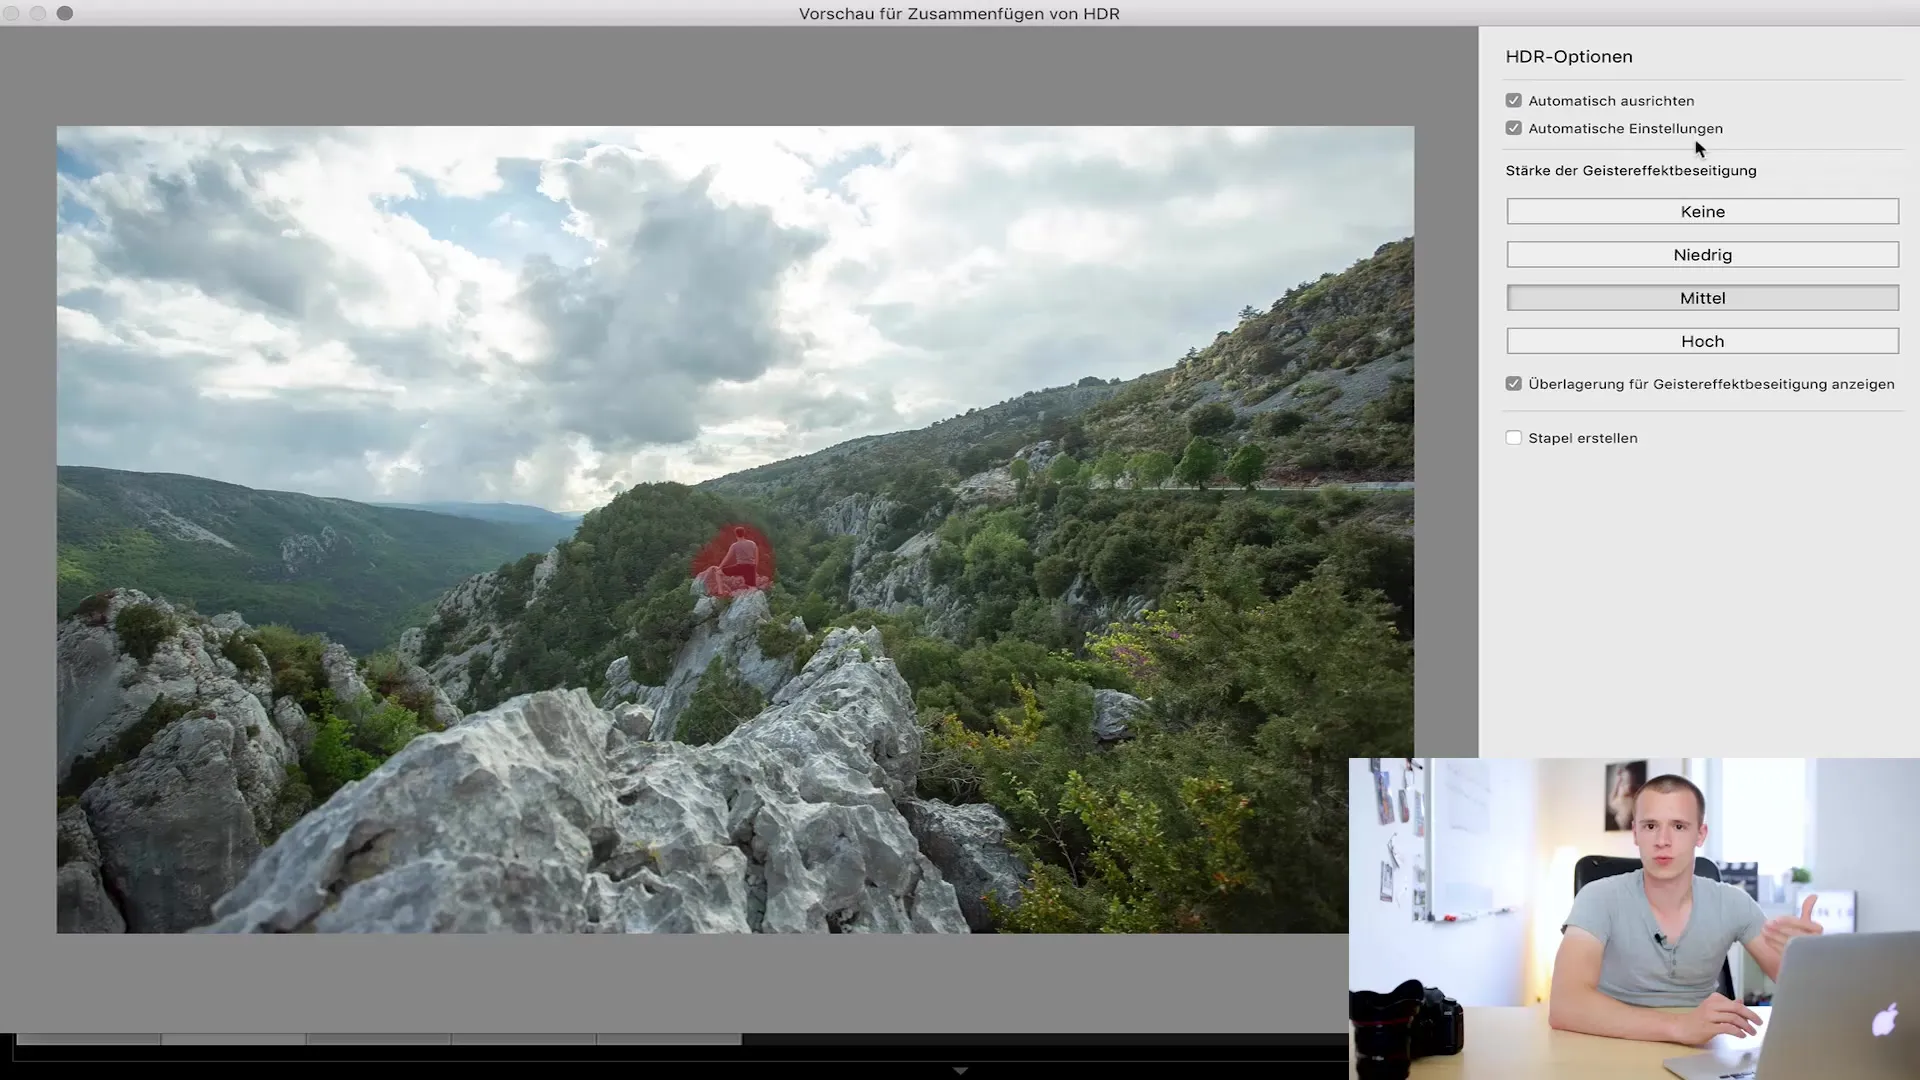
Lightroom allows you to minimize ghosting effects. Review the preview and adjust the strength of the ghosting effect correction. Sometimes it can be useful to set this to "low" to see which areas are cropped.
6. Activate Automatic Settings
Check the "Automatic Settings" box to apply an initial exposure correction. This feature helps you get a better base image. If your image looks too flat, this setting can be particularly beneficial.
7. Check Automatic Alignment
If you took the photos handheld, activate automatic alignment. Lightroom will try to adjust the images precisely. The preview will give you an idea if adjustments are needed.
8. Stack the Original Files
Enable the "Create Stack" option to organize the original files along with the new HDR image in a stack. This keeps your workspace tidy and allows easy access to the originals if needed.
9. Merge HDR Images
Click on "Merge" now. Lightroom will process the images, which may take some time. Once the process is complete, you will see the new HDR image in your catalog. Here is the result:
10. Detailed Image Editing
The merged HDR image is a first step. Now you can make individual adjustments. Start with contrast. The slider should be increased to +10 to +20 for more depth. Be careful not to go too far to avoid overexposure.
11. Adjusting the Highlights and Shadows
Now you adjust the highlights and shadows. Reduce the highlights to correct overexposed areas. At the same time, you can increase the shadows to brighten darker areas. This gives your image a more dynamic appearance.
12. Making Color Corrections
If you are satisfied with the basic values, you can move on to color adjustment. You can move the yellow slider to the left to intensify green tones. It is important to be sparing here to achieve a natural effect.
13. Using Split Toning
Now you can use split toning to make the sky a bit bluer and the ground warmer. Hold down the ALT key to see the areas that will be colored. Experiment with the hues to achieve the desired result.
14. Applying Sharpening
Next, the image is sharpened. Do not overdo it, a value between 70 and 80 should be sufficient to retain the details without looking unnatural.
15. Vignetting for Focus
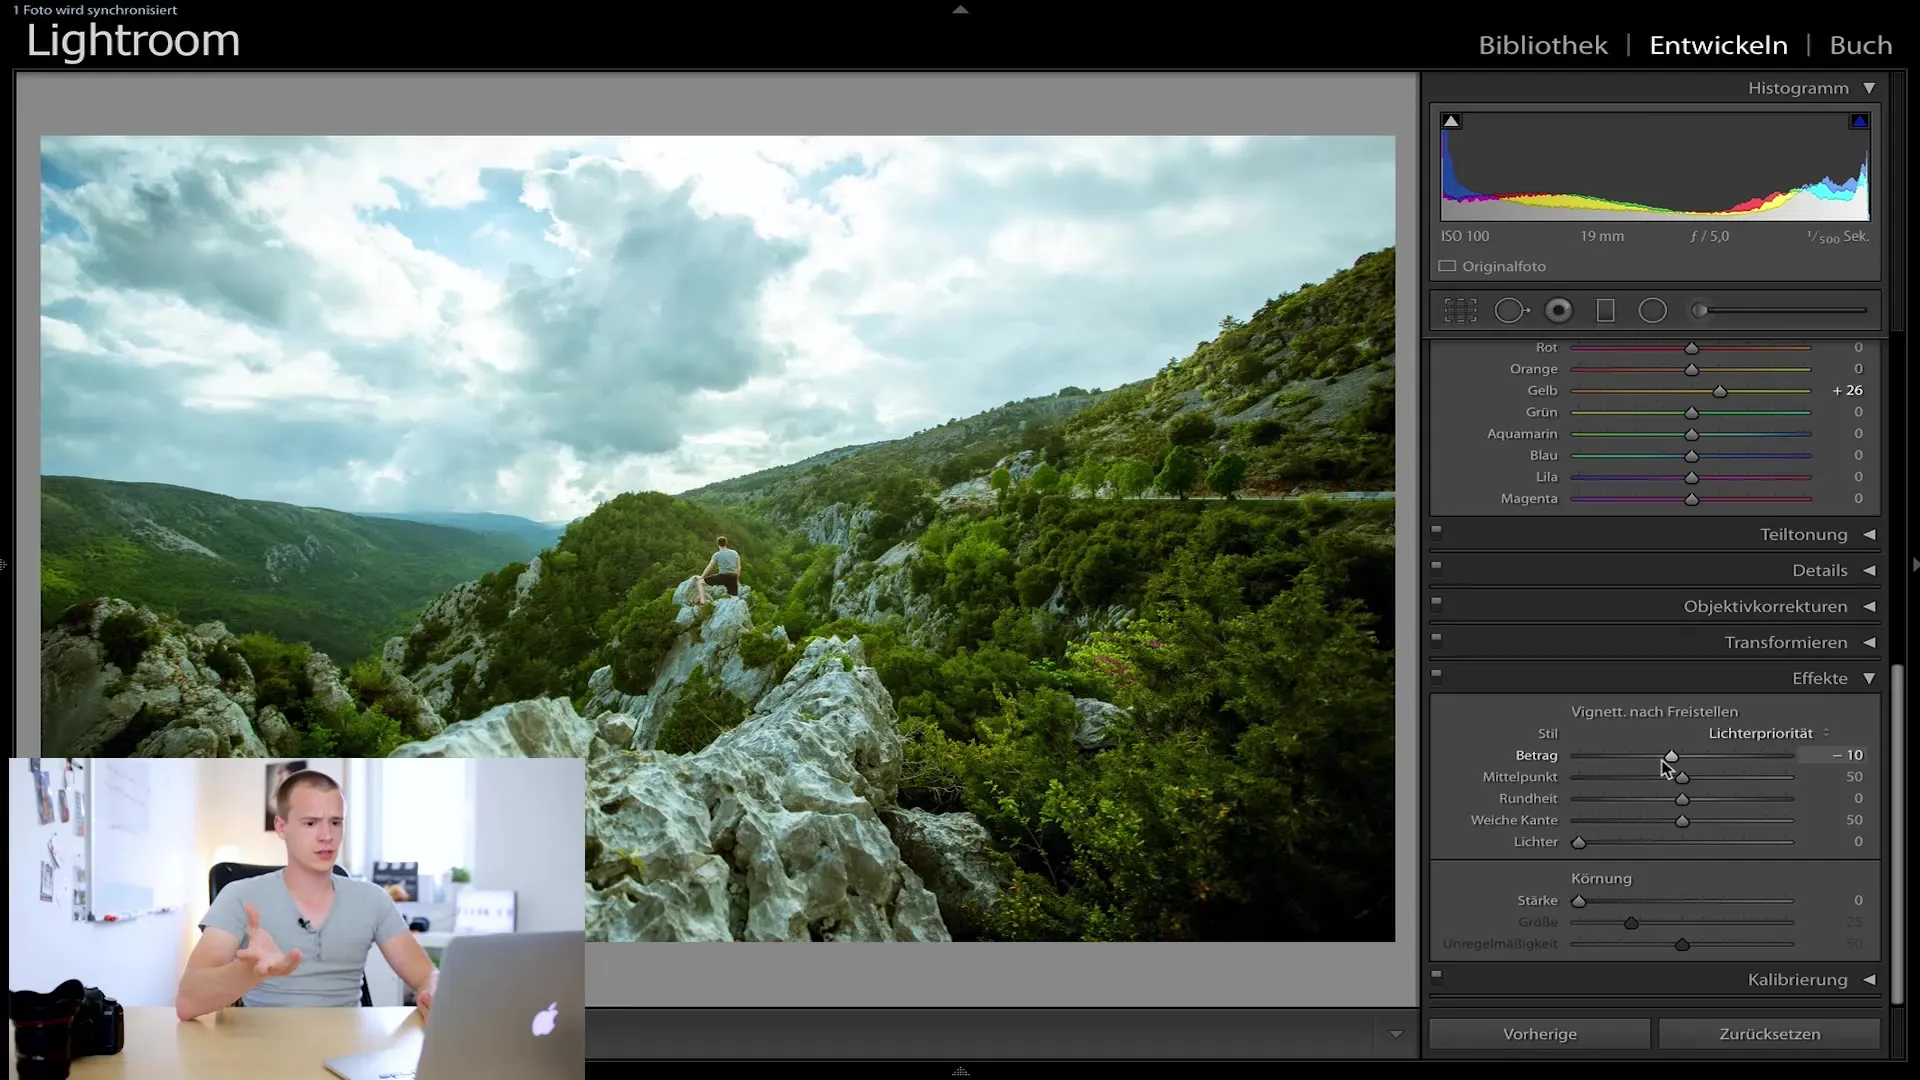
Add a vignette to direct attention to the central object. This can significantly enhance the mood of your image. A subtle vignette is usually more effective.
16. Final Adjustments
Finally, review your finished work and make any final adjustments as needed. This may involve fine-tuning colors and contrasts to make the image look as natural as possible without appearing artificial.
Summary
In this tutorial, you learned how to create and edit HDR photos in Lightroom Classic CC. You should now be able to experiment with your own images and make them impressive.
FAQ
What is HDR photography?HDR photography combines multiple shots of a subject with different exposures to create a high dynamic range.
Why should I use Lightroom for HDR?Lightroom provides powerful tools to easily and efficiently edit HDR images.
What are ghosting effects?Ghosting effects occur when objects move between the different exposures, leading to blurring or distortions in the final image.


