A glance at Excel quickly shows that the application offers more options than one might think at first glance. Special attention should be paid to the autofill functions, which help you enter data quickly and efficiently without having to fill each cell individually. Let’s explore the various possibilities of automatic filling in this guide and find out how you can use these functions meaningfully in your daily work.
Key insights
- Excel can automatically complete data based on previous entries, which is particularly advantageous for long lists.
- There are both time-based (days of the week) and number-based (consecutive numbers) autofill options.
- For specific entries or recurring lists, you can use the control key to enable repetition.
Automatically fill in data
When you work with Excel, you will quickly realize how helpful the autofill function can be. You can not only enter simple data but also recognize and complete more complex patterns. Let’s get started.
Step 1: Automatically fill in weekdays
Set your first marker by entering a list of weekdays. For example, you can start with "Monday" and "Tuesday".
To automatically fill in the rest of the week, highlight both cells and move your mouse to the bottom right corner of the selection. You will see a plus sign.
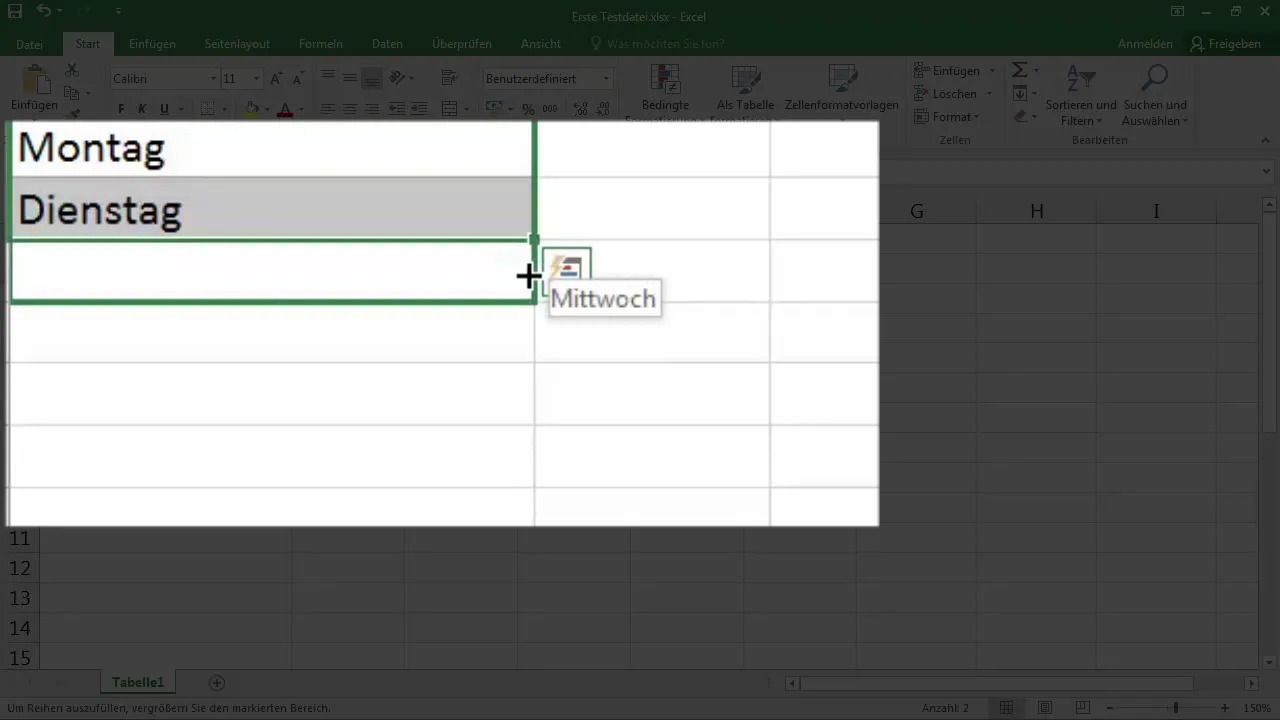
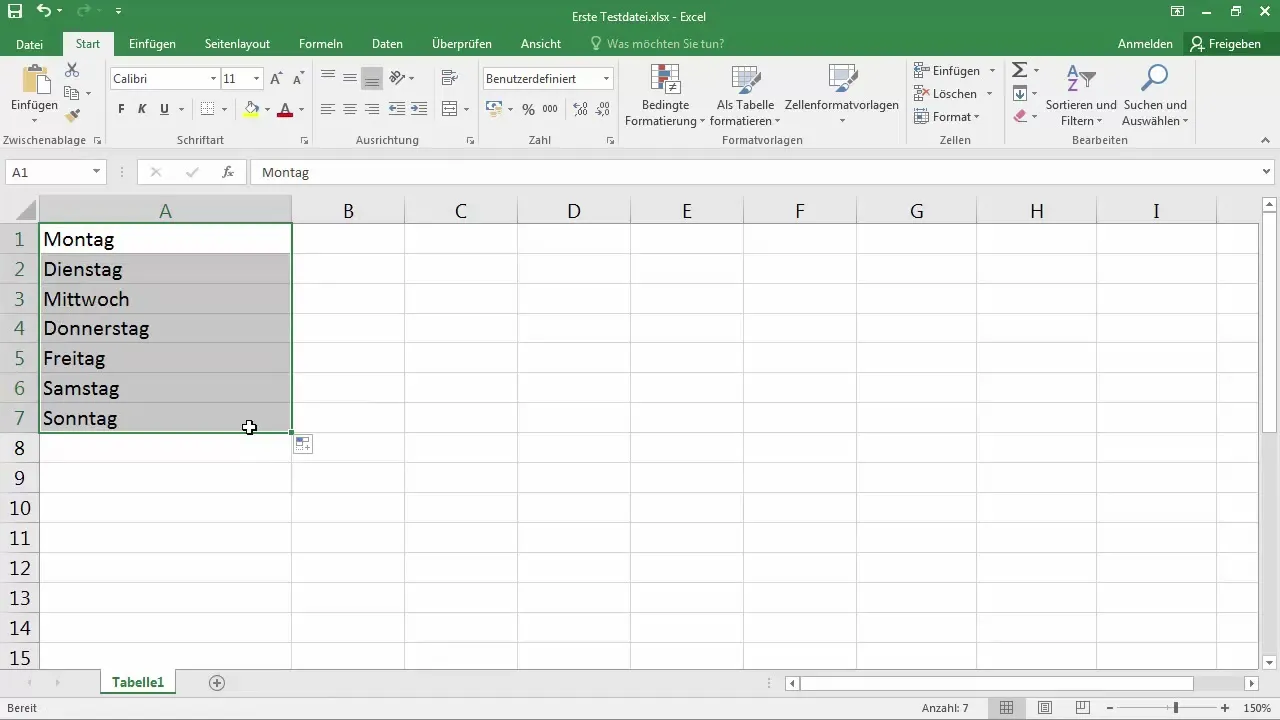
Hold down the mouse button and drag the selection down. Excel automatically recognizes the pattern and fills the cells with "Wednesday", "Thursday", "Friday", "Saturday", "Sunday", and starts again with "Monday".
Step 2: Automatically fill in number sequences
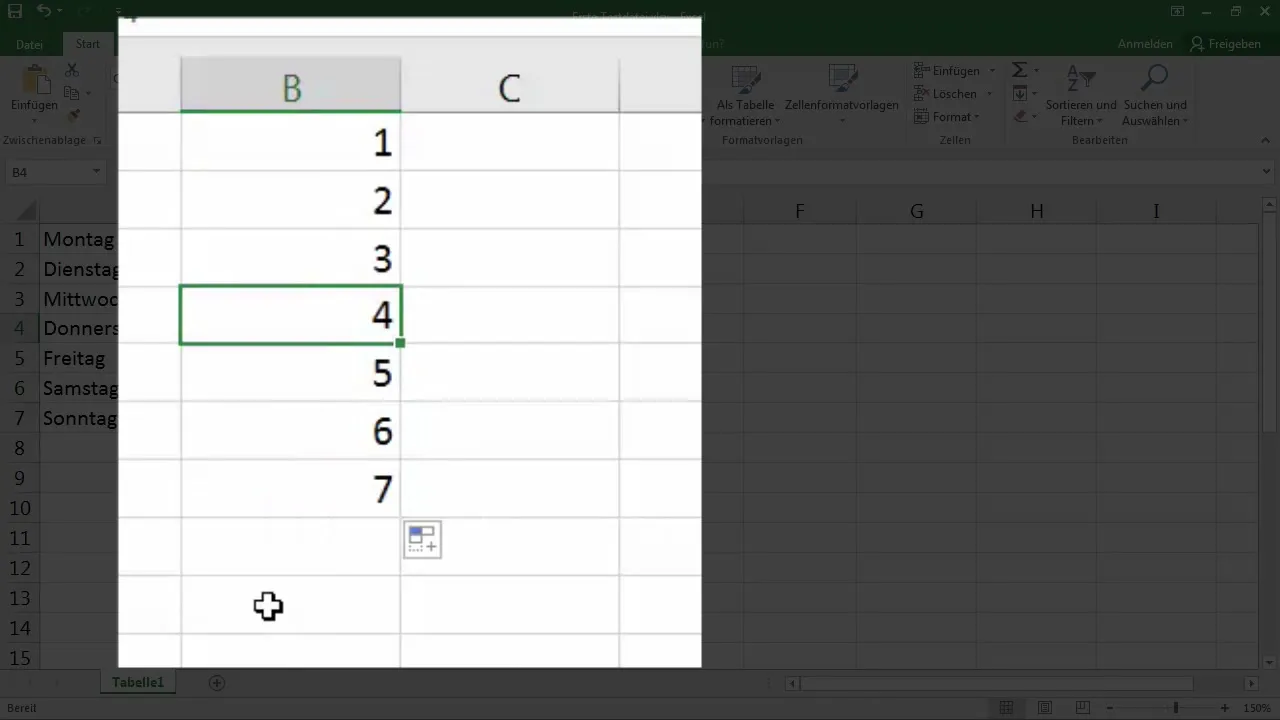
An additional practical example of automatic filling is the use of number sequences. For instance, you can enter the numbers "1", "2", and "3" in three cells and then highlight all three cells.
Again, go to the bottom right corner and drag the selection down. Excel will automatically continue the number sequence, displaying "4", "5", "6" and so on.
You can also use this process for much larger number sequences, such as for thousands steps.
Step 3: Adjustments for text content
You can also autofill text content. Let’s take the example of a loan installment. Enter "Loan installment 1" in your first cell.
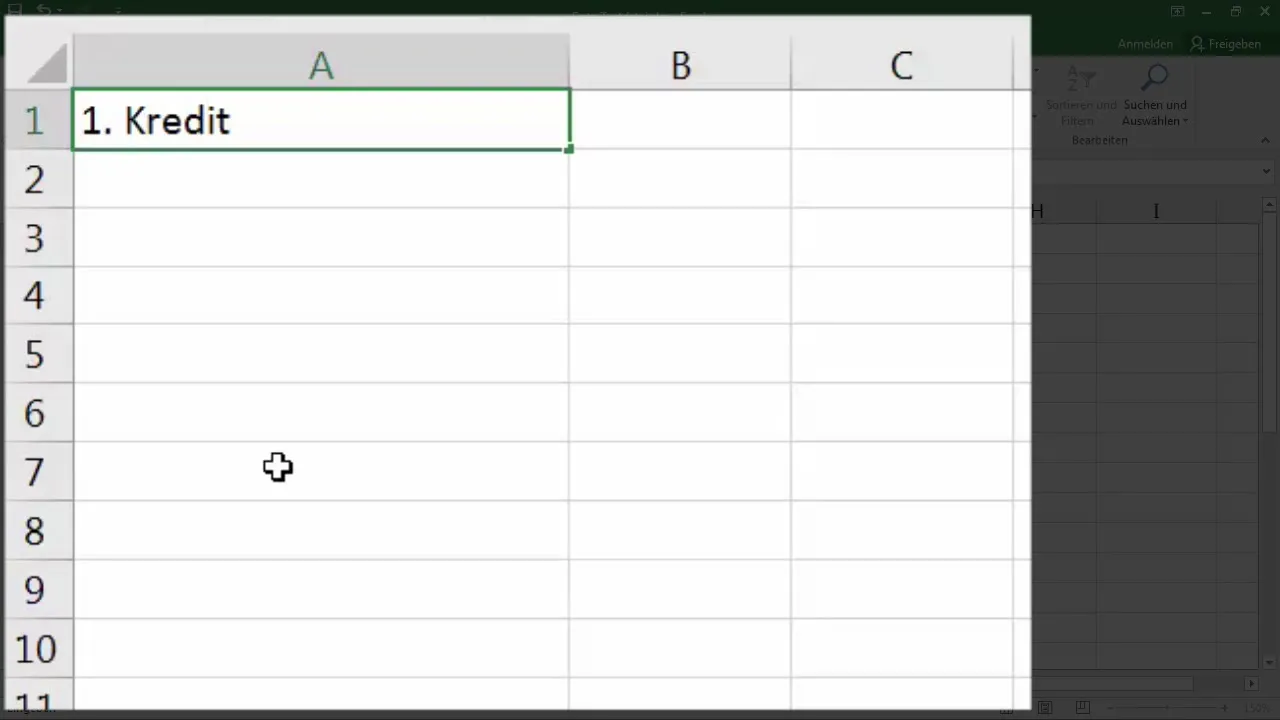
Drag the cell down to create "Loan installment 2", "Loan installment 3", and so on. However, note: If numbers are in the middle of the text, the autofill may not work as expected.
If the text is at the beginning or end, Excel recognizes the list and fills it accordingly.
Step 4: Create recurring sequences
Suppose you want a recurring number sequence, like "1, 2, 3, 4, 5", without Excel increasing these. Hold down the control key or "Ctrl" and drag the selection down.
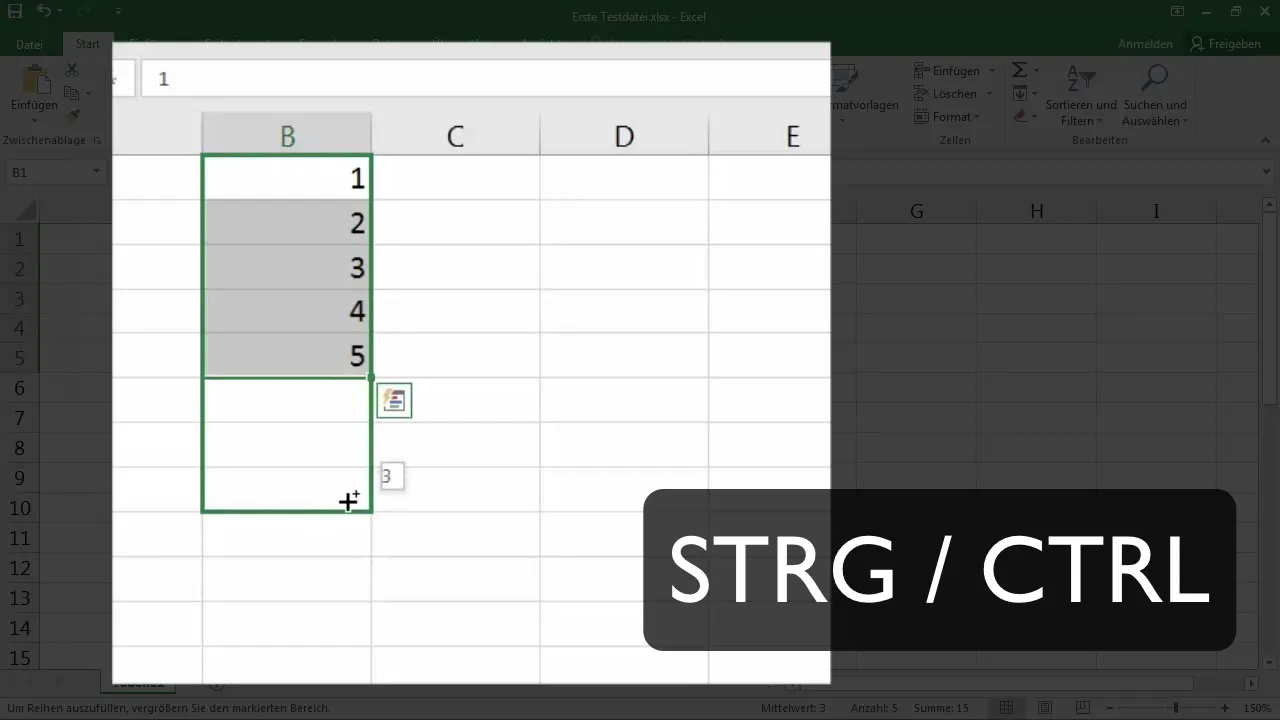
This will repeat the corresponding number sequence down to the desired depth.
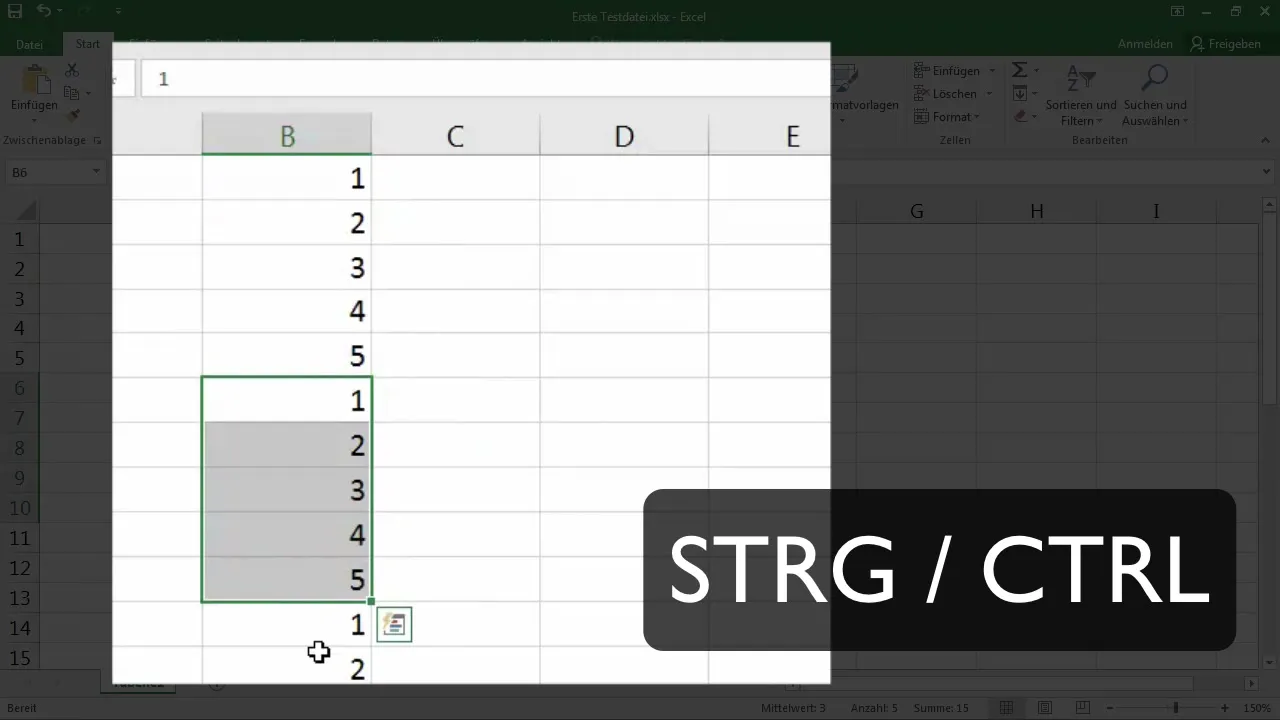
This way, you can gain more control over how often and how long this type of data is entered.
Summary
The autofill feature in Excel proves to be a powerful tool that helps you save time and avoid errors. You have now learned how to efficiently enter weekdays, number sequences, and text contents. Whether for quick lists or recurring datasets – these functions are a must for any Excel user.
Frequently Asked Questions
How do I use autofill in Excel?First, highlight the cells with the initial values, then click and drag down or sideways with the left mouse button held down.
What do I do if Excel does not recognize a number sequence?Ensure that the sequence is clear and highlight multiple cells as a pattern before trying to fill.
Can I also autofill text?Yes, you can enter simple texts and replicate them by dragging down or sideways.
Does autofill work for every type of text?Autofill works best when the numbers or texts are at the beginning or end of the cell. Text with numbers in the middle can be problematic.
What is the difference between normal fill and repeated fill?With normal fill, Excel creates a continuous list, while with repeated fill, you must use the control key to maintain the values.


