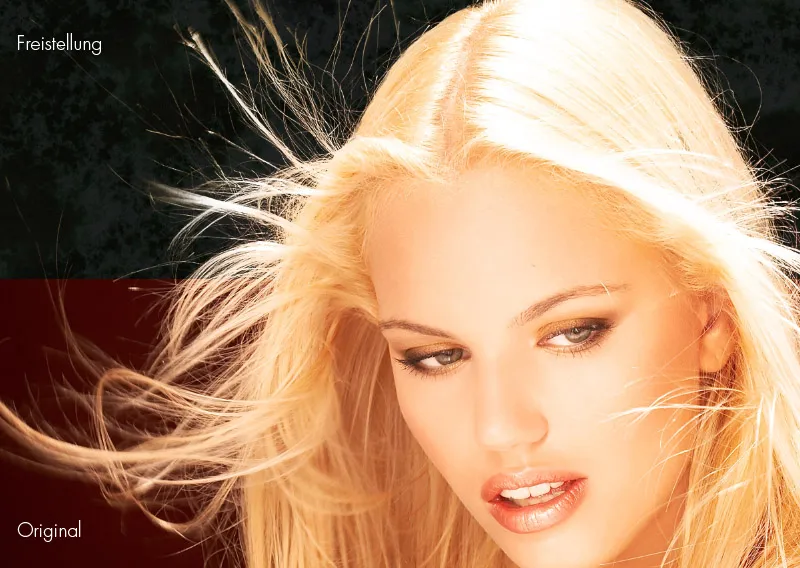
Hair clipping is one of the most challenging techniques in Photoshop. The difficulty lies in separating the fine structures of the hair from the background. These are not always sharp in the image, sometimes they appear semi-transparent and absorb the color from the background. Unfortunately, the usual selection tools such as the lasso tool, color range selection etc. are not suitable for this.
However, there are several techniques that are suitable for clipping hair, which can lead to a good result depending on the subject (hair type) and further use. In the first tutorial, I would like to introduce clipping via channels. This technique is ideal for images in which the hair is to be cropped in great detail and in sufficient sharpness with a visible difference to the background.
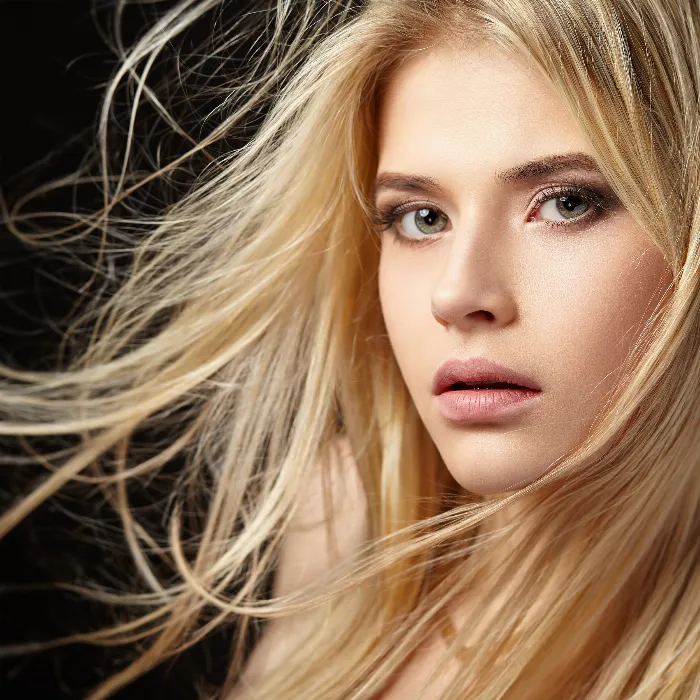
In my example, the hair is swirling through the picture. The technique is intended to show how I crop out almost every single hair in order to place the person and their hair in front of a new background.
Image source: Giorgio Gruizza @ Fotolia.com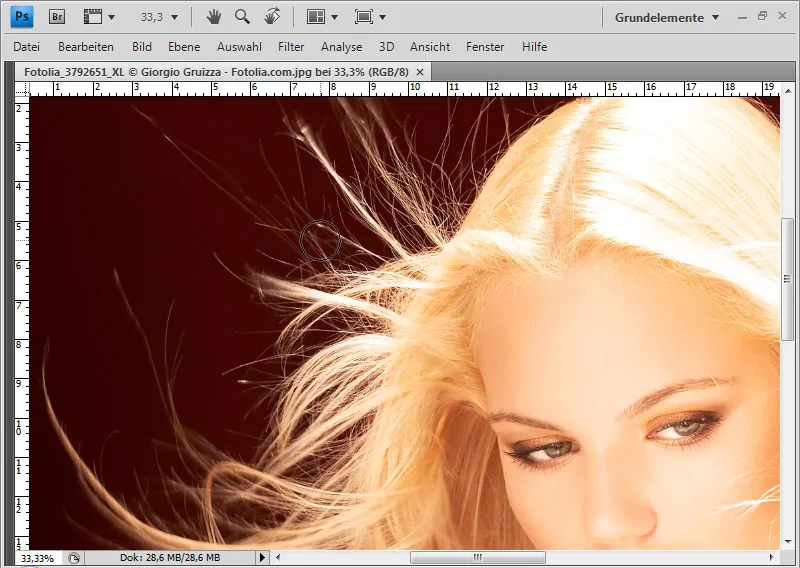
Step 1: Create selection from channel
The first step is to select a channel that is suitable for a mask. The criterion for the channel is the highest possible contrast between the hair and the background. In my example, it is the blue channel. Here, the hair appears white and the background is a dark gray.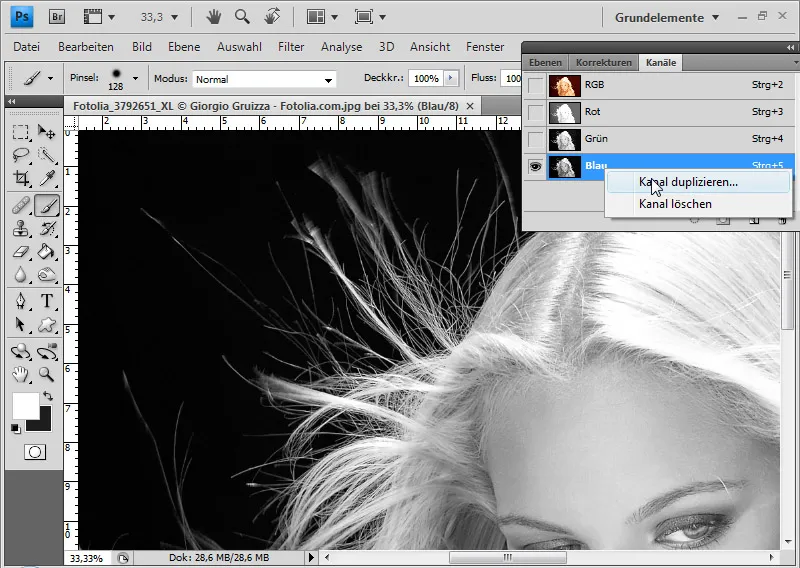
I duplicate the blue channel by clicking the right mouse button>Duplicate channel. I also increase the contrast of the channel copy by selecting Menu>Image>Corrections>Tone correction ....
Now I move the left slider to the right by up to 10 and the right slider to the left by up to 30. This turns the very dark gray into pure black and gives the hair a lighter tone.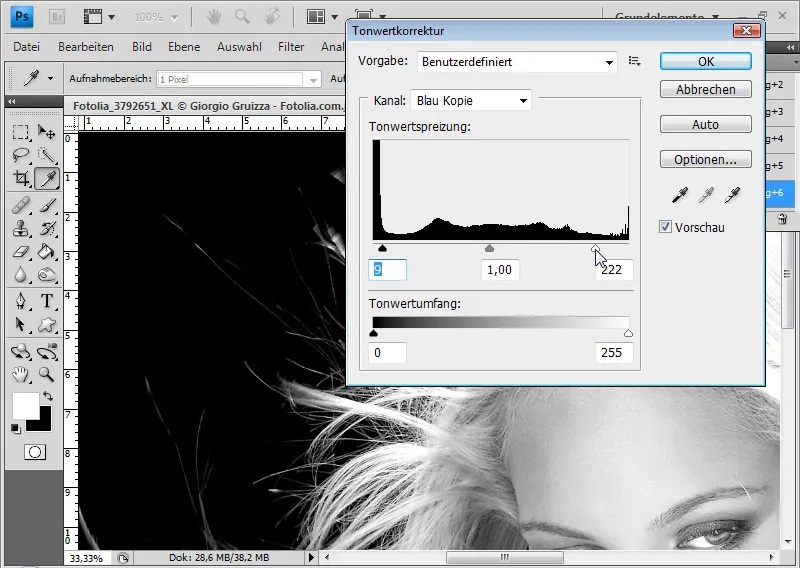
I could just as easily have increased the contrast in the background layer with a gradation curves adjustment layer or channel mixer, etc. The main thing is that the contrast between the hair and the background is increased. The main thing is that the contrast between the hair and the background is very high.
It is important for the selection that there is almost only black and white. I can check the black and white with the color selector. The grayer the areas are, the more I have to dodge and re-expose.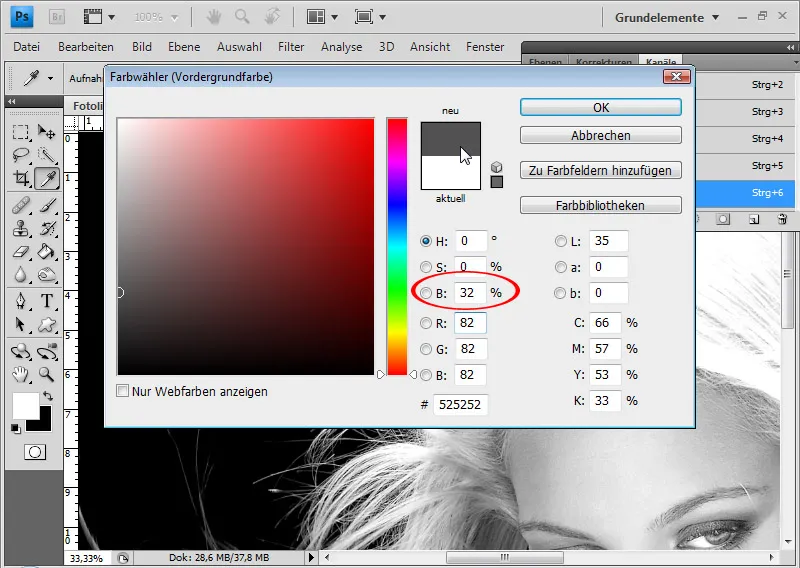
I can therefore paint the head area with a white brush.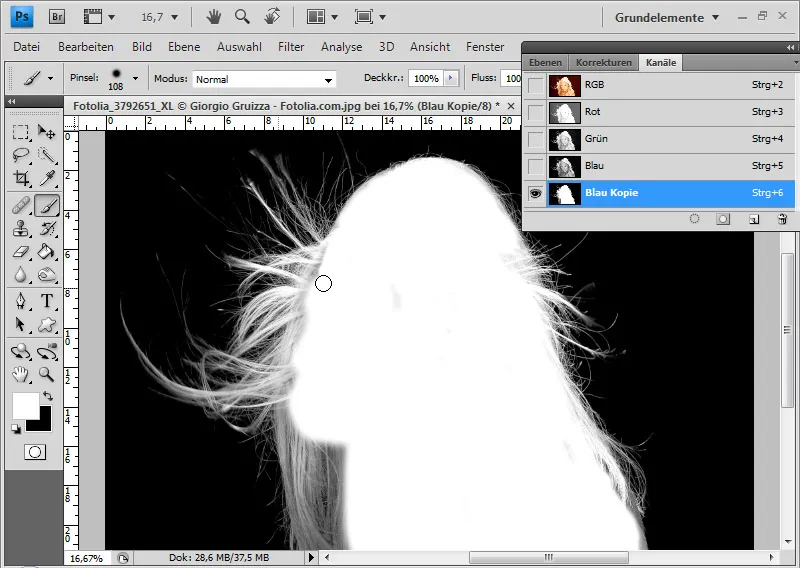
I lighten the individual hairs with the dodge tool to create an almost pure white. The setting is made in the Highlights area with a medium exposure value.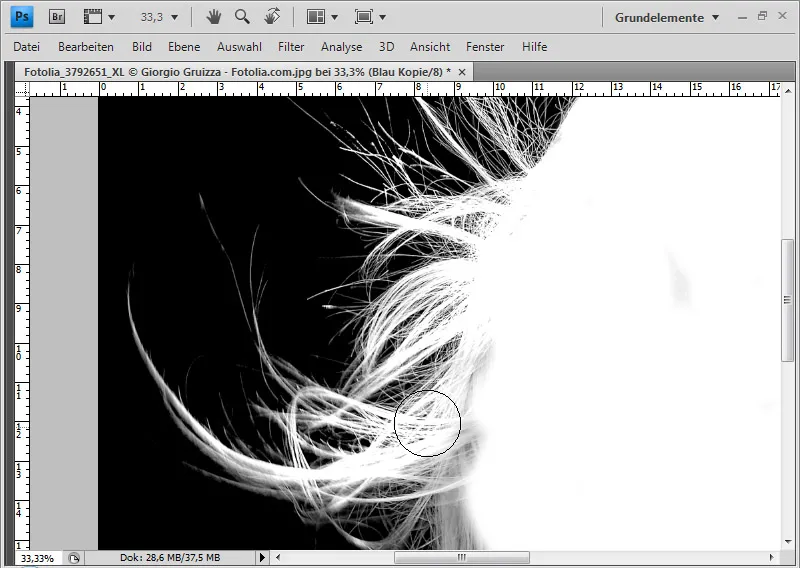
If the background is not yet black, I can blacken it with the post-exposure tool at a low to medium exposure value in the Depths area. I should proceed very carefully, especially in the hair area, so that I don't darken or destroy any hair. Post-exposure and dodging is the decisive work for the success of the selection. Depending on the hair structure and extent, I have to go into very high zoom ranges in order to achieve a proper black and white separation between the hair and the background.
When the duplicated channel is finished, I click on the channel thumbnail with Ctrl+G and the left mouse button. The white channel content is selected.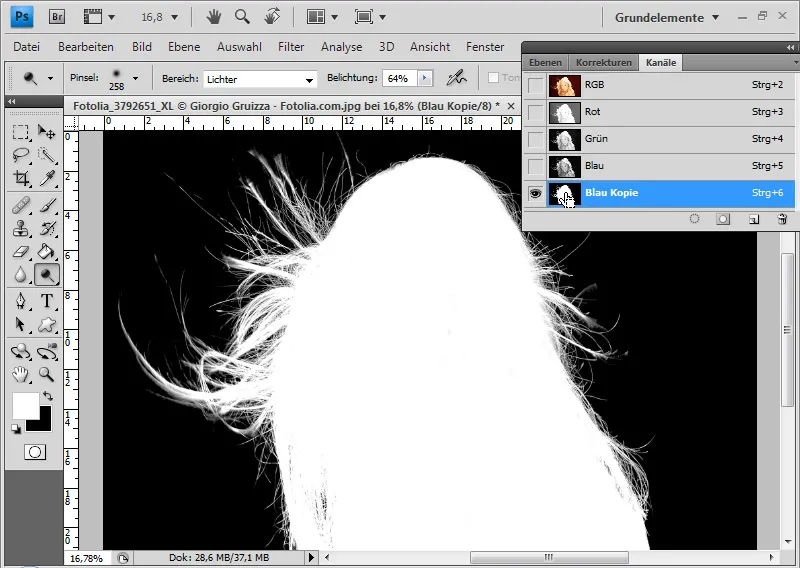
I then go to the layer palette, duplicate the background layer and add a layer mask to it.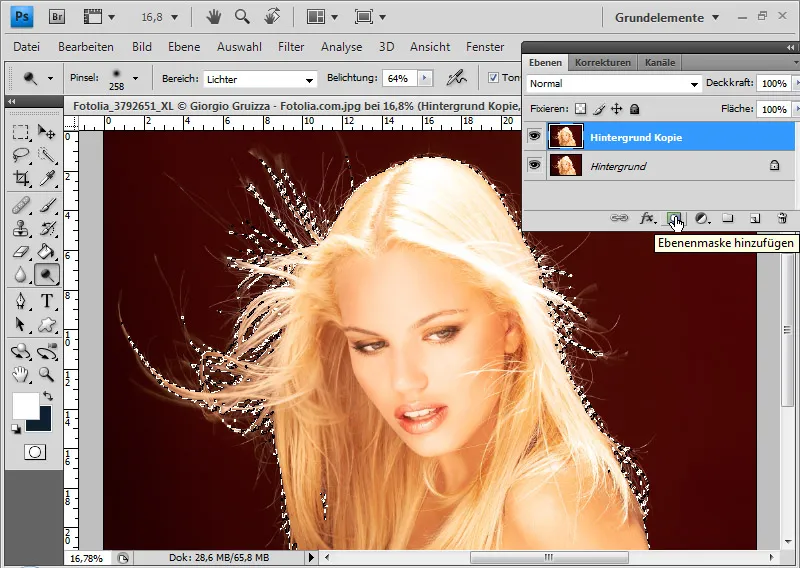
The layer mask immediately takes the previously made selection into account and outputs the result. Note: It always depends on the hair color and background color whether the hair in the channel becomes white or black. The technique described here can also be used in reverse, but I have to invert the selection and then add the layer mask.
Step 2: Remove the color fringe
I place a texture under my cropped hair. You can clearly see that the hair has a red color fringe. This is a particular problem with blonde hair. They tend to partially absorb the background color in photographs - which rarely makes cropping easier.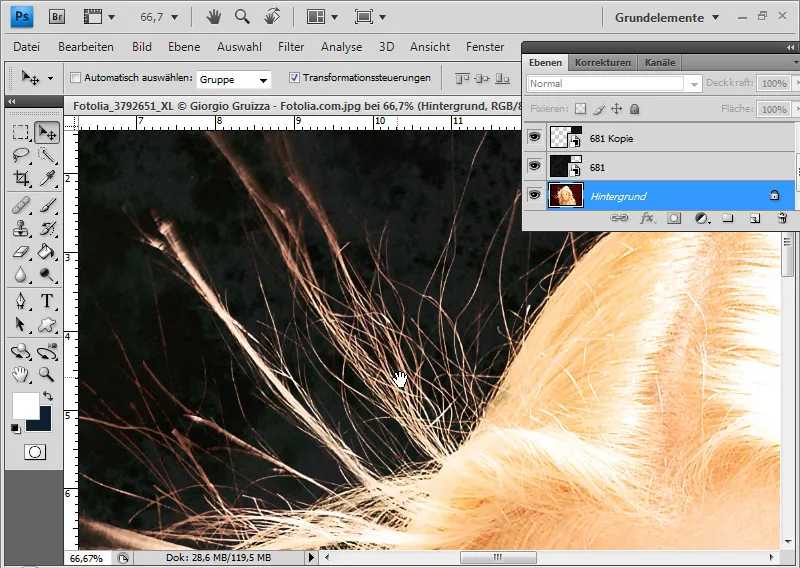
I have two obvious options for removing the color fringe. Either I dye the color fringe in the color of the new background or I dye it in the color of the main hair, i.e. blond. The second option is better because it gives me the option of choosing a different background at any time without having to edit the color fringe again.
I add the Hue/Saturation adjustment layer as a clipping mask to the layer with the clipped hair. The purpose of a clipping mask is to ensure that the effect of the adjustment layer only affects the assigned layer. I can create the clipping mask with Ctrl+Alt+G or Alt and click between both layers or via the menu>Layer>Create clipping mask.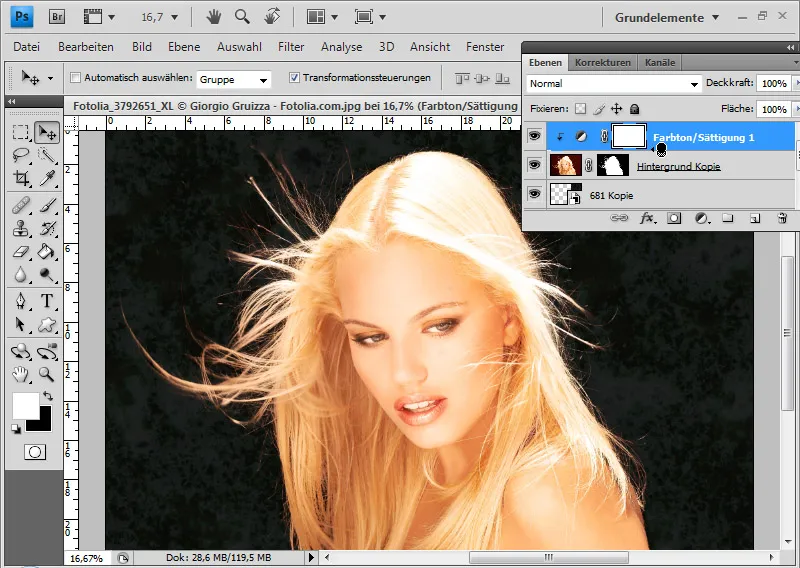
In the adjustment layer, I can now either select the standard mode or specifically address the red tones. I get the result in both modes. I move the hue slider to a yellow value and reduce the saturation to get the color of the remaining hair.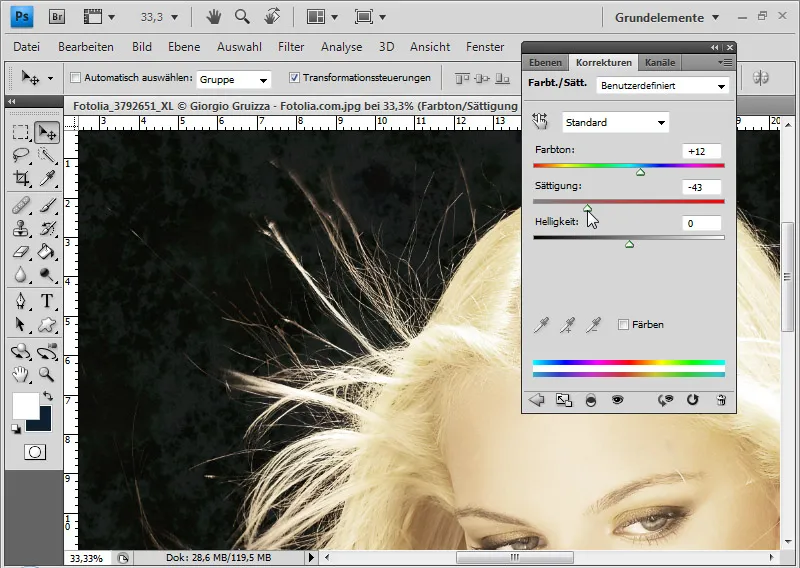
I use the fill tool to fill the layer mask of the adjustment layer with black color so that it is fully masked and the effect is hidden.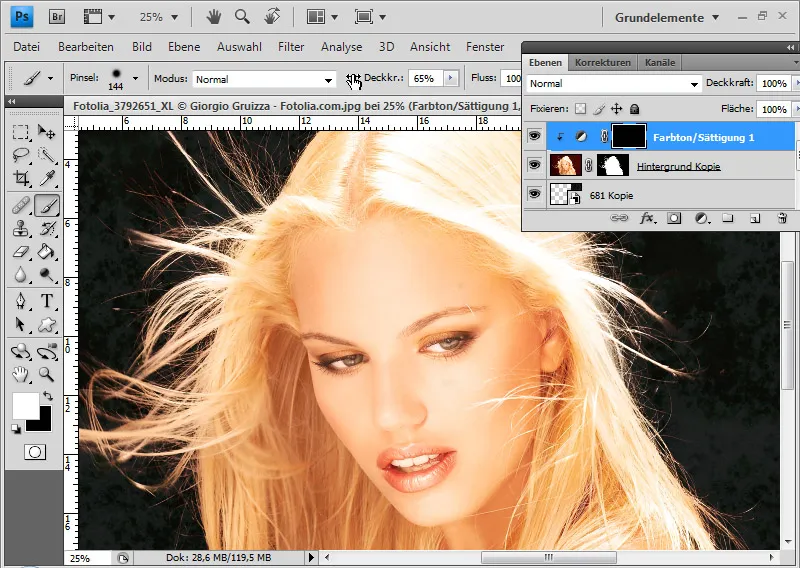
In the next step, I select a white soft brush with medium opacity and paint over the hair area that contains the color fringe. These hairs become blonde. I can make the transitions to the main hair smoother with even less opacity.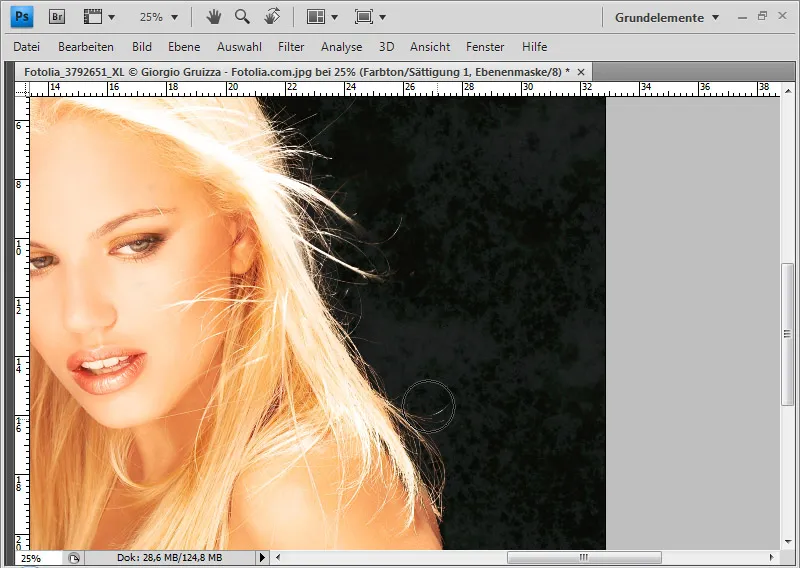
By Alt-clicking on the layer mask , I can see exactly what I have done to fade in the effect from the adjustment layer.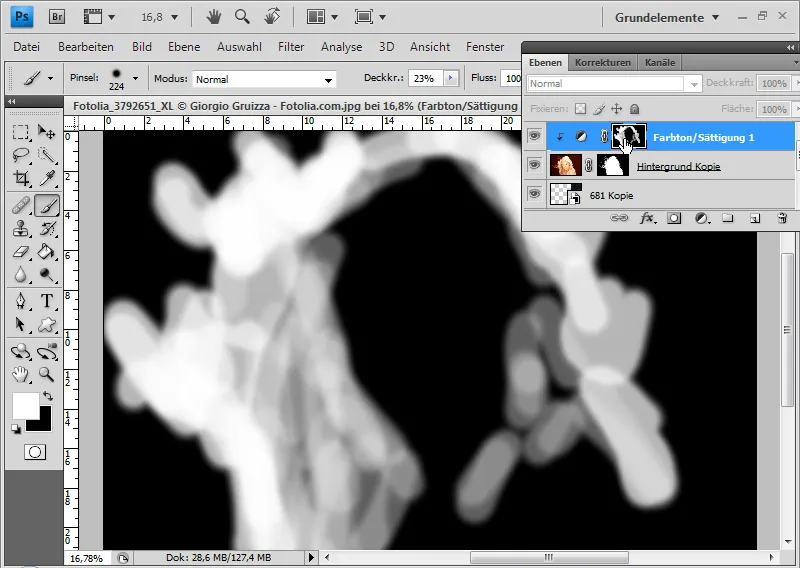
The hair is now perfectly cropped.