Clipping trees in Photoshop may seem like a complicated task at first glance, but with the right techniques and tools, you can do this in no time. In this tutorial, I will show you step by step how to efficiently clip trees, both using Photoshop's latest AI features and manual methods. Whether you just want to remove the background or replace the sky - with these tips, you'll have your tree ready for a new environment in no time.
Key Takeaways
- There are several approaches to clipping trees in Photoshop that differ in their efficiency.
- Use the "Remove Background" function for simple clipping.
- The Eraser tool can be used for targeted editing.
- The sky can also be quickly replaced using the "Replace Sky" function, without clipping the entire scene.
Step-by-Step Guide
1. Remove background with a click
Start by opening the image with the tree you want to clip. The easiest method is to use the "Remove Background" function. Click on the corresponding button in the new toolbar that has been added to Photoshop. You will see that Photoshop automatically tries to remove the background.

2. Eliminate colored areas
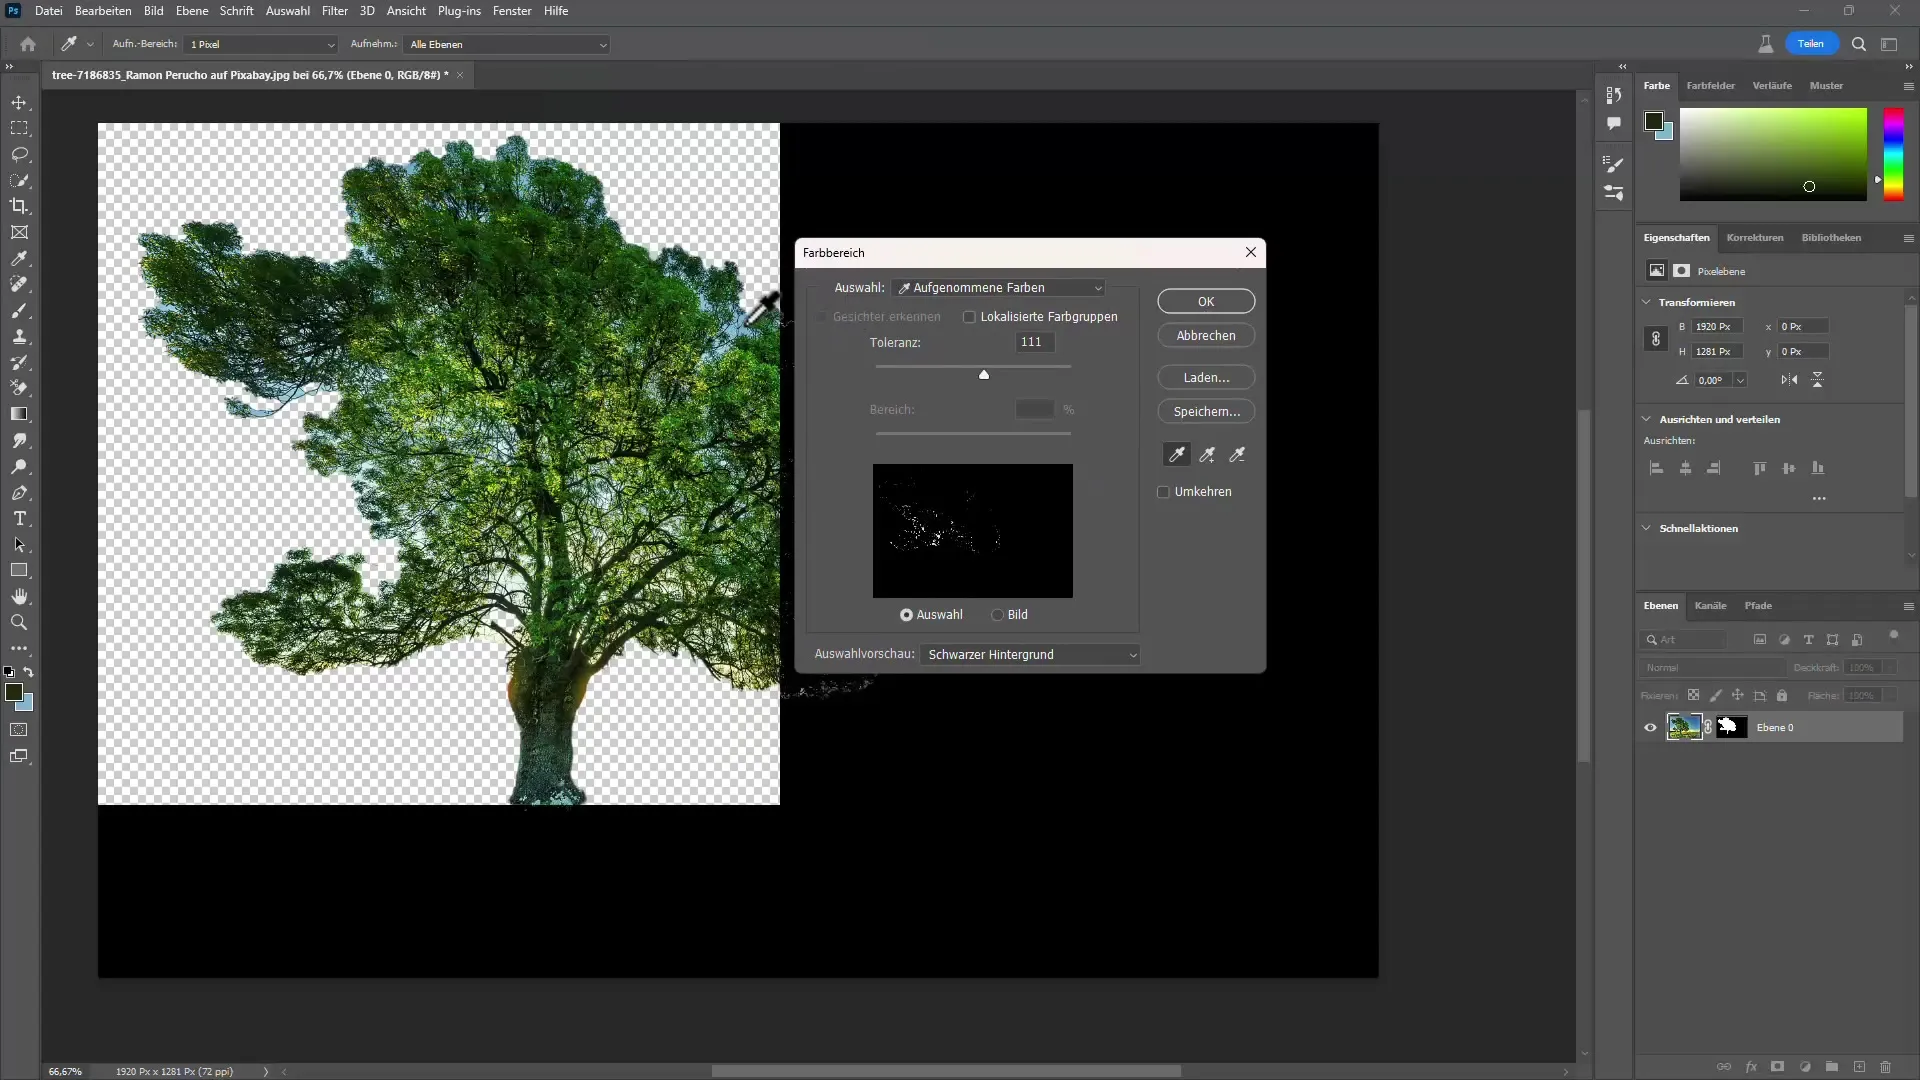
After the first attempt, the tree may still be surrounded by blue tones. To eliminate them, select "Select" and then "Color Range". Here you can select the remaining blue shade. By adjusting the tolerance, you can optimize the area to be selected.
3. Apply layer mask
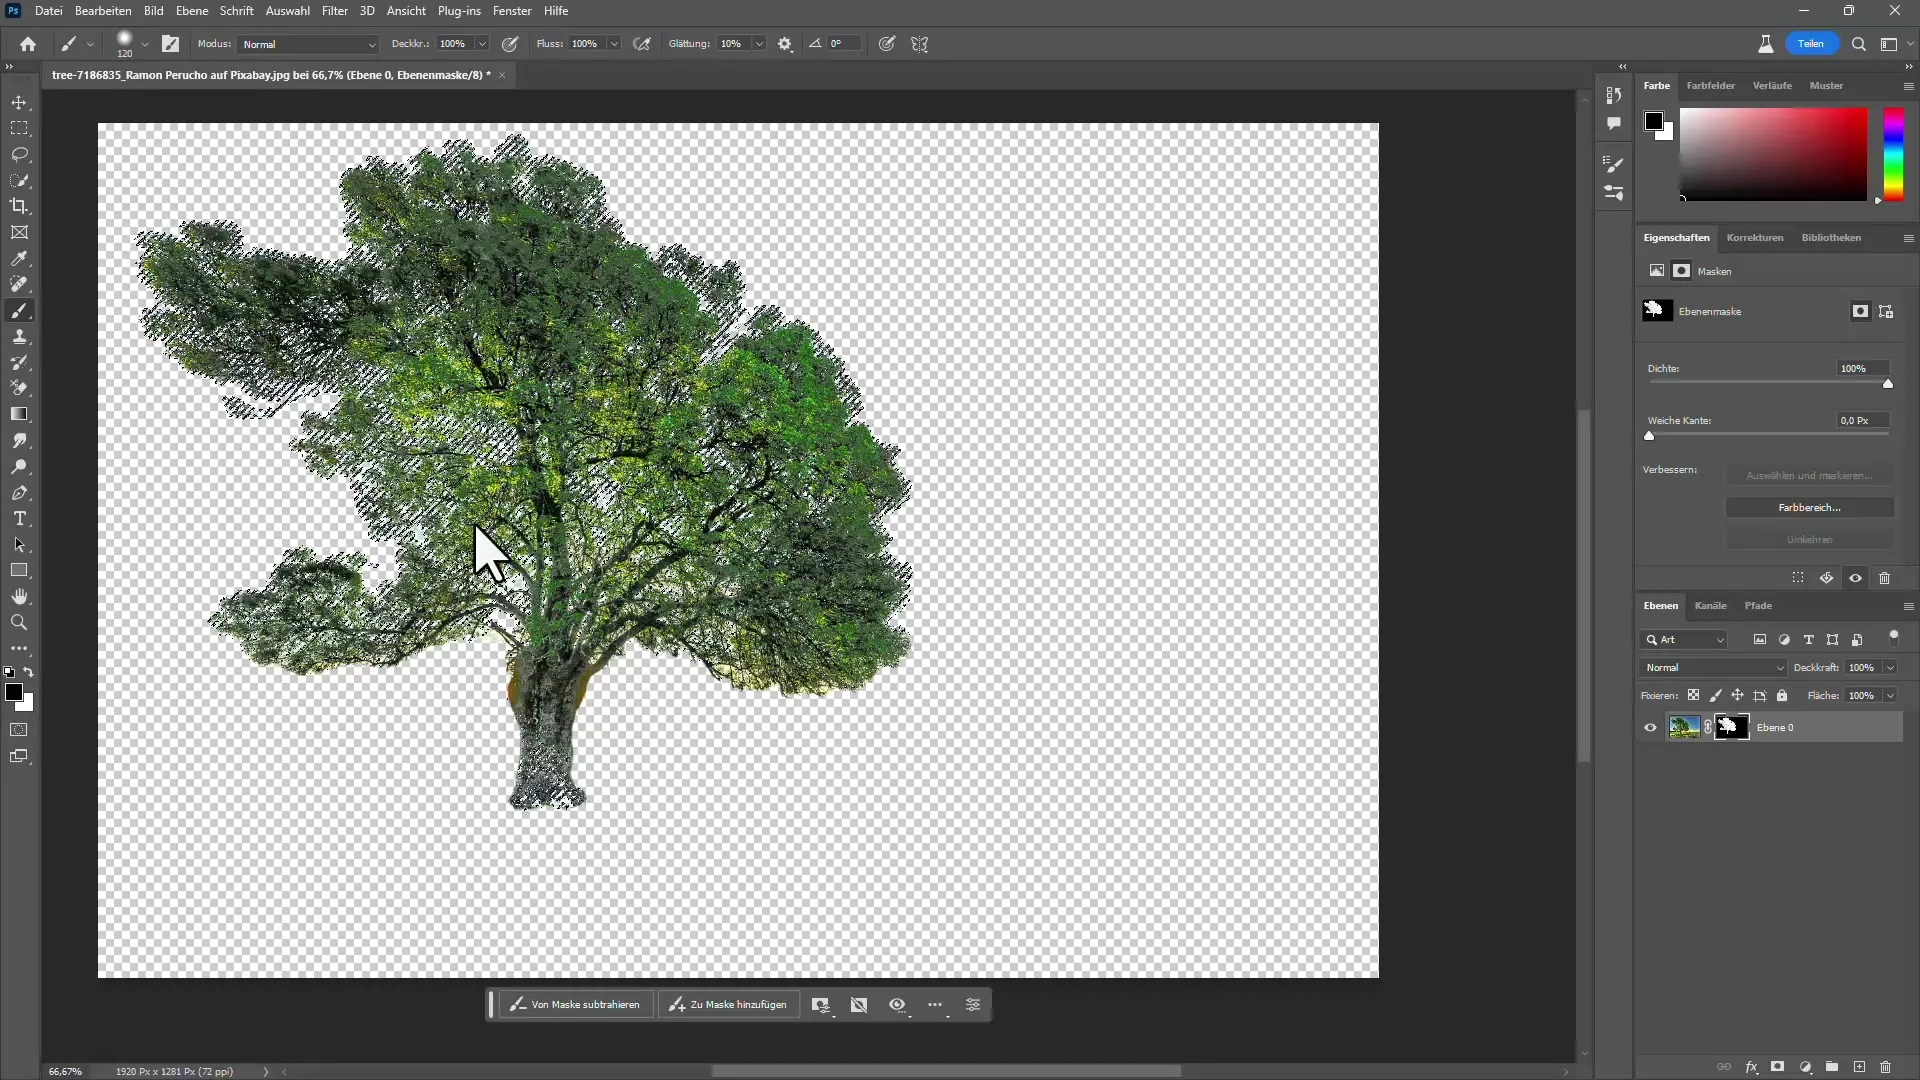
Once you have successfully selected the blue area, click on the layer mask. Choose black as the foreground color, then press the "Alt" and "Backspace" keys simultaneously to hide the unwanted areas. The tree should now be well clipped, although you may still need to adjust the contrast a bit.
4. Refine the clipping process
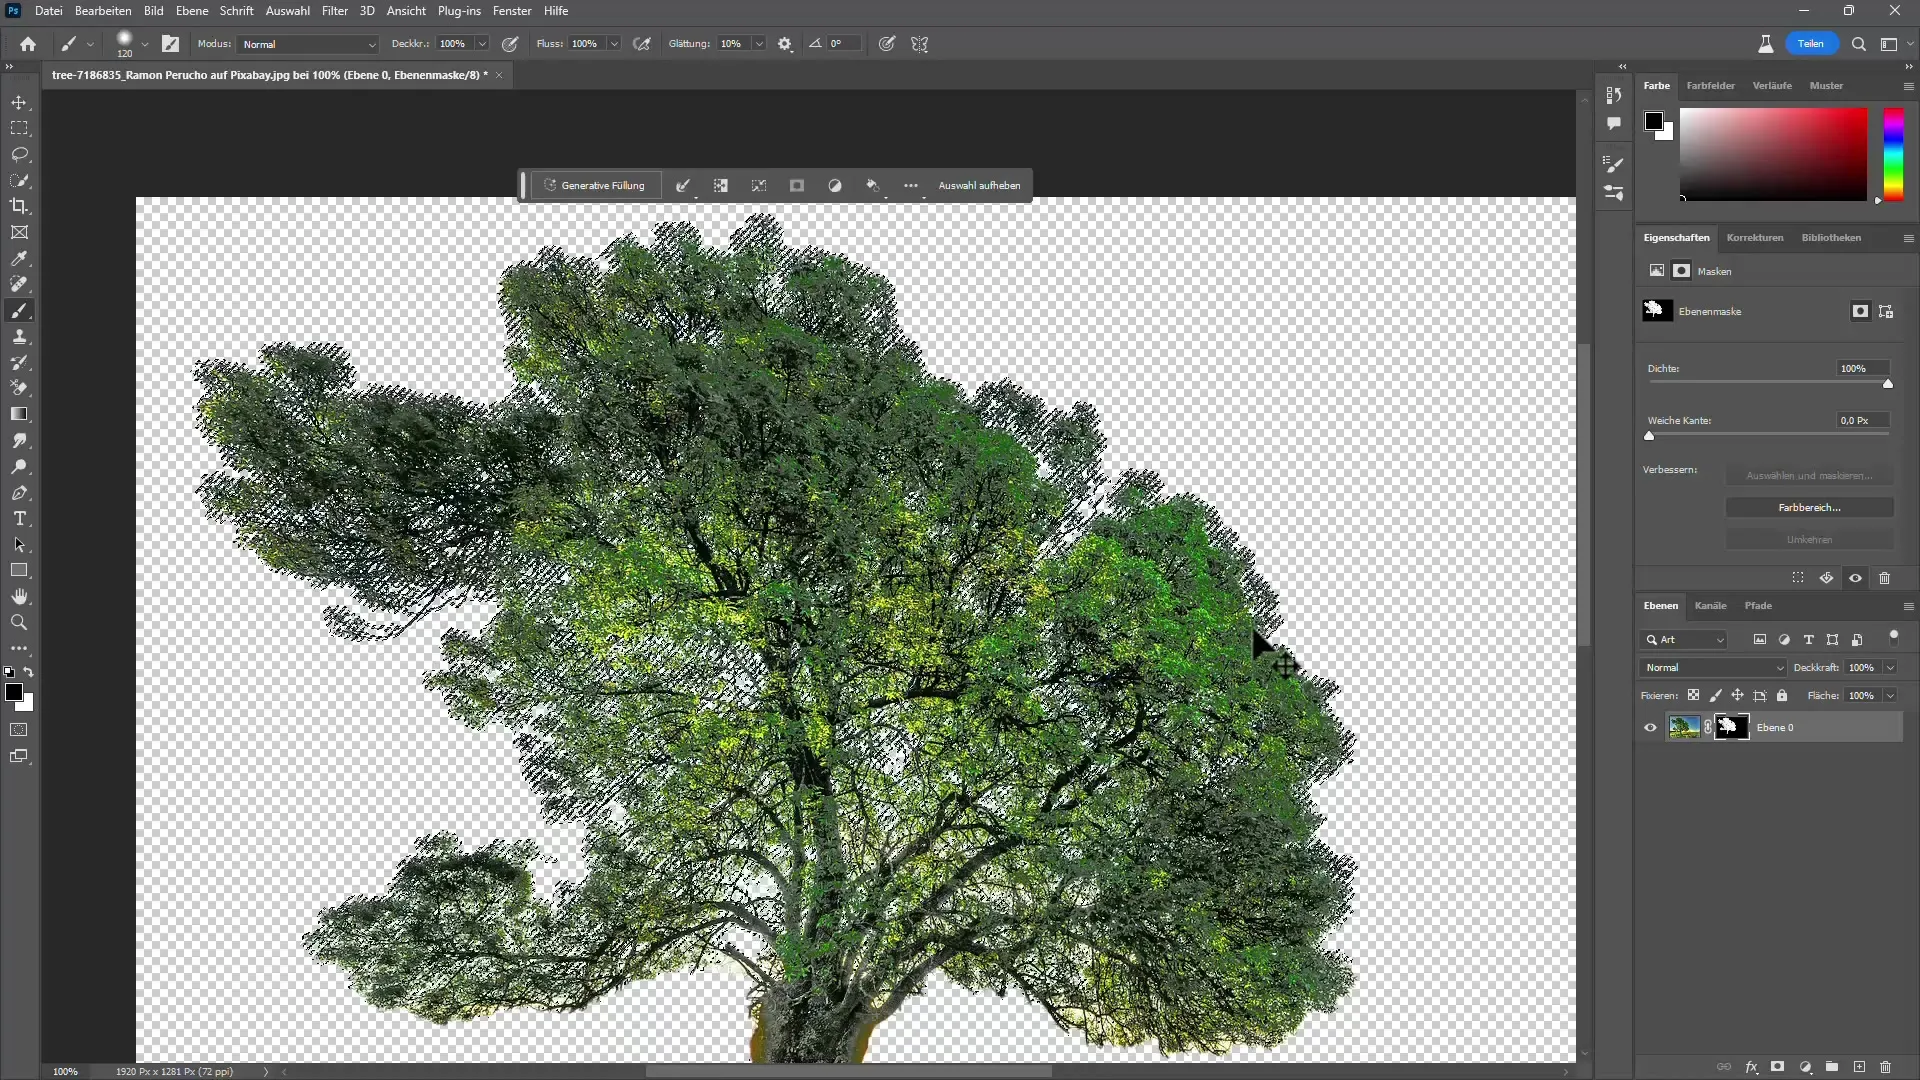
If the tree is not perfectly clipped, you can repeat the process. Adjust the tolerances to achieve the desired effect and make appropriate adjustments to the image. These techniques will help you clip optimally in a few minutes.
5. Make further adjustments
If you are satisfied with the result, you can now add any background, be it a gradient or another image. The tree should now be correctly placed.

6. Using the Eraser tool
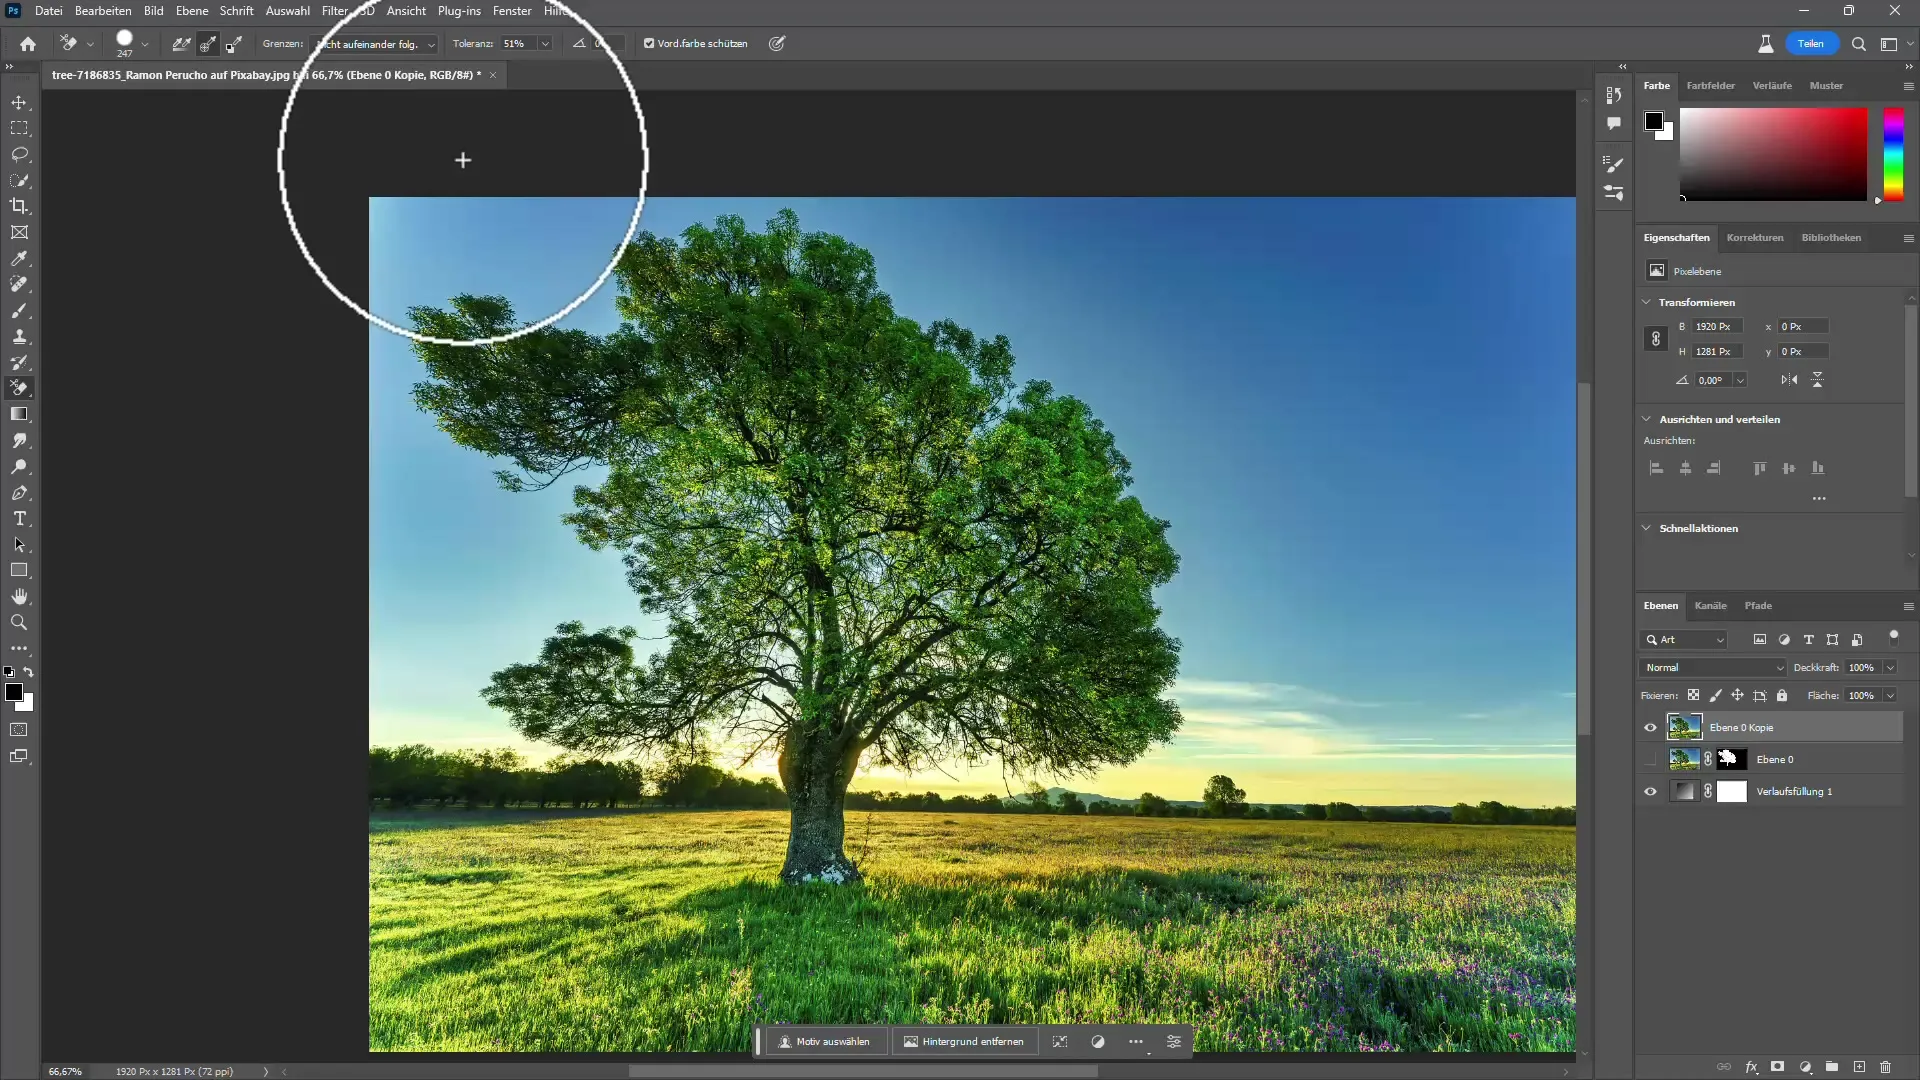
An alternative method for clipping is using the Eraser tool. You can create a copy of the image, set aside the mask, and use the eraser to manually remove unwanted colors. Make sure to adjust the color to be optimal for clipping.
7. Detailing with the mask
Once you have made the main cuts, you can additionally use the layer mask to work more finely. This way, you maintain the flexibility to make subsequent adjustments without destroying the original image.

8. Replace sky
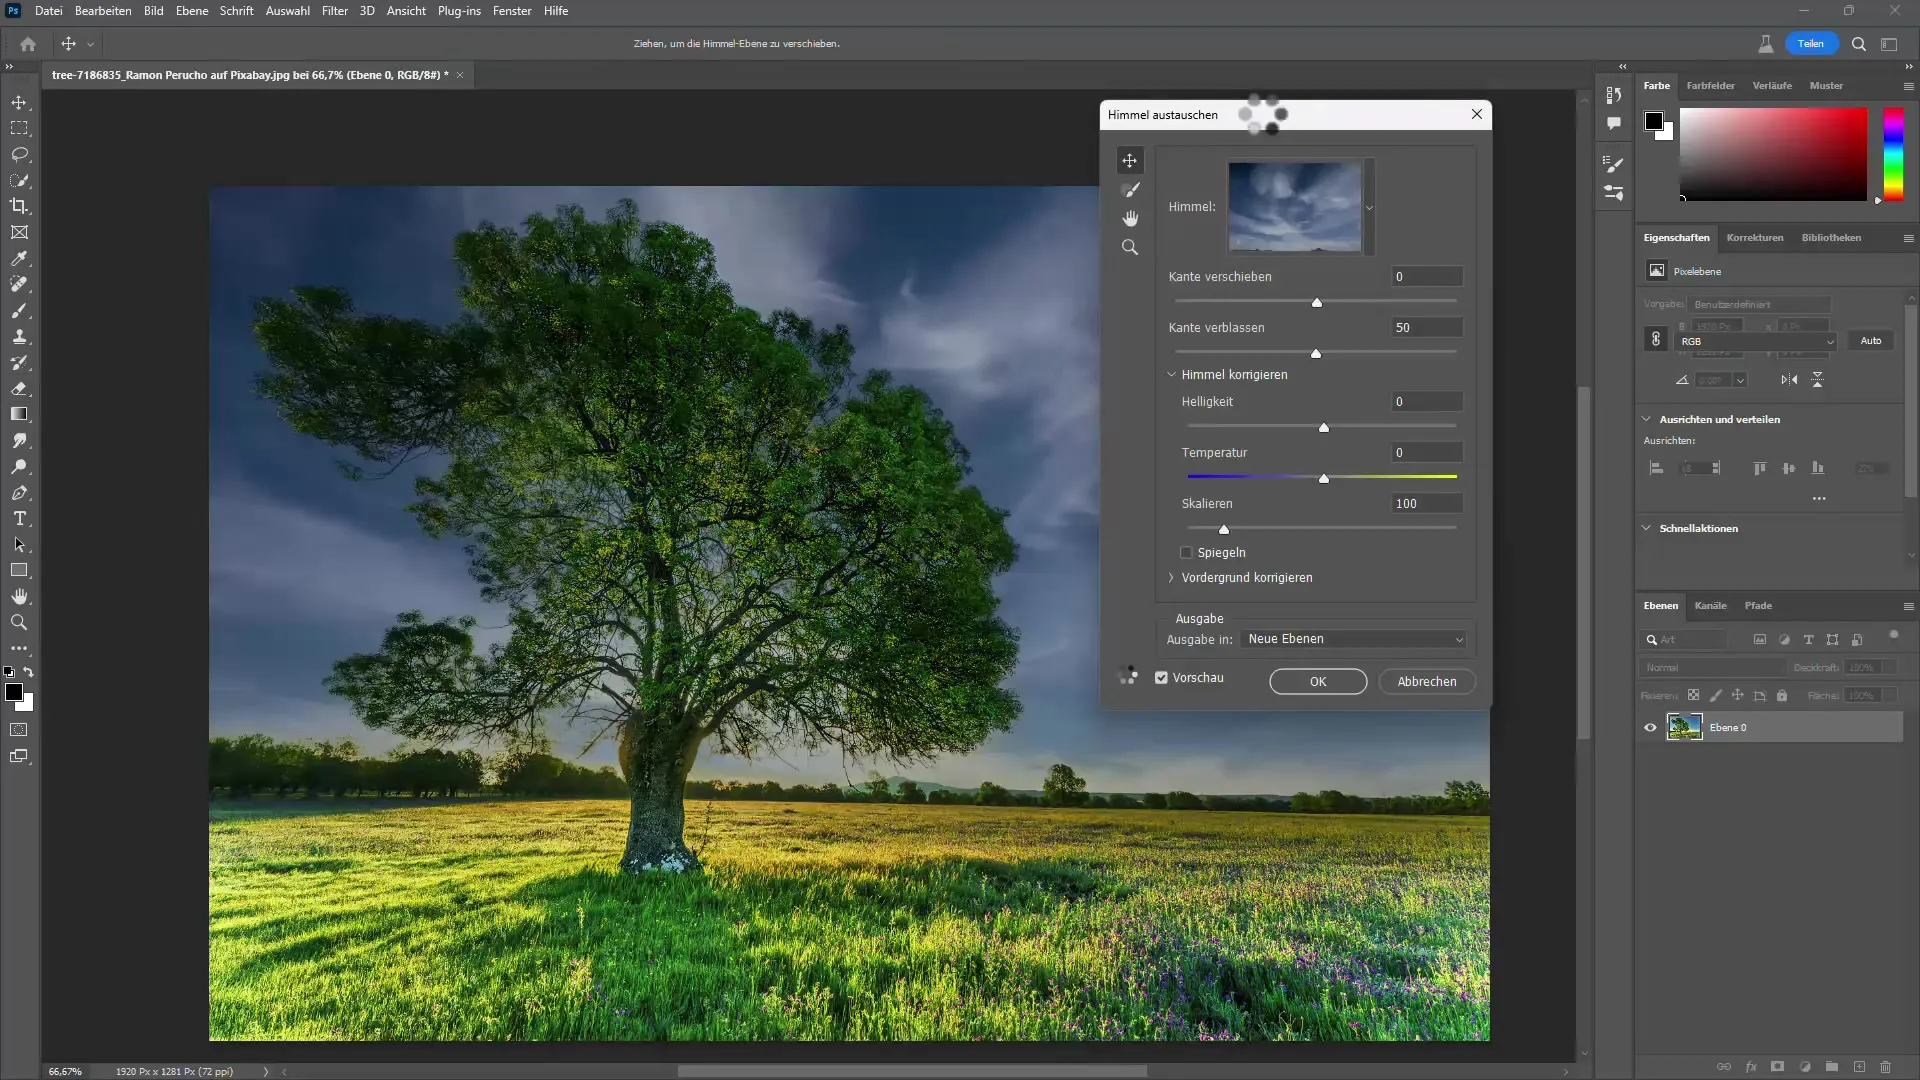
If you only want to change the sky, there is a convenient feature in Photoshop called "Replace Sky". Go to "Edit" and select "Replace Sky". This faster method allows you to bring a new atmosphere to your image without clipping the tree.
9. This optimizes the landscape
If you are also interested in improving the overall composition, you can optimize the sky without much effort in the image itself. Photoshop automatically creates groups and layers that allow you to continue working on your image.

10. Final adjustments and saving
After you are finished with replacing the sky and other edits, finally review the entire image and make the final adjustments before saving it. Cutting out in Photoshop can deliver many results in a short time that can have a really dramatic effect - especially when using the tools correctly.

Summary
Cutting out trees in Photoshop is easy to learn if you use the right steps and tools. Whether you want to remove the background or replace the sky, these techniques can help you achieve impressive results that enhance your image.
Frequently Asked Questions
How long does it take to cut out a tree?The duration depends on the chosen method. Typically, you need less than ten minutes.
Do I need special knowledge in Photoshop for this?Basic knowledge in Photoshop is helpful, but the steps shown here are also suitable for beginners.
Can I edit the image after cutting it out?Yes, after cutting it out, you can further adjust and edit the image as desired.


